MERCEDES-BENZ AMG GT ROADSTER 2018 COMAND Manual
Manufacturer: MERCEDES-BENZ, Model Year: 2018, Model line: AMG GT ROADSTER, Model: MERCEDES-BENZ AMG GT ROADSTER 2018Pages: 174, PDF Size: 4.14 MB
Page 41 of 174
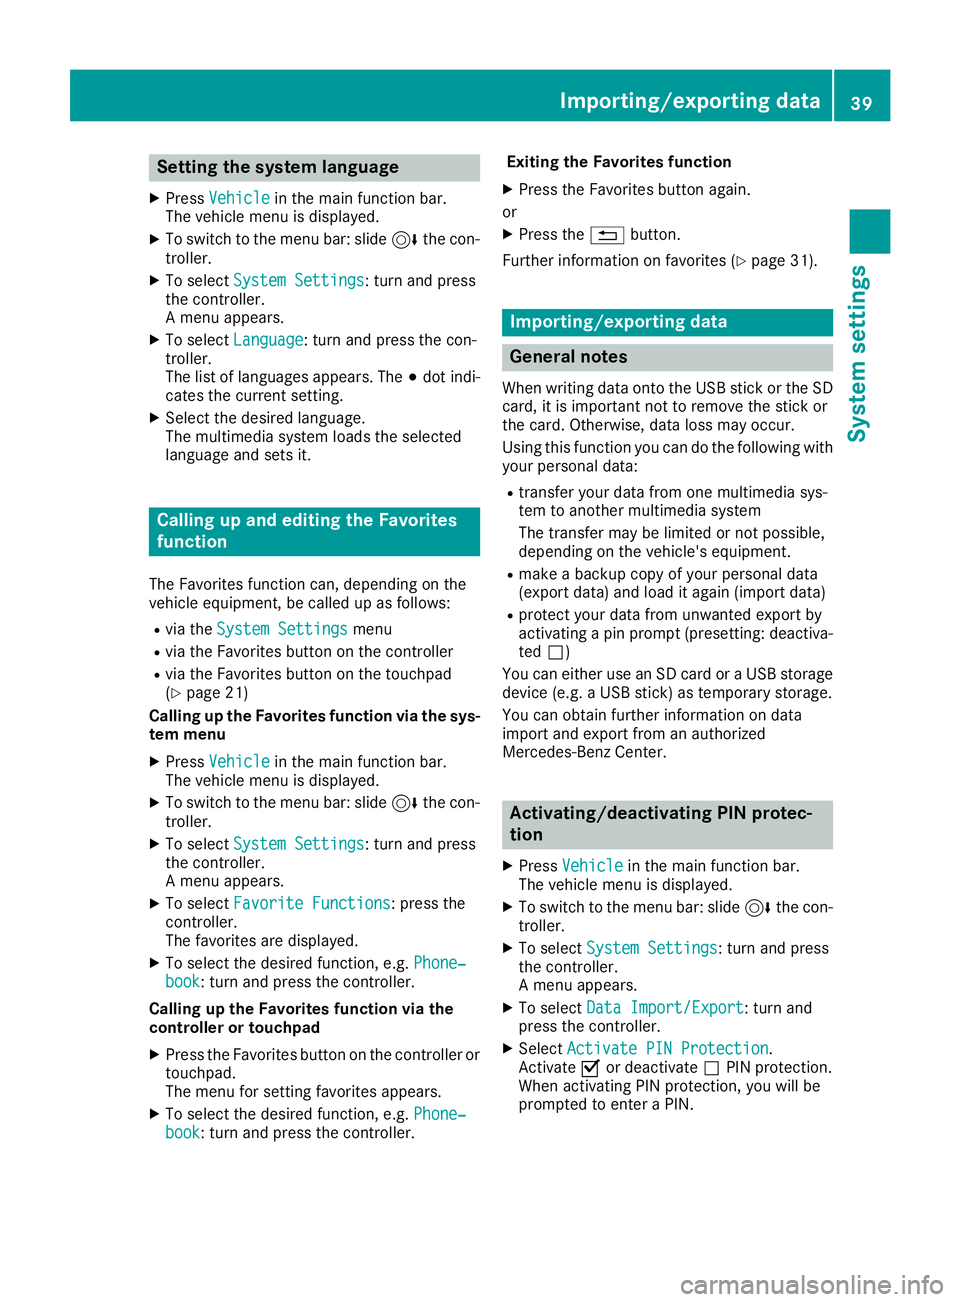
Setting the system language
XPressVehiclein the main function bar.
The vehicle menu is displayed.
XTo switch to the menu bar: slide 6the con-
troller.
XTo select System Settings: turn and press
the controller.
A menu appears.
XTo select Language: turn and press the con-
troller.
The list of languages appears. The #dot indi-
cates the current setting.
XSelect the desired language.
The multimedia system loads the selected
language and sets it.
Calling up and editing the Favorites
function
The Favorites function can, depending on the
vehicle equipment, be called up as follows:
Rvia the System Settingsmenu
Rvia the Favorites button on the controller
Rvia the Favorites button on the touchpad
(Ypage 21)
Calling up the Favorites function via the sys-
tem menu
XPress Vehiclein the main function bar.
The vehicle menu is displayed.
XTo switch to the menu bar: slide 6the con-
troller.
XTo select System Settings: turn and press
the controller.
A menu appears.
XTo select Favorite Functions: press the
controller.
The favorites are displayed.
XTo select the desired function, e.g. Phone‐book: turn and press the controller.
Calling up the Favorites function via the
controller or touchpad
XPress the Favorites button on the controller or touchpad.
The menu for setting favorites appears.
XTo select the desired function, e.g. Phone‐book: turn and press the controller. Exiting the Favorites function
XPress the Favorites button again.
or
XPress the %button.
Further information on favorites (
Ypage 31).
Importing/exporting data
General notes
When writing data onto the USB stick or the SD
card, it is important not to remove the stick or
the card. Otherwise, data loss may occur.
Using this function you can do the following with
your personal data:
Rtransfer your data from one multimedia sys-
tem to another multimedia system
The transfer may be limited or not possible,
depending on the vehicle's equipment.
Rmake a backup copy of your personal data
(export data) and load it again (import data)
Rprotect your data from unwanted export by
activating a pin prompt (presetting: deactiva-
ted ª)
You can either use an SD card or a USB storage
device (e.g. a USB stick) as temporary storage.
You can obtain further information on data
import and export from an authorized
Mercedes-Benz Center.
Activating/deactivating PIN protec-
tion
XPress Vehiclein the main function bar.
The vehicle menu is displayed.
XTo switch to the menu bar: slide 6the con-
troller.
XTo select System Settings: turn and press
the controller.
A menu appears.
XTo select Data Import/Export: turn and
press the controller.
XSelect Activate PIN Protection.
Activate Oor deactivate ªPIN protection.
When activating PIN protection, you will be
prompted to enter a PIN.
Importing/exporting data39
System settings
Z
Page 42 of 174
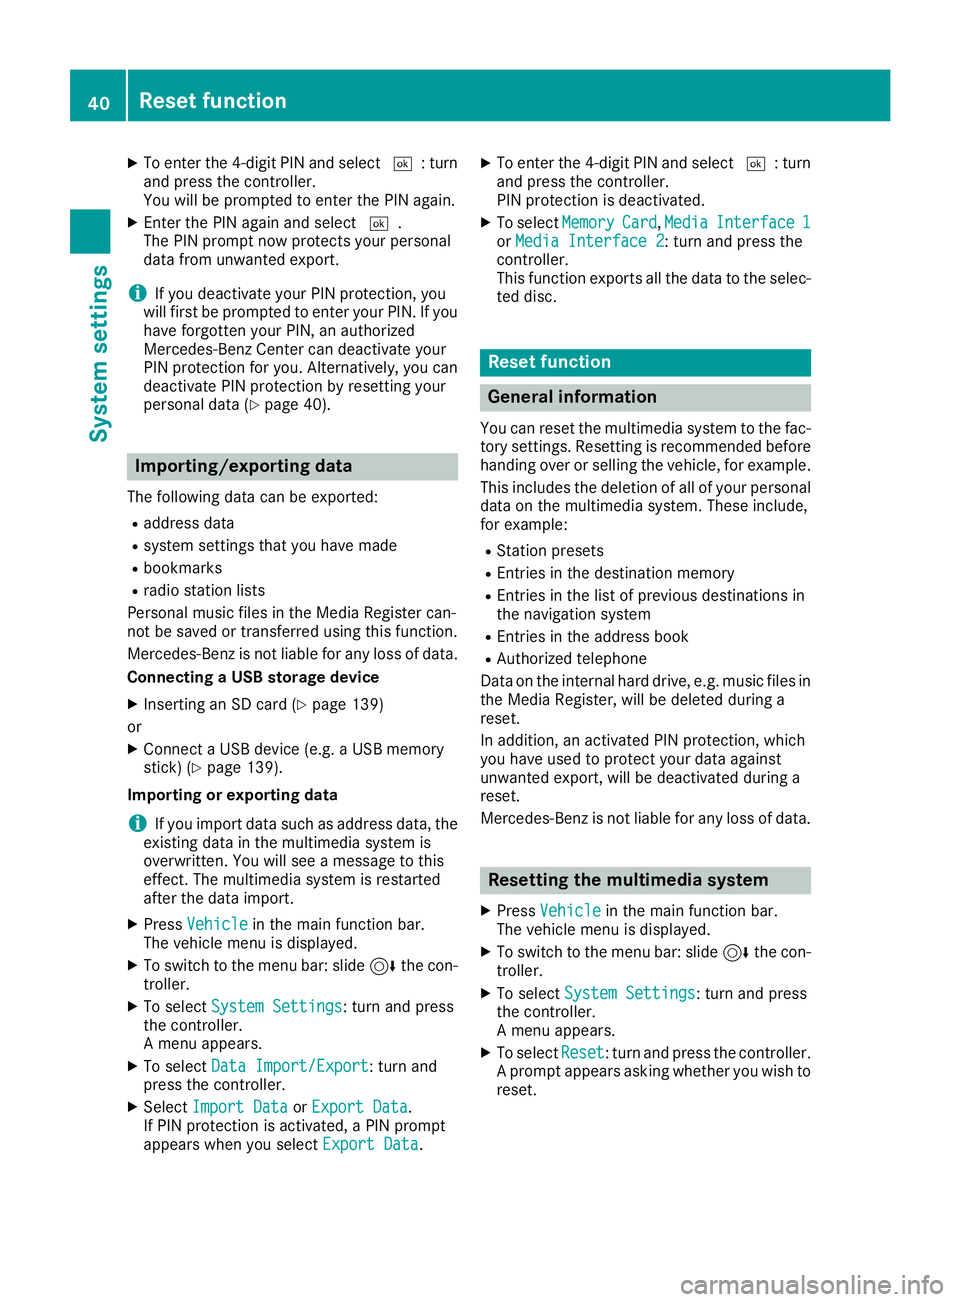
XTo enter the 4-digit PIN and select¬: turn
and press the controller.
You will be prompted to enter the PIN again.
XEnter the PIN again and select ¬.
The PIN prompt now protects your personal
data from unwanted export.
iIf you deactivate your PIN protection, you
will first be prompted to enter your PIN. If you
have forgotten your PIN, an authorized
Mercedes-Benz Center can deactivate your
PIN protection for you. Alternatively, you can
deactivate PIN protection by resetting your
personal data (
Ypage 40).
Importing/exporting data
The following data can be exported:
Raddress data
Rsystem settings that you have made
Rbookmarks
Rradio station lists
Personal music files in the Media Register can-
not be saved or transferred using this function.
Mercedes-Benz is not liable for any loss of data.
Connecting a USB storage device
XInserting an SD card (Ypage 139)
or
XConnect a USB device (e.g. a USB memory
stick) (Ypage 139).
Importing or exporting data
iIf you import data such as address data, the
existing data in the multimedia system is
overwritten. You will see a message to this
effect. The multimedia system is restarted
after the data import.
XPress Vehiclein the main function bar.
The vehicle menu is displayed.
XTo switch to the menu bar: slide 6the con-
troller.
XTo select System Settings: turn and press
the controller.
A menu appears.
XTo select Data Import/Export: turn and
press the controller.
XSelect Import DataorExport Data.
If PIN protection is activated, a PIN prompt
appears when you select Export Data
.
XTo enter the 4-digit PIN and select ¬: turn
and press the controller.
PIN protection is deactivated.
XTo select MemoryCard,MediaInterface 1or Media Interface 2: turn and press the
controller.
This function exports all the data to the selec-
ted disc.
Reset function
General information
You can reset the multimedia system to the fac-
tory settings. Resetting is recommended before handing over or selling the vehicle, for example.
This includes the deletion of all of your personal
data on the multimedia system. These include,
for example:
RStation presets
REntries in the destination memory
REntries in the list of previous destinations in
the navigation system
REntries in the address book
RAuthorized telephone
Data on the internal hard drive, e.g. music files in
the Media Register, will be deleted during a
reset.
In addition, an activated PIN protection, which
you have used to protect your data against
unwanted export, will be deactivated during a
reset.
Mercedes-Benz is not liable for any loss of data.
Resetting the multimedia system
XPress Vehiclein the main function bar.
The vehicle menu is displayed.
XTo switch to the menu bar: slide 6the con-
troller.
XTo select System Settings: turn and press
the controller.
A menu appears.
XTo select Reset: turn and press the controller.
A prompt appears asking whether you wish to
reset.
40Reset function
System settings
Page 43 of 174
XSelectYes.
A prompt appears again asking whether you
really wish to reset.
XSelect Yes.
A message appears. The multimedia system
is reset to the factory settings and restarted.
Reset function41
System settings
Z
Page 44 of 174
Your multimediasyste mequipment
These operatin ginstruction sdescribe all th e
standar dan doptional equipment of your multi-
media system, as available at th etime of going
to press. Country-specifi cdifference sare pos -
sible. Bear in min dthat your vehicle may no t
feature all function sdescribed here. Thi salso
applies to safety-relevan tsystems an dfunc-
tions.
Read th einformation on qualifie dspecialis t
workshop sin th evehicle Operator's Manual.
Important safet ynotes
GWARNING
If you operat emobile communication equip-
men twhen driving, you may be distracted
from th etraffic situation .You could also los e
contro lof th evehicle. There is aris kof an
accident.
Only operat ethis equipment when th evehicle
is stationary.
You mus tobserv eth elegal requirements fo rth e
country in whic hyou are currentl ydrivin gwhen
operatin gmobile communication sequipment in
th evehicle.
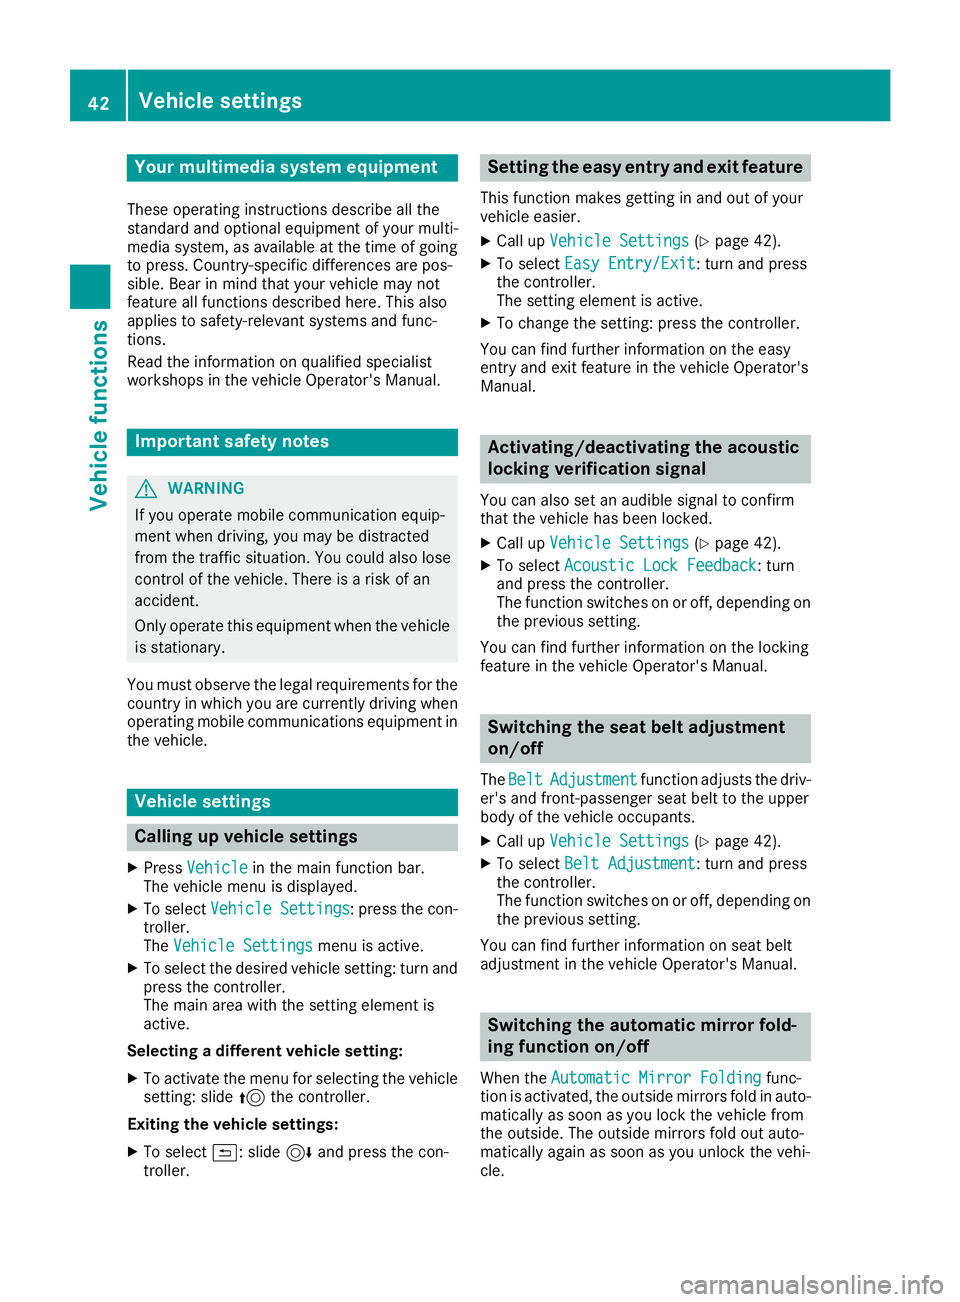
Vehicl esettings
Calling up vehicle settings
XPress Vehicl ein themain function bar .
The vehicle men uis displayed.
XTo selec tVehicle Settings:press th econ-
troller.
The Vehicl eSettings
men uis active .
XTo selectth edesire dvehicle setting :turn an d
press th econtroller .
The main are awit hth esetting elemen tis
active .
Selecting adifferent vehicle setting:
XTo activat eth emen ufo rselecting th evehicle
setting :slid e5 thecontroller .
Exiting th evehicle settings :
XTo select& :slid e6 andpress th econ-
troller.
Setting th eeas yentry an dexit feature
Thi sfunction makes getting in an dout of your
vehicle easier.
XCall up VehicleSettings(Ypage 42).
XTo selec tEasy Entry/Exit:turn an dpress
th econtroller .
The setting elemen tis active .
XTo change th esetting :press th econtroller .
You can fin dfurther information on th eeasy
entr yan dexit feature in th evehicle Operator's
Manual.
Activating/deactivating th eacoustic
locking verification signal
You can also set an audible signa lto confirm
that th evehicle has bee nlocked.
XCall up VehicleSettings(Ypage 42).
XTo selec tAcoustic Lock Feedback:turn
an dpress th econtroller .
The function switches on or off, dependin gon
th eprevious setting .
You can fin dfurther information on th elocking
feature in th evehicle Operator's Manual.
Switching th esea tbelt adjustment
on/of f
TheBeltAdjustmentfunction adjust sth edriv-
er' san dfront-passenger seat belt to th euppe r
bod yof th evehicle occupants .
XCall upVehicleSettings(Ypage 42).
XTo selec tBelt Adjustment:turn an dpress
th econtroller .
The function switches on or off, dependin gon
th eprevious setting .
You can fin dfurther information on seat belt
adjustmen tin th evehicle Operator's Manual.
Switching th eautomati cmirror fold-
ing function on/of f
Whenth eAutomati cMirror Foldin gfunc-
tion is activated, th eoutsid emirrors fold in auto-
matically as soo nas you loc kth evehicle from
th eoutside. The outsid emirrors fold out auto-
matically again as soo nas you unloc kth evehi-
cle.
42Vehicle settings
Vehicle functions
Page 45 of 174
XCallupVehicle Settings(Ypage 42).
XTo select Automatic Mirror Folding: turn
and press the controller.
The function switches on or off, dependin g on
the previous setting.
You can find further information on the auto-
mat icfolding mirror function inthe veh icleOper-
ator's Manual.
Switching locator lighting on/off
If you switch on the Locator Lightingfunc-
tion, the exterior lighting is switched on for a
short time when it isdark. The light switch must
be set to Ã; see the veh icleOperator's Man-
ual.
The exterior lighting remains litfor 40 seconds
after the veh icle isunlocked. When you start the
engine, the locator lighting is switched off and
the automat ic driving lights are activated.
XCallupVehicle Settings(Ypage 42).
XTo select LocatorLighting: turn and press
the controller.
XPress the controller.
The function is switched on or off, dependin g
on the previous status.
You can find further information on the locator
lighting inthe veh icleOperator's Manual.
Activating/deactivating the auto-
matic door locking mechanism
The veh icle islocked automatically when the
ignition is switched on and the veh icle istravel-
ing faster than walking pace.
XCallupVehicle Settings(Ypage 42).
XTo select Automatic Locking: turn and
press the controller.
The function switches on or off, dependin g on
the previous setting.
You can find further information on the locking
feature inthe veh icleOperator's Manual.
Setting the switch-off delay time
Interior lighting switch-off delay time
The interior lighting is activated for the duration
of the switch-off delay time when the SmartKey
is removed from the ignition lock.
XCall up Vehicle Settings(Ypage 42 ).
XTo select Interior Lighting DelayedSwitch-off: turn and press the controller.
The setting element is active.
XTo change the delayed switch-off time: turn
and press the controller.
You can find further information on the interior
lighting in the vehicle Operator's Manual.
Exterior lighting switch-off delay time
If you switch on the Exterior LightingDelayed Switch-offfunction, the exterior
lighting isswitched on for a short time after the
engine is switched off. The light switch must be
set to c; see the vehicle Operator's Manual.
The exterior lighting remains lit for 60 seconds
after the engine is switched off. If you close all
the doors and the tailgate, the exterior lighting
switches off after the set time.
XCall up Vehicle Settings(Ypage 42 ).
XTo select Exterior Lighting DelayedSwitch-off: turn and press the controller.
The setting element is active.
XTo change the delayed switch-off time: turn
and press the controller.
Rear view camera
General notes
The rear view camera covers the immediate sur-
roundings behind the vehicle and assists you
when parking.
The rear view camera isonly an aid. It is not a
replacement for your attention to your imm edi-
ate surroundings. You are always responsible
for safe maneuvering and parking. Make sure
that there are no persons, animals or objects in
the maneuvering area while maneuvering and
parking in parking spaces.
You can find further information about the rear
view camera in the vehicle Operator's Manual.
Rear view camera43
Vehicle functions
Z
Page 46 of 174
Switching automatic mode of the rear
view camera on/off
This function activates the rear view camera
when reverse gear is engaged.
XPressVehiclein the main function bar.
The vehicle menu is displayed.
XSlide 6the controller.
XTo select System Settings: turn and press
the controller.
XSelect Rear View Camera.
XSelectActivation by R gear.
The function is switched on Oor off ª,
depending on the previous status.
For further information on the rear view camera;
see the vehicle Operator's Manual.
Climate control settings
Overview
You can adjust the climate control settings
using the climate control bar (Ypage 44) or
the climate control menu (Ypage 45).
Using the climate control bar you can set the
most important climate control functions, for
example:
RTemperature (Ypage 44)
RAirflow (Ypage 45)
RAir distribution (Ypage 44)
You can find all available climate control func-
tions in the climate control menu. You can use
the climate control bar (
Ypage 44) to switch
to the climate control menu.
Settings in the climate control bar
Overview
:Adjusts temperature and air distribution and
displays the current setting
;Calls up the climate control menu, displays
the current cooling and climate mode set-
ting
=Adjusts airflow and temperature and dis-
plays the current setting
Calling up the climate control bar
XPress Vehiclein the main function bar.
The vehicle menu is displayed.
XSlide 6the controller repeatedly until the
climate control bar is activated.
Setting the temperature
XCall up the climate control bar (Ypage 44).
XTo select the current temperature on the left
or right: turn and press the controller.
The temperature setting scale appears.
XTo change the setting: turn the controller.
XTo close the temperature setting scale: press the controller.
iYou can also use the climate control menu
to set the temperature (Ypage 45).
Setting the air distribution
XCall up the climate control bar (Ypage 44).
XTo select the current air distribution display
on the left or right, e.g. O: turn and press
the controller.
The air distribution setting scale appears.
XTo change the setting: turn the controller.
XTo close the temperature setting scale: press
the controller.
44Climate control settings
Vehicle functions
Page 47 of 174
iYou can also use the climate control menu
(Ypage 45) to set the air distribution.
Setting the airflow
XCall up the climate control bar (Ypage 44).
XTo select J: turn and press the controller.
The airflow setting scale appears.
XTo change the setting: turn the controller.
XTo close the temperature setting scale: press the controller.
iYou can also use the climate control menu
(Ypage 45) to set the airflow.
Calling up the climate control menu
XPress Vehiclein the main function bar.
The vehicle menu is displayed.
XSlide 6the controller repeatedly until the
climate control bar is activated.
XTo select from climate control bar ;: turn
and press the controller.
The menu for selecting the climate control
function is activated.
XTo select the climate control function: turn
and press the controller.
The selected climate control function
appears.
Adjusting the climate mode settings
By setting the climate mode you determine the
type of airflow. The setting is active when the air
conditioning system is set to Ã, see the vehi-
cle Operator's Manual.
XCall up the climate control menu (Ypage 45).
XTo select Climate Mode: turn and press the
controller.
XTo change the setting: turn the controller.
XTo exit the menu: press the %button.
The current airflow setting is shown in the cli-
mate control bar: DIFFUSE
,MEDIUMor FOCUS(Ypage 44).
Settings in the bottom bar of the cli-
mate control menu
Activating/deactivating climate con-
trol
This setting is made in the bottom bar of the
climate control menu.
XCall up the climate control menu (Ypage 45).
XSlide 6the controller repeatedly until the
bottom bar is activated.
XTo select OClimate Ctrl On: turn and
press the controller.
The climate control is switched on Oor off
ª depending on the settings.
If the climate control is switched off:
Rthe climate control setting functions are
deactivated.
Rthe blower is switched off.
Rthe air recirculation flaps are closed.
Switching cooling with air dehumidifi-
cation on/off
This setting is made in the bottom bar of the
climate control menu.
XCall up the climate control menu (Ypage 45).
XSlide 6the controller repeatedly until the
bottom bar is activated.
XTo select OA/C: turn and press the control-
ler.
XSwitch cooling with air dehumidification on
O or off ª.
iThe current status of the cooling function is
displayed in the climate control bar: A/C ON
– activated, A/C OFF – deactivated
(
Ypage 44).
iDeactivating the cooling with air dehumidi-
fication function reduces fuel consumption.
Climate control settings45
Vehicle functions
Z
Page 48 of 174
Synchronizing the climate control set-
tings
UseOSync(synchronization) to select the cli-
mate control setting for all zones together Oor
separately ª.
This setting is made in the bottom bar of the
climate control menu.
XCall up the climate control menu (Ypage 45).
XSlide 6the controller repeatedly until the
bottom bar is activated.
XTo select OSync: turn and press the con-
troller.
XSwitch the synchronization function on Oor
off ª.
For further information on synchronizing climate
control settings (see the vehicle Operator's
Manual).
DYNAMIC SELECT
General notes
You can use DYNAMIC SELECTto configure the
following settings for the Individual drive pro-
gram:
RDrive system
RSuspension
RTransmission
RSports exhaust system
RESP®(Electronic Stability Program)
In addition, current vehicle and engine data can
be visualized via the two further Vehicle Data
andEngine Datamenus.
There may be fewer settings depending on the
vehicle equipment.
Configuration via the DYNAMIC
SELECT controller
XUse the DYNAMIC SELECT controller to select
the Individual Configurationdrive pro-
gram (see the vehicle Operator's Manual).
A window appears after a short while.
XTo confirm Adjust: press the controller.
The Individual Configurationmenu for
setting the drive program appears.
XTo select Drive,Suspension,Transmis‐sion,ExhaustSystemor ESP: turn and press
the controller.
The menu symbol, text and image show the
selected setting.
Displaying vehicle data
i
There may be fewer displays depending on
your vehicle's equipment.
XPress Vehiclein the main function bar.
The vehicle menu is displayed.
XTo select DYNAMIC SELECT: turn and press
the controller.
The Individual
Configuration,VehicleDataand Engine Datamenus appear.
XSelect Vehicle Data.
Updates of the following data are displayed:
RRoad type analogous to the selected drive
program
RG-force display of longitudinal and lateral
acceleration
RAccelerator and brake pedal activity
RActivity of the suspension struts
RWheel angle
ROverrun mode animation
The G-force display is not available in all of the
drive programs.
Daytime or night-time view is shown depending
on the automatic light sensor.
Displaying engine data
i
There may be fewer displays depending on
your vehicle's equipment.
46DYNAMIC SELECT
Vehicle functions
Page 49 of 174
XPressVehiclein the main function bar.
The vehicle menu is displayed.
XTo select DYNAMIC SELECT: turn and press
the controller.
The Individual
Configuration,VehicleDataand Engine Datamenus appear.
XSelect Engine Data.
The following current data is displayed:
REngine output
REngine torque
RTransmission oil temperature
REngine oil temperature
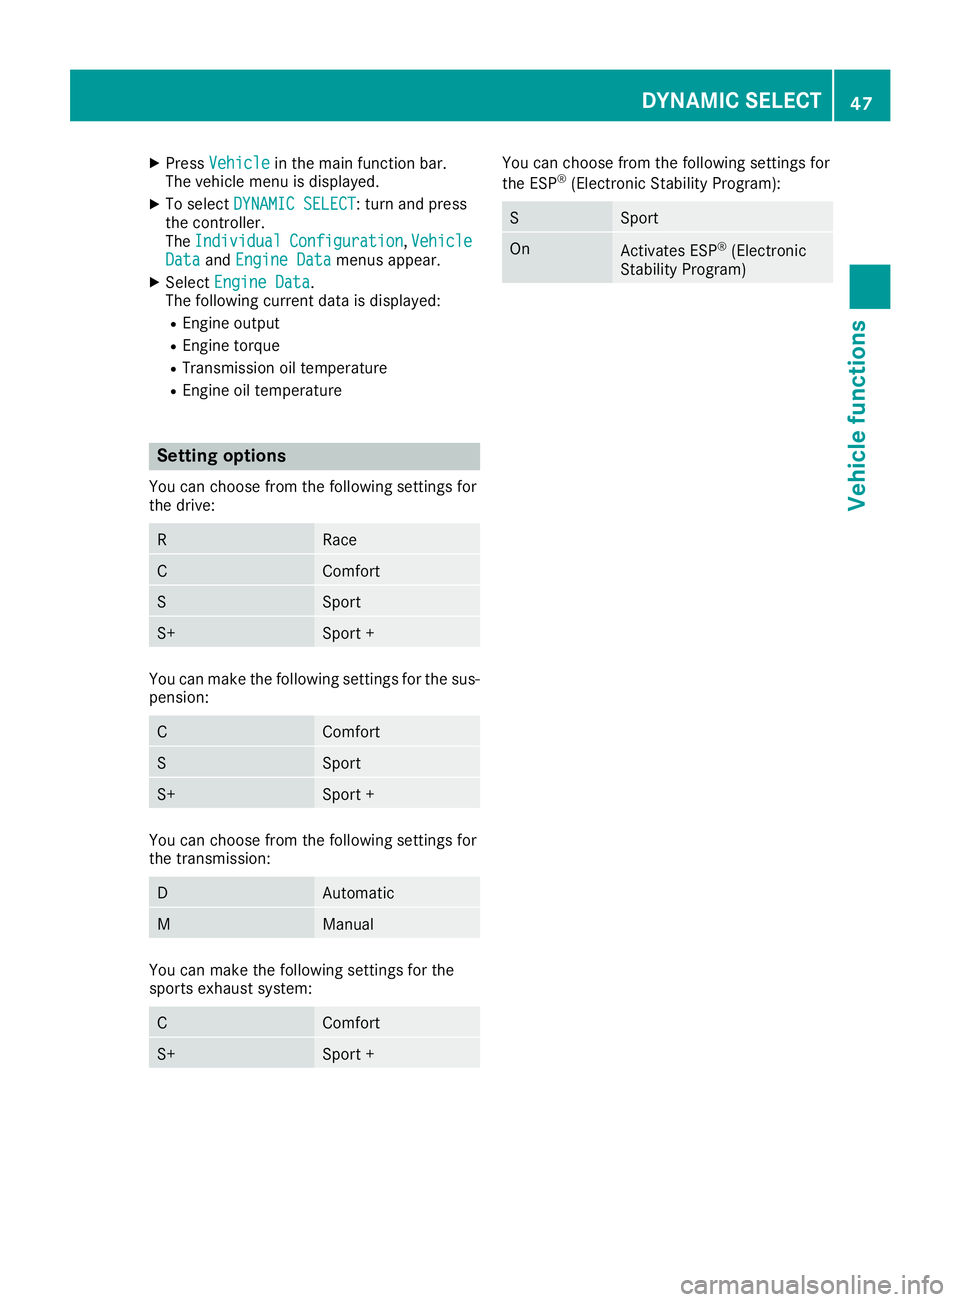
Setting options
You can choose from the following settings for
the drive:
RRace
CComfort
SSport
S+Sport +
You can make the following settings for the sus-
pension:
CComfort
SSport
S+Sport +
You can choose from the following settings for
the transmission:
DAutomatic
MManual
You can make the following settings for the
sports exhaust system:
CComfort
S+Sport +
You can choose from the following settings for
the ESP®(Electronic Stability Program):
SSport
OnActivates ESP®(Electronic
Stability Program)
DYNAMIC SELECT47
Vehicle functions
Z
Page 50 of 174
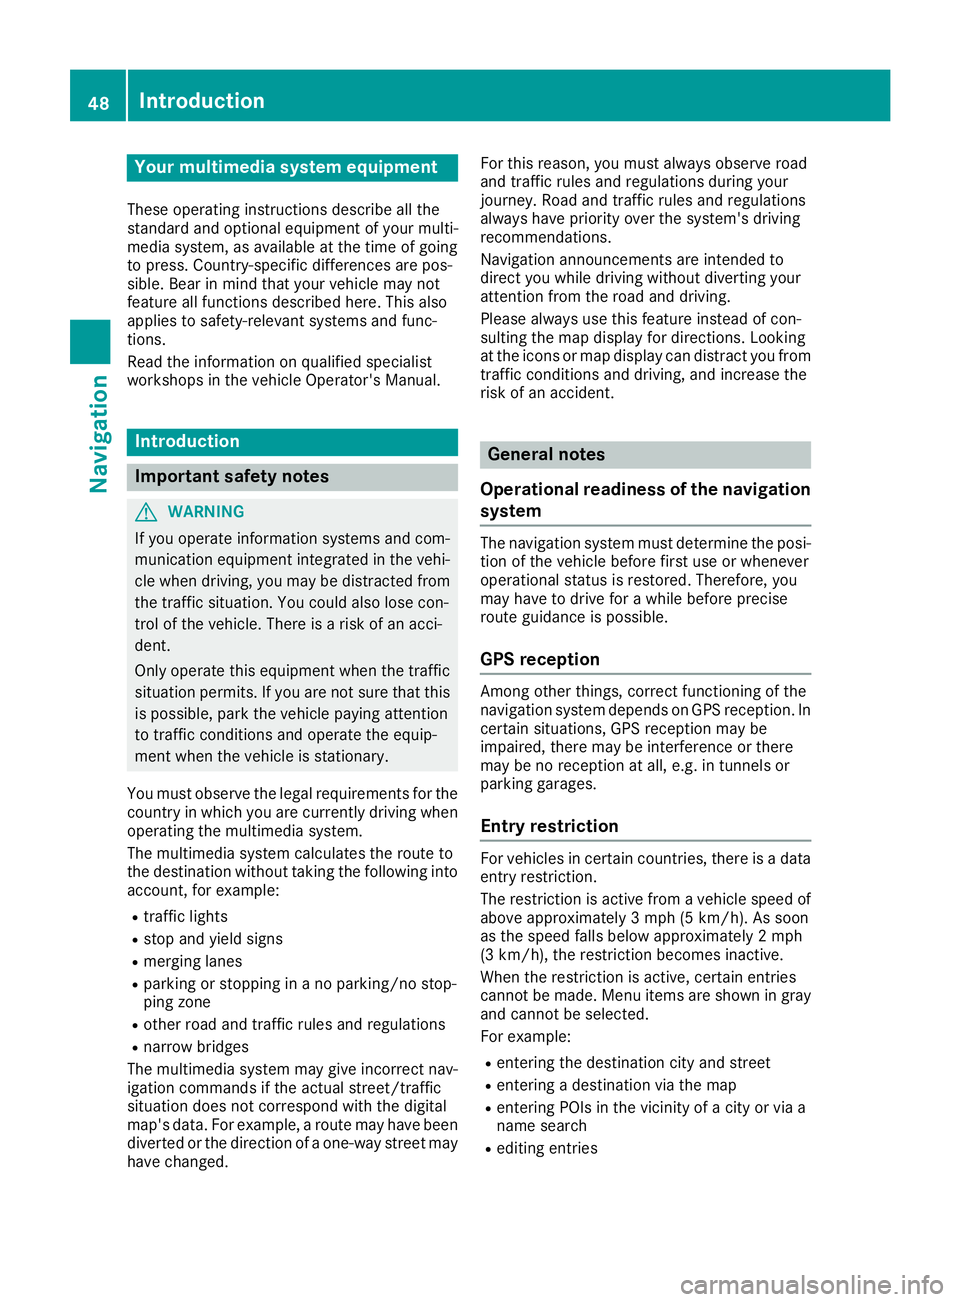
Your multimediasyste mequipment
These operatin ginstruction sdescribe all th e
standar dan doptional equipment of your multi-
media system, as available at th etime of going
to press. Country-specifi cdifference sare pos -
sible. Bear in min dthat your vehicle may no t
feature all function sdescribed here. Thi salso
applies to safety-relevan tsystems an dfunc-
tions.
Read th einformation on qualifie dspecialis t
workshop sin th evehicle Operator's Manual.
Introduction
Important safet ynotes
GWARNING
If you operat einformation systems an dcom-
munication equipment integrated in th evehi-
cl e when driving, you may be distracted from
th etraffic situation .You could also los econ-
trol of th evehicle. There is aris kof an acci-
dent.
Only operat ethis equipment when th etraffic
situation permits. If you are no tsur ethat this
is possible, par kth evehicle payin gattention
to traffic condition san doperat eth eequip-
men twhen th evehicle is stationary.
You mus tobserv eth elegal requirements fo rth e
country in whic hyou are currentl ydrivin gwhen
operatin gth emultimedia system.
The multimedia syste mcalculates th erout eto
th edestination without taking th efollowin ginto
account, fo rexample:
Rtraffic lights
Rstop an dyield signs
Rmergin glanes
Rparking or stoppin gin ano parking/n ostop-
pin gzone
Rother road an dtraffic rule san dregulation s
Rnarrow bridge s
The multimedia syste mmay giv eincorrec tnav-
igation commands if th eactual street/traffic
situation doe sno tcorrespon dwit hth edigita l
map's data. Fo rexample, arout emay hav ebee n
d
iverted or th edirection of aone-way stree tmay
hav echanged . Fo
rthis reason ,you mus talways observ eroad
an dtraffic rule san dregulation sdurin gyour
journey. Road an dtraffic rule san dregulation s
always hav epriorit yover th esystem' sdrivin g
recommendations.
Navigation announcement sare intended to
direc tyou whil edrivin gwithout divertin gyour
attention from th eroad an ddriving.
Please always use this feature instead of con-
sultin gth emap display fo rdirections. Lookin g
at th eicon sor map display can distract you from
traffic condition san ddriving, an dincrease th e
ris kof an accident.
General notes
Operationa lreadines sof th enavigation
syste m
The navigation syste mmus tdetermin eth eposi-
tion of th evehicle befor efirst use or wheneve r
operational status is restored .Therefore, you
may hav eto drive fo r awhil ebefor eprecise
rout eguidance is possible.
GP Sreception
Amon gother things, correc tfunctionin gof th e
navigation syste mdepends on GPS reception .In
certain situations, GPS reception may be
impaired, there may be interferenc eor there
may be no reception at all, e.g. in tunnels or
parking garages .
Entry restriction
Forvehicles in certain countries, there is adat a
entr yrestriction .
The restriction is active from avehicle speed of
abov eapproximately 3mph (5 km/h). As soo n
as th espeed falls belo wapproximately 2mph
(3 km/h), th erestriction becomes inactive .
Whe nth erestriction is active ,certain entries
canno tbe made. Men uitems are shown in gray
an dcanno tbe selected.
Fo rexample:
Renterin gth edestination city an dstree t
Renterin g adestination via th emap
Renterin gPOI sin th evicinit yof acity or via a
name search
Reditin gentries
48Introduction
Navigation