interior lights MERCEDES-BENZ AMG GT ROADSTER 2018 Owner's Manual
[x] Cancel search | Manufacturer: MERCEDES-BENZ, Model Year: 2018, Model line: AMG GT ROADSTER, Model: MERCEDES-BENZ AMG GT ROADSTER 2018Pages: 294, PDF Size: 4.8 MB
Page 4 of 294
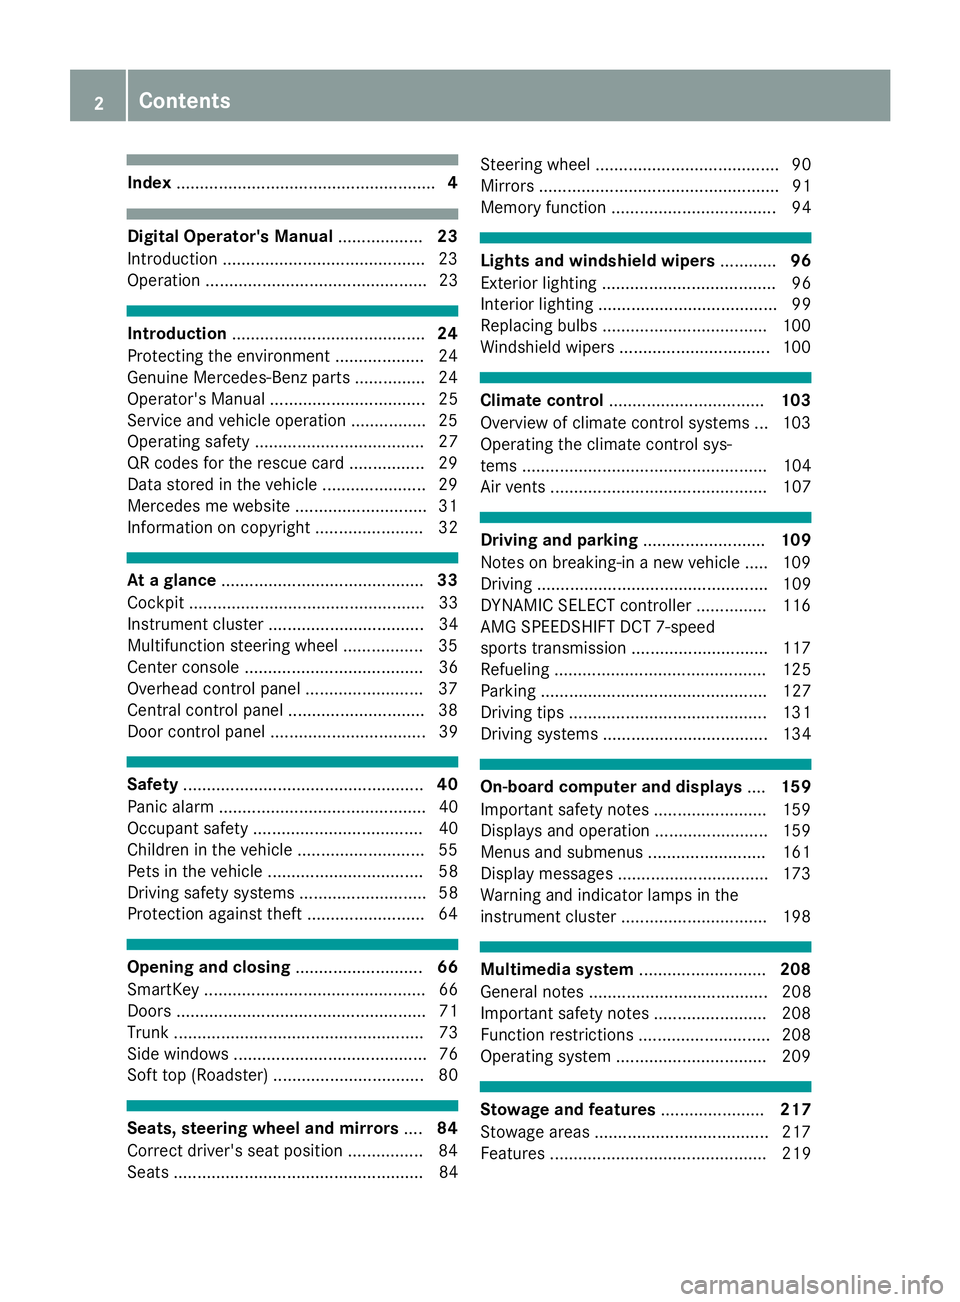
Index....................................................... 4
Digital Operator's Manual..................23
Introduction .......................................... .23
Operation ............................................... 23
Introduction ......................................... 24
Protecting the environment ...................2 4
Genuine Mercedes-Benz parts .............. .24
Operator's Manual ................................. 25
Service and vehicle operation ................2 5
Operating safety .................................... 27
QR codes for the rescue card ................2 9
Data stored in the vehicle ...................... 29
Mercedes me website ............................ 31
Information on copyright ....................... 32
At a glance ........................................... 33
Cockpit .................................................. 33
Instrument cluster ................................. 34
Multifunction steering wheel ................. 35
Center console ...................................... 36
Overhead control panel .........................3 7
Central control panel ............................ .38
Door control panel ................................. 39
Safety ................................................... 40
Panic alarm ............................................ 40
Occupant safety .................................... 40
Children in the vehicle ........................... 55
Pets in the vehicle ................................. 58
Driving safety systems ........................... 58
Protection against theft .........................6 4
Opening and closing...........................66
SmartKey ............................................... 66
Doors ..................................................... 71
Trunk ..................................................... 73
Side windows ......................................... 76
Soft top (Roadster) ................................ 80
Seats, steering wheel and mirrors ....84
Correct driver's seat position ............... .84
Seats ..................................................... 84 Steering wheel ....................................... 90
Mirrors ................................................... 91
Memory function ................................... 94
Lights and windshield wipers
............96
Exterior lighting ..................................... 96
Interior lighting ...................................... 99
Replacing bulbs ................................... 100
Windshield wipers ................................ 100
Climate control ................................. 103
Overview of climate control systems ... 103
Operating the climate control sys-
tems .................................................... 104
Air vents .............................................. 107
Driving and parking ..........................109
Notes on breaking-in a new vehicle ..... 109
Driving ................................................. 109
DYNAMIC SELECT controller ............... 116
AMG SPEEDSHIFT DCT 7-speed
sports transmission ............................. 117
Refueling ............................................. 125
Parking ................................................ 127
Driving tips .......................................... 131
Driving systems ................................... 134
On-board computer and displays ....159
Important safety notes ........................ 159
Displays and operation ........................ 159
Menus and submenus ......................... 161
Display messages ................................ 173
Warning and indicator lamps in the
instrument cluster ............................... 198
Multimedia system ...........................208
General notes ...................................... 208
Important safety notes ........................ 208
Function restrictions ............................ 208
Operating system ................................ 209
Stowage and features ......................217
Stowage areas ..................................... 217
Features .............................................. 219
2Contents
Page 8 of 294
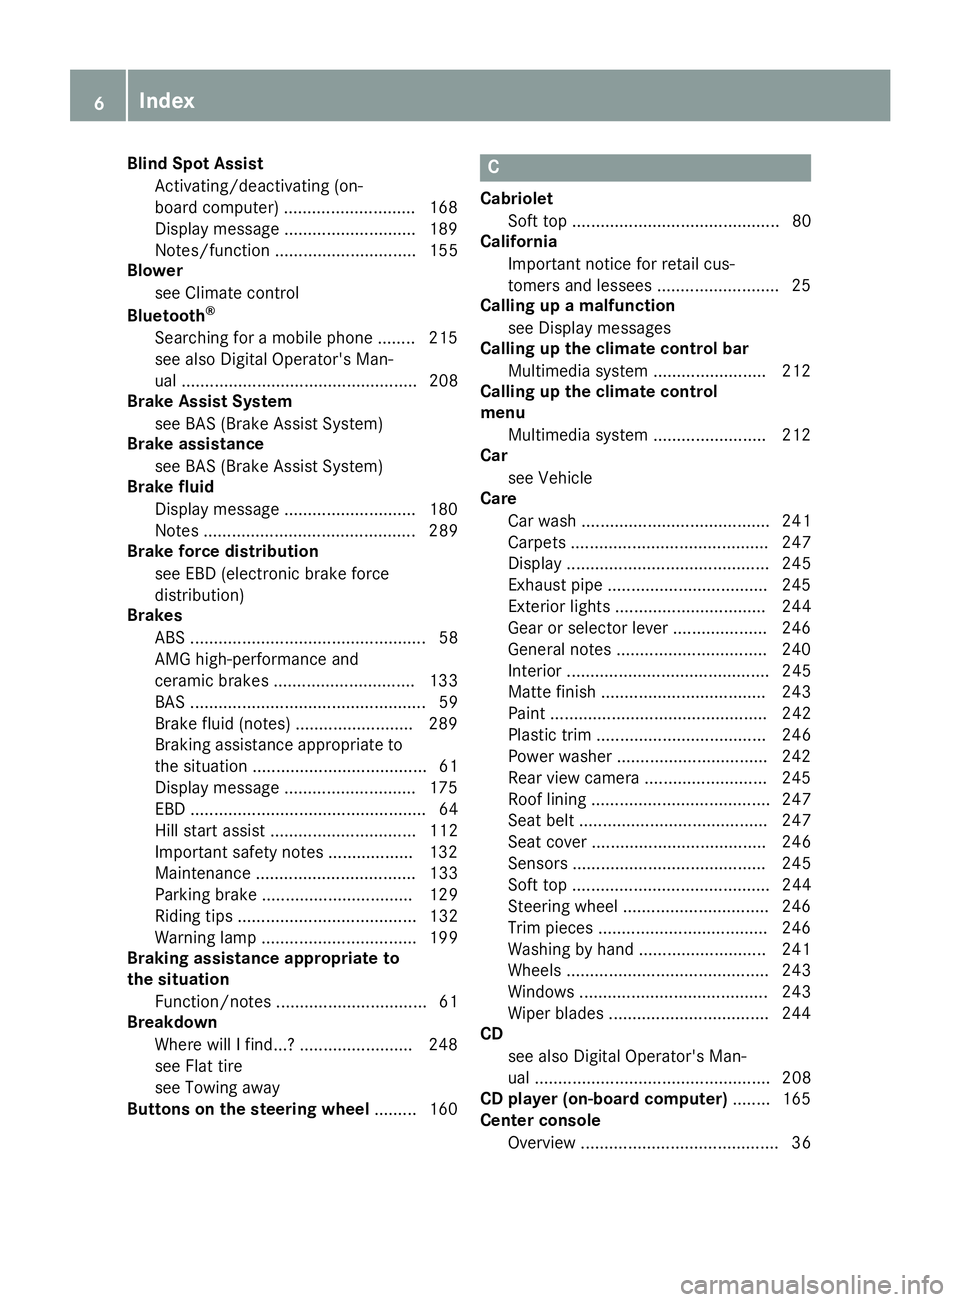
Blind Spot AssistActivating/deactivating (on-
board computer) ............................ 168
Display message ............................ 189
Notes/function .............................. 155
Blower
see Climate control
Bluetooth
®
Searching for a mobile phone ........ 215
see also Digital Operator's Man-
ual .................................................. 208
Brake Assist System
see BAS (Brake Assist System)
Brake assistance
see BAS (Brake Assist System)
Brake fluid
Display message ............................ 180
Notes ............................................. 289
Brake force distribution
see EBD (electronic brake force
distribution)
Brakes
ABS .................................................. 58
AMG high-performance and
ceramic brakes .............................. 133
BAS .................................................. 59
Brake fluid (notes) ......................... 289
Braking assistance appropriate to
the situation ..................................... 61
Display message ............................ 175
EBD .................................................. 64
Hill start assist ............................... 112
Important safety notes .................. 132
Maintenance .................................. 133
Parking brake ................................ 129
Riding tips ...................................... 132
Warning lamp ................................. 199
Braking assistance appropriate to
the situation
Function/notes ................................ 61
Breakdown
Where will I find...? ........................ 248
see Flat tire
see Towing away
Buttons on the steering wheel ......... 160
C
Cabriolet
Soft top ............................................ 80
California
Important notice for retail cus-
tomers and lessees .......................... 25
Calling up a malfunction
see Display messages
Calling up the climate control bar
Multimedia system ........................ 212
Calling up the climate control
menu
Multimedia system ........................ 212
Car
see Vehicle
Care
Car wash ........................................ 241
Carpets .......................................... 247
Display ........................................... 245
Exhaust pipe .................................. 245
Exterior lights ................................ 244
Gear or selector lever .................... 246
General notes ................................ 240
Interior ........................................... 245
Matte finish ................................... 243
Paint .............................................. 242
Plastic trim .................................... 246
Power washer ................................ 242
Rear view camera .......................... 245
Roof lining ...................................... 247
Seat belt ........................................ 247
Seat cover ..................................... 246
Sensors ......................................... 245
Soft top .......................................... 244
Steering wheel ............................... 246
Trim pieces .................................... 246
Washing by hand ........................... 241
Wheels ........................................... 243
Windows ........................................ 243
Wiper blades .................................. 244
CD
see also Digital Operator's Man-
ual .................................................. 208
CD player (on-board computer) ........ 165
Center console
Overview .......................................... 36
6Index
Page 14 of 294
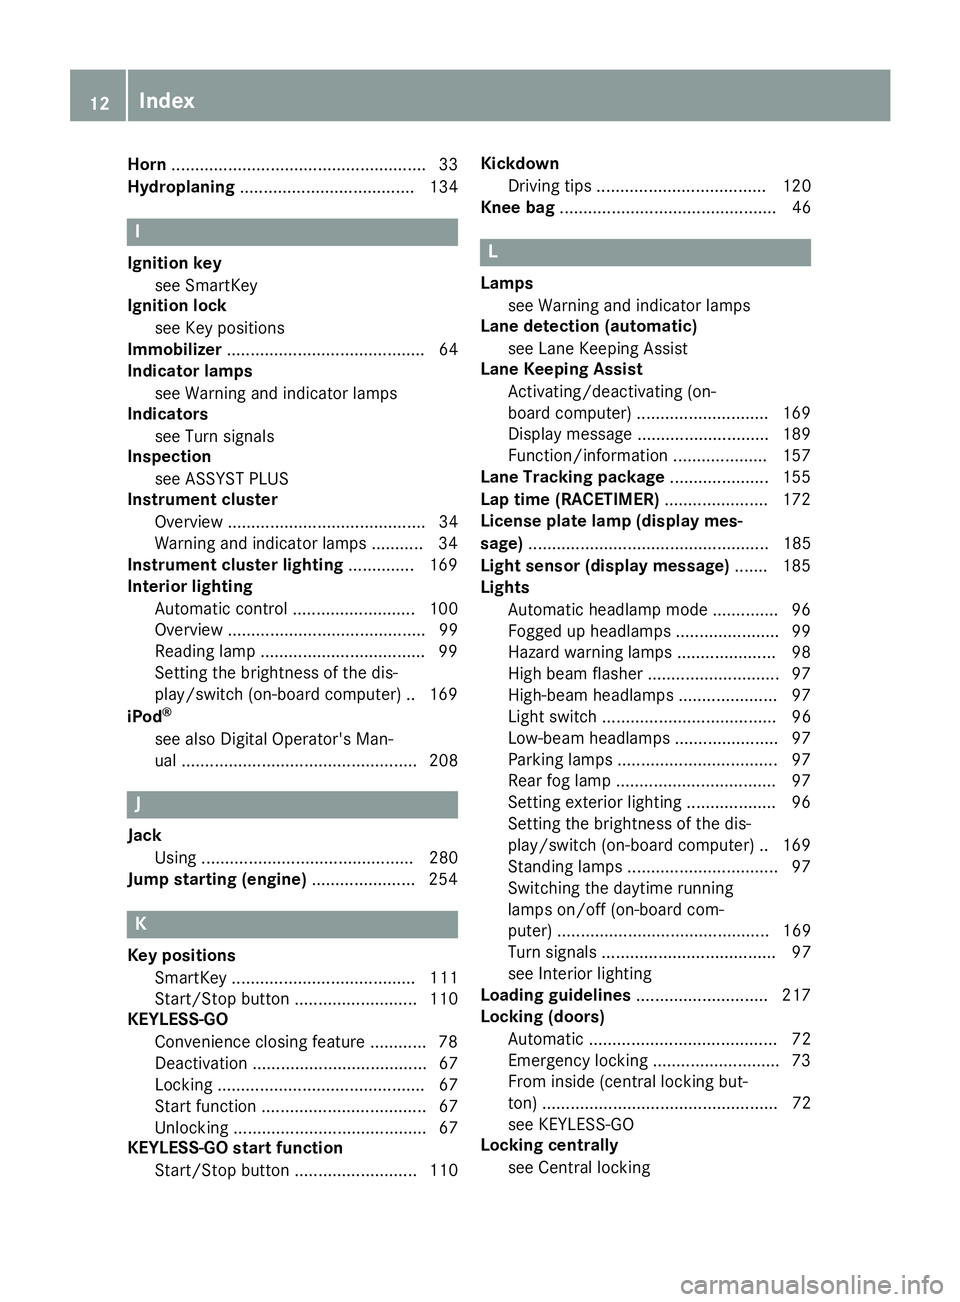
Horn...................................................... 33
Hydroplaning ..................................... 134
I
Ignition key
see SmartKey
Ignition lock
see Key positions
Immobilizer .......................................... 64
Indicator lamps
see Warning and indicator lamps
Indicators
see Turn signals
Inspection
see ASSYST PLUS
Instrument cluster
Overview .......................................... 34
Warning and indicator lamps ...........3 4
Instrument cluster lighting .............. 169
Interior lighting
Automatic control .......................... 100
Overview .......................................... 99
Reading lamp .................................. .99
Setting the brightness of the dis-
play/switch (on-board computer) .. 169
iPod
®
see also Digital Operator's Man-
ual .................................................. 208
J
Jack Using ............................................. 280
Jump starting (engine) ...................... 254
K
Key positions
SmartKey ....................................... 111
Start/Stop button .......................... 110
KEYLESS-GO
Convenience closing feature ............ 78
Deactivation ..................................... 67
Locking ............................................ 67
Start function ................................... 67
Unlocking ......................................... 67
KEYLESS-GO start function
Start/Stop button .......................... 110 Kickdown
Driving tips .................................... 120
Knee bag .............................................. 46
L
Lamps
see Warning and indicator lamps
Lane detection (automatic)
see Lane Keeping Assist
Lane Keeping Assist
Activating/deactivating (on-
board computer) ............................ 169
Display message ............................ 189
Function/information .................... 157
Lane Tracking package ..................... 155
Lap time (RACETIMER) ...................... 172
License plate lamp (display mes-
sage) ................................................... 185
Light sensor (display message) ....... 185
Lights
Automatic headlamp mode .............. 96
Fogged up headlamps ...................... 99
Hazard warning lamps ..................... 98
High beam flasher ............................ 97
High-beam headlamps ..................... 97
Light switch ..................................... 96
Low-beam headlamps ...................... 97
Parking lamps .................................. 97
Rear fog lamp .................................. 97
Setting exterior lighting ................... 96
Setting the brightness of the dis-
play/switch (on-board computer) .. 169
Standing lamps ................................ 97
Switching the daytime running
lamps on/off (on-board com-
puter) ............................................. 169
Turn signals ..................................... 97
see Interior lighting
Loading guidelines ............................ 217
Locking (doors)
Automatic ........................................ 72
Emergency locking ........................... 73
From inside (central locking but-
ton) .................................................. 72
see KEYLESS-GO
Locking centrally
see Central locking
12Index
Page 43 of 294
Restraint system warning lamp
The functions of the restraint system are
checked after the ignition is switched on and at
regular intervals while the engine is running.
Therefore, malfunctions can be detected in
good time.
The6 restraint system warning lamp on the
instrument cluster lights up when the ignition is
switched on. It goes out no later than a few sec-
onds after the vehicle is started. The compo-
nents of the restraint system are in operational
readiness.
A malfunction has occurred if the 6restraint
system warning lamp:
Rdoes not light up after the ignition is switched
on
Rdoes not go out after a few seconds with the
engine running
Rlights up again while the engine is running
GWARNING
If the restraint system is malfunctioning,
restraint system components may be trig-
gered unintentionally or may not deploy as
intended during an accident. This can affect
for example the Emergency Tensioning
Device or the air bag. This poses an increased
risk of injury or even fatal injury.
Have the restraint system checked and
repaired in a qualified specialist workshop as
soon as possible.
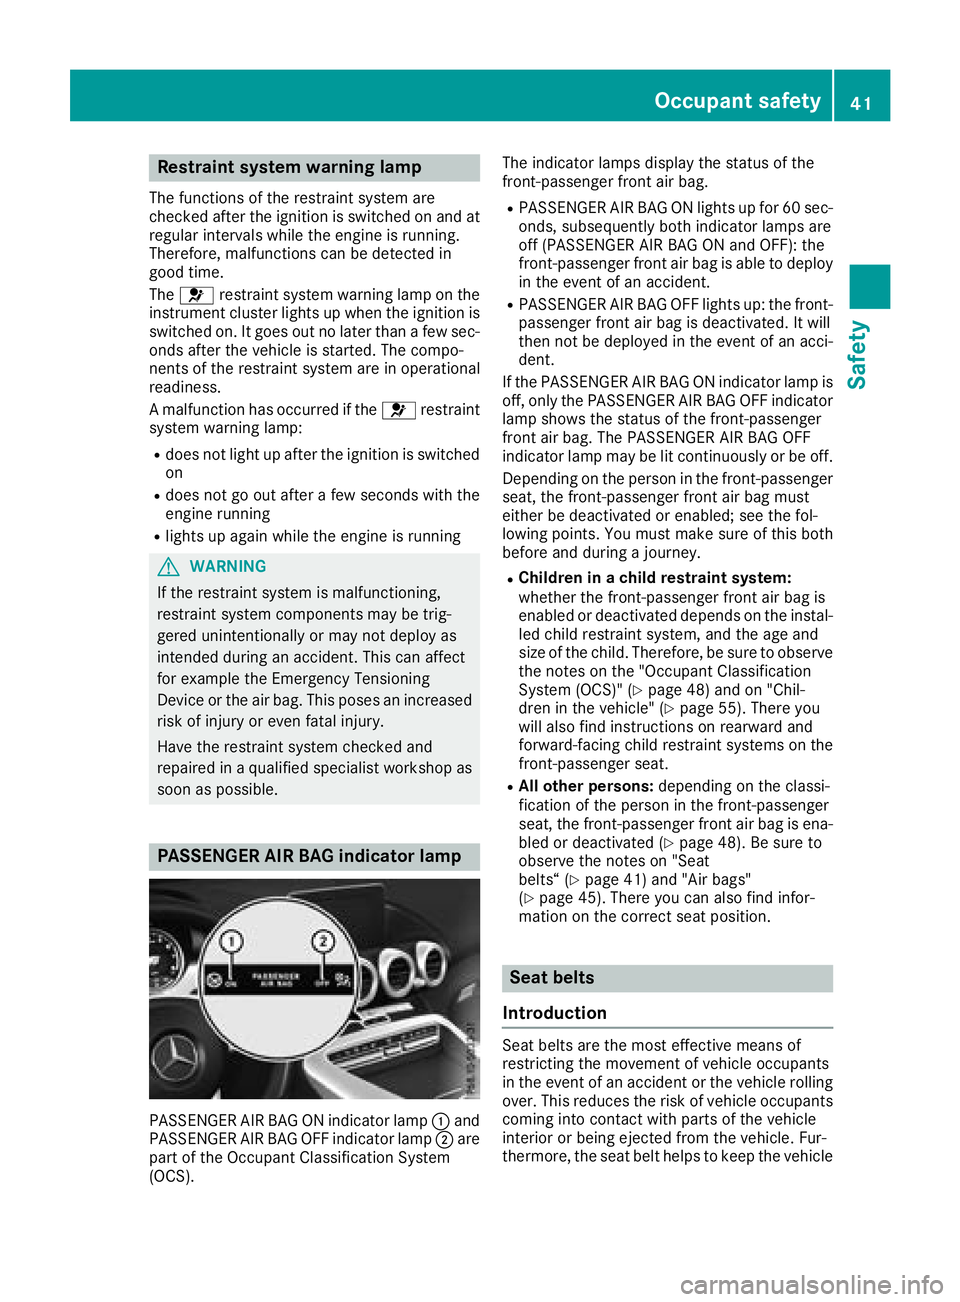
PASSENGER AIR BAG indicator lamp
PASSENGER AIR BAG ON indicator lamp :and
PASSENGER AIR BAG OFF indicator lamp ;are
part of the Occupant Classification System
(OCS). The indicator lamps display the status of the
front-passenger front air bag.
RPASSENGER AIR BAG ON lights up for 60 sec-
onds, subsequently both indicator lamps are
off (PASSENGER AIR BAG ON and OFF): the
front-passenger front air bag is able to deploy
in the event of an accident.
RPASSENGER AIR BAG OFF lights up: the front-
passenger front air bag is deactivated. It will
then not be deployed in the event of an acci-
dent.
If the PASSENGER AIR BAG ON indicator lamp is
off, only the PASSENGER AIR BAG OFF indicator lamp shows the status of the front-passenger
front air bag. The PASSENGER AIR BAG OFF
indicator lamp may be lit continuously or be off.
Depending on the person in the front-passenger
seat, the front-passenger front air bag must
either be deactivated or enabled; see the fol-
lowing points. You must make sure of this both
before and during a journey.
RChildren in a child restraint system:
whether the front-passenger front air bag is
enabled or deactivated depends on the instal-led child restraint system, and the age and
size of the child. Therefore, be sure to observe
the notes on the "Occupant Classification
System (OCS)" (
Ypage 48) and on "Chil-
dren in the vehicle" (Ypage 55). There you
will also find instructions on rearward and
forward-facing child restraint systems on the
front-passenger seat.
RAll other persons: depending on the classi-
fication of the person in the front-passenger
seat, the front-passenger front air bag is ena-
bled or deactivated (
Ypage 48). Be sure to
observe the notes on "Seat
belts“ (
Ypage 41) and "Air bags"
(Ypage 45). There you can also find infor-
mation on the correct seat position.
Seat belts
Introduction
Seat belts are the most effective means of
restricting the movement of vehicle occupants
in the event of an accident or the vehicle rolling over. This reduces the risk of vehicle occupants
coming into contact with parts of the vehicle
interior or being ejected from the vehicle. Fur-
thermore, the seat belt helps to keep the vehicle
Occupant safety41
Safety
Z
Page 51 of 294
If the status of the front-passenger front air bag
changes while the vehicle is in motion, an air bag
display message appears in the instrument clus-
ter (
Ypage 183). When the front-passenger
seat is occupied, always pay attention to the
PASSENGER AIR BAG OFF indicator lamp. Be
aware of the status of the front-passenger front air bag both before and during the journey.
GWARNING
If the PASSENGER AIR BAG OFF indicator
lamp is lit, the front-passenger front air bag is
disabled. It will not be deployed in the event of
an accident and cannot perform its intended
protective function. A person in the front-
passenger seat could then, for example, come
into contact with the vehicle's interior, espe-
cially if the person is sitting too close to the
dashboard. This poses an increased risk of
injury or even fatal injury.
When the front-passenger seat is occupied,
always ensure that:
Rthe classification of the person in the front- passenger seat is correct and the front-
passenger front air bag is enabled or disa-
bled in accordance with the person in the
front-passenger seat
Rthe front-passenger seat has been moved
back as far back as possible.
Rthe person is seated correctly.
Make sure, both before and during the jour-
ney, that the status of the front-passenger
front air bag is correct.
GWARNING
If you secure a child in a rearward-facing child
restraint system on the front-passenger seat
and the PASSENGER AIR BAG OFF indicator
lamp is off, the front-passenger front air bag
can deploy in the event of an accident. The
child could be struck by the air bag. This poses an increased risk of injury or even fatal injury.
Make sure that the front-passenger front air
bag has been deactivated. The PASSENGER
AIR BAG OFF indicator lamp must be lit.
NEVER use a rearward-facing child restraint
on a seat protected by an ACTIVE FRONT AIR-
BAG in front of it; DEATH or SERIOUS INJURYto the child can occur.
If the PASSENGER AIR BAG OFF indicator lamp
stays off, do not install a rearward-facing child
restraint system on the front-passenger seat.
You can find more information on OCS under
"Problems with the Occupant Classification Sys-
tem" (
Ypage 51).
GWARNING
If you secure a child in a forward-facing child
restraint system on the front-passenger seat
and you position the front-passenger seat too close to the dashboard, in the event of an
accident, the child could:
Rcome into contact with the vehicle's inte-
rior if the PASSENGER AIR BAG OFF indi-
cator lamp is lit, for example
Rbe struck by the air bag if the PASSENGER
AIR BAG OFF indicator lamp is off
This poses an increased risk of injury or even fatal injury.
Move the front-passenger seat as far back as
possible. Always make sure that the shoulder belt strap is correctly routed from the vehicle
belt guide to the shoulder belt guide on the
child restraint system. The shoulder belt strap
must be routed forwards and downwards
from the vehicle belt guide. Always observe
the child restraint system manufacturer's
installation instructions.
If OCS determines that:
RThe front-passenger seat is unoccupied, the
PASSENGER AIR BAG OFF indicator lamp
lights up after the system self-test and
remains lit. This indicates that the front-
passenger front air bag is deactivated.
RThe front-passenger seat is occupied by a
child of up to twelve months old, in a standard
child restraint system, the PASSENGER AIR
BAG OFF indicator lamp lights up after the
system self-test and remains lit. This indi-
cates that the front-passenger front air bag is
deactivated.
But even in the case of a twelve-month-old
child, in a standard child restraint system, the
PASSENGER AIR BAG OFF indicator lamp can
go out after the system self-test. This indi-
Occupant safety49
Safety
Z
Page 52 of 294
cates that the front-passenger front air bag is
activated. The result of the classification is
dependent on, among other factors, the child
restraint system and the child's stature. Make
sure that the conditions for a correct classi-
fication are met. If the PASSENGER AIR BAG
OFF indicator lamp remains off, do not install
a child restraint system on the front-
passenger seat.
RThe front-passenger seat is occupied by a
person of smaller stature (e.g. a teenager or
small adult), the PASSENGER AIR BAG OFF
indicator lamp lights up and remains lit after
the system self-test depending on the result
of the classification or, alternatively, goes out.
-If the PASSENGER AIR BAG OFF indicator
lamp is off, move the front-passenger seat
as far back as possible.
-If the PASSENGER AIR BAG OFF indicator
lamp is lit, a person of smaller stature
should not use the front-passenger seat.
RThe front-passenger seat is occupied by an
adult or a person of adult stature, the
PASSENGER AIR BAG OFF indicator lamp
goes out after the system self-test. This indi-
cates that the front-passenger front air bag is
activated.
If children are traveling in the vehicle, be sure to observe the notes on "Children in the vehicle"
(
Ypage 55).
When the Occupant Classification System
(OCS) is malfunctioning, the red 6restraint
system warning lamp on the instrument cluster
and the PASSENGER AIR BAG OFF indicator
lamp light up sim ulta
neously. The front-
passenger front air bag is deactivated in this
case and does not deploy during an accident.
Have the Occupant Classification System (OCS)
checked and repaired immediately at a qualified
specialist workshop. Mercedes-Benz recom-
mends that you use an authorized Mercedes-
Benz Center for this purpose.
If the front-passenger seat, the seat cover or the seat cushion are damaged, have the necessary
repair work carried out at a qualified specialist
workshop. Mercedes-Benz recommends that
you use an authorized Mercedes-Benz Center
for this purpose.
For safety reasons, Mercedes-Benz recom-
mends that you only use seat accessories that
have been approved by Mercedes-Benz.
If the driver's air bag deploys, this does not
mean that the front-passenger front air bag will also deploy. The Occupant Classification Sys-
tem (OCS) categorizes the occupant on the
front-passenger seat. Depending on that result,
the front-passenger front air bag is either ena-
bled or deactivated.
System self-test
GDANGER
If both the PASSENGER AIR BAG OFF and
PASSENGER AIR BAG ON indicator lamps do
not light up during the system self-test, the
system is malfunctioning. The front-
passenger front air bag might be triggered
unintentionally or might not be triggered at all
in the event of an accident with high deceler-
ation. This poses an increased risk of injury or
even fatal injury.
In this case the front-passenger seat may not
be used. Do not install a child restraint system
on the front-passenger seat. Have the Occu-
pant Classification System (OCS) checked
and repaired immediately at a qualified spe-
cialist workshop.
GWARNING
If the PASSENGER AIR BAG OFF indicator
lamp remains lit after the system self-test, the
front-passenger front air bag is disabled. It will
not be deployed in the event of an accident. In
this case, the front-passenger front air bag
cannot perform its intended protective func-
tion, e.g. when a person is seated in the front-
passenger seat.
That person could, for example, come into
contact with the vehicle's interior, especially
if the person is sitting too close to the dash-
board. This poses an increased risk of injury or
even fatal injury.
When the front-passenger seat is occupied,
always ensure that:
Rthe classification of the person in the front-
passenger seat is correct and the front-
passenger front air bag is enabled or disa-
50Occupant safety
Safety
Page 101 of 294
On very rare occasions, Adaptive Highbeam
Assist may fail to recognize other road users
that have lights, or may recognize them too
late. In this, or in similar situations, the auto-
matic high-beam headlamps will not be deac-tivated or will be activated regardless. There is
a risk of an accident.
Always carefully observe the traffic conditions
and switch off the high-beam headlamps in
good time.
Adaptive Highbeam Assist cannot take into
account road, weather or traffic conditions.
Adaptive Highbeam Assist is only an aid. You are
responsible for adjusting the vehicle's lighting
to the prevailing light, visibility and traffic con-
ditions.
In particular, the detection of obstacles can be
restricted if there is:
Rpoor visibility, e.g. due to fog, heavy rain or
snow
Rdirt on the sensors or the sensors are
obscured
Switching Adaptive Highbeam Assist
on/off
XTo switch on: turn the light switch to the
à position.
XPress the combination switch beyond the
pressure point in the direction of arrow :.
The _ indicator lamp in the multifunction
display lights up when it is dark and the light
sensor activates the low-beam headlamps.
If you are driving at speeds above approx-
imately 16 mph (25 km/h):
The headlamp range is set automatically
depending on the distance between the vehi-
cle and other road users.
If you are driving at speeds above approx-
imately 19 mph (30 km/h) and no other road
users have been detected:
The high-beam headlamps are switched on
automatically. The Kindicator lamp in the
instrument cluster also lights up.
If you are driving at speeds below approx-
imately 16 mph (25 km/h) or other road users have been detected or the roads are ade-
quately lit:
The high-beam headlamps are switched off
automatically. The Kindicator lamp in the instrument cluster goes out. The
_indi-
cator lamp in the multifunction display
remains lit.
XTo switch off: move the combination switch
back to its normal position or move the light
switch to another position.
The _ indicator lamp in the instrument
cluster goes out.
Headlamps fogged up on the inside
Certain climatic and physical conditions may
cause moisture to form in the headlamp. This
moisture does not affect the functionality of the
headlamp.
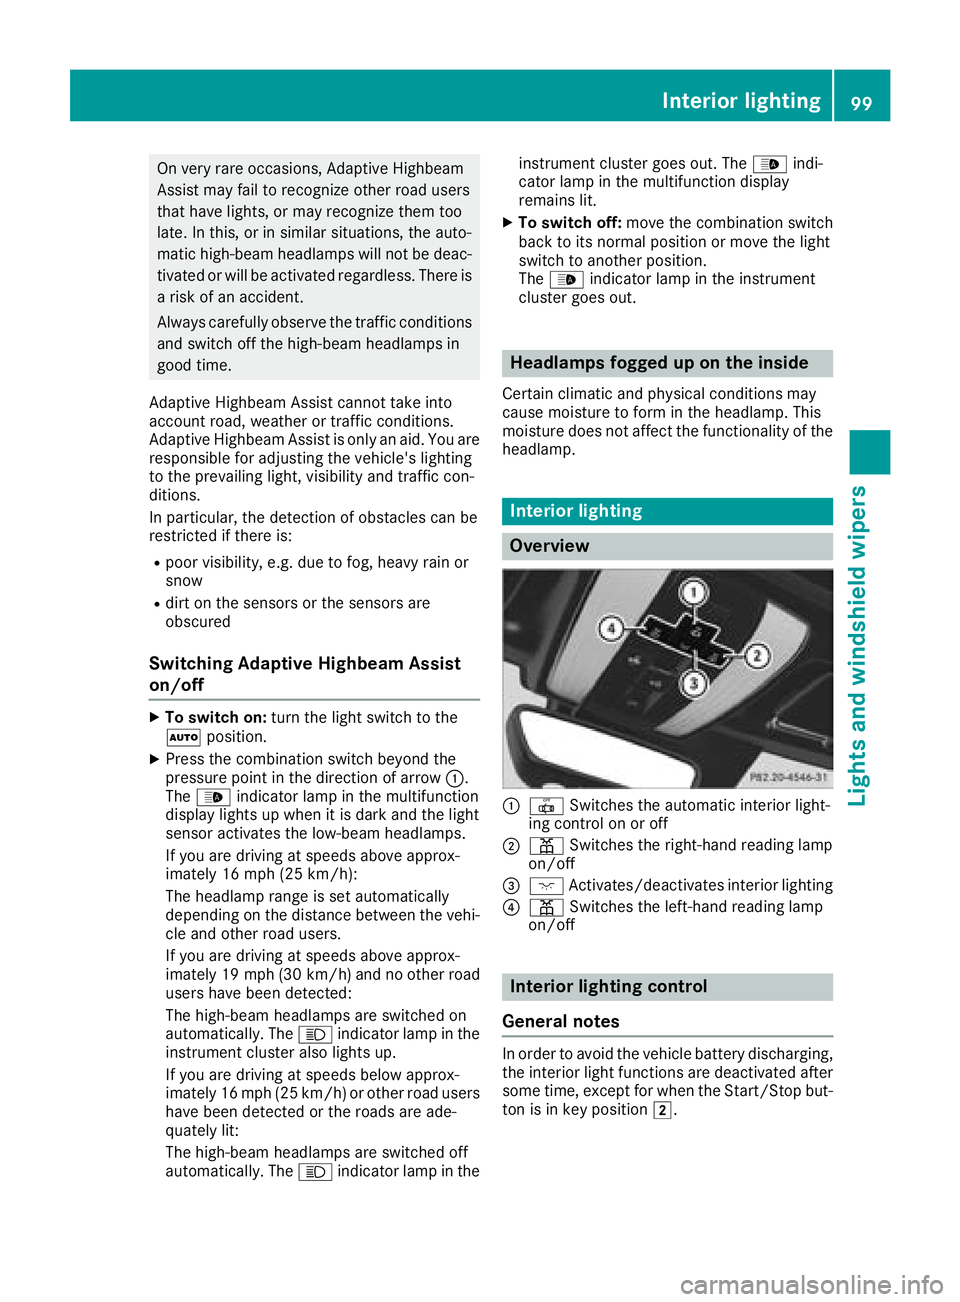
Interior lighting
Overview
:| Switches the automatic interior light-
ing control on or off
;p Switches the right-hand reading lamp
on/off
=c Activates/deactivates interior lighting
?p Switches the left-hand reading lamp
on/off
Interior lighting control
General notes
In order to avoid the vehicle battery discharging,
the interior light functions are deactivated after
some time, except for when the Start/Stop but-
ton is in key position 2.
Interior lighting99
Lights and windshield wipers
Z
Page 102 of 294
Automa tic interi orlighting control
XTo switch on or off :press th e| button.
When th eautomatic interior lighting control is
activated, th ebutto nis flus hwit hth eover-
head control panel.
The interior lighting automatically switches on if
you:
Runloc kth evehicl e
Ropenadoor
Rswitch off th eengin ewit hth eStart/Sto pbut -
to n
The interior lighting is activated for ashort time
when th eengin eis switched off wit hth eStart /
Stop button. This delaye dswitch-off can be
adjusted via th emultimedia system (see Digital
Operator' sManual).
Replacing bulbs
The fron tand rear ligh tclusters of your vehicl e
are equipped wit hLE Dligh tbulbs .Do no t
replace th ebulbs yourself .Contac t aqualified
specialis tworkshop whic hhas th enecessar y
specialis tknowledge and tools to carry out th e
wor krequired.
Lamps are an important aspect of vehicl esafety.
You mus ttherefor emak esur ethat these func-
tion correctl yat all times .Hav eth eheadlamp
setting checke dregularly.
Windshield wipers
Switching the windshield wipers
on/off
!
Do no toperate th ewindshield wiper swhen
th ewindshield is dry, as this could damag e
th ewiper blades. Moreover, dust that has col-
lecte don th ewindshield can scratch th eglas s
if wipin gtakes plac ewhen th ewindshield is
dry.
If it is necessar yto switch on th ewindshield
wiper sin dry weather conditions, always use
washer fluid when operating th ewindshield
wipers.
!If th ewindshield wiper sleav esmears on th e
windshield after th evehicl ehas been washed
in an automatic car wash ,wax or other resi-
dues may be th ereason for this. Clean th ewindshield usin
gwasher fluid after washing
th evehicl ein an automatic car wash .
!Intermittent wipingwit hrain sensor :due to
optical influence sand th ewindshield becom-
ing dirty in dry weather conditions, th ewind-
shield wiper smay be activated inadvertently.
This could then damag eth ewindshield wiper
blade sor scratch th ewindshield.
Fo rthis reason ,you should always switch off
th ewindshield wiper sin dry weather .
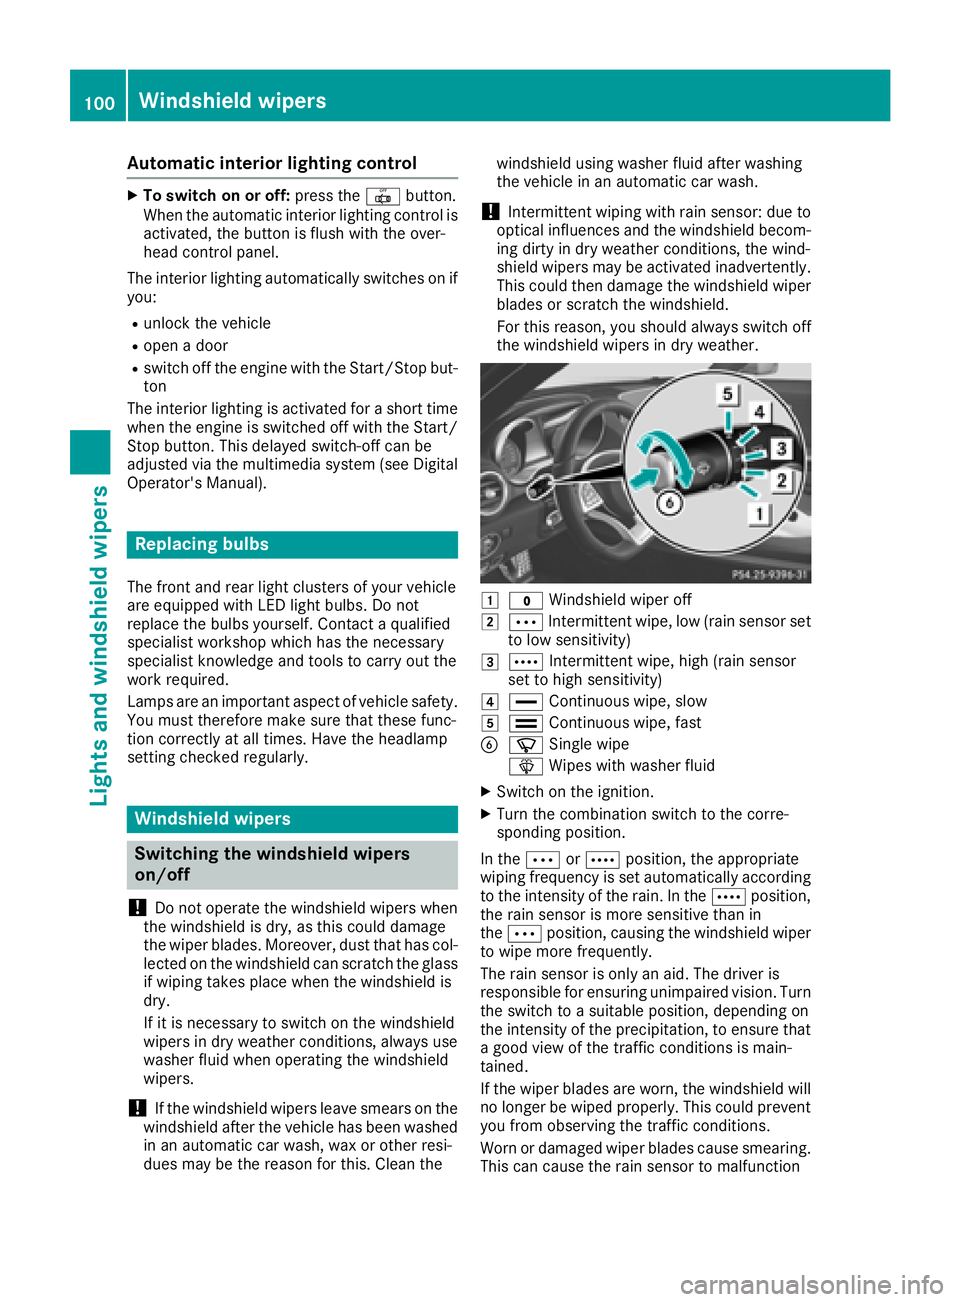
1$Windshield wiper off
2ÄIntermittent wipe, low (rai nsensor set
to low sensitivity)
3Å Intermittent wipe, high (rai nsensor
set to high sensitivity)
4° Continuous wipe, slow
5¯Continuous wipe, fas t
BíSingle wipe
î Wipeswit hwasher fluid
XSwitc hon th eignition .
XTurn thecombination switch to th ecorre-
sponding position .
In th eÄ orÅ position ,th eappropriat e
wipin gfrequency is set automatically according
to th eintensit yof th erain .In th eÅ position ,
th erain sensor is mor esensitive than in
th eÄ position ,causing th ewindshield wiper
to wipe mor efrequently.
The rain sensor is only an aid. The driver is
responsibl efor ensuring unimpaired vision .Turn
th eswitch to asuitable position ,depending on
th eintensit yof th eprecipitation ,to ensur ethat
a goo dvie wof th etraffic condition sis main -
tained.
If th ewiper blade sare worn, th ewindshield will
no longer be wiped properly. This could preven t
you from observing th etraffic conditions.
Wor nor damaged wiper blade scaus esmearing.
This can caus eth erain sensor to malfunction
100Windshield wipers
Lights and windshield wipers
Page 109 of 294
Activating/deactivating
XSelectke yposition 2withth eStart/Sto p
butto n (Ypage 111).
XPress th e¤ rockerswitch up or down .
The indicator lamp abov eth e¤ rocker
switch lights up or goe sout .
Problems with the rear window defros ter
ProblemPossible causes/consequences and MSolutions
The rear window
defrosterhas deactiva-
te dprematurel yor can -
no tbe activated.The battery has no tbeen sufficientl ycharged.
XSwitc hoff any consumer sthat are no trequired, e.g. reading lamps,
interior lighting or th eseat heating .
When th ebattery is sufficientl ycharged, th erear window defroste r
can be activated again .
Switching air-recirculati on mode
on/off
Gene ral notes
You can also temporarily deactivat eth eflo wof
fresh air manually if unpleasant odor sare enter-
ing th evehicl efrom outside .The air already
inside th evehicl ewill then be recirculated.
If you switch on air-recirculation mode, th ewin -
dows can fog up mor equickly, in particular at
low temperatures .Only use air-recirculation
mod ebriefl yto preven tth ewindows from fog -
gin gup.
Activating/deactivating
XSelec tke yposition 2withth eStart/Sto p
butto n (Ypage 111).
XTo activate: press theg rockerswitch up
or down .
The indicator lamp abov eth eg rocker
switch lights up.
Air-recirculation mod eswitches on automati-
cally:
Rat high outside temperatures
Rin atunne l(vehicles wit h anavigation system
only)
The indicator lamp abov eth eg rocker
switch is no tlit when automatic air-recirculation
mod eis activated. Outside air is added after
about 30 minutes.
XTo deactivate: press theg rockerswitch
up or down .
The indicator lamp abov eth eg rocker
switch goe sout .
Air-recirculation mod edeactivates automati-
cally:
Rafter approximately fiv eminute sat outside
temperatures belo wapproximately 41 ‡
(5 †)
Rafter approximately five minutes if cooling
with air dehumidification is deactivated
Rafter approximately 30 minutes at outside
temperatures above approximately 41 ‡
(5 †) if the "Cooling with dehumidification"
function is activated
Air vents
Important safety notes
GWARNING
Very hot or very cold air can flow from the air
vents. This could result in burns or frostbite in
the immediate vicinity of the air vents. There
is a risk of injury.
Make sure that all vehicle occupants always
maintain a sufficient distance to the air out-
lets. If necessary, redirect the airflow to
another area of the vehicle interior.
Air vents107
Climate control
Z
Page 116 of 294
Rthe engine and the transmission are at a suf-
ficient temperature for the ECO start/stop
function
Rthe set temperature for the vehicle interior
has been reached
Rthe battery is sufficiently charged
Rthe system detects that the windshield is not
fogged up when the air-conditioning system isswitched on
Rthe hood is closed
Rthe driver's door is closed and the driver's
seat belt is fastened
All of the vehicle's systems remain active when
the engine is stopped automatically.
The HOLD function can also be activated if the
engine has been switched off automatically. It is
then not necessary to continue applying the
brakes during the automatic stop phase. When
you depress the accelerator pedal, the engine
starts automatically and the braking effect of
the HOLD function is deactivated.
Automatic engine start
The engine starts automatically if:
Ryou switch off the ECO start/stop function by pressing the ECO button
Rswitch to drive program RACE,S+ orS
(Ypage 116)
Ryou switch to manual mode M(Ypage 121)
Rin transmission position h, the brake pedal
is released and the HOLD function is not
active
Ryou depress the accelerator pedal
Ryou engage reverse gear k
Ryou move the transmission out of position j
Ryou unfasten your seat belt or open the driv-
er's door
Rthe vehicle starts to roll
Rthe brake system requires this
Rthe temperature in the vehicle interior devi-
ates from the set range
Rthe system detects moisture on the wind-
shield when the air-conditioning system is
switched on
Rthe battery's condition of charge is too low
Shifting the transmission to position jdoes
not start the engine.
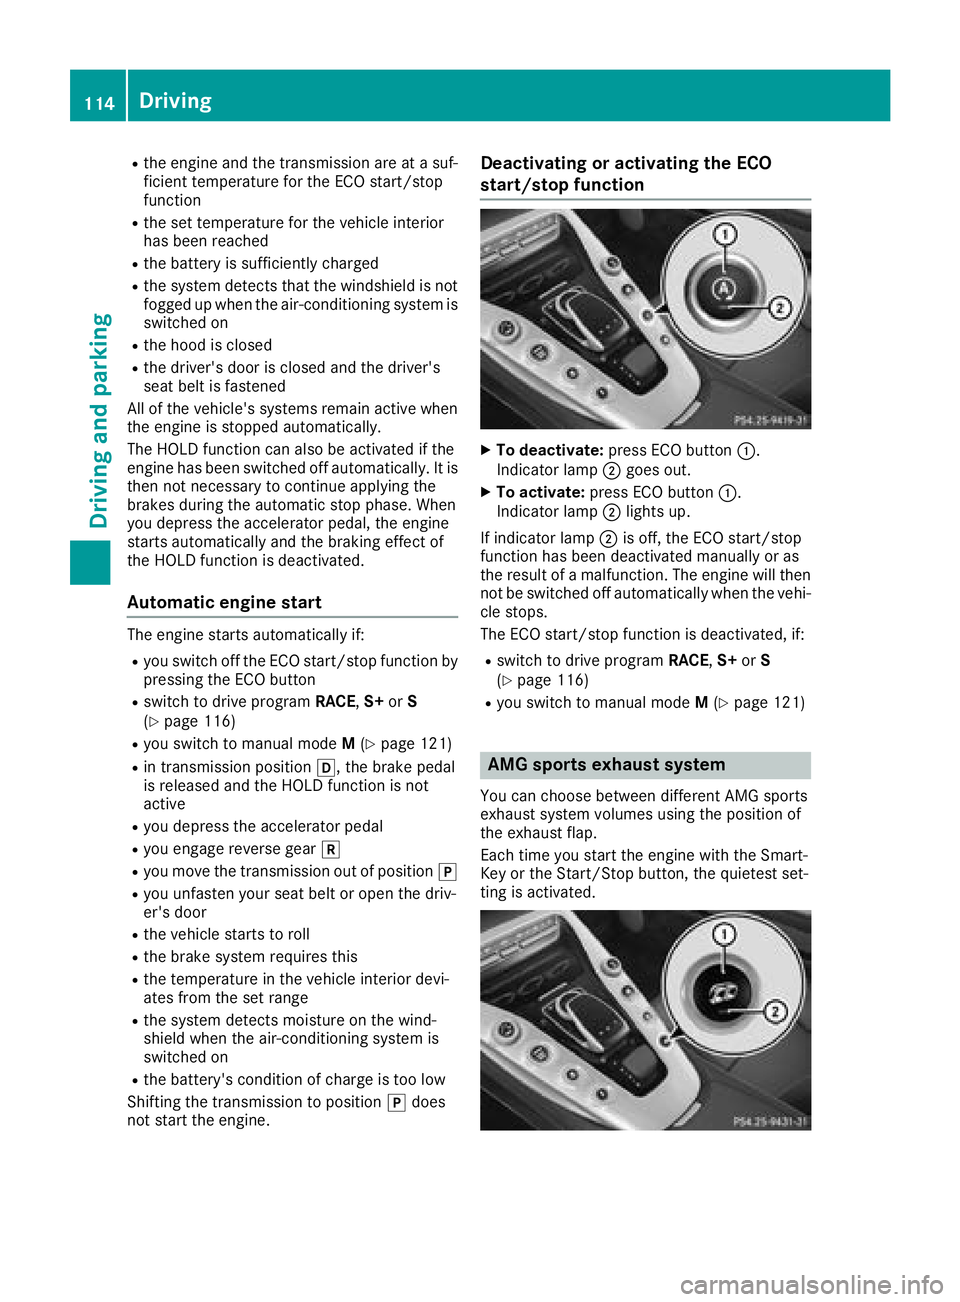
Deactivating or activating the ECO
start/stop function
XTo deactivate: press ECO button :.
Indicator lamp ;goes out.
XTo activate: press ECO button :.
Indicator lamp ;lights up.
If indicator lamp ;is off, the ECO start/stop
function has been deactivated manually or as
the result of a malfunction. The engine will then
not be switched off automatically when the vehi- cle stops.
The ECO start/stop function is deactivated, if:
Rswitch to drive program RACE,S+ orS
(Ypage 116)
Ryou switch to manual mode M(Ypage 121)
AMG sports exhaust system
You can choose between different AMG sports
exhaust system volumes using the position of
the exhaust flap.
Each time you start the engine with the Smart-
Key or the Start/Stop button, the quietest set-
ting is activated.
114Driving
Driving an d parking