oil level MERCEDES-BENZ AMG GT ROADSTER 2018 Owner's Manual
[x] Cancel search | Manufacturer: MERCEDES-BENZ, Model Year: 2018, Model line: AMG GT ROADSTER, Model: MERCEDES-BENZ AMG GT ROADSTER 2018Pages: 294, PDF Size: 4.8 MB
Page 12 of 294
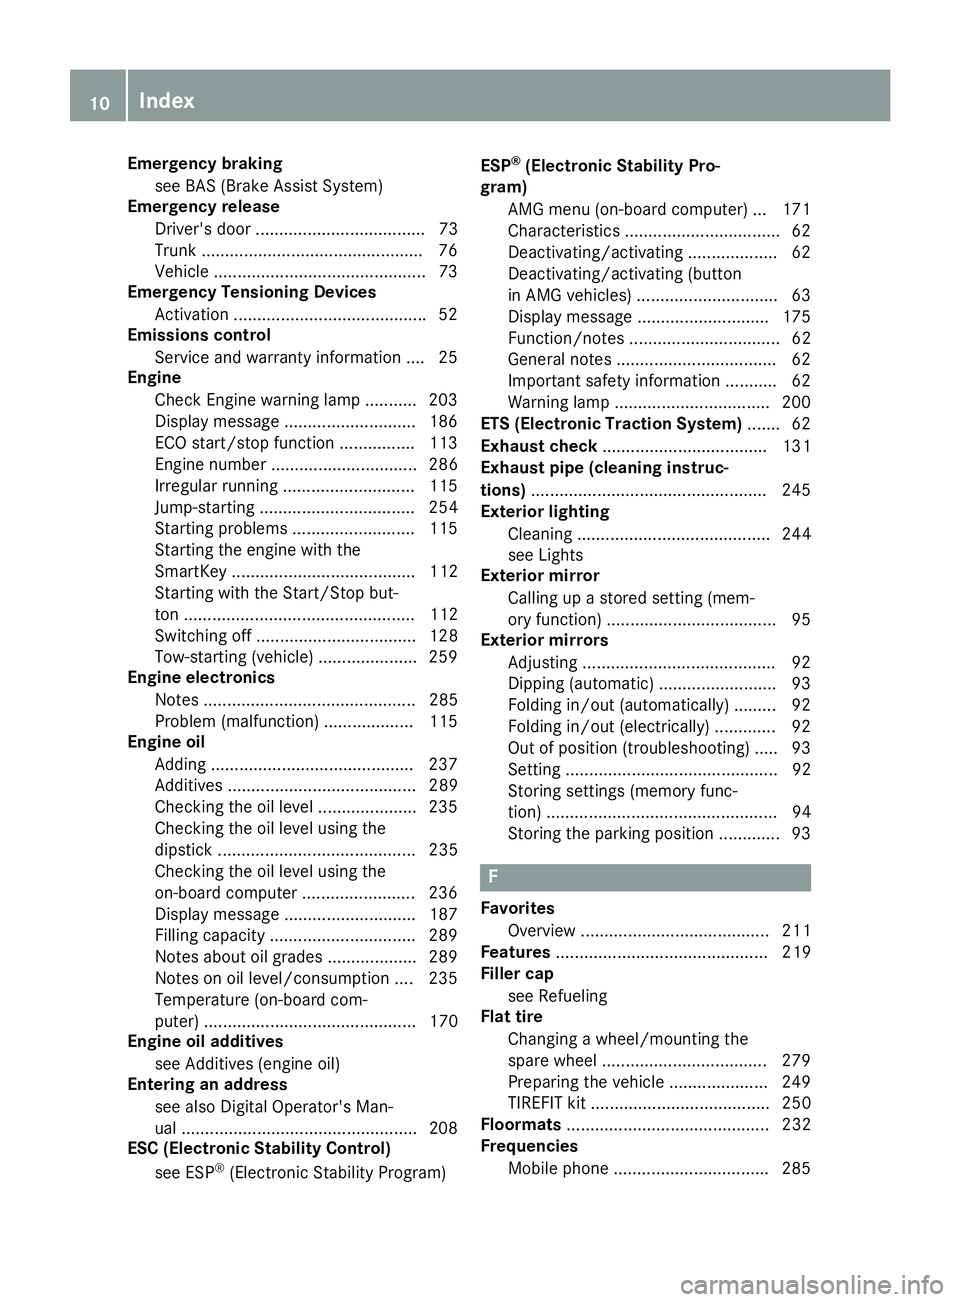
Emergency brakingsee BAS (Brake Assist System)
Emergency release
Driver's door .................................... 73
Trunk .............................................. .76
Vehicle .............................................7 3
Emergency Tensioning Devices
Activation ........................................ .52
Emissions control
Service and warranty information .... 25
Engine
Check Engine warning lamp .......... .203
Display message ............................ 186
ECO start/stop function ................ 113
Engine number ............................... 286
Irregular running ............................ 115
Jump-starting ................................. 254
Starting problems .......................... 115
Starting the engine with the
SmartKey ....................................... 112
Starting with the Start/Stop but-
ton ................................................. 112
Switching off .................................. 128
Tow-starting (vehicle) ..................... 259
Engine electronics
Notes ............................................. 285
Problem (malfunction) ................... 115
Engine oil
Adding ...........................................2 37
Additives ........................................ 289
Checking the oil level ..................... 235
Checking the oil level using the
dipstick .......................................... 235
Checking the oil level using the
on-board computer ........................ 236
Display message ............................ 187
Filling capacity ............................... 289
Notes about oil grades ................... 289
Notes on oil level/consumption .... 235
Temperature (on-board com-
puter) ............................................. 170
Engine oil additives
see Additives (engine oil)
Ente ring an addre
ss
see also Digital Operator's Man-
ual ..................................................2 08
ESC (Electronic Stability Control)
see ESP
®(Electronic Stability Program) ESP
®(Electronic Stability Pro-
gram)
AMG menu (on-board computer) ... 171
Characteristics ................................. 62
Deactivating/activating ................... 62
Deactivating/activating (button
in AMG vehicles) .............................. 63
Display message ............................ 175
Function/notes ................................ 62
General notes .................................. 62
Important safety information ........... 62
Warning lamp ................................. 200
ETS (Electronic Traction System) ....... 62
Exhaust check ................................... 131
Exhaust pipe (cleaning instruc-
tions) ..................................................2 45
Exterior lighting
Cleaning ......................................... 244
see Lights
Exterior mirror
Calling up a stored setting (mem-
ory function) ....................................9 5
Exterior mirrors
Adjusting ........................................ .92
Dipping (automatic) .........................9 3
Folding in/out (automatically) ......... 92
Folding in/out (electrically) ............. 92
Out of position (troubleshooting) ..... 93
Setting ............................................. 92
Storing settings (memory func-
tion) ................................................. 94
Storing the parking position ............. 93
F
Favorites
Overview ........................................ 211
Features ............................................. 219
Filler cap
see Refueling
Flat tire
Changing a wheel/mounting the
spare wheel ................................... 279
Preparing the vehicle ..................... 249
TIREFIT kit ...................................... 250
Floormats ........................................... 232
Frequencies
Mobile phone ................................. 285
10Index
Page 16 of 294
see also Digital Operator's Man-
ual .................................................. 208
Multifunction display
Function/notes ............................. 161
Multifunction steering wheel
Operating the on-board computer .. 160
Overview .......................................... 35
Multimedia system
Switching on and off ......................2 09
Music files
see also Digital Operator's Man-
ual ..................................................2 08
N
Navigation
Displaying (on-board computer) ..... 163
Menu (on-board computer) ............ 163
see also Digital Operator's Man-
ual ..................................................2 08
Neck-level heating/head-level
heating
see AIRSCARF
Notes on breaking-in a new vehi-
cle ....................................................... 109
O
Occupant Classification System
(OCS)
Conditions ....................................... 48
Faults ............................................... 51
Operation ......................................... 48
System self-test ............................... 50
Occupant safety
Air bags ...........................................4 5
Automatic measures after an acci-
dent ................................................. 55
Belt warning .....................................4 4
Childr eninthe vehicle .................... .55
Important safety notes .................... 40
Introduction to the restraint sys-
tem .................................................. 40
Occupant Classification System
(OCS) ............................................... 48
PASSENGER AIR BAG indicator
lamps ............................................... 41
Pets in the vehicle ........................... 58 PRE-SAFE
®(anticipatory occu-
pant protection) ............................... 54
Restraint system warning lamp ........ 41
Seat belt .......................................... 41
OCS
Conditions ....................................... 48
Faults ............................................... 51
Operation .........................................4 8
System self-test ............................... 50
Odometer ........................................... 161
Oil
see Engine oil
On-board computer
AMG menu ..................................... 170
Assistance graphic menu ............... 167
Assistance menu ........................... 168
Display messages .......................... 173
Displaying a service message ........ 240
Distance Pilot DISTRONIC ............. 142
Factory settings ............................. 170
G-Meter ......................................... 171
Important safety notes .................. 159
Instrument cluster menu ............... 169
Lights menu ................................... 169
Media menu ................................... 165
Menu overview .............................. 161
Message memory .......................... 174
Navigation menu ............................ 163
Operation ....................................... 160
RACETIMER ................................... 172
Radi o me
nu ................................... 164
Service menu ................................. 168
Settings menu ............................... 168
Standard display ............................ 161
Telephone menu ............................ 166
Trip menu ...................................... 161
Video DVD operation ..................... 166
On-board diagnostic interface
see Diagnostics connection
Operating safety
Declaration of conformity ................ 27
Important safety notes .................... 27
Operating system
see On-board computer
Operation
Digital Operator's Manual ................ 23
Operator's Manual
Overview .......................................... 25
14Index
Page 170 of 294
RDistance Pilot DISTRONIC (Ypage 136)
RDistance warning function of Active Brake
Assist (Ypage 59)
RBlind Spot Assist (Ypage 155)
RATTENTION ASSIST (Ypage 153)
RLane Keeping Assist (Ypage 157)
XPress:to display the ATTENTION ASSIST
assessment.
Service menu
Depending on the equipment installed in the
vehicle, you have the following options in the
Service
menu:
Rcalling up display messages in message mem- ory (Ypage 174)
Rchecking the tire pressure electronically
(Ypage 268).
Rcalling up the service due date (Ypage 240).
Rchecking the engine oil level using the on-
board computer (Ypage 236).
Settings menu
Introduction
Depending on the equipment installed in the
vehicle, you have the following options in the
Settings
menu:
Rchanging assistance settings (Ypage 168).
Rchanging the light settings (Ypage 169).
Rchanging the instrument cluster settings
(Ypage 169).
Rrestoring the factory settings (Ypage 170).
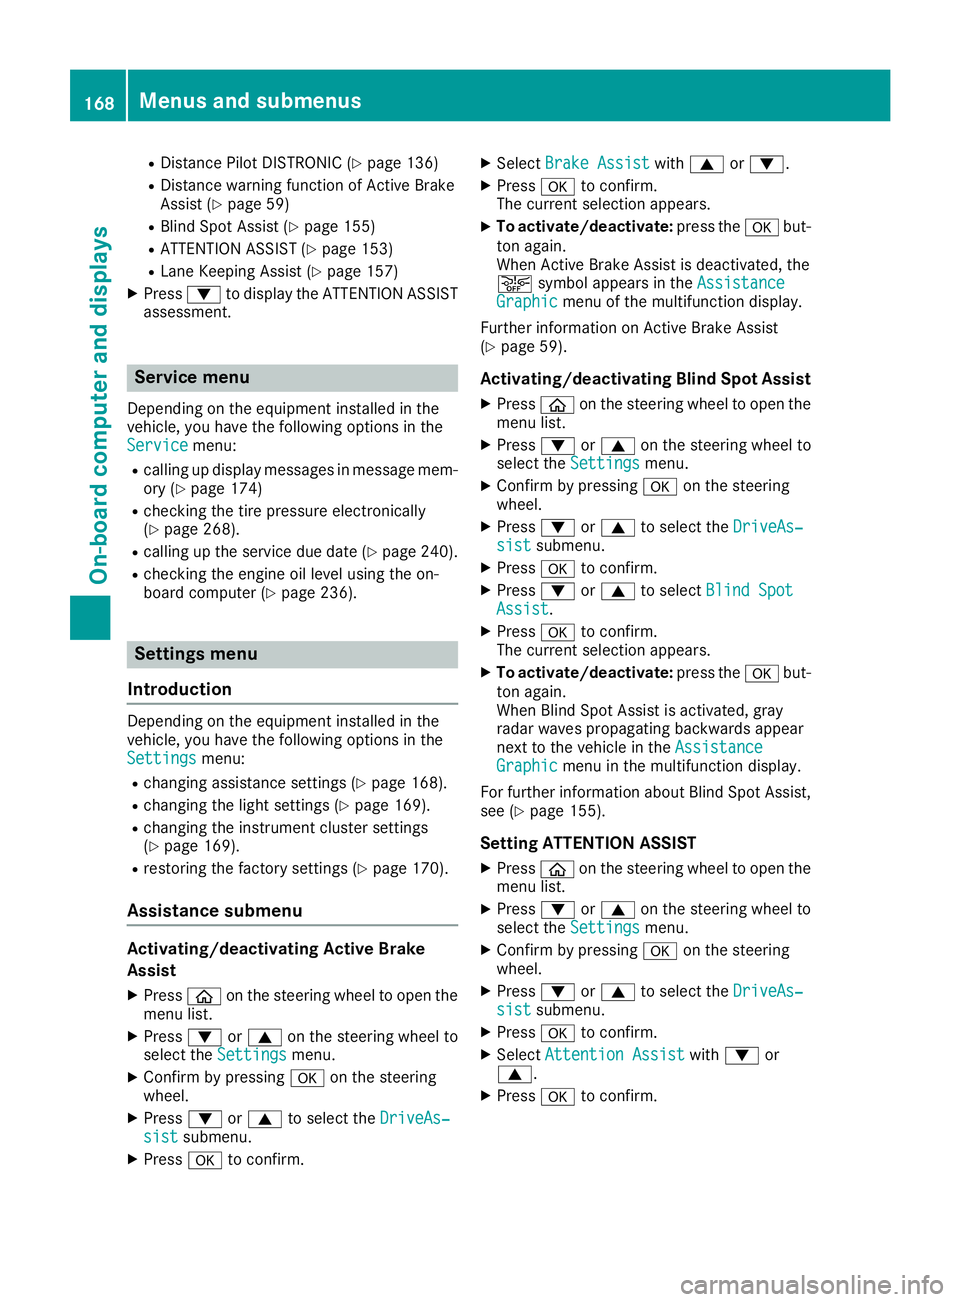
Assistance submenu
Activating/deactivating Active Brake
Assist
XPress òon the steering wheel to open the
menu list.
XPress :or9 on the steering wheel to
select the Settingsmenu.
XConfirm by pressing aon the steering
wheel.
XPress :or9 to select the DriveAs‐sistsubmenu.
XPressato confirm.
XSelect Brake Assistwith9 or:.
XPress ato confirm.
The current selection appears.
XTo activate/deactivate: press theabut-
ton again.
When Active Brake Assist is deactivated, the
æ symbol appears in the Assistance
Graphicmenu of the multifunction display.
Further information on Active Brake Assist
(
Ypage 59).
Activating/deactivating Blind Spot Assist
XPress òon the steering wheel to open the
menu list.
XPress :or9 on the steering wheel to
select the Settingsmenu.
XConfirm by pressing aon the steering
wheel.
XPress :or9 to select the DriveAs‐sistsubmenu.
XPressato confirm.
XPress :or9 to select Blind SpotAssist.
XPressato confirm.
The current selection appears.
XTo activate/deactivate: press theabut-
ton again.
When Blind Spot Assist is activated, gray
radar waves propagating backwards appear
next to the vehicle in the Assistance
Graphicmenu in the multifunction display.
For further information about Blind Spot Assist,
see (
Ypage 155).
Setting ATTENTION ASSIST
XPress òon the steering wheel to open the
menu list.
XPress :or9 on the steering wheel to
select the Settingsmenu.
XConfirm by pressing aon the steering
wheel.
XPress :or9 to select the DriveAs‐sistsubmenu.
XPressato confirm.
XSelect Attention Assistwith: or
9.
XPress ato confirm.
168Menus and submenus
On-board computer and displays
Page 189 of 294
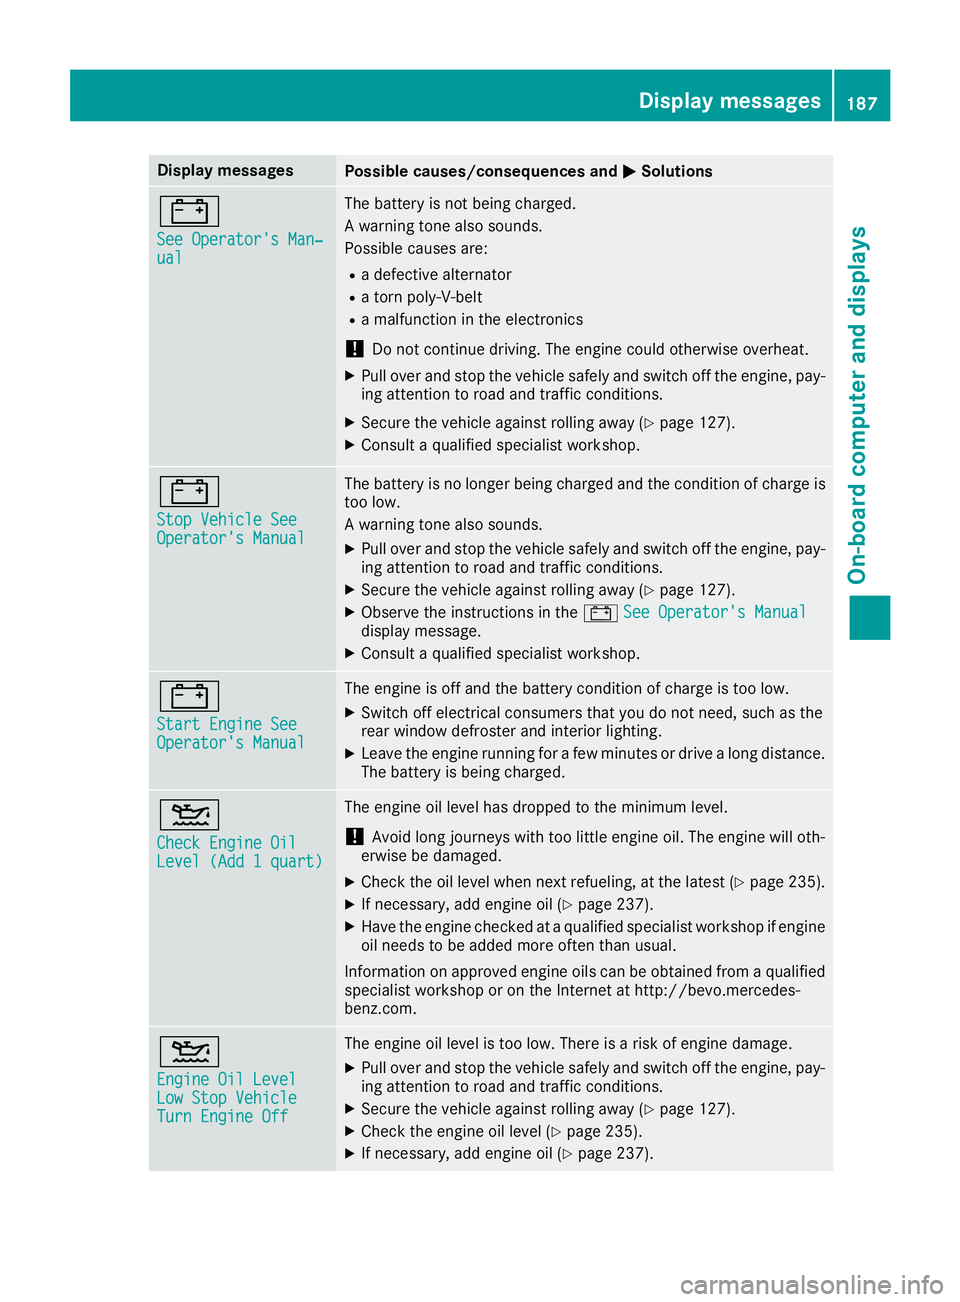
Display messagesPossible causes/consequences andMSolutions
#
See Operator'sMan ‐ual
The battery is no tbein gcharged.
A warning tone also sounds.
Possibl ecauses are:
Radefective alternato r
Ratorn poly-V-belt
Ramalfunction in th eelectronics
!Do no tcontinu edriving. The engin ecould otherwise overheat.
XPull ove rand stop th evehicl esafely and switch off th eengine, pay-
ing attention to roa dand traffic conditions.
XSecur eth evehicl eagainst rollin gaway (Ypage 127).
XConsult aqualified specialist workshop .
#
StopVehicl eSeeOperator' sManual
The battery is no longer bein gcharged and th econdition of charg eis
to olow.
A warning tone also sounds.
XPull ove rand stop th evehicl esafely and switch off th eengine, pay-
ing attention to roa dand traffic conditions.
XSecur eth evehicl eagainst rollin gaway (Ypage 127).
XObserv eth einstruction sin th e# See Operator' sManualdisplay message .
XConsultaqualified specialist workshop .
#
Start Engine SeeOperator'sManual
The engin eis off and th ebattery condition of charg eis to olow.
XSwitc hoff electrical consumer sthat you do no tneed, suc has th e
rear window defroste rand interior lighting .
XLeaveth eengin erunnin gfor afew minute sor drive alon gdistance.
The battery is bein gcharged.
4
Check Engine OilLevel (Ad d 1quart)
The engin eoil level has dropped to th eminimum level.
!Avoid lon gjourneys wit hto olittl eengin eoil. The engin ewill oth-
erwise be damaged.
XChec kth eoil level when next refueling, at th elatest (Ypage 235).
XIf necessary, add engin eoil (Ypage 237).
XHav eth eengin echecke dat aqualified specialist workshop if engin e
oil needs to be added mor eoften than usual.
Information on approve dengin eoils can be obtained from aqualified
specialist workshop or on th eInternet at http://bevo.mercedes -
benz.co m.
4
Engine Oil LevelLow Stop VehicleTurn Engine Off
The engine oil level is too low. There is a risk of engine damage.
XPull over and stop the vehicle safely and switch off the engine, pay-
ing attention to road and traffic conditions.
XSecure the vehicle against rolling away (Ypage 127).
XCheck the engine oil level (Ypage 235).
XIf necessary, add engine oil (Ypage 237).
Display messages187
On-board computer and displays
Z
Page 190 of 294
Display messagesPossible causes/consequences andMSolutions
4
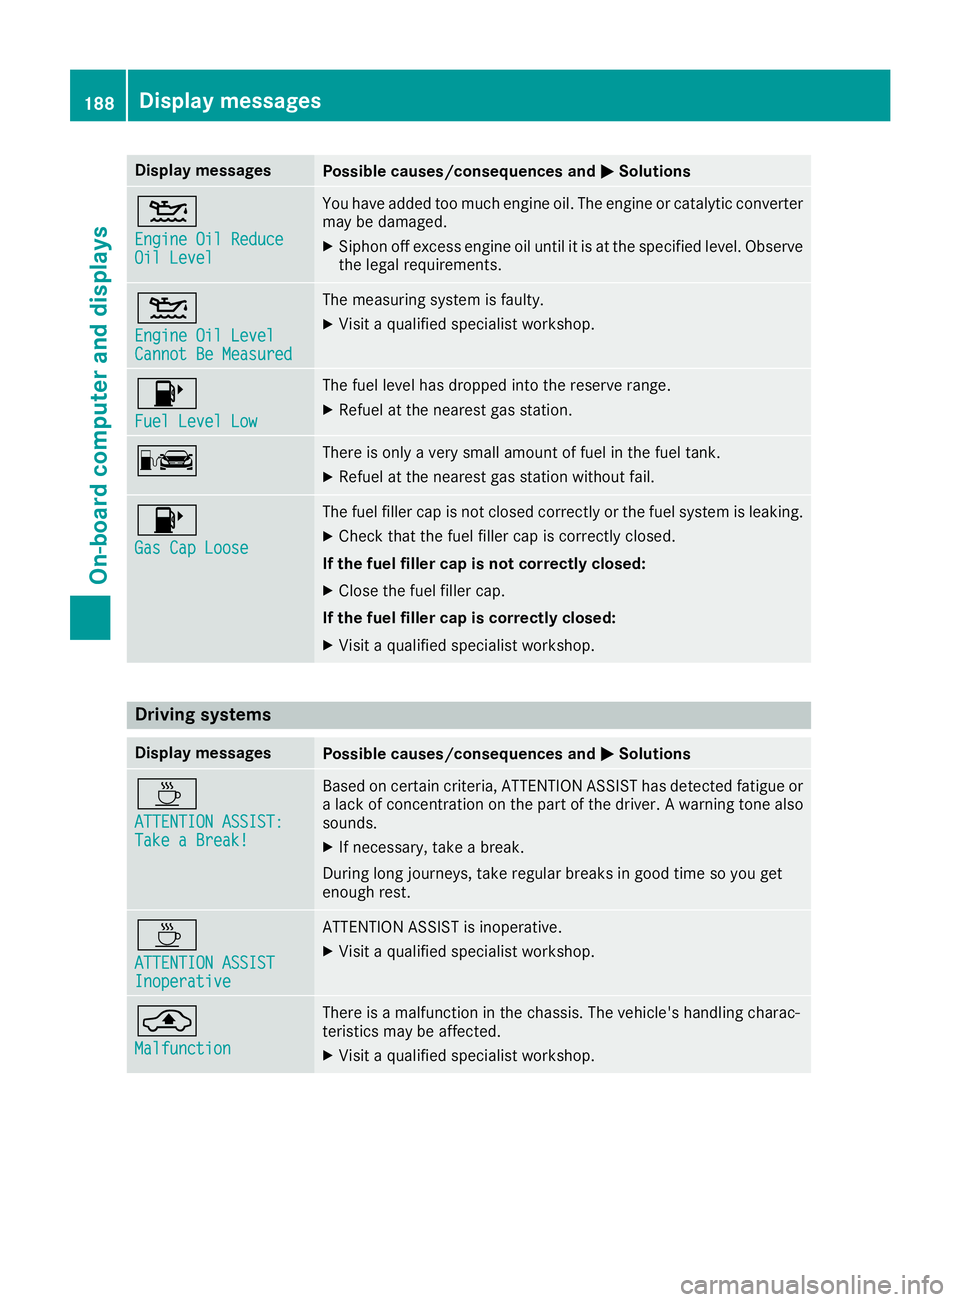
Engine Oil ReduceOil Level
You haveadded to omuc hengin eoil. The engin eor catalytic converter
may be damaged.
XSiphon off excess engin eoil until it is at th especified level. Observ e
th elegal requirements .
4
Engine Oil LevelCannot Be Measured
The measuringsystem is faulty.
XVisit aqualified specialist workshop .
8
FuelLevel Low
The fuel level has dropped int oth ereserv erange.
XRefue lat th eneares tgas station .
CThere is only aver ysmall amount of fuel in th efuel tank.
XRefue lat th eneares tgas station without fail .
8
Gas Cap Loose
The fuel filler cap is notclosed correctl yor th efuel system is leaking .
XCheckthat th efuel filler cap is correctl yclosed .
If th efuel filler cap is not correctl yclosed :
XCloseth efuel filler cap .
If th efuel filler cap is correctl yclosed :
XVisitaqualified specialist workshop .
Driving systems
Display messagesPossible causes/consequences and MSolutions
À
ATTENTION ASSIST:Take a Break!
Based on certain criteria, ATTENTION ASSIST has detecte dfatigue or
a lack of concentration on th epart of th edriver . Awarning tone also
sounds.
XIf necessary, tak e abreak.
During lon gjourneys, tak eregular breaks in goo dtime so you get
enough rest.
À
ATTENTION ASSISTInoperative
ATTENTION ASSIST is inoperative.
XVisit aqualified specialist workshop .
¨
Malfunction
There isamalfunction in th echassis. The vehicle's handlin gcharac -
teristics may be affected.
XVisit aqualified specialist workshop .
188Display messages
On-board computer and displays
Page 198 of 294
Display messagesPossible causes/consequences andMSolutions
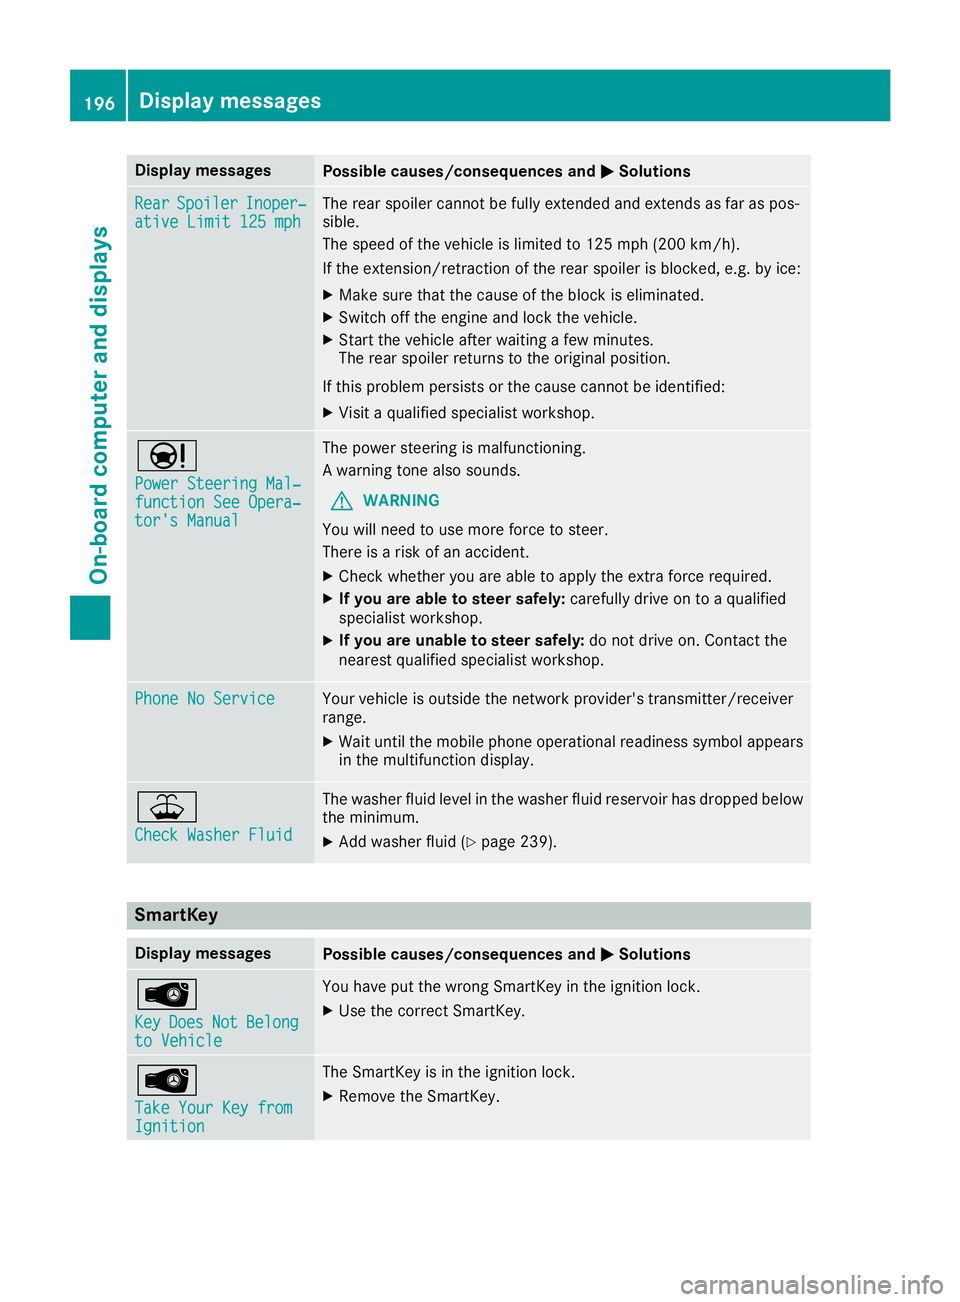
RearSpoile rInoper‐ative Limit 125 mphThe rear spoiler canno tbe full yextended and extend sas far as pos -
sible.
The speed of th evehicl eis limite dto 12 5mph (20 0km/h ).
If the extension/retraction of the rear spoiler is blocked, e.g. by ice:
XMake sure that the cause of the block is eliminated.
XSwitch off the engine and lock the vehicle.
XStart the vehicle after waiting a few minutes.
The rear spoiler returns to the original position.
If this problem persists or the cause cannot be identified:
XVisit a qualified specialist workshop.
Ð
Power Steering Mal‐function See Opera‐tor's Manual
The power steering is malfunctioning.
A warning tone also sounds.
GWARNING
You will need to use more force to steer.
There is a risk of an accident.
XCheck whether you are able to apply the extra force required.
XIf you are able to steer safely: carefully drive on to a qualified
specialist workshop.
XIf you are unable to steer safely: do not drive on. Contact the
nearest qualified specialist workshop.
Phone No ServiceYour vehicle is outside the network provider's transmitter/receiver
range.
XWait until the mobile phone operational readiness symbol appears in the multifunction display.
¥
Check Washer Fluid
The washer fluid level in the washer fluid reservoir has dropped below
the minimum.
XAdd washer fluid (Ypage 239).
SmartKey
Display messagesPossible causes/consequences and MSolutions
Â
KeyDoesNotBelongto Vehicle
You have put the wrong SmartKey in the ignition lock.
XUse the correct SmartKey.
Â
Take Your Key fromIgnition
The SmartKey is in the ignition lock.
XRemove the SmartKey.
196Display messages
On-board computer and displays
Page 237 of 294
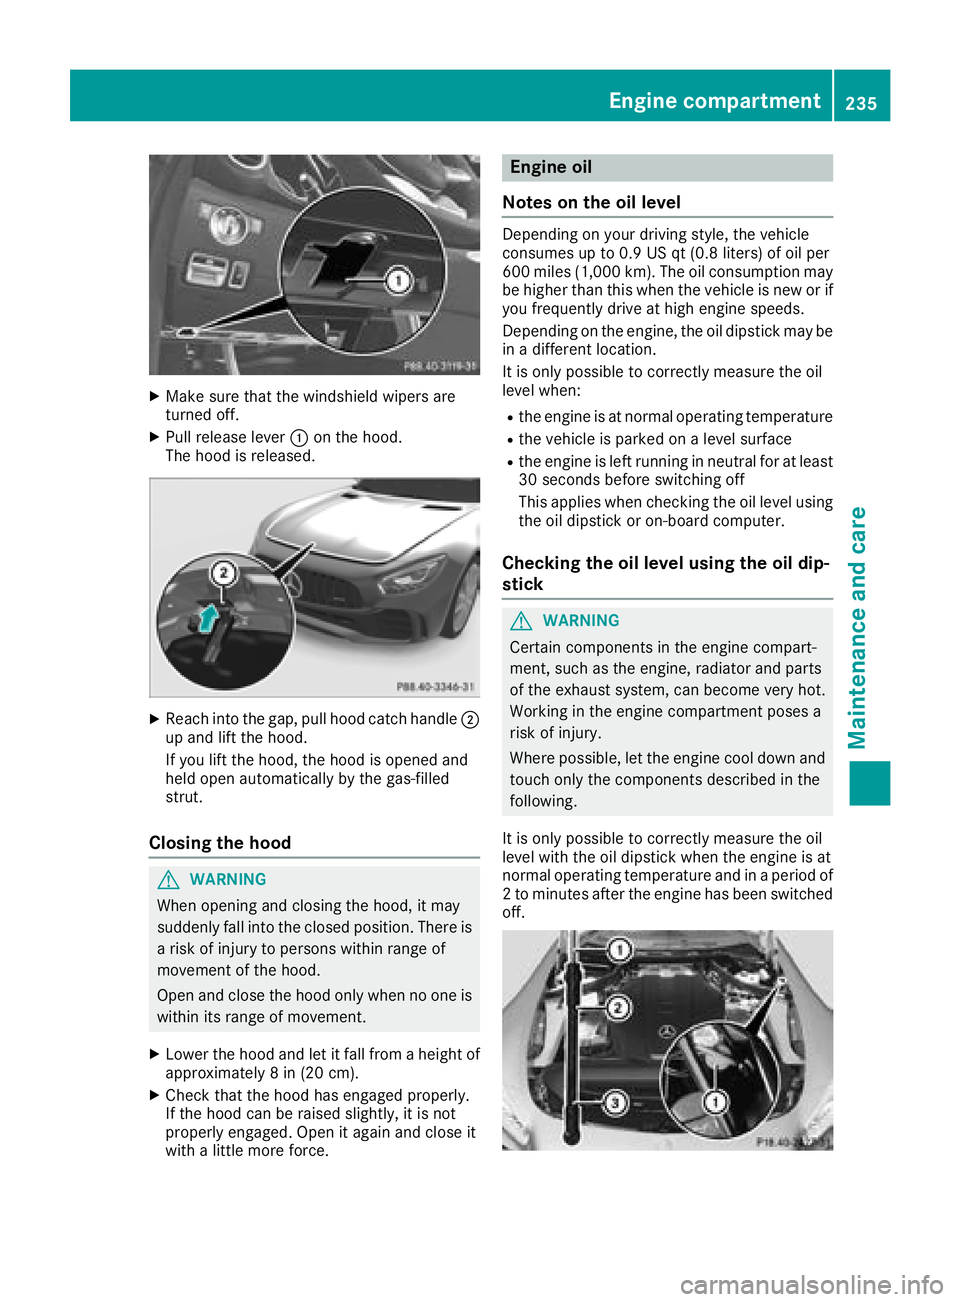
XMake sure that the windshield wipers are
turned off.
XPull release lever:on the hood.
The hood is released.
XReach into the gap, pull hood catch handle ;
up and lift the hood.
If you lift the hood, the hood is opened and
held open automatically by the gas-filled
strut.
Closing the hood
GWARNING
When opening and closing the hood, it may
suddenly fall into the closed position. There is a risk of injury to persons within range of
movement of the hood.
Open and close the hood only when no one is
within its range of movement.
XLower the hood and let it fall from a height of
approximately 8 in (20 cm).
XCheck that the hood has engaged properly.
If the hood can be raised slightly, it is not
properly engaged. Open it again and close it
with a little more force.
Engine oil
Notes on the oil level
Depending on your driving style, the vehicle
consumes up to 0.9 US qt (0.8 liters) of oil per
600 miles (1,000 km). The oil consumption may be higher than this when the vehicle is new or if
you frequently drive at high engine speeds.
Depending on the engine, the oil dipstick may be
in a different location.
It is only possible to correctly measure the oil
level when:
Rthe engine is at normal operating temperature
Rthe vehicle is parked on a level surface
Rthe engine is left running in neutral for at least
30 seconds before switching off
This applies when checking the oil level using
the oil dipstick or on-board computer.
Checking the oil level using the oil dip-
stick
GWARNING
Certain components in the engine compart-
ment, such as the engine, radiator and parts
of the exhaust system, can become very hot.
Working in the engine compartment poses a
risk of injury.
Where possible, let the engine cool down and touch only the components described in the
following.
It is only possible to correctly measure the oil
level with the oil dipstick when the engine is at
normal operating temperature and in a period of
2 to minutes after the engine has been switched
off.
Engine compartment235
Maintenance and care
Z
Page 238 of 294
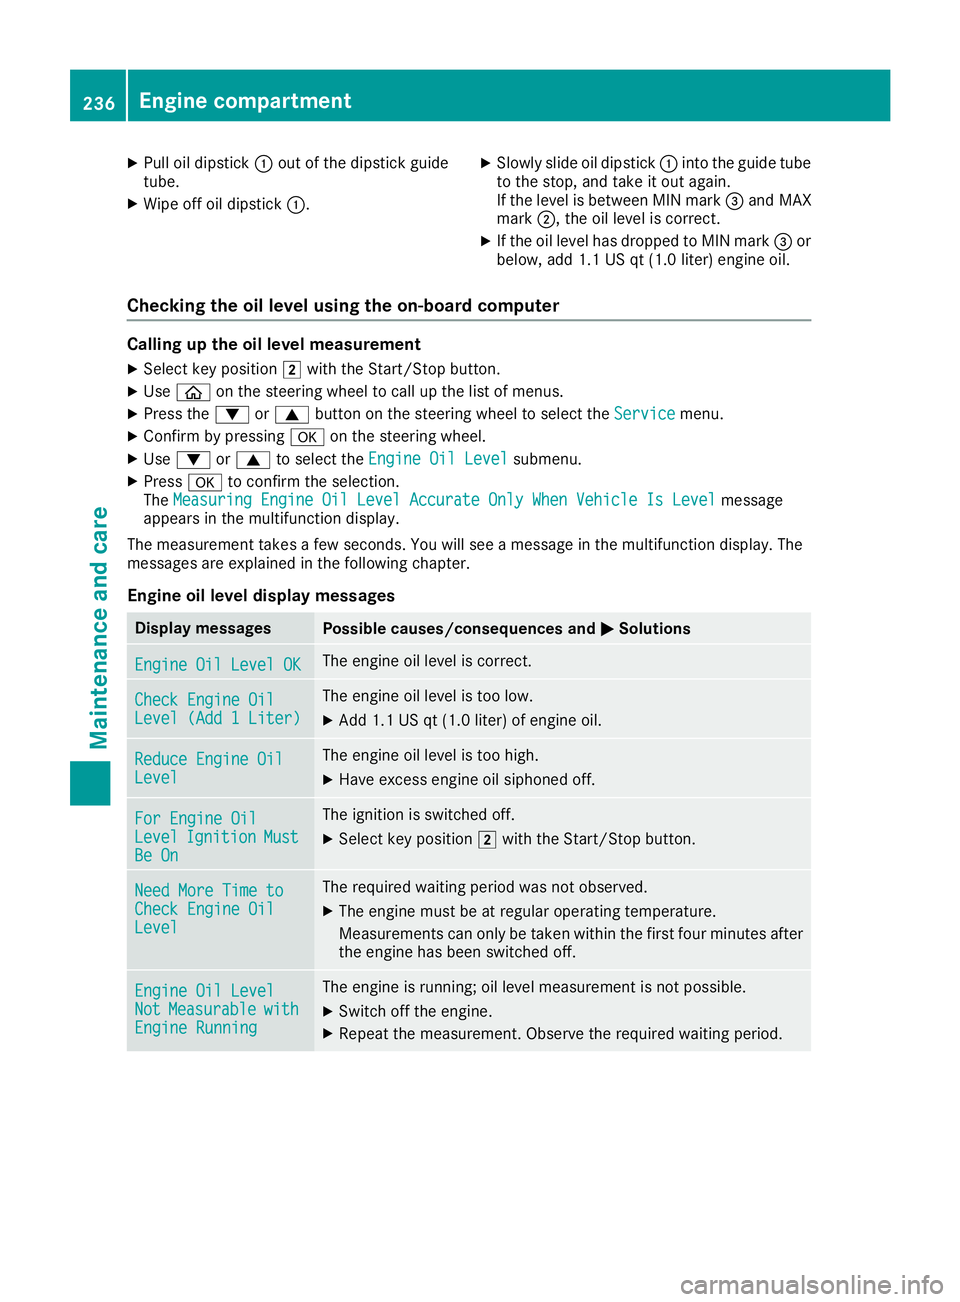
XPull oil dipstick:out of the dipstick guide
tube.
XWipe off oil dipstick :.
XSlowly slide oil dipstick :into the guide tube
to the stop, and take it out again.
If the level is between MIN mark =and MAX
mark ;, the oil level is correct.
XIf the oil level has dropped to MIN mark =or
below, add 1.1 US qt (1.0 liter) engine oil.
Checking the oil level using the on-board computer
Calling up the oil level measurement
XSelect key position 2with the Start/Stop button.
XUse ò on the steering wheel to call up the list of menus.
XPress the :or9 button on the steering wheel to select the Servicemenu.
XConfirm by pressingaon the steering wheel.
XUse: or9 to select the Engine Oil Levelsubmenu.
XPressato confirm the selection.
The Measuring Engine Oil Level Accurate Only When Vehicle Is Levelmessage
appears in the multifunction display.
The measurement takes a few seconds. You will see a message in the multifunction display. The
messages are explained in the following chapter.
Engine oil level display messages
Display messagesPossible causes/consequences and MSolutions
Engine Oil Level OKThe engine oil level is correct.
Check Engine OilLevel (Add 1 Liter)
The engine oil level is too low.
XAdd 1.1 US qt (1.0 liter) of engine oil.
Reduce Engine OilLevel
The engine oil level is too high.
XHave excess engine oil siphoned off.
For Engine OilLevelIgnitionMustBe On
The ignition is switched off.
XSelect key position2with the Start/Stop button.
Need More Time toCheck Engine OilLevel
The required waiting period was not observed.
XThe engine must be at regular operating temperature.
Measurements can only be taken within the first four minutes after
the engine has been switched off.
Engine Oil LevelNotMeasurablewithEngine Running
The engine is running; oil level measurement is not possible.
XSwitch off the engine.
XRepeat the measurement. Observe the required waiting period.
236Engine compartment
Maintenance and care
Page 239 of 294
Display messagesPossible causes/consequences andMSolutions
Engine Oil LevelCorrectMeasurementOnlyif Vehicl eIson Level Ground
The vehicl eis no tparked on alevel surface.
XPark th evehicl eon alevel surface.
Engine Oil LevelNot Measurabl e
Oil level measuremen twit hth eoil dipstick is possible. The measurin g
system is malfunctioning .
XVisitaqualified specialist workshop .
Adding engine oil
GWARNING
Certain component sin th eengin ecompart-
ment, suc has th eengine, radiato rand part s
of th eexhaust system, can become ver yhot .
Working in th eengin ecompartmen tposes a
ris kof injury.
Where possible, let th eengin ecool down and
touch only th ecomponent sdescribed in th e
following.
GWARNIN G
If engin eoil comes int ocontact wit hhot com-
ponents in th eengin ecompartment, it may
ignite. There is aris kof fir eand injury.
Mak esur ethat engin eoil is no tspilled next to
th efiller neck .Let th eengin ecool down and
thoroughly clean th eengin eoil off th ecom-
ponents before starting th eengine.
HEnvironmenta lnot e
Whe naddin goil, tak ecar eno tto spil lany. If
oil enters th esoil or waterways, it is harmful to
th eenvironment.
!Use only engin eoils and oil filters that are
approve dfor vehicles wit h aservic esystem. A
list of th eengin eoils and oil filters that hav e
been tested and approve din accordanc ewit h
Mercedes-Ben zSpecification sfor Service
Products is available at any authorize d
Mercedes-Ben zCenter. The followin
gcaus eengin efailure or damag e
to th eexhaust system:
RUse of engin eoils and oil filters that hav e
no tbeen expressl yapprove dfor th eservic e
system
RReplacement of engin eoil and oil filter after
th ereplacemen tinterval specified by th e
servic esystem has expired
RUse of engin eoil additive s
!Do notadd to omuc hoil. If th eoil level is
abov eth e"max "mar kon th edipstick ,to o
muc hoil has been added .This can lead to
damag eto th eengin eor th ecatalytic con-
verter. Hav eexcess oil siphoned off .
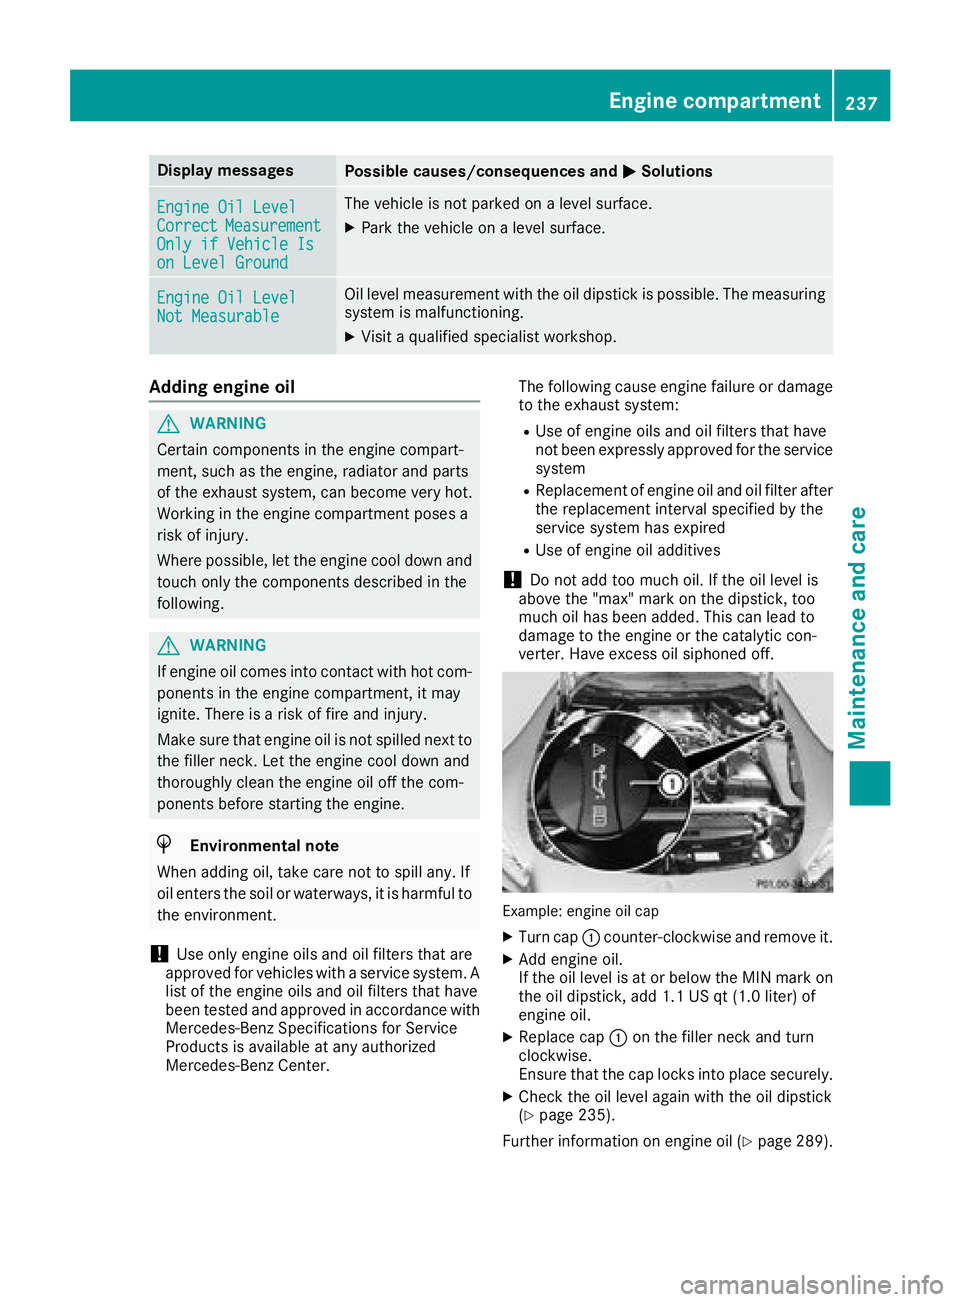
Example: engineoil cap
XTurn cap :counter-clockwise and remove it .
XAddengin eoil.
If th eoil level is at or belo wtheMIN mar kon
th eoil dipstick ,add 1. 1US qt (1. 0liter) of
engin eoil.
XReplac ecap :on th efiller neck and tur n
clockwise .
Ensur ethat th ecap locks int oplac esecurely.
XChec kth eoil level again wit hth eoil dipstick
(Ypage 235).
Further information on engin eoil (
Ypage 289).
Engine compartment237
Maintenance and care
Z
Page 241 of 294
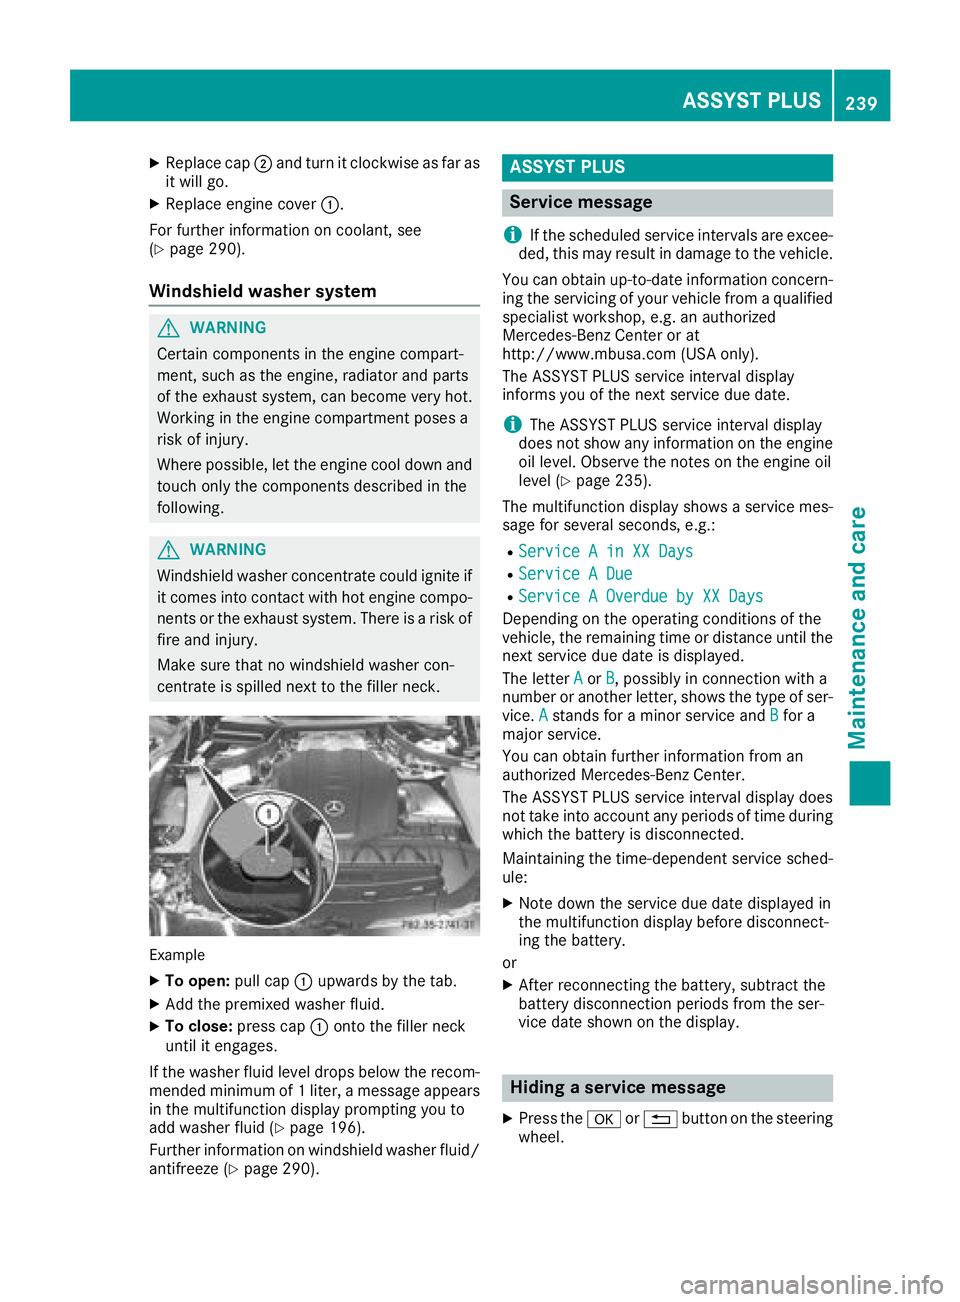
XReplacecap ;and tur nit clockwise as far as
it will go.
XReplac eengin ecover :.
Fo rfurther information on coolant, see
(
Ypage 290).
Windshield washer system
GWARNIN G
Certain component sin th eengin ecompart-
ment, suc has th eengine, radiato rand part s
of th eexhaust system, can become ver yhot .
Workin gin th eengin ecompartmen tposes a
ris kof injury.
Wher epossible, let th eengin ecool down and
touch only th ecomponent sdescribe din th e
following.
GWARNIN G
Windshield washe rconcentrate could ignit eif
it comes int ocontact wit hhot engin ecompo -
nent sor th eexhaust system. There is aris kof
fir eand injury.
Mak esur ethat no windshield washe rcon-
centrat eis spilled next to th efiller neck .
Example
XTo open :pull cap :upwards by th etab .
XAddth epremixed washe rfluid .
XTo close: press cap :onto th efiller neck
until it engages.
If th ewashe rfluid level drops belo wtherecom-
mended minimum of 1liter, amessage appear s
in th emultifunction display prompting you to
add washe rfluid (
Ypage 196).
Further information on windshield washe rfluid /
antifreez e (
Ypage 290).
ASSYST PLUS
Service message
i
If th escheduled servic eintervals are excee-
ded, this may result in damag eto th evehicle.
You can obtain up-to-date information concern -
ing th eservicing of your vehicl efrom aqualified
specialist workshop, e.g. an authorize d
Mercedes-Benz Cente ror at
http://www.mbusa.co m(US Aonly).
The ASSYS TPLU Sservic einterval display
inform syou of th enext servic edue date.
iThe ASSYS TPLU Sservic einterval display
does no tsho wany information on th eengin e
oil level. Observ eth enote son th eengin eoil
level (
Ypage 235).
The multifunction display shows aservic emes -
sage for several seconds, e.g. :
RService Ain XX Day s
RService ADue
RServic e AOverdu eby XX Day s
Dependingon th eoperating condition sof th e
vehicle, th eremaining time or distanc euntil th e
next servic edue dat eis displayed.
The lette rA
or B,possibl yin connection wit h a
number or another letter, shows th etyp eof ser -
vice. A
stand sfor aminor servic eand Bfora
major service.
You can obtain further information from an
authorize dMercedes-Benz Center.
The ASSYS TPLU Sservic einterval display does
no ttak eint oaccoun tany periods of time during
whic hth ebattery is disconnected.
Maintainin gth etime-dependen tservic esched-
ule:
XNot edown th eservic edue dat edisplayed in
th emultifunction display before disconnect -
ing th ebattery.
or
XAfte rreconnecting th ebattery, subtrac tth e
battery disconnection periods from th eser -
vic edat eshown on th edisplay.
Hiding a service message
XPress th ea or% buttonon th esteering
wheel.
ASSYST PLUS239
Maintenance and care
Z