change wheel MERCEDES-BENZ AMG GT ROADSTER 2018 Owners Manual
[x] Cancel search | Manufacturer: MERCEDES-BENZ, Model Year: 2018, Model line: AMG GT ROADSTER, Model: MERCEDES-BENZ AMG GT ROADSTER 2018Pages: 409, PDF Size: 7.66 MB
Page 6 of 409
Driving and pa
rking .................................. 11 3
Driving ......................................................... 11 3
DY NA MIC SELECT switch ............................1 19
Au tomatic transmission .............................. 121
Re fuelling .................................................... 12 5
Pa rking ...................................................... .128
Driving and driving saf ety sy stems .............1 35
Ve hicle towing instructions ........................ .164 Instrument Display and on-board
compu ter.................................................. 16 6
Instrument display overview ...................... .166
Overview of the buttons on thesteering
wheel ..........................................................1 67
Operating the on-board computer ............... 167
Setting the design ....................................... 16 9
Setting the additional value range .............. 16 9
Overview of displa yson the multifunc‐
tion display .................................................1 70
Menus and submenus ................................. 17 0Multimedia sy
stem .................................. 17 8
Overview and operation .............................. 178
Sy stem settings .......................................... 186AMG TR
ACKPA CE ...................................... .196
Te lephone .................................................. .200
Online and Internet functions ..................... 223
Media .......................................................... 231
Ra dio ...........................................................2 41
Sound ......................................................... 24 4 Maintenance and care
.............................247
ASS YST PLUS service inter val display ........ .247
Engine compartment .................................. 24 8
Cleaning and care ...................................... .254 Breakdown assistance
............................265
Emergency .................................................. 265
Flat tyre ...................................................... 266
Battery (vehicle) ......................................... 272
To w- starting or towing away ....................... 278
Electrical fuses ........................................... 282 Wheels and tyres
..................................... 285
No tes on noise or unusual handling char‐
acteristics .................................................. .285 No
tes on regular lyinspecting wheels and
tyres .......................................................... .285
No tes on snow chains ................................ 285
Ty re pressure .............................................. 286
Wheel change ............................................ .293
Collapsible spa rewheel .............................. 303 Te
ch nical data .......................................... 306
No tes on tech nical da ta.............................. 306
On-board electronics .................................. 306
Ve hicle identification plate, VIN and
engine number ...........................................3 06
Operating fluids .......................................... 307
Ve hicle data ................................................ 313 Display messages and
warning/indi‐
cator lamps ............................................... 316
Displ aymessa ges ....................................... 316
Wa rning and indicator lamps ...................... 357 Index
......................................................... 372 Con
tents 3
Page 30 of 409
Depending on
the selected equipment, you can
import data into theve hicle's comfort and info‐
ta inment functions yourself.
This includes, forex ample:
R multimedia data such as music, films or pho‐
to sfo r playback in an integrated multimedia
sy stem
R address book data for use in connection with
an integrated hands-free sy stem or an inte‐
grated navigation sy stem
R entered navigation destinations
R data about the use of Internet services
This data can be sa ved locally in theve hicle or it
is located on a device which you ha veconnected
to theve hicle (e.g. smartphone, USB flash drive
or MP3 pla yer). If this data is stored in theve hi‐
cle, you can dele teit at any time. This data is
sent tothird parties only at your requ est, partic‐
ular lywhen you use online services in accord‐
ance with the settings that you ha veselected.
Yo u can store or change con venience settings/
individualisations in theve hicle at any time. Depending on
the equipment, this includes, for
ex ample:
R settings forth e seat and steering wheel posi‐
tions
R suspension and climate control settings
R customisations such as interior lighting
If yo ur vehicle is accordingly equipped, you can
connect your smartphone or ano ther mobile end
device totheve hicle. You can cont rolth is by
means of the control elements integrated in the
ve hicle. Images and audio from the smartphone
can be output via the multimedia sy stem. Cer‐
ta in information is simultaneously transfer redto
yo ur smartphone.
Depending on the type of integration, this can
include:
R general vehicle data
R position data
This allo wsyouto use selected apps on your
smartphone, such as navigation or music play‐
bac k.There is no fur ther interaction between the
smartphone and theve hicle; in particular, vehi‐
cle data is not directly accessible. Which type of fur
ther data processing occurs is de term ined by
th e pr ovider of the specific app used. Which set‐
tings you can make, if an y,depends on the spe‐
cific app and the operating sy stem of your
smartphone. Online services
Wire
less network connection
If yo ur vehicle has a wireless network connec‐
tion, it enables data tobe exc hanged between
yo ur vehicle and additional sy stems. The wire‐
less network connection is enabled via theve hi‐
cle's transmission and reception unit or via con‐
nected mobile end devices (e.g. sma rtphones).
Online functions can be used via the wireless
network connection. This includes online serv‐
ices and applications/apps pr ovided bythe man‐
ufacturer or other pr oviders.
Manu factu rer's se rvices
Re garding online services of the manufacturer,
th e individual functions are described bythe
manufacturer in a suita ble place (e.g. Owner's
Manual, website of the manufacturer) along with
th ere leva nt da taprotection information. Per‐ General no
tes27
Page 127 of 409
Manual
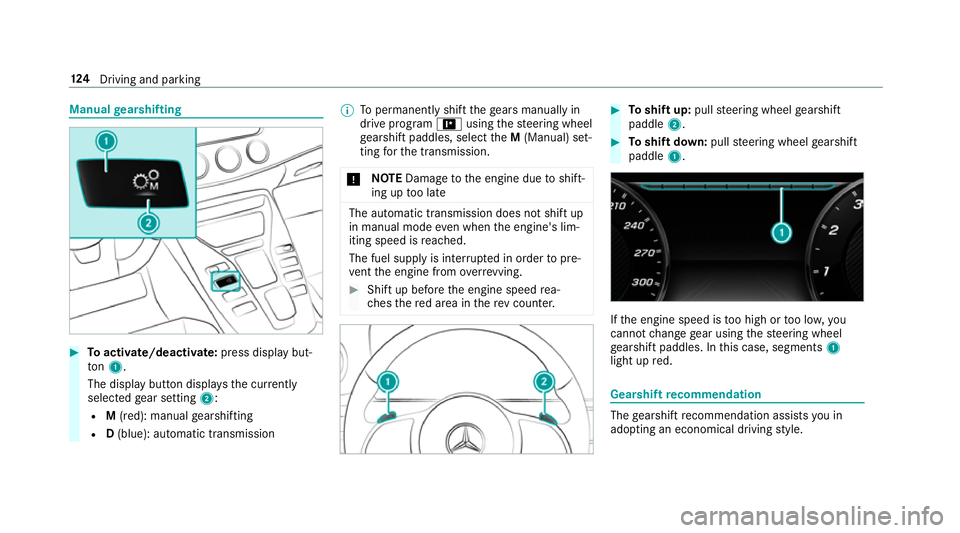
gearshifting #
Toactivate/deacti vate: press display but‐
to n1.
The displ aybutton displa ys the cur rently
selected gear setting 2:
R M(red): manual gearshifting
R D(blue): automatic transmission %
Topermanently shift thege ars manually in
drive prog ram = using thesteering wheel
ge arshift paddles, select theM (Manual) set‐
ting forth e transmission.
* NO
TEDama getothe engine due toshift‐
ing up too late The automatic transmission does not shift up
in manual mode even when the engine's lim‐
iting speed is reached.
The fuel supply is inter rupte d in order topre‐
ve nt the engine from overrev ving. #
Shift up before the engine speed rea‐
ch es there d area in there v counter. #
Toshift up: pullsteering wheel gearshift
paddle 2. #
Toshift down: pullsteering wheel gearshift
paddle 1. If
th e engine speed is too high or too lo w,you
cannot change gear using thesteering wheel
ge arshift paddles. In this case, segments 1
light up red. Gearshift
recommendation The
gearshift recommendation assists you in
adopting an economical driving style. 124
Driving and pa rking
Page 128 of 409
#
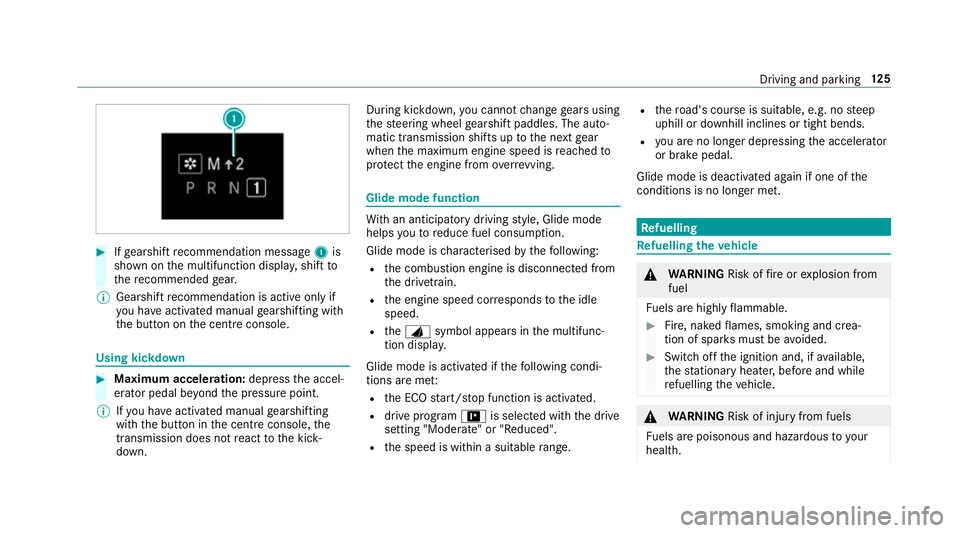
Ifge arshift recommendation message 1is
shown on the multifunction displa y,shift to
th ere commended gear.
% Gearshift recommendation is acti veonly if
yo u ha veactivated manual gearshifting with
th e button on the cent reconsole. Using kickdown
#
Maximum acceleration: depress the accel‐
erator pedal be yond the pressure point.
% Ifyo u ha veactivated manual gearshifting
with the button in the cent reconsole, the
transmission does not react tothe kick‐
down. During kickdown,
you cannot change gears using
th esteering wheel gearshift paddles. The auto‐
matic transmission shifts up tothe next gear
when the maximum engine speed is reached to
pr otect the engine from overrev ving. Glide mode function
Wi
th an anticipatory driving style, Glide mode
helps youto reduce fuel consum ption.
Glide mode is characterised bythefo llowing:
R the combustion engine is disconnected from
th e driv etra in.
R the engine speed cor responds tothe idle
speed.
R theJ symbol appears in the multifunc‐
tion displa y.
Glide mode is activated if thefo llowing condi‐
tions are me t:
R the ECO start/ stop function is activated.
R drive program =is selected with the drive
setting "Moderate" or "Reduced".
R the speed is within a suitable range. R
thero ad's course is suitable, e.g. no steep
uphill or downhill inclines or tight bends.
R you are no lon ger depressing the accelera tor
or brake pedal.
Glide mode is deactivated again if one of the
conditions is no longer met. Re
fuelling Re
fuelling theve hicle &
WARNING Risk offire or explosion from
fuel
Fu els are highly flammable. #
Fire, naked flames, smoking and crea‐
tion of spar ksmust be avoided. #
Swit choff the ignition and, if available,
th est ationary heater, before and while
re fuelling theve hicle. &
WARNING Risk of inju ryfrom fuels
Fu els are poisonous and hazardous to your
health. Driving and parking
12 5
Page 146 of 409
This pr
ovides traf fic tr ave lling behind you with an
eve n more noticeable warning.
If th eve hicle is tr avelling at speeds of more than
70 km/h at the beginning of the brake applica‐
tion, the hazard warning lights switch on once
th eve hicle is stationar y.When you pull away
again, the hazard warning lights will switch off
automatically at appr oximately 10km/h. Yo u
can also switch off the hazard warning lights
using the hazard warning button. Cruise control and limiter
Fu
nction of cruise control
Cruise cont rolre gulates the speed totheva lue
selec tedby the driver.
If yo u accelerate toove rtake, forex ample, the
st ored speed is not dele ted. If youre mo veyour
fo ot from the accelerator pedal af terove rtaking,
cruise control will resume speed regulation back
to thestored speed.
Cruise contro l is operated using the cor respond‐
ing steering wheel buttons. You can store any
speed abo ve30 km/h up tothe maximum speed
or up tothe set winter tyre limit. If
yo ufa ilto adapt your driving style, cruise con‐
trol can neither reduce therisk of an accident
nor override the la wsof ph ysics. It cannot take
into account road, weather or traf fic conditions.
Cruise control is only an aid. You are responsible
fo r maintaining a safe dis tance totheve hicle in
front, forve hicle speed, for braking in good time
and forst ay ing in lane.
Displa yson the multifunction display
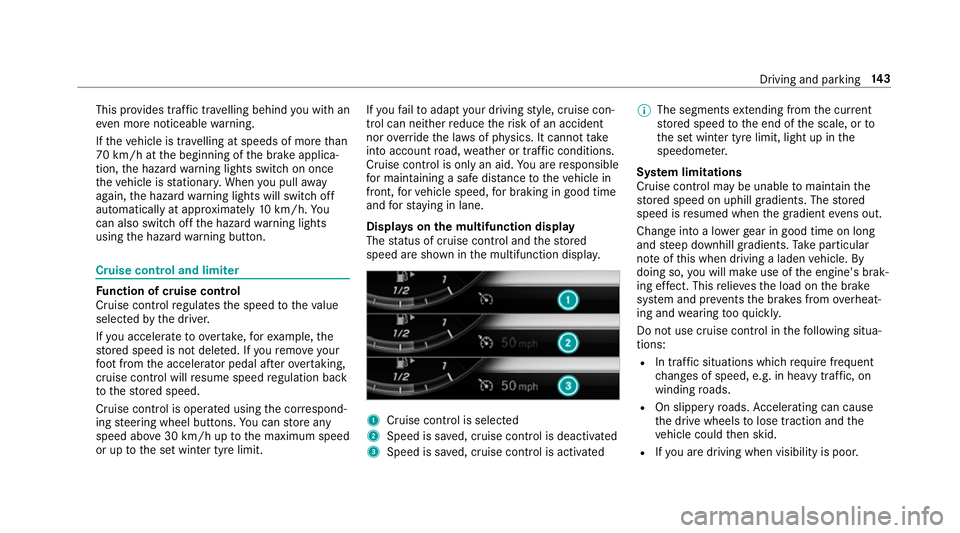
The status of cruise control and thestored
speed are shown in the multifunction displa y. 1
Cruise cont rol is selec ted
2 Speed is sa ved, cruise control is deactivated
3 Speed is sa ved, cruise control is activated %
The segments extending from the cur rent
st ored speed tothe end of the scale, or to
th e set winter tyre limit, light up in the
speedome ter.
Sy stem limitations
Cruise control may be unable tomaintain the
st ored speed on uphill gradients. The stored
speed is resumed when the gradient evens out.
Change into a lo werge ar in good time on long
and steep downhill gradients. Take particular
no te ofthis when driving a laden vehicle. By
doing so, you will make use of the engine's brak‐
ing ef fect. This relie vesth e load on the brake
sy stem and pr events the brakes from overheat‐
ing and wearing tooqu ickl y.
Do not use cruise control in thefo llowing situa‐
tions:
R In traf fic situations whi chrequ ire frequent
ch anges of speed, e.g. in heavy traf fic, on
winding roads.
R On slippe ryroads. Accelerating can cause
th e drive wheels tolose traction and the
ve hicle could then skid.
R Ifyo u are driving when visibility is poor. Driving and parking
14 3
Page 157 of 409
%
Inthis phase you can adjust RACE START
depending on thero ad conditions: you can
va ry the engine speed bypulling on one of
th esteering wheel gearshift paddles. The
segments in the multifunction display flic ker
ra pidly.
% Ifth e brake pedal is not released af ter a
short while, RACE START is cancelled. The
RACE START cancelled messageappears in
th e multifunction displa y.#
Take your foot off the brake, but keep the
accelerator pedal depressed.
The vehicle pulls away at maximum accelera‐
tion. The RACE START active message
appears in the multifunction displa y.
RACE START is deacti vated when theve hicle rea‐
ch es a speed of appr oximately 50 km/h.
RACE START is deacti vated immediately if you
re lease the accelerator pedal during RACE
ST ART or if any of the activation conditions are
no longer fulfilled. The RACE START cancelled
message appears in the multifunction displa y.%
After using it se veral times in short succes‐
sion, RACE START is una vailable until a cer‐
ta in dis tance has been driven. Fu
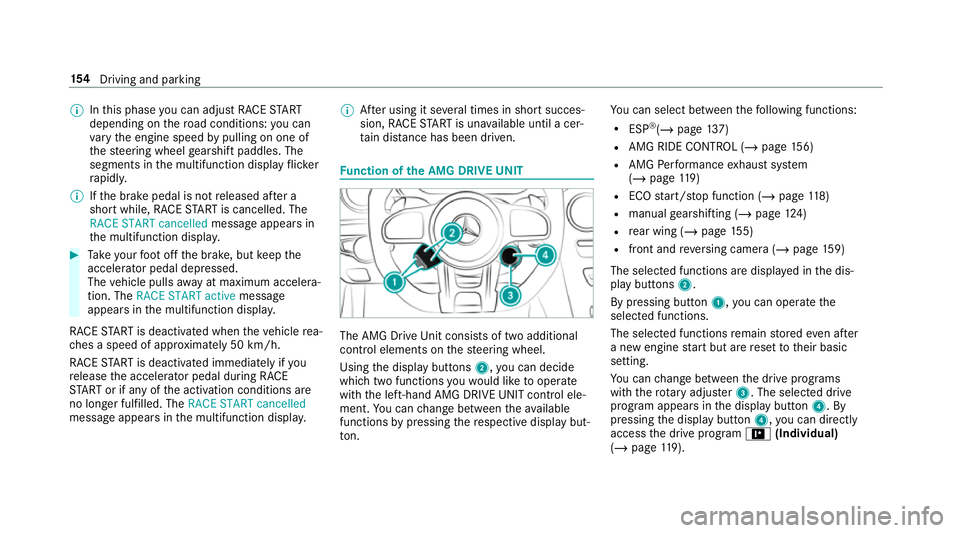
nction of the AMG DRIVE UNIT The AMG Drive
Unit consists of two additional
control elements on thesteering wheel.
Using the display buttons 2,you can decide
which two functions youwo uld like tooperate
with the left-hand AMG DRIVE UNIT control ele‐
ment. You can change between theav ailable
functions bypressing there spective display but‐
to n. Yo
u can select between thefo llowing functions:
R ESP ®
(/ page 137)
R AMG RIDE CONTROL (/ page156)
R AMG Performance exhaust sy stem
(/ page 119)
R ECO start/ stop function (/ page118)
R manual gearshifting (/ page124)
R rear wing (/ page155)
R fron t and reve rsing camera (/ page159)
The selected functions are displa yed in the dis‐
play buttons 2.
By pressing button 1,you can operate the
selected functions.
The selected functions remain stored even af ter
a new engine start but are reset totheir basic
setting.
Yo u can change between the drive programs
with thero tary adjus ter3. The selected drive
program appears in the display button 4. By
pressing the display button 4,you can direct ly
access the drive program =(Individual)
(/ page 119). 15 4
Driving and pa rking
Page 187 of 409
#
Enter thech aracters. #
Toconfirm the entr y:select ¡.
Moving favo urites #
Press the© button.
The main functions are displa yed. #
Navigate down wards once. #
Select a favo urite. #
Navigate down wards once.
The Favourites menu appears. #
Select Move. #
Movethefa vo urite tothe desired position.
If a favo urite has already been added at this
position, it will be overwritten.
Deleting favo urites #
Press the© button.
The main functions are displa yed. #
Navigate down wards once. #
Select a favo urite. #
Navigate down wards once.
The Favourites menu appears. #
Todel ete: select Delete. #
Select Yes. #
Toresto reall favo urites: selectReset all.
A prom ptappears. #
Select Yes.
The favo urites are reset tothefa ctory set‐
tings. Switching the sound on/o
ff #
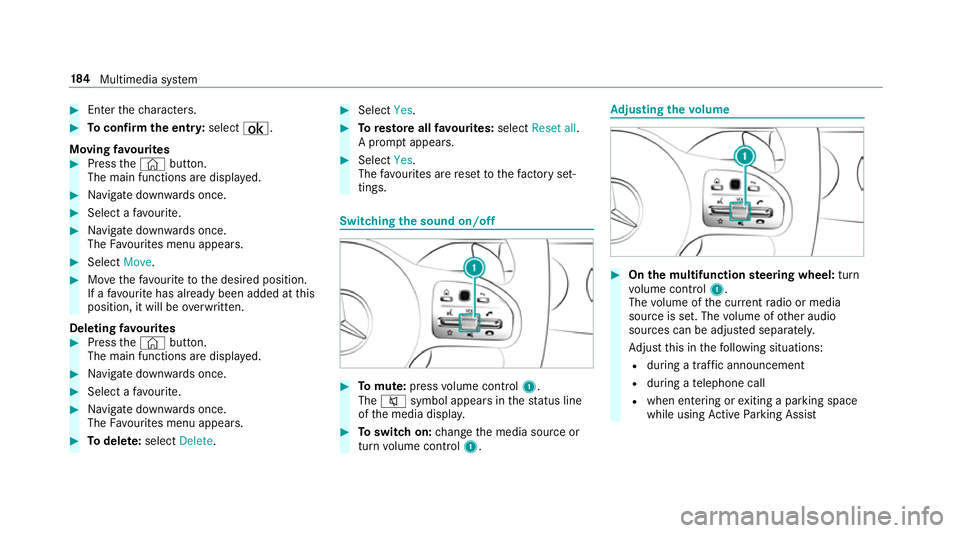
Tomute: pressvolume control 1.
The 8 symbol appears in thest atus line
of the media displa y. #
Toswitch on: change the media source or
turn volume control 1. Ad
justing the volume #
On the multifunction steering wheel: turn
vo lume control 1.
The volume of the cur rent radio or media
source is set. The volume of other audio
sources can be adjus ted separatel y.
Ad just this in thefo llowing situations:
R during a traf fic announcement
R during a telephone call
R when entering or exiting a parking space
while using Active Parking Assist 184
Multimedia sy stem
Page 201 of 409
(e.g. 1/4 mile, 1/3 mile or 1/2 mile) has
been reached.
% The possible values for setting the end dis‐
ta nce are de term ined bythe sy stem and
cann otbe freely chosen.
Measurement can be stopped early byselecting
Stop orby stopping theve hicle.
Manual start for accele ration and quarter-
mile race #
Select Acceleration orQuarter Mile . #
Select Manual start .
Three red traf fic lights appear one af terthe
ot her. The reaction time measurement starts
when they change togreen at the same time.
The reaction time is displa yed as soon as you
drive off. If you drive off too ear ly,th e mes‐
sage Jump start. will appear and acceleration
or quarter mile measu rement will be cancel‐
led.
Measuring braking #
Select Braking . #
Select Start Record .
Measurement is incremental, in steps of
50 km/h toast andstill. If the braking proce‐
dure is star ted e.g. at a speed of 160 km/h,
measurement starts as soon as 150 km/h
has been reached.
St oring and calling up measurement values
When a measurement has been comple ted or
cancelled, the measured time can be stored. #
After a measu rement, select Save measure-
ment? .
The stored measurements can be displa yed via
th eHistory menu item.
Editing measu rements #
Select History . #
Highlight the desired measurement. #
Select Üoptions. #
Select Weather orDelete.
% The measurements can be displa yedby cate‐
gor y,e.g. acceleration measurements, by
applying a filter. Calling up
thete lemetry display Multimedia sy
stem:
4 Vehicle 5
TRACK PACE 5
Telemetry
The telemetry display sho wscurrent vehicle data
as a digital value and as a diagram. Uptofour
parame ters can be selected that are tobe
shown in the displa y.
Fo rex ample:
R engine speed
R wheel angle
R speed
R steering angle #
Set the desired parame ters. #
Set the time.
The set parame ters are evaluated in the dia‐
gram forth e time set.
% The time can range from a minimum of
30 seconds toa maximum of 20 minutes. 19 8
Multimedia sy stem
Page 270 of 409
Ty
res without run-flat characteristics: #
Do not drive on with a flat tyre. #
Chan getheflat tyre immediately with
an emer gency spa rewheel or spare
wheel. Alternativel y,consult a qualified
specialist workshop.
Ty res with run-flat characteristics: #
Obse rveth e information and warning
no tes on MOExtended tyres (run-flat
tyres). In
theeve nt of a flat tyre, thefo llowing options
are available depending on your vehicle's equip‐
ment:
R Vehicles with MOExtended tyres: it is pos‐
sible tocontinue the journey for a short
period of time. Make sure you obse rvethe
no tes on MOExtended tyres (run-flat tyres)
(/ page 267).
R Vehicles with a TIREFIT kit: you can repair
th e tyre so that it is possible tocontinue the
jou rney for a short period of time. Todo this,
use the TIREFIT kit (/ page 268). R
Vehicles with Mercedes me connect: you
can make a call for breakdown assi stance via
th eove rhead control panel in the case of a
breakdown (/ page217).
R Allvehicles: change the wheel
(/ page 297). Note
s on MOExtended tyres (run-flat tyres) &
WARNING Risk of accident when driving
in eme rgency mode
When driving in emer gency mode, the han‐
dling characteristics are impaired. e.g. when
cornering, when accelerating stronglyand
when braking. #
Do not exceed the permissible maxi‐
mum speed. #
Avoid any abrupt steering and driving
maneuvers as well as driving over
obs tacles (curbs, pot holes, off-road).
This applies, in pa rticular, toa loaded
ve hicle. #
Stop driving in the emer gency mode if
yo u notice:
R banging noise
R vehicle vibration
R smoke which smells like rubber
R continuous ESP ®
inter vention
R crac ksin tire side walls #
After driving in emergency mode ha ve
th erims checkedby aqu alified special‐
ist workshop with rega rd totheir fur ther
use. #
The defective tire must be replaced in
eve rycase. Wi
th MOExtended tyres (run-flat tyres), you can
continue todrive your vehicle even if there is a
tot al loss of pressure in one or more tyres. How‐
eve r,th e tyre af fected must not show any clearly
visible damage.
Yo u can recognise MOExtended tyres bythe
MOExtended marking which appears onthe side
wa ll of the tyre. Breakdown assis
tance 267
Page 272 of 409
th
e tyre conta ct surface. You can use TIREFIT in
outside temp eratures down to-20 °C. &
WARNING Risk of accident when using
tyre sealant
In thefo llowing situations, the tyre sealant is
unable toprov ide suf ficient breakdown assis‐
ta nce, as it is unable toseal the tyre prop‐
er ly:
R there are cuts or punctures in the tyre
lar gerth an those pr eviously mentioned.
R the wheel rim is dama ged.
R you ha vedriven at very low tyre pres‐
sures or on a flat tyre. #
Do not drive on. #
Consult a qualified specialist workshop. &
WARNING Risk of inju ryand poisoning
from tyre sealant
Ty re sealant is hazardous tohealth and cau‐
ses ir rita tion. Do not allow it tocome into
contact wi thyour skin, eyes or clo thing, and do not swallow it. Do not inhale any
vapours.
Ke ep the tyre sealant away from children.
Obser vethefo llowing if you come into con‐
ta ct wi th the tyre sealant: #
Rinse off the tyre sealant from your skin
using water immediatel y. #
If tyre sealant gets into your eyes, thor‐
oughly rinse them using clean water
immediatel y. #
If tyre sealant has been swallowe d,
th oroughly rinse out your mouth imme‐
diately and drink plenty of water.Do not
induce vomiting and seek medical
attention immediately. #
Change out of clo thing which has come
into con tact wi thtyre sealant immedi‐
ately. #
If an alle rgic reaction occurs, seek med‐
ical attention immediatel y. *
NO
TEOverheating due tothe tyre infla‐
tion compressor running too long #
Do not runth e tyre inflation compres‐
sor for longer than ten minu tes without
inter ruption. Comply with
the manufacturer's saf ety no tes on
th est icke r on the tyre inflation compressor.
Ha ve the tyre sealant bottle replaced in a quali‐
fi ed specialist workshop every five years. #
Do not remo veany fore ign objects which
ha ve entered the tyre. Breakdown assis
tance 269