clock MERCEDES-BENZ B-Class ELECTRIC 2015 W246 Owner's Manual
[x] Cancel search | Manufacturer: MERCEDES-BENZ, Model Year: 2015, Model line: B-Class ELECTRIC, Model: MERCEDES-BENZ B-Class ELECTRIC 2015 W246Pages: 338, PDF Size: 6.61 MB
Page 83 of 338
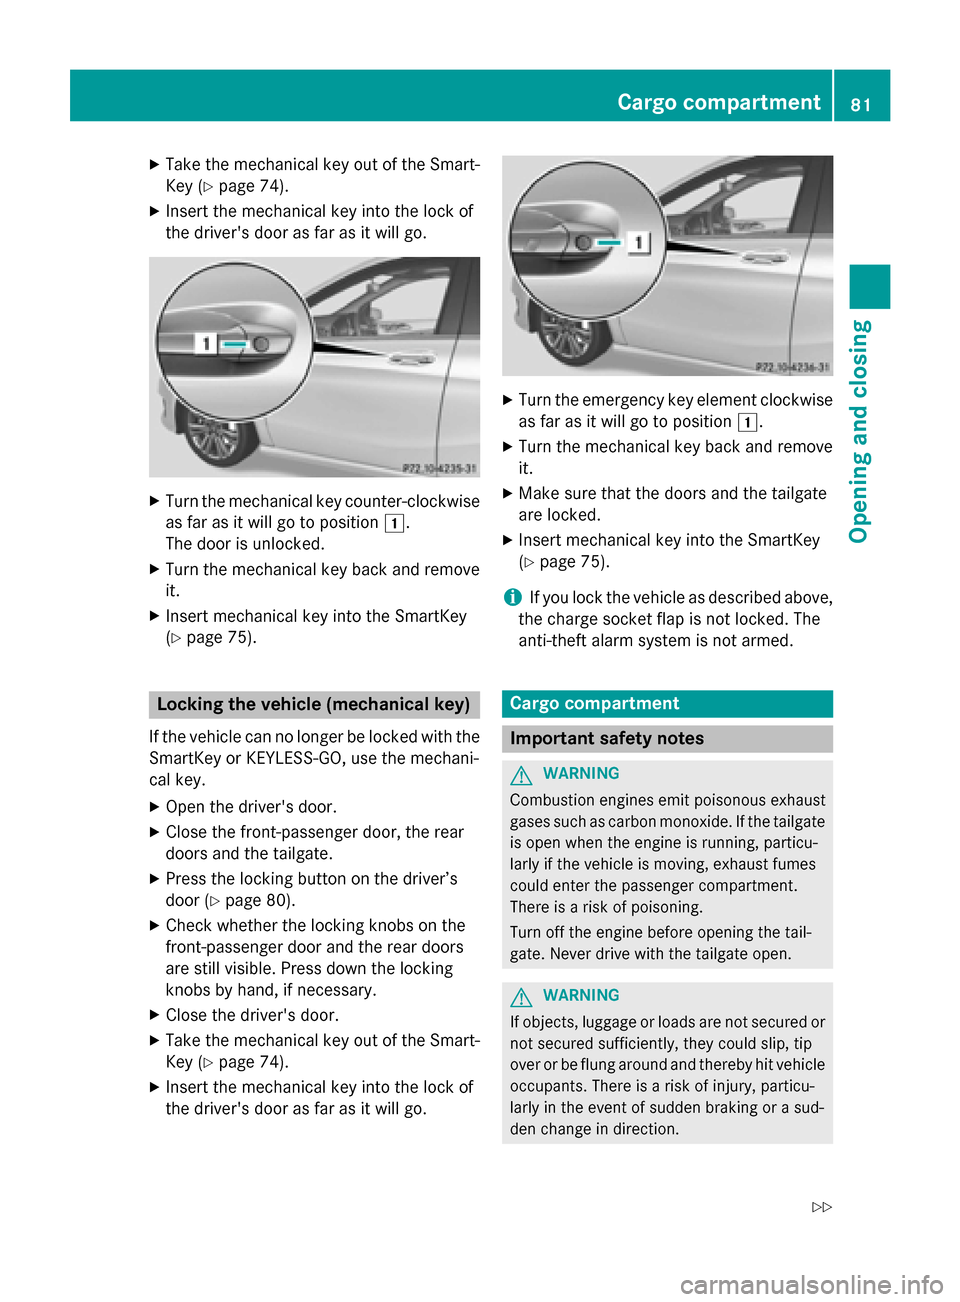
X
Take the mechanical key out of the Smart-
Key (Y page 74).
X Insert the mechanical key into the lock of
the driver's door as far as it will go. X
Turn the mechanical key counter-clockwise
as far as it will go to position 1.
The door is unlocked.
X Turn the mechanical key back and remove
it.
X Insert mechanical key into the SmartKey
(Y page 75). Locking the vehicle (mechanical key)
If the vehicle can no longer be locked with the
SmartKey or KEYLESS-GO, use the mechani-
cal key.
X Open the driver's door.
X Close the front-passenger door, the rear
doors and the tailgate.
X Press the locking button on the driver’s
door (Y page 80).
X Check whether the locking knobs on the
front-passenger door and the rear doors
are still visible. Press down the locking
knobs by hand, if necessary.
X Close the driver's door.
X Take the mechanical key out of the Smart-
Key (Y page 74).
X Insert the mechanical key into the lock of
the driver's door as far as it will go. X
Turn the emergency key element clockwise
as far as it will go to position 1.
X Turn the mechanical key back and remove
it.
X Make sure that the doors and the tailgate
are locked.
X Insert mechanical key into the SmartKey
(Y page 75).
i If you lock the vehicle as described above,
the charge socket flap is not locked. The
anti-theft alarm system is not armed. Cargo compartment
Important safety notes
G
WARNING
Combustion engines emit poisonous exhaust
gases such as carbon monoxide. If the tailgate is open when the engine is running, particu-
larly if the vehicle is moving, exhaust fumes
could enter the passenger compartment.
There is a risk of poisoning.
Turn off the engine before opening the tail-
gate. Never drive with the tailgate open. G
WARNING
If objects, luggage or loads are not secured or not secured sufficiently, they could slip, tip
over or be flung around and thereby hit vehicle
occupants. There is a risk of injury, particu-
larly in the event of sudden braking or a sud-
den change in direction. Cargo compartment
81Opening and closing
Z
Page 85 of 338
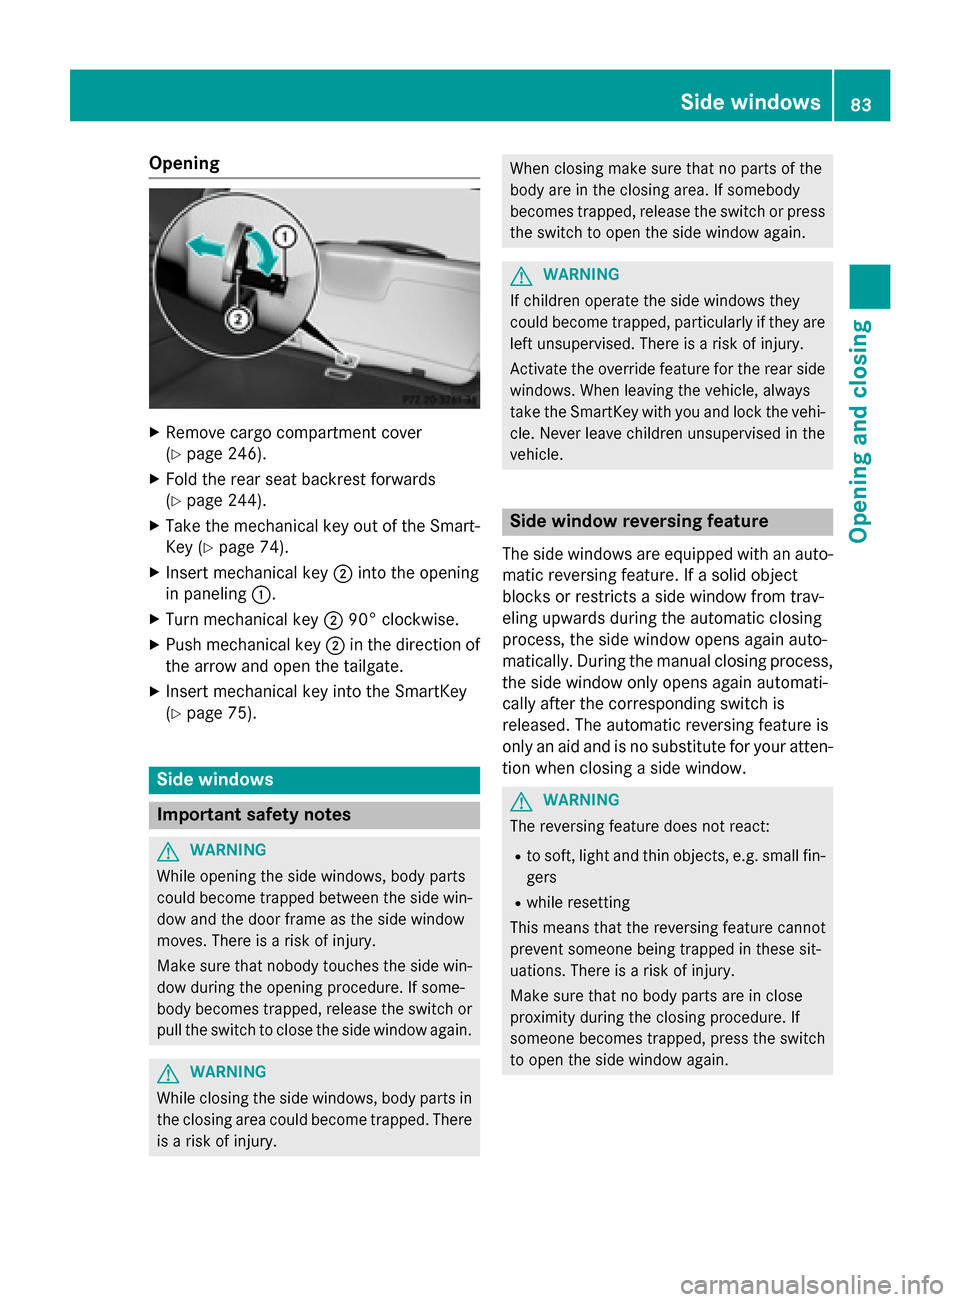
Opening
X
Remove cargo compartment cover
(Y page 246).
X Fold the rear seat backrest forwards
(Y page 244).
X Take the mechanical key out of the Smart-
Key (Y page 74).
X Insert mechanical key ;into the opening
in paneling :.
X Turn mechanical key ;90° clockwise.
X Push mechanical key ;in the direction of
the arrow and open the tailgate.
X Insert mechanical key into the SmartKey
(Y page 75). Side windows
Important safety notes
G
WARNING
While opening the side windows, body parts
could become trapped between the side win- dow and the door frame as the side window
moves. There is a risk of injury.
Make sure that nobody touches the side win-
dow during the opening procedure. If some-
body becomes trapped, release the switch or pull the switch to close the side window again. G
WARNING
While closing the side windows, body parts in the closing area could become trapped. There is a risk of injury. When closing make sure that no parts of the
body are in the closing area. If somebody
becomes trapped, release the switch or press
the switch to open the side window again. G
WARNING
If children operate the side windows they
could become trapped, particularly if they are left unsupervised. There is a risk of injury.
Activate the override feature for the rear side
windows. When leaving the vehicle, always
take the SmartKey with you and lock the vehi-
cle. Never leave children unsupervised in the
vehicle. Side window reversing feature
The side windows are equipped with an auto- matic reversing feature. If a solid object
blocks or restricts a side window from trav-
eling upwards during the automatic closing
process, the side window opens again auto-
matically. During the manual closing process,
the side window only opens again automati-
cally after the corresponding switch is
released. The automatic reversing feature is
only an aid and is no substitute for your atten- tion when closing a side window. G
WARNING
The reversing feature does not react:
R to soft, light and thin objects, e.g. small fin-
gers
R while resetting
This means that the reversing feature cannot
prevent someone being trapped in these sit-
uations. There is a risk of injury.
Make sure that no body parts are in close
proximity during the closing procedure. If
someone becomes trapped, press the switch
to open the side window again. Side windows
83Opening and closing Z
Page 110 of 338
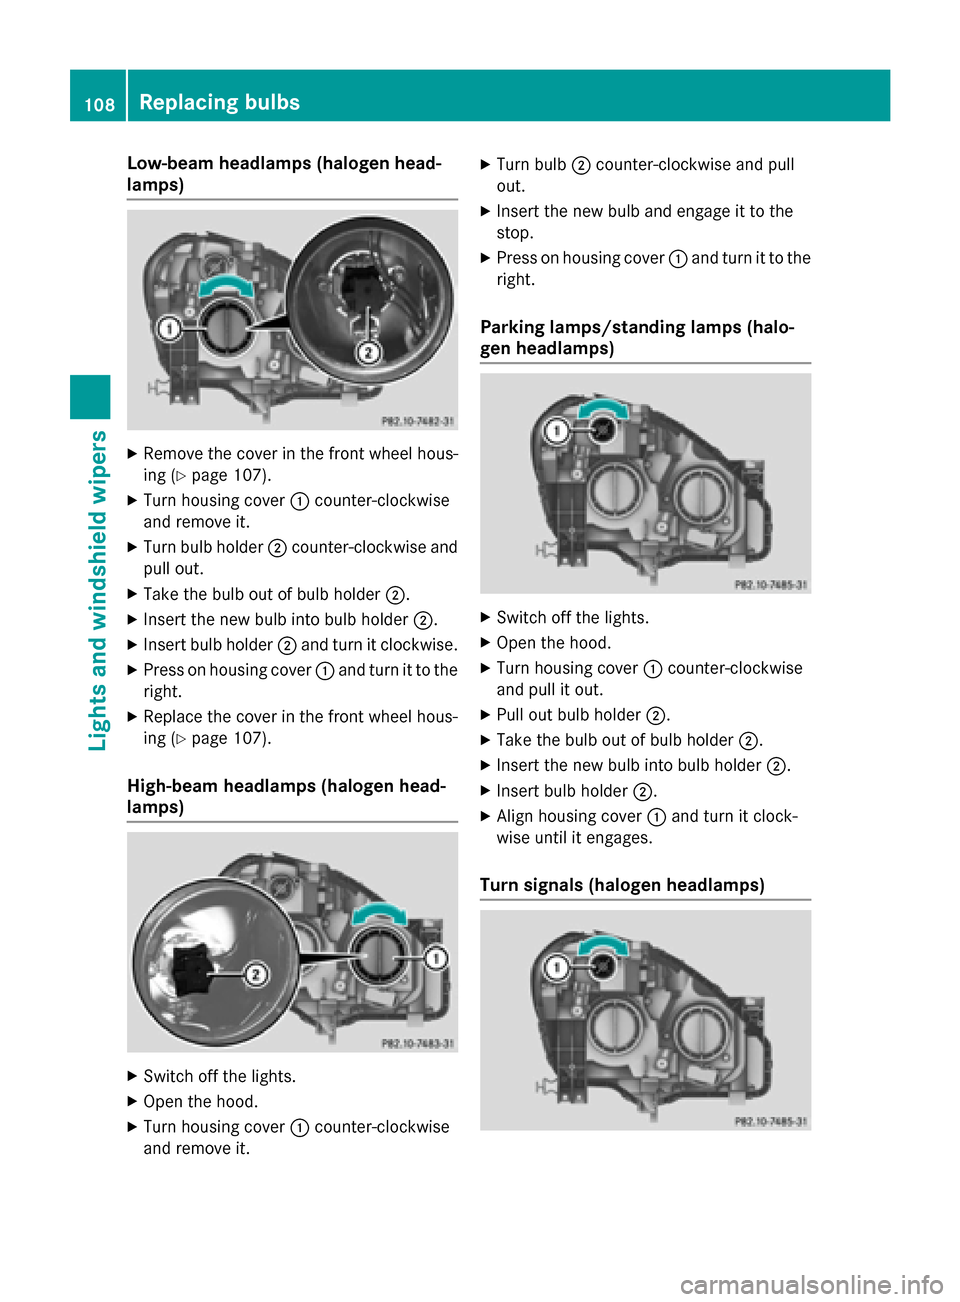
Low-beam headlamps (halogen head-
lamps) X
Remove the cover in the front wheel hous-
ing (Y page 107).
X Turn housing cover :counter-clockwise
and remove it.
X Turn bulb holder ;counter-clockwise and
pull out.
X Take the bulb out of bulb holder ;.
X Insert the new bulb into bulb holder ;.
X Insert bulb holder ;and turn it clockwise.
X Press on housing cover :and turn it to the
right.
X Replace the cover in the front wheel hous-
ing (Y page 107).
High-beam headlamps (halogen head-
lamps) X
Switch off the lights.
X Open the hood.
X Turn housing cover :counter-clockwise
and remove it. X
Turn bulb ;counter-clockwise and pull
out.
X Insert the new bulb and engage it to the
stop.
X Press on housing cover :and turn it to the
right.
Parking lamps/standing lamps (halo-
gen headlamps) X
Switch off the lights.
X Open the hood.
X Turn housing cover :counter-clockwise
and pull it out.
X Pull out bulb holder ;.
X Take the bulb out of bulb holder ;.
X Insert the new bulb into bulb holder ;.
X Insert bulb holder ;.
X Align housing cover :and turn it clock-
wise until it engages.
Turn signals (halogen headlamps) 108
Replacing bulbsLights and windshield wipers
Page 111 of 338
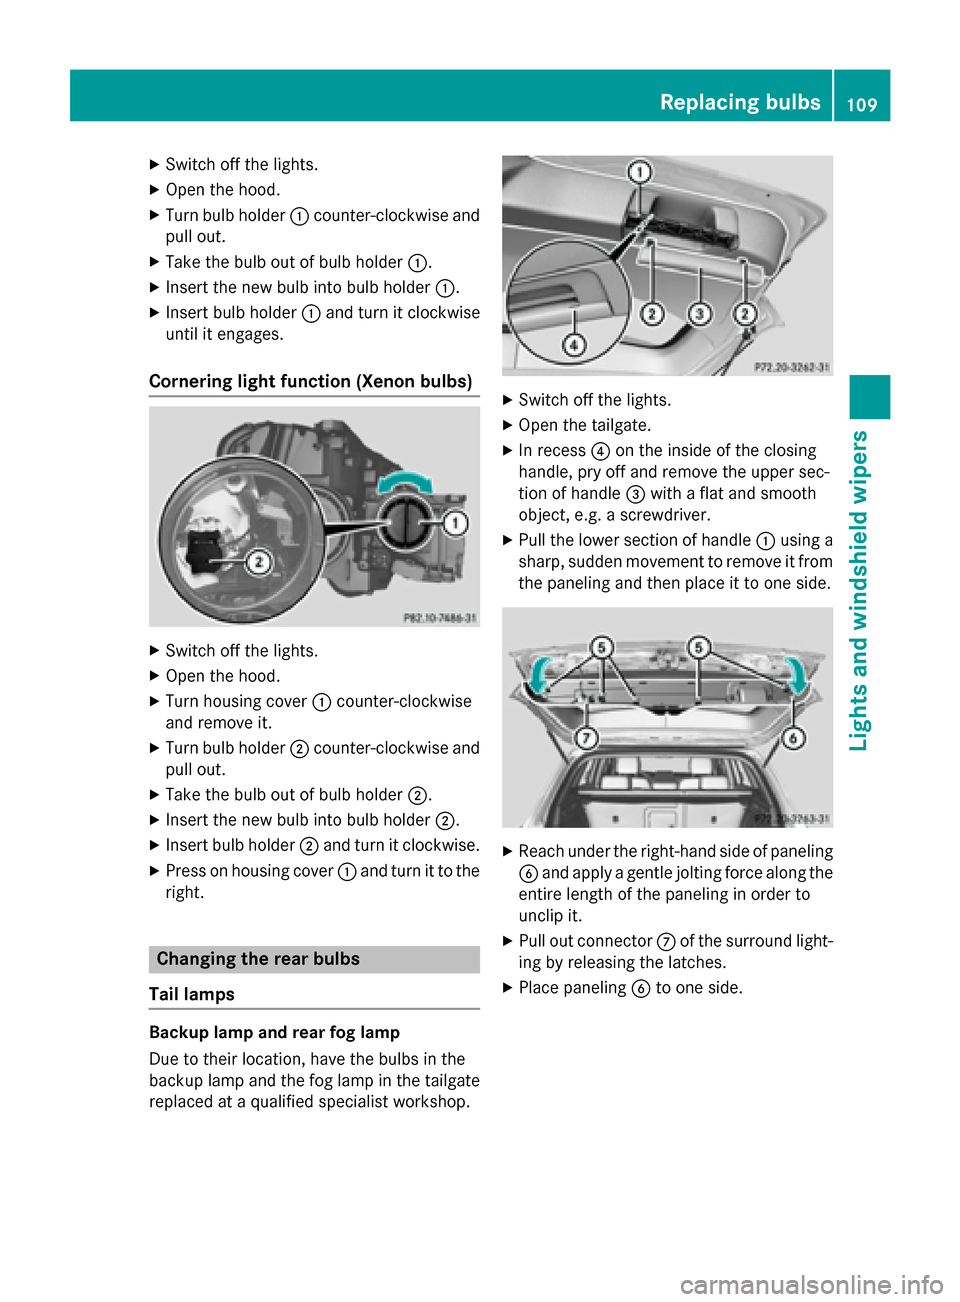
X
Switch off the lights.
X Open the hood.
X Turn bulb holder :counter-clockwise and
pull out.
X Take the bulb out of bulb holder :.
X Insert the new bulb into bulb holder :.
X Insert bulb holder :and turn it clockwise
until it engages.
Cornering light function (Xenon bulbs) X
Switch off the lights.
X Open the hood.
X Turn housing cover :counter-clockwise
and remove it.
X Turn bulb holder ;counter-clockwise and
pull out.
X Take the bulb out of bulb holder ;.
X Insert the new bulb into bulb holder ;.
X Insert bulb holder ;and turn it clockwise.
X Press on housing cover :and turn it to the
right. Changing the rear bulbs
Tail lamps Backup lamp and rear fog lamp
Due to their location, have the bulbs in the
backup lamp and the fog lamp in the tailgate replaced at a qualified specialist workshop. X
Switch off the lights.
X Open the tailgate.
X In recess ?on the inside of the closing
handle, pry off and remove the upper sec-
tion of handle =with a flat and smooth
object, e.g. a screwdriver.
X Pull the lower section of handle :using a
sharp, sudden movement to remove it from the paneling and then place it to one side. X
Reach under the right-hand side of paneling
B and apply a gentle jolting force along the
entire length of the paneling in order to
unclip it.
X Pull out connector Cof the surround light-
ing by releasing the latches.
X Place paneling Bto one side. Replacing bulbs
109Lights and windshield wipers Z
Page 112 of 338
X
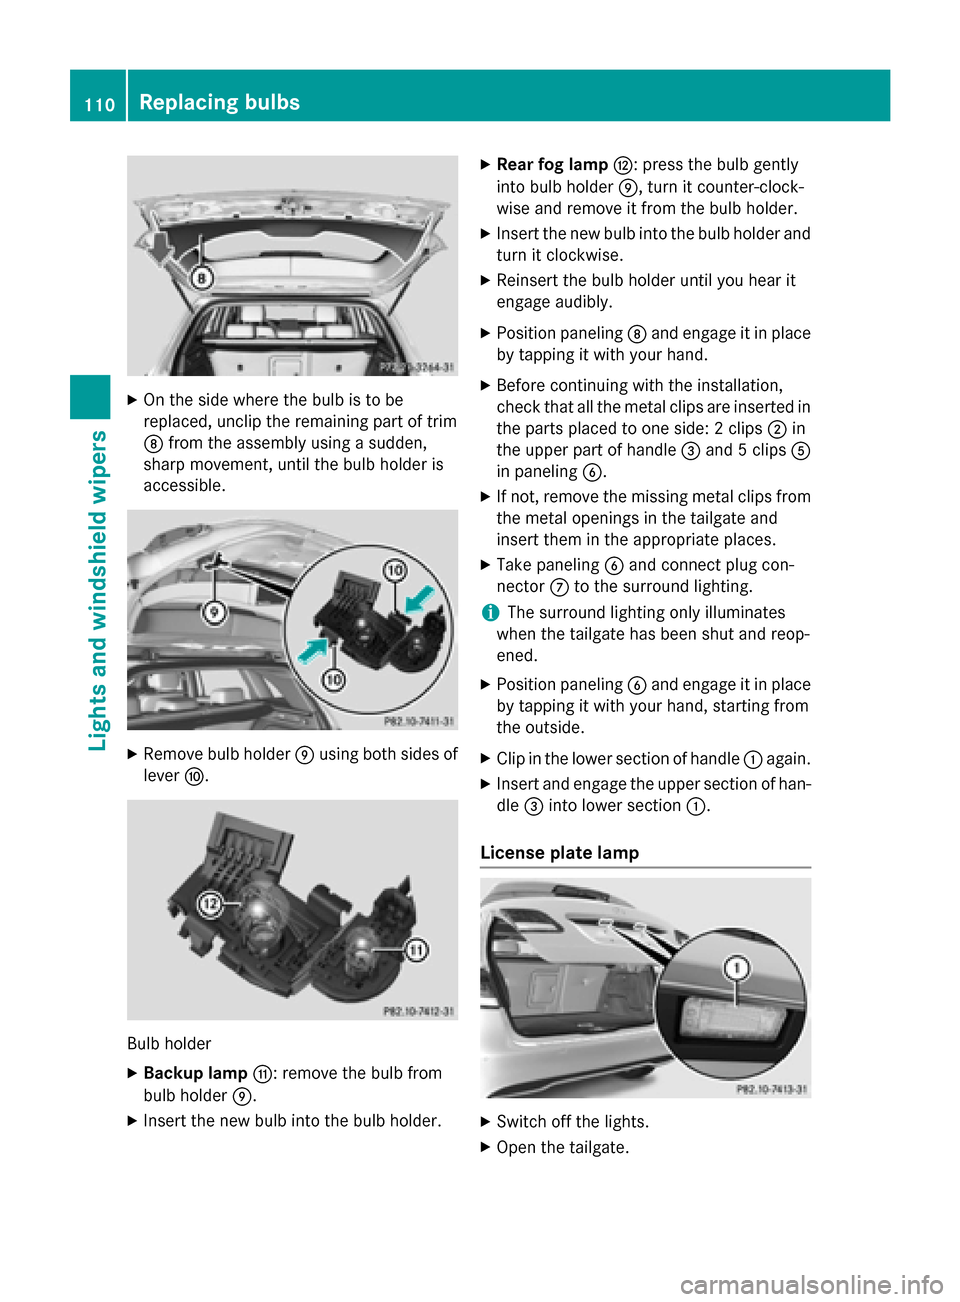
On the side where the bulb is to be
replaced, unclip the remaining part of trim
D from the assembly using a sudden,
sharp movement, until the bulb holder is
accessible. X
Remove bulb holder Eusing both sides of
lever F. Bulb holder
X Backup lamp G: remove the bulb from
bulb holder E.
X Insert the new bulb into the bulb holder. X
Rear fog lamp H: press the bulb gently
into bulb holder E, turn it counter-clock-
wise and remove it from the bulb holder.
X Insert the new bulb into the bulb holder and
turn it clockwise.
X Reinsert the bulb holder until you hear it
engage audibly.
X Position paneling Dand engage it in place
by tapping it with your hand.
X Before continuing with the installation,
check that all the metal clips are inserted in
the parts placed to one side: 2 clips ;in
the upper part of handle =and 5 clips A
in paneling B.
X If not, remove the missing metal clips from
the metal openings in the tailgate and
insert them in the appropriate places.
X Take paneling Band connect plug con-
nector Cto the surround lighting.
i The surround lighting only illuminates
when the tailgate has been shut and reop-
ened.
X Position paneling Band engage it in place
by tapping it with your hand, starting from
the outside.
X Clip in the lower section of handle :again.
X Insert and engage the upper section of han-
dle =into lower section :.
License plate lamp X
Switch off the lights.
X Open the tailgate. 110
Replacing bulbsLights and windshield wipers
Page 122 of 338
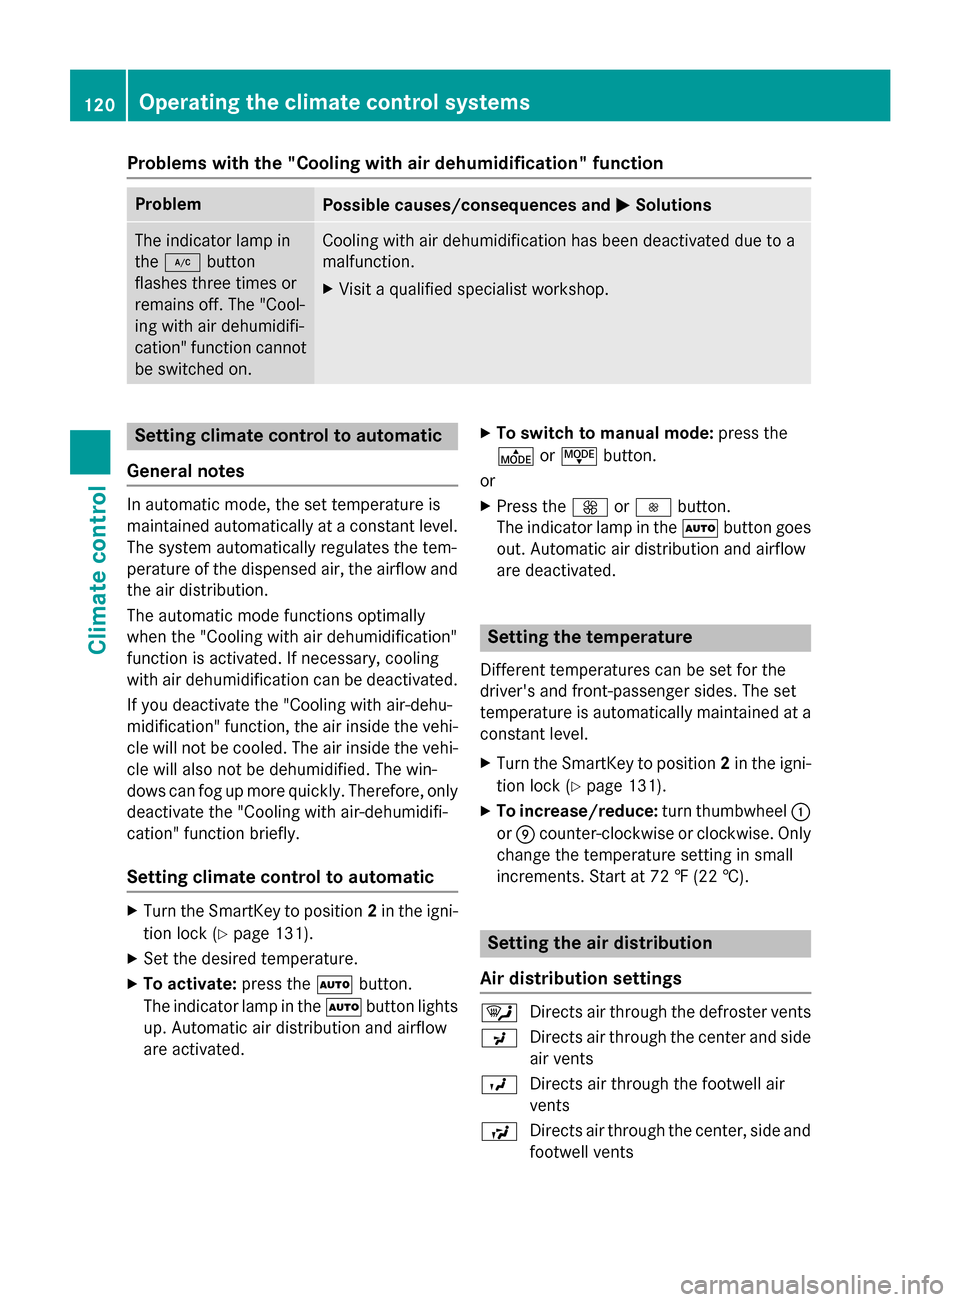
Problems with the "Cooling with air dehumidification" function
Problem
Possible causes/consequences and
M
MSolutions The indicator lamp in
the
¿ button
flashes three times or
remains off. The "Cool-
ing with air dehumidifi-
cation" function cannot
be switched on. Cooling with air dehumidification has been deactivated due to a
malfunction.
X Visit a qualified specialist workshop. Setting climate control to automatic
General notes In automatic mode, the set temperature is
maintained automatically at a constant level.
The system automatically regulates the tem-
perature of the dispensed air, the airflow and
the air distribution.
The automatic mode functions optimally
when the "Cooling with air dehumidification"
function is activated. If necessary, cooling
with air dehumidification can be deactivated.
If you deactivate the "Cooling with air-dehu-
midification" function, the air inside the vehi-
cle will not be cooled. The air inside the vehi- cle will also not be dehumidified. The win-
dows can fog up more quickly. Therefore, only deactivate the "Cooling with air-dehumidifi-
cation" function briefly.
Setting climate control to automatic X
Turn the SmartKey to position 2in the igni-
tion lock (Y page 131).
X Set the desired temperature.
X To activate: press theÃbutton.
The indicator lamp in the Ãbutton lights
up. Automatic air distribution and airflow
are activated. X
To switch to manual mode: press the
É orË button.
or X Press the KorI button.
The indicator lamp in the Ãbutton goes
out. Automatic air distribution and airflow
are deactivated. Setting the temperature
Different temperatures can be set for the
driver's and front-passenger sides. The set
temperature is automatically maintained at a
constant level.
X Turn the SmartKey to position 2in the igni-
tion lock (Y page 131).
X To increase/reduce: turn thumbwheel:
or E counter-clockwise or clockwise. Only
change the temperature setting in small
increments. Start at 72 ‡ (22 †). Setting the air distribution
Air distribution settings ¯
Directs air through the defroster vents
P Directs air through the center and side
air vents
O Directs air through the footwell air
vents
S Directs air through the center, side and
footwell vents 120
Operating the climate control systemsClimate control
Page 123 of 338
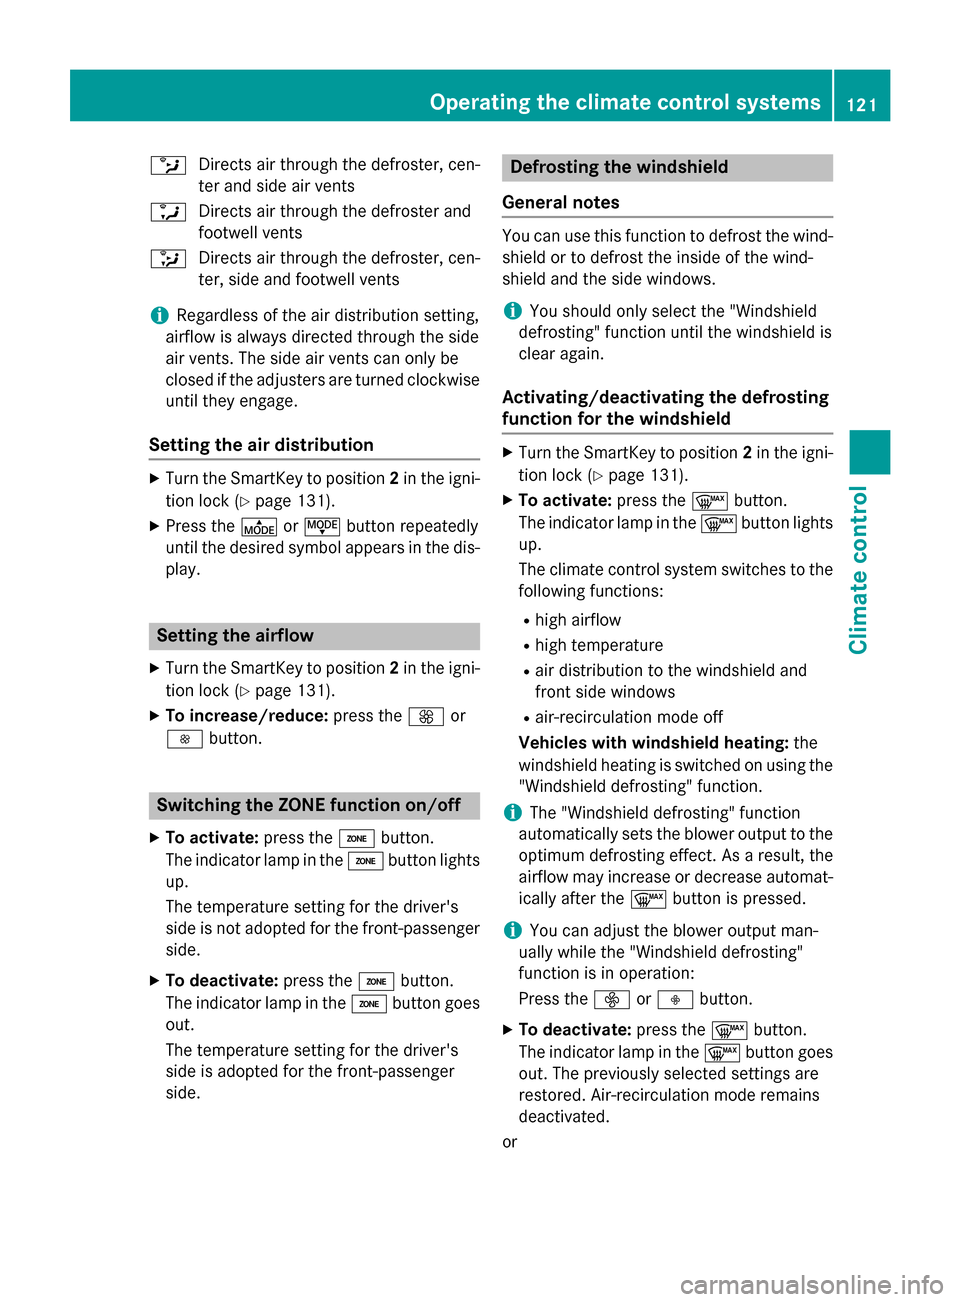
b
Directs air through the defroster, cen-
ter and side air vents
a Directs air through the defroster and
footwell vents
_ Directs air through the defroster, cen-
ter, side and footwell vents
i Regardless of the air distribution setting,
airflow is always directed through the side
air vents. The side air vents can only be
closed if the adjusters are turned clockwise until they engage.
Setting the air distribution X
Turn the SmartKey to position 2in the igni-
tion lock (Y page 131).
X Press the ÉorË button repeatedly
until the desired symbol appears in the dis- play. Setting the airflow
X Turn the SmartKey to position 2in the igni-
tion lock (Y page 131).
X To increase/reduce: press theKor
I button. Switching the ZONE function on/off
X To activate: press theábutton.
The indicator lamp in the ábutton lights
up.
The temperature setting for the driver's
side is not adopted for the front-passenger side.
X To deactivate: press theábutton.
The indicator lamp in the ábutton goes
out.
The temperature setting for the driver's
side is adopted for the front-passenger
side. Defrosting the windshield
General notes You can use this function to defrost the wind-
shield or to defrost the inside of the wind-
shield and the side windows.
i You should only select the "Windshield
defrosting" function until the windshield is
clear again.
Activating/deactivating the defrosting
function for the windshield X
Turn the SmartKey to position 2in the igni-
tion lock (Y page 131).
X To activate: press the¬button.
The indicator lamp in the ¬button lights
up.
The climate control system switches to the
following functions:
R high airflow
R high temperature
R air distribution to the windshield and
front side windows
R air-recirculation mode off
Vehicles with windshield heating: the
windshield heating is switched on using the "Windshield defrosting" function.
i The "Windshield defrosting" function
automatically sets the blower output to the optimum defrosting effect. As a result, the
airflow may increase or decrease automat-
ically after the ¬button is pressed.
i You can adjust the blower output man-
ually while the "Windshield defrosting"
function is in operation:
Press the óorô button.
X To deactivate: press the¬button.
The indicator lamp in the ¬button goes
out. The previously selected settings are
restored. Air-recirculation mode remains
deactivated.
or Operating the climate control systems
121Climate control
Page 124 of 338
X
Press the Ãbutton.
The indicator lamp in the ¬button goes
out. Airflow and air distribution are set to
automatic mode.
or X Turn temperature control :orE counter-
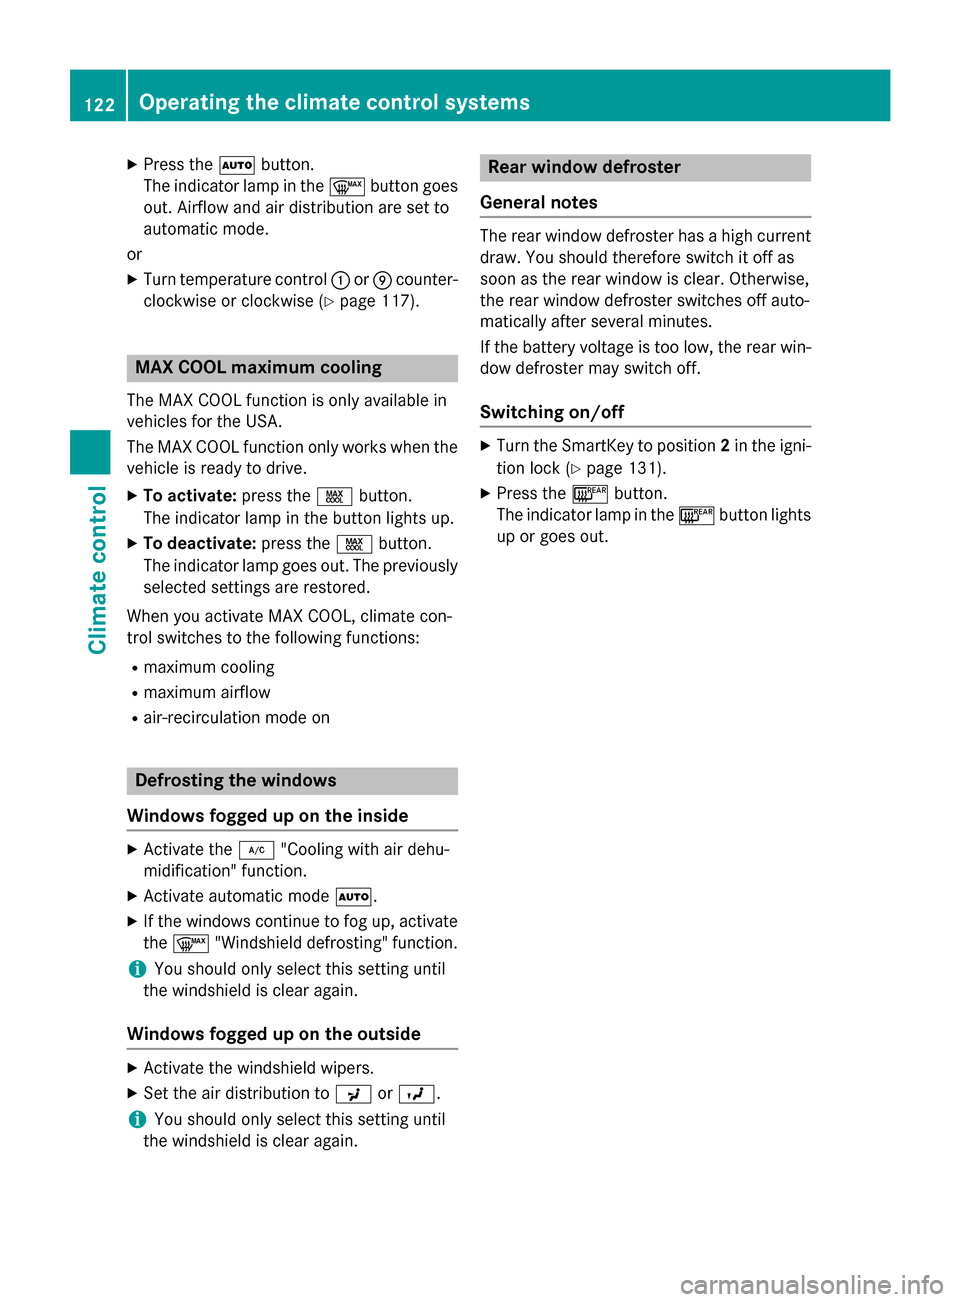
clockwise or clockwise (Y page 117).MAX COOL maximum cooling
The MAX COOL function is only available in
vehicles for the USA.
The MAX COOL function only works when the vehicle is ready to drive.
X To activate: press theÙbutton.
The indicator lamp in the button lights up.
X To deactivate: press theÙbutton.
The indicator lamp goes out. The previously
selected settings are restored.
When you activate MAX COOL, climate con-
trol switches to the following functions:
R maximum cooling
R maximum airflow
R air-recirculation mode on Defrosting the windows
Windows fogged up on the inside X
Activate the ¿"Cooling with air dehu-
midification" function.
X Activate automatic mode Ã.
X If the windows continue to fog up, activate
the ¬ "Windshield defrosting" function.
i You should only select this setting until
the windshield is clear again.
Windows fogged up on the outside X
Activate the windshield wipers.
X Set the air distribution to PorO.
i You should only select this setting until
the windshield is clear again. Rear window defroster
General notes The rear window defroster has a high current
draw. You should therefore switch it off as
soon as the rear window is clear. Otherwise,
the rear window defroster switches off auto-
matically after several minutes.
If the battery voltage is too low, the rear win-
dow defroster may switch off.
Switching on/off X
Turn the SmartKey to position 2in the igni-
tion lock (Y page 131).
X Press the ¤button.
The indicator lamp in the ¤button lights
up or goes out. 122
Operating the climate control systemsClimate control
Page 128 of 338
To activate/deactivate "Immediate pre-
entry climate control"
X Press button :in the center console.
The blue or red indicator lamp in the button
lights up or goes out.
The colors of the indicator lamps in the button have the following meanings:
Re dH eating activated
Blue Cooling activated
Yellow Pre-entry climate control at depar- ture is preselected Air vents
Important safety notes
G
WARNING
Very hot or very cold air can flow from the air vents. This could result in burns or frostbite in the immediate vicinity of the air vents. There
is a risk of injury.
Make sure that all vehicle occupants always
maintain a sufficient distance to the air out-
lets. If necessary, redirect the airflow to
another area of the vehicle interior.
In order to ensure the direct flow of fresh air
through the air vents into the vehicle interior,
please observe the following notes:
R keep the air inlet between the windshield
and the hood free of blockages, such as ice, snow or leaves.
R never cover the air vents or air intake grilles
in the vehicle interior.
i You can move the adjusters for the air
vents vertically or horizontally to set the
direction of the airflow.
i For optimal climate control in the vehicle,
open the air vents completely and set the
adjusters to the central position. Setting the center air vents
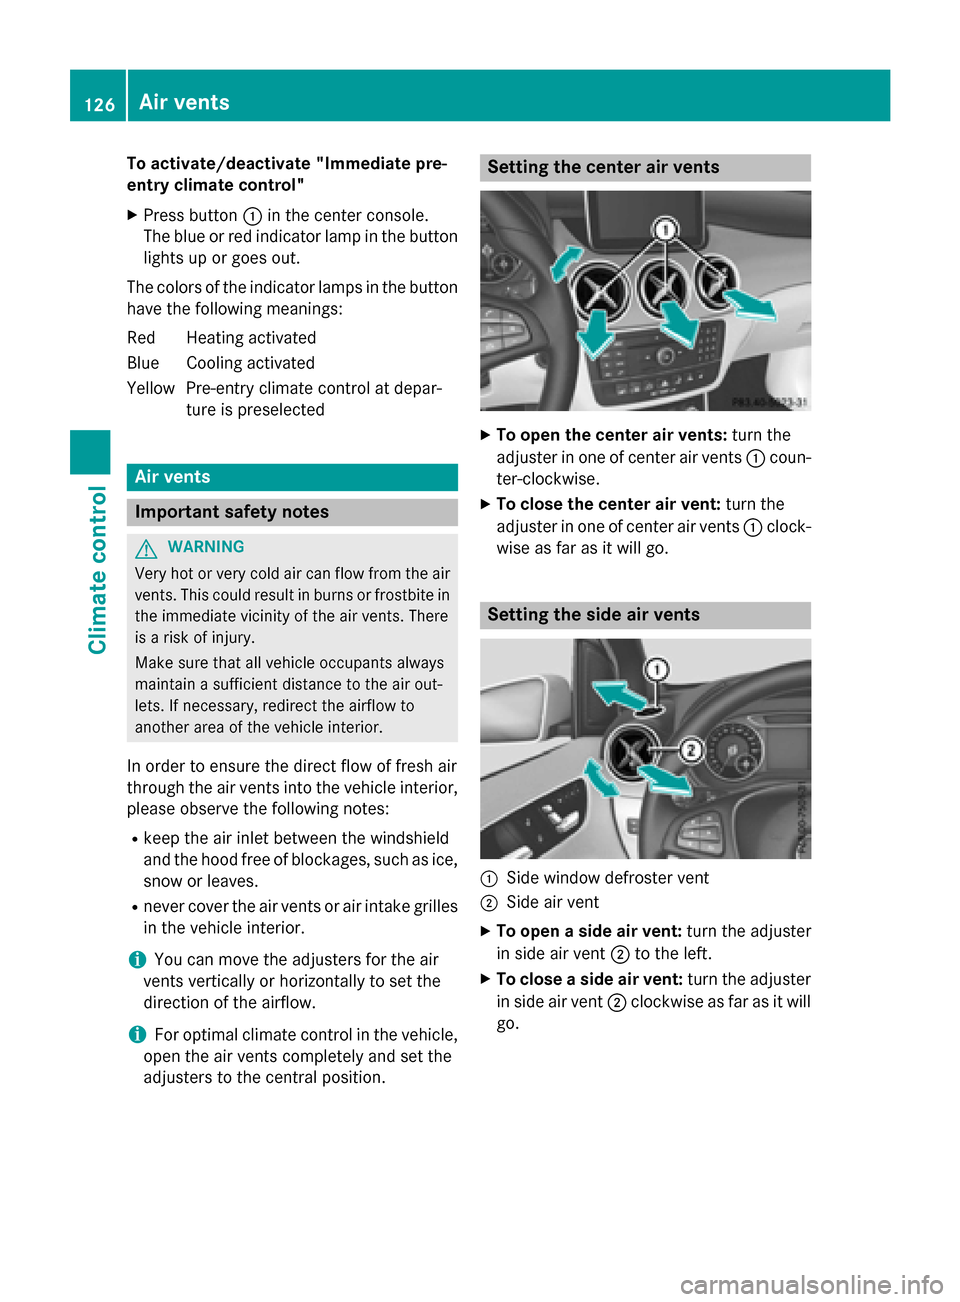
X
To open the center air vents: turn the
adjuster in one of center air vents :coun-
ter-clockwise.
X To close the center air vent: turn the
adjuster in one of center air vents :clock-
wise as far as it will go. Setting the side air vents
:
Side window defroster vent
; Side air vent
X To open a side air vent: turn the adjuster
in side air vent ;to the left.
X To close a side air vent: turn the adjuster
in side air vent ;clockwise as far as it will
go. 126
Air ventsClimate control
Page 184 of 338
Useful information
i This Operator's Manual describes all
models and all standard and optional equip- ment of your vehicle available at the time of
publication of the Operator's Manual.
Country-specific differences are possible.
Please note that your vehicle may not be
equipped with all features described. This
also applies to safety-related systems and
functions.
i Read the information on qualified special-
ist workshops (Y page 25). Important safety notes
G
WARNING
If you operate information systems and com-
munication equipment integrated in the vehi- cle while driving, you will be distracted from
traffic conditions. You could also lose control of the vehicle. There is a risk of an accident.
Only operate the equipment when the traffic
situation permits. If you are not sure that this
is possible, park the vehicle paying attention
to traffic conditions and operate the equip-
ment when the vehicle is stationary.
You must observe the legal requirements for
the country in which you are currently driving when operating the on-board computer. G
WARNING
If the instrument cluster has failed or mal-
functioned, you may not recognize function
restrictions in systems relevant to safety. The operating safety of your vehicle may be
impaired. There is a risk of an accident.
Drive on carefully. Have the vehicle checked
at a qualified specialist workshop immedi-
ately.
The on-board computer only shows messages
or warnings from certain systems in the mul- tifunction display. You should therefore make sure your vehicle is operating safely at all
times.
If the operating safety of your vehicle is
impaired, pull over as soon as it is safe to do
so. Contact a qualified specialist workshop.
For an overview, see the instrument panel
illustration (Y page 31). Displays and operation
Instrument cluster lighting
The light sensor in the instrument cluster
automatically controls the brightness of the
multifunction display. In daylight, the displays
in the instrument cluster are not illuminated.
The lighting in the instrument cluster, in the
displays and the controls in the vehicle inte-
rior can be adjusted using the brightness con- trol knob.
The brightness control knob is located on the
bottom left of the instrument cluster
(Y page 31).
X Turn the brightness control knob clockwise
or counter-clockwise.
If the light switch is set to Ã,Tor
L, the brightness is dependent upon
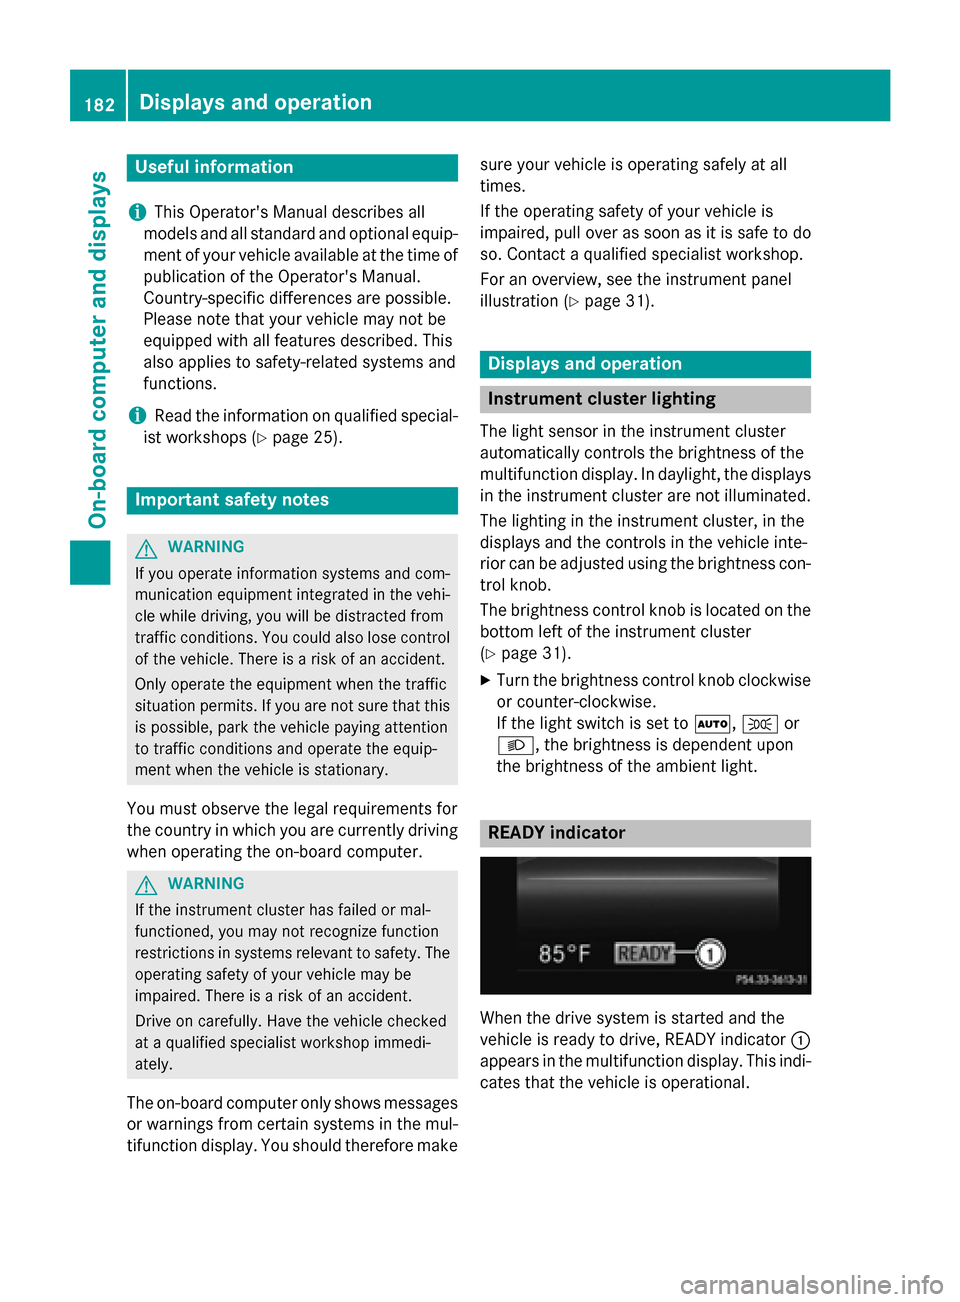
the brightness of the ambient light. READY indicator
When the drive system is started and the
vehicle is ready to drive, READY indicator
:
appears in the multifunction display. This indi- cates that the vehicle is operational. 182
Displays and operationOn-board computer and displays