wheel MERCEDES-BENZ B-Class ELECTRIC 2016 W246 Owner's Guide
[x] Cancel search | Manufacturer: MERCEDES-BENZ, Model Year: 2016, Model line: B-Class ELECTRIC, Model: MERCEDES-BENZ B-Class ELECTRIC 2016 W246Pages: 342, PDF Size: 7.53 MB
Page 95 of 342
The system automatically switches down
from level2to level 1after approximately ten
minutes.
The system automatically switches off
approximately 20 minutes after it is set to
level 1.
XTurn the SmartKey to position 1or 2in the
ignition lock (
Ypage 131).
XTo switch on: press button:repeatedly
until the desired heating level is set.
XTo switch off: press button:repeatedly
until all the indicator lamps go out.
iIf the battery voltage is too low, the seat
heating may switch off.
Seats93
Seats, steering wheel and mirrors
Z
Page 96 of 342
Problems with the seat heating
ProblemPossible causes/consequences andMSolutions
The seat heating has
switched off prema-
turely or cannot be
switched on.The on-board voltage is too low because too many electrical con-
sumers are switched on.
XSwitch off electrical consumers that you do not need, such as
the rear window defroster or interior lighting.
Once the battery is sufficiently charged, the seat heating will
switch back on automatically.
Steering wheel
Important safety notes
GWARNING
You could lose control of your vehicle if you do the following while driving:
Radjust the driver's seat, head restraint,
steering wheel or mirrors
Rfasten the seat belt
There is a risk of an accident.
Adjust the driver's seat, head restraint, steer-
ing wheel and mirror and fasten your seat belt before starting the vehicle's drive system.
GWARNING
Children could injure themselves if they
adjust the steering wheel. There is a risk of
injury.
When leaving the vehicle, always take the
SmartKey with you and lock the vehicle. Never
leave children unsupervised in the vehicle.
Adjusting the steering wheel
GWARNING
If the steering wheel is unlocked while the
vehicle is in motion, it could change position
unexpectedly. This could cause you to lose
control of the vehicle. There is a risk of an
accident.
Before starting off, make sure the steering
wheel is locked. Never unlock the steering
wheel while the vehicle is in motion.
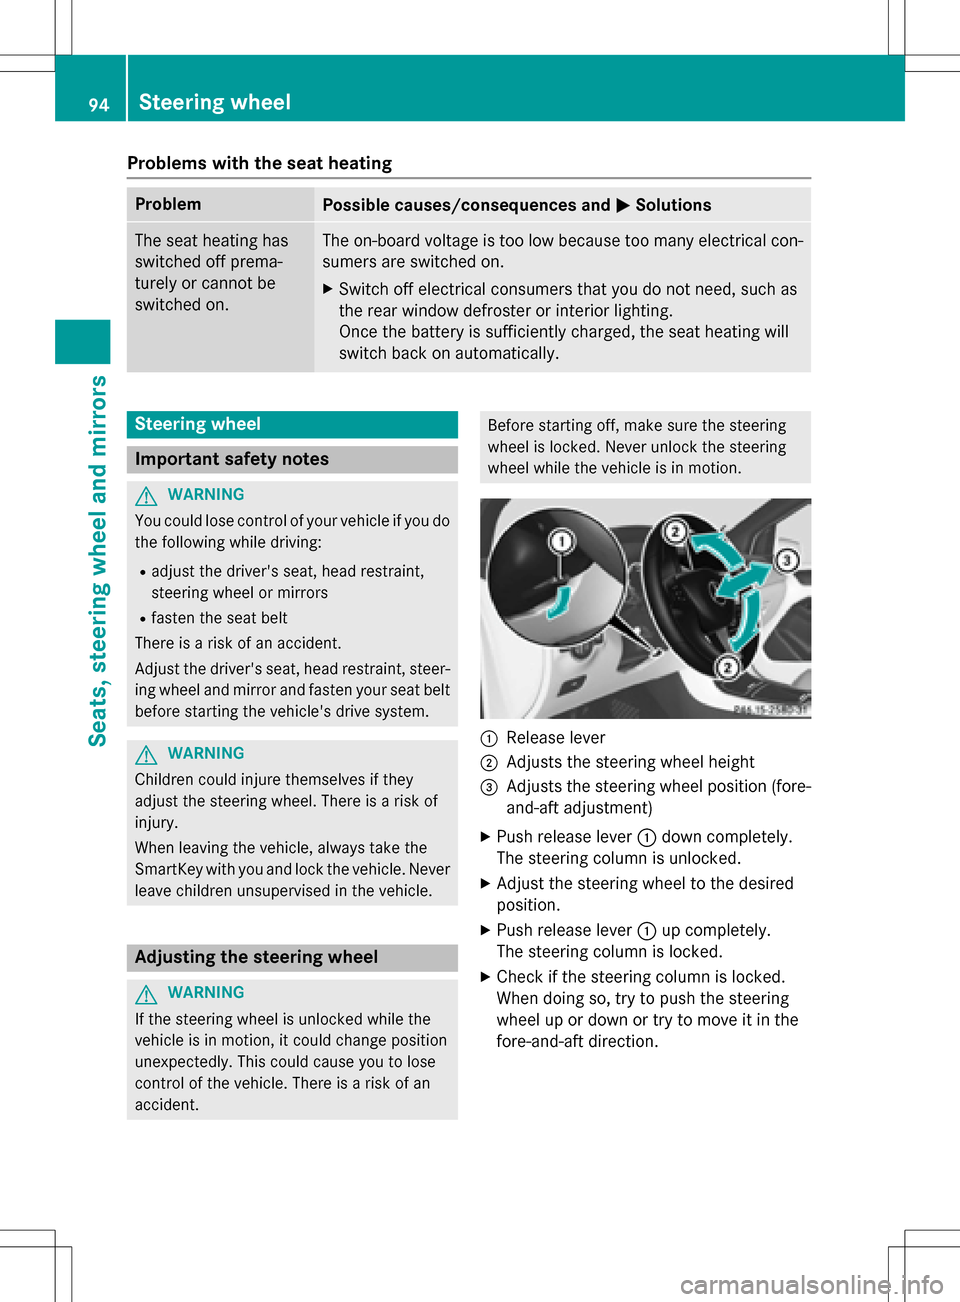
:Release lever
;Adjusts the steering wheel height
=Adjusts the steering wheel position (fore-
and-aft adjustment)
XPush release lever :down completely.
The steering column is unlocked.
XAdjust the steering wheel to the desired
position.
XPush release lever :up completely.
The steering column is locked.
XCheck if the steering column is locked.
When doing so, try to push the steering
wheel up or down or try to move it in the
fore-and-aft direction.
94Steering wheel
Seats, steering wheel and mirrors
Page 97 of 342
Mirrors
Rear-view mirror
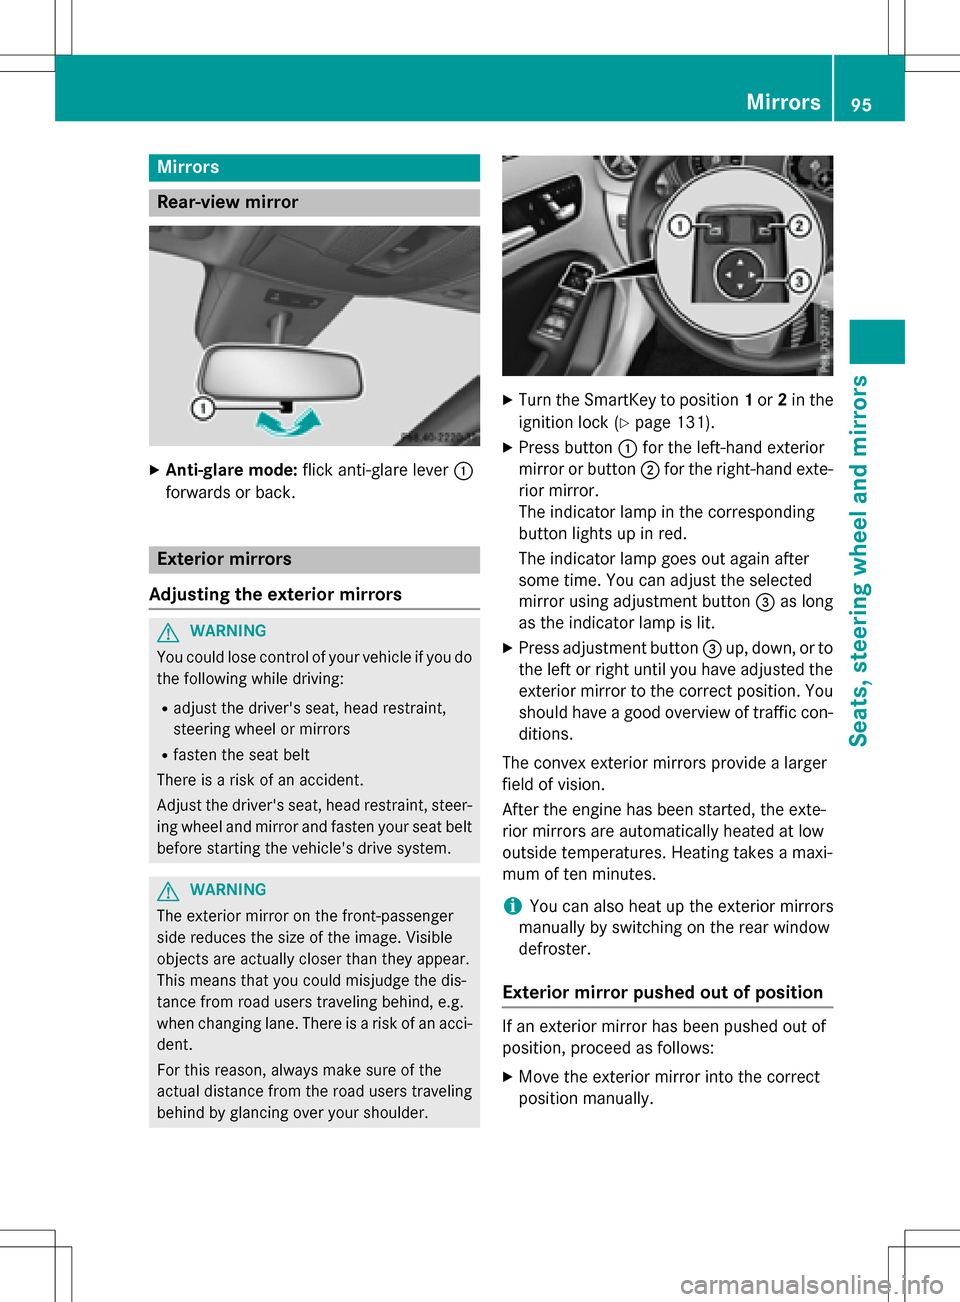
XAnti-glare mode:flick anti-glare lever :
forwards or back.
Exterior mirrors
Adjusting the exterior mirrors
GWARNING
You could lose control of your vehicle if you do the following while driving:
Radjust the driver's seat, head restraint,
steering wheel or mirrors
Rfasten the seat belt
There is a risk of an accident.
Adjust the driver's seat, head restraint, steer-
ing wheel and mirror and fasten your seat belt before starting the vehicle's drive system.
GWARNING
The exterior mirror on the front-passenger
side reduces the size of the image. Visible
objects are actually closer than they appear.
This means that you could misjudge the dis-
tance from road users traveling behind, e.g.
when changing lane. There is a risk of an acci-
dent.
For this reason, always make sure of the
actual distance from the road users traveling
behind by glancing over your shoulder.
XTurn the SmartKey to position 1or 2in the
ignition lock (
Ypage 131).
XPress button :for the left-hand exterior
mirror or button ;for the right-hand exte-
rior mirror.
The indicator lamp in the corresponding
button lights up in red.
The indicator lamp goes out again after
some time. You can adjust the selected
mirror using adjustment button =as long
as the indicator lamp is lit.
XPress adjustment button =up, down, or to
the left or right until you have adjusted the
exterior mirror to the correct position. You
should have a good overview of traffic con-
ditions.
The convex exterior mirrors provide a larger
field of vision.
After the engine has been started, the exte-
rior mirrors are automatically heated at low
outside temperatures. Heating takes a maxi-
mum of ten minutes.
iYou can also heat up the exterior mirrors
manually by switching on the rear window
defroster.
Exterior mirror pushed out of position
If an exterior mirror has been pushed out of
position, proceed as follows:
XMove the exterior mirror into the correct
position manually.
Mirrors95
Seats, steering wheel and mirrors
Z
Page 98 of 342
Automatic anti-glare mirrors
GWARNING
Electrolyte may escape if the glass in an auto-
matic anti-glare mirror breaks. The electrolyte
is harmful and causes irritation. It mustno t
come int o contact with your skin, eyes, res-
piratory organs or clothing or be swallowed.
There is a risk of injury.
If you come into contact with the electrolyte,
observe the following:
RRinse off the electrolyte from your skin
immediately with water.
RImmediately rinse the electrolyte out of
your eyes thoroughly with clean water.
RIf th e electrolyte is swallowed, immediately
rinse your mouth out thoroughly. Do not
induce vomiting.
RIf electrolyte comes into contact with your
skin or hair or is swallowed, seek medical
attention immediately.
RImmediately change out of clothing which
has come into contact with electrolyte.
RIf an allergic reaction occurs, seek medical
attention immediately.
The "Automatic anti-glare mirrors" function is
only available if the vehicle is equipped with
th e "Mirrors package".
The rear-view mirror and the exterior mirror
on the driver's side automatically go into anti-
glare mode if:
Rth e ignition is switched on and
Rincident light from headlamps strikes the
sensor in the rear-view mirror
The mirrors do not go into anti-glare mode if
reverse gear is engaged or the interior lighting
is switched on.
Park ing position for the exterior mir-
ror on the front-passenger side
Gene ral notes
The "Parking position of the exterior mirror on
the front-passenger side" function is only
available if the vehicle is equipped with the
"Mirrors package".
Setting and stori ng the parking position
You can position the front-passenger side
exterior mirror in such a way that you can see
the rear wheel on that side as soon as you
engage reverse gear. You can store this posi-
tion .
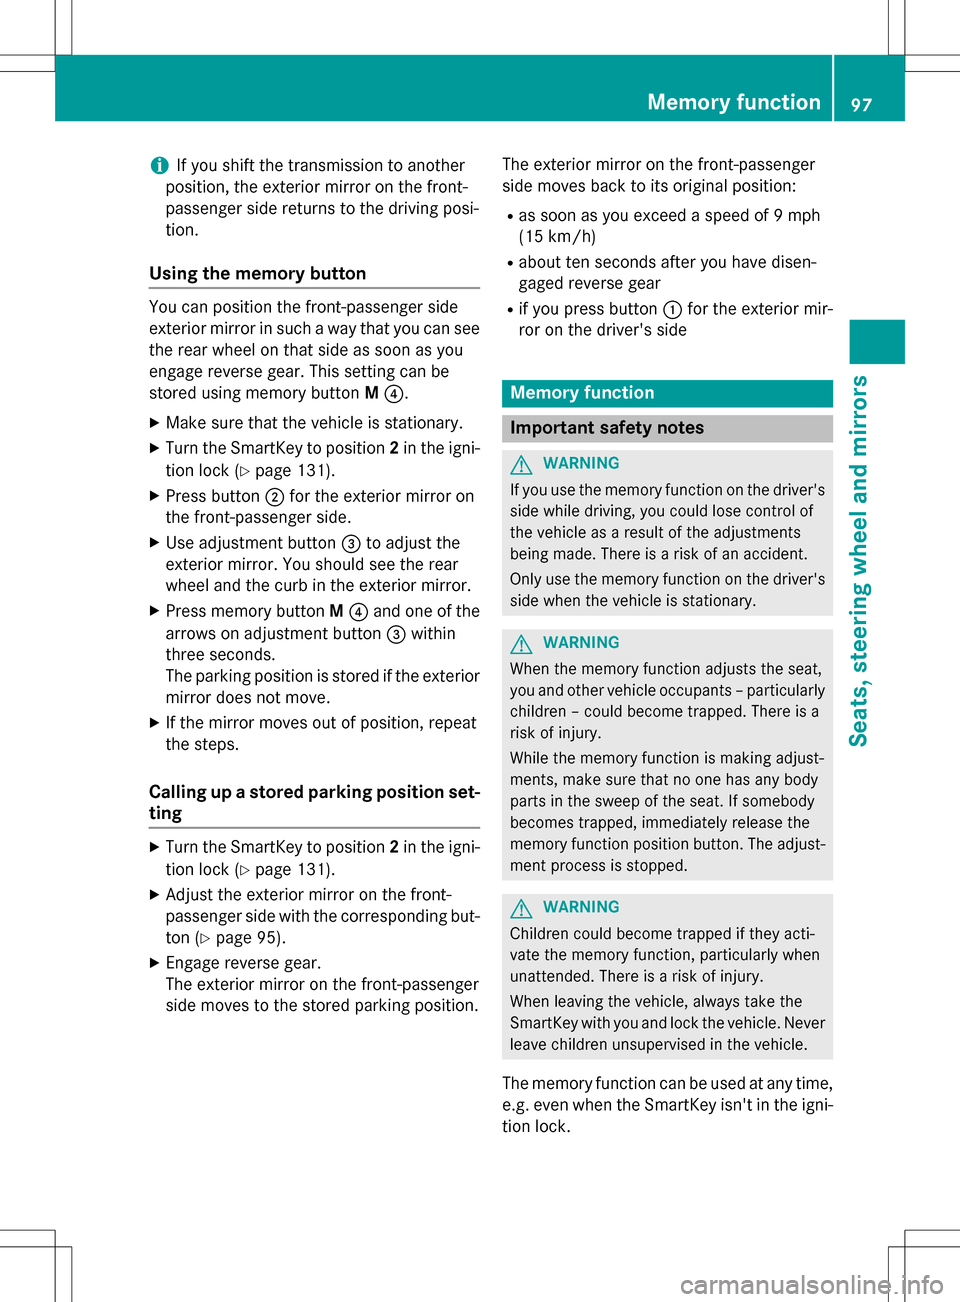
Using reverse gear
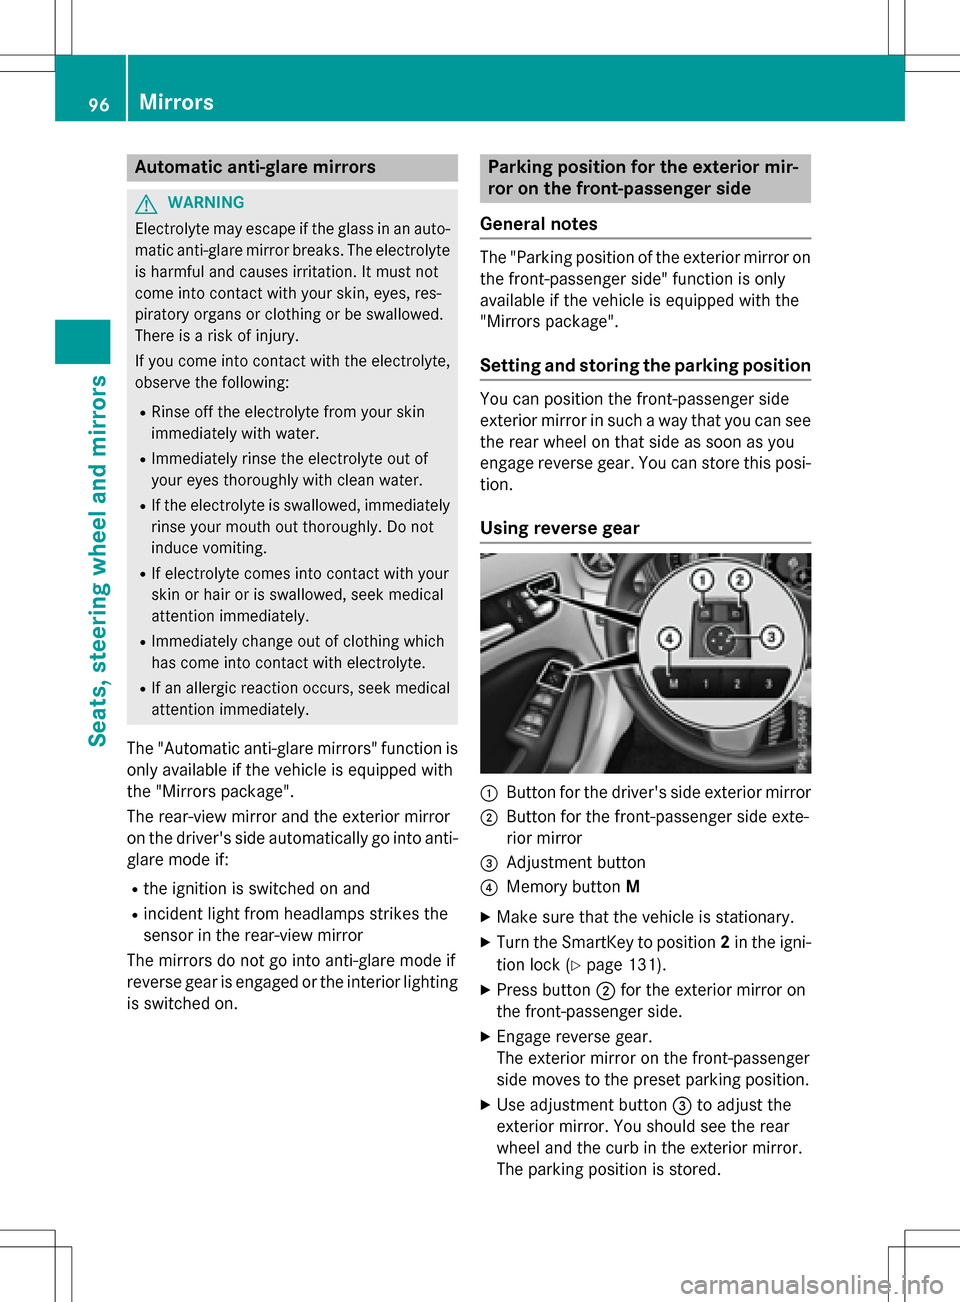
:Butto nfor th e driver's side exterior mirror
;Butto nfor th e front-passenger side exte-
rior mirror
=Adjustment button
?Memory button M
XMake surethat the vehicle is stationary.
XTurn the SmartKey to position 2in the igni-
tion lock(
Ypage 131).
XPress button ;for th e exterior mirror on
th e front-passenger side.
XEngage reverse gear.
The exterior mirror on the front-passenger
side moves to the preset parking position.
XUse adjustment button =to adjust the
exterior mirror. You should see the rear
wheel and the curb in the exterior mirror.
The parking position is stored.
96Mirrors
Seats, steering wheel and mirrors
Page 99 of 342
iIf you shift the transmission to another
position, the exterior mirror on the front-
passenger side returns to the driving posi-
tion.
Using the memory button
You can position the front-passenger side
exterior mirror in such a way that you can see
the rear wheel on that side as soon as you
engage reverse gear. This setting can be
stored using memory button M?.
XMake sure that the vehicle is stationary.
XTurn the SmartKey to position 2in the igni-
tion lock (
Ypage 131).
XPress button ;for the exterior mirror on
the front-passenger side.
XUse adjustment button =to adjust the
exterior mirror. You should see the rear
wheel and the curb in the exterior mirror.
XPress memory button M? and one of the
arrows on adjustment button =within
three seconds.
The parking position is stored if the exterior
mirror does not move.
XIf the mirror moves out of position, repeat
the steps.
Calling up a stored parking position set-
ting
XTurn the SmartKey to position 2in the igni-
tion lock (
Ypage 131).
XAdjust the exterior mirror on the front-
passenger side with the corresponding but-
ton (
Ypage 95).
XEngage reverse gear.
The exterior mirror on the front-passenger
side moves to the stored parking position. The exterior mirror on the front-passenger
side moves back to its original position:
Ras soon as you exceed a speed of 9 mph
(15 km/h)
Rabout ten seconds after you have disen-
gaged reverse gear
Rif you press button
:for the exterior mir-
ror on the driver's side
Memory function
Important safety notes
GWARNING
If you use the memory function on the driver's side while driving, you could lose control of
the vehicle as a result of the adjustments
being made. There is a risk of an accident.
Only use the memory function on the driver's
side when the vehicle is stationary.
GWARNING
When the memory function adjusts the seat,
you and other vehicle occupants – particularly
children – could become trapped. There is a
risk of injury.
While the memory function is making adjust-
ments, make sure that no one has any body
parts in the sweep of the seat. If somebody
becomes trapped, immediately release the
memory function position button. The adjust-
ment process is stopped.
GWARNING
Children could become trapped if they acti-
vate the memory function, particularly when
unattended. There is a risk of injury.
When leaving the vehicle, always take the
SmartKey with you and lock the vehicle. Never
leave children unsupervised in the vehicle.
The memory function can be used at any time,
e.g. even when the SmartKey isn't in the igni-
tion lock.
Memory function97
Seats, steering wheel and mirrors
Z
Page 100 of 342
Storing settings
With the memory function, you can store up
to three different settings, e.g. for three dif-
ferent people.
The following settings are stored as a single
memory preset:
Rseat and backrest position
Rdriver's side: position of the exterior mir-
rors on the driver's and front-passenger
sides
XAdjust the seat (Ypage 91).
XAdjust the exterior mirror on the driver's
side (
Ypage 95).
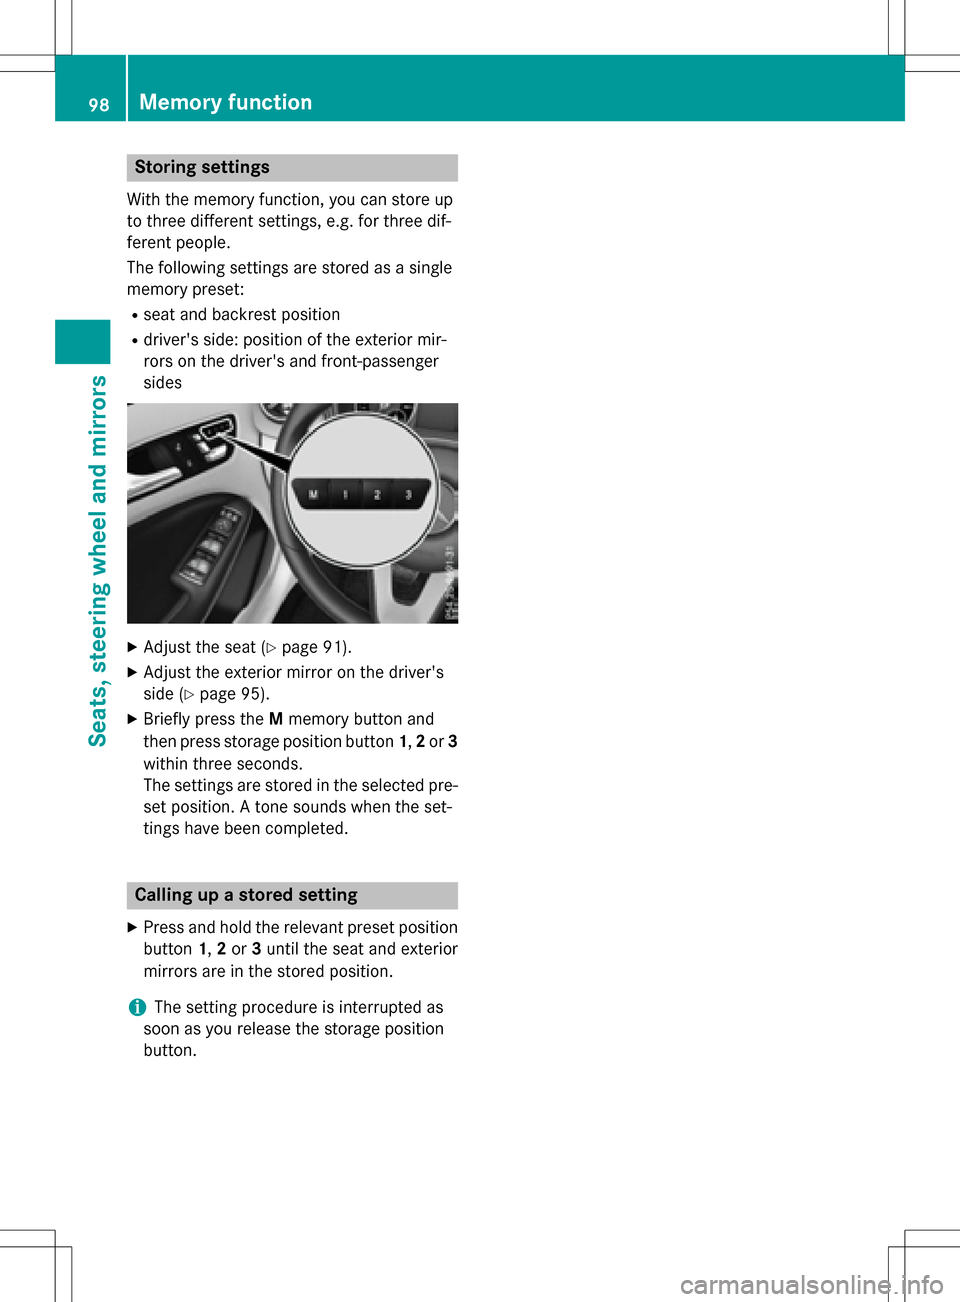
XBriefly press theMmemory button and
then press storage position button 1,2or 3
within three seconds.
The settings are stored in the selected pre-
set position. A tone sounds when the set-
tings have been completed.
Calling up a stored setting
XPress and hold the relevant preset position
button 1,2or 3until the seat and exterior
mirrors are in the stored position.
iThe setting procedure is interrupted as
soon as you release the storage position
button.
98Memory function
Seats, steering wheel and mirrors
Page 105 of 342
Cornering light function
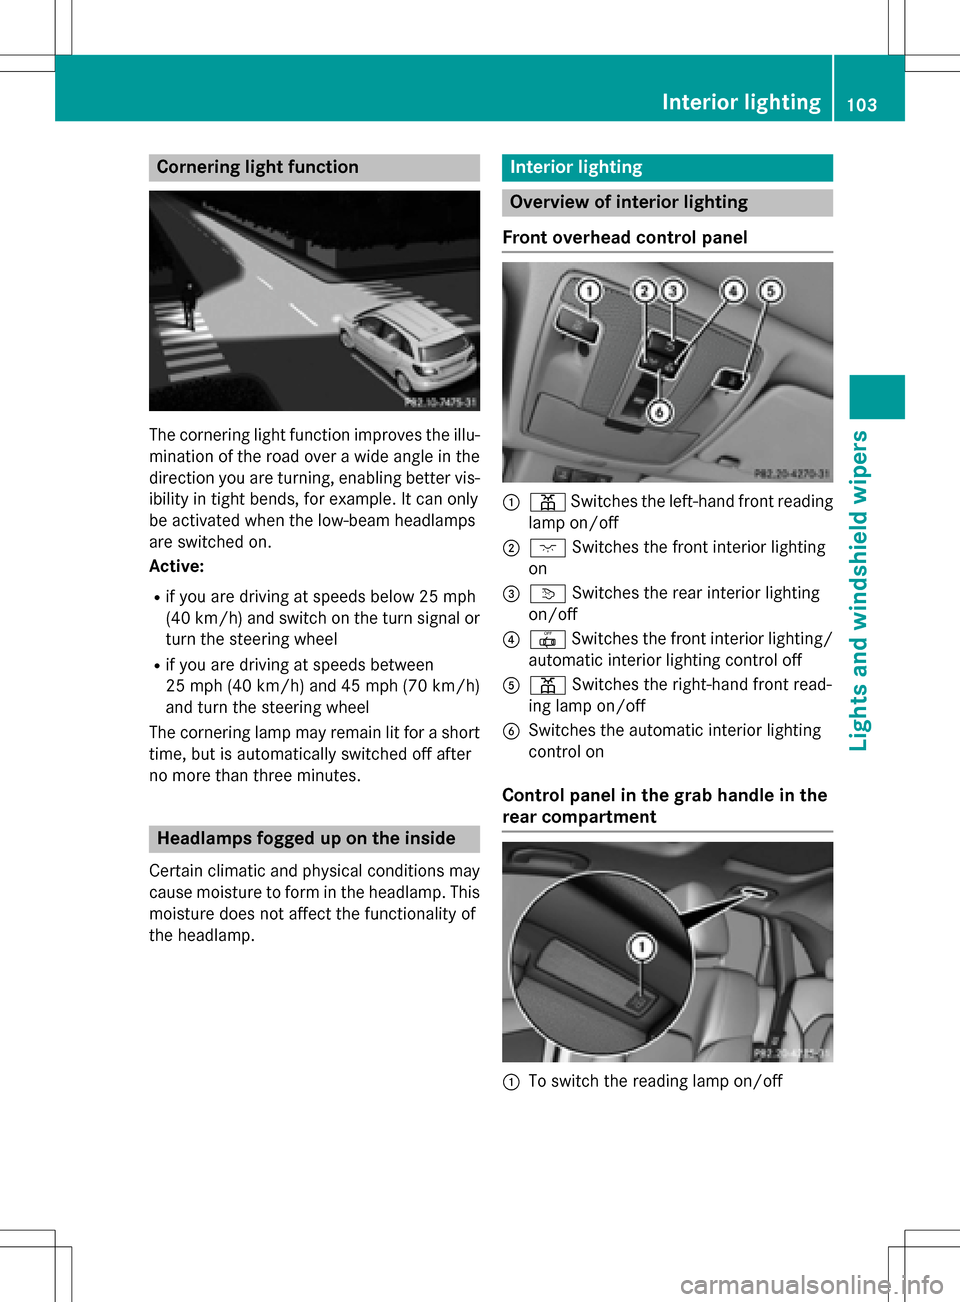
The cornering light function improves the illu-
mination of the road over a wide angle in the
direction you are turning, enabling better vis-
ibility in tight bends, for example. It can only
be activated when the low-beam headlamps
are switched on.
Active:
Rif you are driving at speeds below 25 mph
(40 km/h) and switch on the turn signal or
turn the steering wheel
Rif you are driving at speeds between
25 mph(40 km/ h)and 45 mph (70 km/h)
and turn the steering wheel
The cornering lamp may remain lit for a short
time, but is automatically switched off after
no more than three minutes.
Headlamps fogged up on the inside
Certain climatic and physical conditions may
cause moisture to form in the headlamp. This
moisture does not affect the functionality of
the headlamp.
Interior lighting
Overview of interior lighting
Front overhead control panel
:p Switches the left-hand front reading
lamp on/off
;c Switches the front interior lighting
on
=v Switches the rear interior lighting
on/off
?| Switches the front interior lighting/
automatic interior lighting control off
Ap Switches the right-hand front read-
ing lamp on/off
BSwitches the automatic interior lighting
control on
Control panel in the grab handle in the
rear compartment
:To switch the reading lamp on/off
Interior lighting103
Lights and windshield wipers
Z
Page 108 of 342
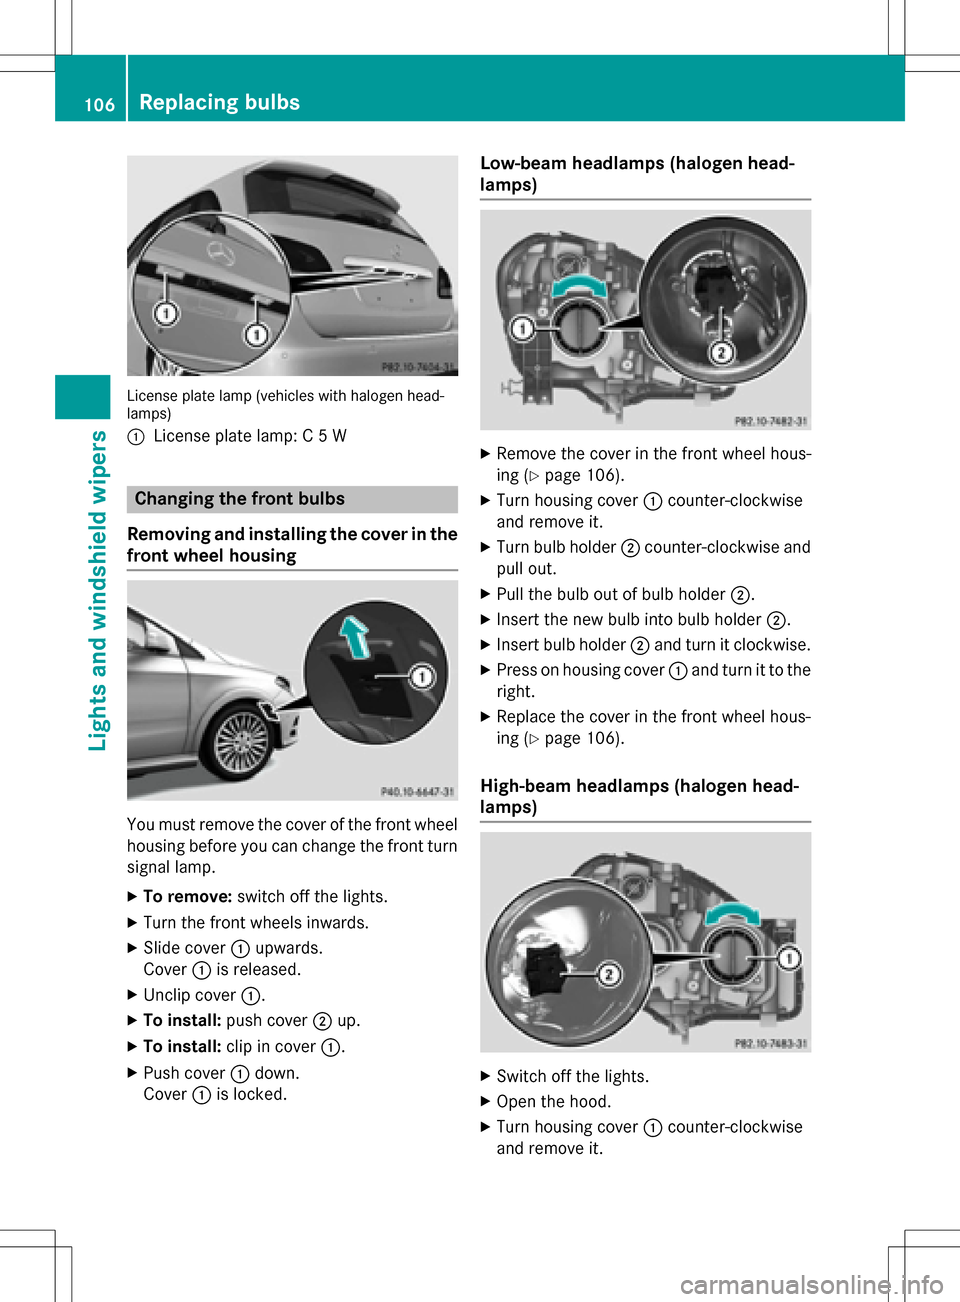
License plate lamp (vehicles with halogen head-
lamps)
:
License plate lamp: C 5 W
Changing the front bulbs
Removing and installing the cover in the
front wheel housing
You must remove the cover of the front wheel
housing before you can change the front turn signal lamp.
XTo remove: switch off the lights.
XTurn the front wheels inwards.
XSlide cover:upwards.
Cover :is released.
XUnclip cover :.
XTo install:push cover ;up.
XTo install: clip in cover :.
XPush cover:down.
Cover :is locked.
Low-beam headlamps (halogen head-
lamps)
XRemove the cover in the front wheel hous-
ing (
Ypage 106).
XTurn housing cover :counter-clockwise
and remove it.
XTurn bulb holder ;counter-clockwise and
pull out.
XPull the bulb out of bulb holder ;.
XInsert the new bulb into bulb holder ;.
XInsert bulb holder;and turn it clockwise.
XPress on housing cover :and turn it to the
right.
XReplace the cover in the front wheel hous-
ing (
Ypage 106).
High-beam headlamps (halogen head-
lamps)
XSwitch off the lights.
XOpen the hood.
XTurn housing cover :counter-clockwise
and remove it.
106Replacing bulbs
Lights and windshield wipers
Page 122 of 342
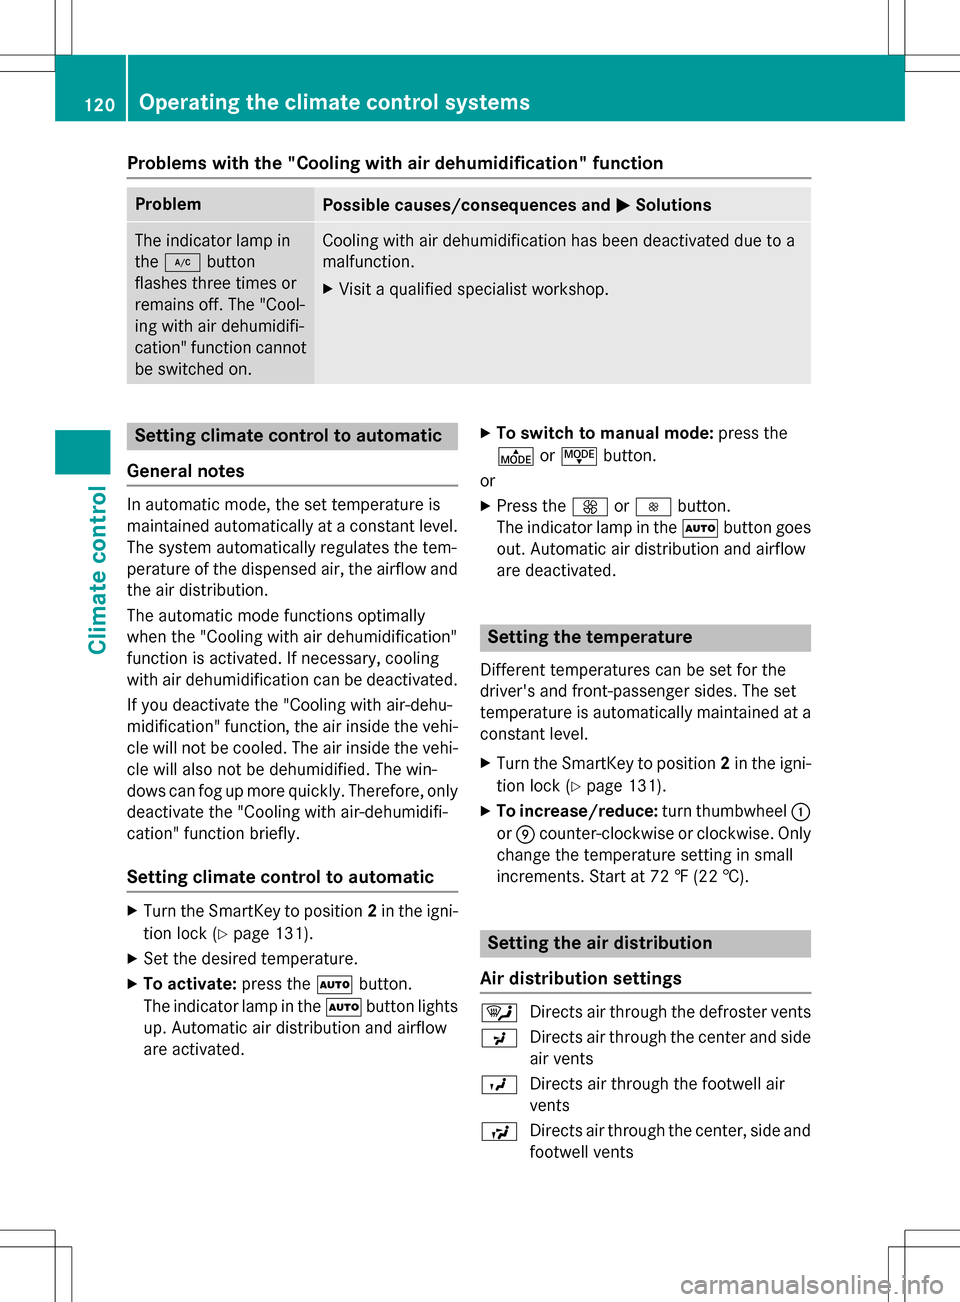
Problems with the "Cooling with air dehumidification" function
ProblemPossible causes/consequences andMSolutions
The indicator lamp in
the¿ button
flashes three times or
remains off. The "Cool-
ing with air dehumidifi-
cation" function cannot
be switched on.Cooling with air dehumidification has been deactivated due to a
malfunction.
XVisit a qualified specialist workshop.
Setting climate control to automatic
General notes
In automatic mode, the set temperature is
maintained automatically at a constant level.
The system automatically regulates the tem-
perature of the dispensed air, the airflow and
the air distribution.
The automatic mode functions optimally
when the "Cooling with air dehumidification"
function is activated. If necessary, cooling
with air dehumidification can be deactivated.
If you deactivate the "Cooling with air-dehu-
midification" function, the air inside the vehi-
cle will not be cooled. The air inside the vehi-
cle will also not be dehumidified. The win-
dows can fog up more quickly. Therefore, only
deactivate the "Cooling with air-dehumidifi-
cation" function briefly.
Setting climate control to automatic
XTurn the SmartKey to position 2in the igni-
tion lock (
Ypage 131).
XSet the desired temperature.
XTo activate: press theÃbutton.
The indicator lamp in the Ãbutton lights
up. Automatic air distribution and airflow
are activated.
XTo switch to manual mode: press the
É orË button.
or
XPress the KorI button.
The indicator lamp in the Ãbutton goes
out. Automatic air distribution and airflow
are deactivated.
Setting the temperature
Different temperatures can be set for the
driver's and front-passenger sides. The set
temperature is automatically maintained at a
constant level.
XTurn the SmartKey to position 2in the igni-
tion lock (
Ypage 131).
XTo increase/reduce: turn thumbwheel:
or E counter-clockwise or clockwise. Only
change the temperature setting in small
increments. Start at 72 ‡ (22 †).
Setting the air distribution
Air distribution settings
¯ Directs air through the defroster vents
P Directs air through the center and side
air vents
O Directs air through the footwell air
vents
S Directs air through the center, side and
footwell vents
120Operating the climate control systems
Climate control
Page 129 of 342
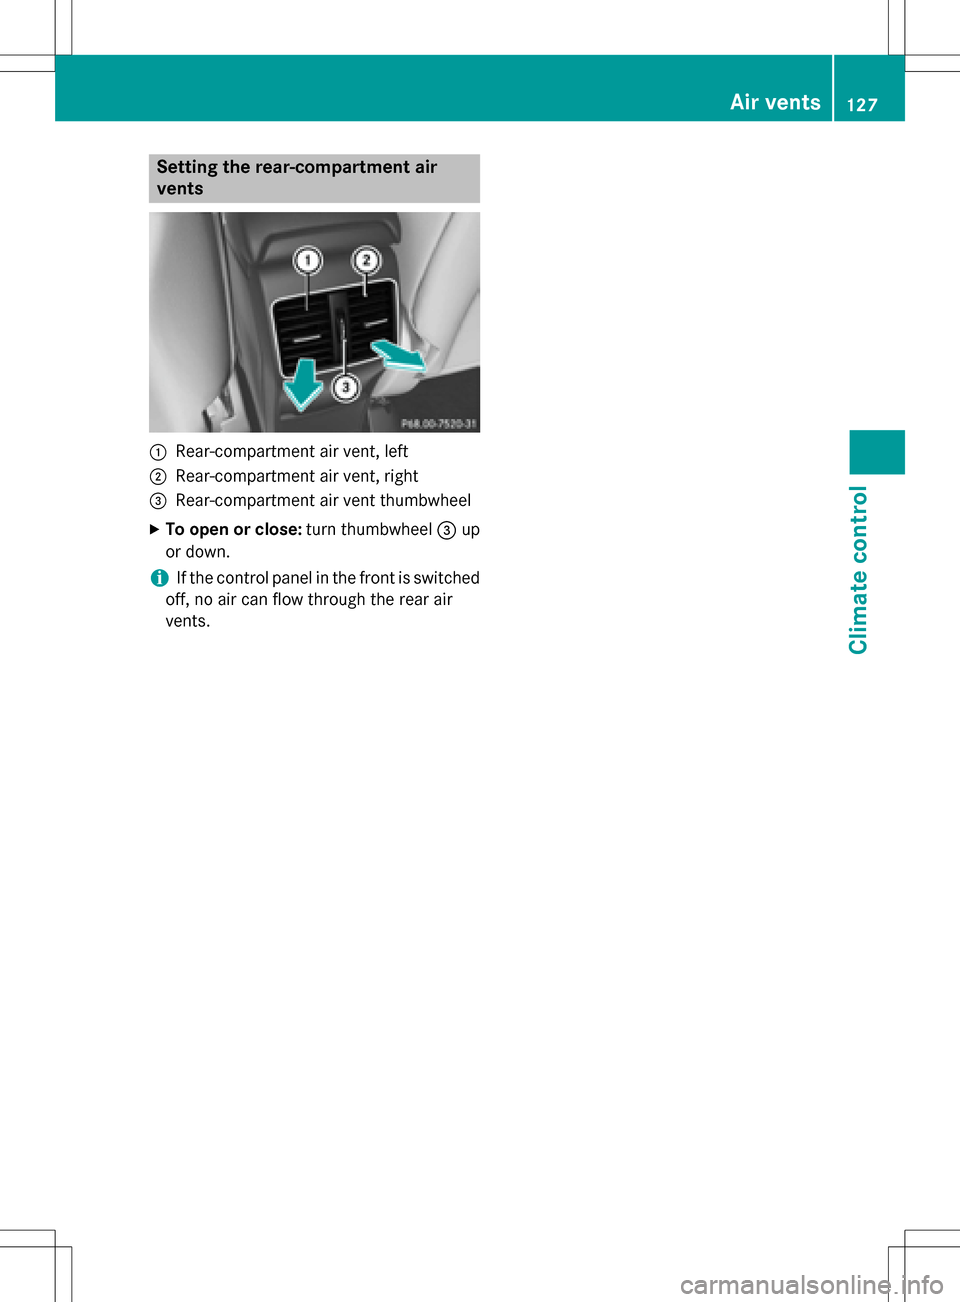
Setting the rear-compartment air
vents
:Rear-compartment air vent, left
;Rear-compartment air vent, right
=Rear-compartment air vent thumbwheel
XTo open or close:turn thumbwheel=up
or down.
iIf the control panel in the front is switched
off, no air can flow through the rear air
vents.
Air vents127
Climate control
Z