ignition MERCEDES-BENZ B-CLASS HATCHBACK 2011 Repair Manual
[x] Cancel search | Manufacturer: MERCEDES-BENZ, Model Year: 2011, Model line: B-CLASS HATCHBACK, Model: MERCEDES-BENZ B-CLASS HATCHBACK 2011Pages: 329, PDF Size: 7.91 MB
Page 206 of 329
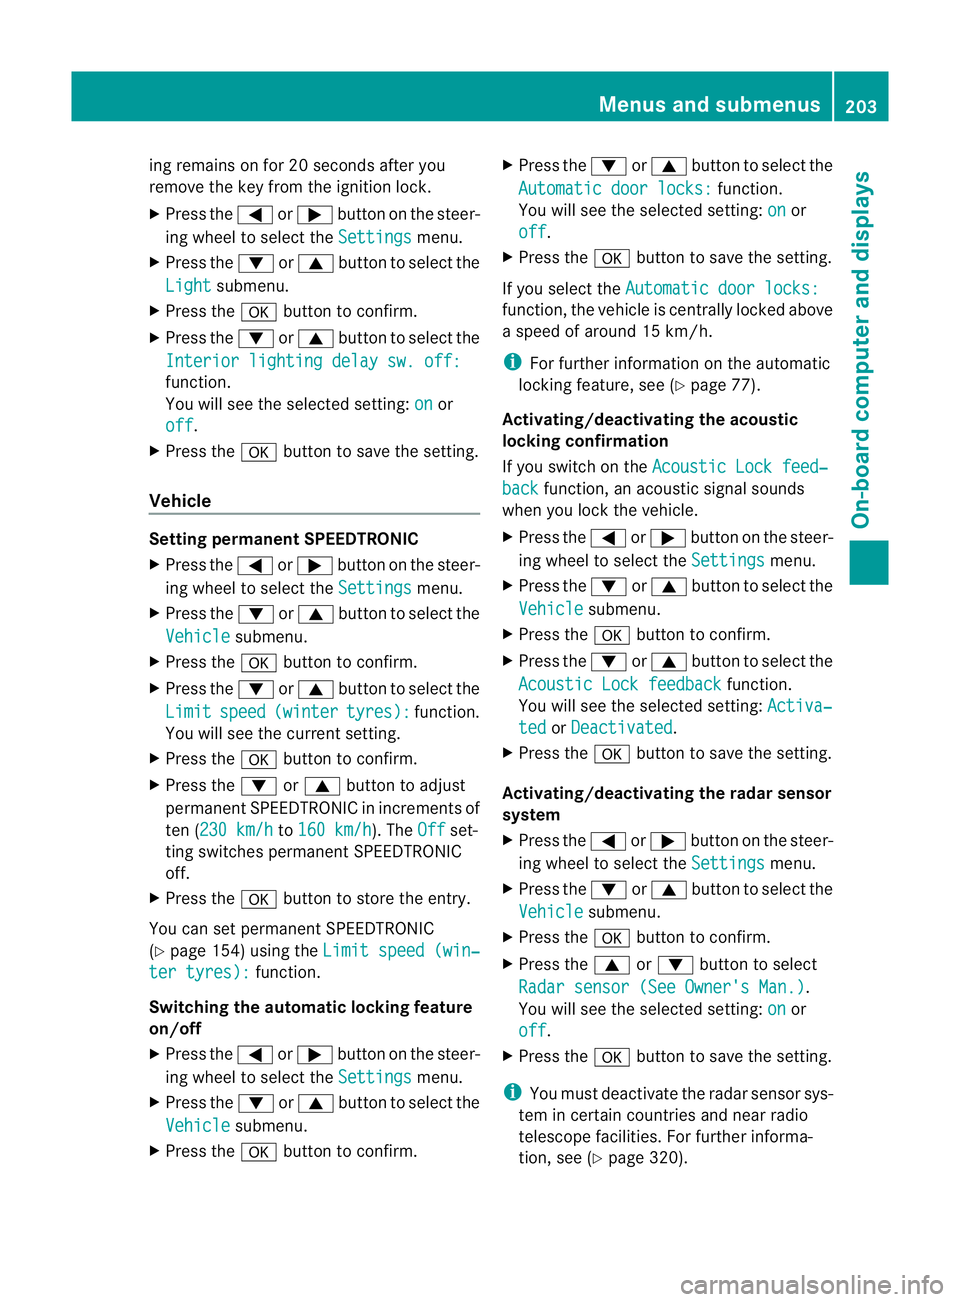
ing remains on for 20 seconds after you
remove the key from the ignition lock.
X Press the =or; button on the steer-
ing wheel to selec tthe Settings menu.
X Press the :or9 button to select the
Light submenu.
X Press the abutton to confirm.
X Press the :or9 button to select the
Interior lighting delay sw. off: function.
You will see the selected setting:
on or
off .
X Press the abutton to save the setting.
Vehicle Setting permanent SPEEDTRONIC
X Press the =or; button on the steer-
ing wheel to select the Settings menu.
X Press the :or9 button to select the
Vehicle submenu.
X Press the abutton to confirm.
X Press the :or9 button to select the
Limit speed (winter tyres): function.
You will see the current setting.
X Press the abutton to confirm.
X Press the :or9 button to adjust
permanent SPEEDTRONIC in increments of
ten (230 km/h to
160 km/h ). The
Off set-
ting switches permanent SPEEDTRONIC
off.
X Press the abutton to store the entry.
You can set permanent SPEEDTRONIC
(Y page 154) using the Limit speed (win‐ter tyres): function.
Switching the automatic locking feature
on/off
X Press the =or; button on the steer-
ing wheel to select the Settings menu.
X Press the :or9 button to select the
Vehicle submenu.
X Press the abutton to confirm. X
Press the :or9 button to select the
Automatic door locks: function.
You will see the selected setting: on or
off .
X Press the abutton to save the setting.
If you select the Automatic door locks: function, the vehicle is centrally locked above
a speed of around 15 km/h.
i
For further information on the automatic
locking feature, see (Y page 77).
Activating/deactivating the acoustic
locking confirmation
If you switch on the Acoustic Lock feed‐ back function, an acoustic signal sounds
when you lock the vehicle.
X Press the =or; button on the steer-
ing wheel to select the Settings menu.
X Press the :or9 button to select the
Vehicle submenu.
X Press the abutton to confirm.
X Press the :or9 button to select the
Acoustic Lock feedback function.
You will see the selected setting: Activa‐ ted or
Deactivated .
X Press the abutton to save the setting.
Activating/deactivating the radar sensor
system
X Press the =or; button on the steer-
ing wheel to select the Settings menu.
X Press the :or9 button to select the
Vehicle submenu.
X Press the abutton to confirm.
X Press the 9or: button to select
Radar sensor (See Owner's Man.) .
You will see the selected setting: on or
off .
X Press the abutton to save the setting.
i You must deactivate the radar sensor sys-
tem in certain countries and near radio
telescope facilities. For further informa-
tion, see (Y page 320). Menus and submenus
203On-board computer and displays Z
Page 207 of 329
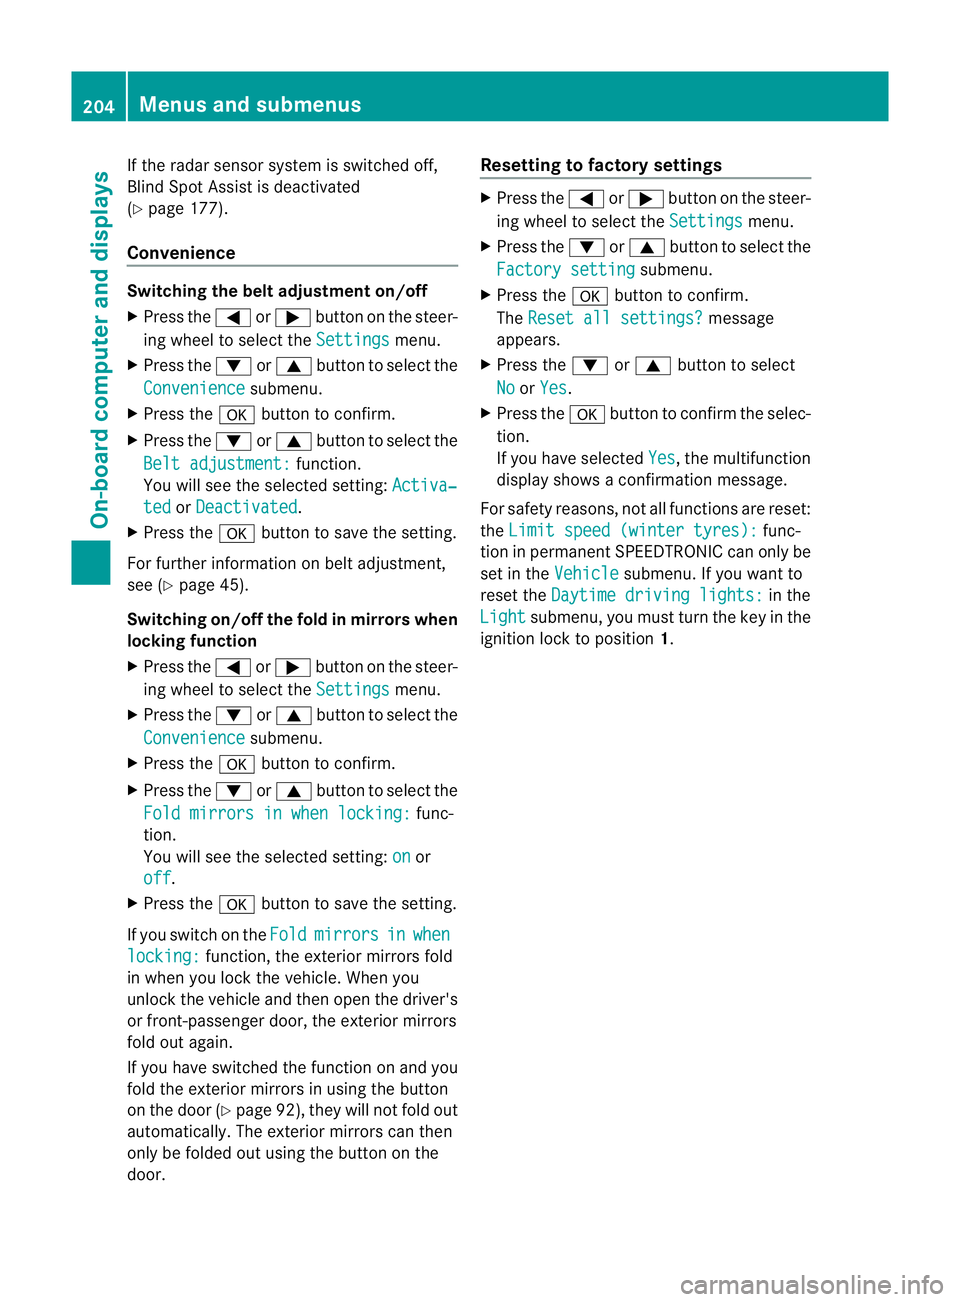
If the radars
ensor system is switched off,
Blind Spot Assist is deactivated
(Y page 177).
Convenience Switching the belt adjustment on/off
X
Press the =or; button on the steer-
ing wheel to select the Settings menu.
X Press the :or9 button to select the
Convenience submenu.
X Press the abutton to confirm.
X Press the :or9 button to select the
Belt adjustment: function.
You will see the selected setting: Activa‐ted or
Deactivated .
X Press the abutton to save the setting.
For further information on belt adjustment,
see (Y page 45).
Switching on/off the fold in mirrors when
locking function
X Press the =or; button on the steer-
ing wheel to select the Settings menu.
X Press the :or9 button to select the
Convenience submenu.
X Press the abutton to confirm.
X Press the :or9 button to select the
Fold mirrors in when locking: func-
tion.
You will see the selected setting: on or
off .
X Press the abutton to save the setting.
If you switch on the Fold mirrors in when
locking: function, the exterior mirrors fold
in when you lock the vehicle. When you
unlock the vehicle and then open the driver's
or front-passenger door, the exterior mirrors
fold out again.
If you have switched the function on and you
fold the exterior mirror sinusing the button
on the door (Y page 92), they will not fold out
automatically. The exterior mirrors can then
only be folded out using the button on the
door. Resetting to factory settings X
Press the =or; button on the steer-
ing wheel to select the Settings menu.
X Press the :or9 button to select the
Factory setting submenu.
X Press the abutton to confirm.
The Reset all settings? message
appears.
X Press the :or9 button to select
No or
Yes .
X Press the abutton to confirm the selec-
tion.
If you have selected Yes , the multifunction
display shows a confirmation message.
For safety reasons, not all functions are reset:
the Limit speed (winter tyres): func-
tion in permanent SPEEDTRONIC can only be
set in the Vehicle submenu. If you want to
reset the Daytime driving lights: in the
Light submenu, you must turn the key in the
ignition lock to position 1.204
Menus and submenusOn-board computer and displays
Page 208 of 329
Display messages
General notes
Display messages appear in th emultifunction display.
Display messages with graphic symbols are simplified in th eOwner's Manual and may differ
fro mt he symbols in the multifunction display.
Please respond in accordance with the display messages and follow the additional notes in
this Owner's Manual.
Certain display messages are accompanied by an audible warning tone or a continuous tone.
When you stop and park the vehicle, please observe the notes on the HOLD function
(Y page 162) and parking (Y page 144).Hiding display messages
You can hide a number of the low-priority display messages.
X Press the aor% button on the steering wheel to hide the display message.
The display message is cleared.
High-priority display messages are red.
You cannot hide display messages of the highest priority. The multifunction display shows
these messages continuously until the causes for the messages have been remedied. Message memory
The on-board computer saves certain display messages. You can call up the display messages
in the message memory.
X Press =or; on the steering wheel to select the Serv. menu.
If there are display messages, the multifunction displays hows2 messages , for example.
X Press the 9or: button to select the entry, e.g. 2 messages .
X Confirm with a.
X Press the 9or: button to scroll through the display messages.
When the ignition is switched off, all display messages are deleted apart from some high-
priority display messages. Once the causes of the high-priority display messages have been
rectified, the corresponding display messages are also deleted. Display messages
205On-board computer and displays Z
Page 212 of 329
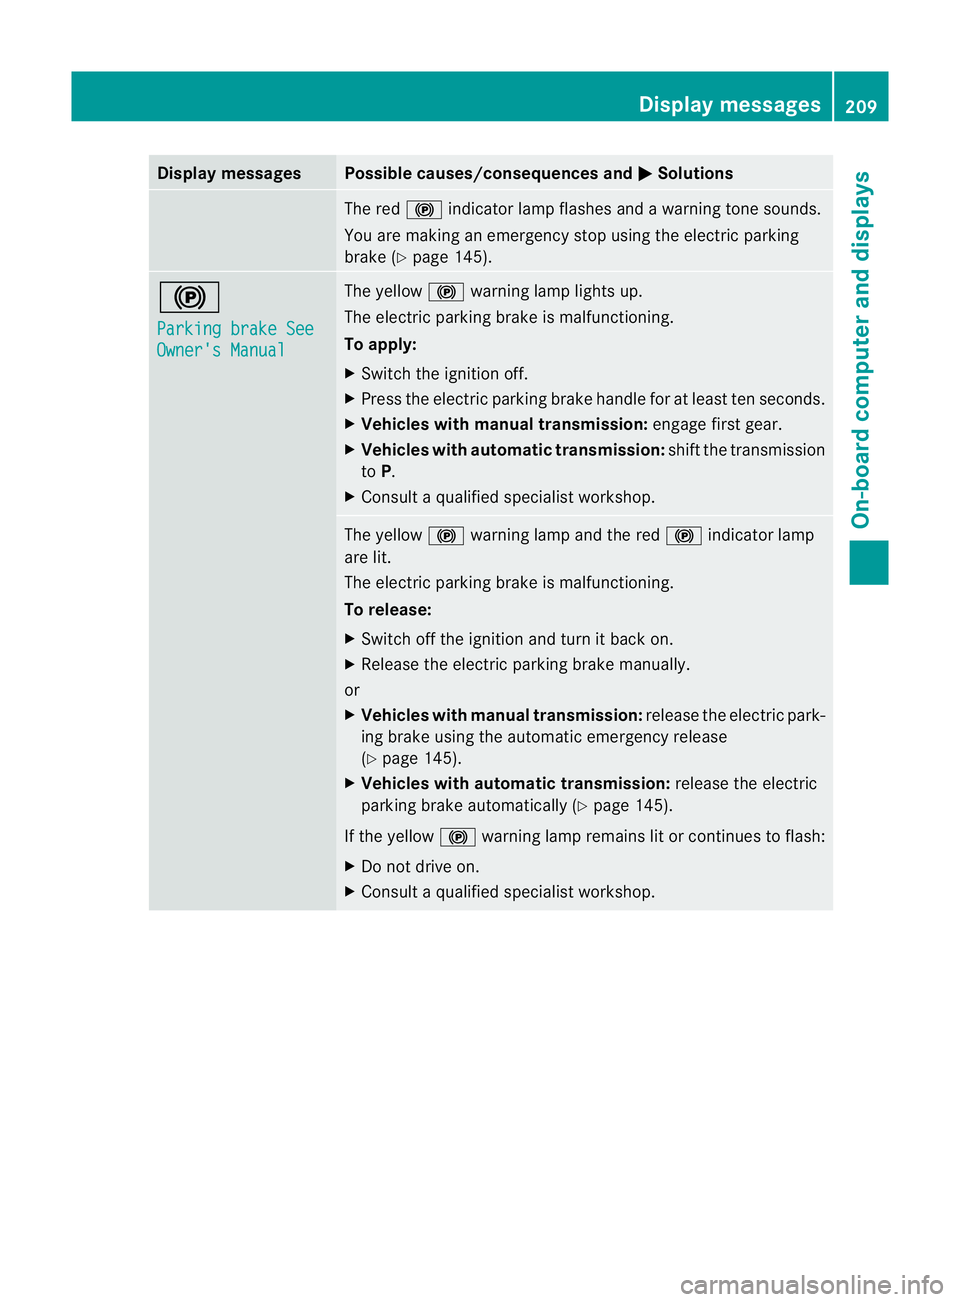
Display messages Possible causes/consequences and
M Solutions
The red
!indicato rlamp flashes and a warning tone sounds.
You are making an emergency stop using the electric parking
brake (Y page 145). !
Parking brake See
Owner's Manual The yellow
!warning lamp lights up.
The electric parking brake is malfunctioning.
To apply:
X Switch the ignition off.
X Press the electric parking brake handle for at least te nseconds.
X Vehicles with manual transmission: engage first gear.
X Vehicles with automatic transmission: shift the transmission
to P.
X Consult a qualified specialist workshop. The yellow
!warning lamp and the red !indicator lamp
are lit.
The electric parking brake is malfunctioning.
To release:
X Switch off the ignition and turn it back on.
X Release the electric parking brake manually.
or
X Vehicles with manual transmission: release the electric park-
ing brake using the automatic emergency release
(Y page 145).
X Vehicles with automatic transmission: release the electric
parking brake automatically ( Ypage 145).
If the yellow !warning lamp remains lit or continues to flash:
X Do not drive on.
X Consult a qualified specialist workshop. Display messages
209On-board computer and displays Z
Page 213 of 329
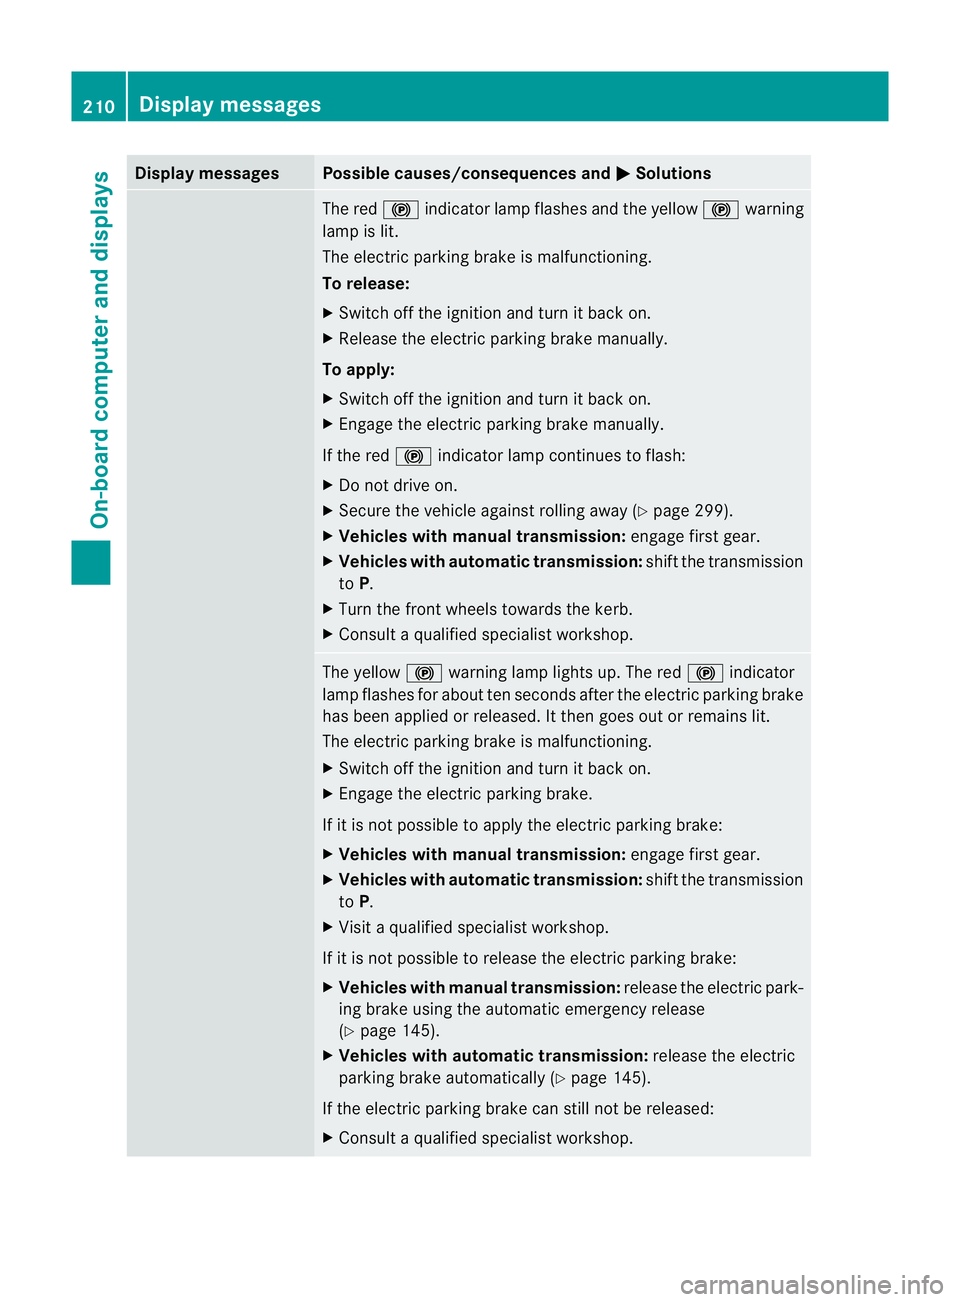
Display messages Possible causes/consequences and
M Solutions
The red
!indicato rlamp flashes and the yellow !warning
lamp is lit.
The electric parking brake is malfunctioning.
To release:
X Switch off the ignition and turn it back on.
X Release the electric parking brake manually.
To apply:
X Switch off the ignition and turn it back on.
X Engage the electric parking brake manually.
If the red !indicator lamp continues to flash:
X Do not drive on.
X Secure the vehicle against rolling away ( Ypage 299).
X Vehicles with manual transmission: engage first gear.
X Vehicles with automatic transmission: shiftthe transmission
to P.
X Turn the front wheels towards the kerb.
X Consult a qualified specialist workshop. The yellow
!warning lamp lights up. The red !indicator
lamp flashes for about ten seconds after the electric parking brake
has been applied or released. It then goes out or remains lit.
The electric parking brake is malfunctioning.
X Switch off the ignition and turn it back on.
X Engage the electric parking brake.
If it is not possible to apply the electric parking brake:
X Vehicles with manual transmission: engage first gear.
X Vehicles with automatic transmission: shift the transmission
to P.
X Visit a qualified specialist workshop.
If it is not possible to release the electric parking brake:
X Vehicles with manual transmission: release the electric park-
ing brake using the automatic emergency release
(Y page 145).
X Vehicles with automatic transmission: release the electric
parking brake automatically (Y page 145).
If the electric parking brake can still not be released:
X Consult a qualified specialist workshop. 210
Display messagesOn-board computer and displays
Page 214 of 329
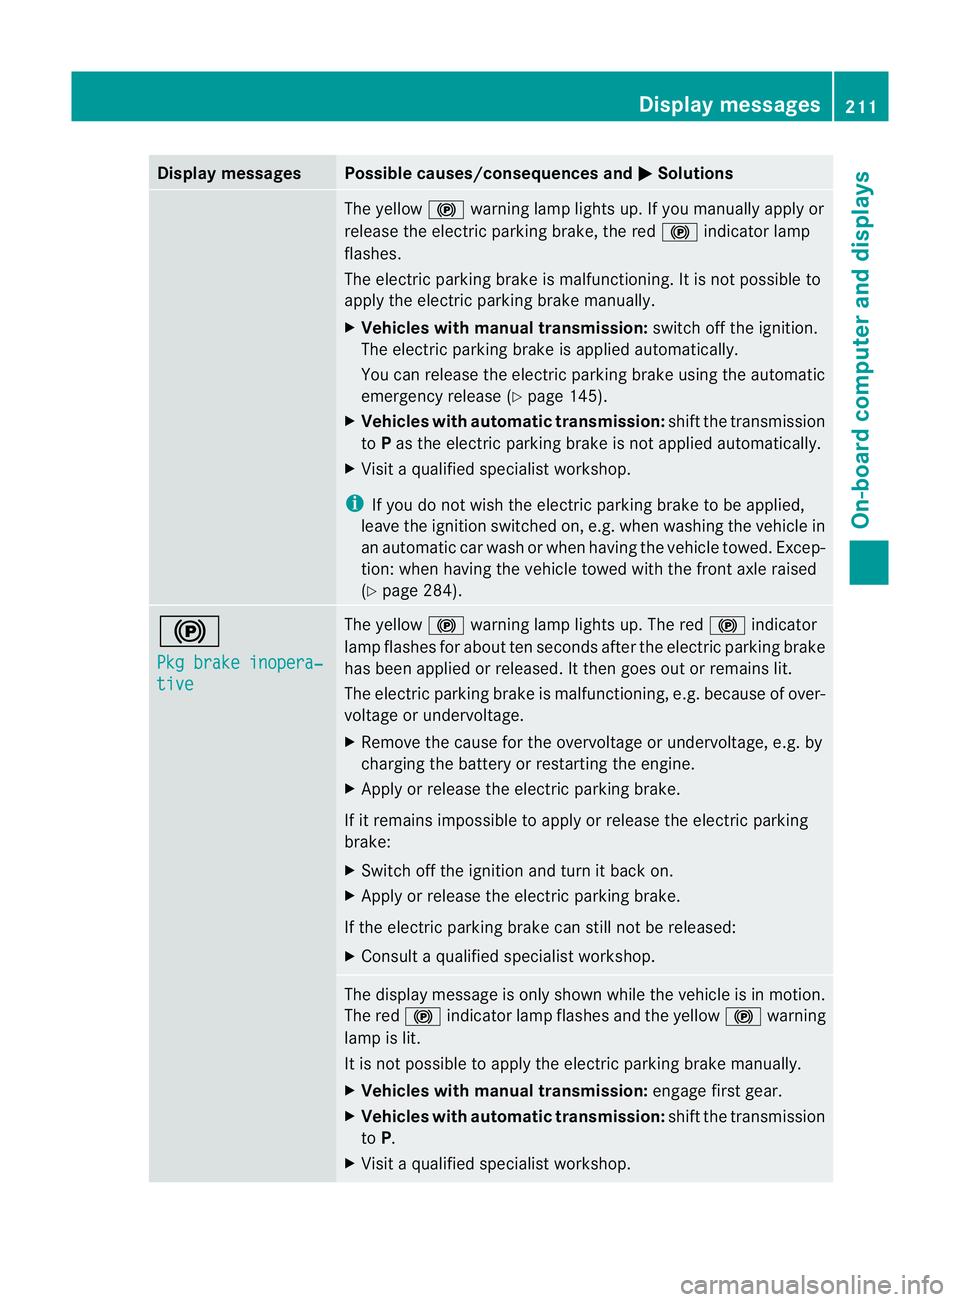
Display messages Possible causes/consequences and
M Solutions
The yellow
!warning lamp lights up. If you manually apply or
release the electric parkin gbrake, the red !indicator lamp
flashes.
The electric parking brake is malfunctioning. It is not possible to
apply the electric parking brake manually.
X Vehicles with manual transmission: switch off the ignition.
The electric parking brake is applied automatically.
You can release the electric parking brake using the automatic
emergency release (Y page 145).
X Vehicles with automatic transmission: shift the transmission
to Pas the electric parking brake is not applied automatically.
X Visi taqualified specialist workshop.
i If you do not wish the electric parking brake to be applied,
leave the ignition switched on, e.g. when washing the vehicle in
an automatic car wash or when having the vehicle towed. Excep-
tion :when having the vehicle towed with the front axle raised
(Y page 284). !
Pkg brake inopera‐
tive The yellow
!warning lamp lights up. The red !indicator
lamp flashes for about ten seconds after the electric parking brake
has been applied or released. It then goes out or remains lit.
The electric parking brake is malfunctioning, e.g. because of over-
voltage or undervoltage.
X Remove the cause for the overvoltage or undervoltage, e.g. by
charging the battery or restarting the engine.
X Apply or release the electric parking brake.
If it remains impossible to apply or release the electric parking
brake:
X Switch off the ignition and turn it back on.
X Apply or release the electric parking brake.
If the electric parking brake can still not be released:
X Consult a qualified specialist workshop. The display message is only shown while the vehicle is in motion.
The red
!indicator lamp flashes and the yellow !warning
lamp is lit.
It is not possible to apply the electric parking brake manually.
X Vehicles with manual transmission: engage first gear.
X Vehicles with automatic transmission: shift the transmission
to P.
X Visit a qualified specialist workshop. Display messages
211On-board computer and displays Z
Page 215 of 329
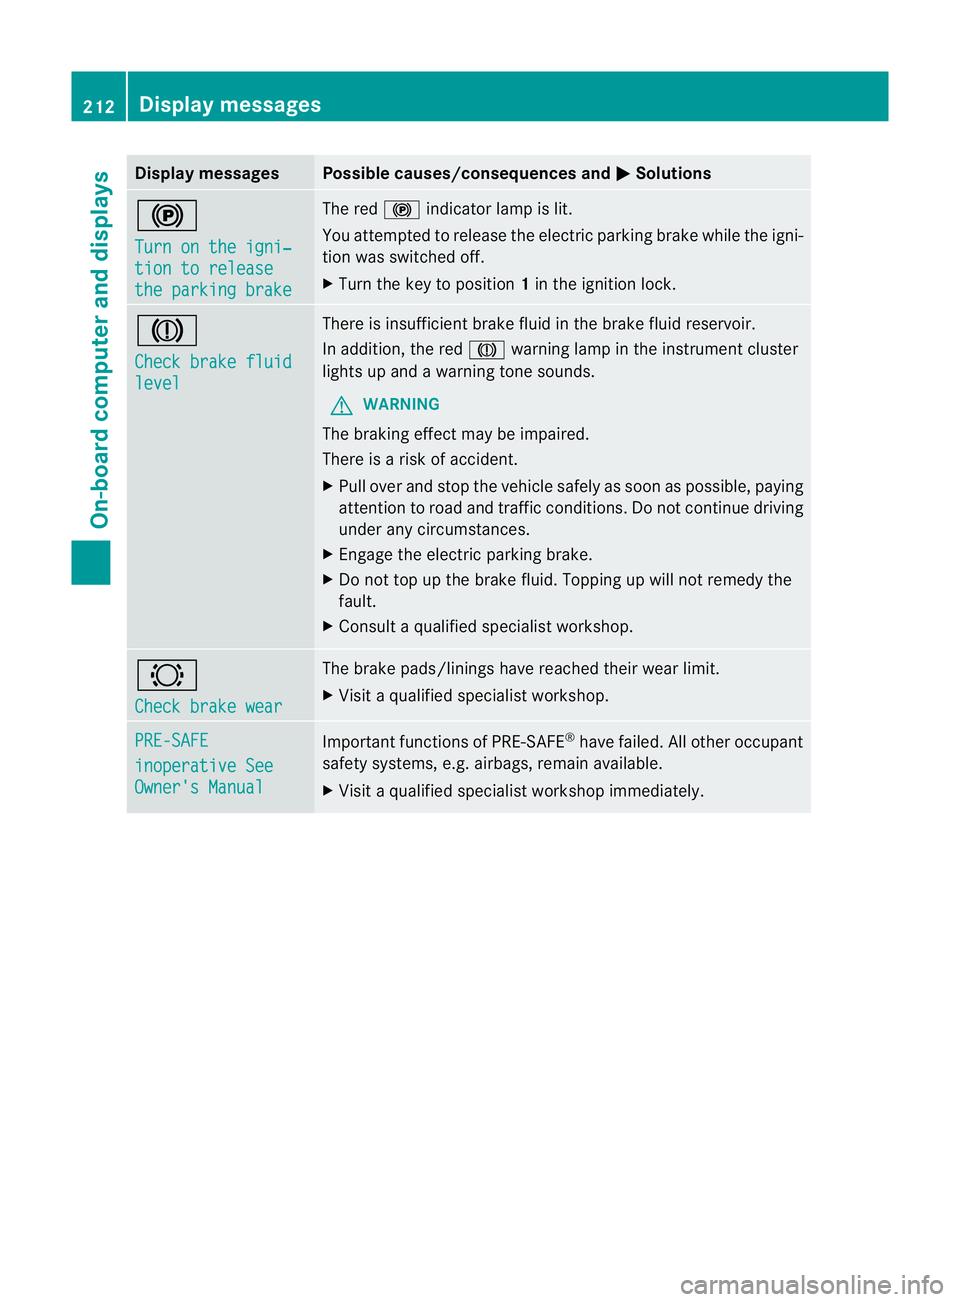
Display messages Possible causes/consequences and
M Solutions
!
Turn on the igni‐
tion to release
the parking brake The red
!indicato rlamp is lit.
You attempted to release the electric parking brak ewhile the igni-
tion was switched off.
X Turn the key to position 1in the ignition lock. J
Check brake fluid
level There is insufficient brake fluid in the brake fluid reservoir.
In addition, the red
Jwarning lamp in the instrument cluster
lights up and a warning tone sounds.
G WARNING
The braking effect may be impaired.
There is a risk of accident.
X Pull over and stop the vehicle safely as soon as possible, paying
attention to road and traffic conditions. Do not continue driving
under any circumstances.
X Engage the electric parking brake.
X Do not top up the brake fluid. Topping up will not remedy the
fault.
X Consult a qualified specialist workshop. #
Check brake wear The brake pads/linings have reached their wear limit.
X
Visit a qualified specialist workshop. PRE-SAFE
inoperative See
Owner's Manual Important functions of PRE-SAFE
®
have failed. All other occupant
safety systems, e.g. airbags, remain available.
X Visit a qualified specialist workshop immediately. 212
Display messagesOn-board computer and displays
Page 241 of 329
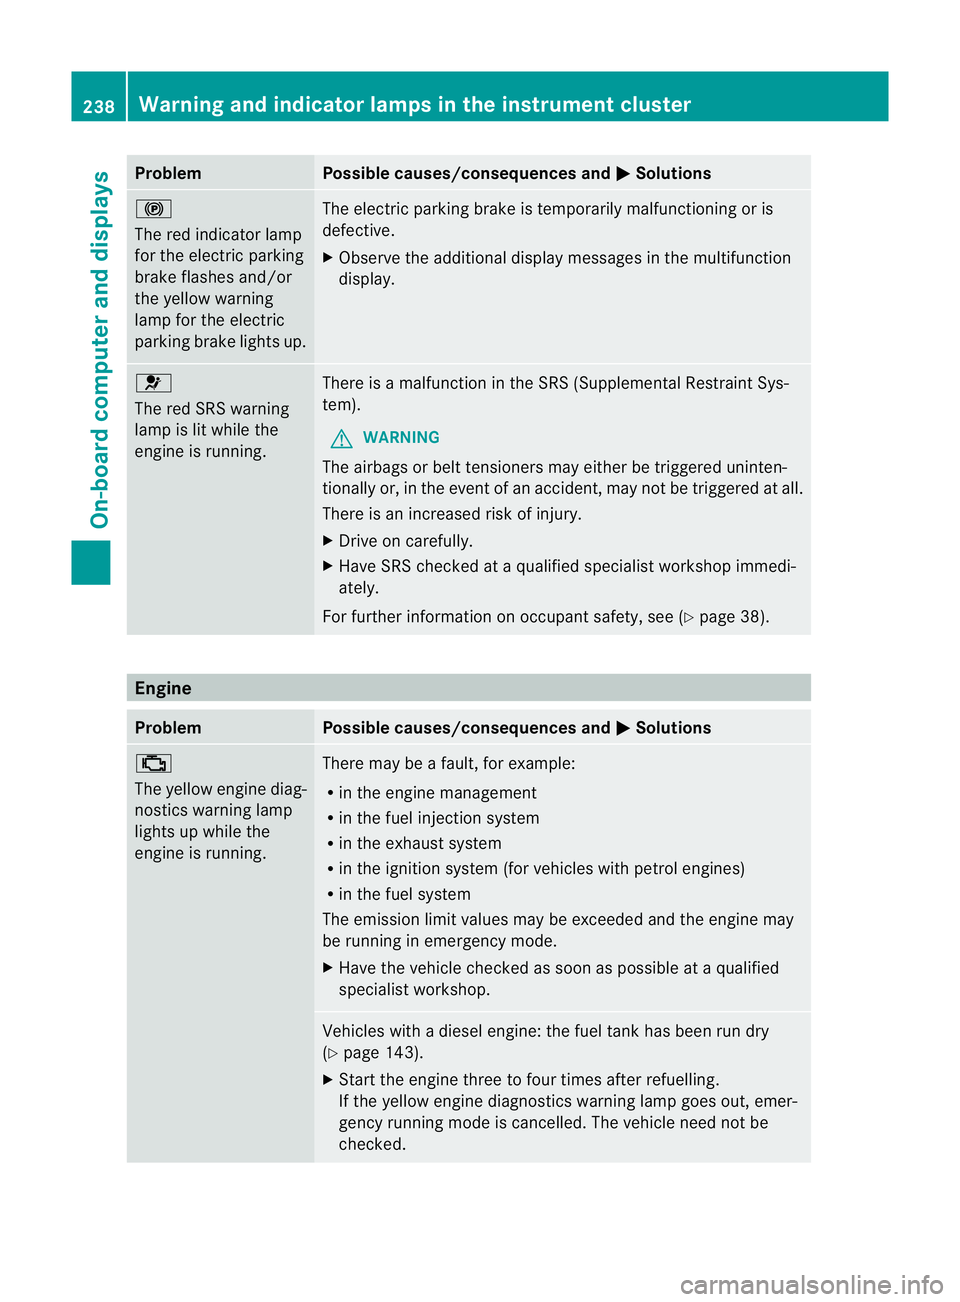
Problem Possible causes/consequences and
M Solutions
!
The red indicator lamp
for the electric parking
brake flashes and/or
the yellow warning
lamp for the electric
parking brake lights up.
The electric parking brake is temporarily malfunctioning or is
defective.
X
Observe the additional display messages in the multifunction
display. 6
The red SRS warning
lamp is lit while the
engine is running.
There is a malfunction in the SRS (Supplemental Restraint Sys-
tem).
G WARNING
The airbags or belt tensioners may either be triggered uninten-
tionally or, in the event of an accident, may not be triggered at all.
There is an increased risk of injury.
X Drive on carefully.
X Have SRS checked at a qualified specialist workshop immedi-
ately.
For further information on occupant safety, see (Y page 38).Engine
Problem Possible causes/consequences and
M Solutions
;
The yellow engine diag-
nostics warning lamp
lights up while the
engine is running. There may be a fault, for example:
R
in the engine management
R in the fuel injection system
R in the exhaust system
R in the ignition system (for vehicles with petrol engines)
R in the fuel system
The emission limit values may be exceeded and the engine may
be running in emergency mode.
X Have the vehicle checked as soon as possible at a qualified
specialist workshop. Vehicles with a diesel engine: the fuel tank has been run dry
(Y
page 143).
X Start the engine three to four times after refuelling.
If the yellow engine diagnostics warning lamp goes out, emer-
gency running mode is cancelled. The vehicle need not be
checked. 238
Warning and indicator lamps in the instrument clusterOn-board computer and displays
Page 260 of 329

Example: vehicles with a cove
rover the stowage
compartment
X To open: push the lower section of
cover :.
The cover opens.
X To remove the insert: lift insert=
up ; and out.
X To refit the insert: press insert=into the
holder until it engages.
i If you remove the ashtray insert, you can
use the resulting compartment for stow-
age.
Ashtray in the rear-compartment centre
console X
To open: pull cover ;out by its top edge.
X To remove the insert: pull out insert:
beyond the stop.
X To fit the insert: fit insert:from above
into the holder and press down into the
holder until it engages. Cigarette lighter
G
WARNING
Only hold the hot cigarette lighter by its knob.
Otherwise, you might burn yourself.
Make sure that children travelling in the vehi-
cle are not able to injure themselves on the
hot cigarette lighter or cause a fire with it. Example: vehicles with a cover over the stowage
compartment
X
Turn the key to position 2in the ignition
lock.
X To open: push the lower section of
cover :.
The ashtray opens.
X Press in cigarette lighter ;.
Cigarette lighter ;will pop out automati-
cally when the heating element is red-hot. 12
Vsockets
Points to observe before use X
Turn the key to position 1in the ignition
lock.
The sockets can be used for accessories with
a maximum current draw of 180 W (15A).
Accessories include such items as lamps, or
chargers for mobile phones.
If you use the sockets for long periods when
the engine is switched off ,the battery may
discharge.
i An emergency cut-offe nsures thatthe on-
board voltage does not drop too low. If the Features
257Stowing and features Z
Page 263 of 329
X
To fold the bracket up: press button:.
X To fold the bracket down: press the
bracket down and allow it to engage.
You can fold the pre-installed bracket up to
improve access to the stowage space
beneath it. Depending on the vehicle's equip-
ment, a USB connection and an AUX-IN con-
nection/Media Interface are fitted in the
stowage compartment (Y page 246).
You can operate the telephone using the
6 and~ buttons on the multifunction
steering wheel. You can operate othe rmobile
phone functions via the on-board computer
(Y page 196).
If you take the key out of the ignition lock, the
mobile phone stays on but you can no longer
use the hands-free system.
If you are making a call and you would like to
take the key out of the ignition lock, first
remove the mobile phone from the bracket.
Otherwise, the call will be ended.
i When a mobile phone bracket is used that
is connected to the mobile phone via Blue-
tooth ®
: if you want to continue a call in
"Private mode", you have to perform the
necessary steps on the mobile phone (see
the separate mobile phone operating
instructions). Floormat on the driver's side
G
WARNING
Make sure that there is sufficient clearance
around the pedals when floormats are used,
and that the floormats are properly secured.
The floormats must be correctly secured at all
times using the securing knob and retainers.
Before you drive off, check the floormats and
secure them if necessary. Afloormat which is
not properly secured can slip and thereby
interfere with the movemen tofthe pedals.
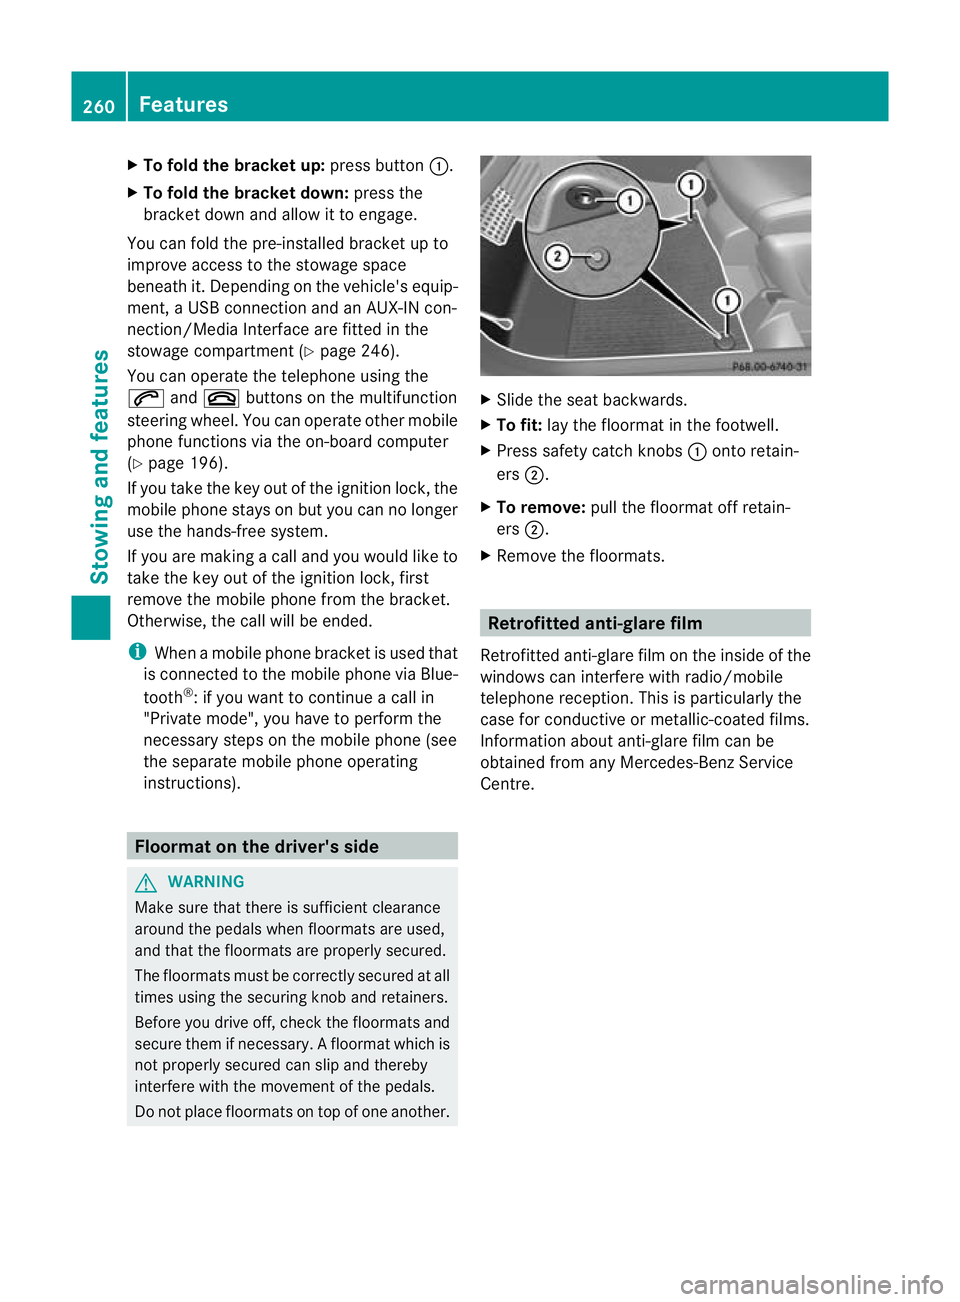
Do not place floormats on top of one another. X
Slide the seat backwards.
X To fit: lay the floormat in the footwell.
X Press safety catch knobs :onto retain-
ers ;.
X To remove: pull the floormat off retain-
ers ;.
X Remove the floormats. Retrofitted anti-glare film
Retrofitted anti-glare film on the inside of the
windows can interfere with radio/mobile
telephone reception. This is particularly the
case for conductive or metallic-coated films.
Information about anti-glare film can be
obtained from any Mercedes-Benz Service
Centre. 260
FeaturesStowing and features