run flat MERCEDES-BENZ C-CLASS 1999 Owners Manual
[x] Cancel search | Manufacturer: MERCEDES-BENZ, Model Year: 1999, Model line: C-CLASS, Model: MERCEDES-BENZ C-CLASS 1999Pages: 122, PDF Size: 1.66 MB
Page 1 of 122

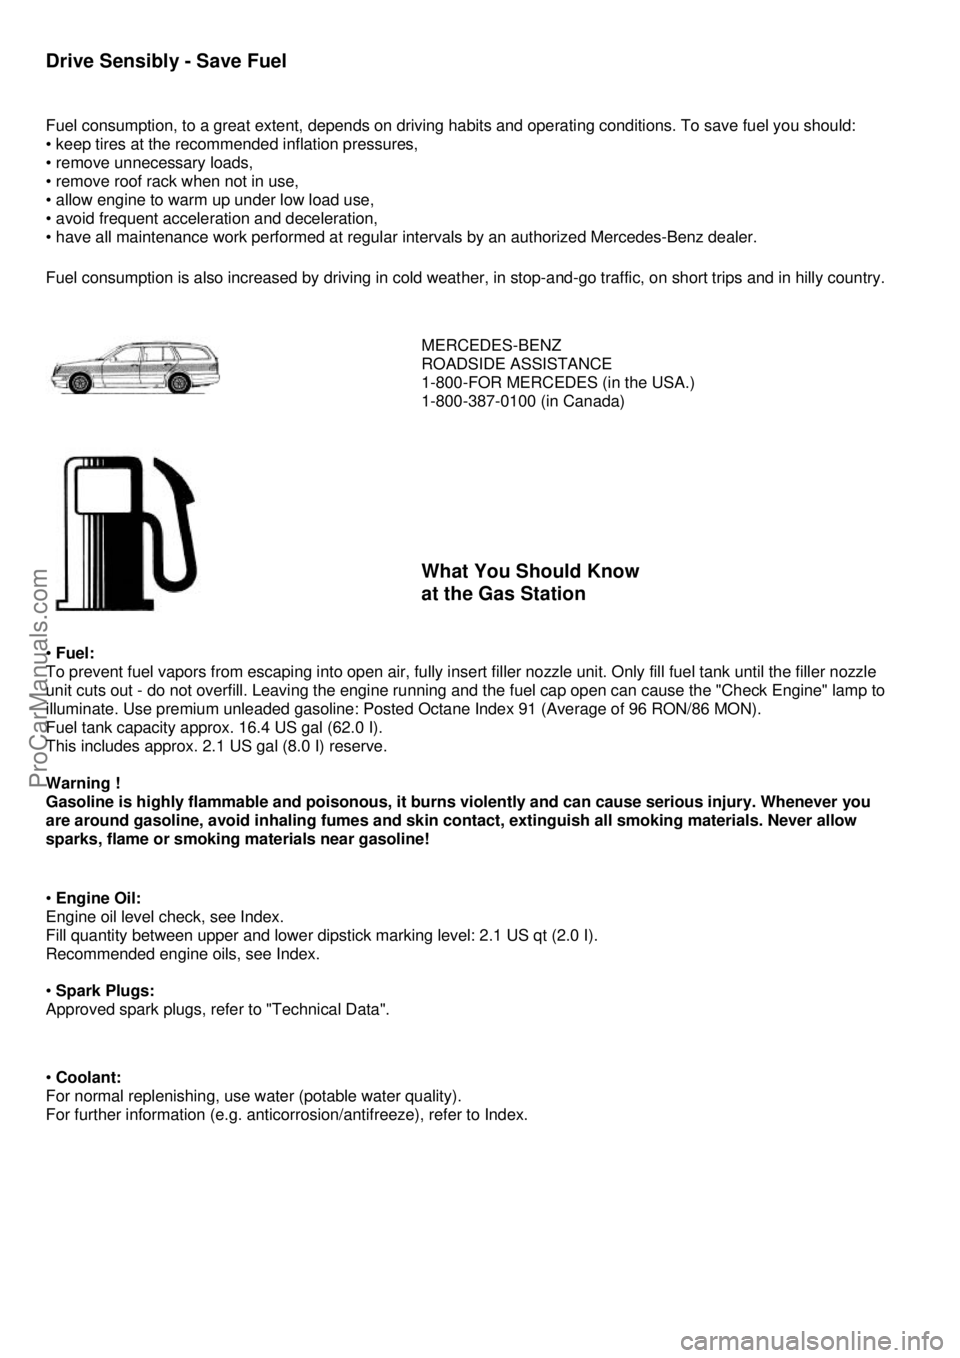
Drive Sensibly - Save Fuel
Fuel consumption, to a great extent, depends on driving habits and operating conditions. To save fuel you should:
• keep tires at the recommended inflation pressures,
• remove unnecessary loads,
• remove roof rack when not in use,
• allow engine to warm up under low load use,
• avoid frequent acceleration and deceleration,
• have all maintenance work performed at regular intervals by an authorized Mercedes-Benz dealer.
Fuel consumption is also increased by driving in cold weat her, in stop-and-go traffic, on short trips and in hilly country.
MERCEDES-BENZ
ROADSIDE ASSISTANCE
1-800-FOR MERCEDES (in the USA.)
1-800-387-0100 (in Canada)
What You Should Know
at the Gas Station
• Fuel:
To prevent fuel vapors from escaping into open air, fully inse rt filler nozzle unit. Only fill fuel tank until the filler nozzl e
unit cuts out - do not overfill. Leaving the engine running and t he fuel cap open can cause the "Check Engine" lamp to
illuminate. Use premium unleaded gasoline: Posted Octane Index 91 (Average of 96 RON/86 MON).
Fuel tank capacity approx. 16.4 US gal (62.0 I).
This includes approx. 2.1 US gal (8.0 I) reserve.
Warning !
Gasoline is highly flammable and poisonous, it burns violently and can cause serious injury. Whenever you
are around gasoline, avoid inhaling fumes and skin cont act, extinguish all smoking materials. Never allow
sparks, flame or smoking materials near gasoline!
• Engine Oil:
Engine oil level check, see Index.
Fill quantity between upper and lower dipstick marking level: 2.1 US qt (2.0 I).
Recommended engine oils, see Index.
• Spark Plugs:
Approved spark plugs, refer to "Technical Data".
• Coolant:
For normal replenishing, use water (potable water quality).
For further information (e.g. anticor rosion/antifreeze), refer to Index.
ProCarManuals.com
Page 23 of 122

Trunk
0 - Neutral position - push to open
1 - Unlocking
2 - Locking (detent)
3 - Separate locking of trunk - remove mechanical key in this position.
When the trunk is separately locked, it remains locked when centrally unlocking
the vehicle. To deny any unauthorized person access to the trunk, lock it
separately. Leave only the electronic main key less its mechanical key with the
vehicle.
Notes:
In case of a malfunction in the central locking system the trunk can be locked and unlocked individually. To lock, turn
mechanical key to position 2 or 3. To unlock and open the trunk lid, turn mechanical key to position 1, hold and push
to open. If the fuel filler flap cannot be opened, refe r to Fuel Filler Flap, Manual Release (see Index).
Important!
Do not place mechanical key inside trunk, since trunk is locked again when closing the
lid.
Lower trunk lid using handle (4) and close it with hands placed flat on trunk lid.
ProCarManuals.com
Page 40 of 122

Infant and Child Restraint Systems
We recommend that all infants and children be properly restra ined at all times while the vehicle is in motion. All lap-
shoulder belts except driver seat have special seat belt re tractors for secure fastening of child restraints. To fasten a
child restraint, use this seat belt: Follow child restraint in structions for routing. Then pull shoulder belt out completely
and let it retract. The belt is now locked. Push down on child restraint to take up any slack.
Important !
The use of infant or child restraints is required by law in all 50 states and all Canadian provinces. Infants and small
children should be seated in an appropriate infant or child restraint system properly secured by a lap-shoulder belt,
and that complies with U.S. Federal Motor Vehicle Safety Standard 213 and Canadian Motor Vehicle Safety Standard
213.1. A statement by the child rest raint manufacturer of compliance with this standard can be found on the
instruction label on the restraint and in the instruction manual provided with the restraint. When using any infant or
child restraint system, be sure to carefully read and follow all manufacturer's instructions for installation and use.
Please read and observe warning labels affixed to inside of vehicle.
Warning !
Children 12 years old and under must never ride in the front seat, except in a Mercedes-Benz authorized
BabySmart™ compatible child seat, which operates with the BabySmart™ system installed in the vehicle to
deactivate the passenger side front airbag when it is properly installed. Otherwise they will be struck by the
airbag when it inflates in a crash. If this happens, serious or fatal injury will result.
The back seat is the safest place for children, infants and small children must ride in back seats and be
seated in an infant or child restraint system, which is properly secured with the vehicle's seat belt, fully in
accordance with the seat manufacturer's instructions.
Infants and small children should never share a seat belt with another occupant. During an accident, they
could be crushed between the occupant and seat belt. Children too big for child restraint systems must ride
in back seats using regular seat belts. Position shoulder belt across chest and shoulder, not face or neck. A
booster seat is necessary to achieve proper belt positioning for children from 41 Ibs. to the point where a
lap/shoulder belt fits properly without one.
When the child restraint is not in use, remove it from the car or secure it with the seat belt to prevent the
child restraint from becoming a projectile in the event of an accident.
U.S.A. Models only:
Since 1986 all U.S. child restraints comply with U.S. regulations without the use of a tether strap. Canada Models
only: This vehicle is provided with tether anchorages for a top tether strap. Consult your authorized Mercedes-Benz
dealer for installation of these anchorages. In compliance with Canadian Motor Vehicle Safety Standard 210.1, child
restraint tether anchorage hardware is attached to the tool kit located in the trunk.
ProCarManuals.com
Page 59 of 122

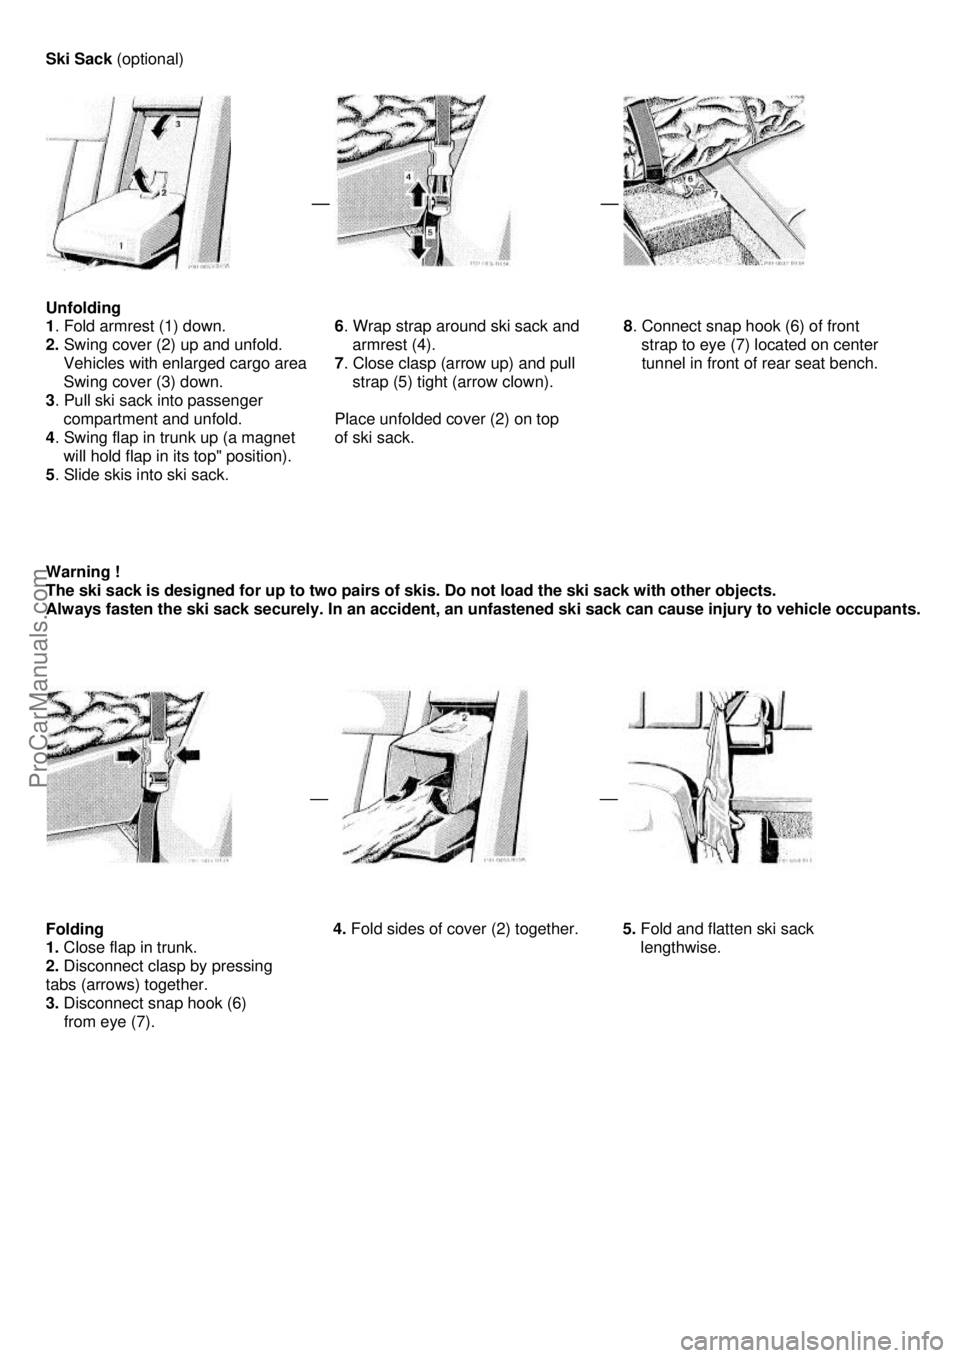
Ski Sack (optional)
Unfolding
1 . Fold armrest (1) down.
2. Swing cover (2) up and unfold.
Vehicles with enlarged cargo area
Swing cover (3) down.
3 . Pull ski sack into passenger
compartment and unfold.
4 . Swing flap in trunk up (a magnet
will hold flap in its top" position).
5 . Slide skis into ski sack.
6
. Wrap strap around ski sack and
armrest (4).
7 . Close clasp (arrow up) and pull
strap (5) tight (arrow clown).
Place unfolded cover (2) on top
of ski sack.
8
. Connect snap hook (6) of front
strap to eye (7) located on center
tunnel in front of rear seat bench.
Warning !
The ski sack is designed for up to two pairs of skis. Do not load the ski sack with other objects.
Always fasten the ski sack securely. In an accident, an unfastened ski sack can cause injury to vehicle occupants.
Folding
1. Close flap in trunk.
2. Disconnect clasp by pressing
tabs (arrows) together.
3. Disconnect snap hook (6)
from eye (7).
4.
Fold sides of cover (2) together.
5.
Fold and flatten ski sack
lengthwise.
ProCarManuals.com
Page 79 of 122

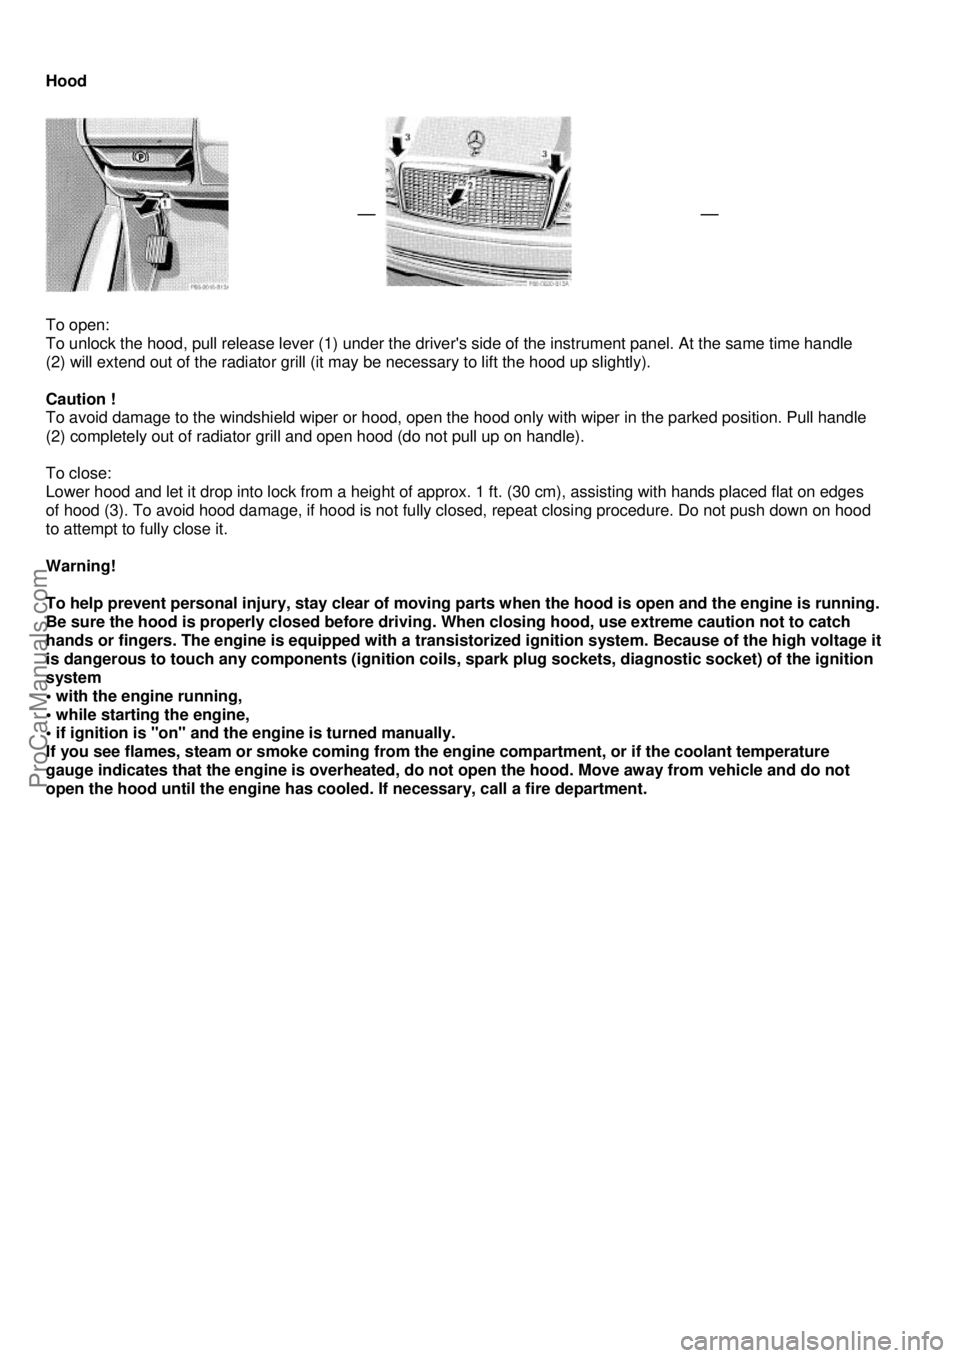
Hood
To open:
To unlock the hood, pull release lever (1) under the driver's
side of the instrument panel. At the same time handle
(2) will extend out of the radiator grill (it may be necessary to lift the hood up slightly).
Caution !
To avoid damage to the windshield wiper or hood, open the hood only with wiper in the parked position. Pull handle
(2) completely out of radiator grill and open hood (do not pull up on handle).
To close:
Lower hood and let it drop into lock from a height of approx. 1 ft. (30 cm), assisting with hands pl aced flat on edges
of hood (3). To avoid hood damage, if hood is not fully cl osed, repeat closing procedure. Do not push down on hood
to attempt to fully close it.
Warning!
To help prevent personal injury, stay clear of moving parts when the hood is open and the engine is running.
Be sure the hood is properly closed before driving. When closing hood, use extreme caution not to catch
hands or fingers. The engine is equipped with a transi storized ignition system. Because of the high voltage it
is dangerous to touch any components (ignition coils , spark plug sockets, diagnostic socket) of the ignition
system
• with the engine running,
• while starting the engine,
• if ignition is "on" and the engine is turned manually.
If you see flames, steam or smoke coming from the engi ne compartment, or if the coolant temperature
gauge indicates that the engine is overheated, do not open the hood. Move away from vehicle and do not
open the hood until the engine has cooled. If necessary, call a fire department.
ProCarManuals.com
Page 98 of 122

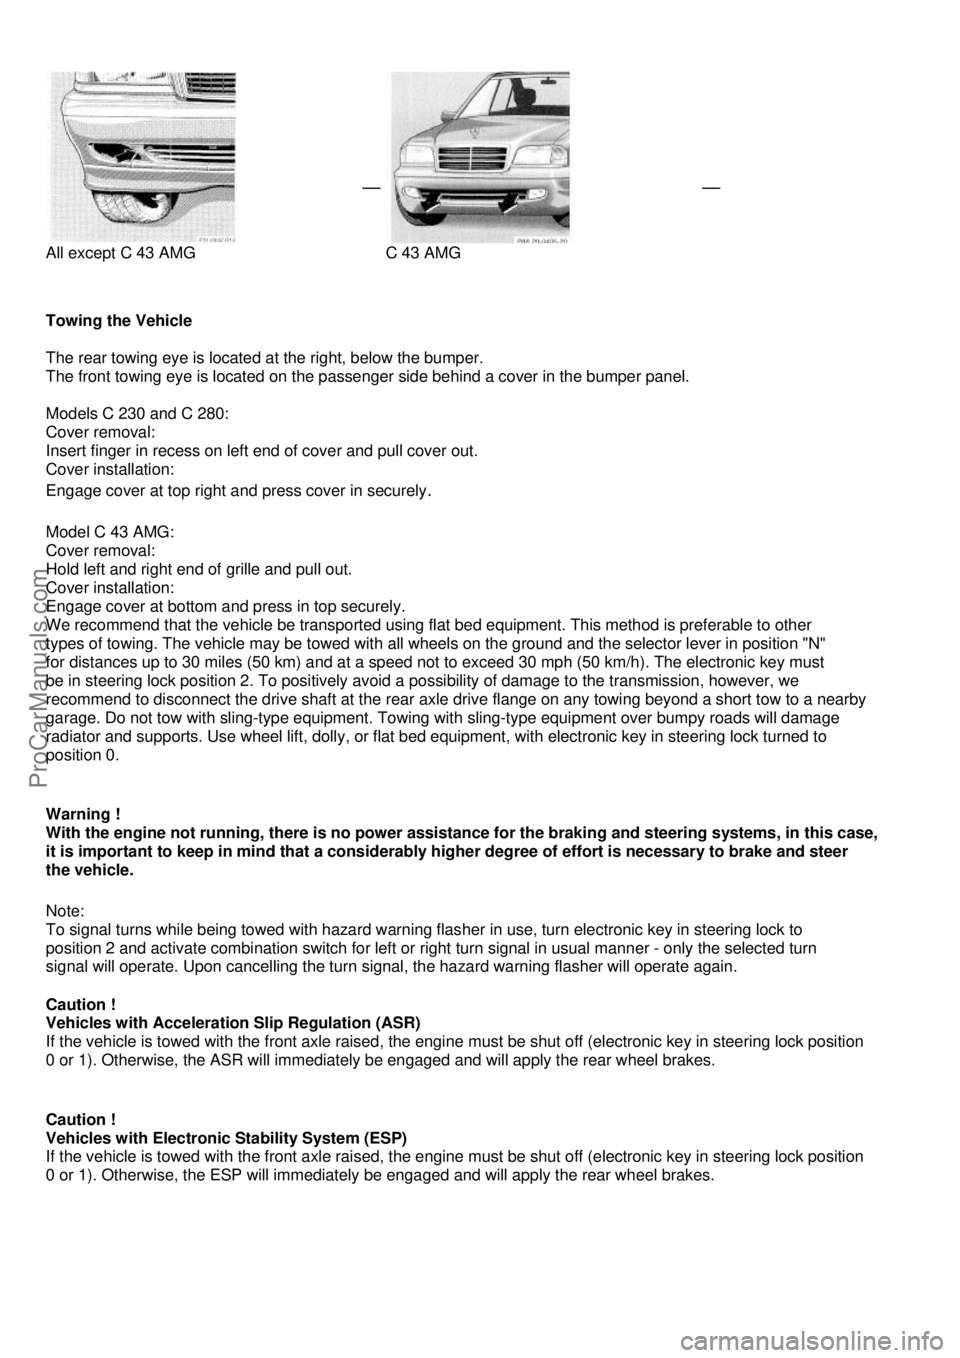
All except C 43 AMG
C 43 AMG
Towing the Vehicle
The rear towing eye is located at the right, below the bumper.
The front towing eye is located on the passenger side behind a cover in the bumper panel.
Models C 230 and C 280:
Cover removal:
Insert finger in recess on left end of cover and pull cover out.
Cover installation:
Engage cover at top right and press cover in securely
.
Model C 43 AMG:
Cover removal:
Hold left and right end of grille and pull out.
Cover installation:
Engage cover at bottom and press in top securely.
We recommend that the vehicle be transported using flat bed equipment. This method is preferable to other
types of towing. The vehicle may be towed with all wheel s on the ground and the selector lever in position "N"
for distances up to 30 miles (50 km) and at a speed not to exceed 30 mph (50 km/h). The electronic key must
be in steering lock position 2. To positively avoid a possibility of damage to the transmission, however, we
recommend to disconnect the drive shaft at the rear axle drive flange on any towing beyond a short tow to a nearby
garage. Do not tow with sling-type equipment. Towing with sling-type equipment over bumpy roads will damage
radiator and supports. Use wheel lift, dolly, or flat bed equipment, with electronic key in steering lock turned to
position 0.
Warning !
With the engine not running, there is no power assistance for the braking and steering systems, in this case,
it is important to keep in mind that a considerably higher degree of effort is necessary to brake and steer
the vehicle.
Note:
To signal turns while being towed with hazard warning flas her in use, turn electronic key in steering lock to
position 2 and activate combination switch for left or right turn signal in usual manner - only the selected turn
signal will operate. Upon cancelling the turn signal, the hazard warning flasher will operate again.
Caution !
Vehicles with Acceleration Slip Regulation (ASR)
If the vehicle is towed with the front axle raised, the engi ne must be shut off (electronic key in steering lock position
0 or 1). Otherwise, the ASR will immediately be engaged and will apply the rear wheel brakes.
Caution !
Vehicles with Electronic Stability System (ESP)
If the vehicle is towed with the front axle raised, the engine must be shut off (electronic key in steering lock position
0 or 1). Otherwise, the ESP will immediately be engaged and will apply the rear wheel brakes.
ProCarManuals.com