light MERCEDES-BENZ C-Class 2015 W205 Comand Manual
[x] Cancel search | Manufacturer: MERCEDES-BENZ, Model Year: 2015, Model line: C-Class, Model: MERCEDES-BENZ C-Class 2015 W205Pages: 214, PDF Size: 5.16 MB
Page 79 of 214
Selection Action
Address
Address
Entry Entry X
Enter a destination by
address (Y page 68). Keyword Keyword
Search Search X
Select a destination by
means of a keyword
search (Y page 70). From Previ‐ From Previ‐
ous Destina‐ ous Destina‐
tions tions X
Select a destination
from the list of last des-
tinations (Y page 72). From POIs From POIs X
Select a point of inter-
est (Y page 72). Using Map
Using Map X
Enter a destination
using the map
(Y page 75). From From
Mercedes- Mercedes-
Benz Apps Benz Apps X
Enter a destination
from Mercedes-Benz
Apps (Y page 78). Using Geo- Using Geo-
Coordinates Coordinates X
Enter a destination
using the geo-coordi-
nates (Y page 79). X
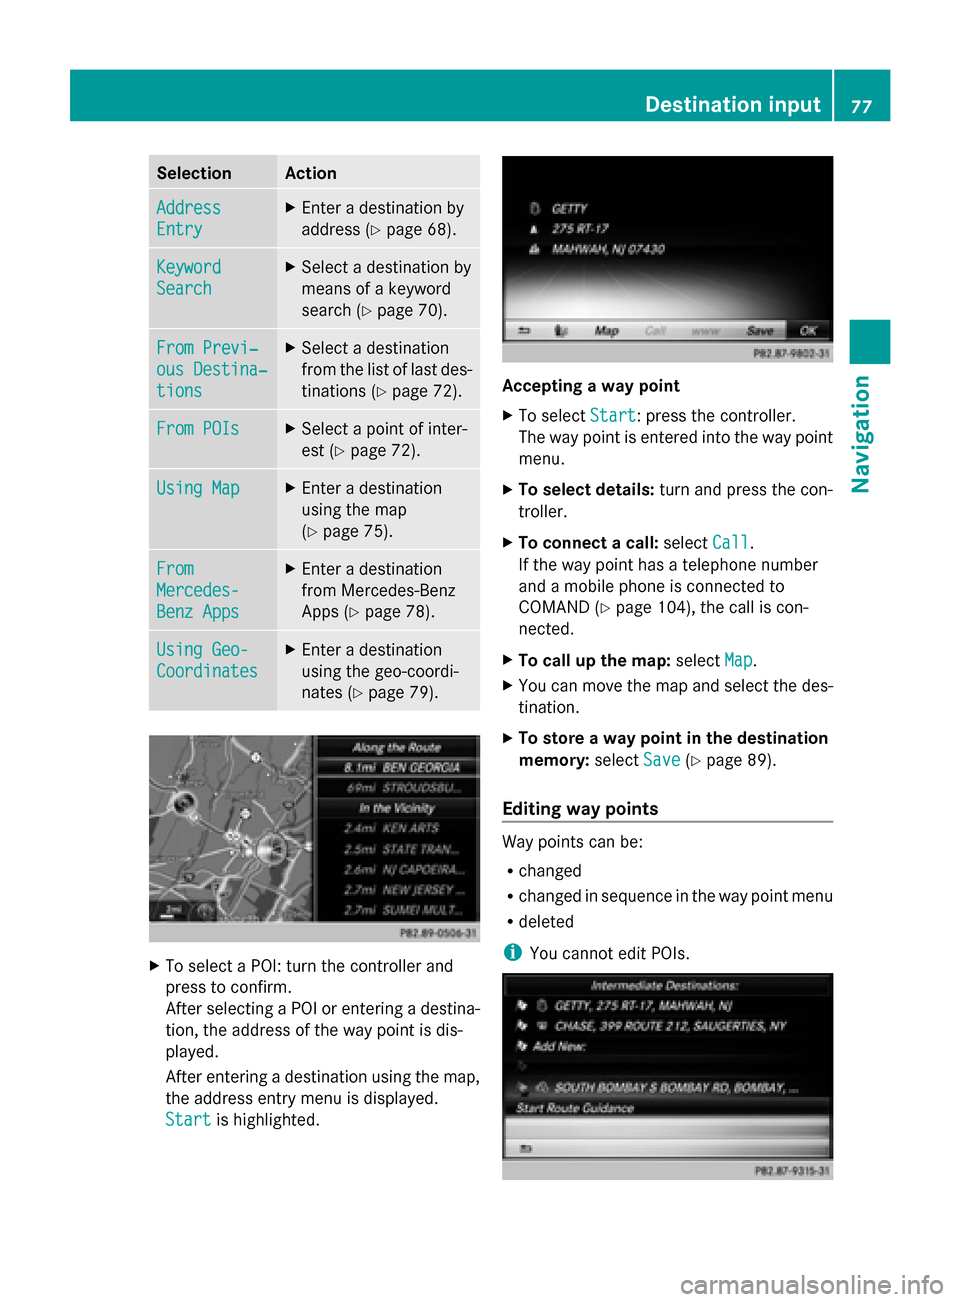
To select a POI: turn the controller and
press to confirm.
After selecting a POI or entering a destina-
tion, the address of the way point is dis-
played.
After entering a destination using the map,
the address entry menu is displayed.
Start
Start is highlighted. Accepting a way point
X
To select Start Start: press the controller.
The way point is entered into the way point
menu.
X To select details: turn and press the con-
troller.
X To connect a call: selectCall
Call.
If the way point has a telephone number
and a mobile phone is connected to
COMAND (Y page 104), the call is con-
nected.
X To call up the map: selectMap Map.
X You can move the map and select the des-
tination.
X To store a way point in the destination
memory: selectSave Save(Ypage 89).
Editing way points Way points can be:
R
changed
R changed in sequence in the way point menu
R deleted
i You cannot edit POIs. Destination input
77Navigation Z
Page 81 of 214
Using geo-coordinates
X To switch to navigation mode: press the
00CB button.
X To show the menu: slide6the control-
ler.
X To select Destination
Destination: turn and press the
controller.
X Select Using Geo-Coordinates
Using Geo-Coordinates.
Geo-coordinates are entered in degrees,
minutes and seconds.
Entering the latitude and longitude coor-
dinates
X To change the value: turn the controller.
X To move the selection within the line: slide
1 the controller.
X To move the selection between lines: slide
4 the controller.
X To confirm the value: press the controller.
Saving a destination
X To select Save
Save: turn and press the control-
ler.
The destination can be saved as:
R a navigable contact in the address book
R My Address
Starting route calculation
X To select Start Route Guidance
Start Route Guidance: turn
and press the controller. Route guidance
Important notes
For this reason, you must always observe
road and traffic rules and regulations during
your journey. Road and traffic rules and reg-
ulations always have priority over system
driving recommendations.
COMAND calculates the route to the destina-
tion without taking account of the following,
for example:
R traffic lights
R stop and yield signs R
merging lanes
R parking or stopping in a no parking/no
stopping zone
R other road and traffic rules and regulations
R narrow bridges
COMAND may give differing navigation com-
mands if the actual street/traffic situation
does not correspond with the digital map's
data. For example, if the road layout or the
direction of a one-way street has been
changed.
For this reason, you must always observe
road and traffic rules and regulations during
your journey. Road and traffic rules and reg-
ulations always have priority over the sys-
tem's driving recommendations.
Route guidance begins once a route has been
calculated (Y page 69).
COMAND guides you to your destination by
means of navigation announcements in the
form of audible navigation announcements
and route guidance displays.
The route guidance displays can be seen if the
display is switched to navigation mode.
If you do not follow the navigation announce-
ments or if you leave the calculated route,
COMAND automatically calculates a new
route to the destination.
If the digital map contains the corresponding
information, the following applies:
R during route guidance, COMAND tries to
avoid roads with restricted access. Those
roads, for example, that are closed to
through-traffic.
R roads that have time restrictions (e.g.
closed on Sundays and public holidays) are
considered for route guidance on days
when they are open. For this purpose, the
relevant times must be correctly stored in
the database. Route guidance
79Navigation Z
Page 82 of 214
Displays during route guidance
Change of direction Changes of direction have three phases:
R preparation phase
R announcement phase
R change-of-direction phase
Changes in direction are also shown in the
multifunction display of the instrument clus-
ter (see the vehicle Operator's Manual).
Preparation phase: COMAND prepares you
for the upcoming change of direction. Based
on the example display below, the change of
direction is announced by the "Prepare to turn
right message", for instance. You see the full-
screen map.
Announcement phase: COMAND announ-
ces the imminent change of direction. The
change of direction is announced ahead of
time, such as with the announcement "Turn
right in 200 meters".
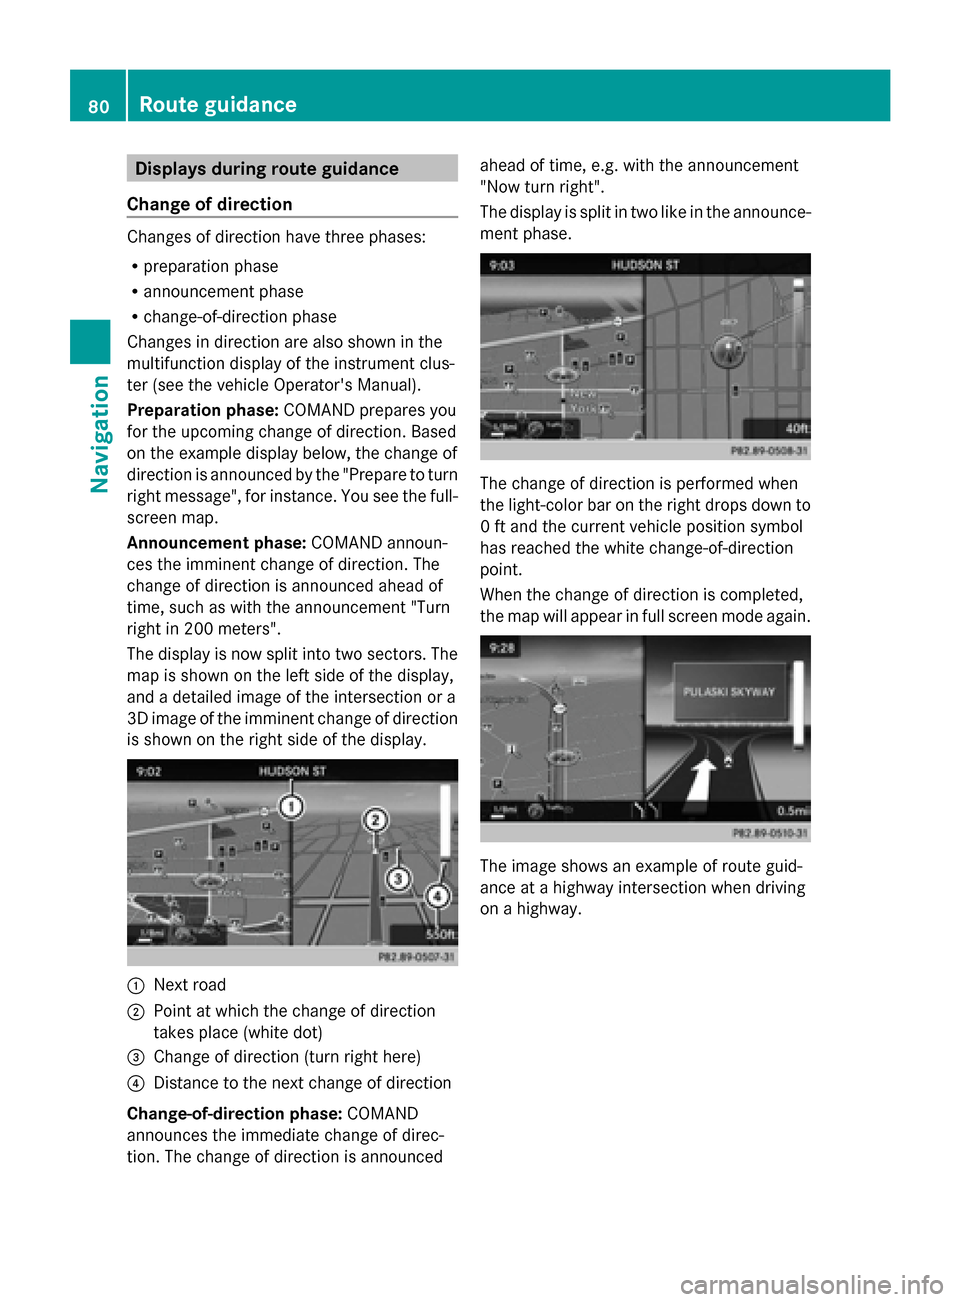
The display is now split into two sectors. The
map is shown on the left side of the display,
and a detailed image of the intersection or a
3D image of the imminent change of direction
is shown on the right side of the display. 0043
Next road
0044 Point at which the change of direction
takes place (white dot)
0087 Change of direction (turn right here)
0085 Distance to the next change of direction
Change-of-direction phase: COMAND
announces the immediate change of direc-
tion. The change of direction is announced ahead of time, e.g. with the announcement
"Now turn right".
The display is split in two like in the announce-
ment phase.
The change of direction is performed when
the light-color bar on the right drops down to
0 ft and the current vehicle position symbol
has reached the white change-of-direction
point.
When the change of direction is completed,
the map will appear in full screen mode again. The image shows an example of route guid-
ance at a highway intersection when driving
on a highway.80
Route guidanceNavigation
Page 83 of 214
Lane recommendations
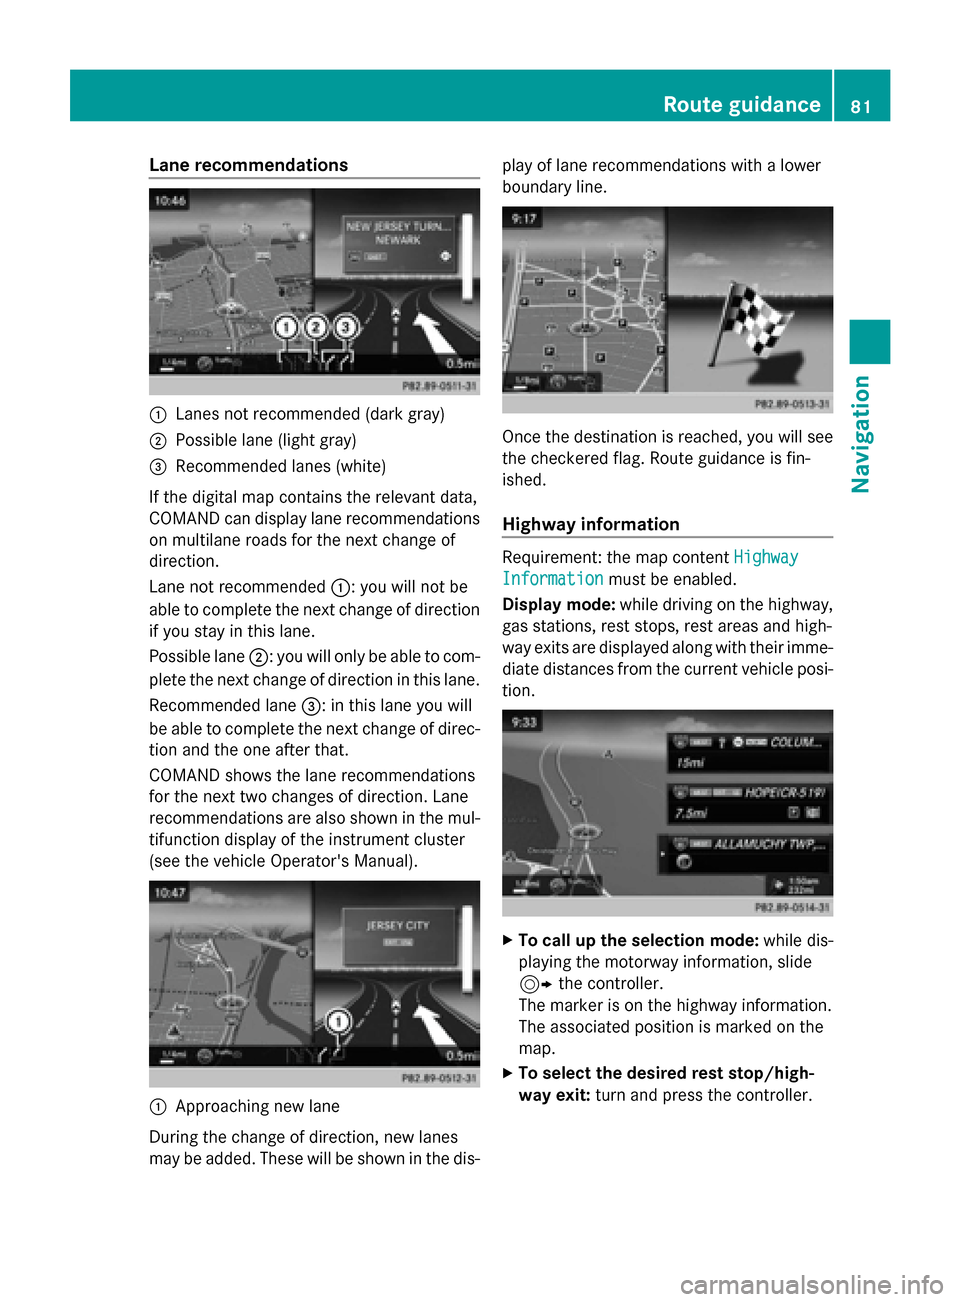
0043
Lanes not recommended (dark gray)
0044 Possible lane (light gray)
0087 Recommended lanes (white)
If the digital map contains the relevant data,
COMAND can display lane recommendations
on multilane roads for the next change of
direction.
Lane not recommended 0043: you will not be
able to complete the next change of direction
if you stay in this lane.
Possible lane 0044: you will only be able to com-
plete the next change of direction in this lane.
Recommended lane 0087: in this lane you will
be able to complete the next change of direc-
tion and the one after that.
COMAND shows the lane recommendations
for the next two changes of direction. Lane
recommendations are also shown in the mul-
tifunction display of the instrument cluster
(see the vehicle Operator's Manual). 0043
Approaching new lane
During the change of direction, new lanes
may be added. These will be shown in the dis- play of lane recommendations with a lower
boundary line. Once the destination is reached, you will see
the checkered flag. Route guidance is fin-
ished.
Highway information
Requirement: the map content
Highway Highway
Information
Information must be enabled.
Display mode: while driving on the highway,
gas stations, rest stops, rest areas and high-
way exits are displayed along with their imme-
diate distances from the current vehicle posi-
tion. X
To call up the selection mode: while dis-
playing the motorway information, slide
9 the controller.
The marker is on the highway information.
The associated position is marked on the
map.
X To select the desired rest stop/high-
way exit: turn and press the controller. Route guidance
81Navigation Z
Page 89 of 214
X
To switch to navigation mode: press the
00BE button.
X To show the menu: slide6the control-
ler.
X To select Traffic
Traffic: turn and press the con-
troller.
If satellite signals cannot be received or
there are no traffic reports, you will see a
message to this effect.
X To close the report: press the controller.
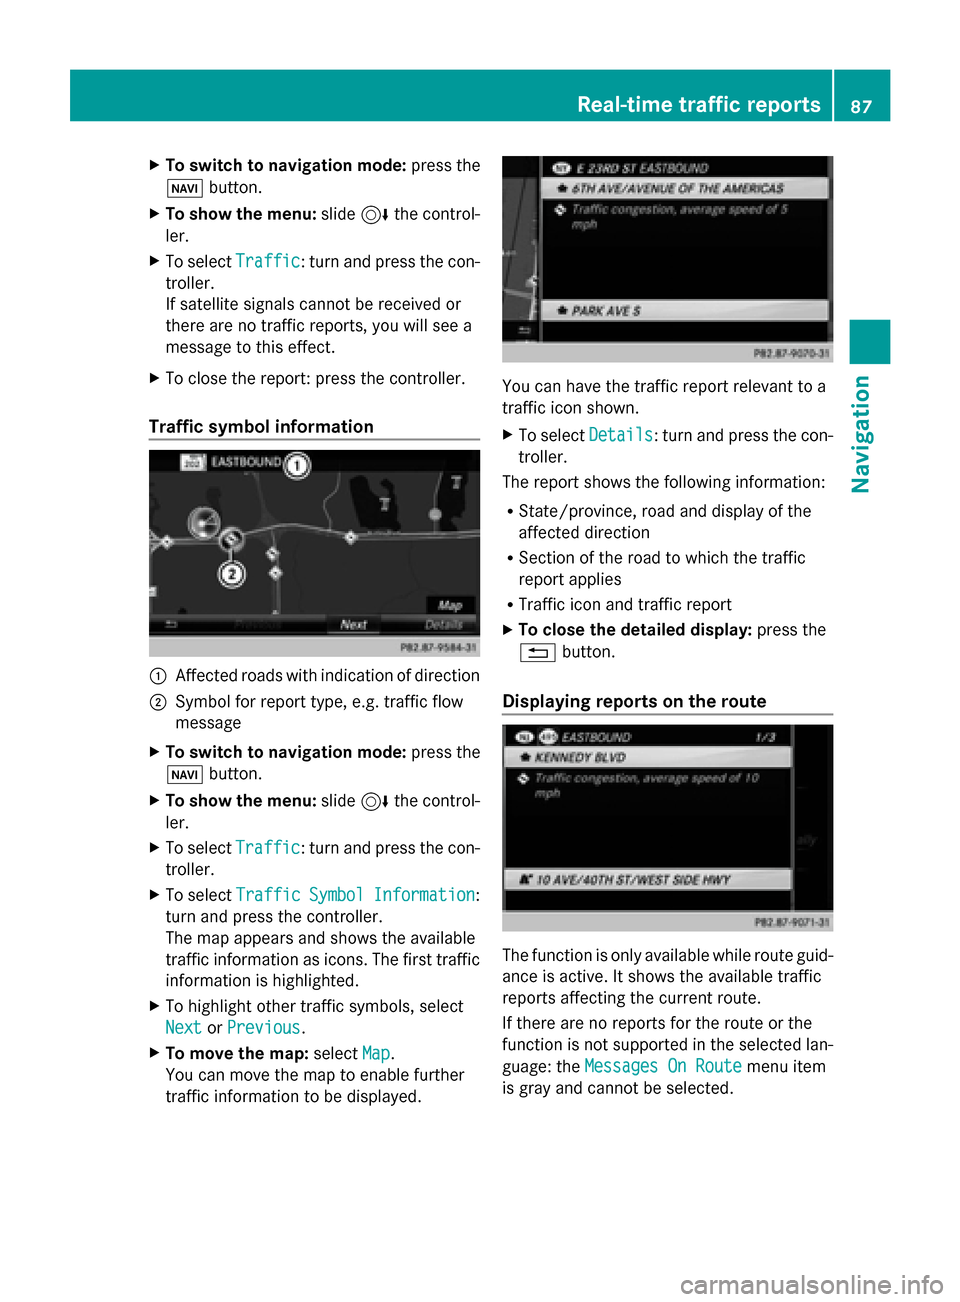
Traffic symbol information 0043
Affected roads with indication of direction
0044 Symbol for report type, e.g. traffic flow
message
X To switch to navigation mode: press the
00BE button.
X To show the menu: slide6the control-
ler.
X To select Traffic
Traffic: turn and press the con-
troller.
X To select Traffic
Traffic Symbol
Symbol Information Information:
turn and press the controller.
The map appears and shows the available
traffic information as icons. The first traffic
information is highlighted.
X To highlight other traffic symbols, select
Next
Next orPrevious Previous.
X To move the map: selectMap
Map.
You can move the map to enable further
traffic information to be displayed. You can have the traffic report relevant to a
traffic icon shown.
X
To select Details Details: turn and press the con-
troller.
The report shows the following information:
R State/province, road and display of the
affected direction
R Section of the road to which the traffic
report applies
R Traffic icon and traffic report
X To close the detailed display: press the
0038 button.
Displaying reports on the route The function is only available while route guid-
ance is active. It shows the available traffic
reports affecting the current route.
If there are no reports for the route or the
function is not supported in the selected lan-
guage: the
Messages On Route Messages On Route menu item
is gray and cannot be selected. Real-time traffic reports
87Navigation Z
Page 92 of 214
X
To add to a contact: selectAdd to Con‐
Add to Con‐
tact
tact.
The address book appears.
X Search for the address book entry (contact)
(Y page 117).
X Press the controller.
You will see the Saving
Saving Successful Successful mes-
sage. The destination address is allocated
to a contact in the address book.
Telephone numbers are not transferred to
the telephone number fields of the address
book. After selecting the destination
address from the address book for naviga-
tion, the associated telephone number will
be displayed.
If the contact already has two destination
addresses, a prompt will appear asking if a
destination address should be overwritten.
X Select Yes
Yes orNo No.
If you select Yes
Yes, a list showing both des-
tination addresses appears.
X To select the destination address: turn and
press the controller.
The destination address is overwritten. Saving the current vehicle position
X To switch to navigation mode: press the
00CB button.
X To show the menu: slide6the control-
ler.
X To select Position
Position: turn and press the
controller.
X Select Save
Save.
The current vehicle position is saved in
"Last destinations". Saving the crosshair position
X To switch to navigation mode: press the
00CB button.
X To display the crosshair: press the con-
troller. X
Move the map to the desired position
(Y page 64).
X To show the menu: press the controller.
X To select Position
Position: turn and press the
controller.
X Select Save Save.
The crosshair position is saved in the last
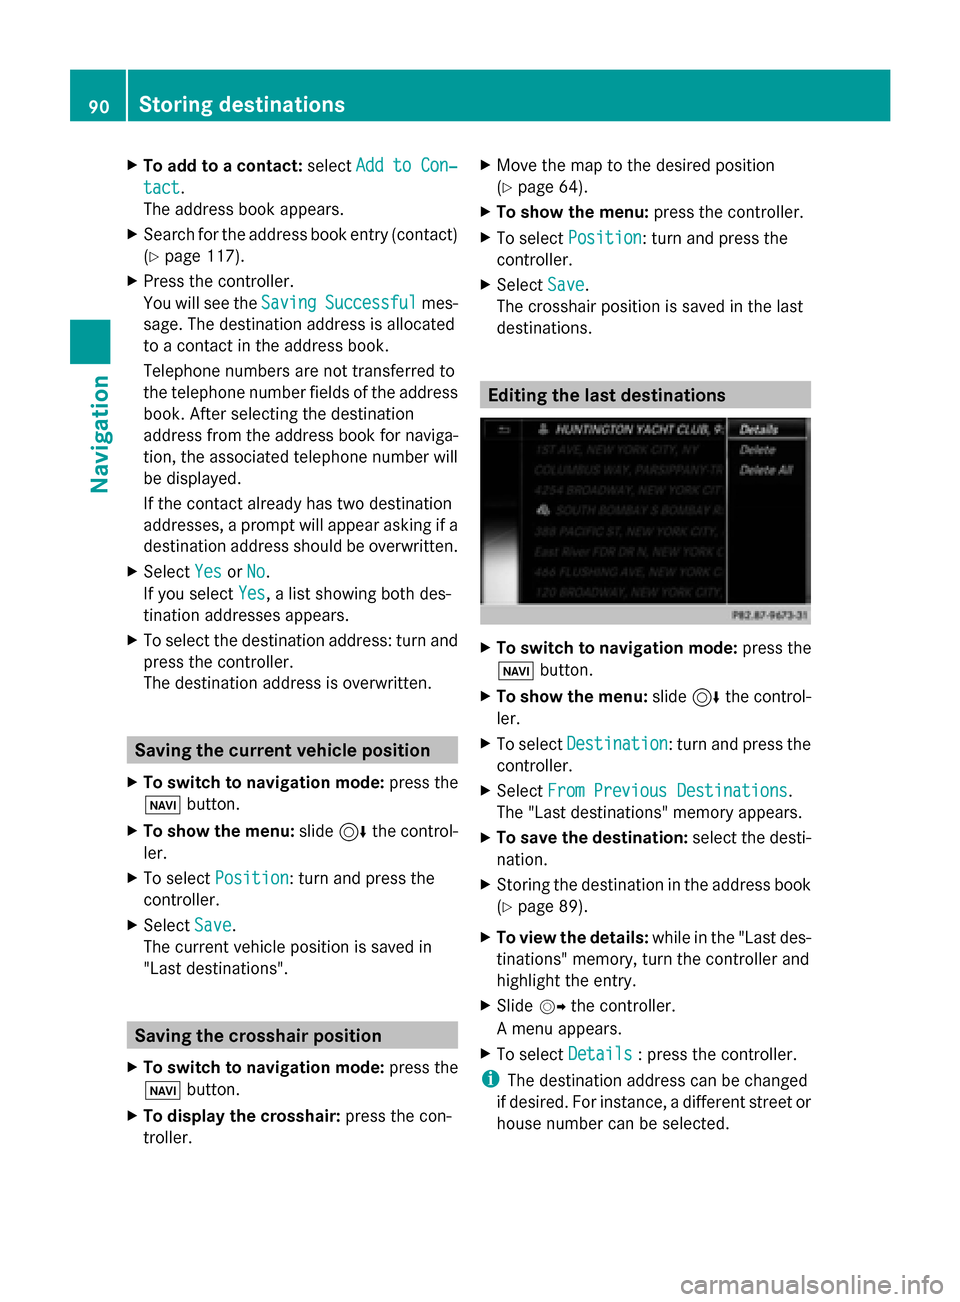
destinations. Editing the last destinations
X
To switch to navigation mode: press the
00CB button.
X To show the menu: slide6the control-
ler.
X To select Destination Destination: turn and press the
controller.
X Select From Previous Destinations
From Previous Destinations .
The "Last destinations" memory appears.
X To save the destination: select the desti-
nation.
X Storing the destination in the address book
(Y page 89).
X To view the details: while in the "Last des-
tinations" memory, turn the controller and
highlight the entry.
X Slide 00520096the controller.
A menu appears.
X To select Details Details: press the controller.
i The destination address can be changed
if desired. For instance, a different street or
house number can be selected. 90
Storing destinationsNavigation
Page 93 of 214
X
To delete one or all destinations: while
in the "Last destinations" memory, turn the
controller and highlight the entry.
X Slide 00520096the controller.
A menu appears.
X To select Delete
Delete orDelete All
Delete All : turn and
press the controller.
A prompt appears.
X Select Yes
Yes orNo No.
Selecting Yes
Yesdeletes the selected desti-
nation or all destinations. Map functions
General notes
Company logos displayed on the map are
trademarks of the respective companies and
used solely for the purpose of indicating the
locations of these companies. The use of such
logos on the map does not indicate approval
of, support of or advertising by these compa-
nies for the navigation system itself. Map settings
Setting the map scale Requirement: the map is in full screen mode,
the menu is faded out (Y page 63).
The lower left-hand section of the map shows
the currently set map scale and compass nee-
dle.
Right-hand-drive vehicles: the currently set
map scale and compass needle are displayed
in the lower right-hand section of the map.
Displaying the map in full screen mode
X To hide the menu: press the 0038button.
or
X Slide the controller to the center of the map
and press to confirm. X
To set the map scale: as soon as you turn
the controller, the scale bar appears on the
bottom of the display.
X Turn the controller until the needle points
to the desired map scale.
Once you are finished selecting a map
scale, the new map scale will be shown.
i Alternatively, you can carry out this oper-
ation using the touchpad (Y page 21).
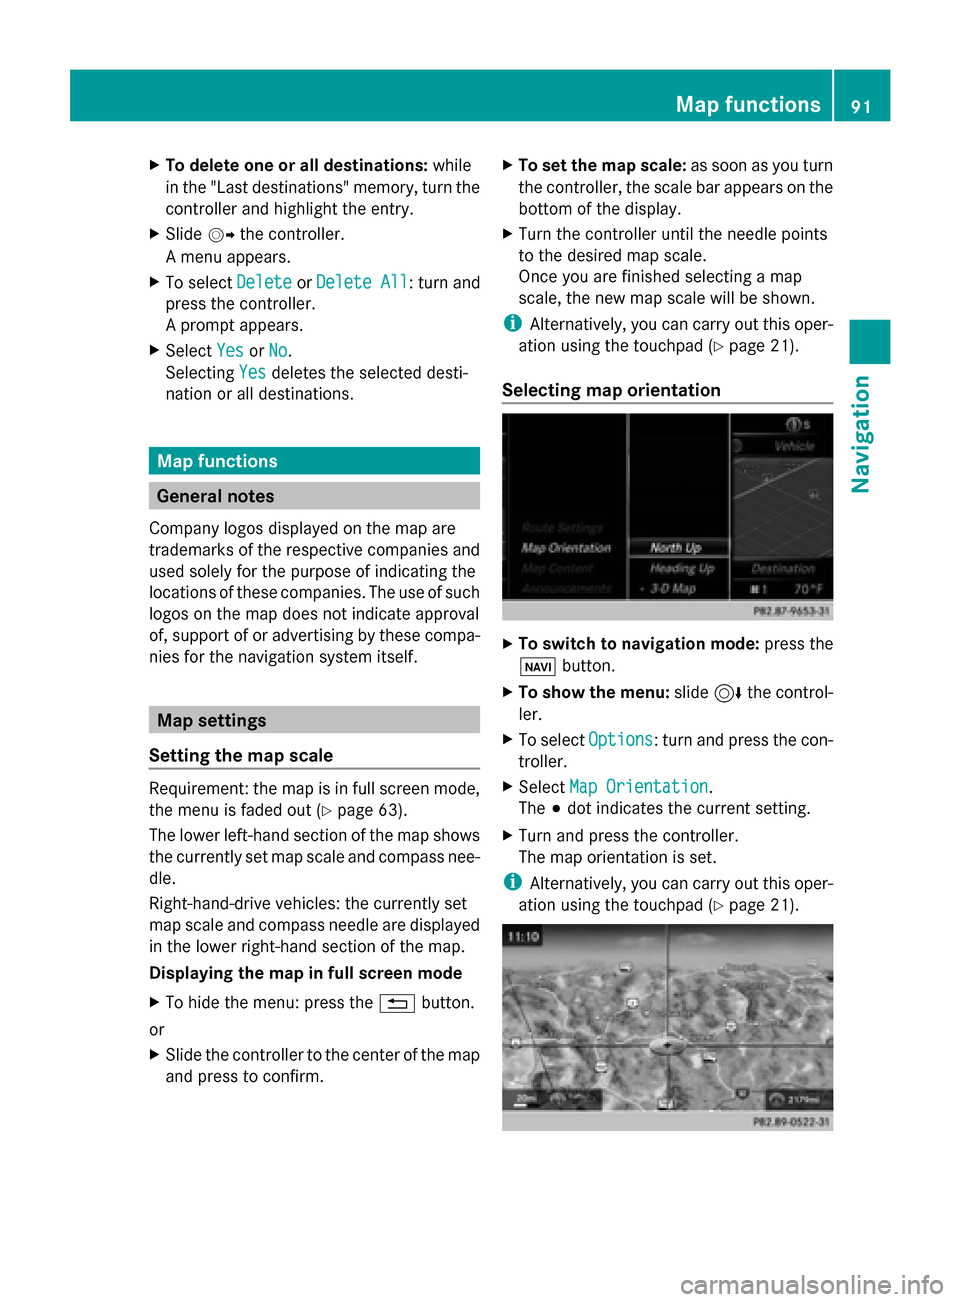
Selecting map orientation X
To switch to navigation mode: press the
00CB button.
X To show the menu: slide6the control-
ler.
X To select Options Options: turn and press the con-
troller.
X Select Map Orientation
Map Orientation.
The 003Bdot indicates the current setting.
X Turn and press the controller.
The map orientation is set.
i Alternatively, you can carry out this oper-
ation using the touchpad (Y page 21). Map functions
91Navigation Z
Page 99 of 214
system in conjunction with the most up-to-
date map software.
Information about new versions of the digital
map can be obtained from an authorized
Mercedes-Benz Center. You can have the dig-
ital map updated there using a data medium,
or you can update it yourself. Navigation functions
Calling up the navigation system
menu
X
To switch to navigation mode: press the
00CB button.
X To show the menu: slide5the control-
ler.
Navi Navi is highlighted in the main function bar.
X Press the controller.
The navigation menu appears.
X Turn the controller to display the navigation
functions one after another.
X To switch to the map: turn the controller
until Navigation Navigation is displayed and press
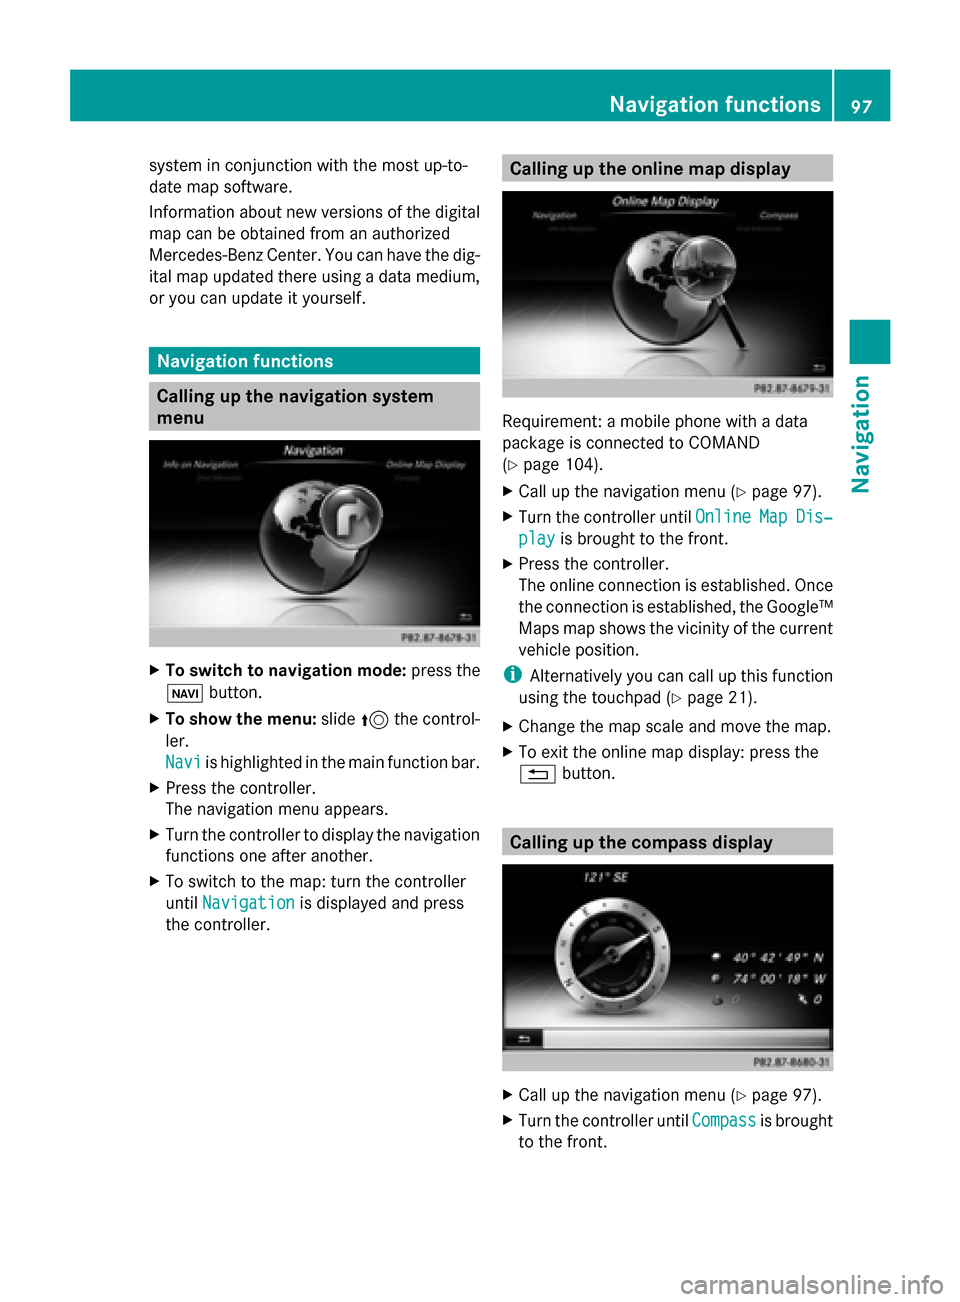
the controller. Calling up the online map display
Requirement: a mobile phone with a data
package is connected to COMAND
(Y
page 104).
X Call up the navigation menu (Y page 97).
X Turn the controller until Online OnlineMap
MapDis‐
Dis‐
play
play is brought to the front.
X Press the controller.
The online connection is established. Once
the connection is established, the Google™
Maps map shows the vicinity of the current
vehicle position.
i Alternatively you can call up this function
using the touchpad (Y page 21).
X Change the map scale and move the map.
X To exit the online map display: press the
0038 button. Calling up the compass display
X
Call up the navigation menu (Y page 97).
X Turn the controller until Compass Compassis brought
to the front. Navigation functions
97Navigation Z
Page 110 of 214
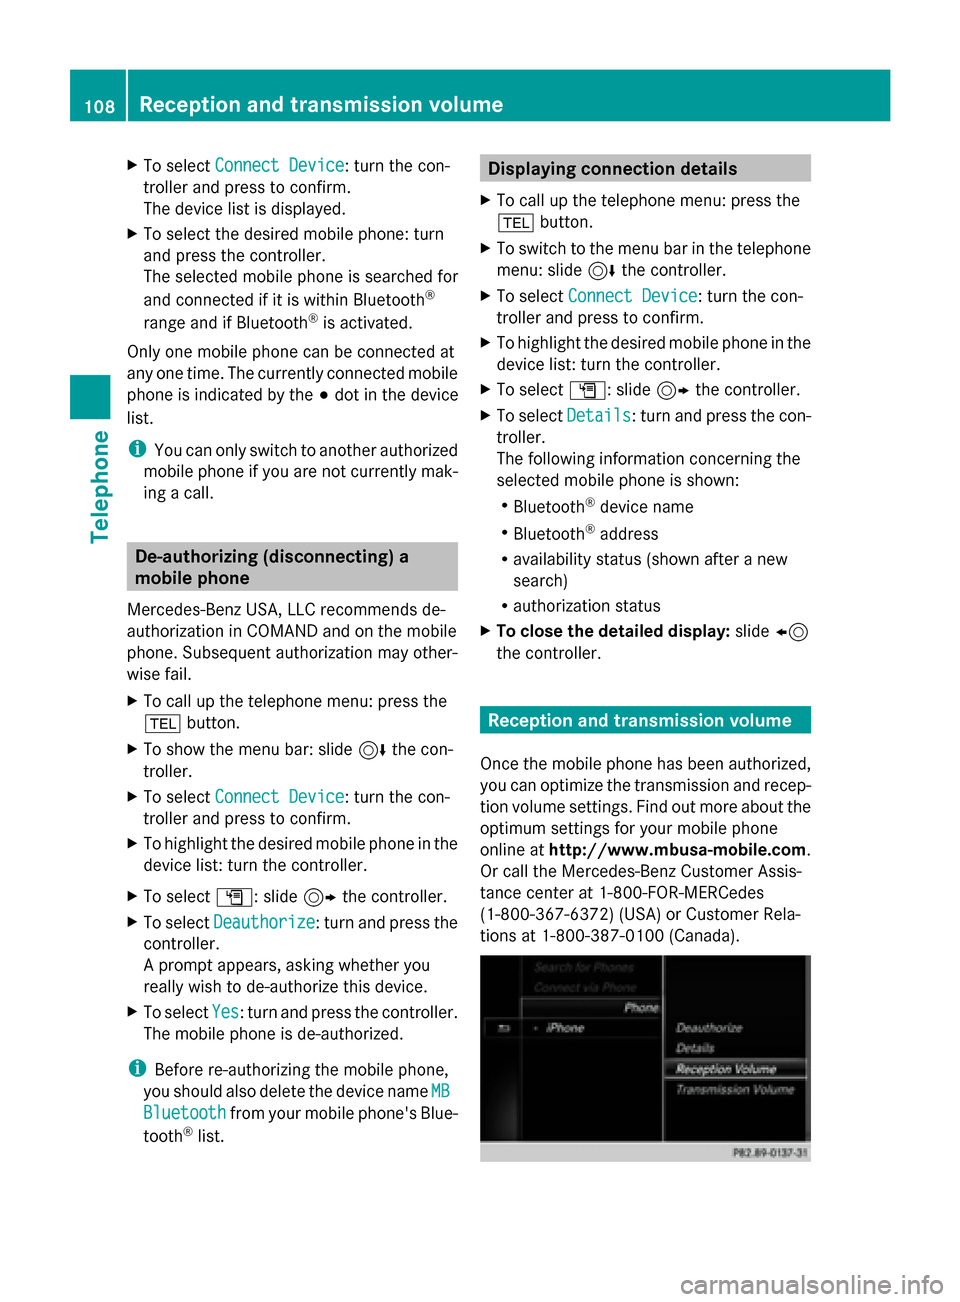
X
To select Connect Device
Connect Device: turn the con-
troller and press to confirm.
The device list is displayed.
X To select the desired mobile phone: turn
and press the controller.
The selected mobile phone is searched for
and connected if it is within Bluetooth ®
range and if Bluetooth ®
is activated.
Only one mobile phone can be connected at
any one time. The currently connected mobile
phone is indicated by the 003Bdot in the device
list.
i You can only switch to another authorized
mobile phone if you are not currently mak-
ing a call. De-authorizing (disconnecting) a
mobile phone
Mercedes-Benz USA, LLC recommends de-
authorization in COMAND and on the mobile
phone. Subsequent authorization may other-
wise fail.
X To call up the telephone menu: press the
002B button.
X To show the menu bar: slide 6the con-
troller.
X To select Connect Device
Connect Device: turn the con-
troller and press to confirm.
X To highlight the desired mobile phone in the
device list: turn the controller.
X To select G: slide 9the controller.
X To select Deauthorize
Deauthorize: turn and press the
controller.
A prompt appears, asking whether you
really wish to de-authorize this device.
X To select Yes Yes: turn and press the controller.
The mobile phone is de-authorized.
i Before re-authorizing the mobile phone,
you should also delete the device name MB
MB
Bluetooth
Bluetooth from your mobile phone's Blue-
tooth ®
list. Displaying connection details
X To call up the telephone menu: press the
002B button.
X To switch to the menu bar in the telephone
menu: slide 6the controller.
X To select Connect Device Connect Device: turn the con-
troller and press to confirm.
X To highlight the desired mobile phone in the
device list: turn the controller.
X To select G: slide 9the controller.
X To select Details Details: turn and press the con-
troller.
The following information concerning the
selected mobile phone is shown:
R Bluetooth ®
device name
R Bluetooth ®
address
R availability status (shown after a new
search)
R authorization status
X To close the detailed display: slide8
the controller. Reception and transmission volume
Once the mobile phone has been authorized,
you can optimize the transmission and recep-
tion volume settings. Find out more about the
optimum settings for your mobile phone
online at http://www.mbusa-mobile.com.
Or call the Mercedes-Benz Customer Assis-
tance center at 1-800-FOR-MERCedes
(1-800-367-6372) (USA) or Customer Rela-
tions at 1-800-387-010 0(Canada). 108
Reception and transmission volumeTelephone
Page 111 of 214
X
To call up the telephone menu: press the
002B button.
X To switch to the menu bar: slide 6the
controller.
X To select Connect Device
Connect Device: turn the con-
troller and press to confirm.
The device list appears.
X To highlight the desired mobile phone in the
device list: turn the controller.
X To select G: slide 9the controller.
X To select Reception Volume
Reception Volume orTrans‐ Trans‐
mission Volume
mission Volume: turn and press the con-
troller.
X To select a volume setting: turn the con-
troller.
X To accept changes: press the controller.
i Incorrect settings may have an impact on
the quality of calls. Using the telephone
Accepting a call
X To select Accept Accept: press the controller.
or
X Press 0061on the multifunction steering
wheel.
The call is accepted.
Additional functions available during a call
(Y page 110).
Adjusting the call volume (Y page 108).
Further information about ending a call
(Y page 113).
i You can also accept the call by voice com-
mand using the Voice Control System (see
the separate operating instructions).
i If the phone number of the caller is trans-
ferred, it appears in the display. If the
phone number is saved in the phone book,
the contact's name is also displayed. If the
phone number is not transferred,
Unknown Unknown is shown in the display. Rejecting a call
X To select Reject
Reject: turn the controller and
press to confirm.
or
X Press 0076on the multifunction steering
wheel. Making a call
Using the telephone menu X
To call up the telephone menu: press the
002B button.
X To select all numbers one after the other in
the telephone menu: turn and press the
controller each time.
X To select 0097in the telephone menu: turn
and press the controller.
The call is made.
Further information about ending a call
(Y page 113).
Redial X
To call up the telephone menu: press the
002B button.
X To select 0097in the telephone menu: turn
and press the controller.
The list of outgoing calls is displayed. The
most recently dialed number is at the top.
X To select an entry and make a call: turn and
press the controller.
Further information about ending a call
(Y page 113).
Using call lists X
To call up the telephone menu: press the
002B button.
X To switch to the menu bar: slide 6the
controller.
X To select Call Lists
Call Lists: turn and press the
controller. Using the telephone
109Telephone Z