clock MERCEDES-BENZ C-Class 2015 W205 Comand Manual
[x] Cancel search | Manufacturer: MERCEDES-BENZ, Model Year: 2015, Model line: C-Class, Model: MERCEDES-BENZ C-Class 2015 W205Pages: 214, PDF Size: 5.16 MB
Page 24 of 214
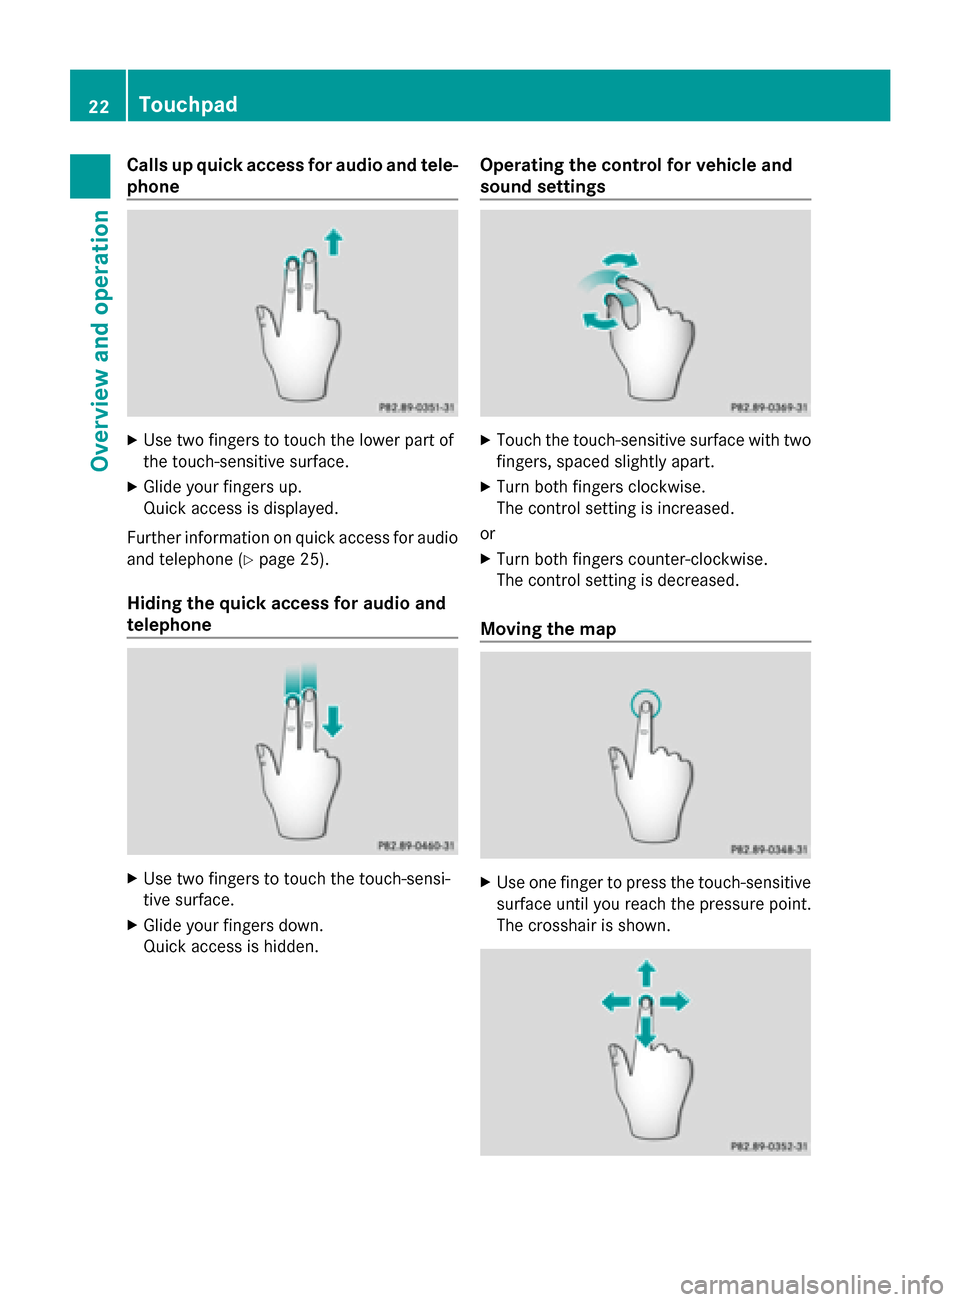
Calls up quick access for audio and tele-
phone X
Use two fingers to touch the lower part of
the touch-sensitive surface.
X Glide your fingers up.
Quick access is displayed.
Further information on quick access for audio
and telephone (Y page 25).
Hiding the quick access for audio and
telephone X
Use two fingers to touch the touch-sensi-
tive surface.
X Glide your fingers down.
Quick access is hidden. Operating the control for vehicle and
sound settings X
Touch the touch-sensitive surface with two
fingers, spaced slightly apart.
X Turn both fingers clockwise.
The control setting is increased.
or
X Turn both fingers counter-clockwise.
The control setting is decreased.
Moving the map X
Use one finger to press the touch-sensitive
surface until you reach the pressure point.
The crosshair is shown. 22
TouchpadOverview and operation
Page 60 of 214
X
Call up the climate control menu
(Y page 54).
X To select Ionization Ionization: turn and press the
controller.
You switch it on or off, depending on the
previous status.
Exiting a menu
X Press the 0038button.
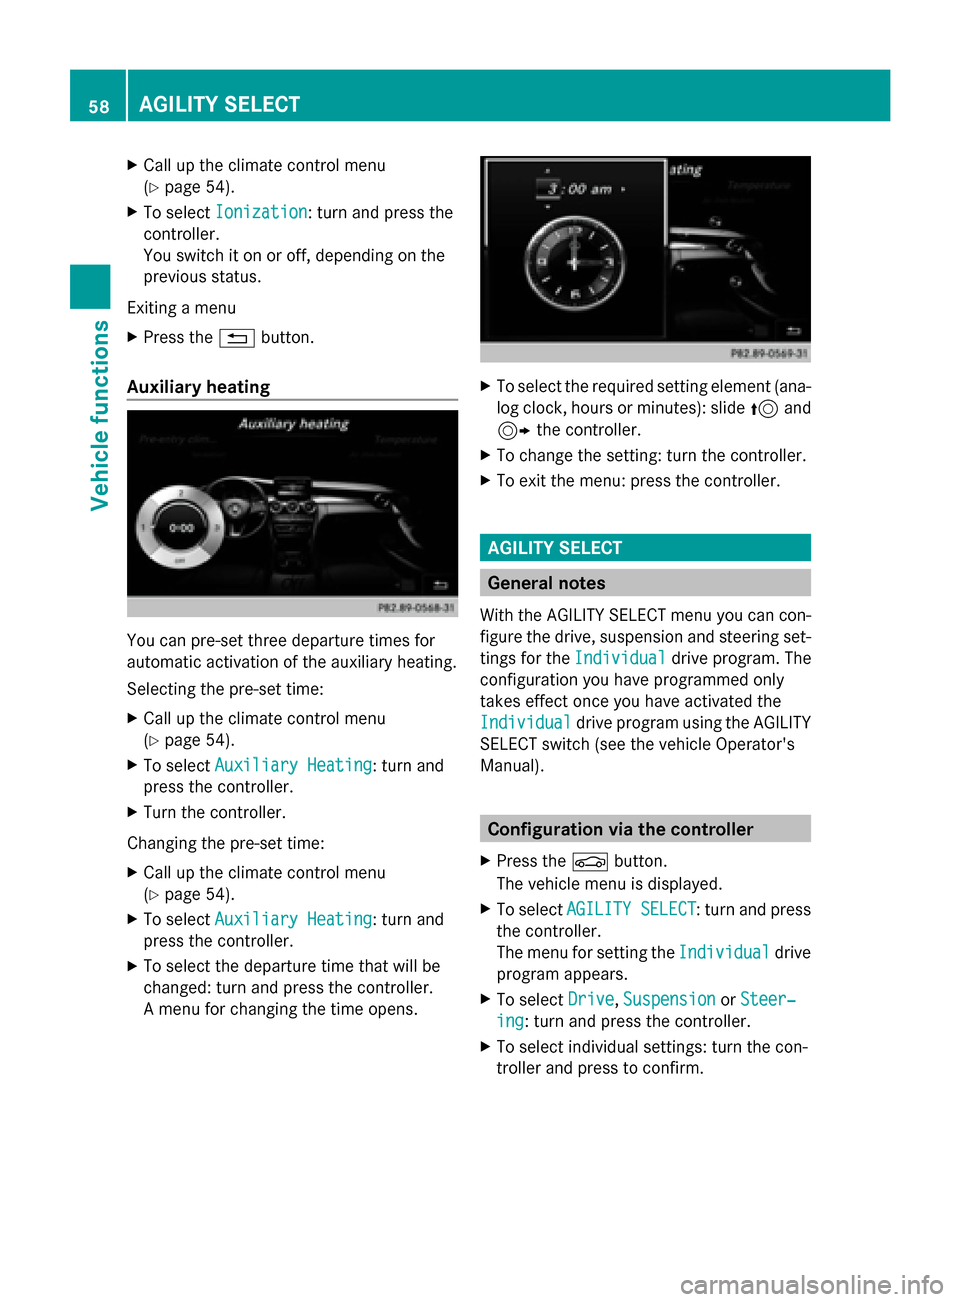
Auxiliary heating You can pre-set three departure times for
automatic activation of the auxiliary heating.
Selecting the pre-set time:
X Call up the climate control menu
(Y page 54).
X To select Auxiliary Heating
Auxiliary Heating: turn and
press the controller.
X Turn the controller.
Changing the pre-set time:
X Call up the climate control menu
(Y page 54).
X To select Auxiliary Heating Auxiliary Heating: turn and
press the controller.
X To select the departure time that will be
changed: turn and press the controller.
A menu for changing the time opens. X
To select the required setting element (ana-
log clock, hours or minutes): slide 5and
9 the controller.
X To change the setting: turn the controller.
X To exit the menu: press the controller. AGILITY SELECT
General notes
With the AGILITY SELECT menu you can con-
figure the drive, suspension and steering set-
tings for the Individual
Individual drive program. The
configuration you have programmed only
takes effect once you have activated the
Individual Individual drive program using the AGILITY
SELECT switch (see the vehicle Operator's
Manual). Configuration via the controller
X Press the 00D4button.
The vehicle menu is displayed.
X To select AGILITY SELECT AGILITY SELECT : turn and press
the controller.
The menu for setting the Individual Individualdrive
program appears.
X To select Drive
Drive,Suspension
Suspension orSteer‐
Steer‐
ing
ing : turn and press the controller.
X To select individual settings: turn the con-
troller and press to confirm. 58
AGILITY SELECTVehicle functions
Page 77 of 214
Selecting a point of interest
Requirement for "Calling a POI": a mobile
phone is connected to COMAND
(Y page 104).
Requirements for "Viewing the vicinity of the
destination" and "Loading data from the Inter-
net": mbrace must be activated for Internet
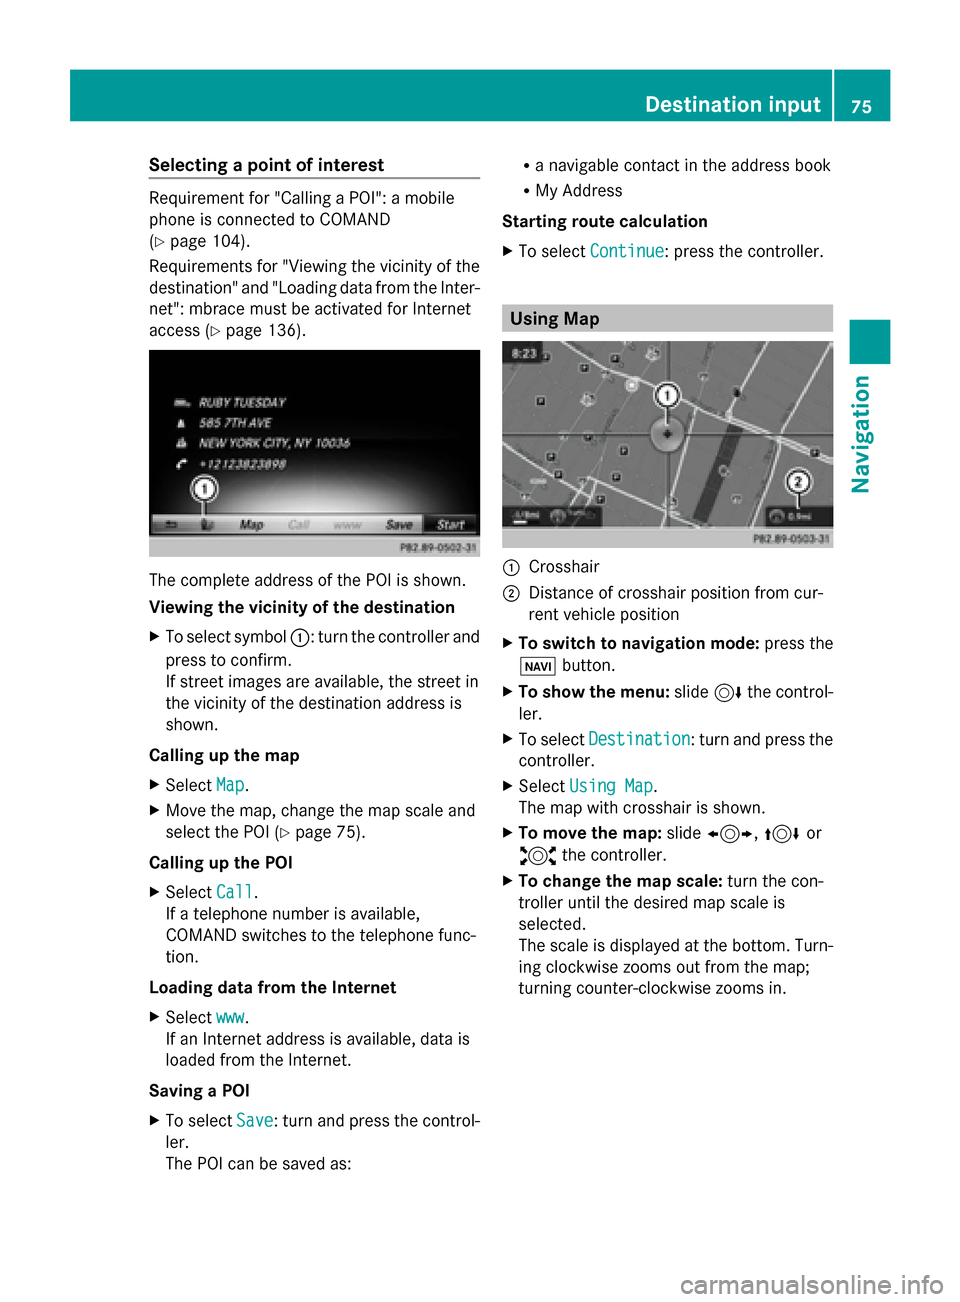
access (Y page 136). The complete address of the POI is shown.
Viewing the vicinity of the destination
X To select symbol 0043: turn the controller and
press to confirm.
If street images are available, the street in
the vicinity of the destination address is
shown.
Calling up the map
X Select Map
Map.
X Move the map, change the map scale and
select the POI (Y page 75).
Calling up the POI
X Select Call Call.
If a telephone number is available,
COMAND switches to the telephone func-
tion.
Loading data from the Internet
X Select www
www.
If an Internet address is available, data is
loaded from the Internet.
Saving a POI
X To select Save
Save: turn and press the control-
ler.
The POI can be saved as: R
a navigable contact in the address book
R My Address
Starting route calculation
X To select Continue Continue: press the controller. Using Map
0043
Crosshair
0044 Distance of crosshair position from cur-
rent vehicle position
X To switch to navigation mode: press the
00CB button.
X To show the menu: slide6the control-
ler.
X To select Destination Destination: turn and press the
controller.
X Select Using Map
Using Map.
The map with crosshair is shown.
X To move the map: slide1, 4or
2 the controller.
X To change the map scale: turn the con-
troller until the desired map scale is
selected.
The scale is displayed at the bottom. Turn-
ing clockwise zooms out from the map;
turning counter-clockwise zooms in. Destination input
75Navigation Z
Page 160 of 214
These include:
R
tunnels
R parking garages
R locations inside or next to buildings
R locations in the vicinity of other structures
SIRIUS XM Satellite Radio offers more than
140 digital-quality radio channels providing
100% commercial-free music, sports, news
and entertainment.
SIRIUS XM Satellite Radio employs a fleet of
high-performance satellites to broadcast
around the clock throughout the USA and
Canada.
The satellite radio program is available for a
monthly fee. Details are available from the
SIRIUS XM Service Center and at
http://www.siriusxm.com (USA) or
http://www.siriusxm.ca (Canada).
Your new Mercedes-Benz vehicle comes with
SIRIUS XM Satellite Radio pre-installed at the
factory. This service is free for a six-month
trial period. About a month before the trial
period ends, information will be provided on
how to extend this subscription. An acoustic
signal sounds and a message is shown,
describing how the subscription can be
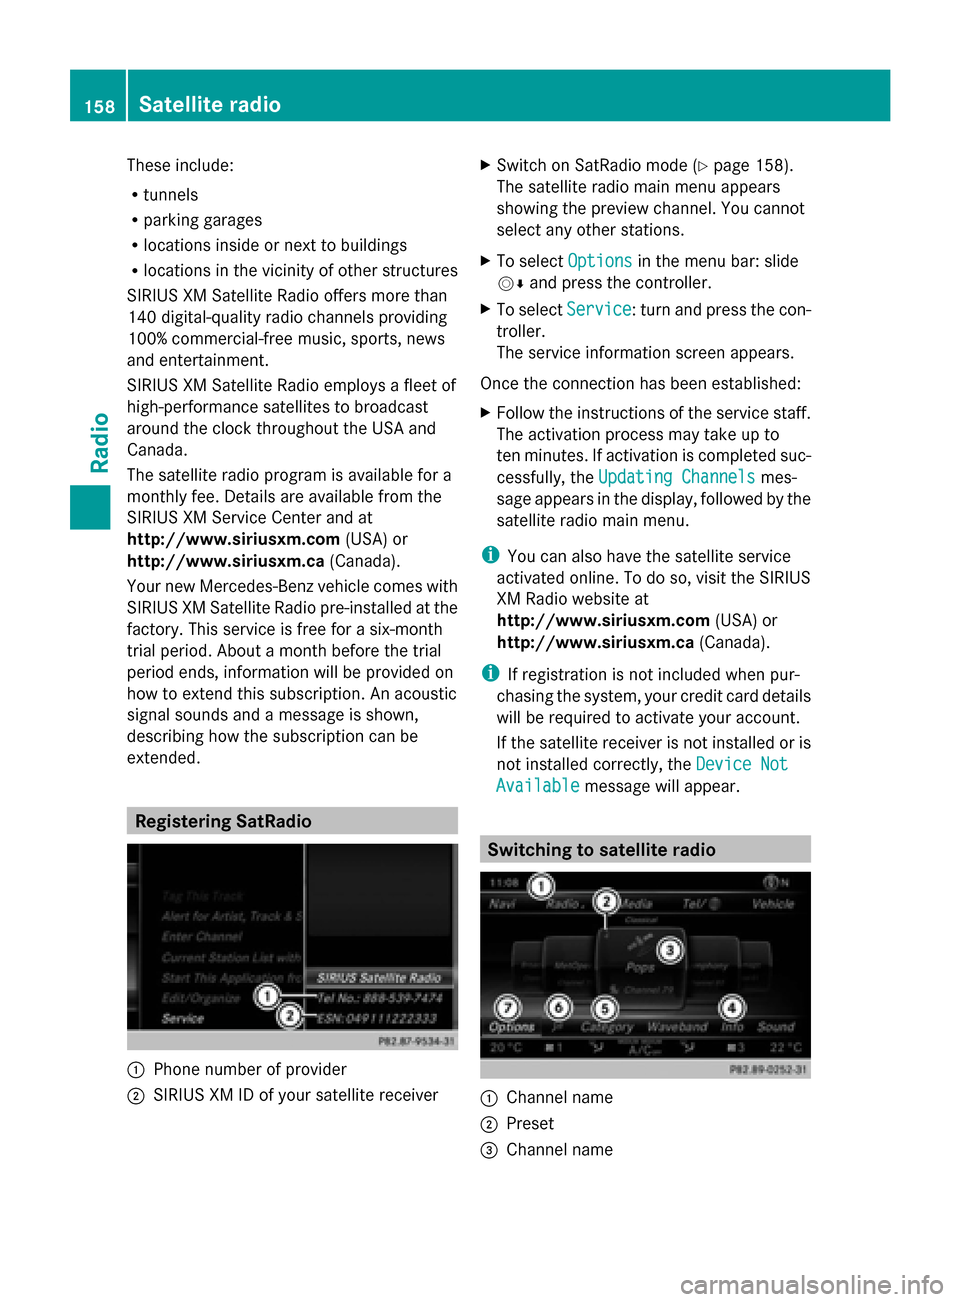
extended. Registering SatRadio
0043
Phone number of provider
0044 SIRIUS XM ID of your satellite receiver X
Switch on SatRadio mode (Y page 158).
The satellite radio main menu appears
showing the preview channel. You cannot
select any other stations.
X To select Options Optionsin the menu bar: slide
00520064 and press the controller.
X To select Service Service: turn and press the con-
troller.
The service information screen appears.
Once the connection has been established:
X Follow the instructions of the service staff.
The activation process may take up to
ten minutes. If activation is completed suc-
cessfully, the Updating Channels Updating Channels mes-
sage appears in the display, followed by the
satellite radio main menu.
i You can also have the satellite service
activated online. To do so, visit the SIRIUS
XM Radio website at
http://www.siriusxm.com (USA) or
http://www.siriusxm.ca (Canada).
i If registration is not included when pur-
chasing the system, your credit card details
will be required to activate your account.
If the satellite receiver is not installed or is
not installed correctly, the Device Not Device Not
Available
Available message will appear. Switching to satellite radio
0043
Channel name
0044 Preset
0087 Channel name 158
Satellite radioRadio
Page 197 of 214
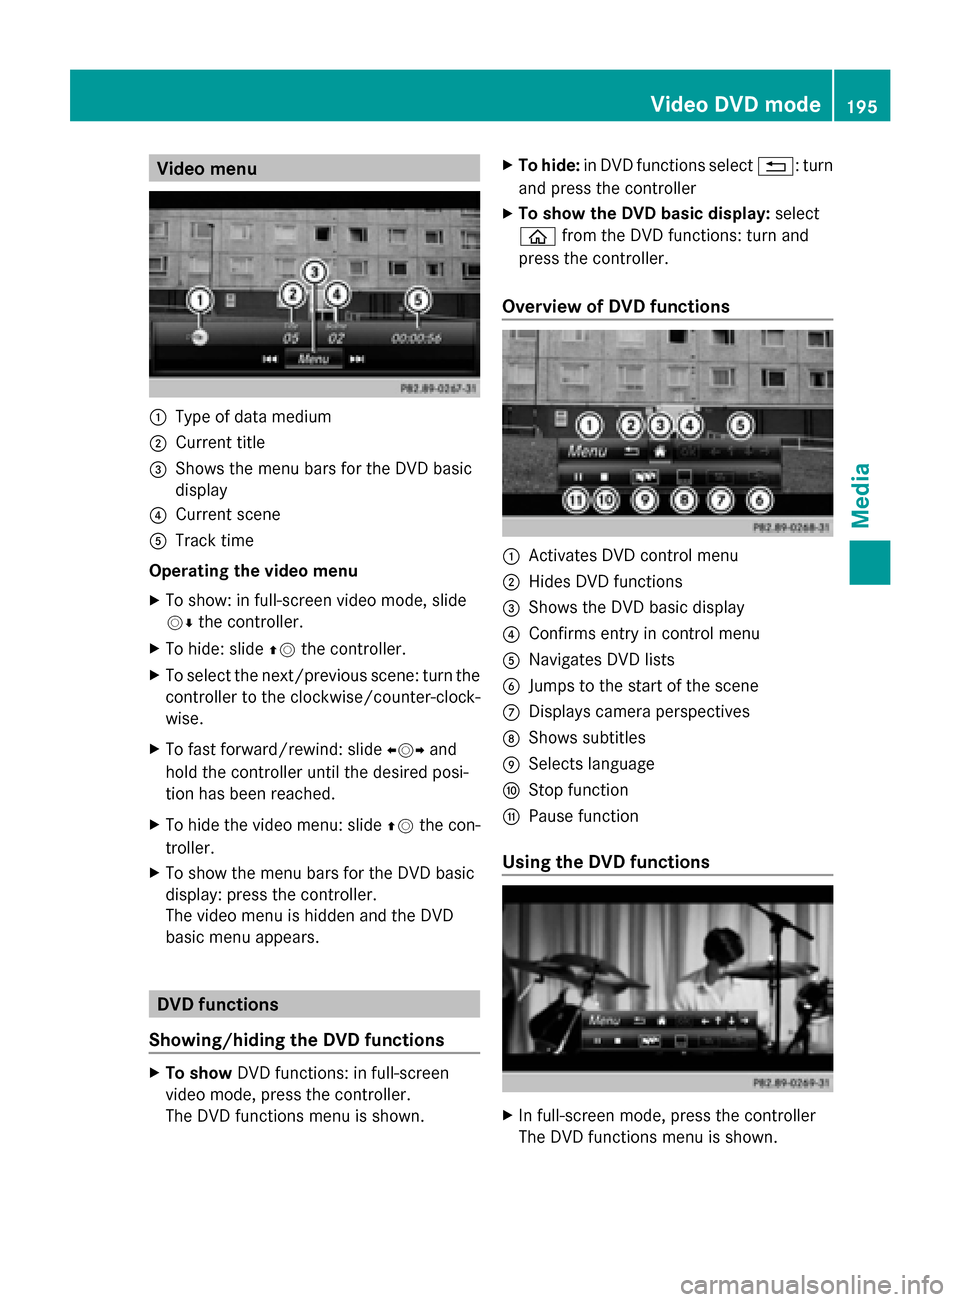
Video menu
0043
Type of data medium
0044 Current title
0087 Shows the menu bars for the DVD basic
display
0085 Current scene
0083 Track time
Operating the video menu
X To show: in full-screen video mode, slide
00520064 the controller.
X To hide: slide 00970052the controller.
X To select the next/previous scene: turn the
controller to the clockwise/counter-clock-
wise.
X To fast forward/rewind: slide 009500520096and
hold the controller until the desired posi-
tion has been reached.
X To hide the video menu: slide 00970052the con-
troller.
X To show the menu bars for the DVD basic
display: press the controller.
The video menu is hidden and the DVD
basic menu appears. DVD functions
Showing/hiding the DVD functions X
To show DVD functions: in full-screen
video mode, press the controller.
The DVD functions menu is shown. X
To hide: in DVD functions select 0038: turn
and press the controller
X To show the DVD basic display: select
00E2 from the DVD functions: turn and
press the controller.
Overview of DVD functions 0043
Activates DVD control menu
0044 Hides DVD functions
0087 Shows the DVD basic display
0085 Confirms entry in control menu
0083 Navigates DVD lists
0084 Jumps to the start of the scene
006B Displays camera perspectives
006C Shows subtitles
006D Selects language
006E Stop function
006F Pause function
Using the DVD functions X
In full-screen mode, press the controller
The DVD functions menu is shown. Video DVD mode
195Media Z
Page 199 of 214
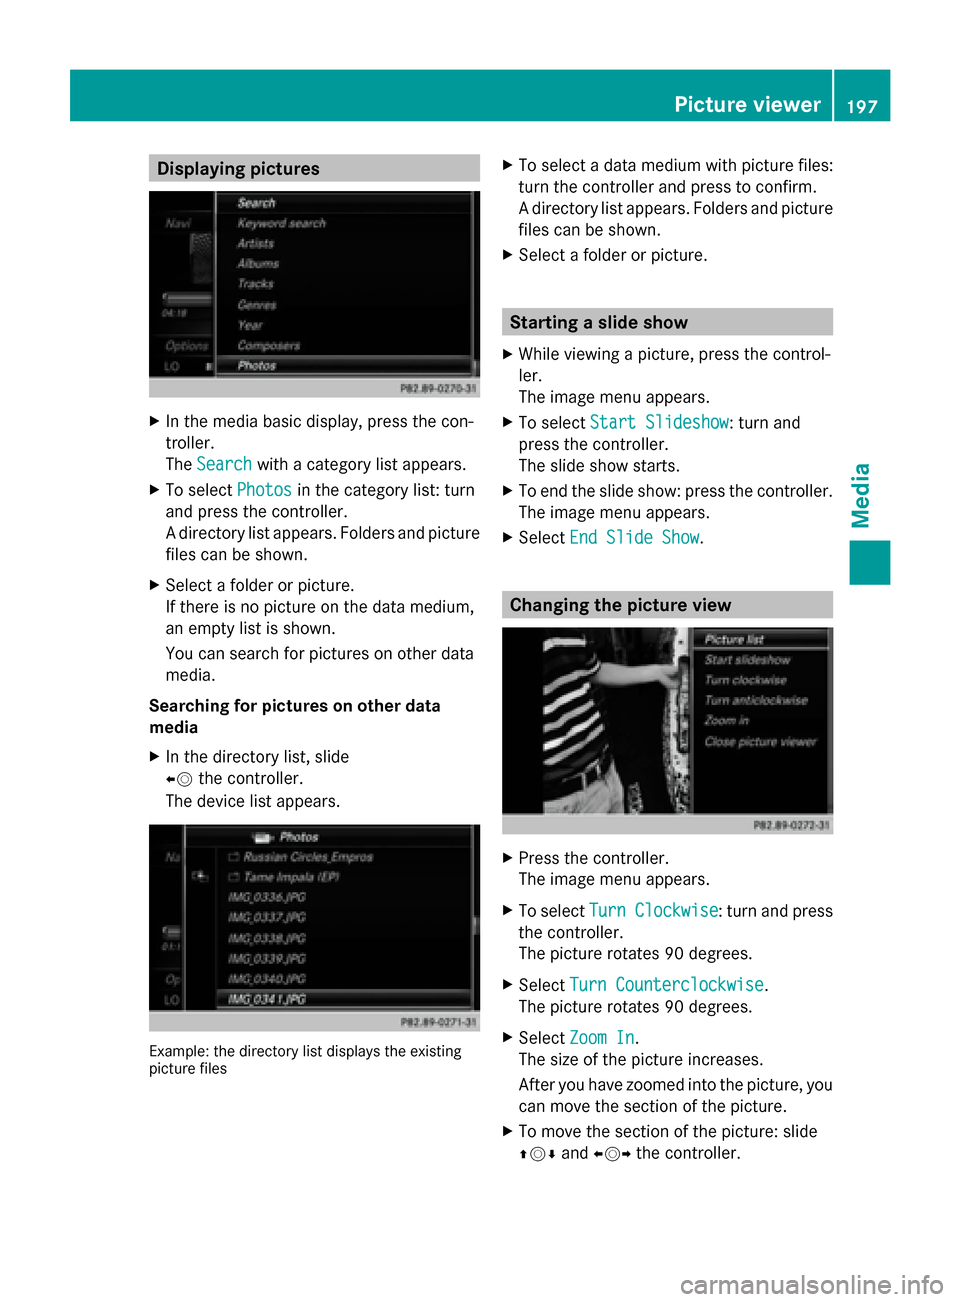
Displaying pictures
X
In the media basic display, press the con-
troller.
The Search
Search with a category list appears.
X To select Photos
Photos in the category list: turn
and press the controller.
A directory list appears. Folders and picture
files can be shown.
X Select a folder or picture.
If there is no picture on the data medium,
an empty list is shown.
You can search for pictures on other data
media.
Searching for pictures on other data
media
X In the directory list, slide
00950052 the controller.
The device list appears. Example: the directory list displays the existing
picture files X
To select a data medium with picture files:
turn the controller and press to confirm.
A directory list appears. Folders and picture
files can be shown.
X Select a folder or picture. Starting a slide show
X While viewing a picture, press the control-
ler.
The image menu appears.
X To select Start Slideshow Start Slideshow : turn and
press the controller.
The slide show starts.
X To end the slide show: press the controller.
The image menu appears.
X Select End Slide Show End Slide Show. Changing the picture view
X
Press the controller.
The image menu appears.
X To select Turn Clockwise Turn Clockwise : turn and press
the controller.
The picture rotates 90 degrees.
X Select Turn Counterclockwise Turn Counterclockwise.
The picture rotates 90 degrees.
X Select Zoom In Zoom In.
The size of the picture increases.
After you have zoomed into the picture, you
can move the section of the picture.
X To move the section of the picture: slide
009700520064 and009500520096 the controller. Picture viewer
197Media Z