MERCEDES-BENZ C-Class 2017 W205 Comand Manual
Manufacturer: MERCEDES-BENZ, Model Year: 2017, Model line: C-Class, Model: MERCEDES-BENZ C-Class 2017 W205Pages: 178, PDF Size: 5.62 MB
Page 161 of 178
In order to manually adjust the brightness, con-
trast and color, the dynamic image enhance-
ment function and the automatic daylight
adjustment feature must be switched off.
XTo selectBrightness,Contrastor
Color: turn and press the controller.
A sliding menu appears.
XTo select the required value: turn the control-
ler.
XTo exit the sliding menu: slide 8the con-
troller.
Setting the picture format
The following options are available for the
screen format for the DVD being played:
RAuto
R16:9
R4:3
RZoom
XTo set the picture format: turn and press the
controller.
The dot before the menu entry shows the
selected format.
DVD's control menu
Most DVDs have their own control menuwhich
can be operated using the controller.
Showing the DVD's control menu
XTo show DVD functions: in full-screen video
mode, press the controller.
The DVD functions menu is shown.
XTo select Menufrom the DVD functions menu:
turn and press the controller.
The DVD functions menu is hidden and the
DVD's menu entries (e.g. scenes, language,
trailers) are displayed.
XTo select a menu entry: turn and press the
controller.
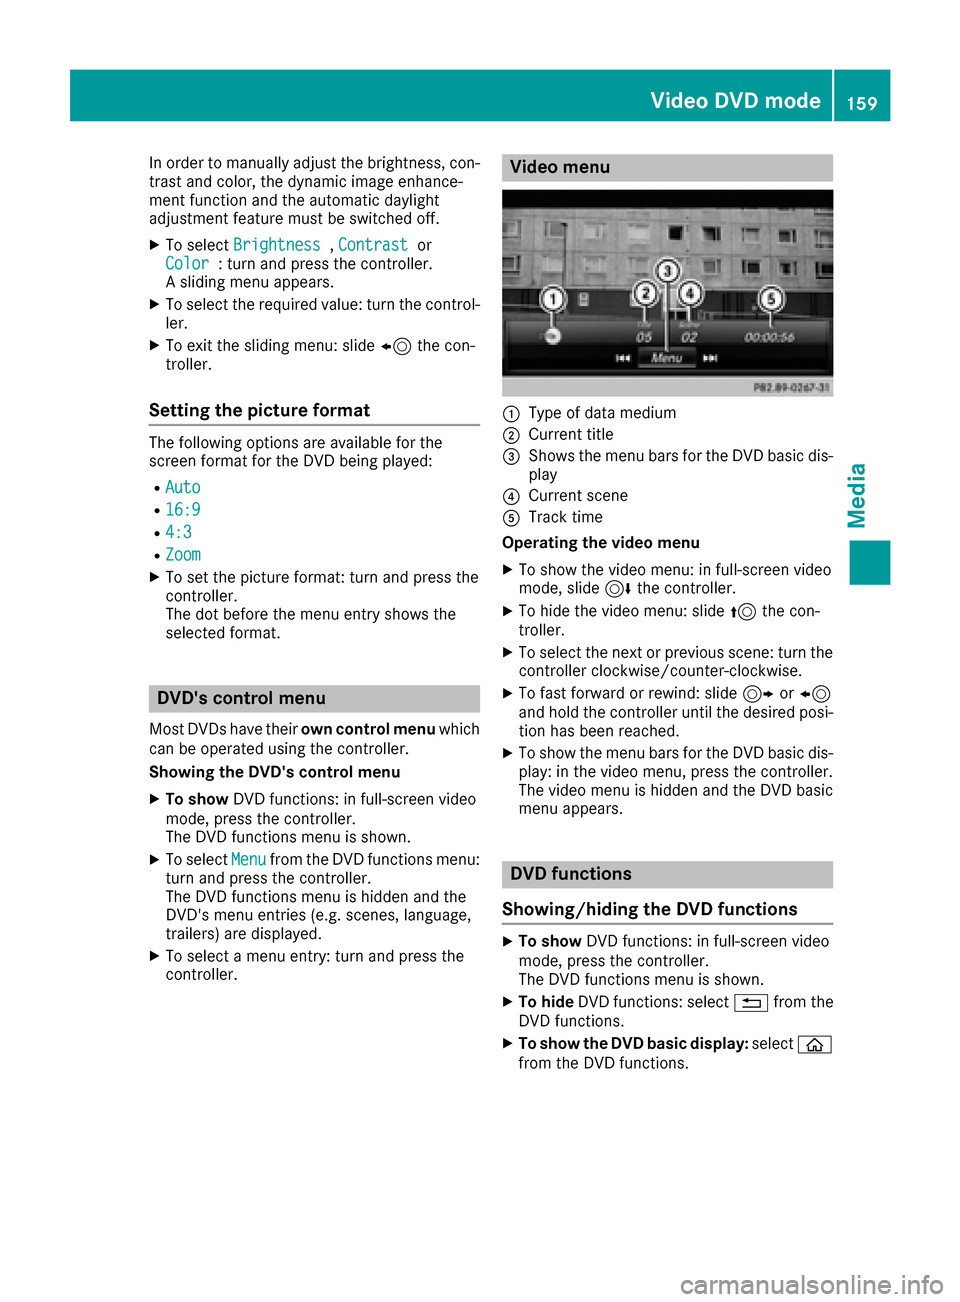
Video menu
:Type of data medium
;Current title
=Shows the menu bars for the DVD basic dis- play
?Current scene
ATrack time
Operating the video menu
XTo show the video menu: in full-screen video
mode, slide 6the controller.
XTo hide the video menu: slide 5the con-
troller.
XTo select the next or previous scene: turn the controller clockwise/counter-clockwise.
XTo fast forward or rewind: slide 9or8
and hold the controller until the desired posi- tion has been reached.
XTo show the menu bars for the DVD basic dis-
play: in the video menu, press the controller.
The video menu is hidden and the DVD basic
menu appears.
DVD functions
Showing/hiding the DVD functions
XTo show DVD functions: in full-screen video
mode, press the controller.
The DVD functions menu is shown.
XTo hide DVD functions: select %from the
DVD functions.
XTo show the DVD basic display: selectò
from the DVD functions.
Video DVD mode159
Media
Z
Page 162 of 178
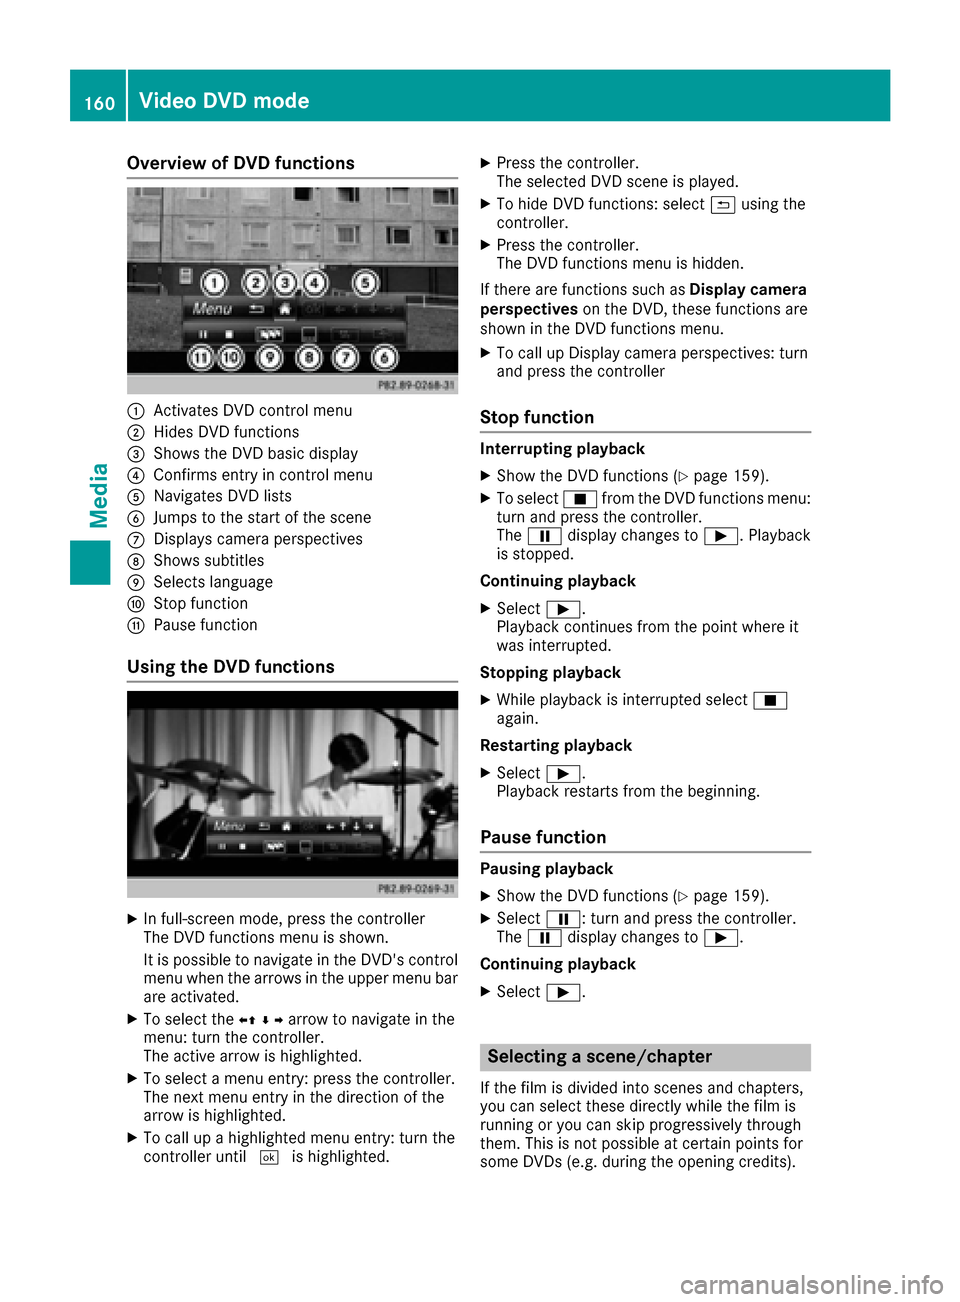
Overview of DVD functions
:Activates DVD control menu
;Hides DVD functions
=Shows the DVD basic display
?Confirms entry in control menu
ANavigates DVD lists
BJumps to the start of the scene
CDisplays camera perspectives
DShows subtitles
ESelects language
FStop function
GPause function
Using the DVD functions
XIn full-screen mode, press the controller
The DVD functions menu is shown.
It is possible to navigate in the DVD's control
menu when the arrows in the upper menu bar
are activated.
XTo select theXZ¬Yarrow to navigate in the
menu: turn the controller.
The active arrow is highlighted.
XTo select a menu entry: press the controller.
The next menu entry in the direction of the
arrow is highlighted.
XTo call up a highlighted menu entry: turn the
controller until ¬is highlighted.
XPress the controller.
The selected DVD scene is played.
XTo hide DVD functions: select &using the
controller.
XPress the controller.
The DVD functions menu is hidden.
If there are functions such as Display camera
perspectives on the DVD, these functions are
shown in the DVD functions menu.
XTo call up Display camera perspectives: turn
and press the controller
Stop function
Interrupting playback
XShow the DVD functions (Ypage 159).
XTo select Éfrom the DVD functions menu:
turn and press the controller.
The Ë display changes to Ì. Playback
is stopped.
Continuing playback
XSelect Ì.
Playback continues from the point where it
was interrupted.
Stopping playback
XWhile playback is interrupted select É
again.
Restarting playback
XSelect Ì.
Playback restarts from the beginning.
Pause function
Pausing playback
XShow the DVD functions (Ypage 159).
XSelect Ë: turn and press the controller.
The Ë display changes to Ì.
Continuing playback
XSelect Ì.
Selecting a scene/chapter
If the film is divided into scenes and chapters,
you can select these directly while the film is
running or you can skip progressively through
them. This is not possible at certain points for
some DVDs (e.g. during the opening credits).
160Video DVD mode
Media
Page 163 of 178
It may also be possible to select the scene and
chapter from the functions stored on the DVD.
XTo skip forwards or back:in the video menu,
turn the controller.
The next or previous scene in the film is skip-
ped to.
iThe DVD functions can also be used to make
selections (Ypage 159).
Picture viewer
General notes
If there are pictures on the active data medium,
you can view them on the multimedia system.
The following data media and picture formats
are supported:
RData media: Media Register, CD, DVD, USB
devices, SD cards
RPicture formats: jpeg, jpg, bmp, png
The maximum image resolution is 20 megapix-
els
It is not possible to view a picture from the driv-
er's side while the vehicle is in motion.
Displaying pictures
XIn media mode, slide 6the controller.
The media menu bar is shown.
XTo select Search: turn and press the control-
ler.
The category list appears.
XTo select Photos: turn and press the control-
ler.
A directory list appears. Folders and picture
files can be shown.
XSelect a folder or picture.
If there is no picture on the data medium, an
empty list is shown.
Searching for pictures on other data media
XYou can search for pictures on other data
media.
In the directory list, slide 8the controller.
The device list appears.
XTo select a data medium with picture files:
turn the controller and press to confirm.
A directory list appears. Folders and picture
files can be shown.
XSelect a folder or picture.
Starting a slide show
XWhile viewing a picture, press the controller.
The image menu appears.
XTo select Start Slideshow: turn and press
the controller.
The slide show starts.
XTo end the slide show: press the controller.
The image menu appears.
XSelect End Slide Show.
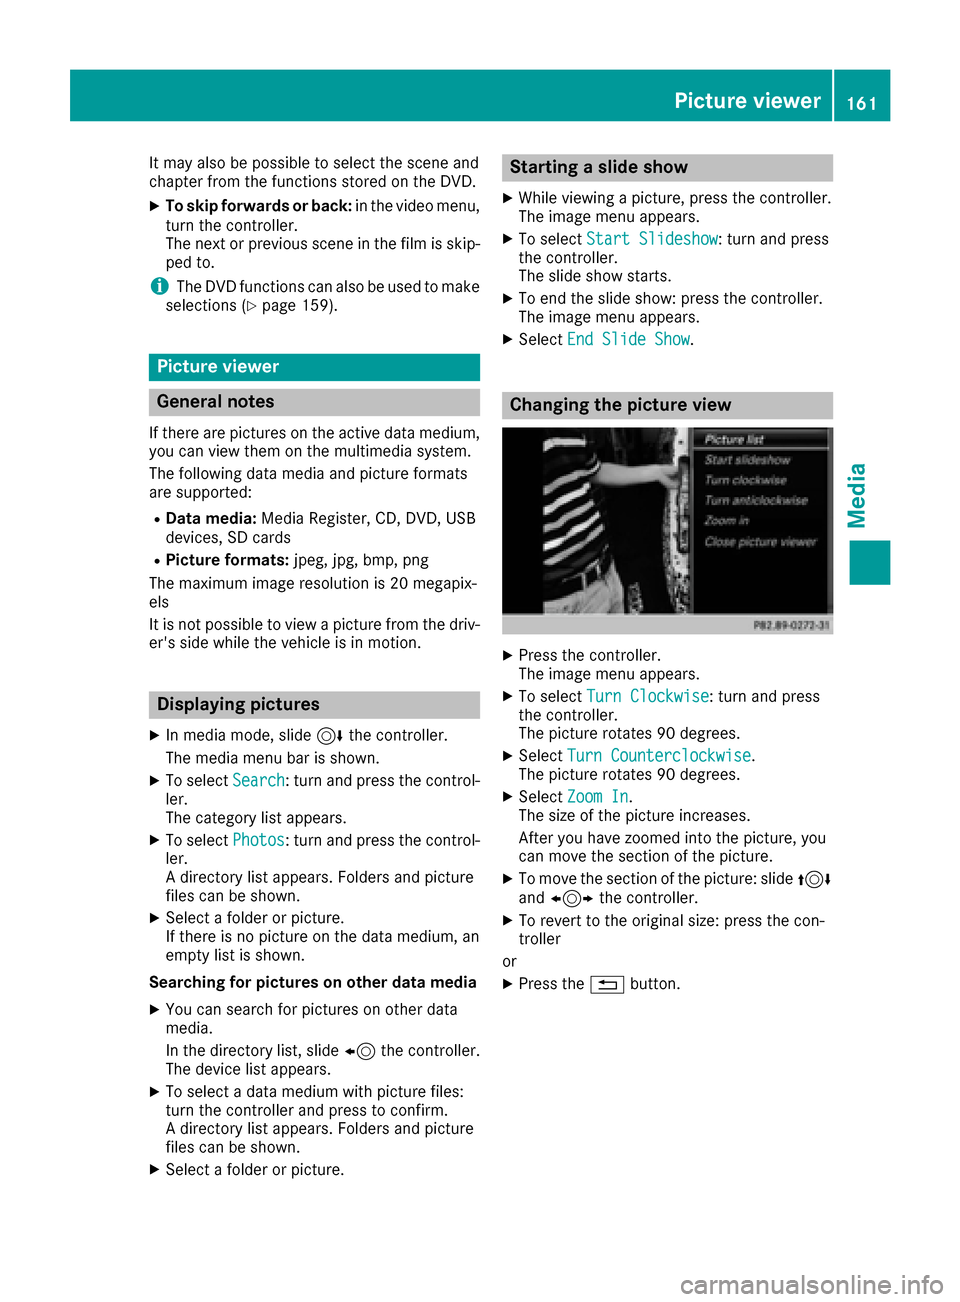
Changing the picture view
XPress the controller.
The image menu appears.
XTo select Turn Clockwise: turn and press
the controller.
The picture rotates 90 degrees.
XSelect Turn Counterclockwise.
The picture rotates 90 degrees.
XSelect Zoom In.
The size of the picture increases.
After you have zoomed into the picture, you
can move the section of the picture.
XTo move the section of the picture: slide 4
and 1 the controller.
XTo revert to the original size: press the con-
troller
or
XPress the %button.
Picture viewer161
Media
Z
Page 164 of 178
Closing the picture viewer
XPress the controller.
The menu appears.
XTo selectClose Picture Viewer: turn and
press the controller.
The multimedia system returns to the last
accessed media function.
162Picture viewer
Media
Page 165 of 178
Your multimediasyste mequipment
These operatin ginstruction sdescribe all th e
standar dan doptional equipment of your multi-
media system, as available at th etime of going
to press. Country-specifi cdifference sare pos -
sible. Bear in min dthat your vehicle may no t
feature all function sdescribed here. Thi salso
applies to safety-relevan tsystems an dfunc-
tions.
Read th einformation on qualifie dspecialis t
workshop sin th evehicle Operator's Manual.
Sound settings
Calling up th esound menu
You can mak evarious sound setting sfo rth e
differen taudio an dvideo sources. It is possible
to set more bass fo rradio mode than fo rCD
audio mode, fo rexample. The respective sound
men ucan be called up from th emen uof th e
desire dmode.
XSwitch to radio mode (Ypage 129).
or
XSwitch to media mode (Ypage 138).
XTo switch to themen ubar :slid e6 thecon-
troller.
XTo selec tà :turn an dpress th econtroller .
The men uappears wit hth elast setting
accessed, e.g. Equalizer
.
Sound men uoverview
FunctionOptions
EqualizerSets treble ,mid -
range an dbass
Balance/faderMoves th esound
focus :left/right an d
front/rea r
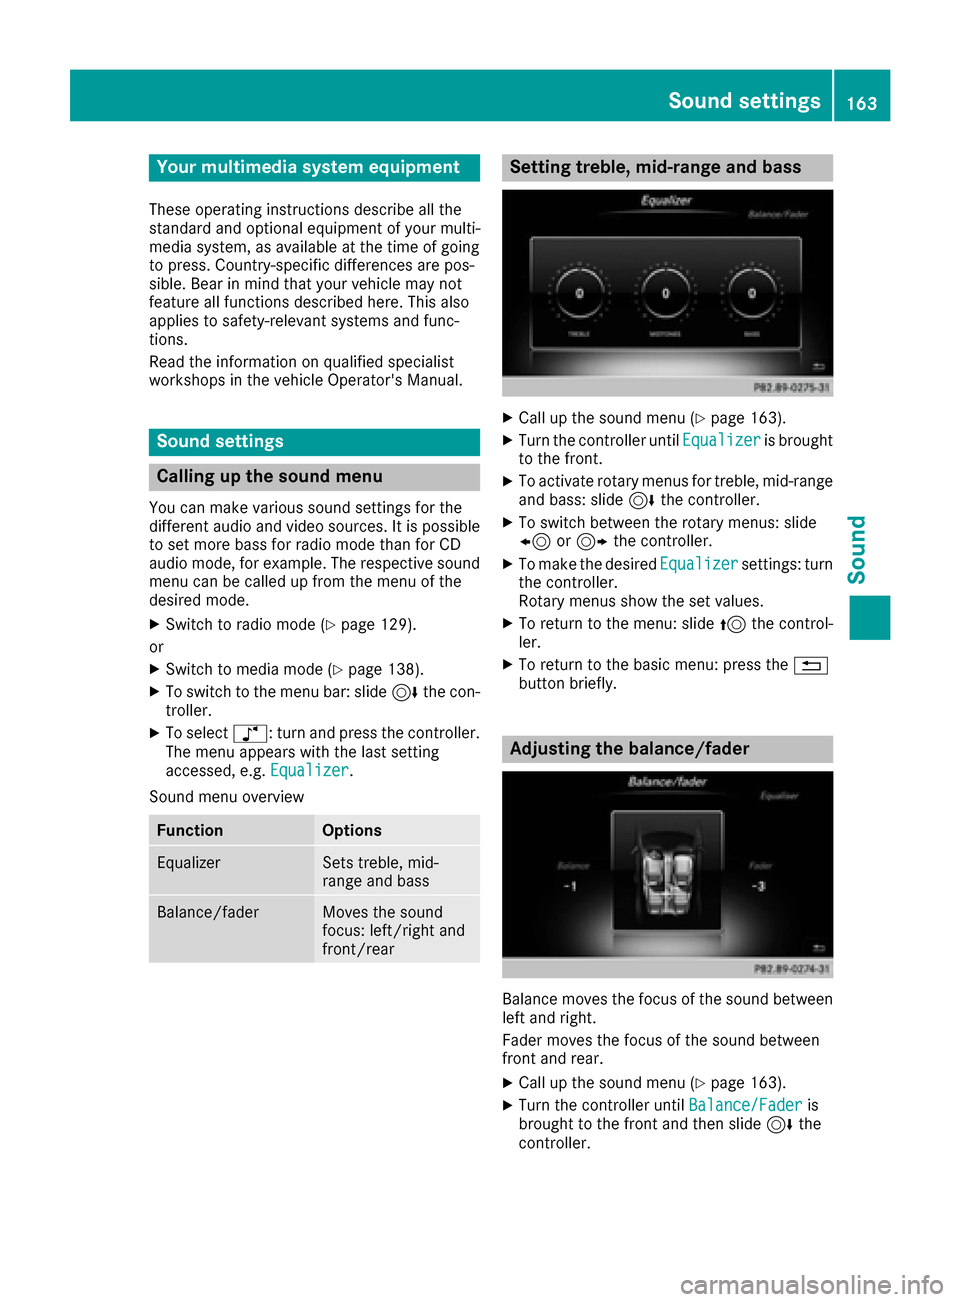
Setting treble, mid-range an dbass
XCall up th esound men u (Ypage 163).
XTurnth econtroller until Equalizeris brought
to th efront.
XTo activat erotary menus fo rtreble ,mid-range
an dbass :slid e6 thecontroller .
XTo switch between th erotary menus: slid e
8 or9 thecontroller .
XTo maketh edesire dEqualize rsettings: turn
th econtroller .
Rotary menus sho wtheset values.
XTo return to th emenu: slid e5 thecontrol-
ler .
XTo return to th ebasi cmenu: press th e%
butto nbriefly.
Adjusting th ebalance/fader
Balance moves th efocus of th esound between
lef tan dright .
Fader moves th efocus of th esound between
fron tan drear.
XCall up th esound men u (Ypage 163).
XTurnth econtroller until Balance/Faderis
brought to th efron tan dthen slid e6 the
controller .
Sound settings163
Sound
Page 166 of 178
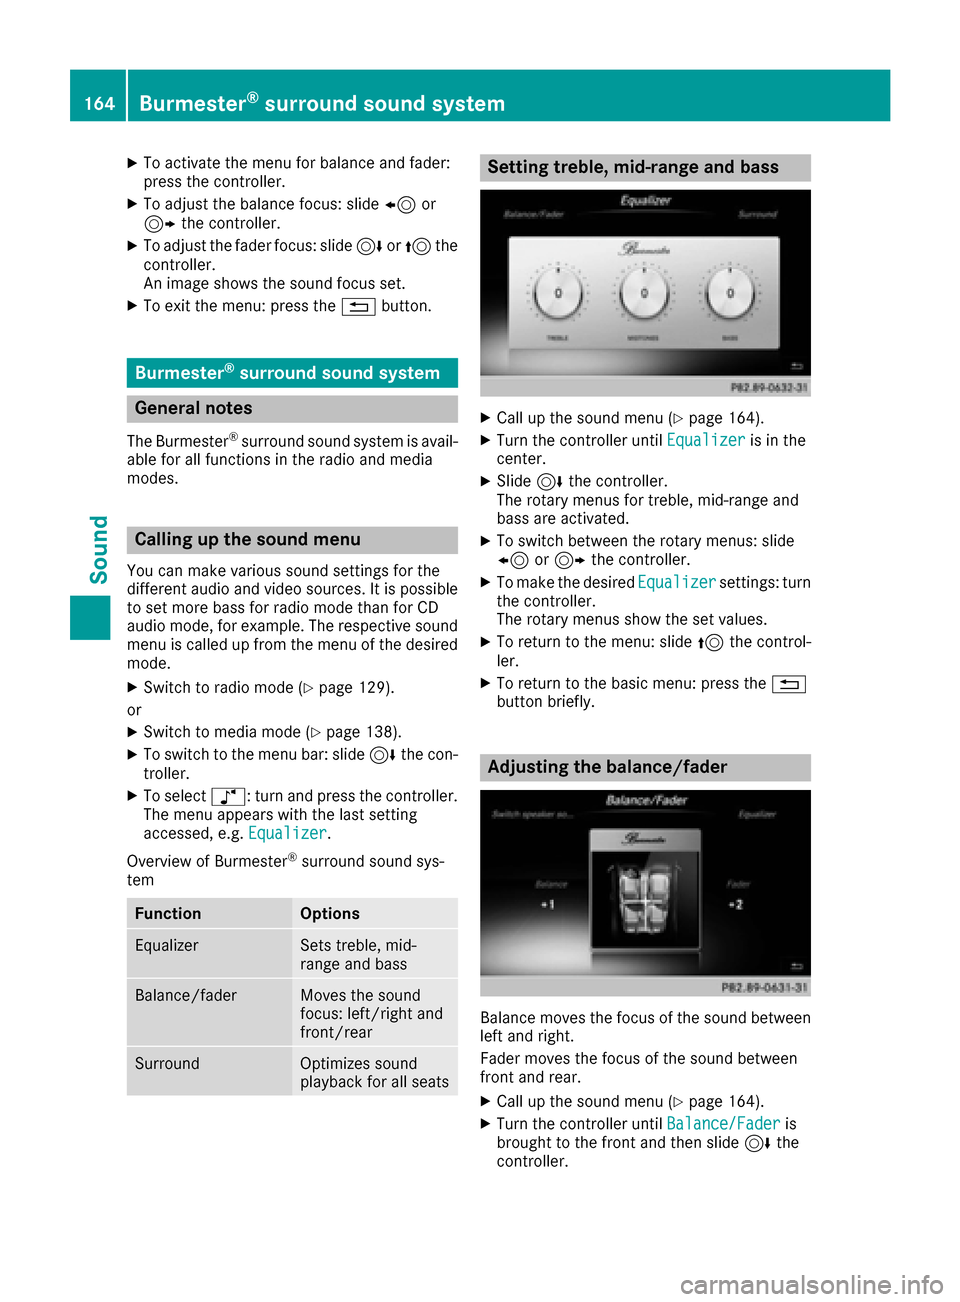
XTo activate the menu for balance and fader:
press the controller.
XTo adjust the balance focus: slide8or
9 the controller.
XTo adjust the fader focus: slide 6or5 the
controller.
An image shows the sound focus set.
XTo exit the menu: press the %button.
Burmester®surround sound system
General notes
The Burmester®surround sound system is avail-
able for all functions in the radio and media
modes.
Calling up the sound menu
You can make various sound settings for the
different audio and video sources. It is possible
to set more bass for radio mode than for CD
audio mode, for example. The respective sound
menu is called up from the menu of the desired
mode.
XSwitch to radio mode (Ypage 129).
or
XSwitch to media mode (Ypage 138).
XTo switch to the menu bar: slide 6the con-
troller.
XTo select à: turn and press the controller.
The menu appears with the last setting
accessed, e.g. Equalizer
.
Overview of Burmester
®surround sound sys-
tem
FunctionOptions
EqualizerSets treble, mid-
range and bass
Balance/faderMoves the sound
focus: left/right and
front/rear
SurroundOptimizes sound
playback for all seats
Setting treble, mid-range and bass
XCall up the sound menu (Ypage 164).
XTurn the controller until Equalizeris in the
center.
XSlide 6the controller.
The rotary menus for treble, mid-range and
bass are activated.
XTo switch between the rotary menus: slide
8 or9 the controller.
XTo make the desired Equalizersettings: turn
the controller.
The rotary menus show the set values.
XTo return to the menu: slide 5the control-
ler.
XTo return to the basic menu: press the %
button briefly.
Adjusting the balance/fader
Balance moves the focus of the sound between
left and right.
Fader moves the focus of the sound between
front and rear.
XCall up the sound menu (Ypage 164).
XTurn the controller until Balance/Faderis
brought to the front and then slide 6the
controller.
164Burmester®surround sound system
Sound
Page 167 of 178
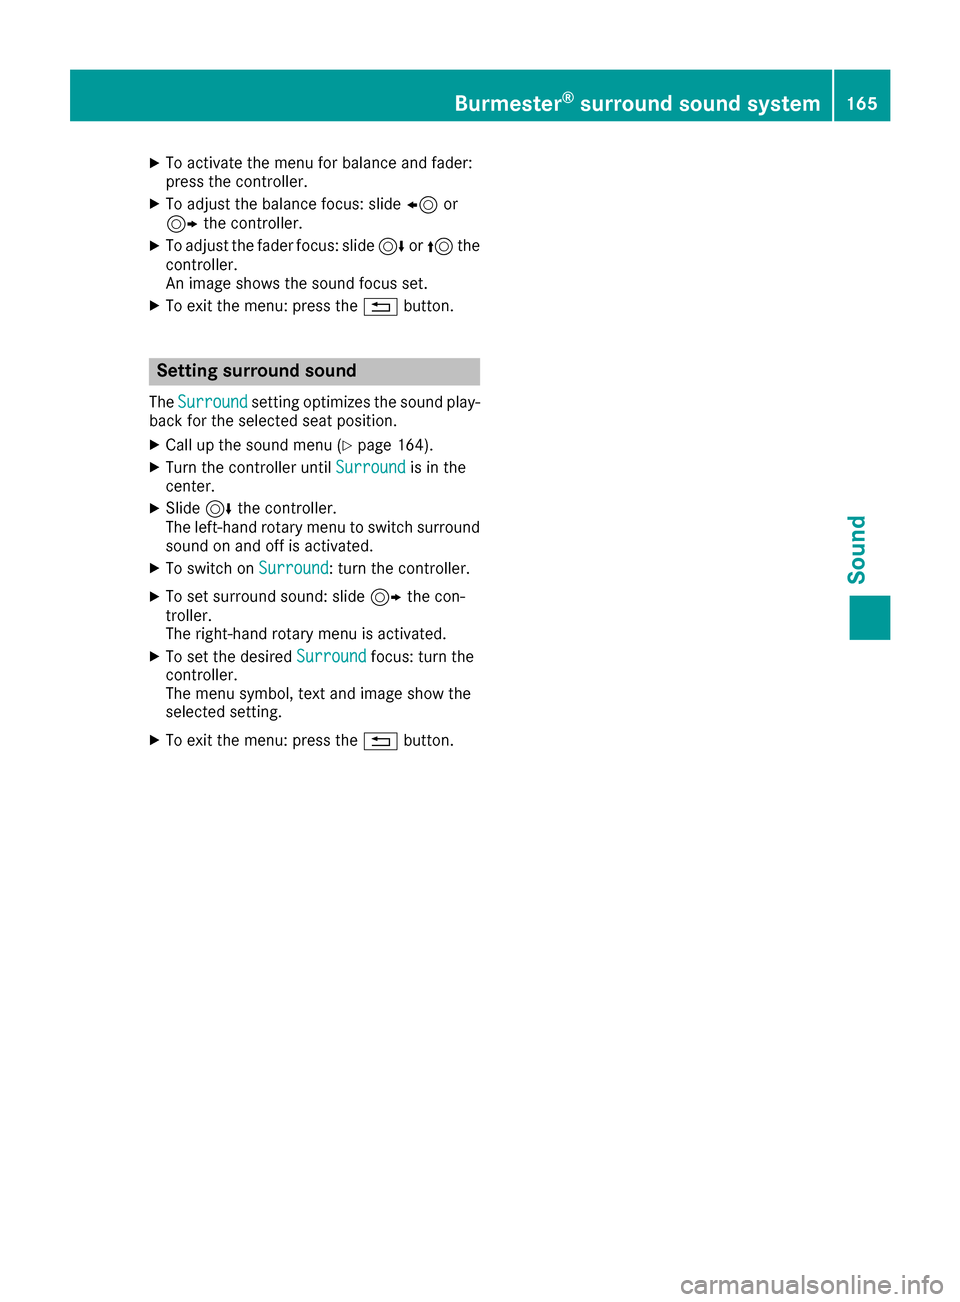
XTo activate the menu for balance and fader:
press the controller.
XTo adjust the balance focus: slide8or
9 the controller.
XTo adjust the fader focus: slide 6or5 the
controller.
An image shows the sound focus set.
XTo exit the menu: press the %button.
Setting surround sound
TheSurroundsetting optimizes the sound play-
back for the selected seat position.
XCall up the sound menu (Ypage 164).
XTurn the controller until Surroundis in the
center.
XSlide 6the controller.
The left-hand rotary menu to switch surround
sound on and off is activated.
XTo switch on Surround: turn the controller.
XTo set surround sound: slide 9the con-
troller.
The right-hand rotary menu is activated.
XTo set the desired Surroundfocus: turn the
controller.
The menu symbol, text and image show the
selected setting.
XTo exit the menu: press the %button.
Burmester®surround sound system165
Sound
Page 168 of 178
Your multimediasyste mequipment
These operatin ginstruction sdescribe all th e
standar dan doptional equipment of your multi-
media system, as available at th etime of going
to press. Country-specifi cdifference sare pos -
sible. Bear in min dthat your vehicle may no t
feature all function sdescribed here. Thi salso
applies to safety-relevan tsystems an dfunc-
tions.
Read th einformation on qualifie dspecialis t
workshop sin th evehicle Operator's Manual.
Weather forecasts
Introduction
Thi sfunction is currentl yno tavailable fo rCan -
ada.
Fo rth ereception of weather forecast svia sat -
ellite radio, you will need aSIRIU SXM Satellite
Weather subscription .
If th emessag eappears alon gwit hth eSIRIU S
telephon ean dID numbers, you will need to hav e
th eweather servic eactivated first .
XTo selectCal lorCancel:turn an dpress th e
controller .
If amobile phone is connecte dto th emulti-
media syste m (
Ypage 91), when you selec t
Cal lacal lis placed to amember of th eSIR-
IU Sservic estaff .The ID number of th eSIRIU S
devic ewill be transferred to th etelephon e
display.
XThi swill be followed by instruction sfrom th e
servic eemployee.
Weather forecast scan be received via th esat -
ellite radio fo rth eUS A(includin gAlask aan d
Hawaii).
The received weather dat acan be displaye das
an information chart (dail yforecast ,five-day
forecast ,detailed information )or on th e
weather map .
The weather dat areceived from th eweather
station is stored fo ron ehour in th emultimedia
system. It can therefore be displaye dagain
immediately after restartin gth eengin e(fo r
example after refueling). Dependin
gon whic hscale has bee nselected,
th eweather map can display th efollowin g
weather dat awit hsymbols :
Rrain radar
Rstormcharacteristics
Rhig han dlow-pressure areas, weather fronts
Rcours eof tropical cyclones (hurricanes,
typhoons )
Rstormwarnings
Rwin ddirection an dspeeds
iThe rain radar canno tbe displaye dfo r
Alaska, Hawaii an dPuerto Rico.
iHurricane: term used to describe th etropi-
cal cyclones that primarily develo pin th e
At lantic, No
rth Pacifi
can dSout hPacifi c
oceans. Awin dspeeds are abov e74 mph
(11 8km/h). Five categorie sare used to clas-
sif yth estrengt hof ahurricane.
Typhoon :term used to describe atropical
cyclon ethat develops in th enorthwestern
Pacific. The win dspeeds are in th ecategory of
a hurricane.
Switching th eSIRIUS Weather display
on/of f
Activating
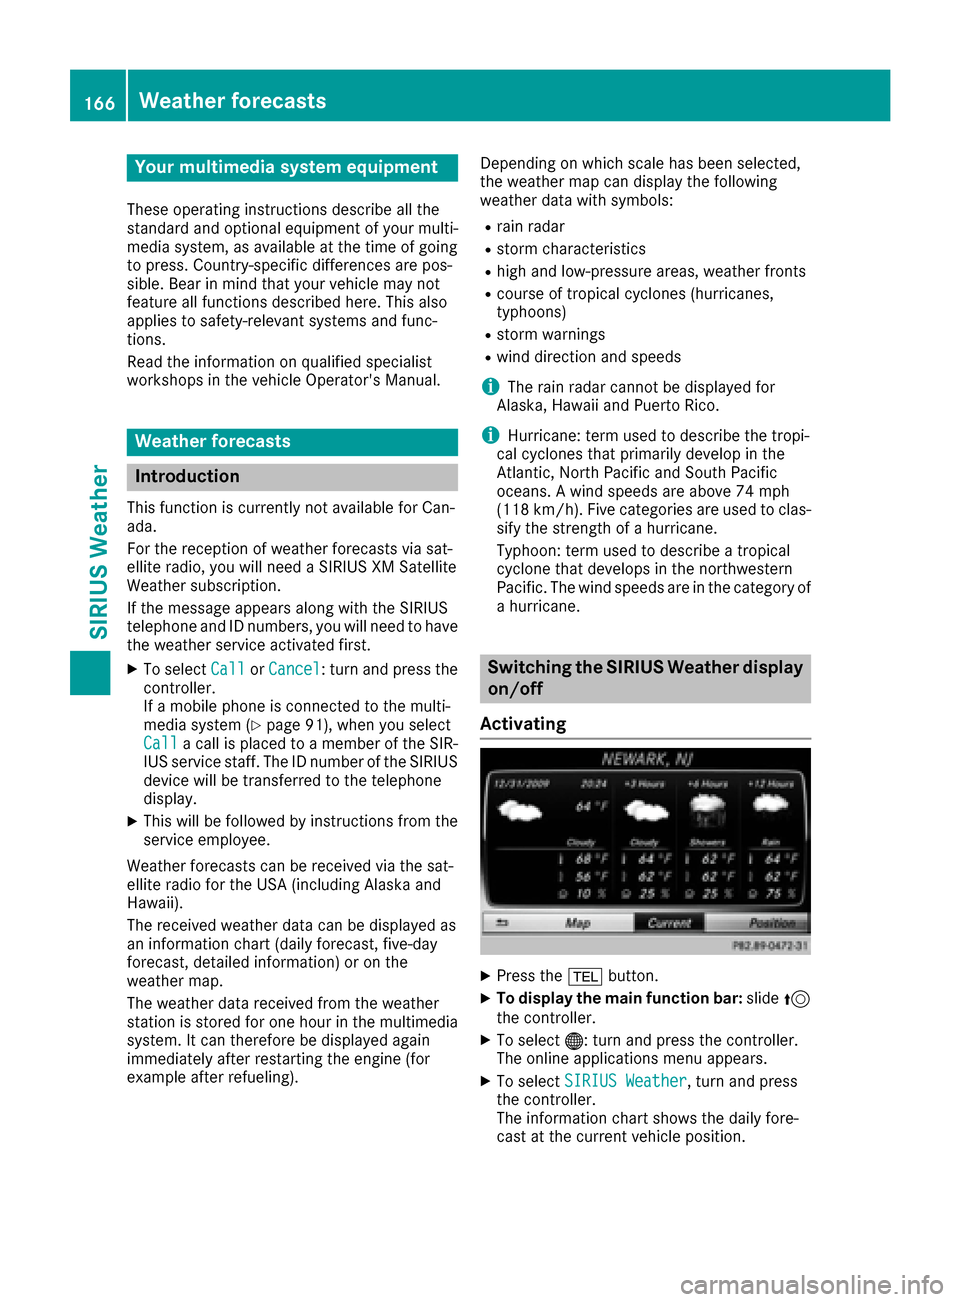
XPress th e% button.
XTo display th emain function bar: slide5
th econtroller .
XTo select® :turn an dpress th econtroller .
The onlin eapplication smen uappears .
XTo selec tSIRIUS Weathe r,turn an dpress
th econtroller .
The information chart shows th edaily fore-
cas tat th ecurren tvehicle position .
166Weather forecasts
SIRIUS Weather
Page 169 of 178
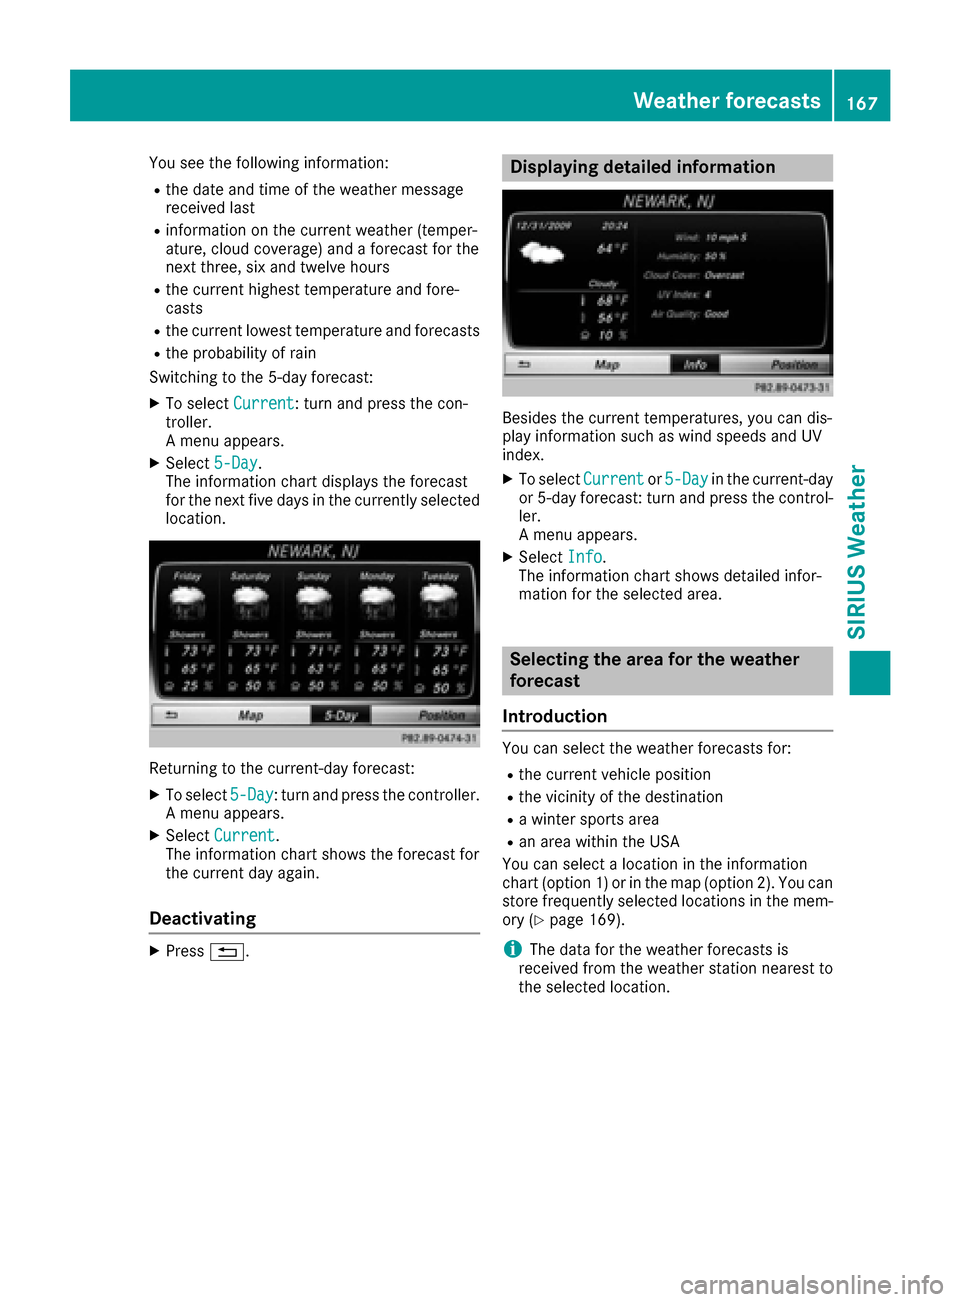
You see the following information:
Rthe date and time of the weather message
received last
Rinformation on the current weather (temper-
ature, cloud coverage) and a forecast for the
next three, six and twelve hours
Rthe current highest temperature and fore-
casts
Rthe current lowest temperature and forecasts
Rthe probability of rain
Switching to the 5-day forecast:
XTo select Current: turn and press the con-
troller.
A menu appears.
XSelect 5-Day.
The information chart displays the forecast
for the next five days in the currently selected
location.
Returning to the current-day forecast:
XTo select 5-Day: turn and press the controller.
A menu appears.
XSelect Current.
The information chart shows the forecast for
the current day again.
Deactivating
XPress %.
Displaying detailed information
Besides the current temperatures, you can dis-
play information such as wind speeds and UV
index.
XTo select Currentor5-Dayin the current-day
or 5-day forecast: turn and press the control-
ler.
A menu appears.
XSelect Info.
The information chart shows detailed infor-
mation for the selected area.
Selecting the area for the weather
forecast
Introduction
You can select the weather forecasts for:
Rthe current vehicle position
Rthe vicinity of the destination
Ra winter sports area
Ran area within the USA
You can select a location in the information
chart (option 1) or in the map (option 2). You can
store frequently selected locations in the mem-
ory (
Ypage 169).
iThe data for the weather forecasts is
received from the weather station nearest to
the selected location.
Weather forecasts167
SIRIUS Weather
Page 170 of 178
Option 1: selecting the area in the infor-
mation chart
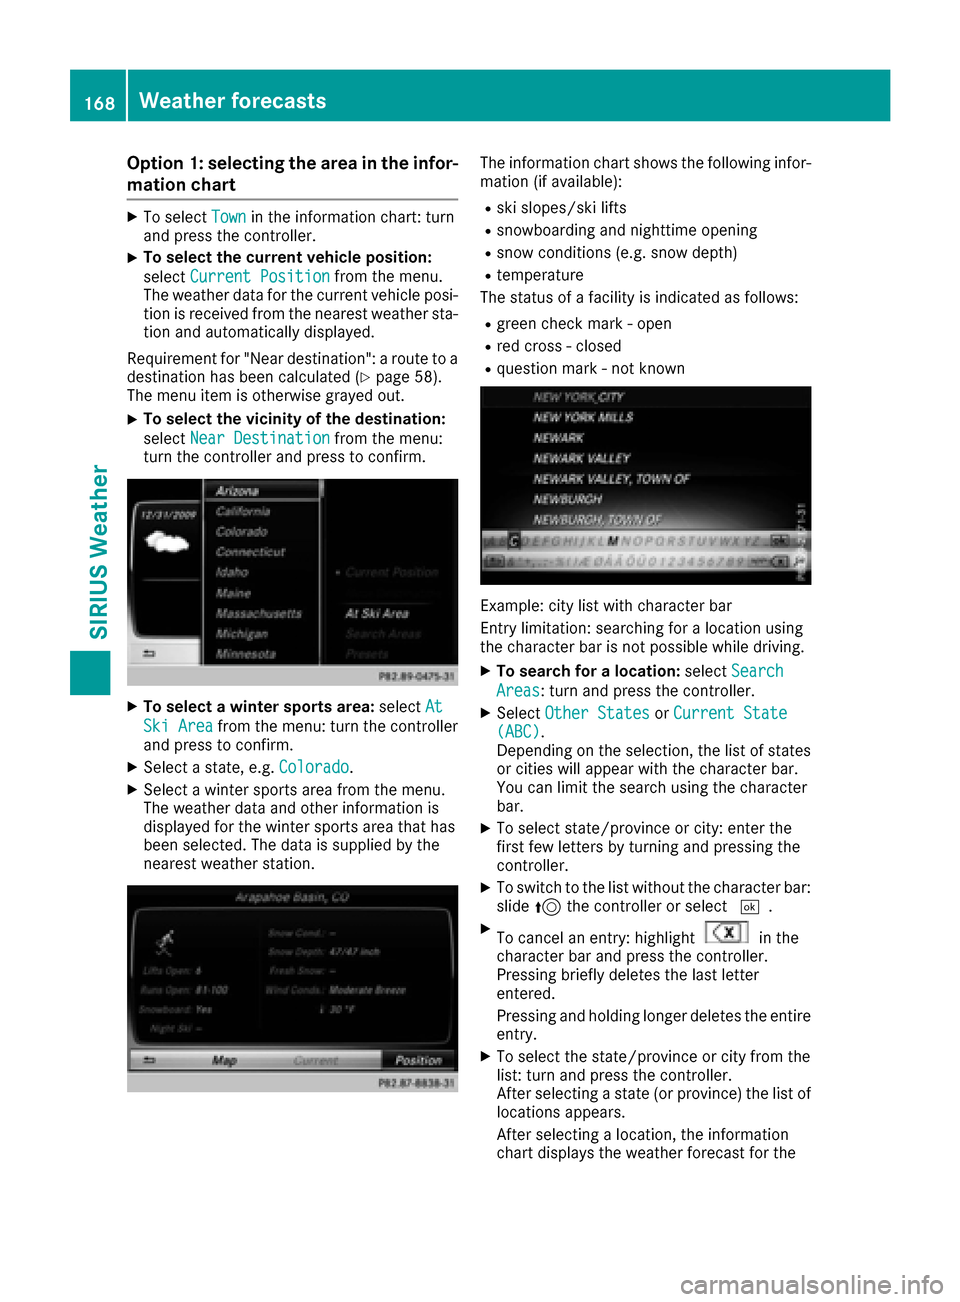
XTo selectTownin the information chart: turn
and press the controller.
XTo select the current vehicle position:
select Current Position
from the menu.
The weather data for the current vehicle posi-
tion is received from the nearest weather sta-
tion and automatically displayed.
Requirement for "Near destination": a route to a
destination has been calculated (
Ypage 58).
The menu item is otherwise grayed out.
XTo select the vicinity of the destination:
select Near Destination
from the menu:
turn the controller and press to confirm.
XTo select a winter sports area: selectAt
Ski Areafrom the menu: turn the controller
and press to confirm.
XSelect a state, e.g. Colorado.
XSelect a winter sports area from the menu.
The weather data and other information is
displayed for the winter sports area that has
been selected. The data is supplied by the
nearest weather station.
The information chart shows the following infor-
mation (if available):
Rski slopes/ski lifts
Rsnowboarding and nighttime opening
Rsnow conditions (e.g. snow depth)
Rtemperature
The status of a facility is indicated as follows:
Rgreen check mark - open
Rred cross - closed
Rquestion mark - not known
Example: city list with character bar
Entry limitation: searching for a location using
the character bar is not possible while driving.
XTo search for a location: selectSearch
Areas: turn and press the controller.
XSelect Other StatesorCurrent State(ABC).
Depending on the selection, the list of states
or cities will appear with the character bar.
You can limit the search using the character
bar.
XTo select state/province or city: enter the
first few letters by turning and pressing the
controller.
XTo switch to the list without the character bar:
slide 5the controller or select ¬.
XTo cancel an entry: highlightin the
character bar and press the controller.
Pressing briefly deletes the last letter
entered.
Pressing and holding longer deletes the entire
entry.
XTo select the state/province or city from the
list: turn and press the controller.
After selecting a state (or province) the list of
locations appears.
After selecting a location, the information
chart displays the weather forecast for the
168Weather forecasts
SIRIUS Weather