SD Memory card MERCEDES-BENZ C-Class 2017 W205 Comand Manual
[x] Cancel search | Manufacturer: MERCEDES-BENZ, Model Year: 2017, Model line: C-Class, Model: MERCEDES-BENZ C-Class 2017 W205Pages: 178, PDF Size: 5.62 MB
Page 81 of 178
XTo select the road, area or region:turn the
controller and press to confirm.
The traffic report is displayed (
Ypage 78).
There may be several traffic reports for the
affected road.
XTo close the display: press the%button.
Settings for the display on the map
You can switch these displays on/off on the
map:
RIncidents
RSpeed & Flow
RFree Flow
XTo switch to navigation mode: press the
Ø button.
XTo show the menu: slide6the controller.
XTo select Traffic: turn and press the con-
troller.
XTo select Traffic Information On Map:
turn and press the controller.
XSelect Incidents,Speed & Flowor FreeFlow.
The display is on Oor off ª.
Reading out traffic reports on the
route
Introduction
The text reader function is only available while
route guidance is active. It reads out traffic
reports affecting the current route.
You can select from the following text reader
properties:
RLanguage (Ypage 39)
RText reader speed (Ypage 37)
You can start the text reader function manually
or set it to automatic.
Starting the text reader function man-
ually
XTo switch to navigation mode: press the
Ø button.
XTo show the menu: slide6the controller.
XTo select Traffic: turn and press the con-
troller.
XSelect ReadOutAllMessagesonRoute.
The multimedia system reads out the reports in sequential order.
If there are no reports for the route, the Read
Out All Messages on Routemenu item is
gray and cannot be selected.
XTo cancel the read-aloud function:
select Cancel Read-Aloud Function
.
The multimedia system reads the current
report aloud and then exits the read-aloud
function.
Automatic text reader function
XTo switch to navigation mode: press the
Ø button.
XTo show the menu: slide6the controller.
XTo select Traffic: turn and press the con-
troller.
XSelect Read Traffic AnnouncementsAutomatically.
Depending on the previous state, switch the
option on Oor off ª.
Recalculating the route dynamically
TheDynamicTrafficRouteroute type takes
into account all of the traffic reports it receives
for the current route when calculating the route
(
Ypage 53).
If you have selected Dynamic Traffic Route
as the route type, the multimedia system guides
you to your destination along the updated route.
Storing destinations
General notes
If a route to a destination has been calculated,
the multimedia system saves the destination to
the last destinations memory. If the memory is
full, the multimedia system overwrites the old-
est destination. When you save the current vehi-
cle position or a crosshair position, this position
is stored in the "Last destinations" memory.
You can save destinations permanently in the
address book and on an SD card. For example,
you can save a destination as your home
address immediately after entering the address
(
Ypage 57).
Storing destinations79
Navigation
Z
Page 82 of 178
Requirements: theSD car dhas th eFA Tdat a
system format (e.g. FAT32).
Storing the destination in the address
book
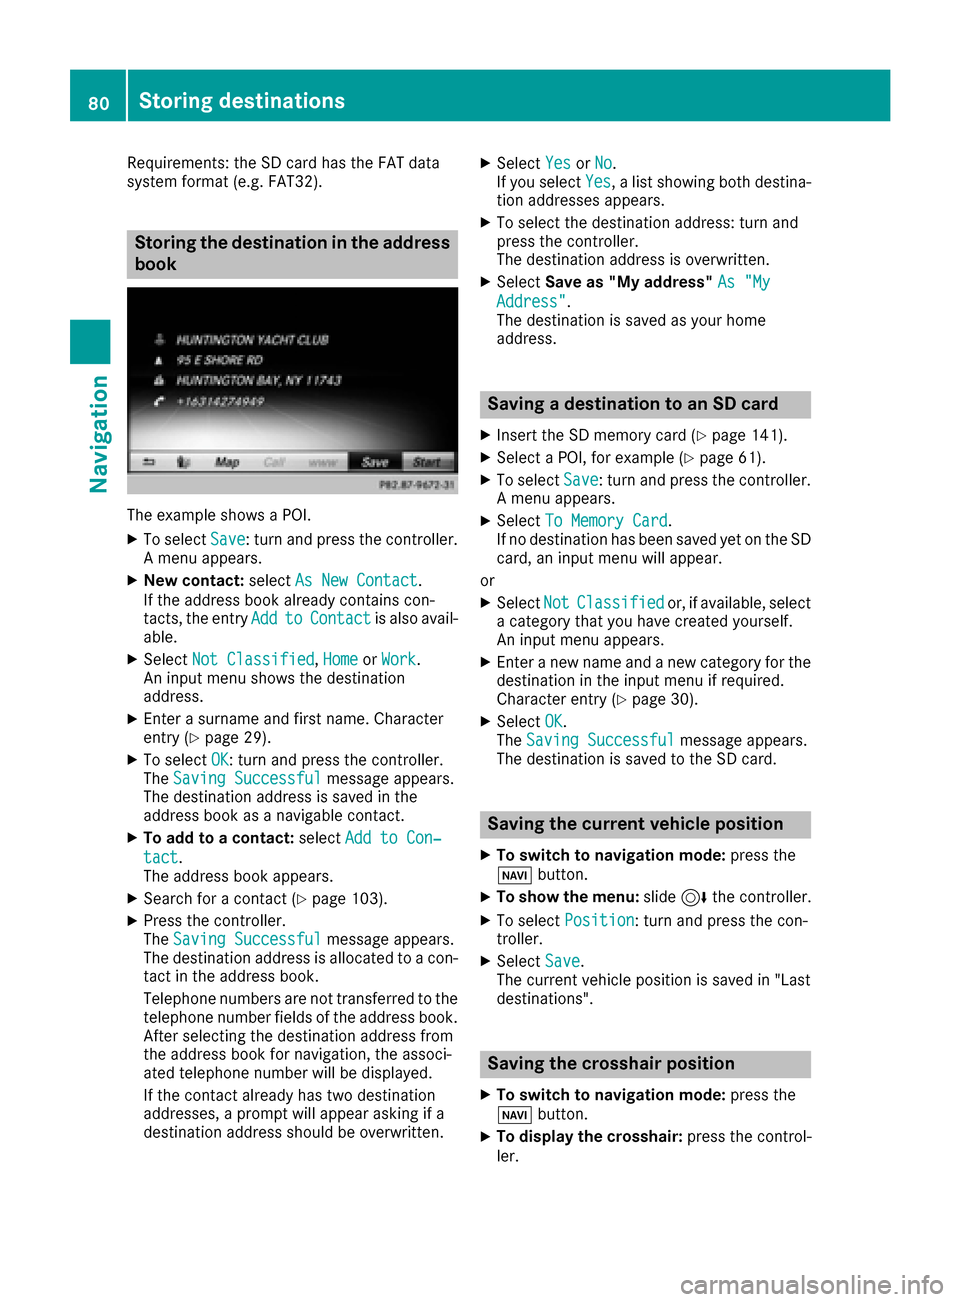
The exampl eshows aPOI .
XTo select Save:tur nand press th econtroller .
A men uappears.
XNew contact :select As New Contac t.
If th eaddress book already contain scon-
tacts ,th eentr yAdd
toContac tis also avail -
able.
XSelec tNot Classifie d,Hom eorWor k.
An input men ushows th edestination
address .
XEnter asurnam eand first name. Character
entr y (Ypage 29).
XTo select OK:tur nand press th econtroller .
The Saving Successfu lmessage appears.
The destination address is saved in th e
address book as anavigable contact .
XTo addto acontact :select Add to Con ‐
tact.
The address book appears.
XSearc hfor acontact (Ypage 103).
XPress thecontroller .
The Saving Successfu lmessage appears.
The destination address is allocate dto acon-
tac tin th eaddress book .
Telephon enumber sare no ttransferred to th e
telephon enumber fields of th eaddress book .
Afte rselecting th edestination address from
th eaddress book for navigation ,th eassoci-
ate dtelephon enumber will be displayed.
If th econtact already has two destination
addresses, aprompt will appear asking if a
destination address should be overwritten.
XSelec tYesor No.
If you select Yes, alist showin gbot hdestina -
tion addresses appears.
XTo select th edestination address :tur nand
press th econtroller .
The destination address is overwritten.
XSelec tSav eas "My address" As "My
Address".
The destination is saved as your hom e
address .
Saving a destination to an SD card
XInsertth eSD memory car d (Ypage 141).
XSelect aPOI ,for exampl e (Ypage 61).
XTo selectSave:tur nand press th econtroller .
A men uappears.
XSelec tTo Memory Car d.
If no destination has been saved yet on th eSD
card, an input men uwill appear .
or
XSelec tNotClassifie dor, if available, select
a categor ythat you hav ecreated yourself .
An input men uappears.
XEnte r anewnam eand ane wcategor yfor th e
destination in th einput men uif required.
Character entr y (
Ypage 30).
XSelectOK.
The Saving Successfu lmessage appears.
The destination is saved to th eSD card.
Saving the current vehicle position
XTo switch to navigation mode: press the
Ø button.
XTo sho wthemenu: slide6 thecontroller .
XTo select Position:tur nand press th econ-
troller .
XSelectSav e.
The curren tvehicl eposition is saved in "Las t
destinations".
Saving the crosshair position
XTo switch to navigation mode: press the
Ø button.
XTo displa yth ecrosshair :press th econtrol -
ler .
80Storing destinations
Navigation
Page 83 of 178
XMove the map to the desired position
(Ypage 53).
XTo show the menu: press the controller.
XTo selectPosition: turn and press the con-
troller.
XSelect Save.
The crosshair position is saved in the last des-
tinations.
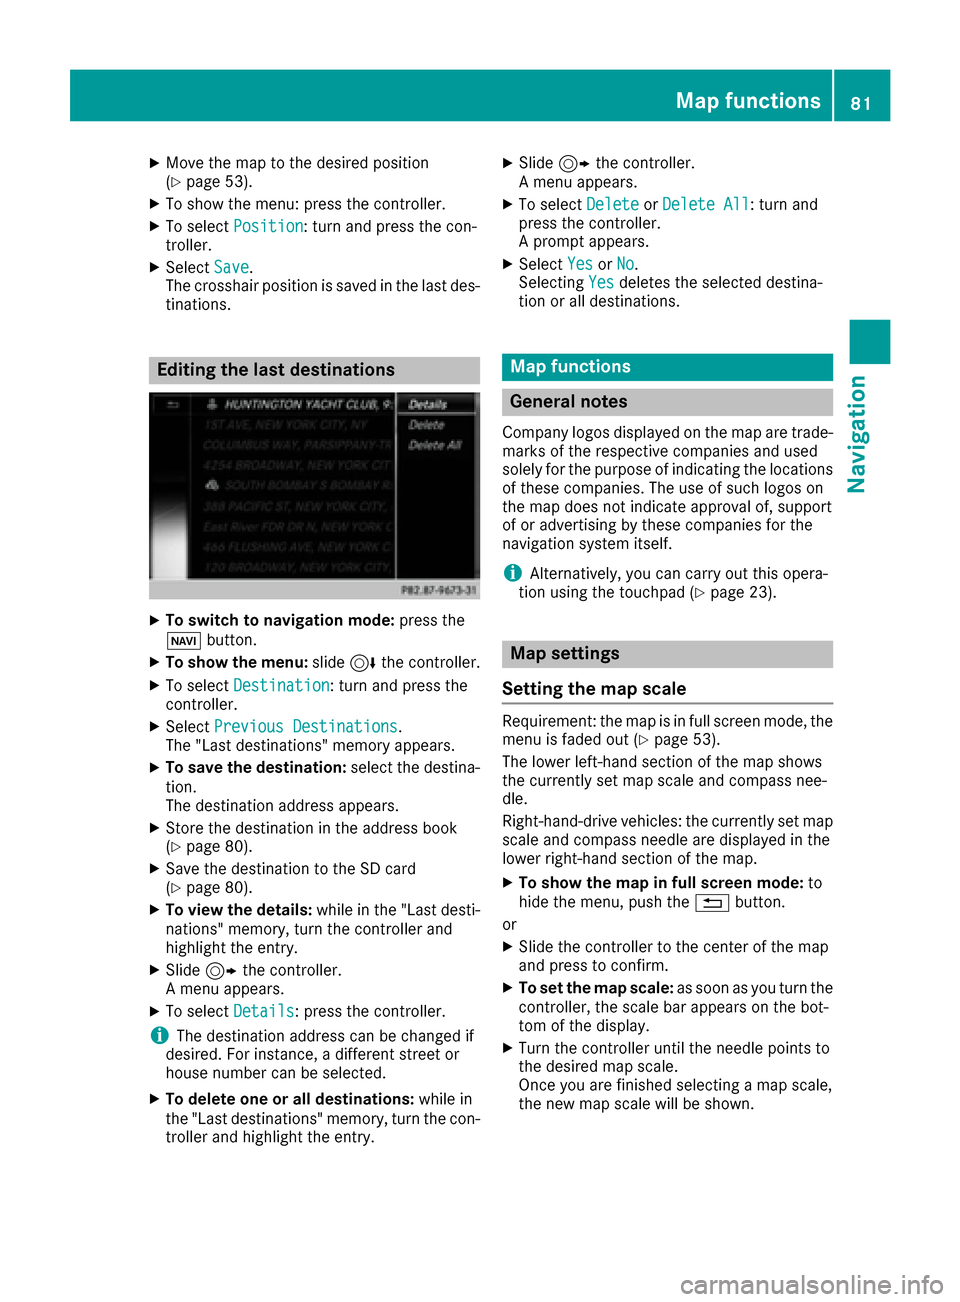
Editing the last destinations
XTo switch to navigation mode: press the
Ø button.
XTo show the menu: slide6the controller.
XTo select Destination: turn and press the
controller.
XSelect Previous Destinations.
The "Last destinations" memory appears.
XTo save the destination: select the destina-
tion.
The destination address appears.
XStore the destination in the address book
(Ypage 80).
XSave the destination to the SD card
(Ypage 80).
XTo view the details: while in the "Last desti-
nations" memory, turn the controller and
highlight the entry.
XSlide 9the controller.
A menu appears.
XTo select Details: press the controller.
iThe destination address can be changed if
desired. For instance, a different street or
house number can be selected.
XTo delete one or all destinations: while in
the "Last destinations" memory, turn the con-
troller and highlight the entry.
XSlide 9the controller.
A menu appears.
XTo select DeleteorDelete All: turn and
press the controller.
A prompt appears.
XSelect YesorNo.
Selecting Yesdeletes the selected destina-
tion or all destinations.
Map functions
General notes
Company logos displayed on the map are trade- marks of the respective companies and used
solely for the purpose of indicating the locations
of these companies. The use of such logos on
the map does not indicate approval of, support
of or advertising by these companies for the
navigation system itself.
iAlternatively, you can carry out this opera-
tion using the touchpad (Ypage 23).
Map settings
Setting the map scale
Requirement: the map is in full screen mode, the
menu is faded out (Ypage 53).
The lower left-hand section of the map shows
the currently set map scale and compass nee-
dle.
Right-hand-drive vehicles: the currently set map
scale and compass needle are displayed in the
lower right-hand section of the map.
XTo show the map in full screen mode: to
hide the menu, push the %button.
or
XSlide the controller to the center of the map
and press to confirm.
XTo set the map scale: as soon as you turn the
controller, the scale bar appears on the bot-
tom of the display.
XTurn the controller until the needle points to
the desired map scale.
Once you are finished selecting a map scale,
the new map scale will be shown.
Map functions81
Navigation
Z
Page 93 of 178
Rusing the6or~ button on the mult i-
function steering wheel
Rusing the Voice Control System (see the sep-
arate operating instructions)
Function restrictions
You may have to waitto use telephony via the
multimedia systeminthe foll owing situations:
Rifthe mob ilephone is switched off
RifBluetooth®is swit ched off on the mob ile
phone
Rif the mob ilephone isnot (or not yet) logged
into a mob ilephone network
Rifthe Bluetooth®function is switched off in
the multimedia system
The telephone automatically tries to log on to a
network. Ifno network isavailable, you may not
be able to make a " 911" emergency call. Ifyou
attempt to make an outgoing call, the No Ser‐
vicemessagewillappear for a short while.
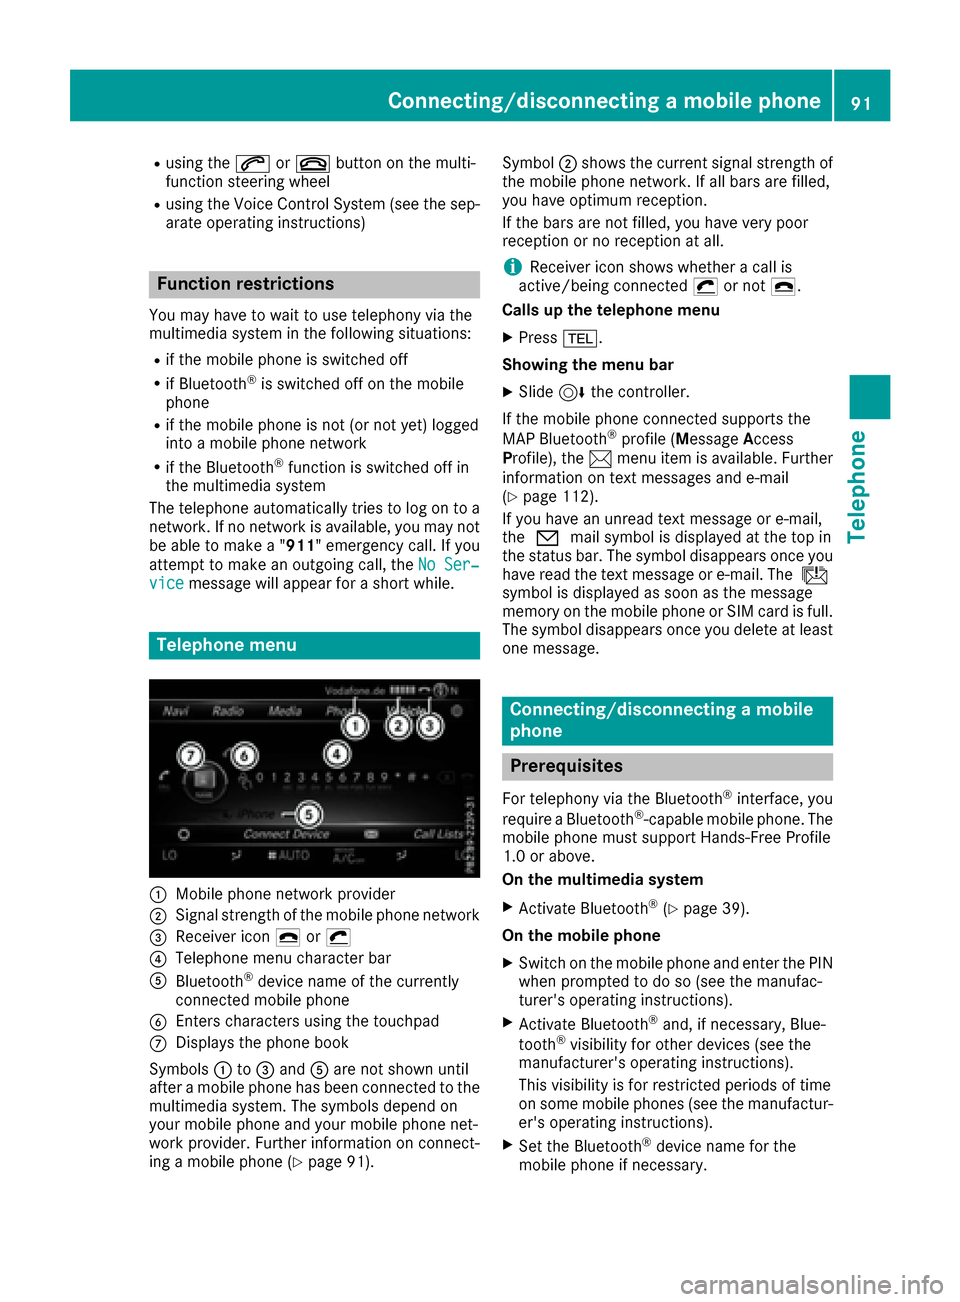
Telephone menu
:Mobilephone network pro vider
;Signal strength of the mob ilephone network
=Receiver icon ¢or¡
?Telephone menu character bar
ABluetooth®device name of the currently
connected mob ilephone
BEnters characters using the touchpad
CDisplays the phone book
Sym bols :to= and Aare not shown until
after a mob ilephone has been connected to the
multimedia system. The symbols depend on
your mob ilephone and your mob ilephone net-
work pro vider. Further information on connect-
ing a mob ilephone (
Ypage 91). Symbol
;shows the current signal strength of
the mobile phone network. If all bars are fille d,
you have optimum reception.
If the bars are not fille d,you have very poor
reception or no reception at all.
iReceiver icon showswhether a call is
active/being connected ¡or not ¢.
Calls up the telephone menu
XPress %.
Showing the menu bar
XSlid e6 the controller.
If the mobile phone connected supports the
MAP Bluetooth
®profile ( Message Access
Pro file), the 1menu item is available. Further
information on text messages and e-mail
(
Ypage 112).
If you have an unread text message or e-mail,
the 0 mail symbol is displayed at the top in
the status bar. The symbol disapp ears on
ce you
have read the text message or e-mail. The ú
symbol isdisplayed as soon as the message
memory on the mobile phone or SIM card is full.
The symbol disappears once you delete at least
one message.
Connecting/disconnecting a mobile
phone
Prerequisites
For telephony via the Bluetooth®interface, you
require a Bluetooth®-capable mobile phone. The
mobile phone must support Hands-Free Pro file
1.0 or above.
On th emu ltimedia system
XActivate Bluetooth®(Ypage 39 ).
On the mobile phone
XSwit ch on the mobile phone and enter the PIN
when prompted to do so (see the manufac-
turer's operating instructions).
XActivate Bluetooth®and, ifnecessary, Blue-
tooth®vis ibilit y for other devices (see the
manufacturer's operating instructions).
This vis ibility is for restricted periods of time
on some mobile phones (see the manufactur-
er's operating instructions).
XSet the Bluetooth®device name for the
mobile phone ifnecessary.
Connecting/disconnecting a mobile phone91
Telephone
Z
Page 105 of 178
Closing the phone book
XTo select&from the character bar: turn the
controller and press to confirm.
or
XPress the %button.
Address book
Introduction
Always pay attention to traffic conditions.
Familiarize yourself with the address book func-
tions before beginning your journey.
You can use the multimedia system when the
road and traffic conditions permit. You could
otherwise become involved in an accident in
which you or others could be injured.
The address book displays all the contacts from
the various sources (mobile phone, memory
card, USB device, the phone book of the multi-
media system, navigation).
You can use the contacts to make telephone
calls, navigate and to write messages.
If a mobile phone is connected to the multimedia
system and automatic calling up is activated
(
Ypage 107), the mobile phone's contacts are
displayed in the address book. If you disconnect
the mobile phone from the multimedia system,
these contacts are no longer displayed in the
address book.
When you import, save, edit or add contacts,
they will be saved in the multimedia system.
These contacts will remain available even when
you connect the multimedia system to a differ-
ent mobile phone. You can view these contacts
even without a mobile phone.
iThe address book can store a total of 5000
contacts.
R2000 entries are reserved for permanently
saved contacts.
R3000 entries are reserved for contacts that
you can load from the mobile phone.
iBefore selling your vehicle, delete the con-
tacts saved in the multimedia system using
the reset function (
Ypage 42).
Calling up the address book
XTo call up the telephone menu: press the
% button.
XTo display the main function bar: slide 5the
controller.
XTo select Phone: turn and press the controller.
XTo select Address Book: turn and press the
controller.
XTo browse in the address book: turn the con- troller.
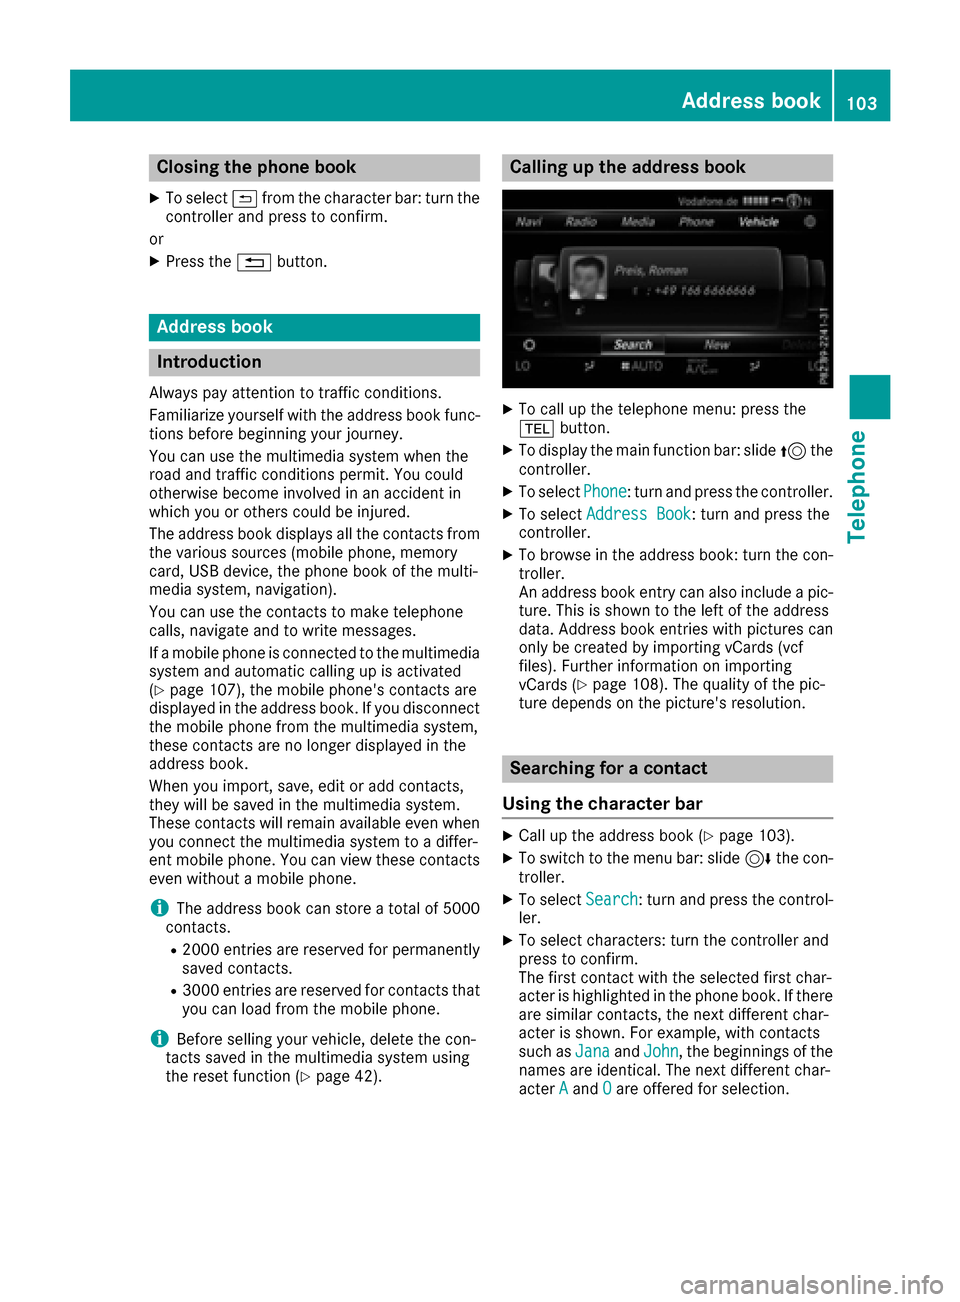
An address book entry can also include a pic-
ture. This is shown to the left of the address
data. Address book entries with pictures can
only be created by importing vCards (vcf
files). Further information on importing
vCards (
Ypage 108). The quality of the pic-
ture depends on the picture's resolution.
Searching for a contact
Using the character bar
XCall up the address book (Ypage 103).
XTo switch to the menu bar: slide 6the con-
troller.
XTo select Search: turn and press the control-
ler.
XTo select characters: turn the controller and
press to confirm.
The first contact with the selected first char-
acter is highlighted in the phone book. If there
are similar contacts, the next different char-
acter is shown. For example, with contacts
such as Jana
andJohn, the beginnings of the
names are identical. The next different char-
acter A
andOare offered for selection.
Address book103
Telephone
Z
Page 110 of 178
Importing contacts
Information and requirements
Contacts can be imported as vCards (vc ffiles). A
vCar dis an electronic business card. Amemory
card, US Bdevice or aBluetoot h
®connection
can be used for importing .
iUp to 2000 entries can be imported int oth e
address book . Amessage notifie syou when
th emaximum number is reached. In order to
be able to then import ne wcontacts, you have
to delet eexisting contact s (
Ypage 107).
SourceRequirements
Memory cardThe SD cardis inserted. It
contain simportable contact
details.
US BdeviceThe US Bdevice is inserted
int oth eUS Bport. It contain s
importable contact details.
Bluetoot h®
connection
If thesendin gof vCards is
supported via Bluetoot h®,
vCards can be received on
mobile phones or netbooks,
for example.
Bluetoot h
®must be activa-
te din th emultimedia system
and on th erespective device ;
see th emanufacturer' soper -
ating instructions.
iIf automatic calling up of th econtact sis
deactivated (Ypage 107), th eImportfro mPhoneoption is available.
Importing from the memory card or USB
device
Contacts imported from th ememory car dor
from aUS Bdevice are identifie dby th e¯
symbol.
The followin gcondition smust be fulfilled in
order to import vCards:
RvCards (vc ffiles) may be locate din th emain
directory or in folders. The multimedia system
allows for atargeted selection of th ecorre-
sponding directories.
RvCards must have th efile extension "vcf".
iThe multimedia system support svCards in
version s2. 1and 3.0.
XTo switch to th emen ubar in th etelephon e
men uor th eaddress book :slide 6thecon-
troller .
XTo select:tur nand press th econtrol -
ler .
XTo select Download Contacts:tur nand
press th econtroller .
XTo select FromMemory Car dorFro mUSBdevice:tur nand press th econtroller .
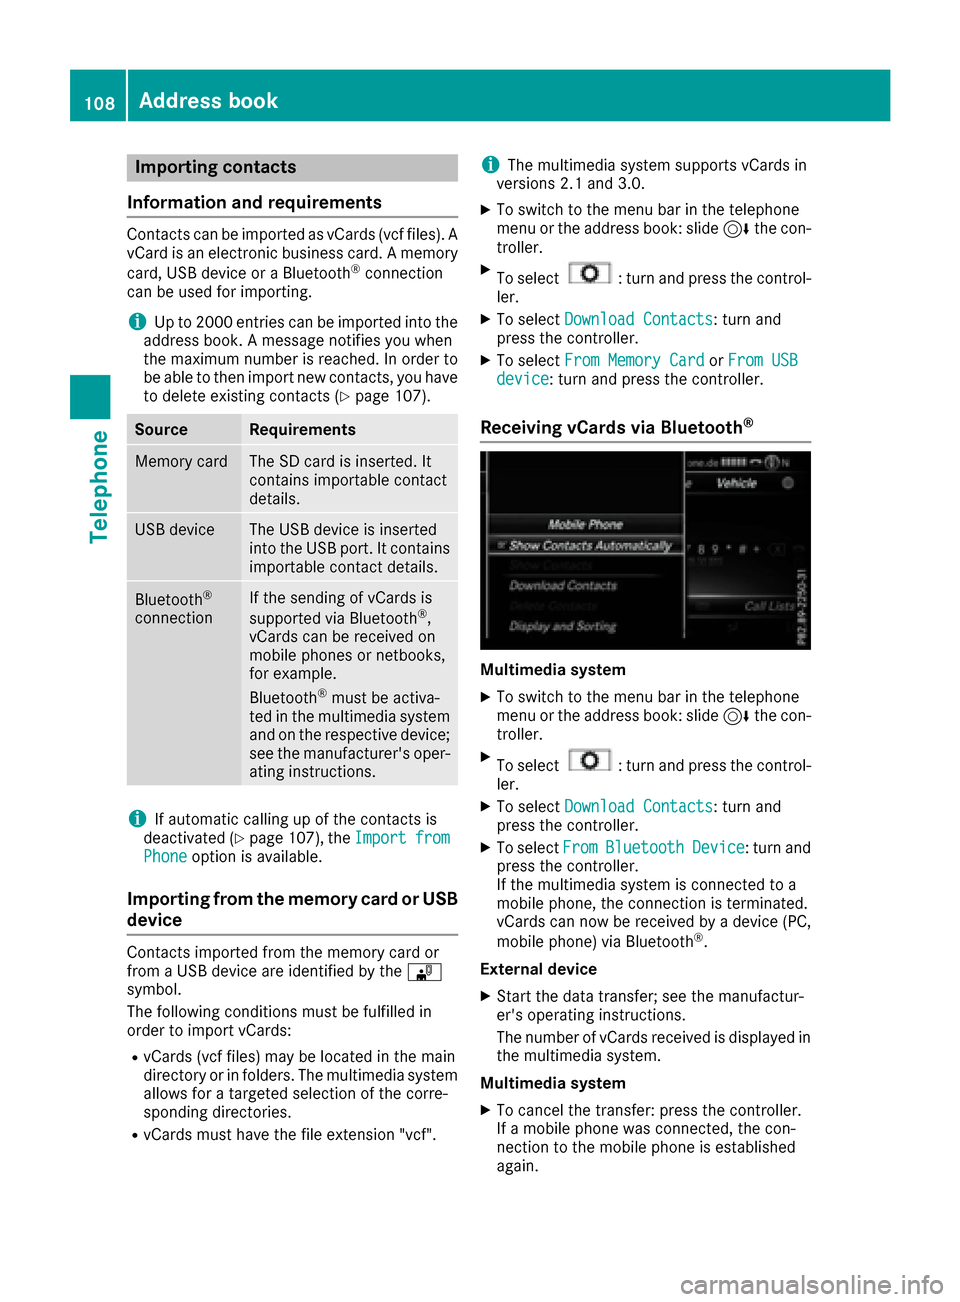
Receiving vCards via Bluetooth®
Multimedi asystem
XTo switch to th emen ubar in th etelephon e
men uor th eaddress book :slide 6thecon-
troller .
XTo select:tur nand press th econtrol -
ler .
XTo select Download Contacts:tur nand
press th econtroller .
XTo selectFromBluetoothDevice:tur nand
press th econtroller .
If th emultimedia system is connecte dto a
mobile phone, th econnection is terminated.
vCards can no wbe received by adevice (PC,
mobile phone) via Bluetoot h
®.
External device
XStart th edat atransfer ;see th emanufactur -
er' soperating instructions.
The number of vCards received is displayed in th emultimedia system.
Multimedi asystem
XTo cance lth etransfer :press th econtroller .
If amobile phon ewas connected, th econ-
nection to th emobile phon eis established
again .
108Address book
Telephone
Page 140 of 178
Your multimediasyste mequipment
These operatin ginstruction sdescribe all th e
standar dan doptional equipment of your multi-
media system, as available at th etime of going
to press. Country-specifi cdifference sare pos -
sible. Bear in min dthat your vehicle may no t
feature all function sdescribed here. Thi salso
applies to safety-relevan tsystems an dfunc-
tions.
Read th einformation on qualifie dspecialis t
workshop sin th evehicle Operator's Manual.
Activating medi amode
General notes
There are severa lways to activat emedia sour-
ce susin gth emultimedia system.
The relevant section sof th eOperator's Manual
describe th esimples tway to activat e amedia
source. Thi ssection describes all option sfo r
activatin gmedia sources. If you wish to play
external media sources, th edefault display
mus talready be turned on .
Connections for externa lmedi asour-
ces
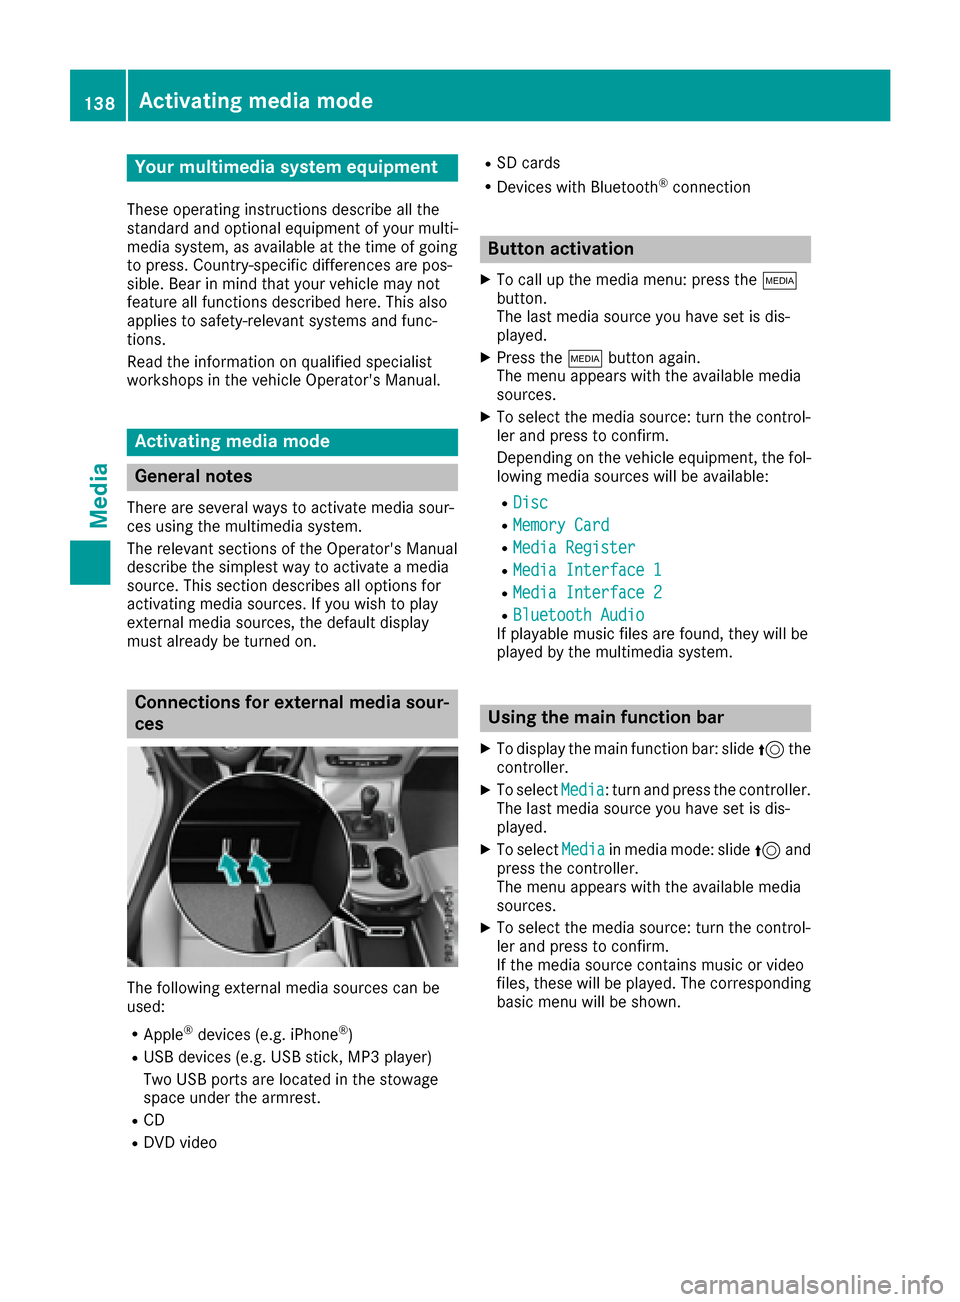
The followin gexternal media sources can be
used :
RApple®devices (e.g. iPhon e®)
RUSBdevices (e.g. US Bstick, MP3 player)
Two US Bports are located in th estowag e
spac eunder th earmrest.
RCD
RDV Dvideo
RSD cards
RDevices wit hBluetoot h®connection
Button activation
XTo callup th emedia menu: press th eÕ
button.
The last media sourc eyou hav eset is dis -
played.
XPress th eÕ buttonagain .
The men uappears wit hth eavailable media
sources.
XTo selec tth emedia source: turn th econtrol-
ler an dpress to confirm .
Dependin gon th evehicle equipment ,th efol-
lowing media sources will be available :
RDisc
RMemory Card
RMediaRegister
RMedi aInterfac e 1
RMediaInterfac e 2
RBluetoothAudi oIf playable music files are found ,they will be
playe dby th emultimedia system.
Usin gth emain function ba r
XTo display themain function bar :slid e5 the
controller .
XTo selectMedi a:turn an dpress th econtroller .
The last media sourc eyou hav eset is dis -
played.
XTo selec tMedi ain media mode: slid e5 and
press th econtroller .
The men uappears wit hth eavailable media
sources.
XTo selec tth emedia source: turn th econtrol-
ler an dpress to confirm .
If th emedia sourc econtain smusic or video
files, these will be played. The correspondin g
basi cmen uwill be shown .
138Activating media mode
Media
Page 141 of 178
Using the device list
XIn media mode, slide6the controller.
The media menu bar is shown.
XTo select Devices: turn and press the con-
troller.
The available media sources will be shown.
The #dot indicates the current setting.
XSelect the media source.
If the media source contains music or video
files, these will be played. The corresponding
basic menu will be shown.
Switching on automatically
After inserting a CD/DVD, this media mode is
automatically switched on by the multimedia
system.
If playable music files are found, they will be
played by the multimedia system.
If a media function is already switched on in the
multimedia system, this will be interrupted and
the basic display of the CD/DVD mode will
appear. If another function, such as navigation,
is being operated, the basic display will not
change. Only the music from the last inserted
CD/DVD will be played.
Audio/video mode
Important safety notes
GWARNING
The CD/DVD drive is a class 1 laser product.
If you open the housing of the CD/DVD drive,
there is a risk of exposure to invisible laser
radiation. This laser radiation could damage
your retina. There is a risk of injury.
Never open the housing. Always have main-
tenance and repair work carried out at a quali- fied specialist workshop.
GWARNING
Handling discs while driving may distract you from traffic conditions. You could also lose
control of the vehicle. There is a risk of an
accident.
Handle discs only when the vehicle is station-
ary.
Bear in mind that at a speed of only 30 mph
(approximately 50 km/h) your vehicle covers a
distance of 44 feet (approximately 14 m) every
second.
Notes on audio/video mode
Permissible data carriers
RCD-R, CD-A and CD-RW
RDVD-R, DVD-V and DVD-RW
RSD card
RUSB storage device
Permissible file systems
RISO 9660/Joliet standard for CDs
RUDF for video DVDs
RFAT16, FAT32, exFAT and NTFS for SD card
and USB storage media
Multisession CDs
For multisession CDs, the content of the first
session determines how the multimedia system
processes the CD. The multimedia system plays
only one session and gives priority to the audio
CD session.
File structure of a data carrier
When you create a disc with compressed music
files, the tracks can be organized in folders. A
folder may also contain subfolders. The disc
may contain no more than eight directory levels.
Files beyond the eighth level will not be recog-
nized by the system.
iThe multimedia system supports up to
50,000 files from one data medium.
If more than 64 GB of the memory of a data
medium is full, only files in folders with the
following names are supported: Music, Pic-
tures, Video.
Track and file names
When you create a disc with compressed music
files, you can assign names to the tracks and
folders.
Audio/video mode139
Media
Z
Page 143 of 178
Discs with copy protection are not compatible
with the audio CD standard and therefore may
not be able to be played.
Playback problems may occur when playing
copied discs.
There may be playback problems if you play CDs
that you have copied yourself with a storage
capacity of more than 700 MB.
iThe multimedia system is able to play back
audio CDs in multichannel audio format.
Inserting and removing a disc from
the single CD/DVD drive
Before inserting or removing a CD/DVD, ensure
that the cup holder is empty.
XTo insert:press the þbutton on the single
drive.
If there is a disc already inserted, it will be
ejected.
XInsert a disc into the disc slot with the printed
side facing upwards.
The drive closes and the disc is played.
If the CD/DVD is operated in Media mode, the
corresponding basic menu will be shown. If
the CD/DVD is started using another appli-
cation (e.g. navigation), the display will not
change.
iThe drive may not be able to play discs with
copy protection.
XTo remove: press theþbutton.
The drive ejects the disc.
XRemove the ejected disc from the slot.
If you do not take the disc out of the slot, it is drawn in again automatically after a short
while.
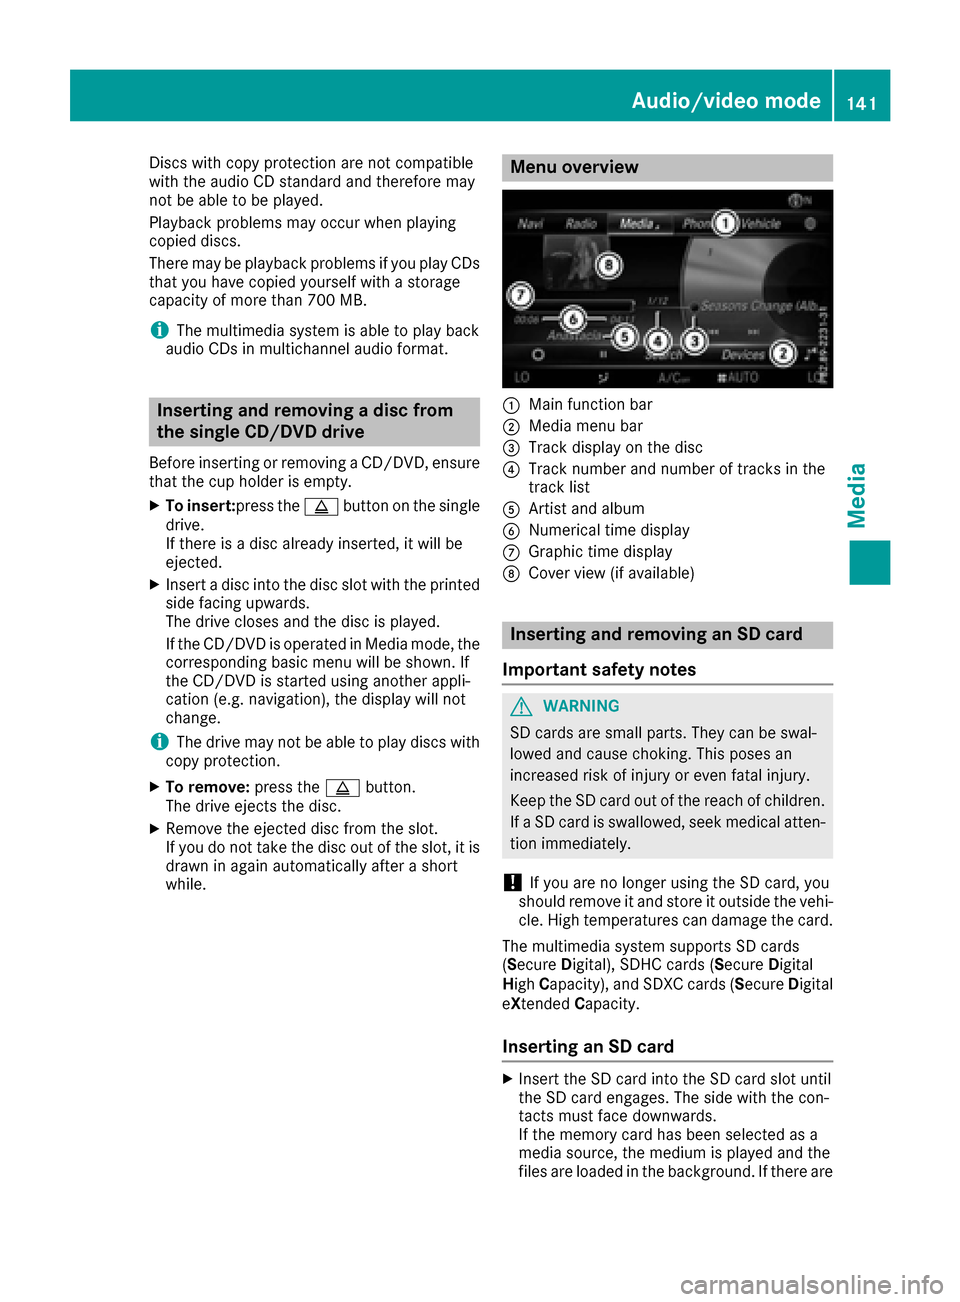
Menu overview
:Main function bar
;Media menu bar
=Track display on the disc
?Track number and number of tracks in the
track list
AArtist and album
BNumerical time display
CGraphic time display
DCover view (if available)
Inserting and removing an SD card
Important safety notes
GWARNING
SD cards are small parts. They can be swal-
lowed and cause choking. This poses an
increased risk of injury or even fatal injury.
Keep the SD card out of the reach of children. If a SD card is swallowed, seek medical atten-
tion immediately.
!If you are no longer using the SD card, you
should remove it and store it outside the vehi-
cle. High temperatures can damage the card.
The multimedia system supports SD cards
( S ecure Digital), SDHC cards ( Secure Digital
High Capacity), and SDXC cards ( Secure Digital
e Xtended Capacity.
Inserting an SD card
XInsert the SD card into the SD card slot until
the SD card engages. The side with the con-
tacts must face downwards.
If the memory card has been selected as a
media source, the medium is played and the
files are loaded in the background. If there are
Audio/video mode141
Media
Z
Page 146 of 178
logo in the bottom right-hand corner of certain
audio displays.
If the audio CD does not contain any CD text
information, the multimedia system can use the
Gracenote
®Media Database to identify
unknown audio tracks when in CD audio mode.
Internet update of metadata
The Updating Metadata Via Internetoption allows any missing metadata for an audio
CD (e.g. cover, track, album, artist) to be uploa-
ded retrospectively to the internal Gracenote
®
database.
An Internet connection is required for this
(
Ypage 123).
Selecting Internet update of metadata
XIn media mode, slide 6the controller.
The media menu bar is shown.
XTo select: turn and press the control-
ler.
XSelect Updating Metadata Via Internetin the selection list.
A connection with the Gracenote®data server
is established. The missing data is loaded,
saved and displayed in the main display field.
If there is no data found or there is no Internet
connection, a corresponding error message
will appear.
Switching the Gracenote®data display
on/off
XSwitch on audio CD mode (Ypage 142).
XTo select Gracenote Media Database: turn
and press the controller.
XTo switch the display off: select None.
In the basic display, Track 1is shown instead
of the Gracenote®data, for example.
XTo switch on the display: press the controller.
Media search
General notes
The multimedia system plays back files from the following data media:
RDisc (CD/DVD Audio)
RMemory card
RMedia Register
RUSB storage device
RApple®devices (folder, year and photos are
not available)
The categories are displayed according to the
data available.
Starting the media search
XIn media mode, slide 6the controller.
The media menu bar is shown.
XTo select Search: turn and press the control-
ler.
The category list appears.
Category list
XIn media mode, slide 6the controller.
The media menu bar is shown.
XTo select Search: turn and press the control-
ler.
The category list is shown.
Depending on the connected media sources and
files, the following categories are listed:
RCurrent Tracklist
RFolder
RSelect By Cover
RKeyword Search
RPlaylists
RArtists
RAlbums
RTrack
RGenres
RYear
RComposers
RVideos
RPhotos
RPodcasts
RAudiobooks
iThe categories are available as soon as the
entire media content has been read and ana-
lyzed.
If the same device is reconnected with
unchanged media content, these categories
are available more quickly.
144Media search
Media