light MERCEDES-BENZ C-Class 2017 W205 Comand Manual
[x] Cancel search | Manufacturer: MERCEDES-BENZ, Model Year: 2017, Model line: C-Class, Model: MERCEDES-BENZ C-Class 2017 W205Pages: 178, PDF Size: 5.62 MB
Page 61 of 178
XTo switch to navigation mode:press the
Ø button.
XIf no route guidance is active, select Desti‐nation.
iIf route guidance is active, first slide6the
controller and show the menu.
XSelect Free Destination Search.
XEnter the first few letters of the city and
street, e.g. NEWandEMP.
While entering the information, the number of
exact matches/all hits is shown.
---/---
is displayed if fewer than three char-
acters have been entered.
999+
is displayed if there are too many hits.
XSelect the ¬symbol.
The search results are displayed
(
Ypage 59).
Selecting search results
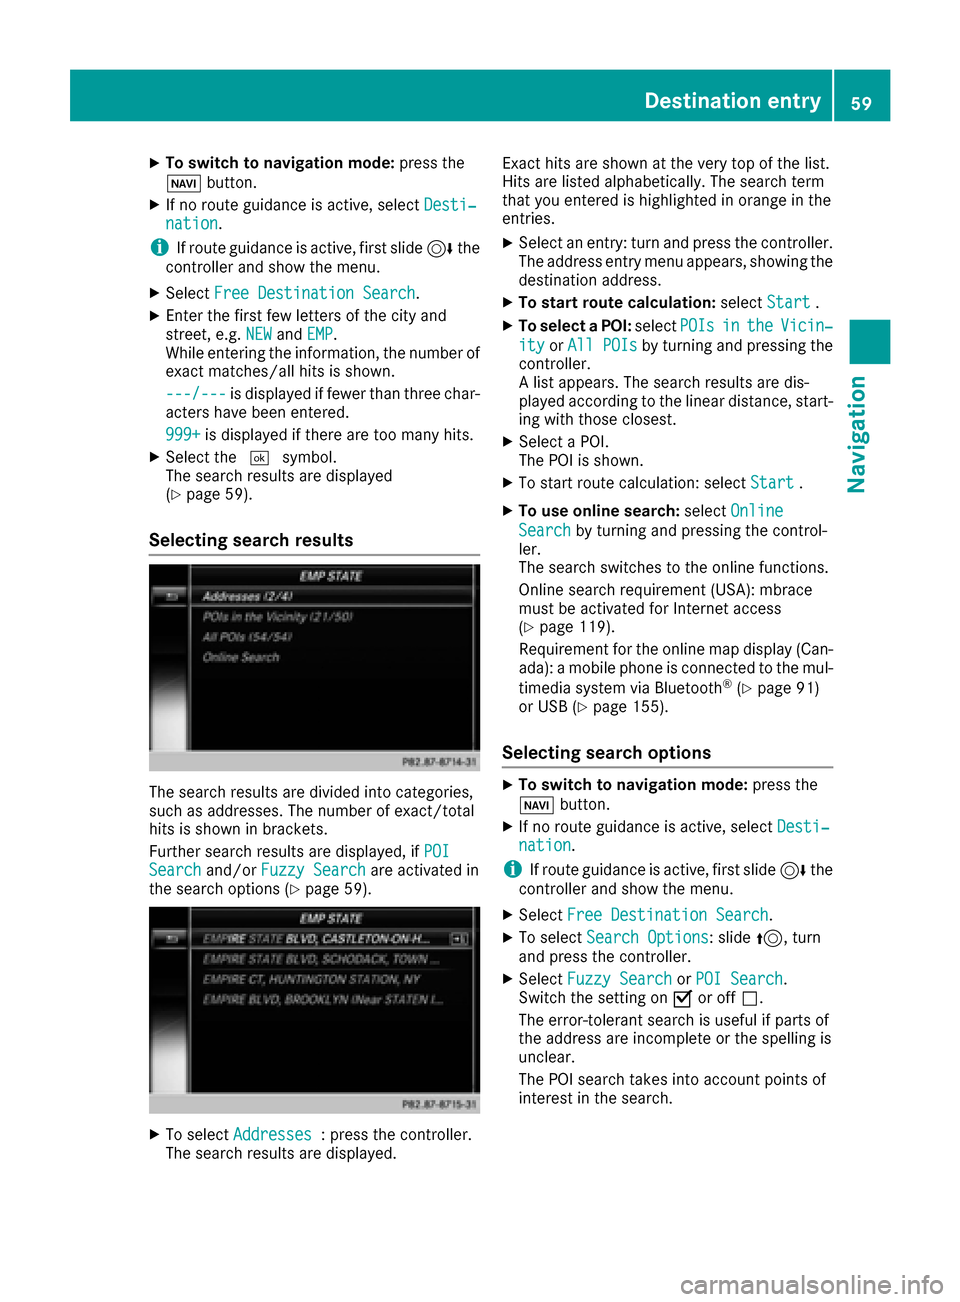
The search results are divided into categories,
such as addresses. The number of exact/total
hits is shown in brackets.
Further search results are displayed, if POI
Searchand/orFuzzy Searchare activated in
the search options (Ypage 59).
XTo select Addresses: press the controller.
The search results are displayed. Exact hits are shown at the very top of the list.
Hits are listed alphabetically. The search term
that you entered is highlighted in orange in the
entries.
XSelect an entry: turn and press the controller.
The address entry menu appears, showing the
destination address.
XTo start route calculation:
selectStart.
XTo select a POI: selectPOIsintheVicin‐
ityorAll POIsby turning and pressing the
controller.
A list appears. The search results are dis-
played according to the linear distance, start-
ing with those closest.
XSelect a POI.
The POI is shown.
XTo start route calculation: select Start.
XTo use online search:selectOnline
Searchby turning and pressing the control-
ler.
The search switches to the online functions.
Online search requirement (USA): mbrace
must be activated for Internet access
(
Ypage 119).
Requirement for the online map display (Can-
ada): a mobile phone is connected to the mul-
timedia system via Bluetooth
®(Ypage 91)
or USB (Ypage 155).
Selecting search options
XTo switch to navigation mode: press the
Ø button.
XIf no route guidance is active, select Desti‐nation.
iIf route guidance is active, first slide6the
controller and show the menu.
XSelect Free Destination Search.
XTo select Search Options: slide5, turn
and press the controller.
XSelect Fuzzy SearchorPOI Search.
Switch the setting on Oor off ª.
The error-tolerant search is useful if parts of
the address are incomplete or the spelling is
unclear.
The POI search takes into account points of
interest in the search.
Destination entry59
Navigation
Z
Page 66 of 178
XTo select a destination:press the controller.
XTo select a destination from the selection list:
turn and press the controller.
If the digital map provides navigable address
data, you will see the destination address in
the address entry menu.
XTo start route calculation: selectStart.
Entering intermediate destinations
Introduction
You can also map the route to the destination
yourself by entering up to four intermediate des-
tinations. The sequence of the intermediate des-
tinations can be changed at any time.
The multimedia system provides a selection of
predefined destinations in eight categories for
this purpose, such as Gas Station
. You can
also use the destination entry options to enter
intermediate destinations.
Creating intermediate destinations
XTo switch to navigation mode: press the
Ø button.
XIf no route guidance is active, select Desti‐nation.
iIf route guidance is active, first slide6the
controller and show the menu.
XSelect Intermediate Destinations.
XTo select a POI category or Other: turn and
press the controller.
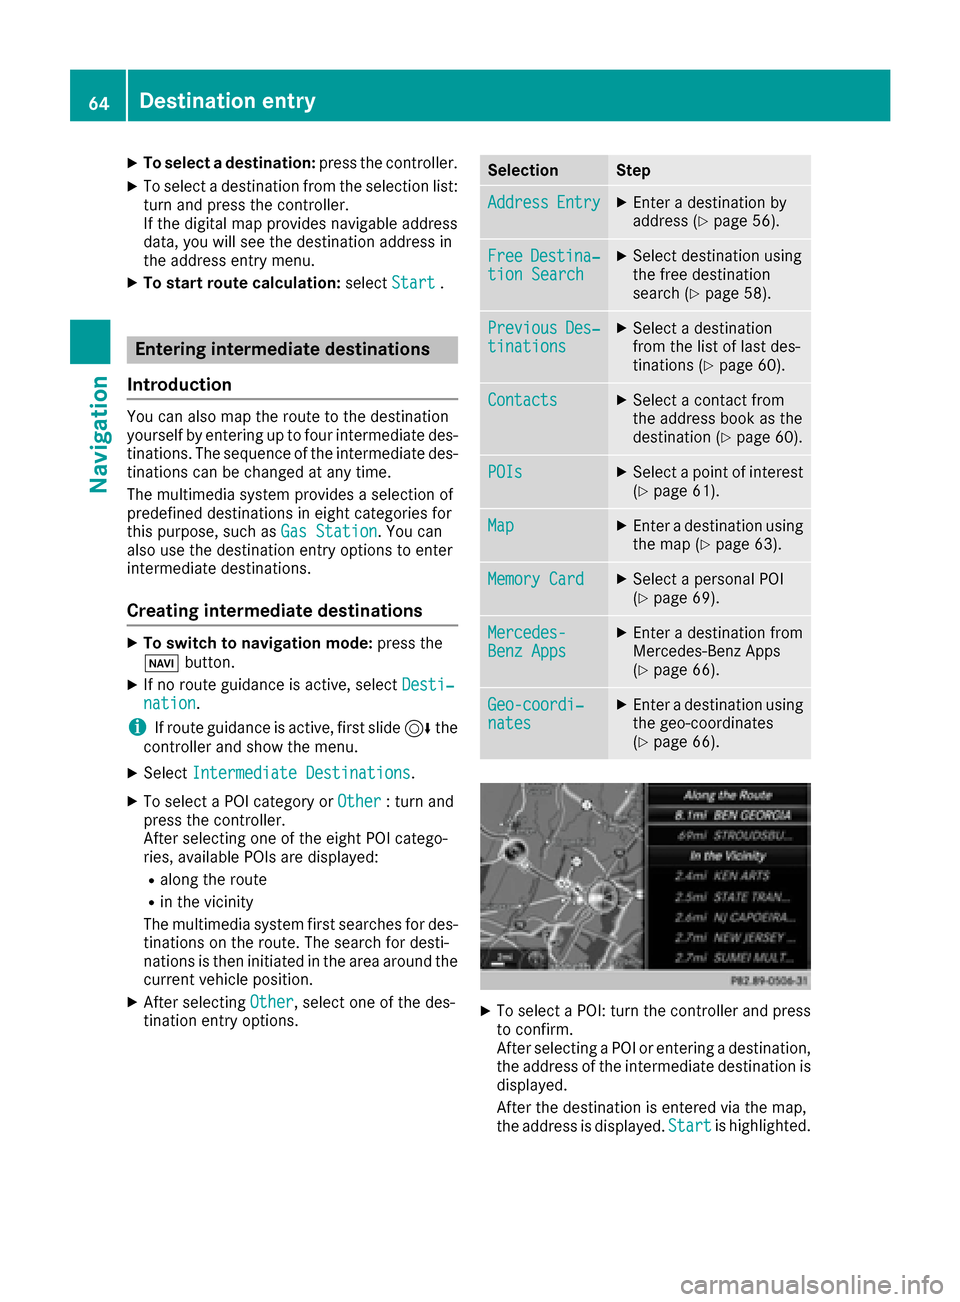
After selecting one of the eight POI catego-
ries, available POIs are displayed:
Ralong the route
Rin the vicinity
The multimedia system first searches for des-
tinations on the route. The search for desti-
nations is then initiated in the area around the
current vehicle position.
XAfter selecting Other, select one of the des-
tination entry options.
SelectionStep
AddressEntryXEnter a destination by
address (Ypage 56).
FreeDestina‐tion SearchXSelect destination using
the free destination
search (
Ypage 58).
PreviousDes‐tinationsXSelect a destination
from the list of last des-
tinations (
Ypage 60).
ContactsXSelect a contact from
the address book as the
destination (
Ypage 60).
POIsXSelect a point of interest (Ypage 61).
MapXEnter a destination using
the map (Ypage 63).
Memory CardXSelect a personal POI
(Ypage 69).
Mercedes-Benz AppsXEnter a destination from
Mercedes-Benz Apps
(
Ypage 66).
Geo-coordi‐natesXEnter a destination using
the geo-coordinates
(
Ypage 66).
XTo select a POI: turn the controller and pressto confirm.
After selecting a POI or entering a destination,
the address of the intermediate destination is
displayed.
After the destination is entered via the map,
the address is displayed. Start
is highlighted.
64Destination entry
Navigation
Page 67 of 178
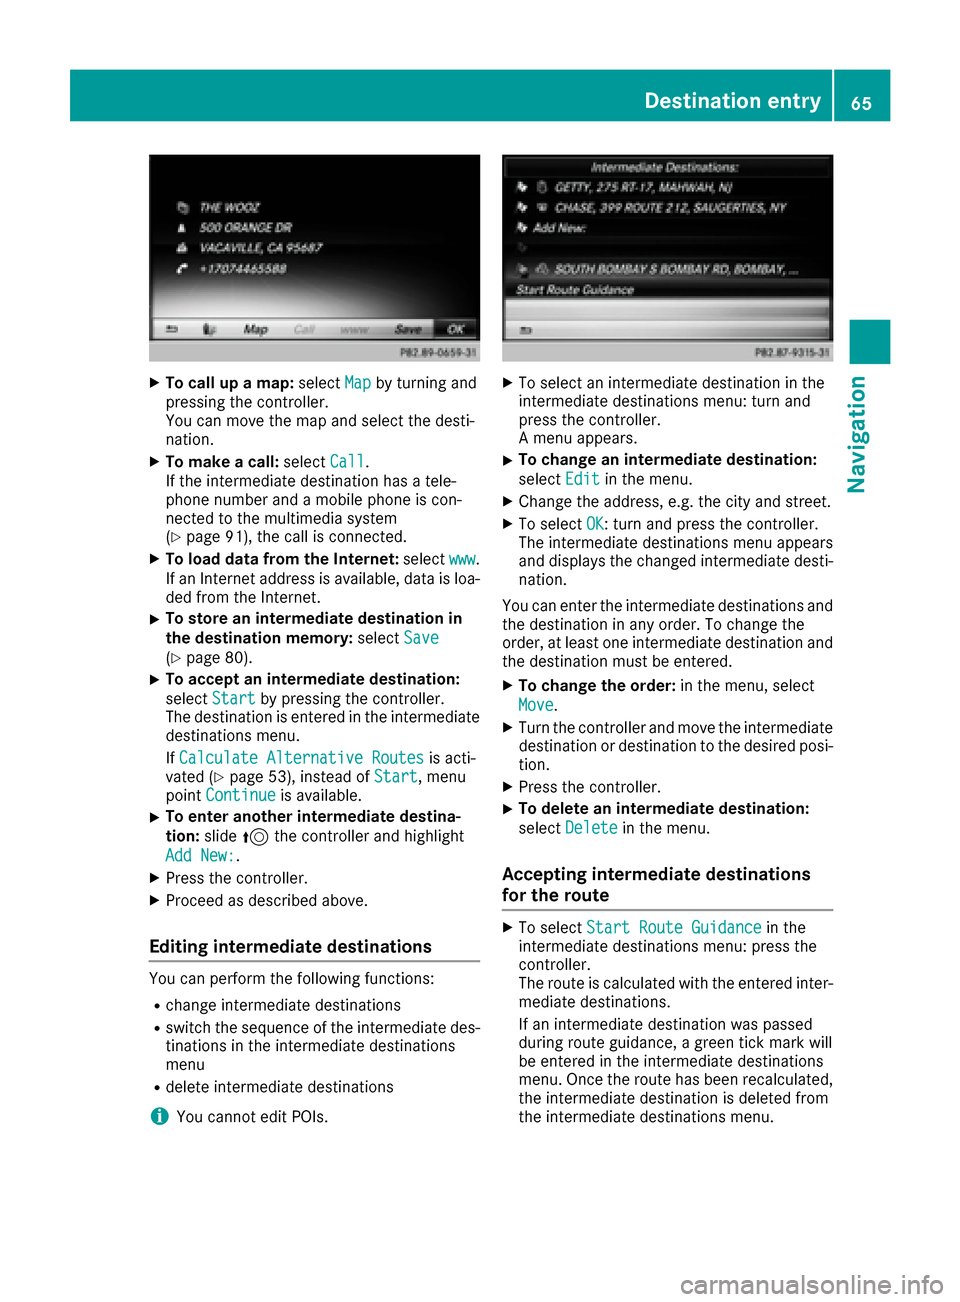
XTo call up a map:selectMapby turning and
pressing the controller.
You can move the map and select the desti-
nation.
XTo make a call: selectCall.
If the intermediate destination has a tele-
phone number and a mobile phone is con-
nected to the multimedia system
(
Ypage 91), the call is connected.
XTo load data from the Internet: selectwww.
If an Internet address is available, data is loa- ded from the Internet.
XTo store an intermediate destination in
the destination memory: selectSave
(Ypage 80).
XTo accept an intermediate destination:
selectStart
by pressing the controller.
The destination is entered in the intermediate
destinations menu.
If Calculate Alternative Routes
is acti-
vated (Ypage 53), instead of Start, menu
point Continueis available.
XTo enter another intermediate destina-
tion:slide5the controller and highlight
Add New:
.
XPress the controller.
XProceed as described above.
Editing intermediate destinations
You can perform the following functions:
Rchange intermediate destinations
Rswitch the sequence of the intermediate des-
tinations in the intermediate destinations
menu
Rdelete intermediate destinations
iYou cannot edit POIs.
XTo select an intermediate destination in the
intermediate destinations menu: turn and
press the controller.
A menu appears.
XTo change an intermediate destination:
select Edit
in the menu.
XChange the address, e.g. the city and street.
XTo select OK: turn and press the controller.
The intermediate destinations menu appears
and displays the changed intermediate desti-
nation.
You can enter the intermediate destinations and
the destination in any order. To change the
order, at least one intermediate destination and
the destination must be entered.
XTo change the order: in the menu, select
Move
.
XTurn the controller and move the intermediate destination or destination to the desired posi-
tion.
XPress the controller.
XTo delete an intermediate destination:
select Delete
in the menu.
Accepting intermediate destinations
for the route
XTo select Start Route Guidancein the
intermediate destinations menu: press the
controller.
The route is calculated with the entered inter-
mediate destinations.
If an intermediate destination was passed
during route guidance, a green tick mark will
be entered in the intermediate destinations
menu. Once the route has been recalculated,
the intermediate destination is deleted from
the intermediate destinations menu.
Destination entry65
Navigation
Z
Page 69 of 178
Personal POIs and routes
General notes
The use of personal POIs for displaying traffic
surveillance equipment is not permitted in everycountry. Please observe the country-specific
regulations and always drive at a suitable speed.
Personal POIs are filed in categories:
RNot Classified
Standard entry for personal POIs
RMercedes-Benz Apps
Personal POIs (destinations, routes) that you
have imported via the online functions.
RCategories which you have created yourself,
e.g. on your PC
Personal routes are not categorized.
Settings for personal POIs
Displaying on the map
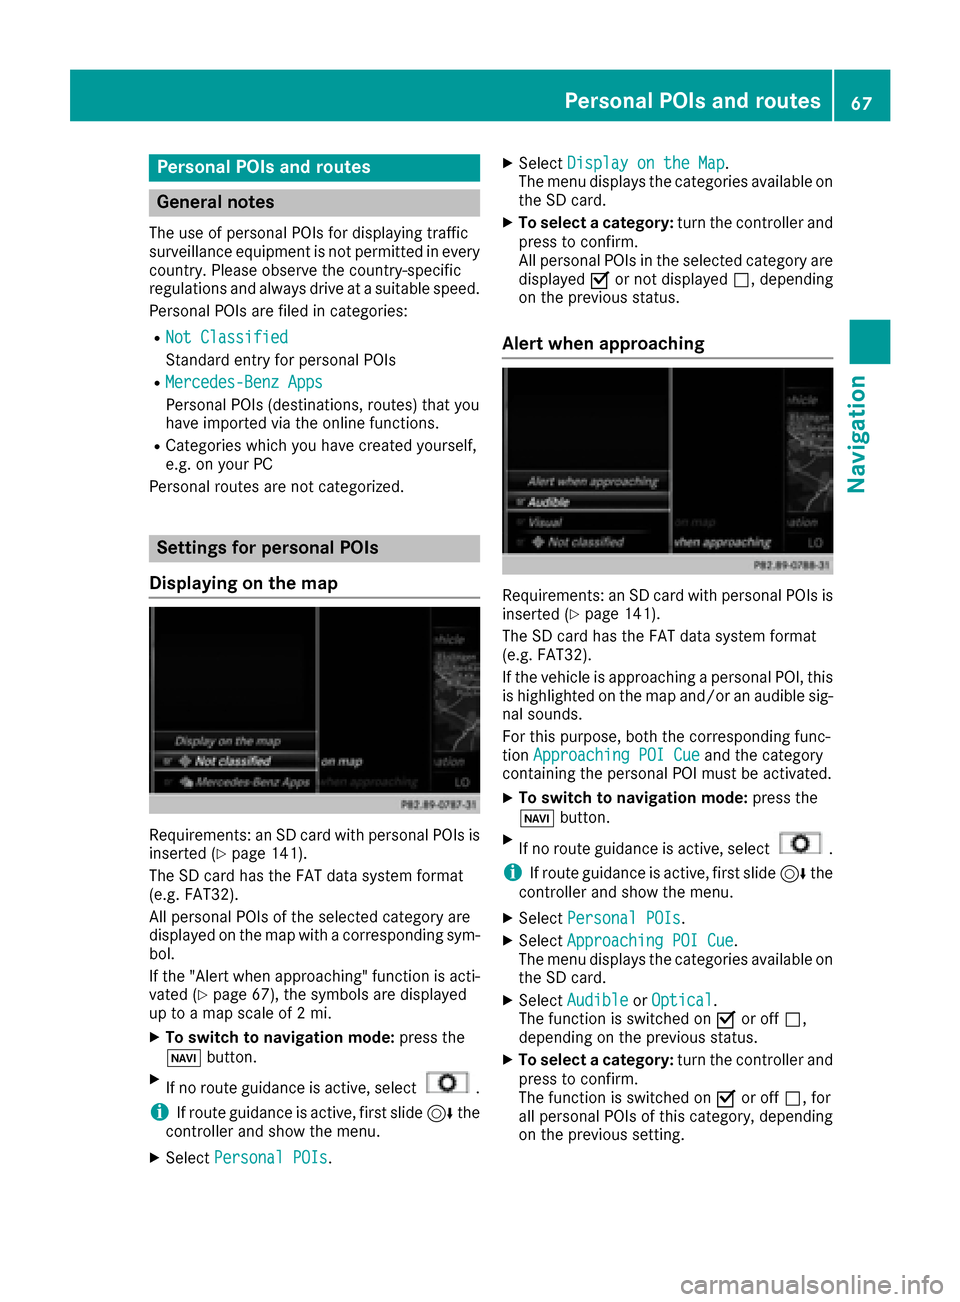
Requirements: an SD card with personal POIs is
inserted (Ypage 141).
The SD card has the FAT data system format
(e.g. FAT32).
All personal POIs of the selected category are
displayed on the map with a corresponding sym-
bol.
If the "Alert when approaching" function is acti-
vated (
Ypage 67), the symbols are displayed
up to a map scale of 2 mi.
XTo switch to navigation mode: press the
Ø button.
XIf no route guidance is active, select.
iIf route guidance is active, first slide 6the
controller and show the menu.
XSelect Personal POIs.
XSelectDisplay on the Map.
The menu displays the categories available on
the SD card.
XTo select a category: turn the controller and
press to confirm.
All personal POIs in the selected category are
displayed Oor not displayed ª, depending
on the previous status.
Alert when approaching
Requirements: an SD card with personal POIs is
inserted (Ypage 141).
The SD card has the FAT data system format
(e.g. FAT32).
If the vehicle is approaching a personal POI, this
is highlighted on the map and/or an audible sig-
nal sounds.
For this purpose, both the corresponding func-
tion Approaching POI Cue
and the category
containing the personal POI must be activated.
XTo switch to navigation mode: press the
Ø button.
XIf no route guidance is active, select.
iIf route guidance is active, first slide 6the
controller and show the menu.
XSelect Personal POIs.
XSelectApproaching POI Cue.
The menu displays the categories available on
the SD card.
XSelect AudibleorOptical.
The function is switched on Oor off ª,
depending on the previous status.
XTo select a category: turn the controller and
press to confirm.
The function is switched on Oor off ª, for
all personal POIs of this category, depending
on the previous setting.
Personal POIs and routes67
Navigation
Z
Page 72 of 178
into consideration. Therefore, the outward
and return routes may differ from each other.
XTo start route guidance:turn and press the
controller to select Start
.
Recording the route
General notes
Routes are recorded using the SD card.
Requirements: the SD card has the FAT data
system format (e.g. FAT32).
When recording the route, bear in mind the fol-
lowing:
RIf the SD card is inserted, it must not be
removed during recording.
RIf route recording is started manually, it must
be finished manually before the multimedia
system is switched off (e. g. when the engine
is switched off).
RThe multimedia system minimizes the num-
ber of route points recorded. Therefore when
the recorded route is subsequently com-
menced, it may differ from the route that was
originally recorded.
Starting/finishing route recording
XInsert the SD memory card (Ypage 141).
XTo switch to navigation mode: press the
Ø button.
XIf no route guidance is active, select.
iIf route guidance is active, first slide 6the
controller and show the menu.
XSelect Memory Card.
XSelectStart Route Recording.
The route is recorded and REC appears at the
bottom edge of the screen.
XTo stop recording, select End RouteRecordingfrom the menu.
The route is stored under Personal Routes.
Displaying/editing the recorded route
XInsert the SD memory card (Ypage 141).
XTo switch to navigation mode: press the
Ø button.
XIf no route guidance is active, select.
iIf route guidance is active, first slide 6the
controller and show the menu.
XSelect Memory Card.
XSelectPersonal Routes.
Previously recorded routes are displayed.
XTo select a route, turn and press the control-
ler.
The map appears with a menu. The recorded
route is shown on the map in blue.
XTo calculate a route: selectStart.
XTo change the name and symbol: select
Edit
.
XSelect Change NameorEdit Icon.
XCharacter entry (Ypage 29).
XSelect a symbol.
Route guidance
General notes
The multimedia system calculates the route to
the destination without taking the following into
account, for example:
Rtraffic lights
Rstop and yield signs
Rparking or stopping restrictions
Rroad narrowing
Rtemporary traffic rules and regulations
The navigation system can give differing driving
recommendations if the actual street/traffic sit-
uation does not correspond with the digital
map's data. For example, if the road layout or
the direction of a one-way street has been
changed.
For this reason, you must always observe road
and traffic rules and regulations during your
journey. Road and traffic rules and regulations
always have priority over system driving recom-
mendations.
Route guidance begins once a route has been
calculated (
Ypage 58).
The multimedia system guides you to your des-
tination by means of navigation announcements
in the form of audible navigation announce-
ments and route guidance displays.
The route guidance displays can be seen if nav-
igation mode is switched on.
If you do not follow the navigation announce-
ments or if you leave the calculated route, the
70Route guidance
Navigation
Page 73 of 178
multimedia system automatically calculates a
new route to the destination.
If the digital map contains the corresponding
information, the following applies:
RDuring route guidance, the multimedia sys-
tem tries to avoid roads with restricted
access. These include, for example, roads
which are closed to through-traffic.
RRoads that have time restrictions (e.g. closed
on Sundays and public holidays) are consid-
ered for route guidance on days when they are
open. For this purpose, the relevant times
must be correctly stored in the database.
Change of direction
Overview
Changes of direction have three phases:
RPreparation phase
RAnnouncement phase
RChange-of-direction phase
Changes in direction are also shown in the mul-
tifunction display of the instrument cluster (see
the vehicle Operator's Manual).
Preparation phase
The multimedia system prepares you for the
upcoming driving maneuver, e.g. with the
announcement "Prepare to turn right". You see
the full-screen map.
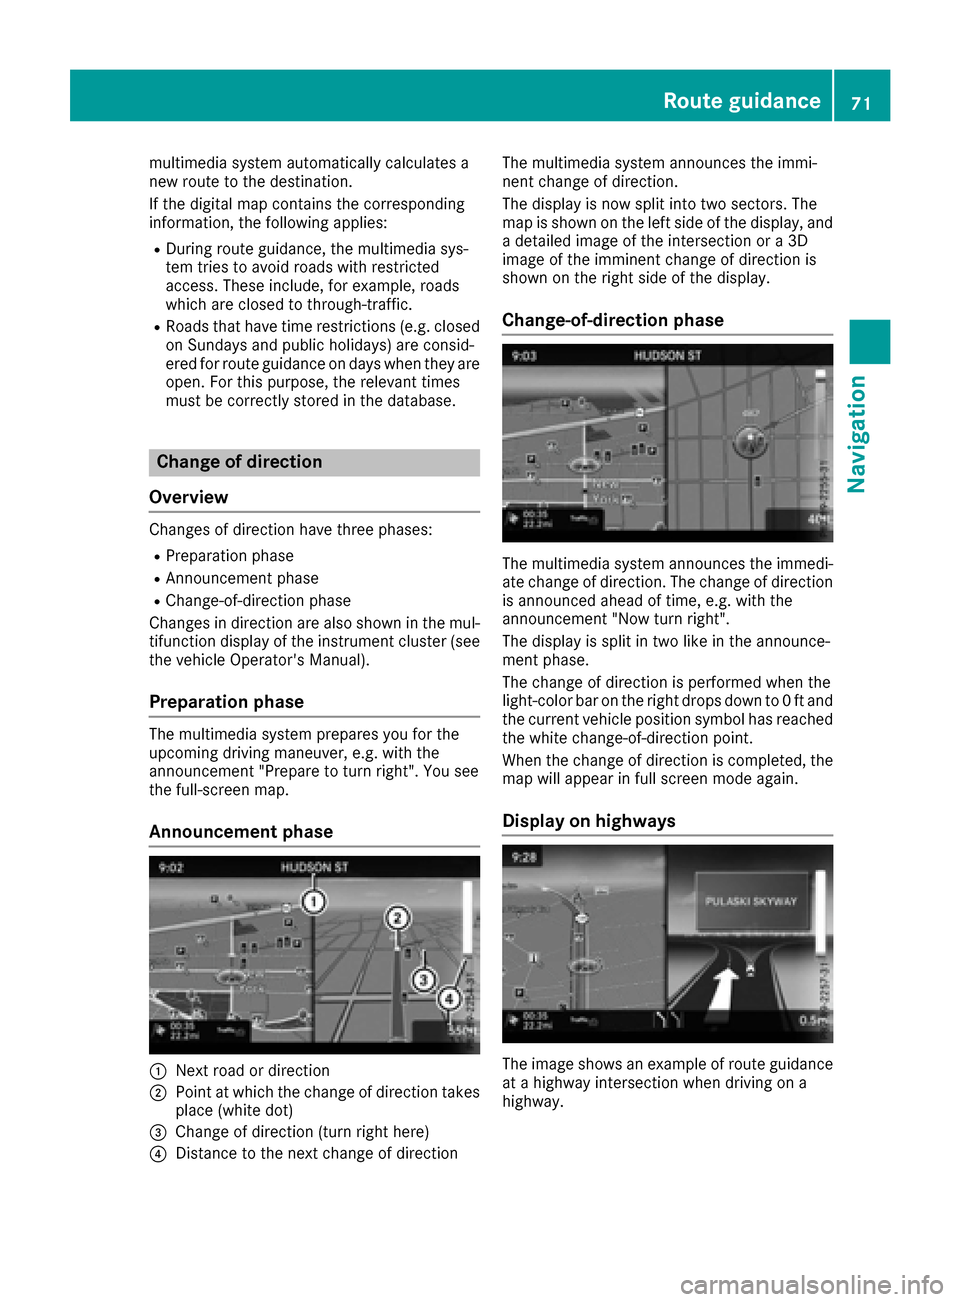
Announcement phase
:Next road or direction
;Point at which the change of direction takes
place (white dot)
=Change of direction (turn right here)
?Distance to the next change of direction The multimedia system announces the immi-
nent change of direction.
The display is now split into two sectors. The
map is shown on the left side of the display, and
a detailed image of the intersection or a 3D
image of the imminent change of direction is
shown on the right side of the display.
Change-of-direction phase
The multimedia system announces the immedi-
ate change of direction. The change of direction
is announced ahead of time, e.g. with the
announcement "Now turn right".
The display is split in two like in the announce-
ment phase.
The change of direction is performed when the
light-color bar on the right drops down to 0 ft and
the current vehicle position symbol has reached
the white change-of-direction point.
When the change of direction is completed, the
map will appear in full screen mode again.
Display on highways
The image shows an example of route guidance
at a highway intersection when driving on a
highway.
Route guidance71
Navigation
Z
Page 74 of 178
Lane recommendations
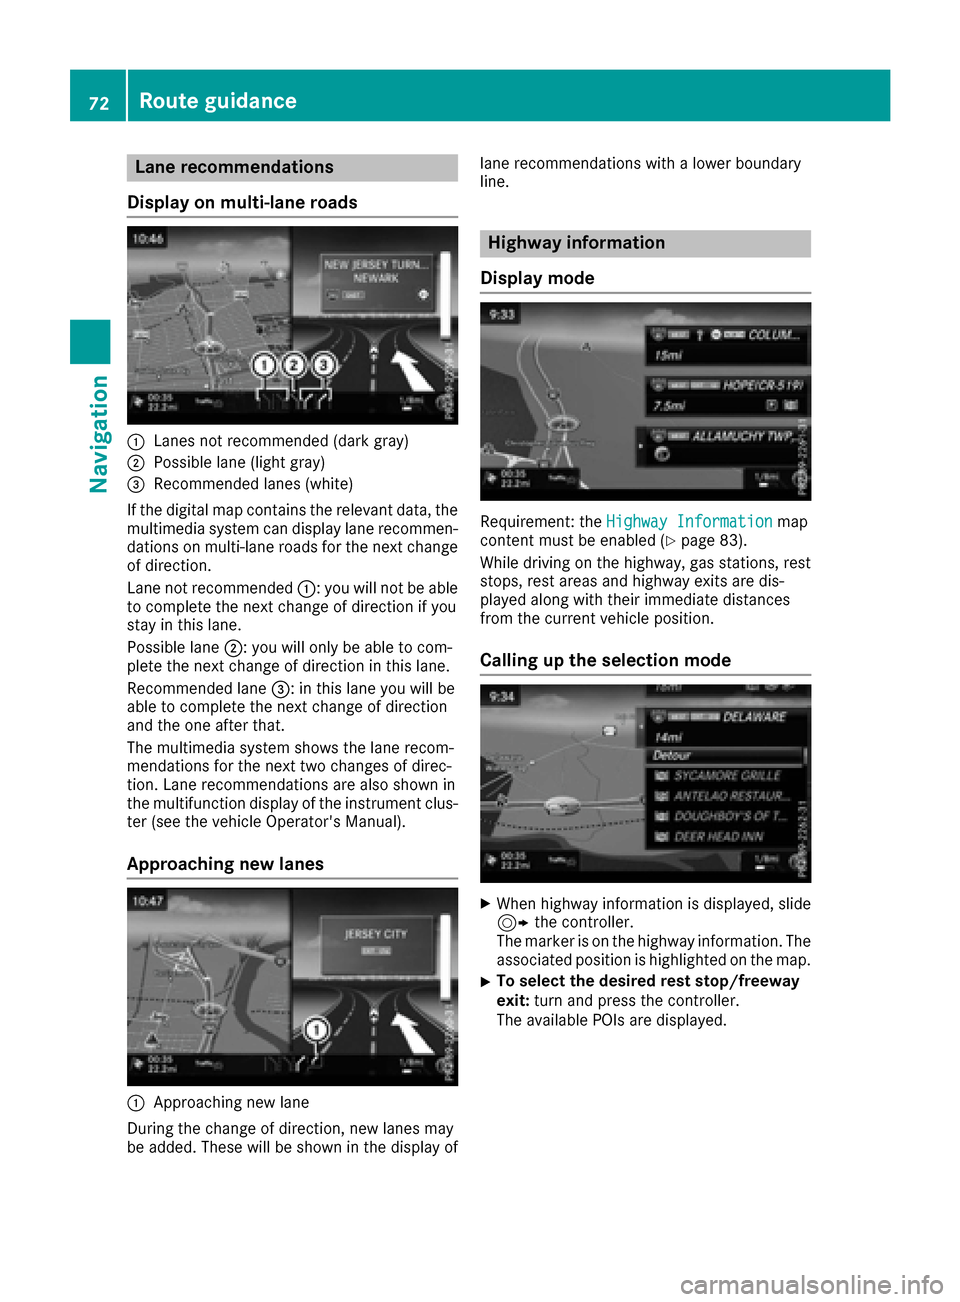
Display on multi-lane roads
:Lanes not recommended (dark gray)
;Possible lane (light gray)
=Recommended lanes (white)
If the digital map contains the relevant data, the
multimedia system can display lane recommen-
dations on multi-lane roads for the next change
of direction.
Lane not recommended :: you will not be able
to complete the next change of direction if you
stay in this lane.
Possible lane ;: you will only be able to com-
plete the next change of direction in this lane.
Recommended lane =: in this lane you will be
able to complete the next change of direction
and the one after that.
The multimedia system shows the lane recom-
mendations for the next two changes of direc-
tion. Lane recommendations are also shown in
the multifunction display of the instrument clus-
ter (see the vehicle Operator's Manual).
Approaching new lanes
:Approaching new lane
During the change of direction, new lanes may
be added. These will be shown in the display of lane recommendations with a lower boundary
line.
Highway information
Display mode
Requirement: the Highway Informationmap
content must be enabled (Ypage 83).
While driving on the highway, gas stations, rest
stops, rest areas and highway exits are dis-
played along with their immediate distances
from the current vehicle position.
Calling up the selection mode
XWhen highway information is displayed, slide 9 the controller.
The marker is on the highway information. The
associated position is highlighted on the map.
XTo select the desired rest stop/freeway
exit: turn and press the controller.
The available POIs are displayed.
72Route guidance
Navigation
Page 80 of 178
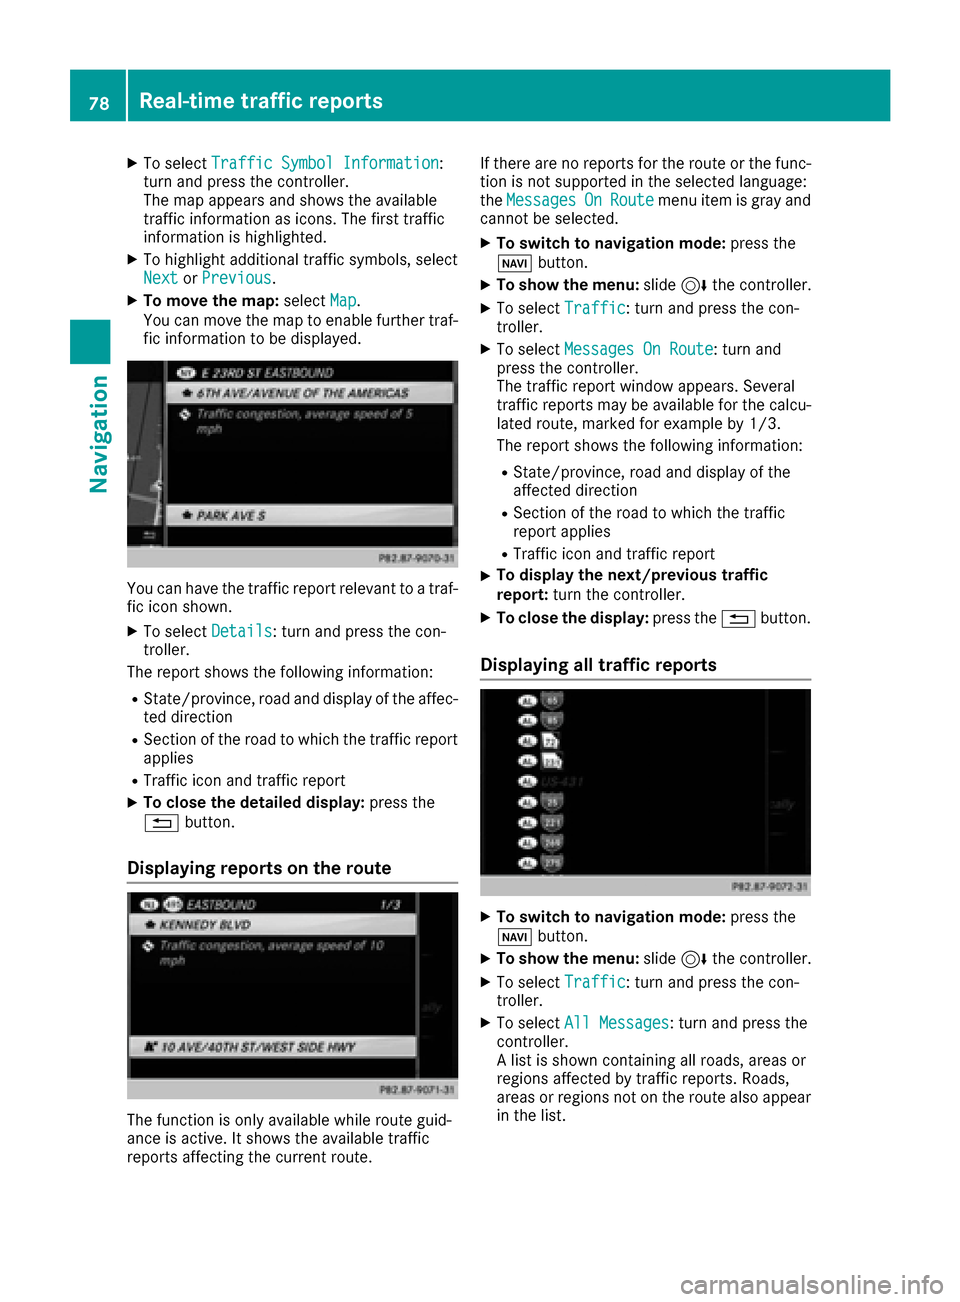
XTo selectTraffic Symbol Information:
turn and press the controller.
The map appears and shows the available
traffic information as icons. The first traffic
information is highlighted.
XTo highlight additional traffic symbols, select
Nextor Previous.
XTo move the map: selectMap.
You can move the map to enable further traf-
fic information to be displayed.
You can have the traffic report relevant to a traf-
fic icon shown.
XTo select Details: turn and press the con-
troller.
The report shows the following information:
RState/province, road and display of the affec-
ted direction
RSection of the road to which the traffic report applies
RTraffic icon and traffic report
XTo close the detailed display: press the
% button.
Displaying reports on the route
The function is only available while route guid-
ance is active. It shows the available traffic
reports affecting the current route. If there are no reports for the route or the func-
tion is not supported in the selected language:
the
Messages
OnRoutemenu item is gray and
cannot be selected.
XTo switch to navigation mode: press the
Ø button.
XTo show the menu: slide6the controller.
XTo select Traffic: turn and press the con-
troller.
XTo select Messages On Route: turn and
press the controller.
The traffic report window appears. Several
traffic reports may be available for the calcu-
lated route, marked for example by 1/3.
The report shows the following information:
RState/province, road and display of the
affected direction
RSection of the road to which the traffic
report applies
RTraffic icon and traffic report
XTo display the next/previous traffic
report: turn the controller.
XTo close the display: press the%button.
Displaying all traffic reports
XTo switch to navigation mode: press the
Ø button.
XTo show the menu: slide6the controller.
XTo select Traffic: turn and press the con-
troller.
XTo select All Messages: turn and press the
controller.
A list is shown containing all roads, areas or
regions affected by traffic reports. Roads,
areas or regions not on the route also appear
in the list.
78Real-time traffic reports
Navigation
Page 83 of 178
XMove the map to the desired position
(Ypage 53).
XTo show the menu: press the controller.
XTo selectPosition: turn and press the con-
troller.
XSelect Save.
The crosshair position is saved in the last des-
tinations.
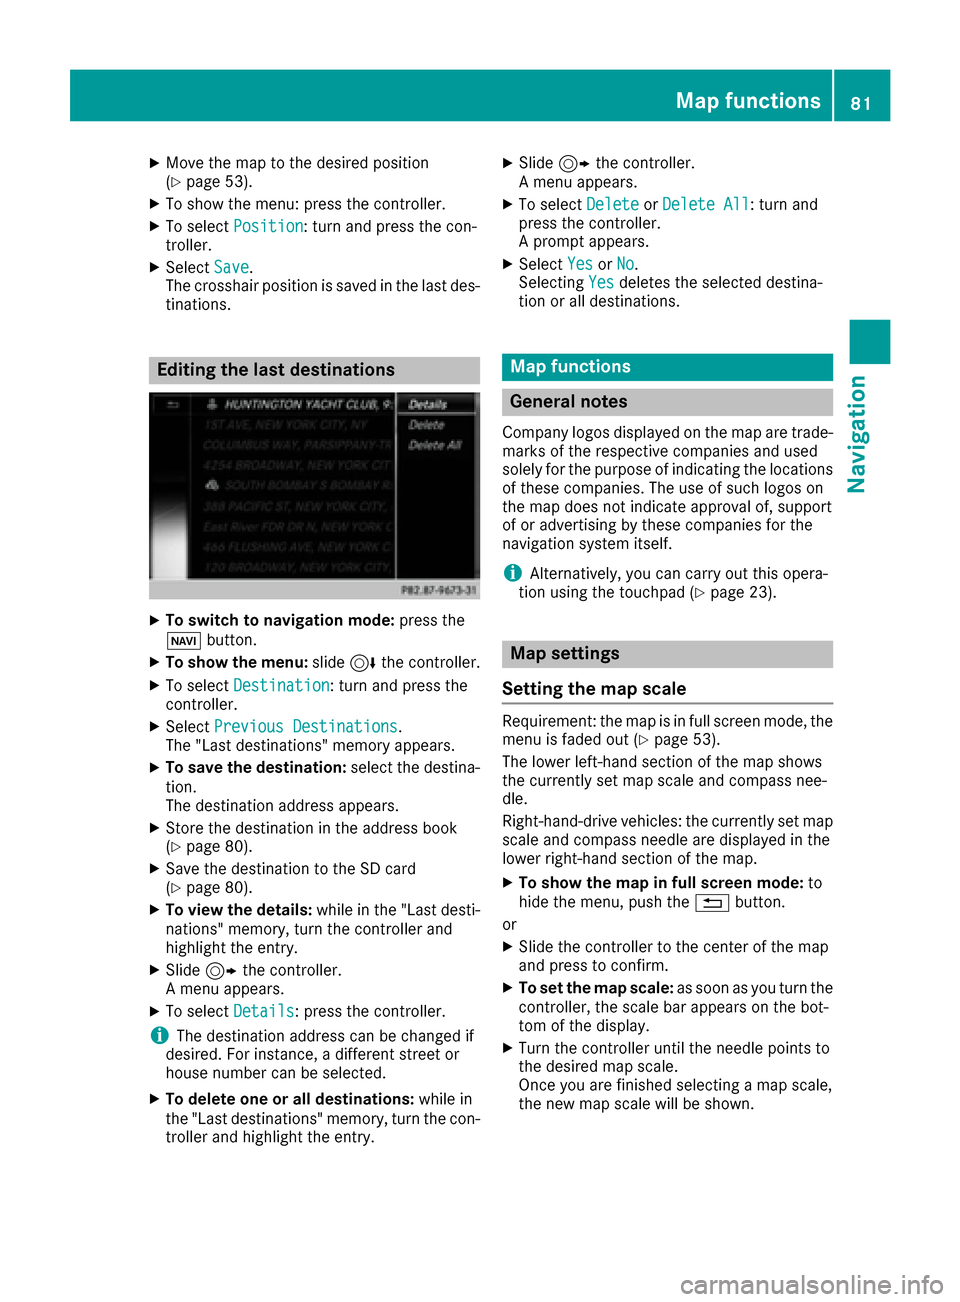
Editing the last destinations
XTo switch to navigation mode: press the
Ø button.
XTo show the menu: slide6the controller.
XTo select Destination: turn and press the
controller.
XSelect Previous Destinations.
The "Last destinations" memory appears.
XTo save the destination: select the destina-
tion.
The destination address appears.
XStore the destination in the address book
(Ypage 80).
XSave the destination to the SD card
(Ypage 80).
XTo view the details: while in the "Last desti-
nations" memory, turn the controller and
highlight the entry.
XSlide 9the controller.
A menu appears.
XTo select Details: press the controller.
iThe destination address can be changed if
desired. For instance, a different street or
house number can be selected.
XTo delete one or all destinations: while in
the "Last destinations" memory, turn the con-
troller and highlight the entry.
XSlide 9the controller.
A menu appears.
XTo select DeleteorDelete All: turn and
press the controller.
A prompt appears.
XSelect YesorNo.
Selecting Yesdeletes the selected destina-
tion or all destinations.
Map functions
General notes
Company logos displayed on the map are trade- marks of the respective companies and used
solely for the purpose of indicating the locations
of these companies. The use of such logos on
the map does not indicate approval of, support
of or advertising by these companies for the
navigation system itself.
iAlternatively, you can carry out this opera-
tion using the touchpad (Ypage 23).
Map settings
Setting the map scale
Requirement: the map is in full screen mode, the
menu is faded out (Ypage 53).
The lower left-hand section of the map shows
the currently set map scale and compass nee-
dle.
Right-hand-drive vehicles: the currently set map
scale and compass needle are displayed in the
lower right-hand section of the map.
XTo show the map in full screen mode: to
hide the menu, push the %button.
or
XSlide the controller to the center of the map
and press to confirm.
XTo set the map scale: as soon as you turn the
controller, the scale bar appears on the bot-
tom of the display.
XTurn the controller until the needle points to
the desired map scale.
Once you are finished selecting a map scale,
the new map scale will be shown.
Map functions81
Navigation
Z
Page 89 of 178
starter battery has insufficient power, the mul-
timedia system may switch off automatically.
This protects the battery. In order to prevent
this, a suitable power supply to the vehicle must
be maintained.
Navigation functions
Calling up the navigation system
menu
XTo switch to navigation mode:press the
ß button.
XTo show the menu: slide5the controller.
Navi
is highlighted in the main function bar.
XPress the controller.
The navigation menu appears.
XTurn the controller to display the navigation
functions one after another.
XTo change to the map: turn the controller until
Navigationis shown and then press the con-
troller.
Calling up the online map display
Requirement for online map display (USA):
mbrace must be activated for Internet access
(
Ypage 119).
Requirement for the online map display (Can-
ada): a mobile phone is connected to the multi-
media system via Bluetooth
®(Ypage 91) or
USB (Ypage 155).
XCall up the navigation menu (Ypage 87).
XTurn the controller until Online Map Dis‐playis brought to the front.
XPress the controller.
The online connection is established. Once
the connection is established, the Google
Maps™ map shows the vicinity of the current
vehicle position.
iAlternatively you can call up this function
using the touchpad (Ypage 23).
XTo exit the online map display: press the %
button.
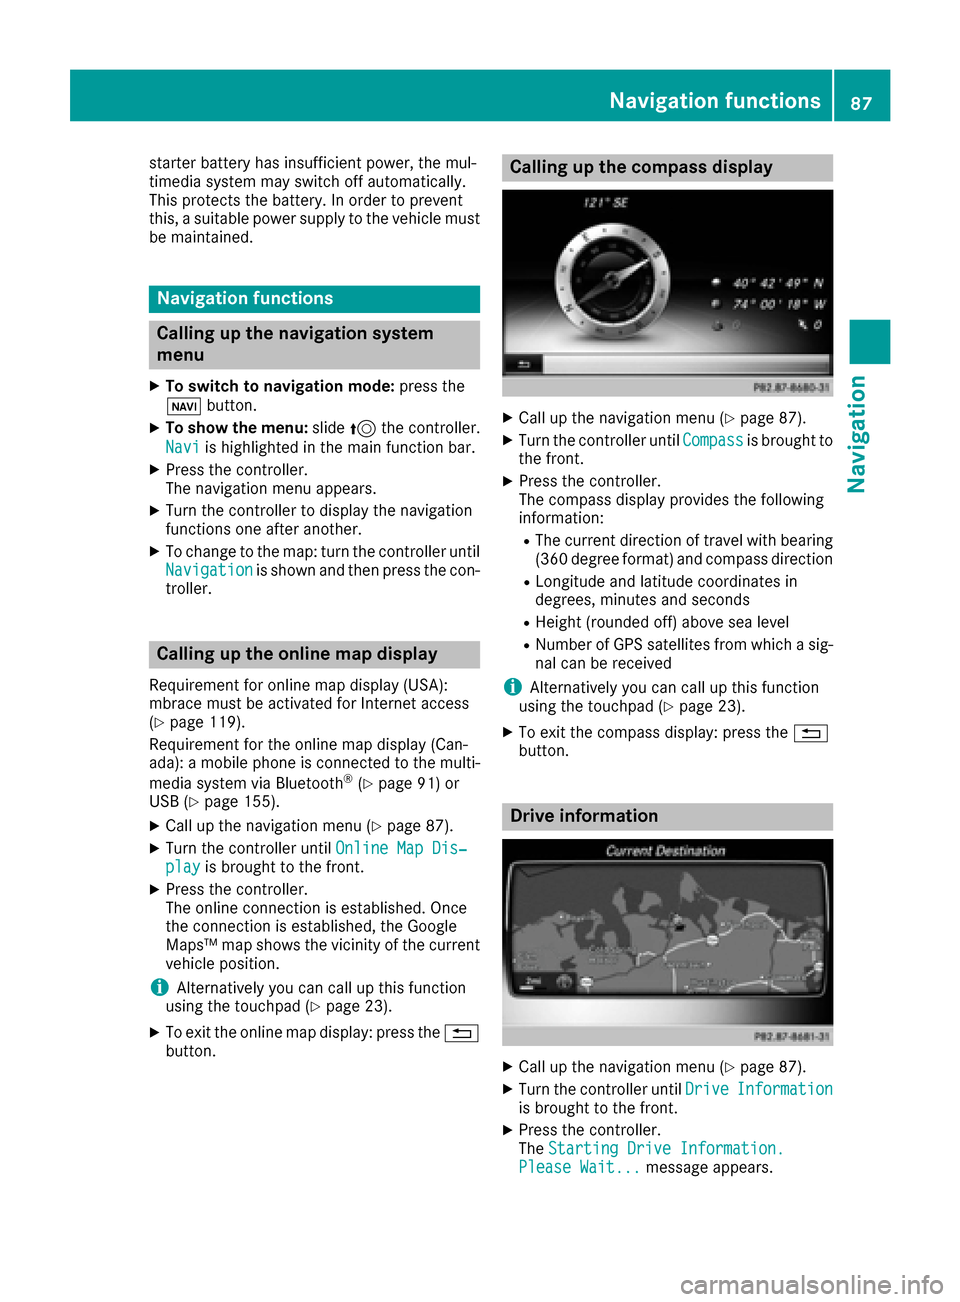
Calling up the compass display
XCall up the navigation menu (Ypage 87).
XTurn the controller until Compassis brought to
the front.
XPress the controller.
The compass display provides the following
information:
RThe current direction of travel with bearing
(360 degree format) and compass direction
RLongitude and latitude coordinates in
degrees, minutes and seconds
RHeight (rounded off) above sea level
RNumber of GPS satellites from which a sig- nal can be received
iAlternatively you can call up this function
using the touchpad (Ypage 23).
XTo exit the compass display: press the %
button.
Drive information
XCall up the navigation menu (Ypage 87).
XTurn the controller until DriveInformationis brought to the front.
XPress the controller.
TheStarting Drive Information.
Please Wait...message appears.
Navigation functions87
Navigation
Z