MERCEDES-BENZ C-CLASS CABRIOLET 2018 Owner's Manual
Manufacturer: MERCEDES-BENZ, Model Year: 2018, Model line: C-CLASS CABRIOLET, Model: MERCEDES-BENZ C-CLASS CABRIOLET 2018Pages: 350, PDF Size: 5.73 MB
Page 141 of 350
Temporary setting
XTo activate:shift the DIRECT SELECT lever to
position h.
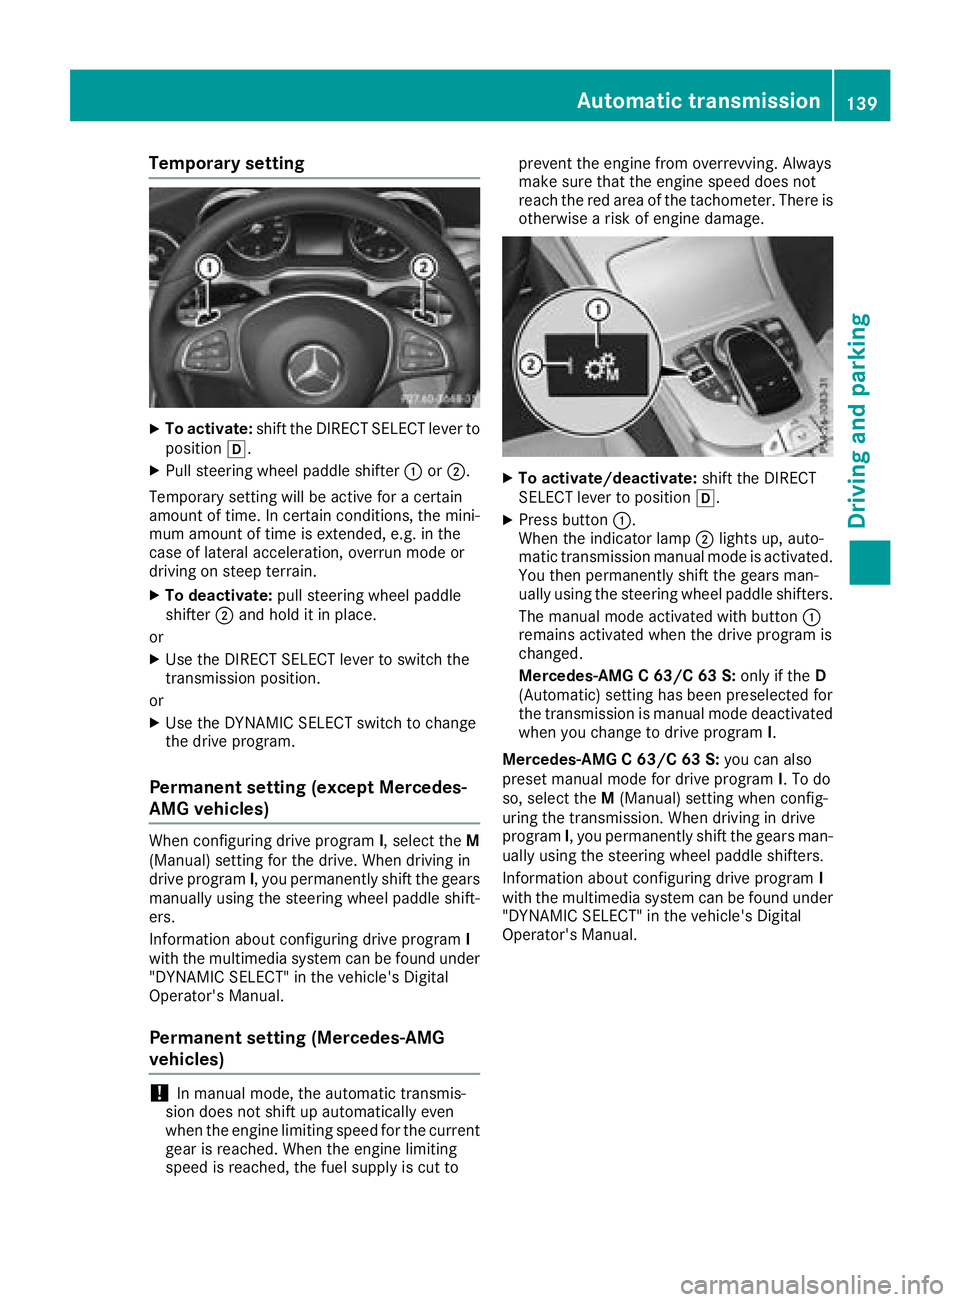
XPull steering wheel paddle shifter :or;.
Temporary setting will be active for a certain
amount of time. In certain conditions, the mini-
mum amount of time is extended, e.g. in the
case of lateral acceleration, overrun mode or
driving on steep terrain.
XTo deactivate: pull steering wheel paddle
shifter ;and hold it in place.
or
XUse the DIRECT SELECT lever to switch the
transmission position.
or
XUse the DYNAMIC SELECT switch to change
the drive program.
Permanent setting (except Mercedes-
AMG vehicles)
When configuring drive program I, select the M
(Manual) setting for the drive. When driving in
drive program I, you permanently shift the gears
manually using the steering wheel paddle shift-
ers.
Information about configuring drive program I
with the multimedia system can be found under
"DYNAMIC SELECT" in the vehicle's Digital
Operator's Manual.
Permanent setting (Mercedes-AMG
vehicles)
!In manual mode, the automatic transmis-
sion does not shift up automatically even
when the engine limiting speed for the current
gear is reached. When the engine limiting
speed is reached, the fuel supply is cut to prevent the engine from overrevving. Always
make sure that the engine speed does not
reach the red area of the tachometer. There is
otherwise a risk of engine damage.
XTo activate/deactivate:
shift the DIRECT
SELECT lever to position h.
XPress button:.
When the indicator lamp ;lights up, auto-
matic transmission manual mode is activated.
You then permanently shift the gears man-
ually using the steering wheel paddle shifters.
The manual mode activated with button :
remains activated when the drive program is
changed.
Mercedes-AMG C 63/C 63 S: only if theD
(Automatic) setting has been preselected for
the transmission is manual mode deactivated
when you change to drive program I.
Mercedes-AMG C 63/C 63 S: you can also
preset manual mode for drive program I. To do
so, select the M(Manual) setting when config-
uring the transmission. When driving in drive
program I, you permanently shift the gears man-
ually using the steering wheel paddle shifters.
Information about configuring drive program I
with the multimedia system can be found under
"DYNAMIC SELECT" in the vehicle's Digital
Operator's Manual.
Automatic transmission139
Driving an d parking
Z
Page 142 of 350
Shifting gears
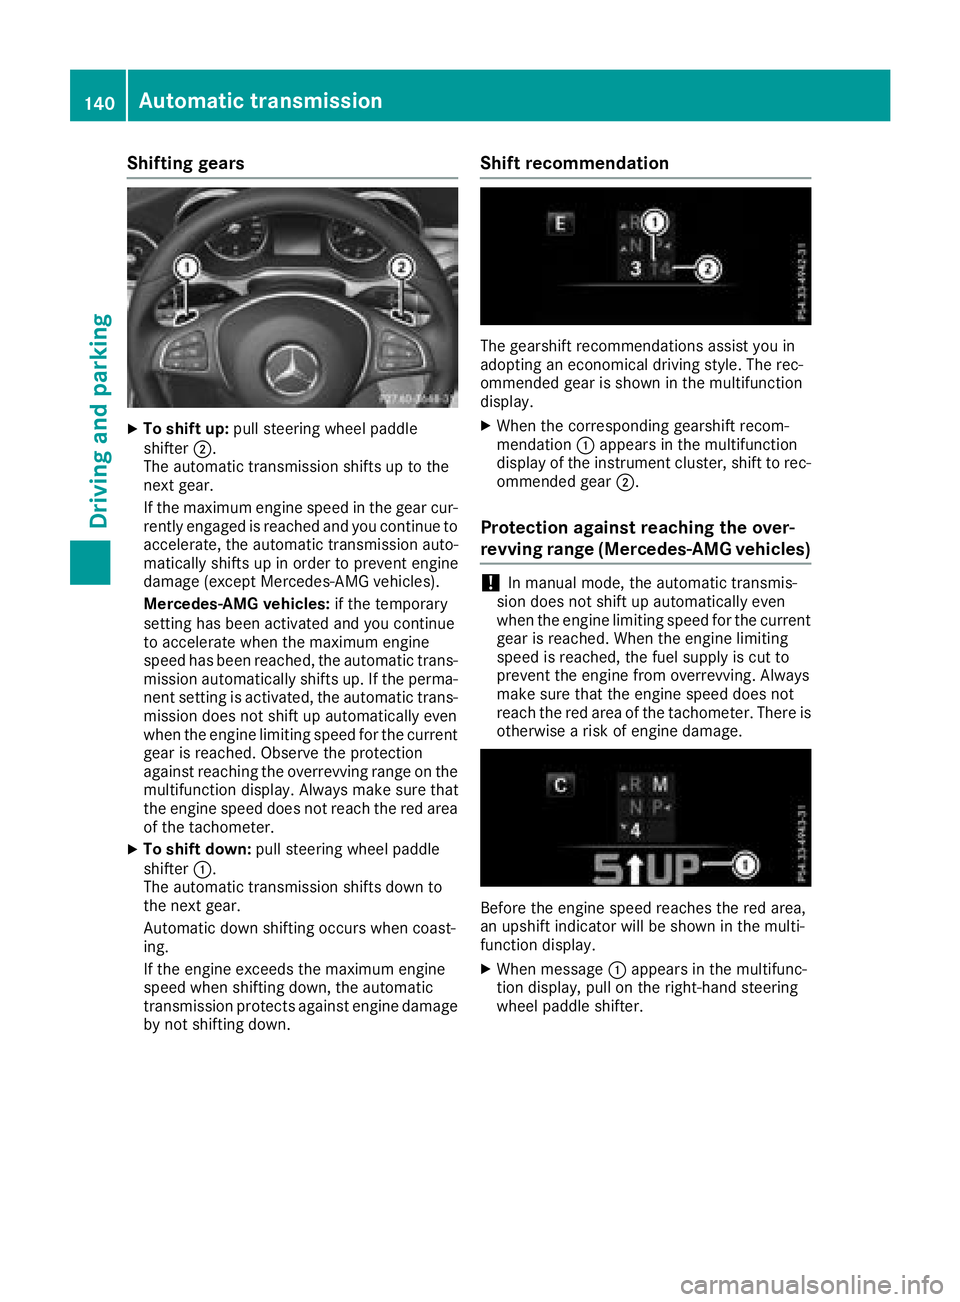
XTo shift up:pull steering wheel paddle
shifter ;.
The automatic transmission shifts up to the
next gear.
If the maximum engine speed in the gear cur-
rently engaged is reached and you continue to
accelerate, the automatic transmission auto-
matically shifts up in order to prevent engine
damage (except Mercedes-AMG vehicles).
Mercedes-AMG vehicles: if the temporary
setting has been activated and you continue
to accelerate when the maximum engine
speed has been reached, the automatic trans- mission automatically shifts up. If the perma-
nent setting is activated, the automatic trans-
mission does not shift up automatically even
when the engine limiting speed for the current
gear is reached. Observe the protection
against reaching the overrevving range on the
multifunction display. Always make sure that
the engine speed does not reach the red area of the tachometer.
XTo shift down: pull steering wheel paddle
shifter :.
The automatic transmission shifts down to
the next gear.
Automatic down shifting occurs when coast-
ing.
If the engine exceeds the maximum engine
speed when shifting down, the automatic
transmission protects against engine damage by not shifting down.
Shift recommendation
The gearshift recommendations assist you in
adopting an economical driving style. The rec-
ommended gear is shown in the multifunction
display.
XWhen the corresponding gearshift recom-
mendation :appears in the multifunction
display of the instrument cluster, shift to rec-
ommended gear ;.
Protection against reaching the over-
revving range (Mercedes-AMG vehicles)
!In manual mode, the automatic transmis-
sion does not shift up automatically even
when the engine limiting speed for the current
gear is reached. When the engine limiting
speed is reached, the fuel supply is cut to
prevent the engine from overrevving. Always
make sure that the engine speed does not
reach the red area of the tachometer. There is
otherwise a risk of engine damage.
Before the engine speed reaches the red area,
an upshift indicator will be shown in the multi-
function display.
XWhen message :appears in the multifunc-
tion display, pull on the right-hand steering
wheel paddle shifter.
140Automatic transmission
Driving and parking
Page 143 of 350
Kickdown
XFormaximum acceleration ,depress th e
accelerato rpedal beyon dth epressur epoint.
The automatic transmission shift sto alower
gear depending on th eengin espeed.
XShift bac kup once th edesire dspee dis
reached. If you apply full throttle, th
eautomatic trans -
mission shift sup to th enext gear when th e
maximum engin espeed is reached. This pre -
vents th eengin efrom overrevving .
Mercedes-AMG vehicles: kickdown is only
possibl ein th etemporar ysetting .
Problems with the trans mission
ProblemPossible causes/consequences and MSolutions
The transmission has
problemsshifting gear .The transmission is losing oil.
XHaveth etransmission checke dat aqualified specialist workshop
immediately.
The acceleration abilit y
is deteriorating .
The transmission no lon -
ger changes gear .The transmission is in emergenc ymode.
It is possibl eto shift to agear and revers egear only.
XStop th evehicle.
XShift th etransmission to position j.
XSwitchoff th eengine.
XWait at least te nseconds before restarting th eengine.
XShift th etransmission to position hork.
If h is selected, th etransmission only shift sto on egear ;if k is
selected, th etransmission shift sto revers egear .
XHaveth etransmission checke dat aqualified specialist workshop
immediately.
Transfer case
This section is only valid for vehicles wit h4-
whee ldrive (4MATIC). Powe ris always trans -
mitte dto bot haxles.
!Performance test smay only be carrie dout
on a2-axl edynamometer. The brak esystem
or transfer cas ecould otherwise be damaged.
Contac t aqualified specialist workshop for a
performance test .
!Since ESP®engagesautomatically, th eigni-
tion mus tbe switched off (the SmartKey or
Start/Sto pbutto nmus tbe in position gor
1) if
Rtheelectrical parking brak eis bein gtested
usin g adynamometer
Rthevehicl eis bein gtowed wit honly on e
axl eraised (not permitte dfor vehicles wit h
4MATIC) Otherwise
,th ebrak esystem can be dam-
aged .
!Vehicles wit h4MATIC mus tno tbe towed
wit heither th efron tor th erear axl eraised, as
doin gso will damag eth etransmission .
Refueling
Important safety notes
GWARNIN G
Fue lis highly flammable. If you handle fuel
incorrectly, there is aris kof fir eand explo-
sion .
You mus tavoid fire, open flames, creating
sparks and smoking .Switc hoff th eengin e
and ,if applicable, th eauxiliary heating before
refueling.
Refueling141
Driving and parking
Z
Page 144 of 350
GWARNING
Fuel is poisonous and hazardous to health.
There is a risk of injury.
You must make sure that fuel does not come into contact with your skin, eyes or clothing
and that it is not swallowed. Do not inhale fuel
vapors. Keep fuel away from children.
If you or others come into contact with fuel,
observe the following:
RWash away fuel from skin immediately
using soap and water.
RIf fuel comes into contact with your eyes,
immediately rinse them thoroughly with
clean water. Seek medical assistance with-
out delay.
RIf fuel is swallowed, seek medical assis-
tance without delay. Do not induce vomit-
ing.
RImmediately change out of clothing which
has come into contact with fuel.
GWARNING
Electrostatic buildup can create sparks and
ignite fuel vapors. There is a risk of fire and
explosion.
Always touch the vehicle body before opening
the fuel filler flap or touching the fuel pump
nozzle. Any existing electrostatic buildup is
thereby discharged.
Do not get into the vehicle again during the refu-
eling process. otherwise electrostatic charge
could build up again.
!Do not use diesel to refuel vehicles with a
gasoline engine. Do not switch on the ignition
if you accidentally refuel with the wrong fuel.
Otherwise, the fuel will enter the fuel system. Even small amounts of the wrong fuel could
result in damage to the fuel system and the
engine. Notify a qualified specialist workshop
and have the fuel tank and fuel lines drained
completely.
!Overfilling the fuel tank could damage the
fuel system.
!Take care not to spill any fuel on painted
surfaces. You could otherwise damage the
paintwork.
!Use a filter when adding fuel from a fuel can.
The fuel lines and/or the fuel injection system
could otherwise be blocked by particles from
the fuel can.
If you overfill the fuel tank, fuel could spray out
when the fuel pump nozzle is removed.
For further information on fuel and fuel quality
(
Ypage 340).
Refueling
General information
Pay attention to the important safety notes
(Ypage 141).
If you unlock/lock the vehicle from the outside,
the fuel filler flap also unlocks/locks.
The position of the 8fuel filler cap is dis-
played on the instrument cluster. The arrow next
to the filling pump indicates the side of the vehi-
cle.
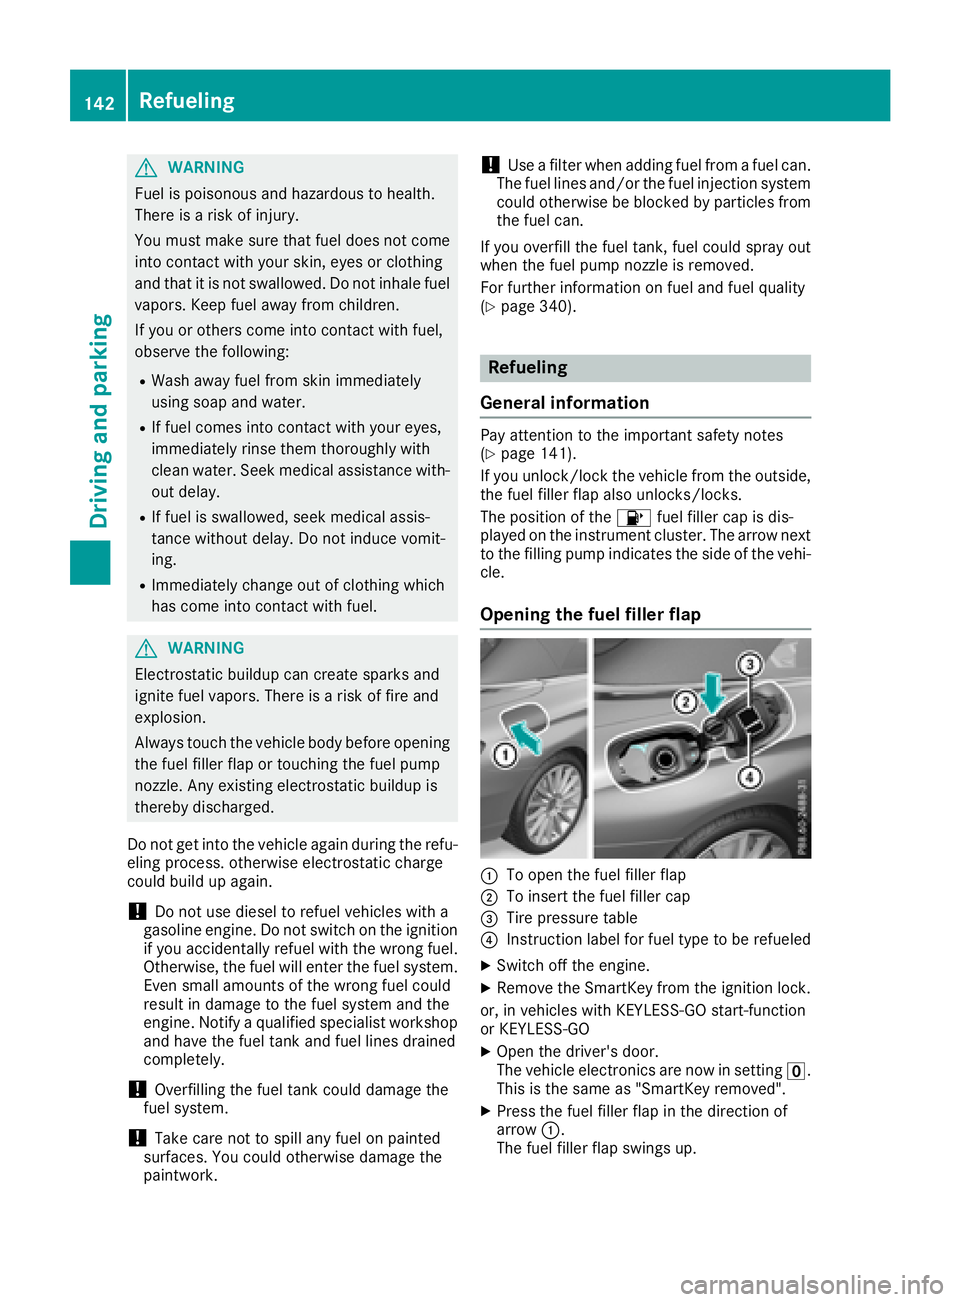
Opening the fuel filler flap
:To open the fuel filler flap
;To insert the fuel filler cap
=Tire pressure table
?Instruction label for fuel type to be refueled
XSwitch off the engine.
XRemove the SmartKey from the ignition lock.
or, in vehicles with KEYLESS-GO start-function
or KEYLESS ‑GO
XOpen the driver's door.
The vehicle electronics are now in setting u.
This is the same as "SmartKey removed".
XPress the fuel filler flap in the direction of
arrow :.
The fuel filler flap swings up.
142Refueling
Driving and parking
Page 145 of 350
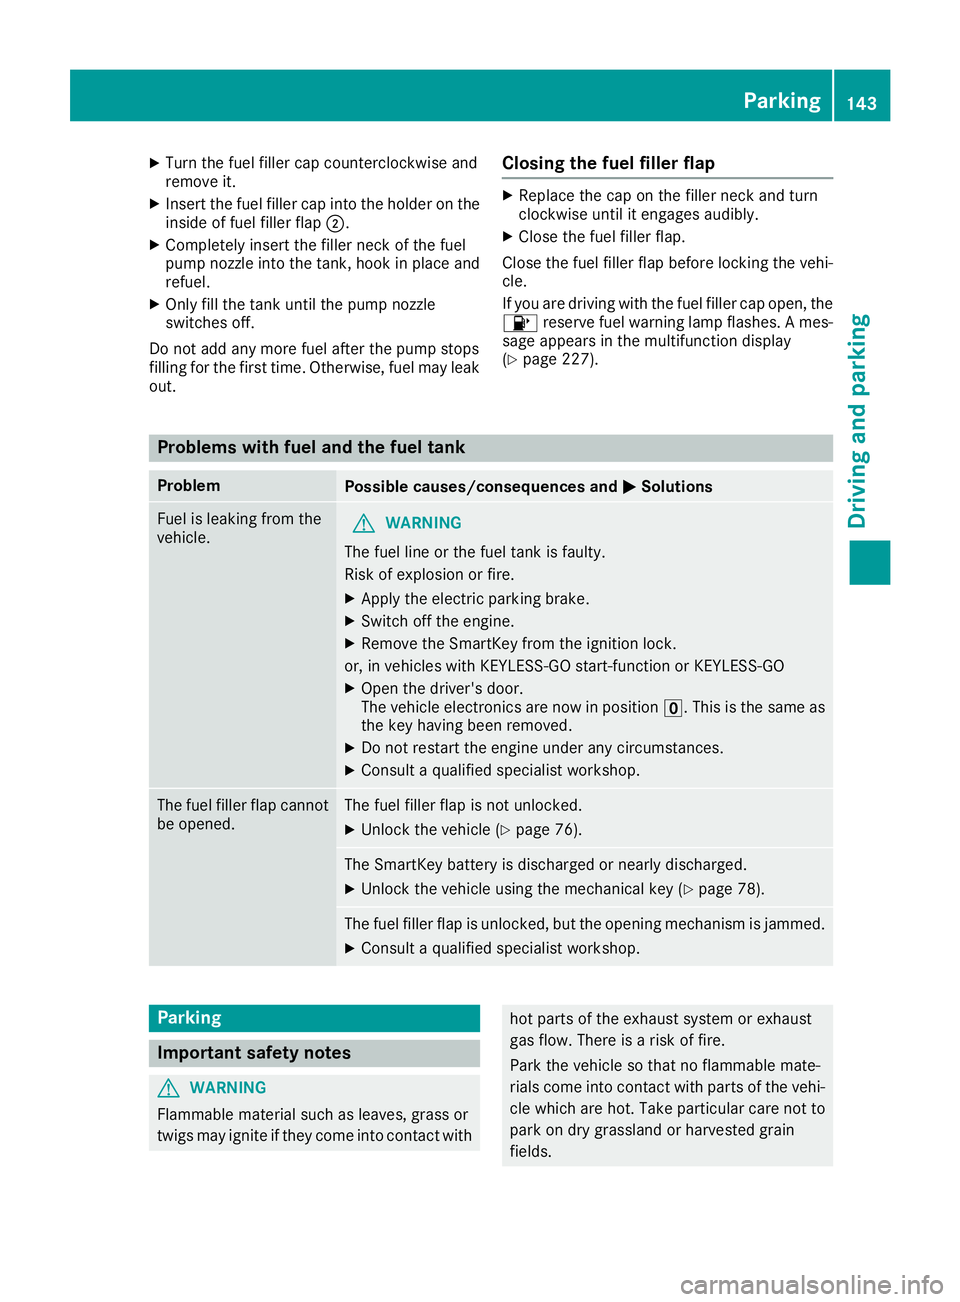
XTurn the fuel filler cap counterclockwise and
remove it.
XInsert the fuel filler cap into the holder on theinside of fuel filler flap ;.
XCompletely insert the filler neck of the fuel
pump nozzle into the tank, hook in place and
refuel.
XOnly fill the tank until the pump nozzle
switches off.
Do not add any more fuel after the pump stops
filling for the first time. Otherwise, fuel may leak
out.
Closing the fuel filler flap
XReplace the cap on the filler neck and turn
clockwise until it engages audibly.
XClose the fuel filler flap.
Close the fuel filler flap before locking the vehi-
cle.
If you are driving with the fuel filler cap open, the
8 reserve fuel warning lamp flashes. A mes-
sage appears in the multifunction display
(
Ypage 227).
Problems with fuel and the fuel tank
ProblemPossible causes/consequences and MSolutions
Fuel is leaking from the
vehicle.GWARNING
The fuel line or the fuel tank is faulty.
Risk of explosion or fire.
XApply the electric parking brake.
XSwitch off the engine.
XRemove the SmartKey from the ignition lock.
or, in vehicles with KEYLESS-GO start-function or KEYLESS ‑GO
XOpen the driver's door.
The vehicle electronics are now in positionu. This is the same as
the key having been removed.
XDo not restart the engine under any circumstances.
XConsult a qualified specialist workshop.
The fuel filler flap cannot
be opened.The fuel filler flap is not unlocked.
XUnlock the vehicle (Ypage 76).
The SmartKey battery is discharged or nearly discharged.
XUnlock the vehicle using the mechanical key (Ypage 78).
The fuel filler flap is unlocked, but the opening mechanism is jammed.
XConsult a qualified specialist workshop.
Parking
Important safety notes
GWARNING
Flammable material such as leaves, grass or
twigs may ignite if they come into contact with
hot parts of the exhaust system or exhaust
gas flow. There is a risk of fire.
Park the vehicle so that no flammable mate-
rials come into contact with parts of the vehi-
cle which are hot. Take particular care not to
park on dry grassland or harvested grain
fields.
Parking143
Driving and parking
Z
Page 146 of 350
GWARNING
If you leave children unsupervised in the vehi-
cle, they could set it in motion by, for example:
Rrelease the parking brake.
Rshift the automatic transmission out of the
parking position P.
Rstart the engine.
In addition, they may operate vehicle equip-
ment and become trapped. There is a risk of
an accident and injury.
When leaving the vehicle, always take the
SmartKey with you and lock the vehicle. Never
leave children unsupervised in the vehicle.
!Always secure the vehicle correctly against
rolling away. Otherwise, the vehicle or its driv-
etrain could be damaged.
To ensure that the vehicle is secured against
rolling away unintentionally:
Rthe electric parking brake must be applied.
Rthe transmission must be in position jand
the SmartKey must be removed from the igni-
tion lock.
Rthe front wheels must be turned towards the
curb on steep uphill or downhill gradients.
Rthe empty vehicle must be secured at the
front axle with a wheel chock or similar, for
example, on uphill or downhill gradients.
Ron uphill or downhill gradients the laden vehi- cle must also be secured at the rear axle, for
example with a wheel chock or similar object.
Switching off the engine
Important safety notes
GWARNING
The automatic transmission switches to neu-
tral position Nwhen you switch off the engine.
The vehicle may roll away. There is a risk of an
accident.
After switching off the engine, always switch
to parking position P. Prevent the parked vehi-
cle from rolling away by applying the parking
brake.
Vehicles with automatic transmission
XApply the electric parking brake.
XShift the transmission to position j.
XWith the SmartKey:turn the SmartKey to
position uin the ignition lock and remove it.
The immobilizer is activated.
XWith the Start/Stop button: press the
Start/Stop button (Ypage 124).
The engine stops and all the indicator lamps in
the instrument cluster go out.
When the driver's door is closed, this corre-
sponds to key position 1. When the driver's
door is open, this corresponds to key position
u, "Key removed".
If you switch the engine off with the transmis-
sion in position korh the automatic trans-
mission shifts to iautomatically.
With the SmartKey: if you then open the driv-
er's door or the front-passenger door or remove the SmartKey from the ignition, the automatic
transmission shifts to jautomatically.
With the Start/Stop button: if you then open
the driver's door or the front-passenger door,
the automatic transmission shifts to jauto-
matically.
If you want the automatic transmission to
remain in neutral i, for example, when having
the vehicle cleaned in an automatic car wash
with a towing system:
XVehicles with KEYLESS-GO or KEYLESS-
GO start function: remove the Start/Stop
button from the ignition lock.
XInsert the SmartKey into the ignition lock.
XAll vehicles: switch the ignition on.
XDepress the brake pedal and keep it
depressed.
XEngage neutral i.
XRelease the brake pedal.
XRelease the electric parking brake.
XSwitch off the ignition and leave the SmartKey
in the ignition lock.
The engine can be switched off in an emergency
while the vehicle is in motion by pressing and
holding the Start/Stop button for three sec-
onds. This function operates independently of
the ECO start/stop automatic engine switch-off function.
144Parking
Driving and parking
Page 147 of 350
Electric parking brake
General notes
GWARNING
If you leave children unsupervised in the vehi-
cle, they could set it in motion by, for example:
Rrelease the parking brake.
Rshift the automatic transmission out of the
parking position P.
Rstart the engine.
In addition, they may operate vehicle equip-
ment and become trapped. There is a risk of
an accident and injury.
When leaving the vehicle, always take the
SmartKey with you and lock the vehicle. Never
leave children unsupervised in the vehicle.
The function of the electric parking brake is
depending on the on-board voltage. If the on-
board voltage is low or there is a malfunction in
the system, it may not be possible to apply the
released parking brake.
XIf this happens, park the vehicle on level
ground only and secure it to prevent it from
rolling away.
XShift the transmission to position j.
It may not be possible to release an applied
parking brake if the on-board voltage is low or
there is a malfunction in the system. Contact a
qualified specialist workshop.
The electric parking brake performs a function
test at regular intervals while the engine is
switched off. The sounds that can be heard while
this is occurring are normal.
Applying or releasing manually
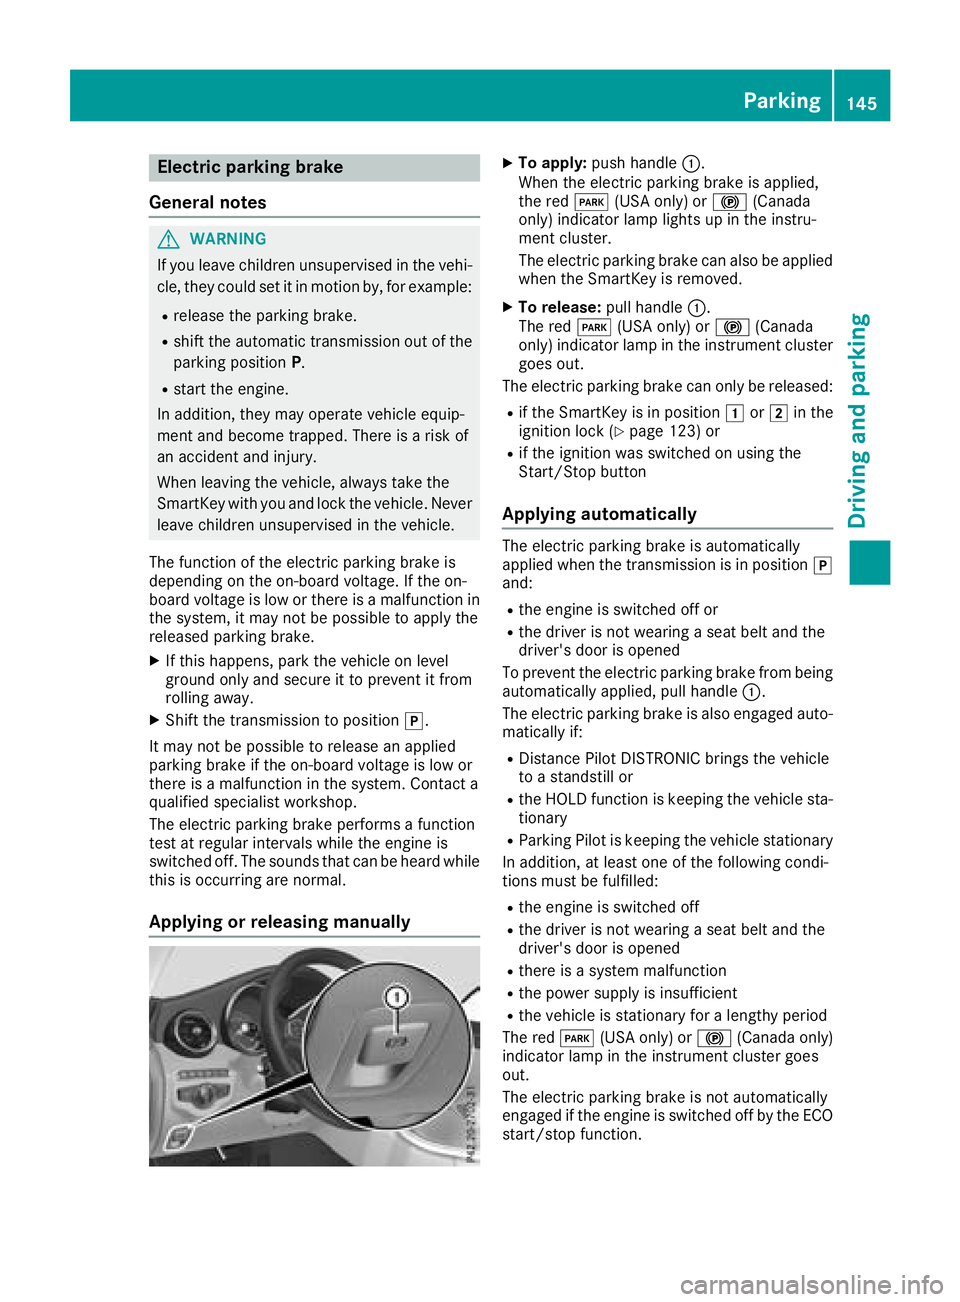
XTo apply: push handle :.
When the electric parking brake is applied,
the red F(USA only) or !(Canada
only) indicator lamp lights up in the instru-
ment cluster.
The electric parking brake can also be applied
when the SmartKey is removed.
XTo release: pull handle:.
The red F(USA only) or !(Canada
only) indicator lamp in the instrument cluster goes out.
The electric parking brake can only be released:
Rif the SmartKey is in position 1or2 in the
ignition lock (Ypage 123) or
Rif the ignition was switched on using the
Start/Stop button
Applying automatically
The electric parking brake is automatically
applied when the transmission is in position j
and:
Rthe engine is switched off or
Rthe driver is not wearing a seat belt and the
driver's door is opened
To prevent the electric parking brake from being
automatically applied, pull handle :.
The electric parking brake is also engaged auto-
matically if:
RDistance Pilot DISTRONIC brings the vehicle
to a standstill or
Rthe HOLD function is keeping the vehicle sta- tionary
RParking Pilot is keeping the vehicle stationary
In addition, at least one of the following condi-
tions must be fulfilled:
Rthe engine is switched off
Rthe driver is not wearing a seat belt and the
driver's door is opened
Rthere is a system malfunction
Rthe power supply is insufficient
Rthe vehicle is stationary for a lengthy period
The red F(USA only) or !(Canada only)
indicator lamp in the instrument cluster goes
out.
The electric parking brake is not automatically
engaged if the engine is switched off by the ECO
start/stop function.
Parking145
Driving and parking
Z
Page 148 of 350
Releasing automatically
Your vehicle's electric parking brake is auto-
matically released if all of the following condi-
tions are met:
Rthe seat belt has been fastened
Rthe engine is running
Rthe transmission is in positionhork and
you accelerate.
or
you shift from transmission position jto
position hork. On steep inclines, you have
to press the accelerator as well.
If the transmission is in position k, the trunk lid
must be closed.
If your seat belt is not fastened, the following
conditions must be fulfilled to automatically
release the electric parking brake:
Rthe driver's door is closed
RYou have shifted out of transmission position
j or you have previously driven faster than
2 mph (3 km/h).
Ensure that you do not depress the accelerator
pedal unintentionally. Otherwise, the parking
brake will be released and the vehicle will start
to move.
Emergency braking
The vehicle can also be braked during an emer- gency by using the electric parking brake.
XWhile driving, push handle :of the electric
parking brake (Ypage 145).
The vehicle is braked as long as you keep
handle :of the electric parking brake
depressed. The longer electric parking brake
handle :is depressed, the greater the brak-
ing force.
During braking:
Ra warning tone sounds
Rthe Please Release Parking Brakemes-
sage appears
Rthe red F(USA only) or !(Canada
only) indicator lamp in the instrument cluster
flashes
When the vehicle has been braked to a stand-
still, the electric parking brake is engaged.
Parking the vehicle for a long period
If you leave the vehicle parked for longer than
four weeks, the battery may be damaged by
exhaustive discharging.
If you leave the vehicle parked for longer than six
weeks, the vehicle may suffer damage as a
result of lack of use.
XVisit a qualified specialist workshop and seek
advice.
iYou can obtain information about trickle
chargers from a qualified specialist work-
shop.
Driving tips
General driving tips
Important safety notes
GWARNING
If you switch off the ignition while driving,
safety-relevant functions are only available
with limitations, or not at all. This could affect, for example, the power steering and the brake
boosting effect. You will require considerably
more effort to steer and brake. There is a risk
of an accident.
Do not switch off the ignition while driving.
GWARNING
If you operate mobile communication equip-
ment when driving, you may be distracted
from the traffic situation. You could also lose
control of the vehicle. There is a risk of an
accident.
Only operate this equipment when the vehicle
is stationary.
Observe the legal requirements for the country
in which you are driving. Some jurisdictions pro-
hibit the driver from using a mobile phone while driving a vehicle.
If you make a call while driving, always use
hands-free mode. Only operate the telephone
when the traffic situation permits. If you are
unsure, pull over to a safe location and stop
before operating the telephone.
146Driving tips
Driving and parking
Page 149 of 350
Bear in mind that at a speed of only 30 mph
(approximately 50 km/h), the vehicle covers a
distance of 44 ft (approximately 14m)per sec-
ond.
Drive sensibly – save fuel
Observe the following tips to save fuel:
XThe tires should always be inflated to the rec-
ommended tire pressure.
XRemove unnecessary loads.
XRemove roof racks when they are not needed.
XWarm up the engine at low engine speeds.
XAvoid frequent acceleration or braking.
XHave all maintenance work carried out as
indicated by the service intervals in the Main-
tenance Booklet or by the service interval dis-
play.
Fuel consumption also increases when driving in cold weather, in stop-start traffic and in hilly ter-
rain.
Drinking and driving
GWARNING
Drinking and driving and/or taking drugs and driving are very dangerous combinations.
Even a small amount of alcohol or drugs can
affect your reflexes, perceptions and judg-
ment.
The possibility of a serious or even fatal acci-
dent is greatly increased when you drink or
take drugs and drive.
Do not drink or take drugs and drive or allow
anyone to drive who has been drinking or tak-
ing drugs.
Emission control
GWARNING
Combustion engines emit poisonous exhaust
gases such as carbon monoxide. Inhaling
these exhaust gases leads to poisoning. There
is a risk of fatal injury. Therefore never leave
the engine running in enclosed spaces with-
out sufficient ventilation. Certain engine systems are designed to keep
the level of poisonous components in exhaust
fumes within legal limits.
These systems only work at peak efficiency if
they are serviced exactly in accordance with the
manufacturer's specifications. Always have
work on the engine carried out at a qualified
specialist workshop. Mercedes-Benz recom-
mends that you use an authorized Mercedes-
Benz Center for this purpose. In particular, work
relevant to safety or on safety-related systems
must be carried out at a qualified specialist
workshop.
The engine settings must not be changed under any circumstances. Furthermore, all specific
service work must be carried out at regular
intervals and in accordance with the Mercedes-
Benz service requirements. Details can be found in the Maintenance Booklet.
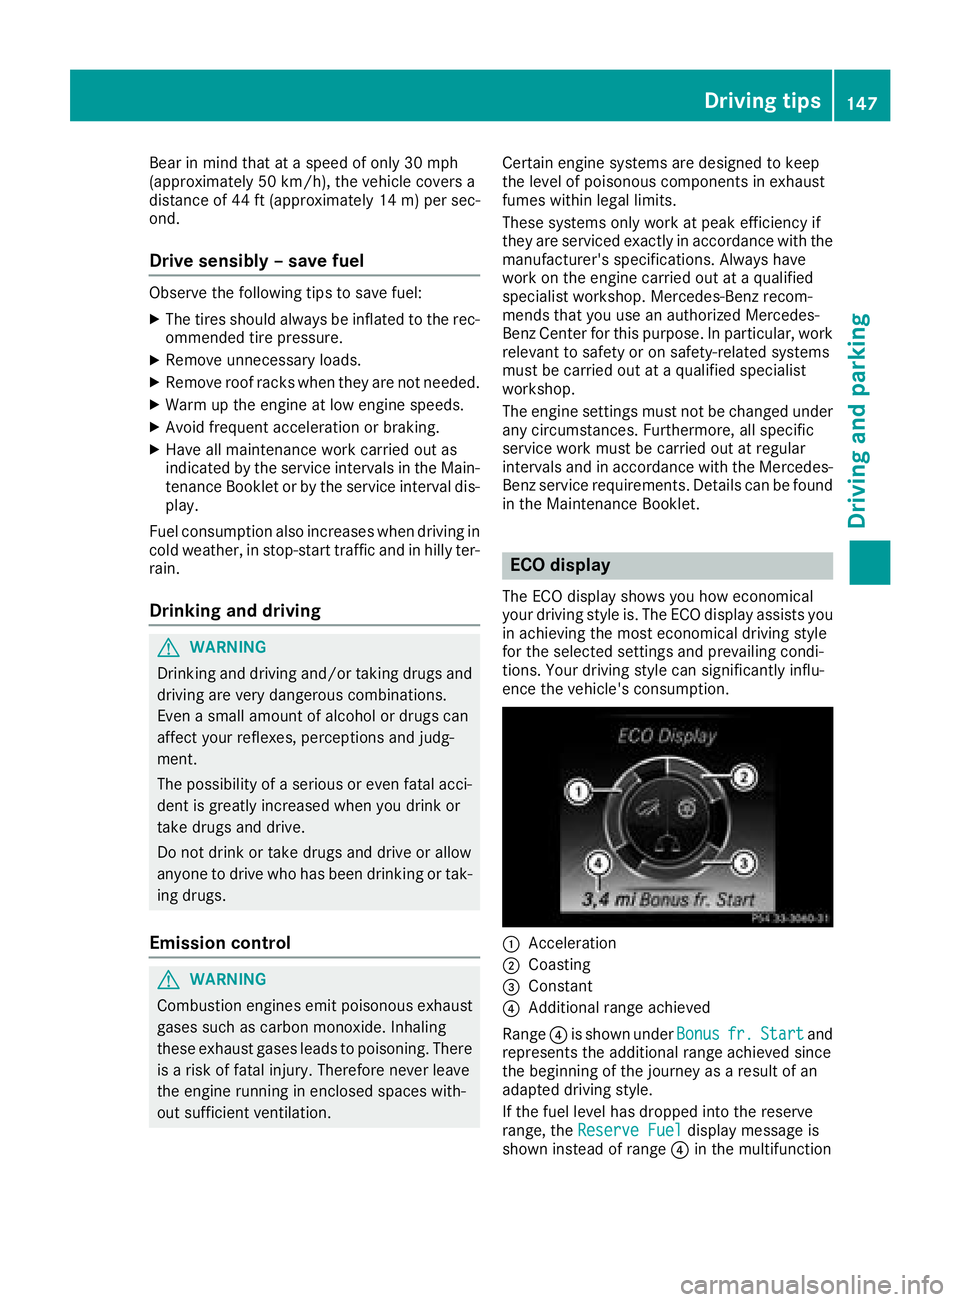
ECO display
The ECO display shows you how economical
your driving style is. The ECO display assists you
in achieving the most economical driving style
for the selected settings and prevailing condi-
tions. Your driving style can significantly influ-
ence the vehicle's consumption.
:Acceleration
;Coasting
=Constant
?Additional range achieved
Range ?is shown under Bonus
fr.Startand
represents the additional range achieved since
the beginning of the journey as a result of an
adapted driving style.
If the fuel level has dropped into the reserve
range, the Reserve Fuel
display message is
shown instead of range ?in the multifunction
Driving tips147
Driving and parking
Z
Page 150 of 350
display. The8warning lamp in the instru-
ment cluster also lights up (Ypage 247).
The ECO display consists of three sections, with
an inner and outer area. The sections corre-
spond to the following three categories:
:Acceleration (evaluation of all accel-
eration processes):
Rthe outer area fills up and the inner area lights up green: moderate
acceleration, especially at higher
speeds
Rthe outer area empties and the
inner area is gray: sporty acceler-
ation
;Coasting (evaluation of all decelera-
tion processes):
Rthe outer area fills up and the inner area lights up green: anticipatory
driving, keeping your distance and
early release of the accelerator.
The vehicle can coast without use
of the brakes.
Rthe outer area empties and the
inner area is gray: frequent heavy
braking
=Constant (continuous evaluation
over the entire journey):
Rthe outer area fills up and the inner area lights up green: constant
speed and avoidance of unneces-
sary acceleration and deceleration
Rthe outer area empties and the
inner area is gray: fluctuations in
speed
The three inner areas display the current driving
style and light up green as a result of a particu-
larly economical driving style. Depending on thedriving situation, up to two areas may light up
simultaneously.
At the beginning of the journey, the three outer
areas are empty and fill up as a result of eco-
nomical driving. A higher level indicates a more
economical driving style. If the three outer areas
are completely filled at the same time, the driver
has adopted the most economical driving style
for the selected settings and prevailing condi-
tions. The ECO display border lights up.
The ECO display does not indicate the actual fuel consumption. The additionally achieved range displayed under
Bonus fr. Start
does not
indicate a fixed consumption reduction.
In addition to driving style, the actual consump-
tion is affected by other factors, such as:
Rload
RTire pressure
RCold start
RChoice of route
RActive electrical consumers
These factors are not included in the ECO dis-
play.
An economical driving style specially requires
driving at moderate engine speeds.
Achieving a higher value in the categories
"Acceleration" and "Constant":
Robserve the gearshift recommendations
Rdrive using drive program E
On long journeys at a constant speed, e.g. on the
highway, only the outer area for "constant" will
change.
The ECO display summarizes the driving style
from the start of the journey to its completion.
Therefore, there are more marked changes in
the outer areas at the start of a journey. On lon- ger journeys, there are fewer changes. For more
marked changes, perform a manual rest
(
Ypage 198).
For further information on the ECO display, see
(
Ypage 197).
Braking
Important safety notes
GWARNING
If you shift down on a slippery road surface in an attempt to increase the engine's braking
effect, the drive wheels could lose their grip.
There is an increased danger of skidding and
accidents.
Do not shift down for additional engine brak-
ing on a slippery road surface.
Downhill gradients
!On long and steep gradients, you must
reduce the load on the brakes by shifting to a
lower gear in good time. This allows you to
take advantage of the engine's braking effect.
148Driving tips
Driving and parking