door lock MERCEDES-BENZ C CLASS COUPE 2002 Owner's Manual
[x] Cancel search | Manufacturer: MERCEDES-BENZ, Model Year: 2002, Model line: C CLASS COUPE, Model: MERCEDES-BENZ C CLASS COUPE 2002Pages: 399, PDF Size: 16.59 MB
Page 102 of 399

99
Instrument cluster
Te ch n i c a l
data
Instruments
and controls Operation
DrivingInstrument
cluster display Practical hints Car care Index
Activating instrument cluster display
The instrument cluster is activated by:
• Opening the door
1.
• Pressing button (1) on the instrument cluster
1.
• Turning the electronic key in starter switch to
position 1 or 2.
• Switching on the exterior lamps.
Instrument cluster illumination
The instrument cluster illumination is dimmed or
brightened automatically to suit daylight lighting
conditions.
The instrument cluster illumination will also be
adjusted when the vehicle’s exterior lamps are switched
on.
1 The instrument cluster is activated for approximately 30 seconds.
Display illumination, changing basic settings for driving
at dusk or in darkness:
Rotate adjusting knob (1) clockwise – instrument lamp
intensity increases.
Rotate adjusting knob (1) counterclockwise –
instrument lamp intensity decreases.
Note:
It is not possible to select a basic brightness setting in
daylight – the intensity is adjusted automatically.
Page 136 of 399

133
Multifunction steering wheel, multifunction display
Te ch n i c a l
data
Instruments
and controls Operation
DrivingInstrument
cluster display Practical hints Car care Index
1
Preliminary display of the individual settings
2 “SETTINGS” – in this options menu you can call up
the individual setting menu “VEHICLE”.
Pressing button æ orç on the multifunction
steering wheel controls the selection marker.
3 “PRESS BUTTON IN AUDIO MODE”
– radio adjustment “STATION SEARCH”: use
the j ork button to select a frequency.
– radio adjustment “MEMORY”: use the j
or k button to select a stored station (preset
memory).
4 “AUTOMATIC DOOR LOCK”, see automatic central
locking on page 40.
5 Returning the individual setting menu “VEHICLE”
to the factory setting.
6 Acknowledgment.
Press the è or ÿ button repeatedly until the
individual setting preliminary display (1) appears.
Press the j or k button until the setting menu
“SETTINGS” (2) is displayed.
Press button æ orç until the individual setting
menu “VEHICLE” is selected by the selection marker. Press the
j or k button until the required
display (3 to 4) is displayed. Pressing the æ orç
button controls the selection marker. The settings made
are stored and applied immediately.
The individual setting preliminary display (1) will
appear again after you have run through all the setting
menus. Pressing the è or ÿ button displays the
next or previous system.
To return menu “VEHICLE” (3 and 4) to its factory
setting:
• Call up menu (3 or 4).
• Press the reset knob on the instrument cluster (see
page 96) in the instrument cluster for approximately
3 seconds. Display (5) will appear.
• Press the reset knob on the instrument cluster once
more. The individual setting menu “VEHICLE” is
reset to factory settings, acknowledged by
display (6).
The individual setting display “SETTINGS” (2) will
appear if you do not press the knob for instrument
cluster illumination within about 5 seconds. The
setting menus will not be reset.
Page 150 of 399
147
Exterior lamp switch
Te ch n i c a l
data
Instruments
and controls Operation
DrivingInstrument
cluster display Practical hints Car care Index
Locator lighting
After unlocking the vehicle with the electronic key
during darkness the fog lamps and parking lamps
switch on for approximately 40 seconds.
The exterior lamps will be switched off when opening
the driver’s door.
See the individual setting menu “LIGHTING” –
“LOCATOR LIGHTING” on page 128, for instructions on
how to activate the function.
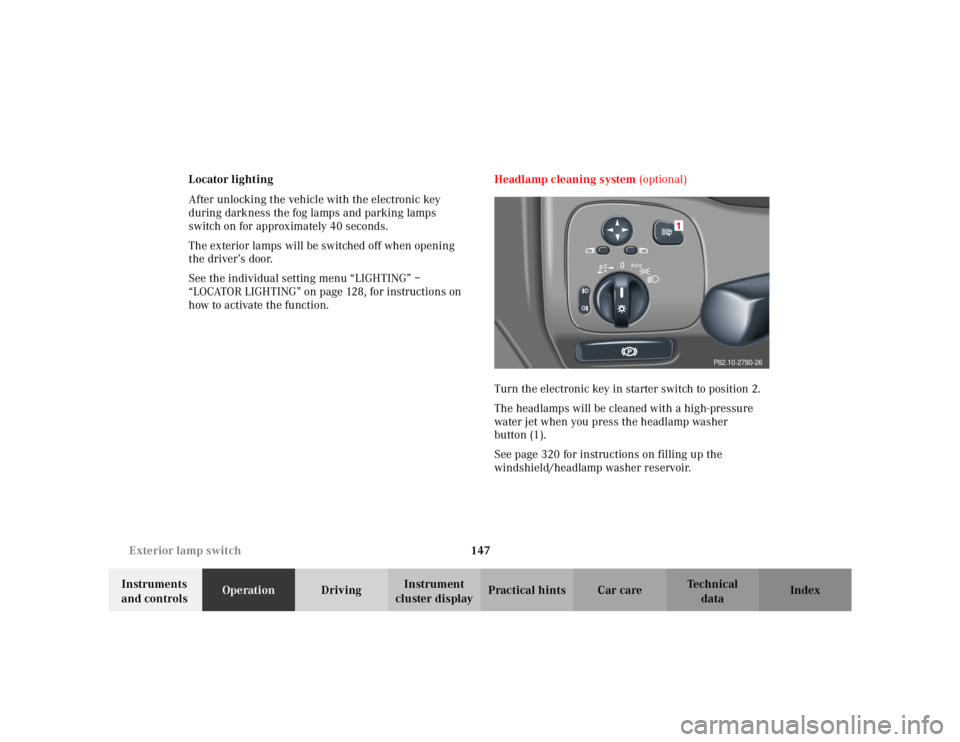
Headlamp cleaning system
(optional)
Turn the electronic key in starter switch to position 2.
The headlamps will be cleaned with a high-pressure
water jet when you press the headlamp washer
button (1).
See page 320 for instructions on filling up the
windshield/headlamp washer reservoir.
P82.10-2780-26
Page 200 of 399

197
Interior equipment
Te ch n i c a l
data
Instruments
and controls Operation
DrivingInstrument
cluster display Practical hints Car care Index
Power windows
The control panel is located on the driver’s door.
Switches for:
1 left, front
2 right, front
There is a single switch on the passenger door.
Turn electronic key in starter switch to position 1 or 2. Opening the windows:
Press the switch to resistance point.
Closing the windows:
Pull the switch to resistance point.
Release switch when window is in desired position.
Express opening and closing
Press or pull switch past resistance point and release –
window opens or closes completely.
To interrupt procedure, briefly press or pull switch.
If the upward movement of the window is blocked
during the closing procedure, the window will stop
during the last few inches before closure and open
slightly.
When pulling and holding the switch to close the
window, and upward movement of the window is
blocked during the last few inches before closure, it will
stop but not
open slightly.
Page 201 of 399
198
Interior equipment
Te ch n i c a l
data
Instruments
and controls Operation
DrivingInstrument
cluster display Practical hints Car care Index
The windows can also be opened and closed using: • the summer opening / convenience feature, see
page 34.
• the button O in the control panel of the climate
control, see page 158 or automatic climate control,
see page 167.
• the button e in the control panel of the
automatic climate control, see page 168. Synchronizing power windows
If the power supply was interrupted, (battery
disconnected or low), the windows cannot be opened or
closed by the express feature.
To resynchronize the express feature, pull switch until
the window is completely closed and hold for
approximately 1 second. Repeat procedure for each
window.
The automatic full opening and closing procedure of the
windows should now be restored.
Wa r n i n g !
When closing the windows, be sure that there is no
danger of anyone being harmed by the closing
procedure.In case of obstruction, the automatic reversal will
not operate if a door window is being closed by
pulling the switch to its resistance point and
holding it there, or when using the electronic key.The closing procedure can be immediately reversed
by either pressing or pulling the switch, or
pressing button
Œon the electronic key and
holding it.
When leaving the vehicle, always remove the
electronic key from starter switch, and lock your
vehicle. Do not leave children unattended in the
vehicle, or with access to an unlocked vehicle.
Unsupervised use of vehicle equipment can cause
serious personal injury.
Page 206 of 399
203
Interior equipment
Te ch n i c a l
data
Instruments
and controls Operation
DrivingInstrument
cluster display Practical hints Car care Index
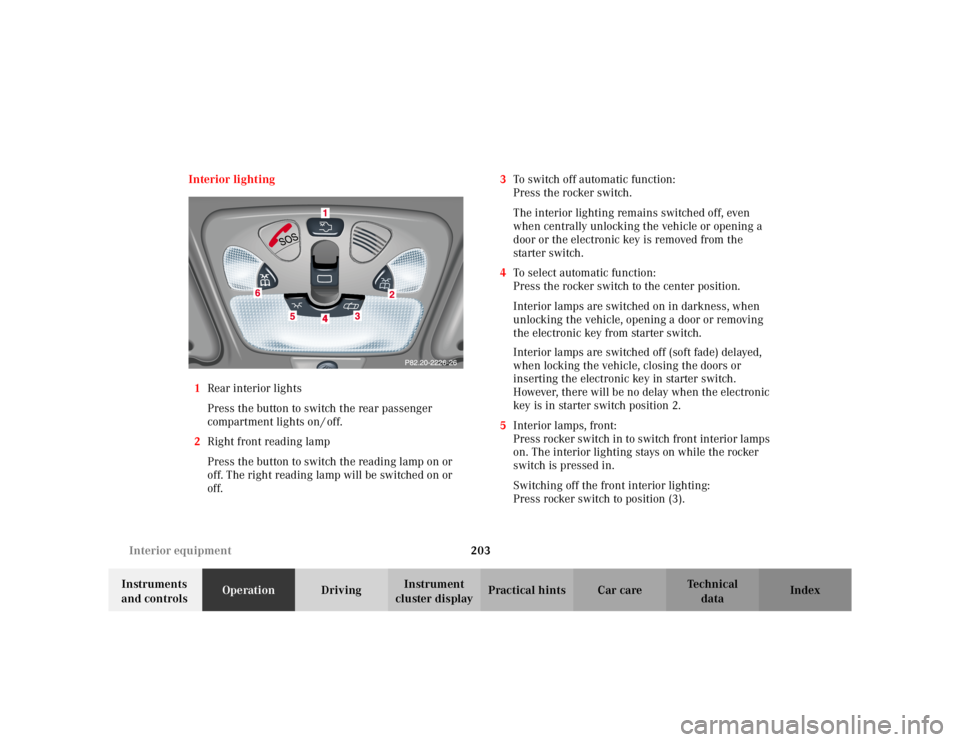
Interior lighting
1 Rear interior lights
Press the button to switch the rear passenger
compartment lights on / off.
2 Right front reading lamp
Press the button to switch the reading lamp on or
off. The right reading lamp will be switched on or
off. 3
To switch off automatic function:
Press the rocker switch.
The interior lighting remains switched off, even
when centrally unlocking the vehicle or opening a
door or the electronic key is removed from the
starter switch.
4 To select automatic function:
Press the rocker switch to the center position.
Interior lamps are switched on in darkness, when
unlocking the vehicle, opening a door or removing
the electronic key from starter switch.
Interior lamps are switched off (soft fade) delayed,
when locking the vehicle, closing the doors or
inserting the electronic key in starter switch.
However, there will be no delay when the electronic
key is in starter switch position 2.
5 Interior lamps, front:
Press rocker switch in to switch front interior lamps
on. The interior lighting stays on while the rocker
switch is pressed in.
Switching off the front interior lighting:
Press rocker switch to position (3).
Page 231 of 399
228
Tele Aid
Te ch n i c a l
data
Instruments
and controls Operation
DrivingInstrument
cluster display Practical hints Car care Index
Tele Aid (optional)
Important!
The initial activation of the Tele Aid system may only be
performed by completing the subscriber agreement and
placing an acquaintance call using the “SOS” button.
Failure to complete either of these steps will result in a
system that is not activated. If the system is not
activated the indicator lamp in the “SOS” button stays
on after turning electronic key in starter switch to
position 2 and the message “TELE AID – NOT
ACTIVATED” will be shown in the multifunction display
for approx. 10 seconds.
If you have any questions regarding activation, please
call the Response Center at 1-800-756-9018 (in the USA)
or 1-888-923-8367 (in Canada).
( Te l e matic Alarm Identification on Demand)
The Tele Aid system consists of three types of response;
automatic and manual emergency, roadside assistance
and information.
The Tele Aid system is operational providing that the
vehicle’s battery is charged, properly connected, not
damaged and cellular and GPS coverage is available. The speaker volume of a Tele Aid call can be adjusted
when using the volume control on the multifunction
steering wheel, for raising press button
æand for
lowering press button ç.
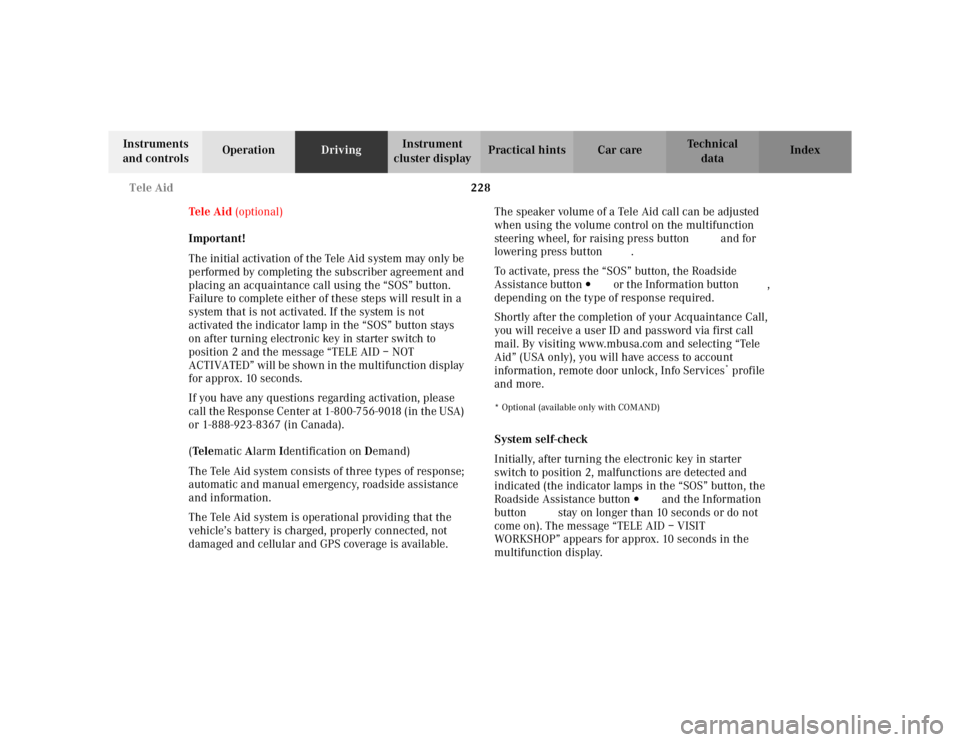
To activate, press the “SOS” button, the Roadside
Assistance button or the Information button ¡,
depending on the type of response required.
Shortly after the completion of your Acquaintance Call,
you will receive a user ID and password via first call
mail. By visiting www.mbus a.com and selecting “Tele
Aid” (USA only), you will have access to account
information, remote door unlock, Info Services
* profile
and more.
* Optional (available only with COMAND)System self-check
Initially, after turning the electronic key in starter
switch to position 2, malfunctions are detected and
indicated (the indicator lamps in the “SOS” button, the
Roadside Assistance button and the Information
button ¡ stay on longer than 10 seconds or do not
come on). The message “TELE AID – VISIT
WORKSHOP” appears for approx. 10 seconds in the
multifunction display.
Page 239 of 399

236
Tele Aid
Te ch n i c a l
data
Instruments
and controls Operation
DrivingInstrument
cluster display Practical hints Car care Index
Remote door unlock
In the case you have your vehicle locked unintentionally
(e.g. key inside vehicle), and no other key is available,
contact the Mercedes-Benz Response Center at
1-800-756-9018 (in the USA) or 1-888-923-8367 (in
Canada). You will be asked to provide your password
which you provided when you completed the subscriber
agreement.
Then return to your vehicle and pull recessed handle in
trunk lid for minimum of 20 seconds until the “SOS”
button is flashing. The message “EMERGENCY CALL – CALL CONNECTED” appears in the multifunction
display.
As an alternative, you may unlock the vehicle via
Internet using the ID and password sent to you shortly
after the completion of your Acquaintance Call.
The Response Center will then unlock your vehicle with
the remote door unlocking feature. Notes:
The remote door unlock feature is available if the
relevant cellular phone network is available.
The SOS button will flash and the message
“EMERGENCY CALL – CALL CONNECTED” will appear
in the multifunction display to indicate receipt of the
door unlock command.
Once the vehicle is unlocked, a Response Center
specialist will attempt to establish voice contact with the
vehicle occupants.
If the recessed handle in trunk lid was pulled for more
than 20 seconds before door unlock authorization was
received by the Response Center, you must wait
15 minutes before pulling recessed handle again.
Page 244 of 399

241
Starter switch
Te ch n i c a l
data
Instruments
and controls Operation
DrivingInstrument
cluster display Practical hints Car care Index
Important!
If the electronic key is left in the starter switch
position 0 for a extended period of time, it can no longer
be turned in the lock. In this case, remove electronic key
from starter switch and reinsert.
Caution!
To prevent accelerated battery discharge and a possible
dead battery, always remove the electronic key from the
starter switch.
Do not leave the electronic key in starter
switch position 0. Notes:
A warning sounds when the driver’s door is opened
with the electronic key is in starter switch position 1
or 0.
If the electronic key cannot be turned in the starter
switch, the vehicle battery may not be sufficiently
charged. See battery on page 336 or jump starting on
page 338.
With the engine at idle speed, the charging rate of the
alternator (output) is limited.
It is therefore recommended that you turn off
unnecessary electrical consumers while driving in stop-
and-go traffic. This precaution helps to avoid draining of
the battery.
Unnecessary strain on the battery and charging system
may be minimized by turning off the following power
consumers, for example:
Heated seats, rear window defroster. In addition, the
automatic climate air volume control should be set to
the lowest position.
Page 252 of 399
249
Automatic transmission
Te ch n i c a l
data
Instruments
and controls Operation
DrivingInstrument
cluster display Practical hints Car care Index
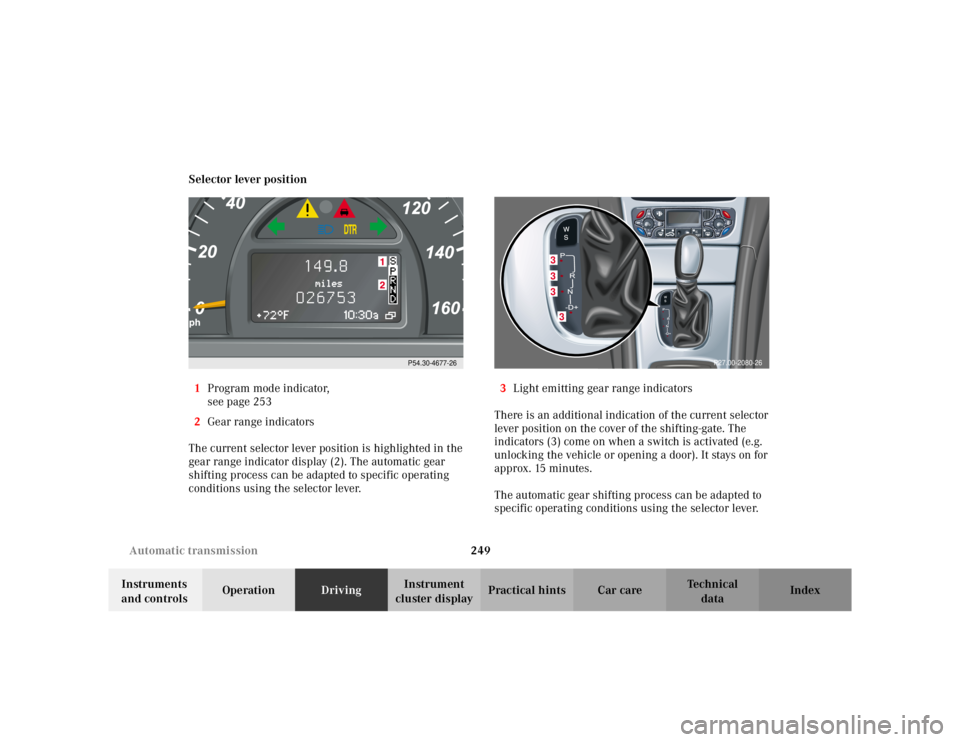
Selector lever position
1 Program mode indicator,
see page 253
2 Gear range indicators
The current selector lever position is highlighted in the
gear range indicator display (2). The automatic gear
shifting process can be adapted to specific operating
conditions using the selector lever. 3
Light emitting gear range indicators
There is an additional indication of the current selector
lever position on the cover of the shifting-gate. The
indicators (3) come on when a switch is activated (e.g.
unlocking the vehicle or opening a door). It stays on for
approx. 15 minutes.
The automatic gear shifting process can be adapted to
specific operating conditions using the selector lever.
P54.30-4677-26
3333
P27.00-2080-26