fog light MERCEDES-BENZ C-CLASS COUPE 2018 Owner's Manual
[x] Cancel search | Manufacturer: MERCEDES-BENZ, Model Year: 2018, Model line: C-CLASS COUPE, Model: MERCEDES-BENZ C-CLASS COUPE 2018Pages: 354, PDF Size: 5.88 MB
Page 15 of 354
HeadlampsDisplay message ............................ 228
Fogging up ..................................... 111
see Automatic headlamp mode
Heating
see Climate control
High beam flasher ............................. 109
High-beam headlamps
Adaptive Highbeam Assist ............. 110
Display message ............................ 228
Replacing bulbs ............................. 113
Switching on/off ........................... 109
Hill start assist .................................. 130
HOLD function
Activating ....................................... 166
Activation conditions .....................1 65
Deactivating ................................... 166
Display message ............................ 235
Function/notes .............................1 65
General notes ................................ 165
Home address
see also Digital Operator's Man-
ual ..................................................2 56
Hood
Closing ...........................................2 87
Display message ............................ 242
Important safety notes .................. 286
Opening ......................................... 286
Horn ...................................................... 35
HUD
see Head-up display
Hydroplaning ..................................... 154
I
Ignition key
see SmartKey
Ignition lock
see Key positions
Immobilizer .......................................... 73
Indicator lamps
see Warning and indicator lamps
Indicators
see Turn signals
Insect protection on the radiator .... 287
Inspection
see ASSYST PLUS Instrument cluster
Overview .......................................... 36
Warning and indicator lamps ........... 36
Instrument cluster lighting .............. 196
Interior lighting
Automatic control .......................... 112
Control ...........................................1 12
Overview ........................................ 111
Reading lamp ................................. 111
iPod
®
see also Digital Operator's Man-
ual ..................................................2 56
J
Jack
Using ............................................. 337
Jump starting (engine) ......................308
K
Key positions
SmartKey ....................................... 126
Start/Stop button .......................... 127
KEYLESS-GO
Activating ......................................... 76
Convenience closing feature ............ 89
Deactivation ..................................... 76
Locking ............................................ 76
Removing the Start/Stop button ... 127
Start function ................................... 77
Unlocking ......................................... 76
Kickdown
Driving tips ....................................1 39
Manual gearshifting ....................... 144
Knee bag .............................................. 50
L
Lamps
see Warning and indicator lamps
Lane Change Assist
see Active Blind Spot Assist
Lane detection (automatic)
see Lane Keeping Assist
Lane Keeping Assist
Activating/deactivating ................. 189
Activating/deactivating (on-
board computer) ............................ 209
Index13
Page 16 of 354
Display message ............................ 234
Function/information .................... 188
see Active Lane Keeping Assist
Lane Tracking package ..................... 186
Lap time (RACETIMER) ...................... 214
LATCH-type (ISOFIX) child seat
anchors ................................................ 61
License plate lamp (display mes-
sage) ................................................... 228
Light function, active
Display message ............................ 228
Light switch
Operation ....................................... 108
Lights
Adaptive Highbeam Assist .............1 10
Automatic headlamp mode ............ 108
Cornering light function ................. 110
Fogged up headlamps .................... 111
General notes ................................ 108
Hazard warning lamps ................... 110
High beam flasher .......................... 109
High-beam headlamps ................... 109
Light switch ................................... 108
Low-beam headlamps .................... 109
Parking lamps ................................ 109
Rear fog lamp ................................ 109
Setting exterior lighting ................. 108
Standing lamps .............................. 109
Switching the daytime running
lamps on/off (on-board com-
puter) ............................................. 211
Turn signals ................................... 109
see Interior lighting
Loading guidelines ............................ 266
Locking
see Central locking
Locking (doors)
Automatic ........................................ 82
Emergency locking ........................... 82
From inside (central locking but-
ton) ..................................................8 1
Locking centrally
see Central locking
Low-beam headlamps
Display message ............................ 228
Replacing bulbs .......................... ..
.1 13
Sw
itching on/off ........................... 109 Lubricant additives
see Additives (engine oil)
Lumbar support
Adjusting the 4-way lumbar sup-
port ..................................................9 9
M
M+S tires............................................ 318
Malfunction message
see Display messages
Matte finish (cleaning instruc-
tions) .................................................. 294
mbrace
Call priority ....................................2 78
Display message ............................ 222
Downloading destinations
(COMAND) ..................................... 279
Downloading routes ....................... 281
Emergency call .............................. 276
General notes ................................ 275
Geo fencing ................................... 282
Info call button .............................. 278
Locating a stolen vehicle ...............2 80
Remote fault diagnosis .................. 280
Remote vehicle locking .................. 280
Roadside assistance button ........... 277
Search & Send ............................... 279
Self-test ......................................... 276
Speed alert .................................... 281
System .......................................... 275
Triggering the vehicle alarm ........... 282
Vehicle remote unlocking .............. 280
Mechanical key
Function/notes ................................ 77
General notes .................................. 77
Inserting .......................................... 77
Locking vehicle ................................ 82
Removing ......................................... 77
Unlocking the driver's door .............. 82
Media Interface
see Digital Operator's Manual
Memory card (audio) ......................... 205
Memory function
Seats, steering wheel, exterior
mirrors ........................................... 106
Mercedes-Benz Intelligent Drive
360°camera .................................. 180
14Index
Page 110 of 354
Exterior lighting
General notes
USA only: if you wish to drive during the daytime
without lights, switch off theDaytime Run‐
ning Lightsfunction via the on-board com-
puter (Ypage 211).
Setting the exterior lighting
Setting options
Exterior lighting can be set using the:
Rlight switch (Ypage 108)
Rcombination switch (Ypage 109)
Ron-board computer (Ypage 211)
Light switch
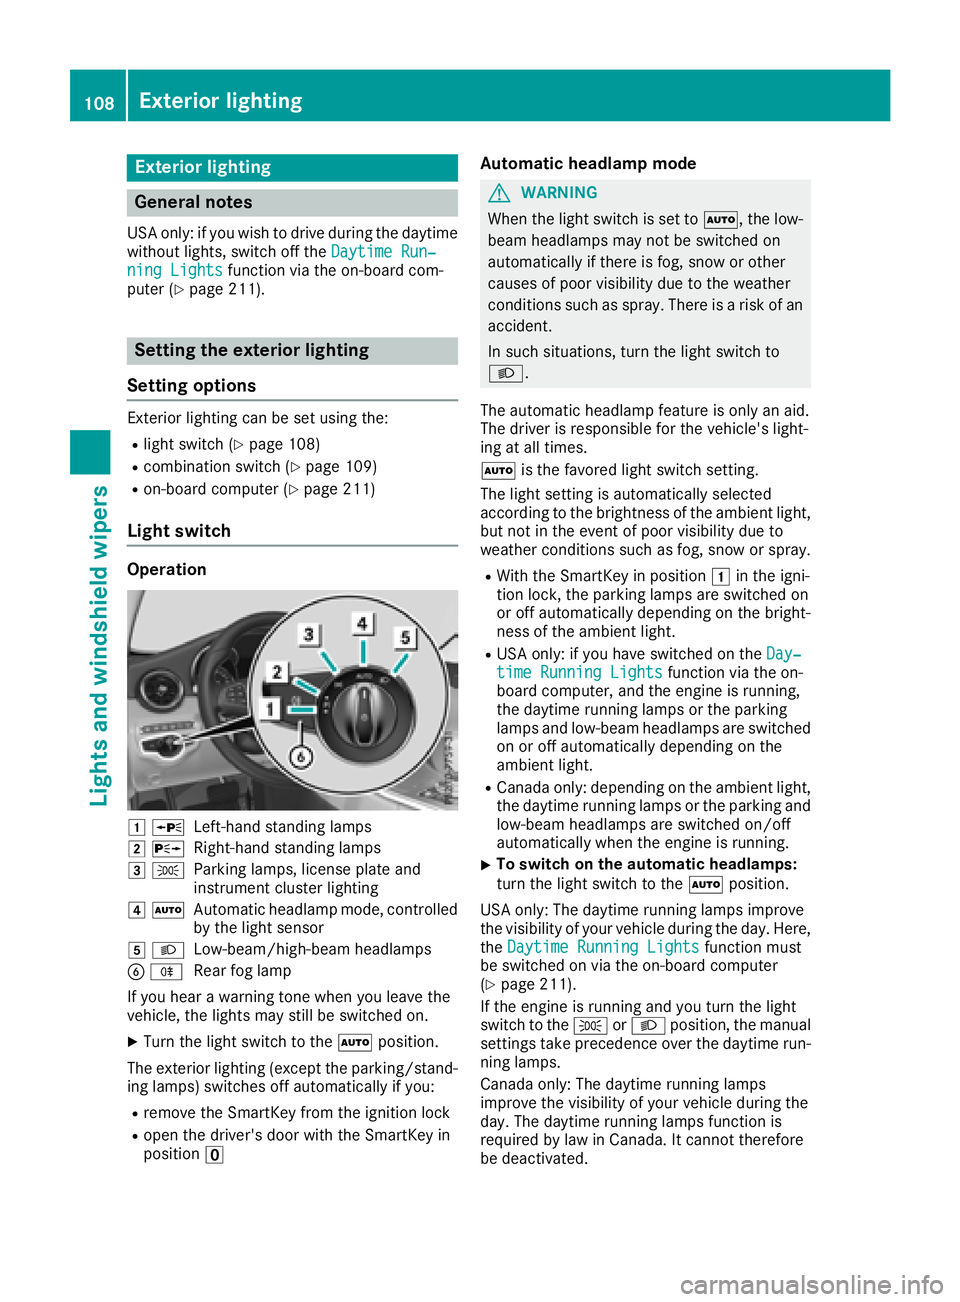
Operation
1 WLeft-hand standing lamps
2XRight-hand standing lamps
3TParking lamps, license plate and
instrument cluster lighting
4ÃAutomatic headlamp mode, controlled
by the light sensor
5 LLow-beam/high-beam headlamps
BRRear fog lamp
If you hear a warning tone when you leave the
vehicle, the lights may still be switched on.
XTurn the light switch to the Ãposition.
The exterior lighting (except the parking/stand-
ing lamps) switches off automatically if you:
Rremove the SmartKey from the ignition lock
Ropen the driver's door with the SmartKey in
position u
Automatic headlamp mode
GWARNING
When the light switch is set to Ã, the low-
beam headlamps may not be switched on
automatically if there is fog, snow or other
causes of poor visibility due to the weather
conditions such as spray. There is a risk of an
accident.
In such situations, turn the light switch to
L.
The automatic headlamp feature is only an aid.
The driver is responsible for the vehicle's light-
ing at all times.
à is the favored light switch setting.
The light setting is automatically selected
according to the brightness of the ambient light,
but not in the event of poor visibility due to
weather conditions such as fog, snow or spray.
RWith the SmartKey in position 1in the igni-
tion lock, the parking lamps are switched on
or off automatically depending on the bright-
ness of the ambient light.
RUSA only: if you have switched on the Day‐time Running Lightsfunction via the on-
board computer, and the engine is running,
the daytime running lamps or the parking
lamps and low-beam headlamps are switched
on or off automatically depending on the
ambient light.
RCanada only: depending on the ambient light,
the daytime running lamps or the parking and
low-beam headlamps are switched on/off
automatically when the engine is running.
XTo switch on the automatic headlamps:
turn the light switch to the Ãposition.
USA only: The daytime running lamps improve
the visibility of your vehicle during the day. Here,
the Daytime Running Lights
function must
be switched on via the on-board computer
(
Ypage 211).
If the engine is running and you turn the light
switch to the TorL position, the manual
settings take precedence over the daytime run-
ning lamps.
Canada only: The daytime running lamps
improve the visibility of your vehicle during the
day. The daytime running lamps function is
required by law in Canada. It cannot therefore
be deactivated.
108Exterior lighting
Lights and windshield wipers
Page 111 of 354
When the engine is running and the vehicle is
stationary: if you move the selector lever from a
driving position toP, the daytime running lamps
and low-beam headlamps go out after three
minutes.
When the engine is running, the vehicle is sta-
tionary and in bright ambient light: if you turn the
light switch to the Tposition, the daytime
running lamps and parking lamps switch on.
If the engine is running and you turn the light
switch to the Lposition, the manual settings
take precedence over the daytime running
lamps.
Low-beam headlamps
GWARNING
When the light switch is set to Ã, the low-
beam headlamps may not be switched on
automatically if there is fog, snow or other
causes of poor visibility due to the weather
conditions such as spray. There is a risk of an
accident.
In such situations, turn the light switch to
L.
Even if the light sensor does not detect that it is
dark, the parking lamps and low-beam head-
lamps switch on when the ignition is switched on and the light switch is set to the Lposition.
This is a particularly useful function in the event
of rain and fog.
XTo switch on the low-beam headlamps:
turn the SmartKey to position 2in the igni-
tion lock or start the engine.
XTurn the light switch to the Lposition.
The green Lindicator lamp in the instru-
ment cluster lights up.
Rear fog lamp
The rear fog lamp improves visibility of your
vehicle for the traffic behind in the event of thick
fog. You must observe the legal requirements
for the country in which you are currently driving
when operating the rear fog lamp.
XTo switch on the rear fog lamp: turn the
SmartKey in the ignition lock to position 2or
start the engine.
XTurn the light switch to the LorÃ
position.
XPress the Rbutton.
The yellow Rindicator lamp on the instru-
ment cluster lights up.
Parking lamps
!If the battery charge is very low, the parking
lamps or standing lamps are automatically
switched off to enable the next engine start.
Always park your vehicle safely and in a well lit
area, in accordance with the relevant legal
stipulations. Avoid using the Tparking
lamps over a period of several hours. If pos-
sible, switch on the right-hand Xor left-
hand W standing lamps.
XTo switch on the parking lamps: turn the
light switch to the Tposition.
The green Tindicator lamp on the instru-
ment cluster lights up.
Standing lamps
Switching on the standing lamps ensures the
corresponding side of the vehicle is illuminated.
XTo switch on the standing lamps: turn the
Smart Key to position uin the ignition lock or
remove the SmartKey.
XTurn the light switch to the W(left-hand
side of the vehicle) or X(right-hand side of
the vehicle) position.
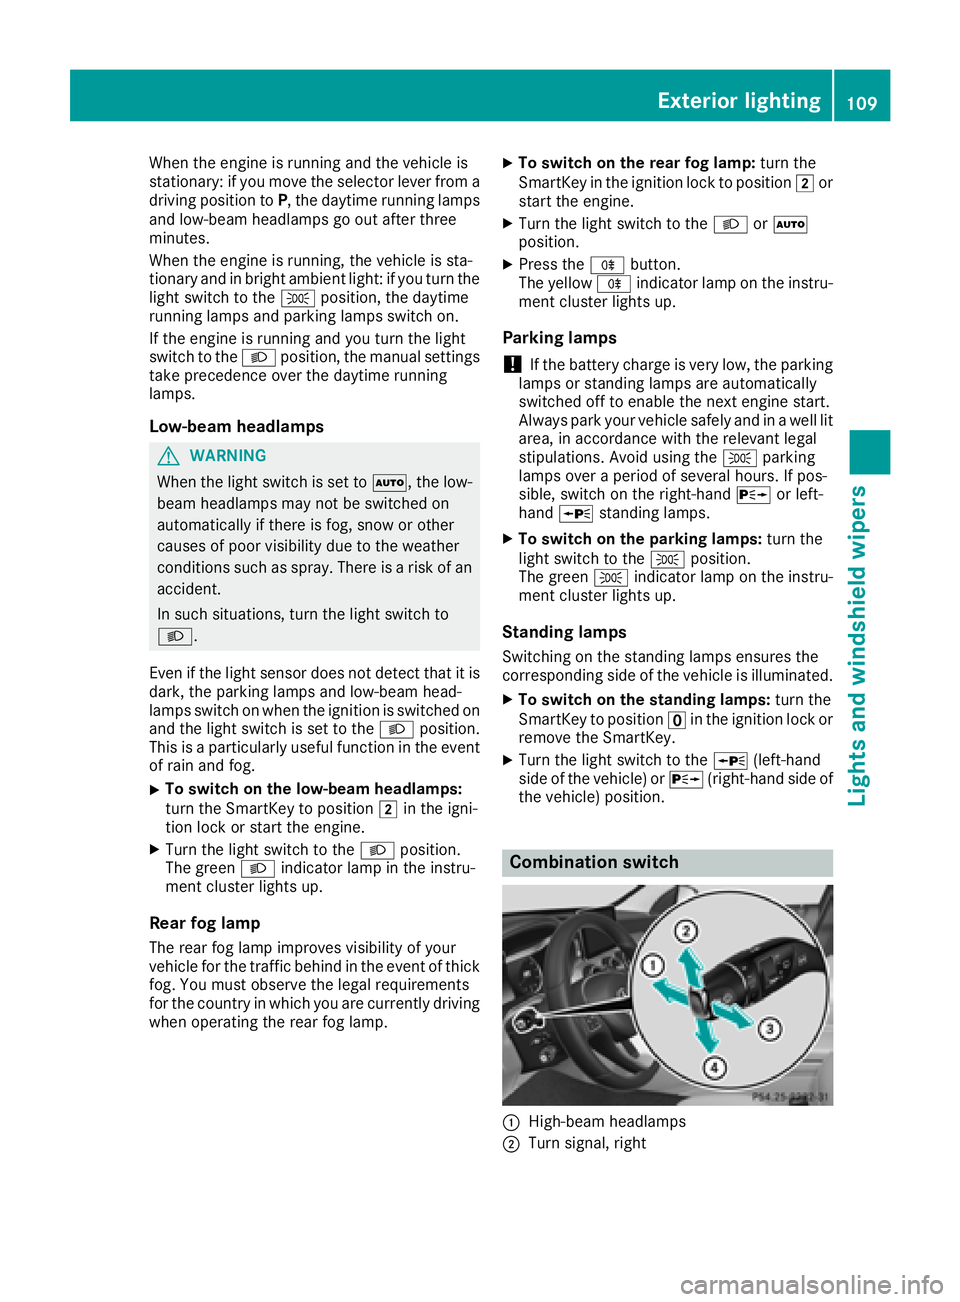
Combination switch
:High-beam headlamps
;Turn signal, right
Exterior lighting109
Lights and windshield wipers
Z
Page 113 of 354
Important safety notes
GWARNING
Adaptive Highbeam Assist does no trecognize
road users:
Rwho have no lights ,e.g. pedestrian s
Rwho havepoor lighting ,e.g. cyclist s
Rwhoselighting is blocked, e.g. by abarrier
On ver yrar eoccasions, Adaptive Highbeam
Assist may fail to recognize other road user s
that have lights ,or may recognize them to o
late. In this, or in similar situations, th eauto -
matic high-beam headlamps will no tbe deac -
tivated or will be activated regardless .Ther eis
a ris kof an accident.
Always carefully observ eth etraffic condition s
and switch off th ehigh-beam headlamps in
goo dtime.
Adaptive Highbeam Assist canno ttak eint o
accoun troad ,weather or traffic conditions.
Adaptive Highbeam Assist is only an aid. You are responsible for adjusting th evehicle's lighting
to th eprevailing light, visibilit yand traffic con-
ditions.
In particular, th edetection of obstacles can be
impaired if:
Rthere is poor visibility, e.g. due to fog ,heav y
rain or snow
Rthere is dirt on th esensor sor anythin gelse
covering th esensor s
Switching Adaptive Highbeam Assist
on/off
XTo switch on: turnth eligh tswitch to th e
à position .
XPress th ecombination switch forwards
beyon dth epressur epoin t (Ypage 109).
The _ indicator lamp on th emultifunction
display lights up when it is dark and th eligh t
sensor switches on th elow-beam headlamps .
If you are driving at speeds abov eapprox -
imately 16 mph (25 km/h):
The headlamp range is set automatically
depending on the distance between the vehi-
cle and other road users. If you are driving at speeds above approx-
imately 19 mph (30 km/h)
and no other road
users are detected:
The high-beam headlamps are switched on
automatically. The Kindicator lamp on the
instrument cluster also lights up.
If you are driving at speeds below approx-
imately 16 mph (25 km/h) or other road users are detected or the roads are adequately lit:
The high-beam headlamps are switched off
automatically. The Kindicator lamp on the
instrument cluster goes out. The _indi-
cator lamp on the multifunction display
remains lit.
XTo switch off: move the combination switch
back to its normal position or move the light
switch to another position.
The K indicator lamp on the instrument
cluster goes out.
Headlamps fogged up on the inside
Certain climatic and physical conditions may
cause moisture to form in the headlamp. This
moisture does not affect the functionality of the
headlamp.
Interior lighting
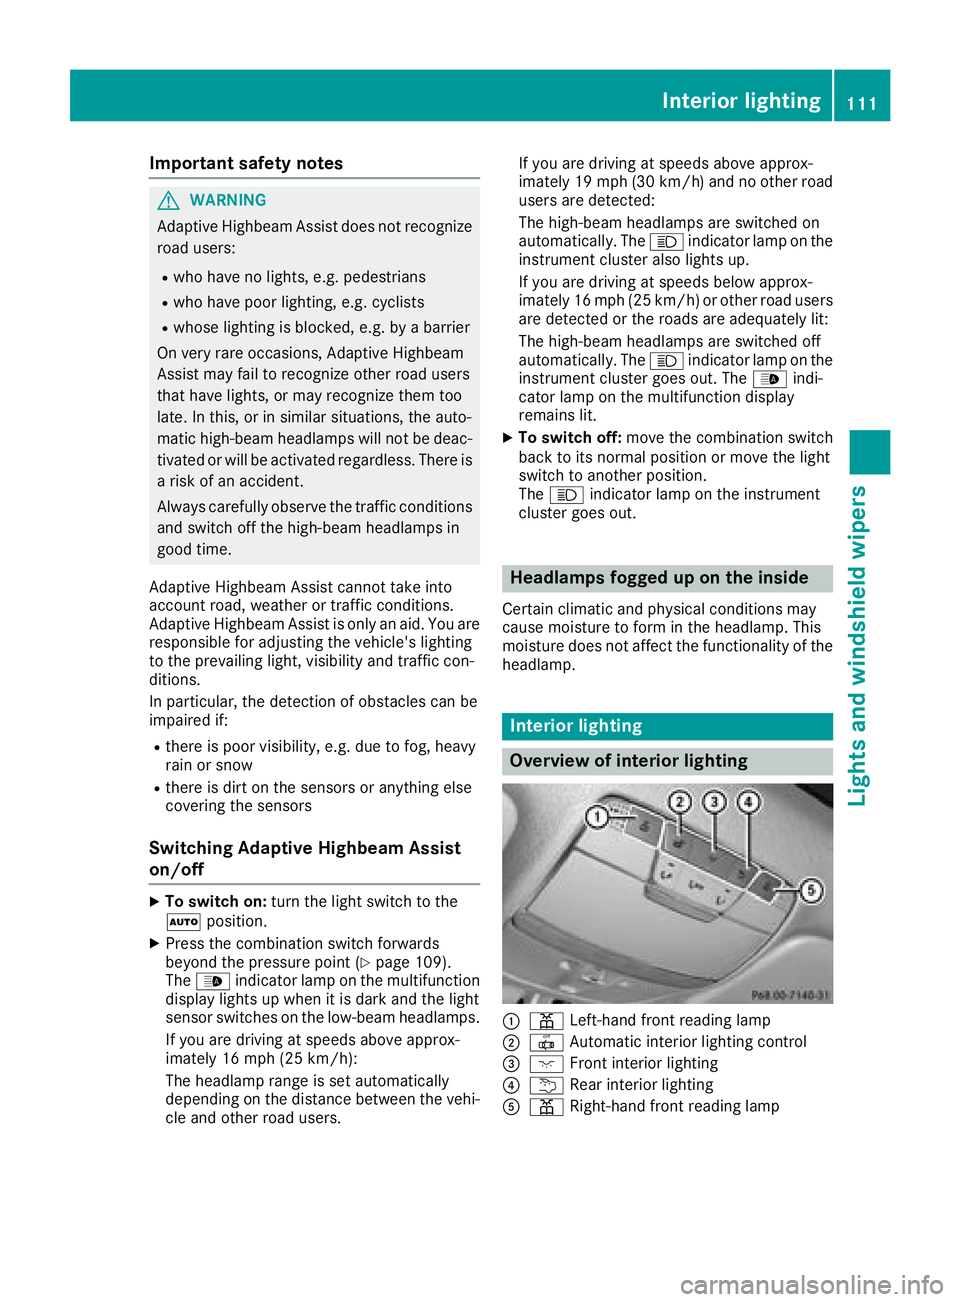
Overview of interior lighting
:p Left-hand front reading lamp
;|Automatic interior lighting control
=c Front interior lighting
?uRear interior lighting
ApRight-hand front reading lamp
Interior lighting111
Lights and windshield wipers
Z
Page 120 of 354
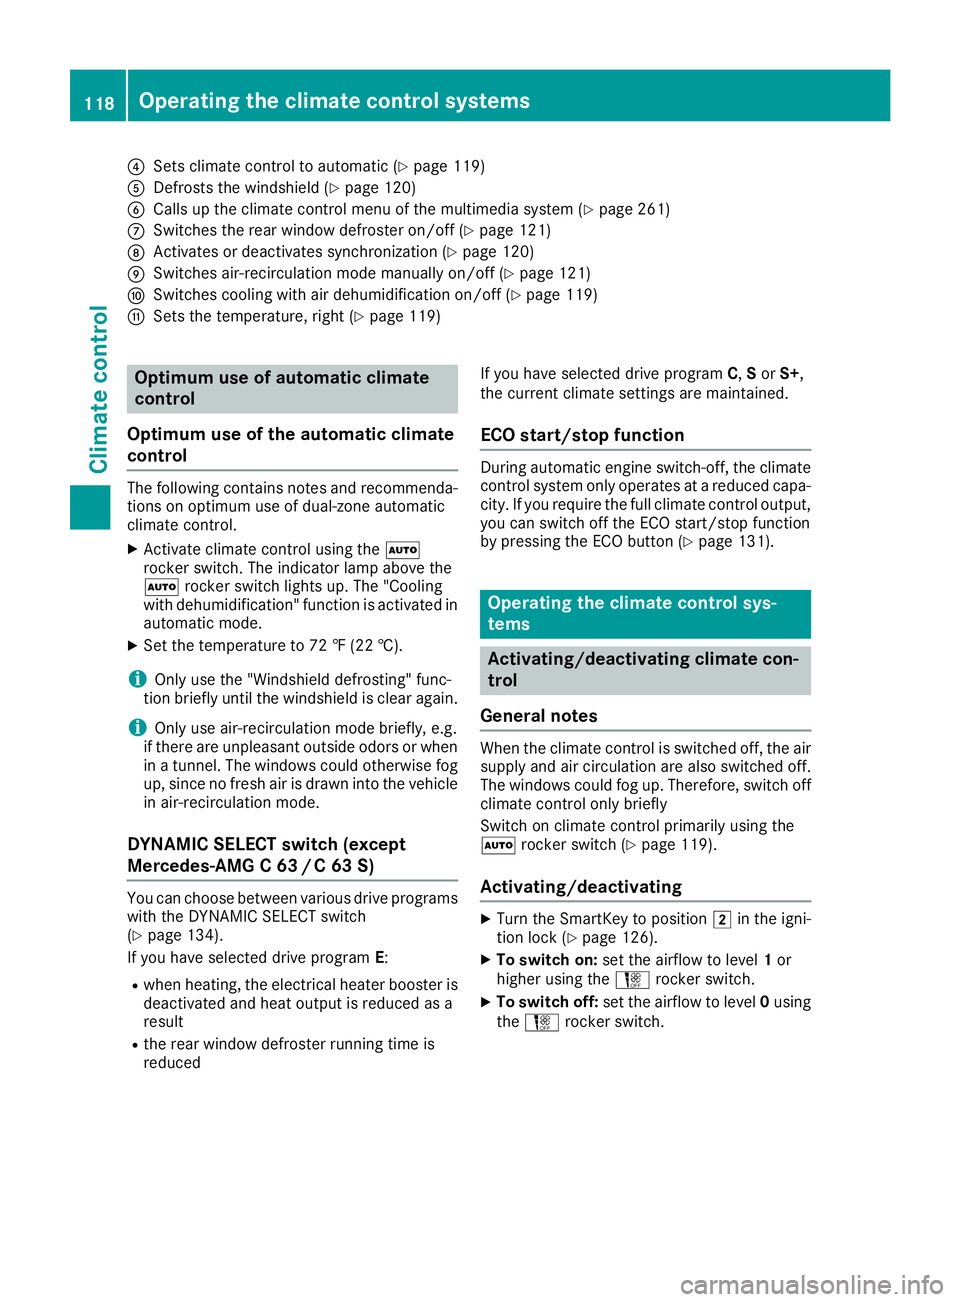
?Sets climate control to automatic (Ypage 119)
ADefrosts the windshield (Ypage 120)
BCalls up the climate control menu of the multimedia system (Ypage 261)
CSwitches the rear window defroster on/off (Ypage 121)
DActivates or deactivates synchronization (Ypage 120)
ESwitches air-recirculation mode manually on/off (Ypage 121)
FSwitches cooling with air dehumidification on/off (Ypage 119)
GSets the temperature, right (Ypage 119)
Optimum use of automatic climate
control
Optimum use of the automatic climate
control
The following contains notes and recommenda-
tions on optimum use of dual-zone automatic
climate control.
XActivate climate control using the Ã
rocker switch. The indicator lamp above the
à rocker switch lights up. The "Cooling
with dehumidification" function is activated in
automatic mode.
XSet the temperature to 72 ‡ (22 †).
iOnly use the "Windshield defrosting" func-
tion briefly until the windshield is clear again.
iOnly use air-recirculation mode briefly, e.g.
if there are unpleasant outside odors or when
in a tunnel. The windows could otherwise fog
up, since no fresh air is drawn into the vehicle in air-recirculation mode.
DYNAMIC SELECT switch (except
Mercedes-AMG C 63 /C63S)
You can choose between various drive programs
with the DYNAMIC SELECT switch
(
Ypage 134).
If you have selected drive program E:
Rwhen heating, the electrical heater booster is
deactivated and heat output is reduced as a
result
Rthe rear window defroster running time is
reduced If you have selected drive program
C,Sor S+,
the current climate settings are maintained.
ECO start/stop function
During automatic engine switch-off, the climate
control system only operates at a reduced capa-
city. If you require the full climate control output,
you can switch off the ECO start/stop function
by pressing the ECO button (
Ypage 131).
Operating the climate control sys-
tems
Activating/deactivating climate con-
trol
General notes
When the climate control is switched off, the air
supply and air circulation are also switched off.
The windows could fog up. Therefore, switch off
climate control only briefly
Switch on climate control primarily using the
à rocker switch (
Ypage 119).
Activating/deactivating
XTurn the SmartKey to position 2in the igni-
tion lock (Ypage 126).
XTo switch on: set the airflow to level 1or
higher using the Hrocker switch.
XTo switch off: set the airflow to level 0using
the H rocker switch.
118Operating the climate control systems
Climate control
Page 121 of 354
Switching cooling with air dehumidification on/off
General notes
If you deactivate the "Cooling with air-dehumidification" function, the air inside the vehicle will not
be cooled. The air inside the vehicle will also not be dehumidified. The windows can fog up more
quickly. Therefore, only deactivate the "Cooling with air-dehumidification" function briefly.
The "Cooling with air dehumidification" function is only available when the engine is running. The air
inside the vehicle is cooled and dehumidified according to the temperature selected.
Condensation may drip from the underside of the vehicle when it is in cooling mode. This is normal
and not a sign that there is a malfunction.
Activating/deactivating
XPress the ¿rocker switch up or down.
The indicator lamp above the rocker switch lights up or goes out.
Problems with the "Cooling with air dehumidification" function
ProblemPossible causes/consequences and MSolutions
The indicator lamp above
the¿ rocker switch
remains off. The cooling
with air dehumidification
function cannot be acti-
vated via the multimedia
system any longer
(
Ypage 261).
Cooling with air dehumidification has been deactivated due to a mal-
function.
XVisit a qualified specialist workshop.
Setting climate control to automatic
General notes
In automatic mode, the set temperature is main-
tained automatically at a constant level. The
system automatically regulates the temperature
of the dispensed air, the airflow and the air dis-
tribution.
During automatic controlling, the "Cooling with
air dehumidification" function is activated.
Automatic control
XTurn the SmartKey to position 2in the igni-
tion lock (Ypage 126).
XTo activate: press theÃrocker switch up
or down.
The indicator lamp above the Ãrocker
switch lights up.
XSet the desired temperature using the w
rocker switch on the front control unit.
XTo switch to manual operation: press the
H rocker switch up or down.
or
XPress the _rocker switch up or down.
The indicator lamp above the Ãrocker
switch goes out.
In automatic mode, if you adjust the airflow or
air distribution manually, the indicator lamp
above the Ãrocker switch goes out. The
function which has not been changed manually,
however, continues to be controlled automati-
cally. When the manually set function switches
back to automatic mode, the indicator lamp
above the Ãrocker switch lights up again.
Setting the temperature
Dual-zone automatic climate control: different
temperatures can be set for the driver's and
front-passenger sides.
Operating the climate control systems119
Climate control
Page 122 of 354
XTurn the SmartKey to position2in the igni-
tion lock (Ypage 126).
XTo increase or reduce: press thew
rocker switch up or down.
Only change the temperature setting in small
increments. Start at 72 ‡ (22 †).
Setting the air distribution
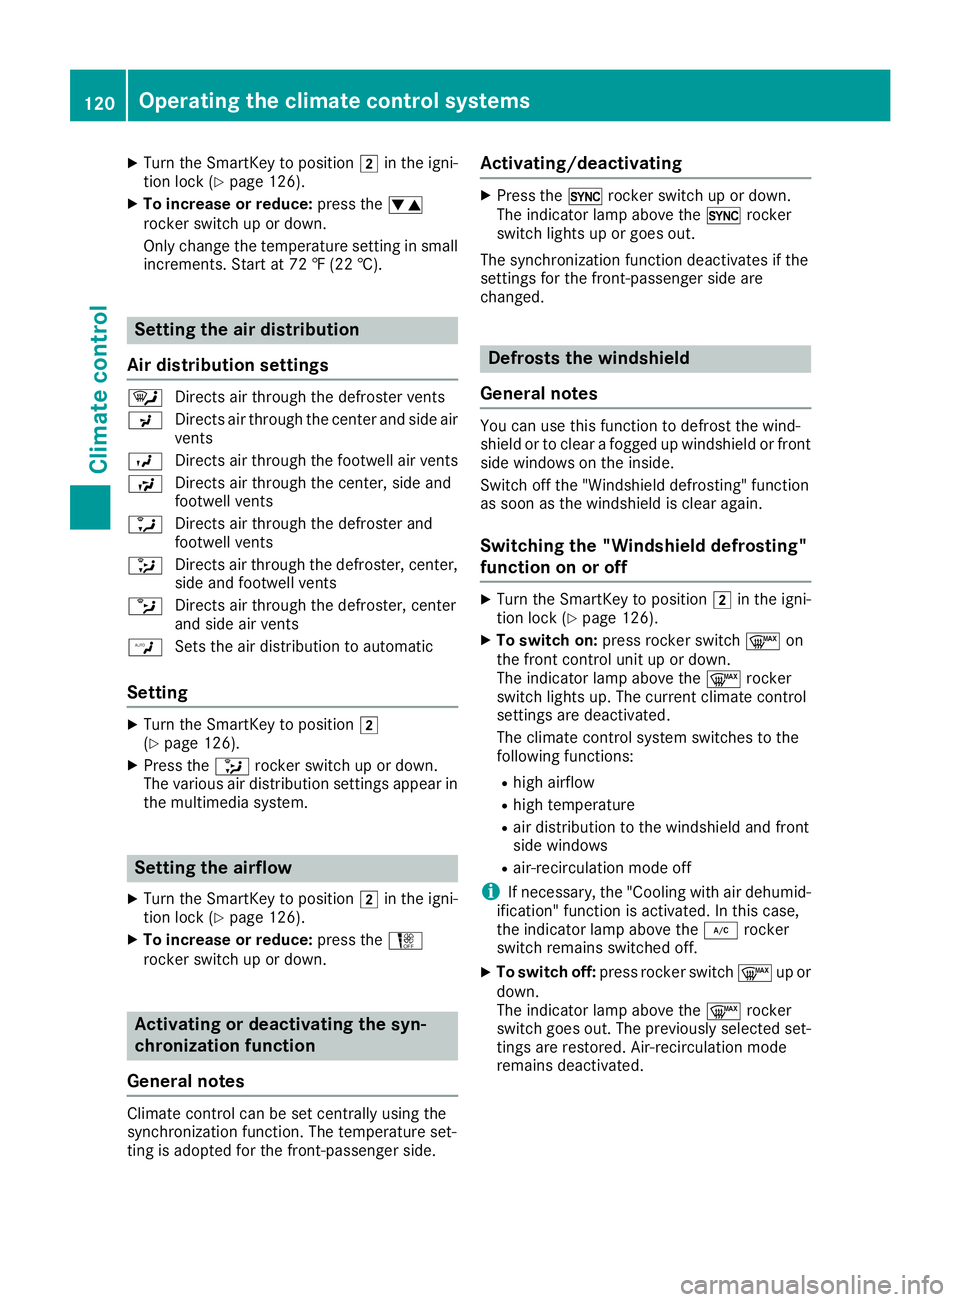
Air distribution settings
¯ Directs air through the defroster vents
P Directs air through the center and side air
vents
O Directs air through the footwell air vents
S Directs air through the center, side and
footwell vents
a Directs air through the defroster and
footwell vents
_ Directs air through the defroster, center,
side and footwell vents
b Directs air through the defroster, center
and side air vents
W Sets the air distribution to automatic
Setting
XTurn the SmartKey to position 2
(Ypage 126).
XPress the _rocker switch up or down.
The various air distribution settings appear in
the multimedia system.
Setting the airflow
XTurn the SmartKey to position 2in the igni-
tion lock (Ypage 126).
XTo increase or reduce: press theH
rocker switch up or down.
Activating or deactivating the syn-
chronization function
General notes
Climate control can be set centrally using the
synchronization function. The temperature set-
ting is adopted for the front-passenger side.
Activating/deactivating
XPress the 0rocker switch up or down.
The indicator lamp above the 0rocker
switch lights up or goes out.
The synchronization function deactivates if the
settings for the front-passenger side are
changed.
Defrosts the windshield
General notes
You can use this function to defrost the wind-
shield or to clear a fogged up windshield or front
side windows on the inside.
Switch off the "Windshield defrosting" function
as soon as the windshield is clear again.
Switching the "Windshield defrosting"
function on or off
XTurn the SmartKey to position 2in the igni-
tion lock (Ypage 126).
XTo switch on: press rocker switch ¬on
the front control unit up or down.
The indicator lamp above the ¬rocker
switch lights up. The current climate control
settings are deactivated.
The climate control system switches to the
following functions:
Rhigh airflow
Rhigh temperature
Rair distribution to the windshield and front
side windows
Rair-recirculation mode off
iIf necessary, the "Cooling with air dehumid-
ification" function is activated. In this case,
the indicator lamp above the ¿rocker
switch remains switched off.
XTo switch off: press rocker switch ¬up or
down.
The indicator lamp above the ¬rocker
switch goes out. The previously selected set-
tings are restored. Air-recirculation mode
remains deactivated.
120Operating the climate control systems
Climate control
Page 123 of 354
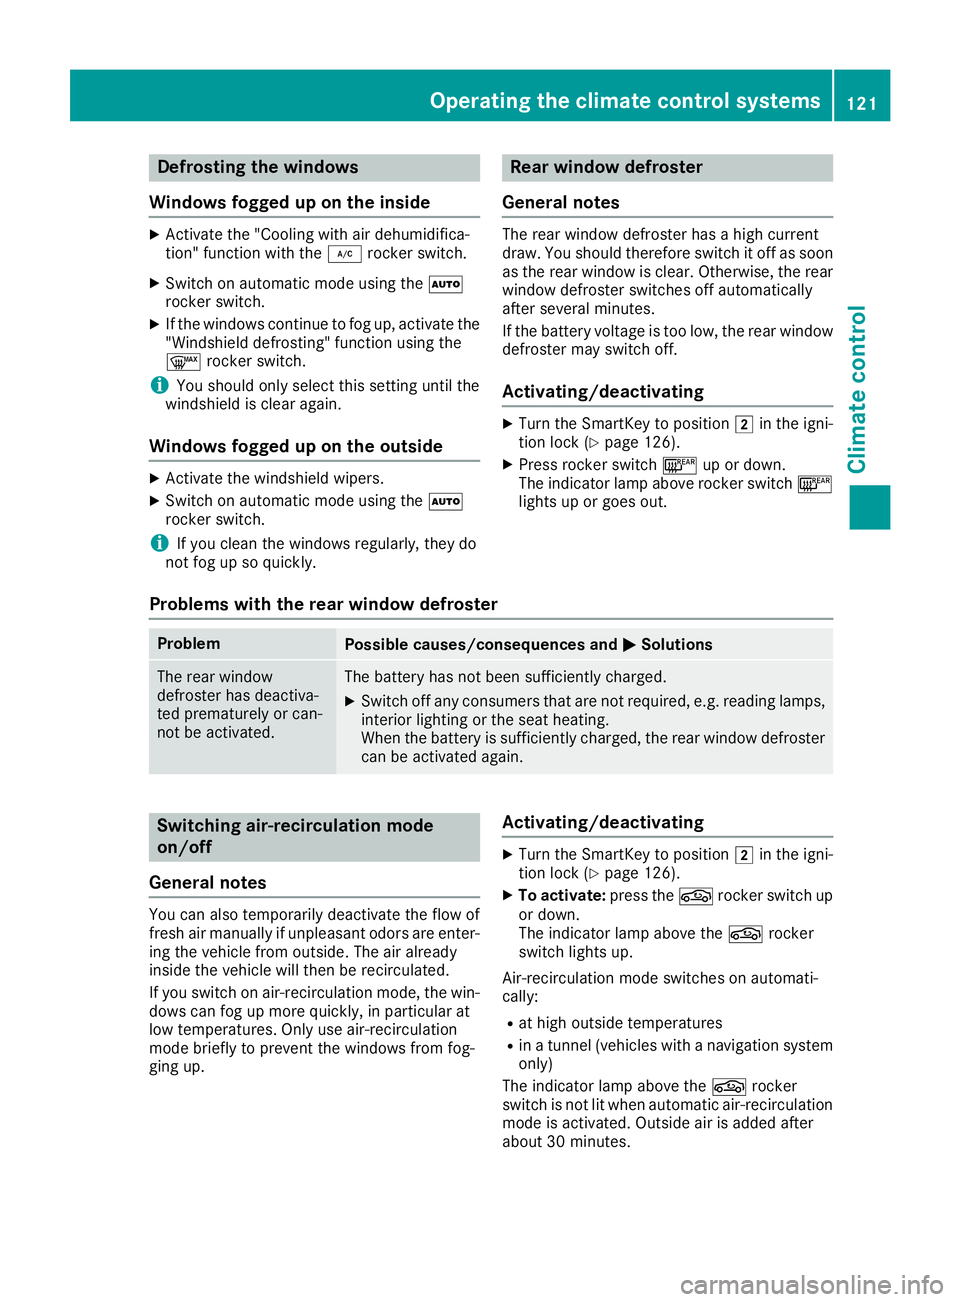
Defrosting thewindows
Windows fogged up on th einside
XActivat eth e"Coolin gwit hair dehumidifica-
tion "function wit hth e¿ rocker switch .
XSwitchon automatic mode usin gth eÃ
rocker switch .
XIf thewindows continue to fo gup, activat eth e
"Windshield defrosting" function usin gth e
¬ rocker switch .
iYou should only selec tthis setting until th e
windshield is clear again .
Windows fogged up on th eoutsid e
XActivat eth ewindshield wipers .
XSwitchon automatic mode usin gth eÃ
rocker switch .
iIf you clean th ewindows regularly, they do
no tfo gup so quickly.
Rea rwindow defroster
General notes
The rea rwindow defroster has ahig hcurren t
draw. You should therefore switch it of fas soo n
as th erea rwindow is clear .Otherwise ,th erea r
window defroster switches of fautomatically
after severa lminutes.
If th ebattery voltage is to olow, th erea rwindow
defroster may switch off.
Activating/deactivating
XTur nth eSmartKey to position 2in th eigni-
tion loc k (Ypage 126).
XPress rocker switch ¤up or down .
The indicator lamp abov erocker switch ¤
lights up or goe sout .
Problem swit hth erear window defroster
ProblemPossible causes/consequences an dMSolutions
The rea rwindow
defroster has deactiva-
te dprematurely or can -
no tbe activated.The battery has no tbee nsufficientl ycharged.
XSwitc hof fany consumers that are no trequired, e.g. readin glamps,
interio rlighting or th eseat heating.
Whe nth ebattery is sufficientl ycharged, th erea rwindow defroster
can be activated again .
Switchingair-recirculation mode
on/of f
General notes
You can also temporarily deactivat eth eflo wof
fresh air manually if unpleasant odors are enter-
in g th evehicle from outside. The air already
insid eth evehicle will then be recirculated.
If you switch on air-recirculation mode, th ewin -
dows can fo gup more quickly, in particular at
low temperatures. Only use air-recirculation
mode briefly to preven tth ewindows from fog-
gin gup.
Activating/deactivating
XTur nth eSmartKey to position 2in th eigni-
tion loc k (Ypage 126).
XTo activate :press th eg rocker switch up
or down .
The indicator lamp abov eth eg rocker
switch lights up.
Air-recirculation mode switches on automati-
cally:
Rat hig houtsid etemperature s
Rinatunnel (vehicles wit h anavigation system
only)
The indicator lamp abov eth eg rocker
switch is no tlit when automatic air-recirculation
mode is activated. Outsid eair is adde dafter
about 30 minutes.
Operating the climate control systems12 1
Climate control
Page 133 of 354
Rthe battery is sufficiently charged
Rthe system detects that the windshield is not
fogged up when the air-conditioning system isswitched on
Rthe hood is closed
Rthe driver's door is closed and the driver's
seat belt is fastened
All of the vehicle's systems remain active when
the engine is stopped automatically.
The HOLD function can also be activated if the
engine has been switched off automatically. It is
then not necessary to continue applying the
brakes during the automatic stop phase. When
you depress the accelerator pedal, the engine
starts automatically and the braking effect of
the HOLD function is deactivated.
Mercedes-AMG C 63 and Mercedes-
AMG C 63 S: the number of consecutive auto-
matic engine switch-offs is unlimited.
All other models: automatic engine switch-off
can take place a maximum of four times in a row
(initial switch-off, then three subsequent switch-
offs).
Automatic engine start
The engine starts automatically if:
Ryou switch off the ECO start/stop function by pressing the ECO button
RMercedes-AMG C 63 and Mercedes-AMG
C 63 S: you switch to drive program RACE
(S‑ MODEL), S+orS
Rall other models: you switch to drive pro-
gram S+
RMercedes-AMG vehicles: you permanently
activate manual gearshifting (Ypage 142)
Rin transmission position hori, the brake
pedal is released and the HOLD function is not
active
Ryou depress the accelerator pedal
Ryou engage reverse gear k
Ryou move the transmission out of position j
Ryou unfasten your seat belt or open the driv-
er's door
Rthe vehicle starts to roll
Rthe brake system requires this
Rthe temperature in the vehicle interior devi-
ates from the set range
Rthe system detects moisture on the wind-
shield when the air-conditioning system is
switched on
Rthe condition of charge of the battery is too
low
Shifting the transmission to position jdoes
not start the engine.
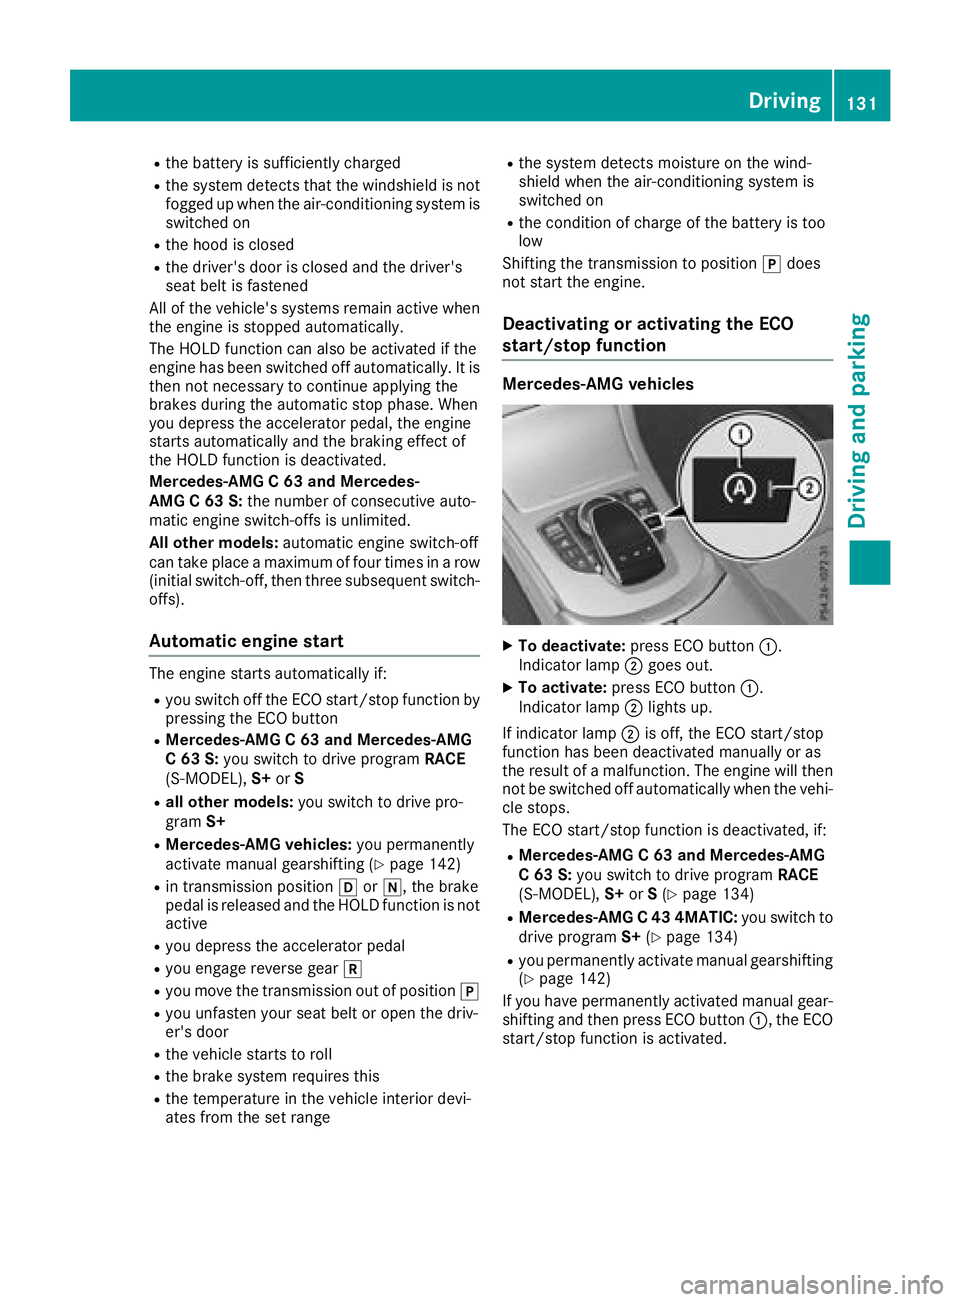
Deactivating or activating the ECO
start/stop function
Mercedes-AMG vehicles
XTo deactivate: press ECO button :.
Indicator lamp ;goes out.
XTo activate: press ECO button :.
Indicator lamp ;lights up.
If indicator lamp ;is off, the ECO start/stop
function has been deactivated manually or as
the result of a malfunction. The engine will then
not be switched off automatically when the vehi- cle stops.
The ECO start/stop function is deactivated, if:
RMercedes-AMG C 63 and Mercedes-AMG
C 63 S: you switch to drive program RACE
(S‑ MODEL), S+orS(
Ypage 134)
RMercedes-AMG C 43 4MATIC: you switch to
drive program S+(Ypage 134)
Ryou permanently activate manual gearshifting
(Ypage 142)
If you have permanently activated manual gear-
shifting and then press ECO button :, the ECO
start/stop function is activated.
Driving131
Dr iving an d parking
Z