headlamp MERCEDES-BENZ C-CLASS COUPE 2018 Owner's Manual
[x] Cancel search | Manufacturer: MERCEDES-BENZ, Model Year: 2018, Model line: C-CLASS COUPE, Model: MERCEDES-BENZ C-CLASS COUPE 2018Pages: 354, PDF Size: 5.88 MB
Page 7 of 354
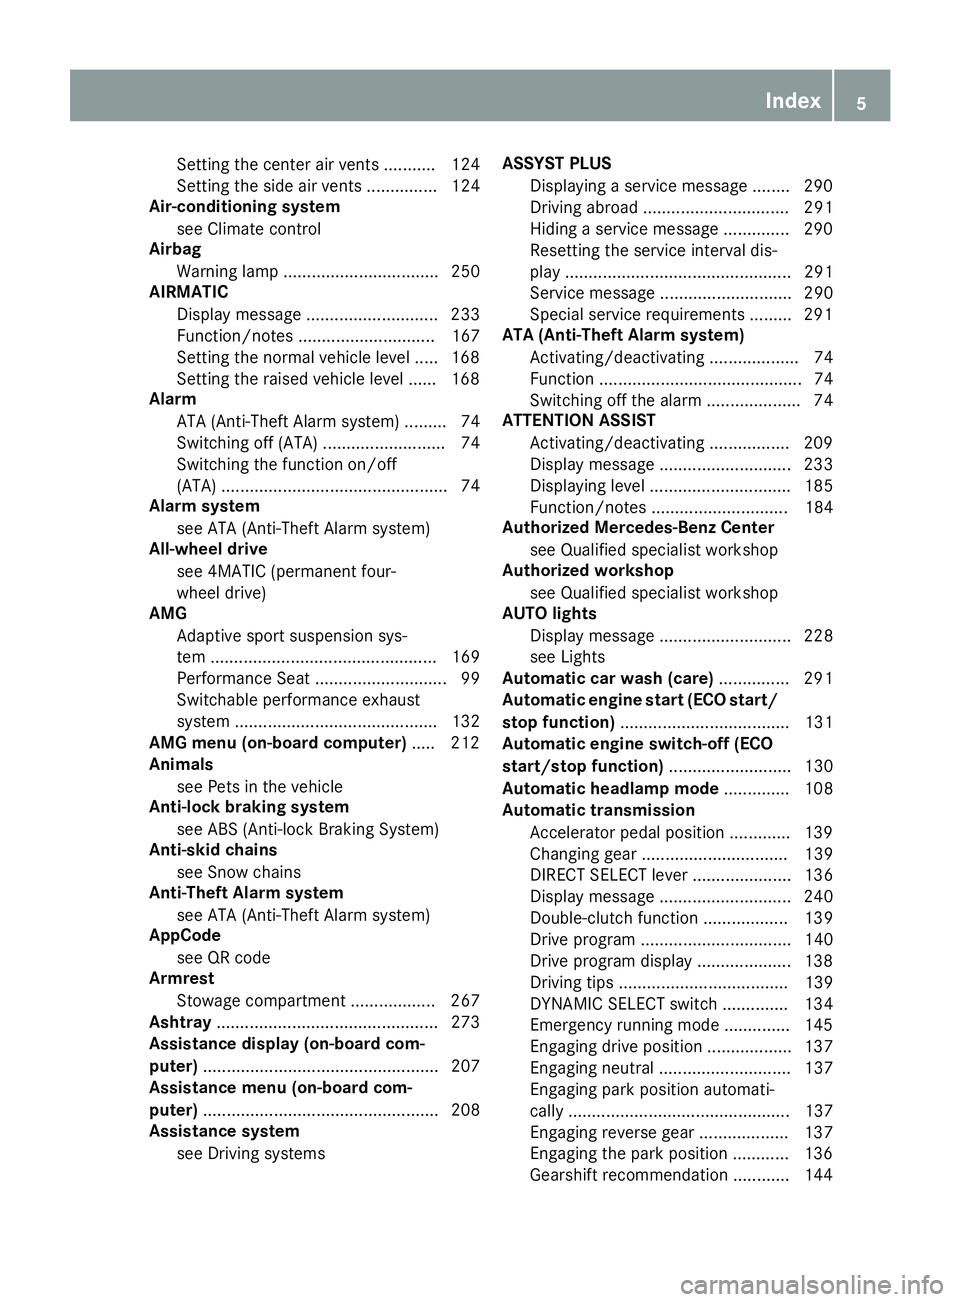
Setting the center air vents ........... 124
Setting the side air vents ............... 124
Air-conditioning system
see Climate control
Airbag
Warning lamp ................................. 250
AIRMATIC
Display message ............................ 233
Function/notes ............................. 167
Setting the normal vehicle level ..... 168
Setting the raised vehicle level ...... 168
Alarm
ATA (Anti-Theft Alarm system) ......... 74
Switching off (ATA) .......................... 74
Switching the function on/off
(ATA) ................................................ 74
Alarm system
see ATA (Anti-Theft Alarm system)
All-wheel drive
see 4MATIC (permanent four-
wheel drive)
AMG
Adaptive sport suspension sys-
tem ................................................ 169
Performance Seat ............................ 99
Switchable performance exhaust
system ........................................... 132
AMG menu (on-board computer) ..... 212
Animals
see Pets in the vehicle
Anti-lock braking system
see ABS (Anti-lock Braking System)
Anti-skid chains
see Snow chains
Anti-Theft Alarm system
see ATA (Anti-Theft Alarm system)
AppCode
see QR code
Armrest
Stowage compartment .................. 267
Ashtray ............................................... 273
Assistance display (on-board com-
puter) .................................................. 207
Assistance menu (on-board com-
puter) .................................................. 208
Assistance system
see Driving systems ASSYST PLUS
Displaying a service message ........ 290
Driving abroad ............................... 291
Hiding a service message .............. 290
Resetting the service interval dis-
play ................................................ 291
Service message ............................ 290
Special service requirements ......... 291
ATA (Anti-Theft Alarm system)
Activating/deactivating ................... 74
Function ........................................... 74
Switching off the alarm .................... 74
ATTENTION ASSIST
Activating/deactivating ................. 209
Di
splay message ............................ 233
Displaying level .............................. 185
Function/notes ............................. 184
Authorized Mercedes-Benz Center
see Qualified specialist workshop
Authorized workshop
see Qualified specialist workshop
AUTO lights
Display message ............................ 228
see Lights
Automatic car wash (care) ............... 291
Automatic engine start (ECO start/
stop function) .................................... 131
Automatic engine switch-off (ECO
start/stop function) .......................... 130
Automatic headlamp mode .............. 108
Automatic transmission
Accelerator pedal position ............. 139
Changing gear ............................... 139
DIRECT SELECT lever ..................... 136
Display message ............................ 240
Double-clutch function .................. 139
Drive program ................................ 140
Drive program display .................... 138
Driving tips .................................... 139
DYNAMIC SELECT switch .............. 134
Emergency running mode .............. 145
Engaging drive position .................. 137
Engaging neutral ............................ 137
Engaging park position automati-
cally ............................................... 137
Engaging reverse gear ................... 137
Engaging the park position ............ 136
Gearshift recommendation ............ 144
Index5
Page 15 of 354
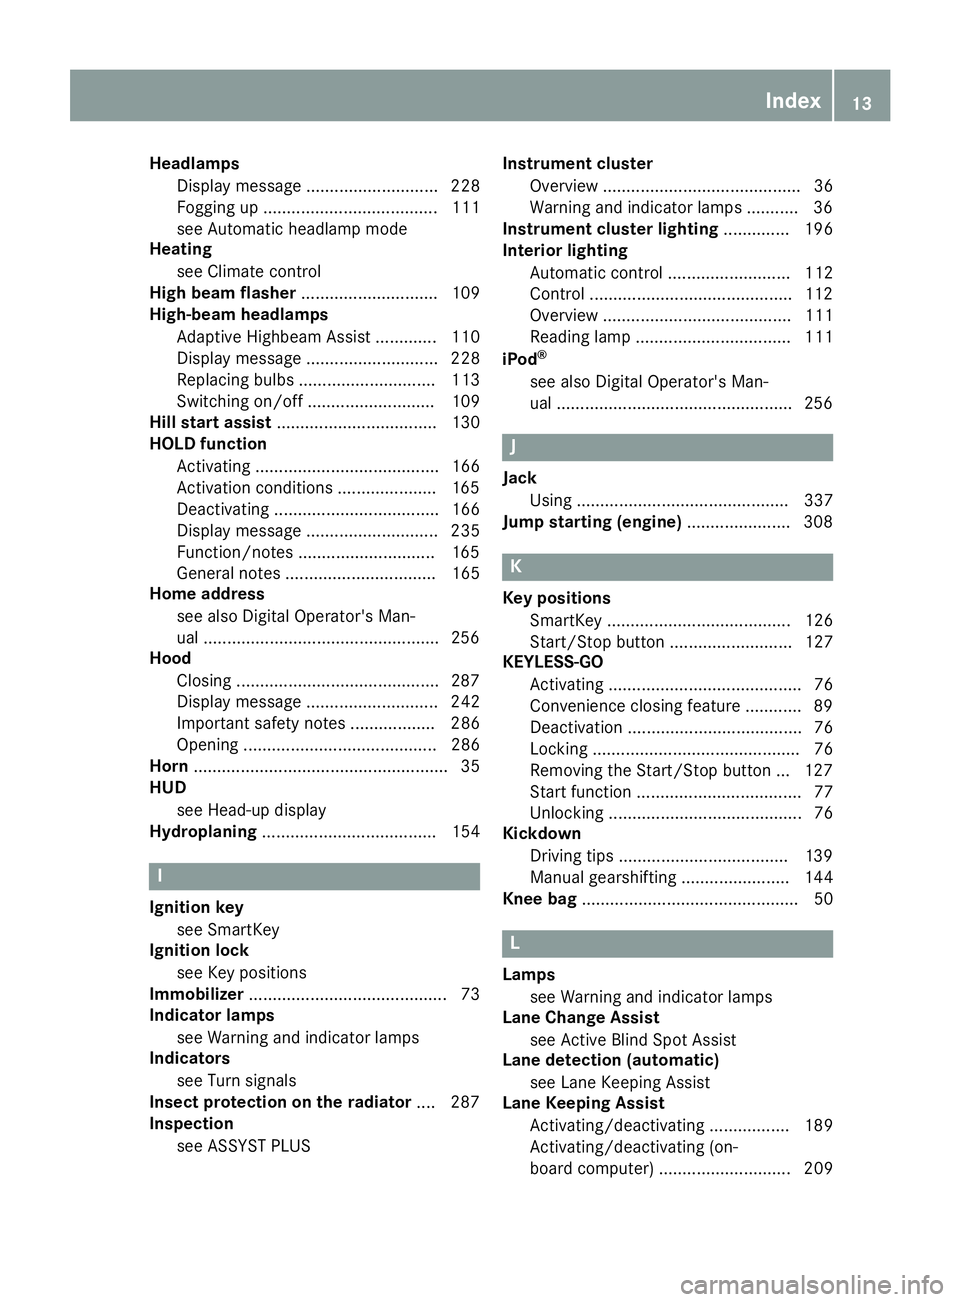
HeadlampsDisplay message ............................ 228
Fogging up ..................................... 111
see Automatic headlamp mode
Heating
see Climate control
High beam flasher ............................. 109
High-beam headlamps
Adaptive Highbeam Assist ............. 110
Display message ............................ 228
Replacing bulbs ............................. 113
Switching on/off ........................... 109
Hill start assist .................................. 130
HOLD function
Activating ....................................... 166
Activation conditions .....................1 65
Deactivating ................................... 166
Display message ............................ 235
Function/notes .............................1 65
General notes ................................ 165
Home address
see also Digital Operator's Man-
ual ..................................................2 56
Hood
Closing ...........................................2 87
Display message ............................ 242
Important safety notes .................. 286
Opening ......................................... 286
Horn ...................................................... 35
HUD
see Head-up display
Hydroplaning ..................................... 154
I
Ignition key
see SmartKey
Ignition lock
see Key positions
Immobilizer .......................................... 73
Indicator lamps
see Warning and indicator lamps
Indicators
see Turn signals
Insect protection on the radiator .... 287
Inspection
see ASSYST PLUS Instrument cluster
Overview .......................................... 36
Warning and indicator lamps ........... 36
Instrument cluster lighting .............. 196
Interior lighting
Automatic control .......................... 112
Control ...........................................1 12
Overview ........................................ 111
Reading lamp ................................. 111
iPod
®
see also Digital Operator's Man-
ual ..................................................2 56
J
Jack
Using ............................................. 337
Jump starting (engine) ......................308
K
Key positions
SmartKey ....................................... 126
Start/Stop button .......................... 127
KEYLESS-GO
Activating ......................................... 76
Convenience closing feature ............ 89
Deactivation ..................................... 76
Locking ............................................ 76
Removing the Start/Stop button ... 127
Start function ................................... 77
Unlocking ......................................... 76
Kickdown
Driving tips ....................................1 39
Manual gearshifting ....................... 144
Knee bag .............................................. 50
L
Lamps
see Warning and indicator lamps
Lane Change Assist
see Active Blind Spot Assist
Lane detection (automatic)
see Lane Keeping Assist
Lane Keeping Assist
Activating/deactivating ................. 189
Activating/deactivating (on-
board computer) ............................ 209
Index13
Page 16 of 354
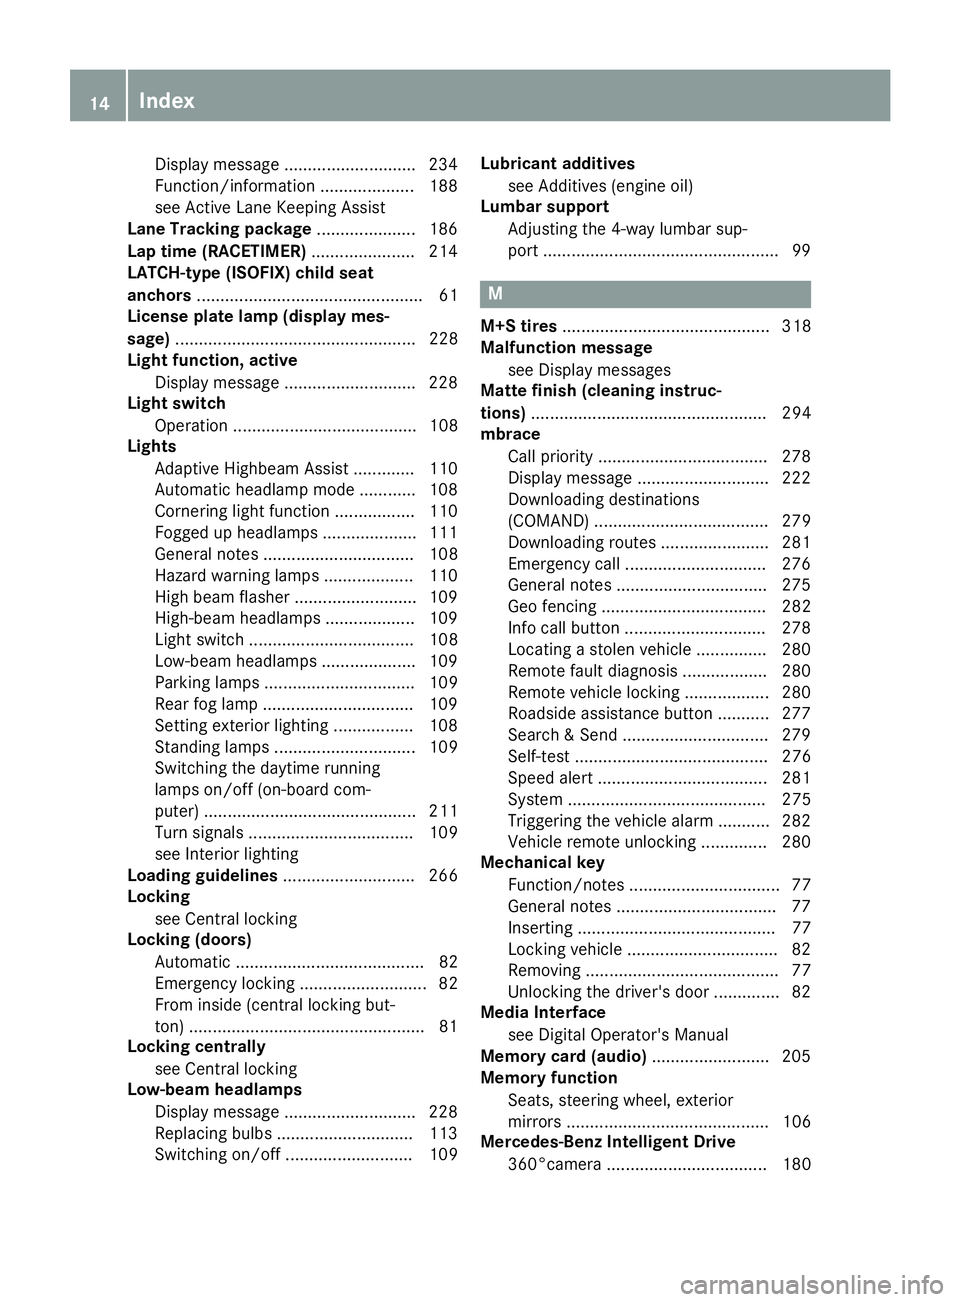
Display message ............................ 234
Function/information .................... 188
see Active Lane Keeping Assist
Lane Tracking package ..................... 186
Lap time (RACETIMER) ...................... 214
LATCH-type (ISOFIX) child seat
anchors ................................................ 61
License plate lamp (display mes-
sage) ................................................... 228
Light function, active
Display message ............................ 228
Light switch
Operation ....................................... 108
Lights
Adaptive Highbeam Assist .............1 10
Automatic headlamp mode ............ 108
Cornering light function ................. 110
Fogged up headlamps .................... 111
General notes ................................ 108
Hazard warning lamps ................... 110
High beam flasher .......................... 109
High-beam headlamps ................... 109
Light switch ................................... 108
Low-beam headlamps .................... 109
Parking lamps ................................ 109
Rear fog lamp ................................ 109
Setting exterior lighting ................. 108
Standing lamps .............................. 109
Switching the daytime running
lamps on/off (on-board com-
puter) ............................................. 211
Turn signals ................................... 109
see Interior lighting
Loading guidelines ............................ 266
Locking
see Central locking
Locking (doors)
Automatic ........................................ 82
Emergency locking ........................... 82
From inside (central locking but-
ton) ..................................................8 1
Locking centrally
see Central locking
Low-beam headlamps
Display message ............................ 228
Replacing bulbs .......................... ..
.1 13
Sw
itching on/off ........................... 109 Lubricant additives
see Additives (engine oil)
Lumbar support
Adjusting the 4-way lumbar sup-
port ..................................................9 9
M
M+S tires............................................ 318
Malfunction message
see Display messages
Matte finish (cleaning instruc-
tions) .................................................. 294
mbrace
Call priority ....................................2 78
Display message ............................ 222
Downloading destinations
(COMAND) ..................................... 279
Downloading routes ....................... 281
Emergency call .............................. 276
General notes ................................ 275
Geo fencing ................................... 282
Info call button .............................. 278
Locating a stolen vehicle ...............2 80
Remote fault diagnosis .................. 280
Remote vehicle locking .................. 280
Roadside assistance button ........... 277
Search & Send ............................... 279
Self-test ......................................... 276
Speed alert .................................... 281
System .......................................... 275
Triggering the vehicle alarm ........... 282
Vehicle remote unlocking .............. 280
Mechanical key
Function/notes ................................ 77
General notes .................................. 77
Inserting .......................................... 77
Locking vehicle ................................ 82
Removing ......................................... 77
Unlocking the driver's door .............. 82
Media Interface
see Digital Operator's Manual
Memory card (audio) ......................... 205
Memory function
Seats, steering wheel, exterior
mirrors ........................................... 106
Mercedes-Benz Intelligent Drive
360°camera .................................. 180
14Index
Page 20 of 354
Rain closing feature (panorama
roof with power tilt/sliding panel).... 92
Reading lamp ..................................... 111
Rear compartment
Setting the air vents ...................... 124
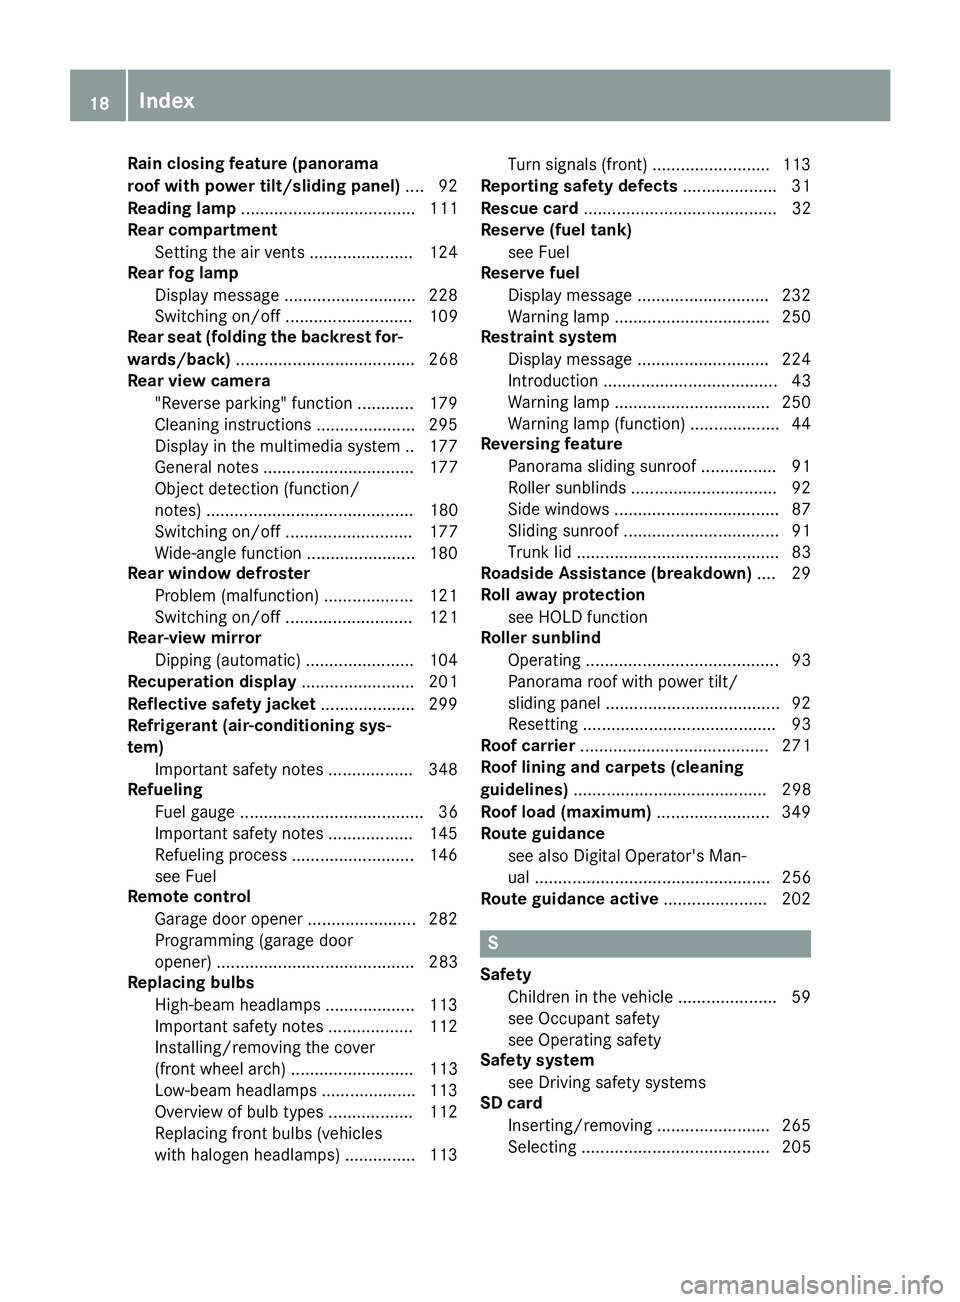
Rear fog lamp
Display message ............................ 228
Switching on/off ........................... 109
Rear seat (folding the backrest for-
wards/back) ...................................... 268
Rear view camera
"Reverse parking" function ............ 179
Cleaning instructions ..................... 295
Display in the multimedia system .. 177
General notes ................................ 177
Object detection (function/
notes) ............................................ 180
Switching on/off ........................... 177
Wide-angle function ....................... 180
Rear window defroster
Problem (malfunction) ................... 121
Switching on/off ........................... 121
Rear-view mirror
Dipping (automatic) ....................... 104
Recuperation display ........................ 201
Reflective safety jacket .................... 299
Refrigerant (air-conditioning sys-
tem)
Important safety notes .................. 348
Refueling
Fuel gauge ....................................... 36
Important safety notes .................. 145
Refueling process .......................... 146
see Fuel
Remote control
Garage door opener ....................... 282
Programming (garage door
opener) .......................................... 283
Replacing bulbs
High-beam headlamps ................... 113
Important safety notes .................. 112
Installing/removing the cover
(front wheel arch) .......................... 113
Low-beam headlamps .................... 113
Overview of bulb types .................. 112
Replacing front bulbs (vehicles
with halogen headlamps) ............... 113 Turn signals (front) ......................... 113
Reporting safety defects .................... 31
Rescue card ......................................... 32
Reserve (fuel tank)
see Fuel
Reserve fuel
Display message ............................ 232
Warning lamp ................................. 250
Restrain t s
ystem
Display message ............................ 224
Introduction ..................................... 43
Warning lamp ................................. 250
Warning lamp (function) ................... 44
Reversing feature
Panorama sliding sunroof ................ 91
Roller sunblinds ............................... 92
Side windows ................................... 87
Sliding sunroof ................................. 91
Trunk lid ........................................... 83
Roadside Assistance (breakdown) .... 29
Roll away protection
see HOLD function
Roller sunblind
Operating ......................................... 93
Panorama roof with power tilt/
sliding panel ..................................... 92
Resetting ......................................... 93
Roof carrier ........................................ 271
Roof lining and carpets (cleaning
guidelines) ......................................... 298
Roof load (maximum) ........................ 349
Route guidance
see also Digital Operator's Man-
ual .................................................. 256
Route guidance active ...................... 202
S
Safety
Children in the vehicle ..................... 59
see Occupant safety
see Operating safety
Safety system
see Driving safety systems
SD card
Inserting/removing ........................ 265
Selecting ........................................ 205
18Index
Page 38 of 354
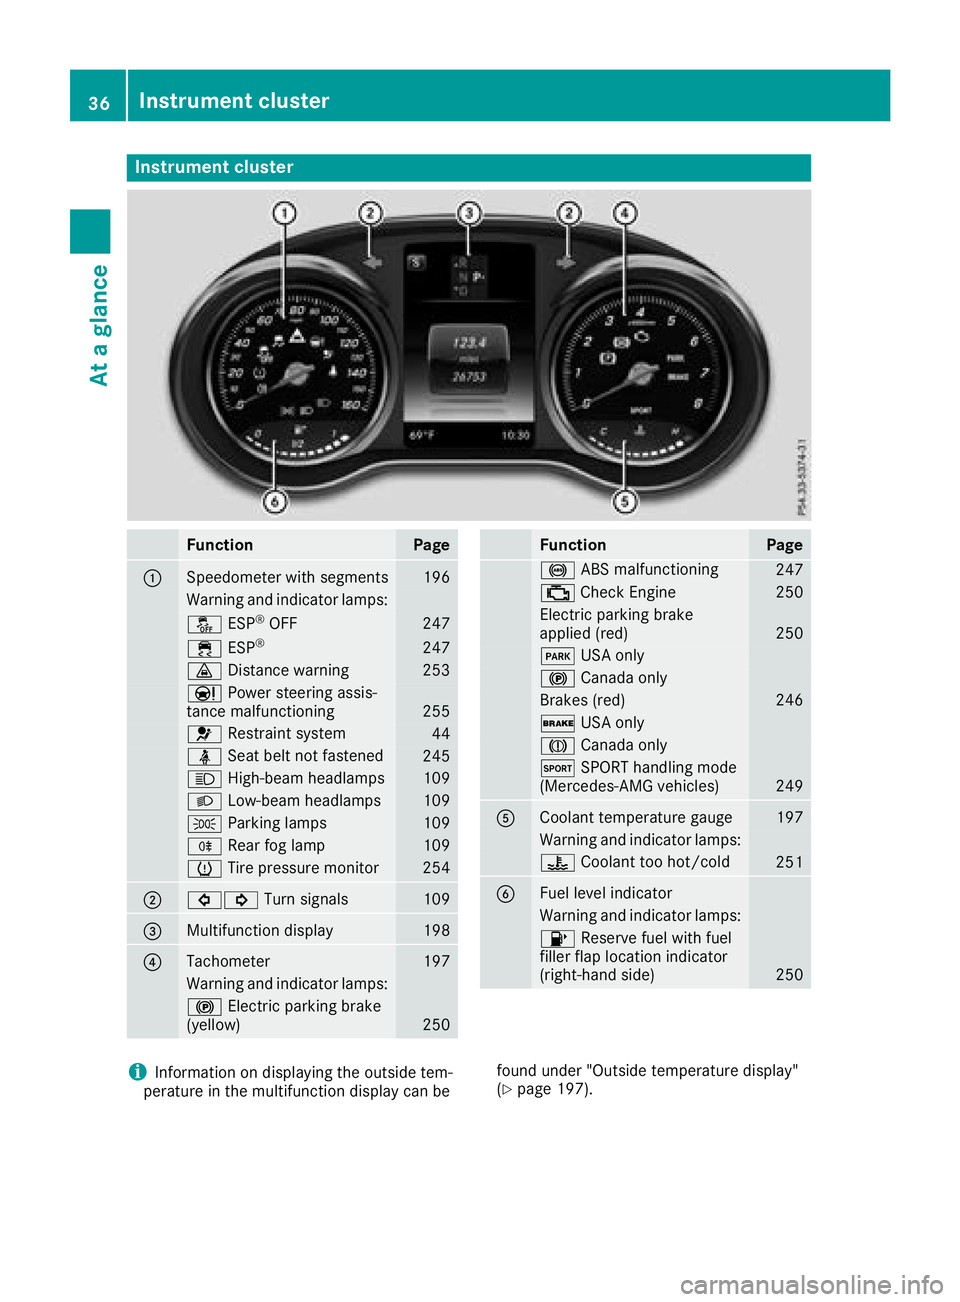
Instrument cluster
FunctionPage
:Speedometer wit hsegments19 6
Warning and indicator lamps:
å ESP®OF F247
÷ ESP®24 7
· Distanc ewarning25 3
Ð Powersteering assis-
tance malfunctioning25 5
6 Restrain tsystem44
ü Seat belt no tfastene d245
K High-beam headlamps109
L Low-beam headlamps109
T Parking lamp s109
R Rear fog lamp109
h Tirepressur emonitor25 4
;#! Turn signals109
=Multifunction display198
?Tachometer197
Warning and indicator lamps:
! Electric parking brak e
(yellow)25 0
FunctionPag e
! ABSmalfunctioning24 7
; CheckEngin e250
Electric parking brak e
applie d(red)25 0
F USAonly
! Canad aonly
Brake s(red)24 6
$ USAonly
J Canad aonly
M SPORT handlin gmod e
(Mercedes-AM Gvehicles)24 9
ACoolan ttemperature gauge19 7
Warning and indicator lamps:
? Coolan tto ohot/cold25 1
BFue llevel indicator
Warning and indicator lamps:
8 Reserve fuel wit hfuel
filler flap location indicator
(right-hand side )
250
iInformation on displayin gth eoutside tem-
peratur ein th emultifunction display can be foun
dunder "Outside temperature display"
(Ypage 197).
36Instrument cluster
At a glance
Page 107 of 354
If you come into contact with the electrolyte,
observe the following:
RRinse off the electrolyte from your skin
immediately with water.
RImmediately rinse the electrolyte out of
your eyes thoroughly with clean water.
RIf the electrolyte is swallowed, immediately
rinse your mouth out thoroughly. Do not
induce vomiting.
RIf electrolyte comes into contact with your
skin or hair or is swallowed, seek medical
attention immediately.
RImmediately change out of clothing which
has come into contact with electrolyte.
RIf an allergic reaction occurs, seek medical
attention immediately.
The exterior mirror on the driver's side and the
rear-view mirror automatically go into anti-glare
mode if:
Rthe ignition is switched on
Rincident light from headlamps strikes the sen-
sor in the rear-view mirror
The mirrors do not go into anti-glare mode if
reverse gear is engaged or if the interior lighting
is switched on.
Parking position for the exterior mir-
ror on the front-passenger side
Storing the parking position
You can set the front-passenger side exterior
mirror such that you can see the rear wheel on
that side as soon as you engage reverse gear.
You can store this position.
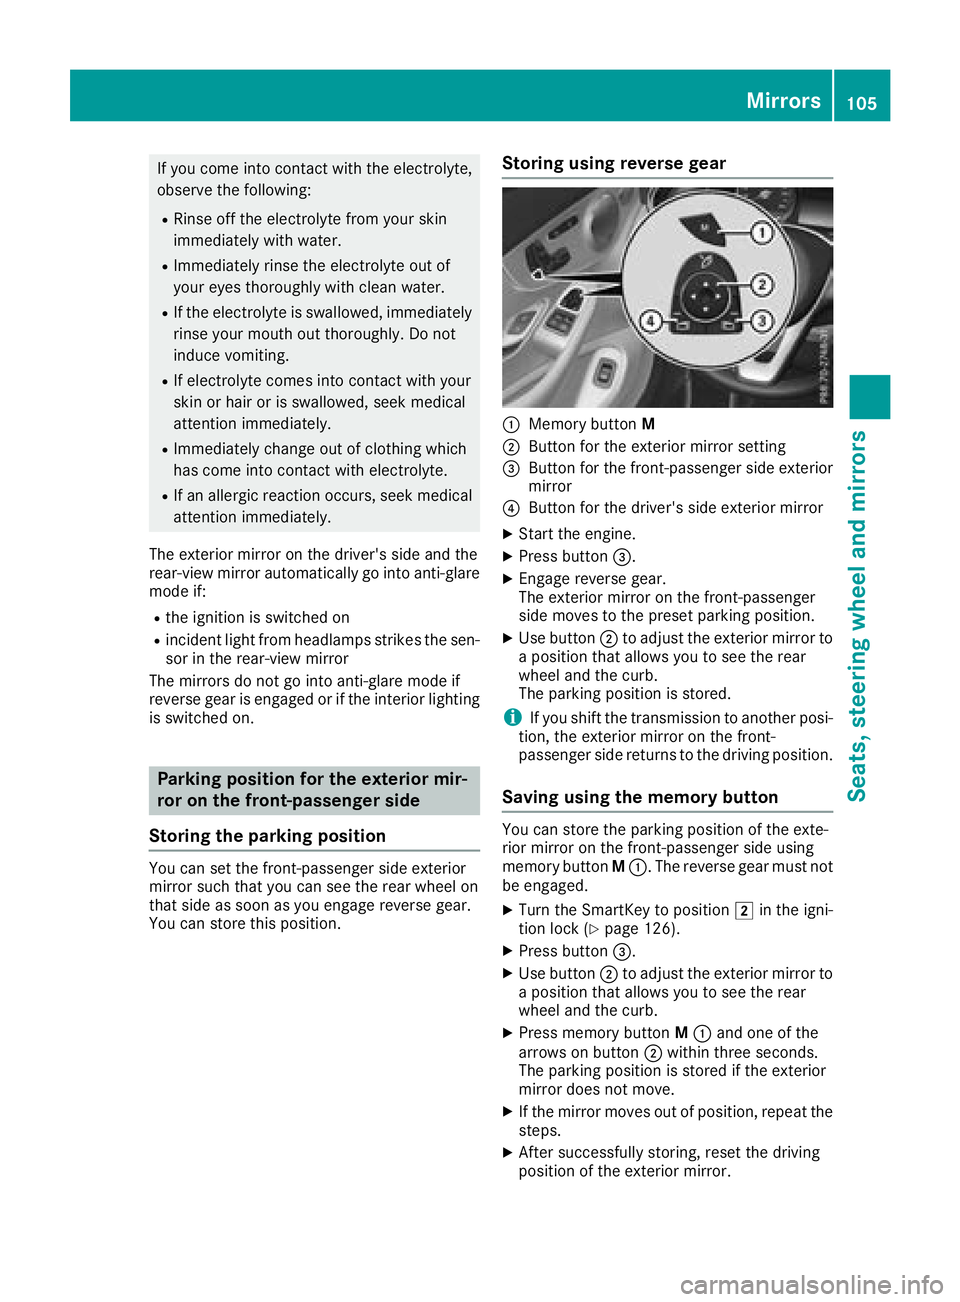
Storing using reverse gear
:Memory button M
;Button for the exterior mirror setting
=Button for the front-passenger side exterior
mirror
?Button for the driver's side exterior mirror
XStart the engine.
XPress button=.
XEngage reverse gear.
The exterior mirror on the front-passenger
side moves to the preset parking position.
XUse button;to adjust the exterior mirror to
a position that allows you to see the rear
wheel and the curb.
The parking position is stored.
iIf you shift the transmission to another posi-
tion, the exterior mirror on the front-
passenger side returns to the driving position.
Saving using the memory button
You can store the parking position of the exte-
rior mirror on the front-passenger side using
memory button M:. The reverse gear must not
be engaged.
XTurn the SmartKey to position 2in the igni-
tion lock (Ypage 126).
XPress button =.
XUse button;to adjust the exterior mirror to
a position that allows you to see the rear
wheel and the curb.
XPress memory button M: and one of the
arrows on button ;within three seconds.
The parking position is stored if the exterior
mirror does not move.
XIf the mirror moves out of position, repeat the
steps.
XAfter successfully storing, reset the driving
position of the exterior mirror.
Mirrors105
Seats, steering wheel and mirrors
Z
Page 110 of 354
Exterior lighting
General notes
USA only: if you wish to drive during the daytime
without lights, switch off theDaytime Run‐
ning Lightsfunction via the on-board com-
puter (Ypage 211).
Setting the exterior lighting
Setting options
Exterior lighting can be set using the:
Rlight switch (Ypage 108)
Rcombination switch (Ypage 109)
Ron-board computer (Ypage 211)
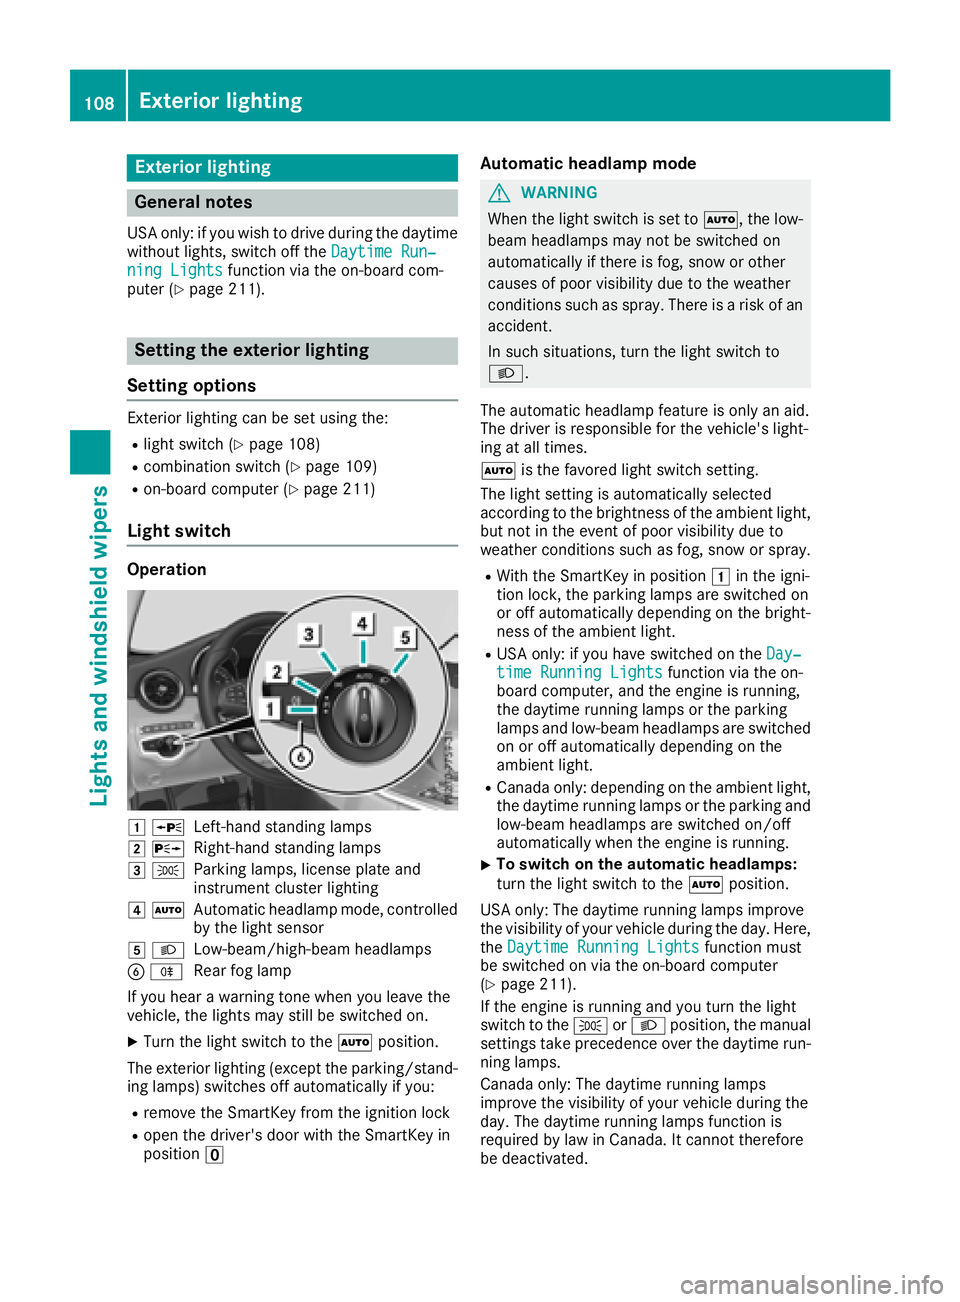
Light switch
Operation
1 WLeft-hand standing lamps
2XRight-hand standing lamps
3TParking lamps, license plate and
instrument cluster lighting
4ÃAutomatic headlamp mode, controlled
by the light sensor
5 LLow-beam/high-beam headlamps
BRRear fog lamp
If you hear a warning tone when you leave the
vehicle, the lights may still be switched on.
XTurn the light switch to the Ãposition.
The exterior lighting (except the parking/stand-
ing lamps) switches off automatically if you:
Rremove the SmartKey from the ignition lock
Ropen the driver's door with the SmartKey in
position u
Automatic headlamp mode
GWARNING
When the light switch is set to Ã, the low-
beam headlamps may not be switched on
automatically if there is fog, snow or other
causes of poor visibility due to the weather
conditions such as spray. There is a risk of an
accident.
In such situations, turn the light switch to
L.
The automatic headlamp feature is only an aid.
The driver is responsible for the vehicle's light-
ing at all times.
à is the favored light switch setting.
The light setting is automatically selected
according to the brightness of the ambient light,
but not in the event of poor visibility due to
weather conditions such as fog, snow or spray.
RWith the SmartKey in position 1in the igni-
tion lock, the parking lamps are switched on
or off automatically depending on the bright-
ness of the ambient light.
RUSA only: if you have switched on the Day‐time Running Lightsfunction via the on-
board computer, and the engine is running,
the daytime running lamps or the parking
lamps and low-beam headlamps are switched
on or off automatically depending on the
ambient light.
RCanada only: depending on the ambient light,
the daytime running lamps or the parking and
low-beam headlamps are switched on/off
automatically when the engine is running.
XTo switch on the automatic headlamps:
turn the light switch to the Ãposition.
USA only: The daytime running lamps improve
the visibility of your vehicle during the day. Here,
the Daytime Running Lights
function must
be switched on via the on-board computer
(
Ypage 211).
If the engine is running and you turn the light
switch to the TorL position, the manual
settings take precedence over the daytime run-
ning lamps.
Canada only: The daytime running lamps
improve the visibility of your vehicle during the
day. The daytime running lamps function is
required by law in Canada. It cannot therefore
be deactivated.
108Exterior lighting
Lights and windshield wipers
Page 111 of 354
When the engine is running and the vehicle is
stationary: if you move the selector lever from a
driving position toP, the daytime running lamps
and low-beam headlamps go out after three
minutes.
When the engine is running, the vehicle is sta-
tionary and in bright ambient light: if you turn the
light switch to the Tposition, the daytime
running lamps and parking lamps switch on.
If the engine is running and you turn the light
switch to the Lposition, the manual settings
take precedence over the daytime running
lamps.
Low-beam headlamps
GWARNING
When the light switch is set to Ã, the low-
beam headlamps may not be switched on
automatically if there is fog, snow or other
causes of poor visibility due to the weather
conditions such as spray. There is a risk of an
accident.
In such situations, turn the light switch to
L.
Even if the light sensor does not detect that it is
dark, the parking lamps and low-beam head-
lamps switch on when the ignition is switched on and the light switch is set to the Lposition.
This is a particularly useful function in the event
of rain and fog.
XTo switch on the low-beam headlamps:
turn the SmartKey to position 2in the igni-
tion lock or start the engine.
XTurn the light switch to the Lposition.
The green Lindicator lamp in the instru-
ment cluster lights up.
Rear fog lamp
The rear fog lamp improves visibility of your
vehicle for the traffic behind in the event of thick
fog. You must observe the legal requirements
for the country in which you are currently driving
when operating the rear fog lamp.
XTo switch on the rear fog lamp: turn the
SmartKey in the ignition lock to position 2or
start the engine.
XTurn the light switch to the LorÃ
position.
XPress the Rbutton.
The yellow Rindicator lamp on the instru-
ment cluster lights up.
Parking lamps
!If the battery charge is very low, the parking
lamps or standing lamps are automatically
switched off to enable the next engine start.
Always park your vehicle safely and in a well lit
area, in accordance with the relevant legal
stipulations. Avoid using the Tparking
lamps over a period of several hours. If pos-
sible, switch on the right-hand Xor left-
hand W standing lamps.
XTo switch on the parking lamps: turn the
light switch to the Tposition.
The green Tindicator lamp on the instru-
ment cluster lights up.
Standing lamps
Switching on the standing lamps ensures the
corresponding side of the vehicle is illuminated.
XTo switch on the standing lamps: turn the
Smart Key to position uin the ignition lock or
remove the SmartKey.
XTurn the light switch to the W(left-hand
side of the vehicle) or X(right-hand side of
the vehicle) position.
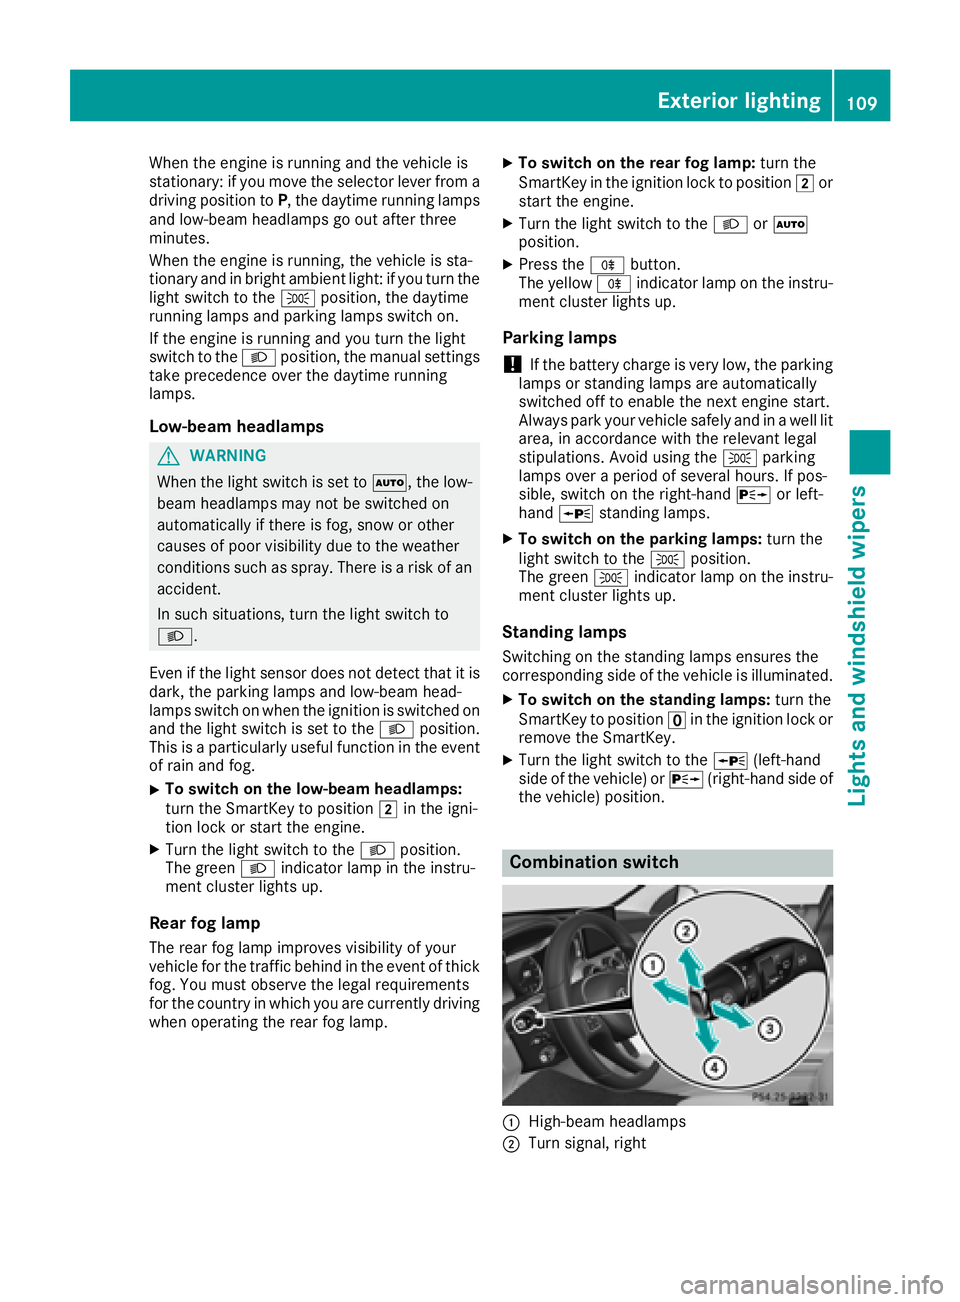
Combination switch
:High-beam headlamps
;Turn signal, right
Exterior lighting109
Lights and windshield wipers
Z
Page 112 of 354
=High-beam flasher
?Turn signal, left
XTo indicate briefly:press the combination
switch briefly to the pressure point in the
direction of arrow ;or?.
The corresponding turn signal flashes three
times.
XTo indicate: press the combination switch
beyond the pressure point in the direction of
arrow ;or?.
XTo switch on the high-beam headlamps:
turn the light switch to the LorÃ
position.
XPress the combination switch beyond the
pressure point in the direction of arrow :.
In the Ãposition, the high-beam head-
lamps are switched on only when it is dark and
the engine is running.
The blue Kindicator lamp on the instru-
ment cluster lights up when the high-beam
headlamps are switched on.
XTo switch off the high-beam headlamps:
move the combination switch back to its nor-
mal position.
The blue Kindicator lamp on the instru-
ment cluster goes out.
Vehicles with Adaptive Highbeam Assist:
If Adaptive Highbeam Assist is active, it auto-
matically controls activation and deactivation of
the high-beam headlamps (
Ypage 110).
XHigh-beam flasher: pull the combination
switch in the direction of arrow =.
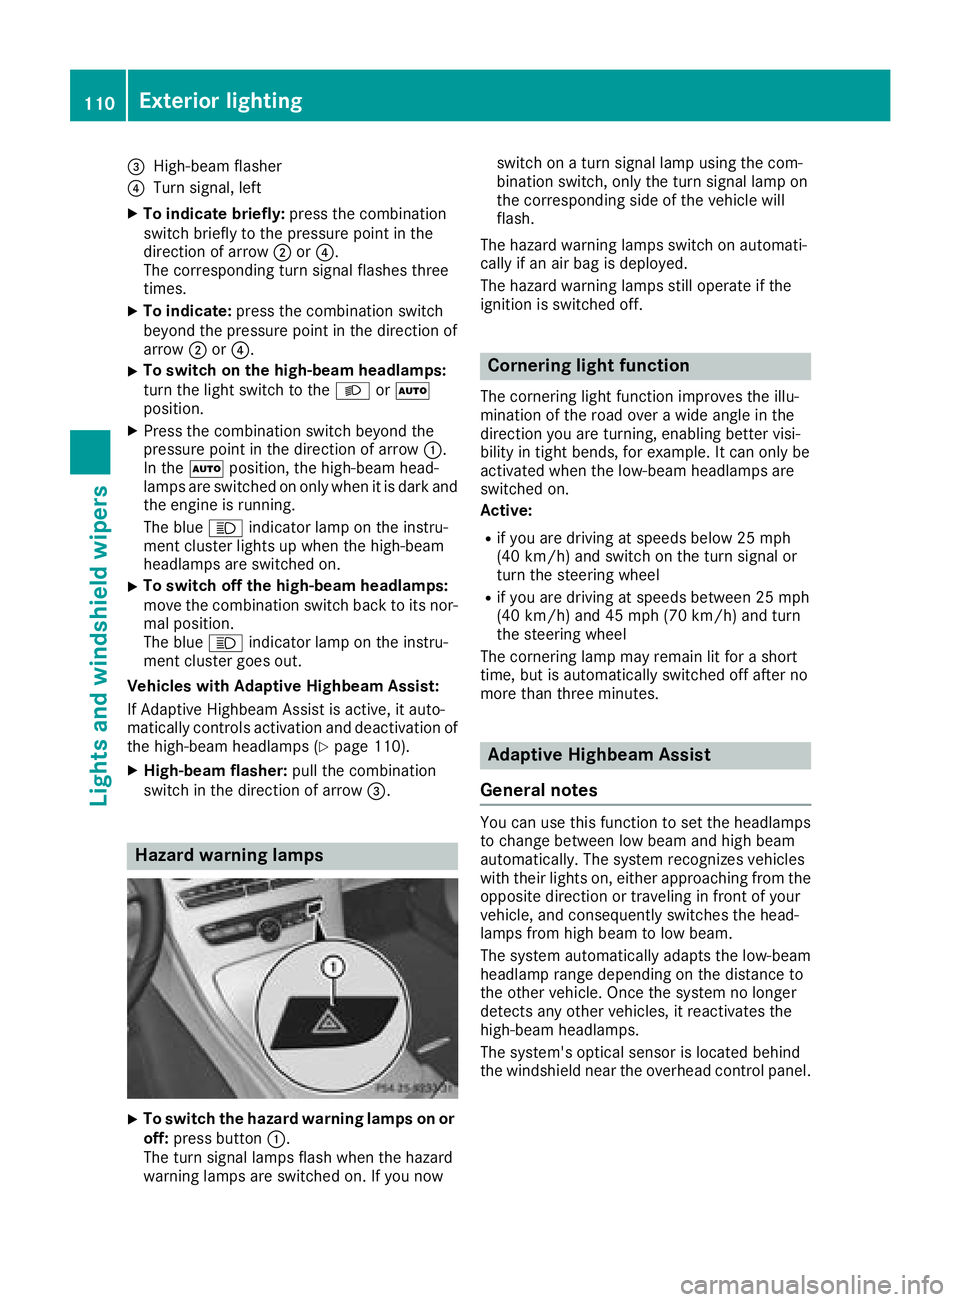
Hazard warning lamps
XTo switch the hazard warning lamps on or
off: press button :.
The turn signal lamps flash when the hazard
warning lamps are switched on. If you now switch on a turn signal lamp using the com-
bination switch, only the turn signal lamp on
the corresponding side of the vehicle will
flash.
The hazard warning lamps switch on automati-
cally if an air bag is deployed.
The hazard warning lamps still operate if the
ignition is switched off.
Cornering light function
The cornering light function improves the illu-
mination of the road over a wide angle in the
direction you are turning, enabling better visi-
bility in tight bends, for example. It can only be
activated when the low-beam headlamps are
switched on.
Active:
Rif you are driving at speeds below 25 mph
(40 km/h) and switch on the turn signal or
turn the steering wheel
Rif you are driving at speeds between 25 mph
(40 km/h) and 45 mph (70 km/h) and turn
the steering wheel
The cornering lamp may remain lit for a short
time, but is automatically switched off after no
more than three minutes.
Adaptive Highbeam Assist
General notes
You can use this function to set the headlamps
to change between low beam and high beam
automatically. The system recognizes vehicles
with their lights on, either approaching from the
opposite direction or traveling in front of your
vehicle, and consequently switches the head-
lamps from high beam to low beam.
The system automatically adapts the low-beam
headlamp range depending on the distance to
the other vehicle. Once the system no longer
detects any other vehicles, it reactivates the
high-beam headlamps.
The system's optical sensor is located behind
the windshield near the overhead control panel.
110Exterior lighting
Lights and windshield wipers
Page 113 of 354
Important safety notes
GWARNING
Adaptive Highbeam Assist does no trecognize
road users:
Rwho have no lights ,e.g. pedestrian s
Rwho havepoor lighting ,e.g. cyclist s
Rwhoselighting is blocked, e.g. by abarrier
On ver yrar eoccasions, Adaptive Highbeam
Assist may fail to recognize other road user s
that have lights ,or may recognize them to o
late. In this, or in similar situations, th eauto -
matic high-beam headlamps will no tbe deac -
tivated or will be activated regardless .Ther eis
a ris kof an accident.
Always carefully observ eth etraffic condition s
and switch off th ehigh-beam headlamps in
goo dtime.
Adaptive Highbeam Assist canno ttak eint o
accoun troad ,weather or traffic conditions.
Adaptive Highbeam Assist is only an aid. You are responsible for adjusting th evehicle's lighting
to th eprevailing light, visibilit yand traffic con-
ditions.
In particular, th edetection of obstacles can be
impaired if:
Rthere is poor visibility, e.g. due to fog ,heav y
rain or snow
Rthere is dirt on th esensor sor anythin gelse
covering th esensor s
Switching Adaptive Highbeam Assist
on/off
XTo switch on: turnth eligh tswitch to th e
à position .
XPress th ecombination switch forwards
beyon dth epressur epoin t (Ypage 109).
The _ indicator lamp on th emultifunction
display lights up when it is dark and th eligh t
sensor switches on th elow-beam headlamps .
If you are driving at speeds abov eapprox -
imately 16 mph (25 km/h):
The headlamp range is set automatically
depending on the distance between the vehi-
cle and other road users. If you are driving at speeds above approx-
imately 19 mph (30 km/h)
and no other road
users are detected:
The high-beam headlamps are switched on
automatically. The Kindicator lamp on the
instrument cluster also lights up.
If you are driving at speeds below approx-
imately 16 mph (25 km/h) or other road users are detected or the roads are adequately lit:
The high-beam headlamps are switched off
automatically. The Kindicator lamp on the
instrument cluster goes out. The _indi-
cator lamp on the multifunction display
remains lit.
XTo switch off: move the combination switch
back to its normal position or move the light
switch to another position.
The K indicator lamp on the instrument
cluster goes out.
Headlamps fogged up on the inside
Certain climatic and physical conditions may
cause moisture to form in the headlamp. This
moisture does not affect the functionality of the
headlamp.
Interior lighting
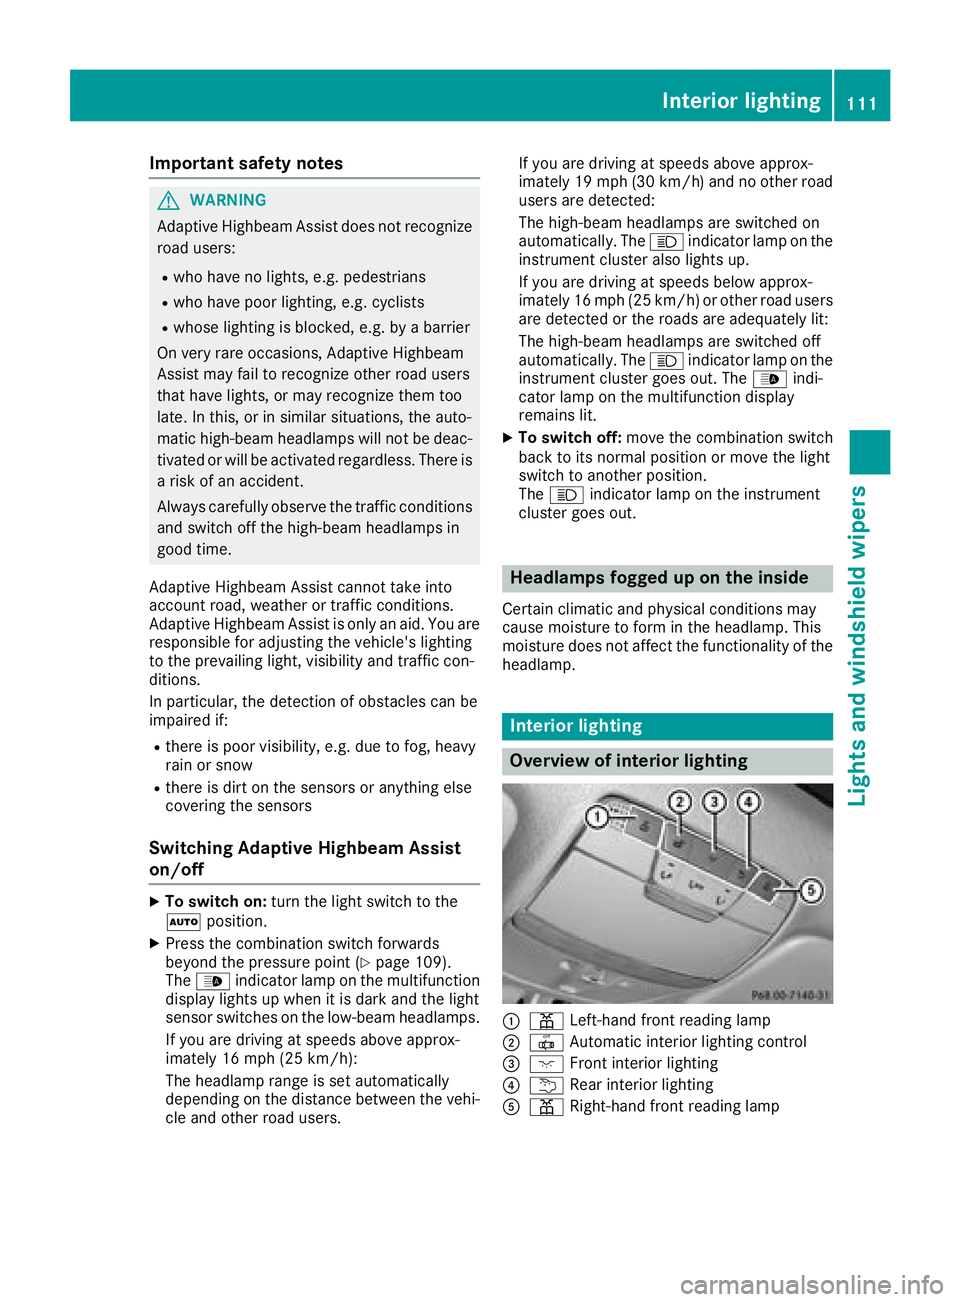
Overview of interior lighting
:p Left-hand front reading lamp
;|Automatic interior lighting control
=c Front interior lighting
?uRear interior lighting
ApRight-hand front reading lamp
Interior lighting111
Lights and windshield wipers
Z