change wheel MERCEDES-BENZ C-CLASS ESTATE 2020 Owner's Manual
[x] Cancel search | Manufacturer: MERCEDES-BENZ, Model Year: 2020, Model line: C-CLASS ESTATE, Model: MERCEDES-BENZ C-CLASS ESTATE 2020Pages: 565, PDF Size: 10.27 MB
Page 424 of 565
On-board computer:
4 Service 5
Tyres #
Swipe down wards on Touch Control on the
left-hand side of thesteering wheel.
The Use current tyre pressures as new refer-
ence values? message is shown in the multi‐
function displa y. #
Torestart, press Touch Control on the left-
hand side of thesteering wheel.
The Tyre press. monitor restarted message is
shown in the multifunction displa y.
Cur rent wa rning messages are dele ted and
th eye llow h warning lamp goes out.
Af teryo u ha vebeen driving for a few
minutes, the sy stem checks whe ther the cur‐
re nt tyre pressures are wi thin the specified
ra nge. The cur rent tyre pressures are then
accep ted as refere nce values and monitored.
Be sure toalso pay attention tothefo llowing
re lated topic:
R Notes on tyre pressure (/ page418) Wheel
change Note
s on selecting, fitting and replacing
tyres *
NO
TEMercedes-AMG vehicles #
Obser vethe no tes in the Supplement.
Yo u could otherwise failto recognise
dangers. &
WARNING Risk of accident due toincor‐
re ct dimensions of wheels and tyres
If wheels and tyres of the wrong size are
used, the wheel brakes or wheel suspension
components may become damaged. #
Alw aysre place wheels and tyres with
th ose that fulfil the specifications of the
original part.
When replacing wheels, make sure tofit the
cor rect:
R Designation
R Type When
replacing tyres, make sure tofit the
cor rect:
R Designation
R Manufactu rer
R Type &
WARNING Risk of injury thro ugh exceed‐
ing the specified tyre load-bearing capa‐
city or the permissible speed rating
Exceeding the load-bearing capacity of the
tyres can lead totyre dama geand could
cause the tyres toexplode. #
Therefore, only use tyre types and sizes
appr ovedfo ryo ur vehicle model. #
Obser vethe tyre load-bearing capacity
ra ting and speed rating requ iredfor
yo ur vehicle. Wheels and tyres
421
Page 425 of 565

*
NO
TEVehicle and tyre damage thro ugh
tyre types and sizes that ha venot been
appr oved Fo
r saf etyre asons, only use tyres, wheels
and accessories which ha vebeen specially
appr ovedby Mercedes-Benz foryo ur vehicle.
These tyres are specially adap tedto the con‐
trol sy stems, such as ABS, ESP ®
and
4MATIC, and mar ked as follo ws:
R MO = Mercedes-Benz Original
R MOE = Mercedes-Benz Original Extended
(run-flat tyres only for cer tain wheels)
R MO1 = Mercedes-Benz Original (only cer‐
tain AMG tyres)
Cer tain characteristics, such as handling,
ve hicle noise emissions, consum ption, etc.
may otherwise be adversely af fected. Fur‐
th ermore, other tyre sizes could result in the
tyres rubbing against the body and axle com‐
ponents when loaded. This could result in
damage tothe tyre or theve hicle. Only use tyres, wheels and accessories
that
ha ve been checked and recommended by
Mercedes-Benz. *
NO
TERisk todriving saf ety from retrea‐
ded tyres Re
treaded tyres are nei ther tested nor rec‐
ommended byMercedes-Benz, since pr evi‐
ous damage cannot alw ays be de tected on
re treaded tyres.
Fo rth is reason driving saf ety cannot be guar‐
anteed. #
Do not use used tyres if you ha veno
information about their pr evious usage. *
NO
TEPossible damage towheels or
tyres when driving over obs tacles Large wheels ha
vea lo wer tyre section width.
The lo werth e tyre section width, the greater
is therisk of damage towheels or tyres when
driving over obs tacles. #
Avoid obs tacles or drive part icularly
carefully. *
NO
TEPossible wheel and tyre damage
when parking on kerbs or in po tholes Pa
rking on kerbs or in po tholes may damage
th e wheels and tyres. #
If possible, park only on flat sur faces. #
Avoid kerbs and po tholes when parking. *
NO
TEDama getoelectronic component
parts from the use of tyre-fitting tools Ve
hicles with a tyre pressure monitoring
sy stem: electronic component parts are
located in the wheel. Tyre-fitting tools should
not be applied in the area of theva lve.
The tools could damage the electronic com‐
ponent parts. #
Have the tyres changed at a qualified
specialist workshop onl y. 422
Wheels and tyres
Page 427 of 565
If
th e tyre's maximum speed is below that of
th eve hicle, this must be indicated byan
appropriate label in the driver's field of
vision.
R Run in new tyres at moderate speeds forthe
fi rs t10 0 km.
R Replace the tyres af ter six years at the latest,
re ga rdless of wear.
R When replacing with tyres that do not
fe ature run-flat characteristics: vehicles
with MOExtended tyres are not equipped
with a TIREFIT kit at thefa ctor y.Equip the
ve hicle with a TIREFIT kit af terre placing with
tyres that do not feature run-flat characteris‐
tics, e.g. winter tyres.
% You can permanently limit the maximum
ve hicle speed for driving with winter tyres
(/ page 203).
Fo r more information on wheels and tyres, con‐
ta ct a qualified specialist workshop.
Be sure toalso obse rveth efo llowing fur ther
re lated subjects:
R Notes on tyre pressure (/ page418) R
Tyre pressure table (/ page419)
R Notes on the emer gency spa rewheel
(/ page 431) Note
s on inter changing wheels &
WARNING Risk of injury thro ugh dif fer‐
ent wheel sizes
Inter changing the front and rear wheels can
se verely impair the driving characteristics.
The disk brakes or wheel suspension compo‐
nents may also be damaged. #
Onlyinter change the front and rear
wheels if the wheels and tyres ha vethe
same dimensions. Inter
changing the front and rear wheels if the
wheels or tyres ha vediffere nt dimensions can
re nder thege neral operating pe rmit in valid.
The wear pat tern s on the front and rear wheels
dif fer:
R front wheels wear more on the tyre shoulder R
rear wheels wear more in the cent reofthe
tyre
Do not drive wi thtyres that ha vetoo little tread
dep th. This significantly reduces traction on wet
ro ads (aquaplaning).
On vehicles with the same front and rear wheel
size, you can inter change the wheels every
5000 to10,000 km, depending on thewe ar.
Ensure the direction of rotation is maintained for
th e wheels.
Obser vethe instructions and saf ety no tes on
"Changing a wheel" when doing so
(/ page 425). Note
s onstoring wheels When
storing wheels, obser vethefo llowing
no tes:
R Afterre moving wheels, store them in a cool,
dry and preferably dark place.
R Protect the tyres from conta ct withoil,
grease or fuel. 424
Wheels and tyres
Page 428 of 565

Overview of
the ty re-change tool kit *
NO
TEMercedes-AMG vehicles #
Obser vethe no tes in the Supplement.
Yo u could otherwise failto recognise
dangers. *
NO
TEPlug-in hybrid #
Obser vethe no tes in the Supplement.
Yo u could otherwise failto recognise
dangers. Apa
rtfrom some countr y-specific variants, vehi‐
cles are not equipped with a tyre-change tool kit.
Fo r more information on which tyre-changing
to ols are required and appr oved for per form ing a
wheel change on your vehicle, consult a qualified
specialist workshop.
Yo ure qu ire thefo llowing tools, forex ample, to
ch ange a wheel:
R Jack
R Chock
R Wheel wrench R
Cent ring pin
% The jack weighs appr oximately 2.1 kg.
The maximum load capacity of the jack can
be found on thest icke r af fixe dto the jac k.
The jack is maintenance-free. If there is a
malfunction, please conta ct aqualified spe‐
cialist workshop.
The tyre-change tool kit is located under the load
compartment floor.
% Depending on the model, the tyre change
to ol kit may be located in other positions
under the load compartment floor. 1
Wheel wrench
2 Folding chock
3 Jack Preparing
theve hicle for a wheel change Re
quirements:
R The requ ired tyre-change tool kit is available.
If yo ur vehicle is not equipped with the tyre-
ch ange tool kit, consult a qualified specialist
wo rkshop tofind out about suitable tools.
R The vehicle is not on a slope.
R The vehicle is on solid, non-slippery and le vel
ground. Whee
ls and tyres 425
Page 429 of 565
#
App lythe electric parking brake manually. #
Movethe front wheels tothest ra ight-ahead
position. #
Vehicles with automatic transmission:
shift into position j.#
Vehicles with le vel control sy stem: setthe
normal vehicle le vel (/ page 226). #
Swit choff the engine. #
Make sure that the engine cann otbe star ted. #
Place choc ks orother suitable items under
th e front and rear of the wheel that is diago‐
nally opposite the wheel you wish tochange. #
If necessar y,remo vethe wheel trim/hub
caps (/ page 426). #
Raise theve hicle (/ page 427). Re
moving and fitting the wheel trim/hub
caps Re
quirements:
R The vehicle is prepared for a wheel change
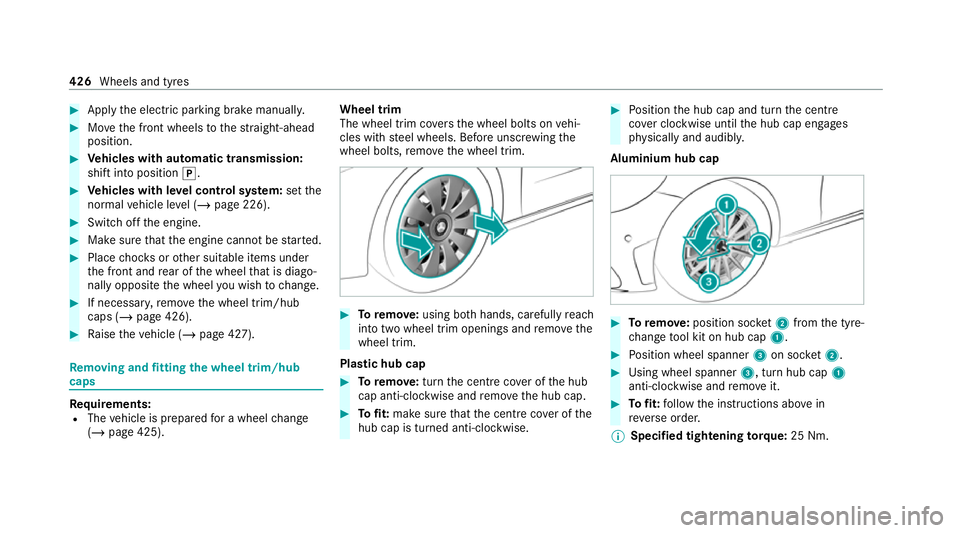
(/ page 425). Wheel trim
The wheel trim co
vers the wheel bolts on vehi‐
cles with steel wheels. Before unscr ewing the
wheel bolts, remo vethe wheel trim. #
Toremo ve:using bo thhands, carefully reach
into two wheel trim openings and remo vethe
wheel trim.
Plastic hub cap #
Toremo ve:turn the cent recover of the hub
cap anti-clockwise and remo vethe hub cap. #
Tofit: make sure that the cent recover of the
hub cap is turned anti-clockwise. #
Position the hub cap and turn the cent re
co ver clockwise until the hub cap engages
ph ysically and audibly.
Aluminium hub cap #
Toremo ve:position soc ket2 from the tyre-
ch ange tool kit on hub cap 1. #
Position wheel spanner 3on soc ket2. #
Using wheel spanner 3, turn hub cap1
anti-clo ckwise and remo veit. #
Tofit: follow the instructions abo vein
re ve rse order.
% Specified tightening torq ue: 25 Nm. 426
Wheels and tyres
Page 430 of 565
Ra
ising theve hicle when changing a wheel Re
quirements:
R There are no persons in theve hicle.
R The vehicle has been prepared for a wheel
ch ange (/ page 425).
R The wheel trims and hub caps ha vebeen
re mo ved (/ page 426).
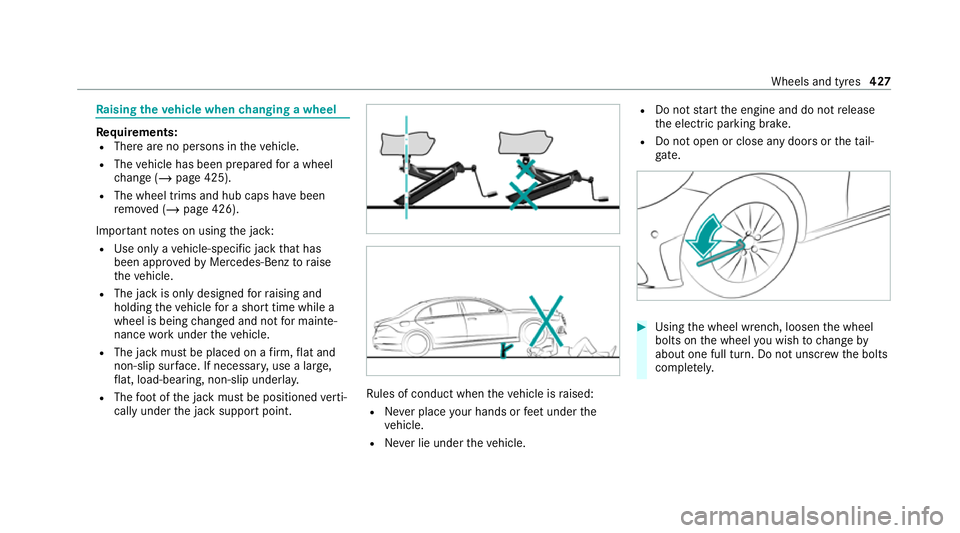
Impor tant no tes on using the jack:
R Use only a vehicle-specific jack that has
been appr oved byMercedes-Benz toraise
th eve hicle.
R The jack is only designed forra ising and
holding theve hicle for a short time while a
wheel is being changed and not for mainte‐
nance workunder theve hicle.
R The jack must be placed on a firm ,fl at and
non-slip sur face. If necessar y,use a lar ge,
fl at, load-bearing, non-slip unde rlay.
R The foot ofthe jack must be positioned verti‐
cally under the jack support point. Ru
les of conduct when theve hicle is raised:
R Never place your hands or feet under the
ve hicle.
R Never lie under theve hicle. R
Do not start the engine and do not release
th e electric parking brake.
R Do not open or close any doors or theta il‐
gate. #
Using the wheel wrench, loosen the wheel
bolts on the wheel you wish tochange by
about one full turn. Do not unscr ewthe bolts
comple tely. Wheels and tyres
427
Page 433 of 565

#
Obser vethe information on thech oice of
tyres (/ page 421).
Fo r tyres with a specified direction of rotation,
an ar row on the side wall of the tyre indicates
th e cor rect dire ction of rotation. Obse rvethe
direction of rotation when fitting. #
Slide the wheel tobe mounted onto the cen‐
tring pin and push it on. &
WARNING Risk of injury from tightening
wheel bolts and nuts
If yo u tighten the wheel bolts or wheel nuts
when theve hicle is raised, the jack could tip. #
Only tighten wheel bolts or wheel nuts
when theve hicle is on the ground. #
Be sure toobser vethe instructions and
saf ety no tes on "Changing a wheel"
(/ page 421). #
For saf etyre asons, only use wheel bolts
which ha vebeen appr ovedby Mercedes-
Benz and forth e wheel in question. #
Tighten the wheel bolts evenly in a diagonal
pattern in the order indicated until they are
fi nger-tight. #
Unscr ew and remo vethe cent ring pin. #
Tighten the last wheel bolt until it is finger-
tight. #
Lowe rth eve hicle (/ page 430). Lo
weri ngtheve hicle af ter a wheel change Re
quirements:
R The new wheel has been fitted
(/ page 429). #
Tolowe r the vehicle: turnthe crank of the
jack anti-clo ckwise until theve hicle is once
again standing firm lyon the ground. #
Tighten the wheel bolts evenly in a diagonal
pattern in the order indicated 1to5 with
an initial maximum forc e of 80 Nm. #
Tighten the wheel bolts evenly in a diagonal
pattern in the order indicated 1to5 to
th e specified tightening torque of 130 Nm. &
WARNING Risk of accident due toincor‐
re ct tigh tening torque
The wheels could come loose if the wheel
bolts or wheel nuts are not tightened tothe
prescribed torque. 430
Wheels and tyres
Page 561 of 565
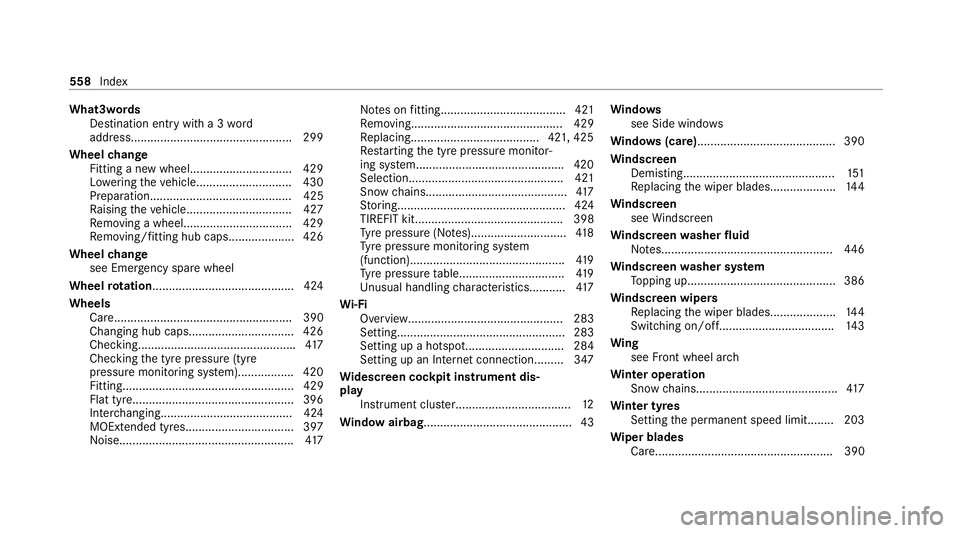
What3words
Destination entry with a 3 word
address................................................ .299
Wheel change
Fitting a new wheel............................... 429
Lo we ring theve hicle.............................4 30
Prepa ration........................................... 425
Ra ising theve hicle................................4 27
Re moving a wheel. ................................ 429
Re moving/fitting hub caps.................... 426
Wheel change
see Emer gency spa rewheel
Wheel rotation........................................... 424
Wheels Care...................................................... 390
Changing hub caps................................ 426
Checking............................................... .417
Checking the tyre pressure (tyre
pressure monitoring sy stem)................. 420
Fitting.................................................... 429
Flat tyre.................................................3 96
Inter changing........................................ 424
MOExtended tyres................................ .397
No ise.................................................... .417 No
tes on fitting...................................... 421
Re moving.............................................. 429
Re placing.......................................4 21, 425
Re starting the tyre pressure monitor‐
ing sy stem.............................................4 20
Selection............................................... 421
Snow chains.......................................... .417
St oring................................................... 424
TIREFIT kit............................................. 398
Ty re pressure (N otes)............................. 41 8
Ty re pressure monitoring sy stem
(function)............................................... 419
Ty re pressure table................................ 419
Un usual handling characteristic s...........417
Wi -Fi
Overview............................................... 283
Setting................................................... 283
Setting up a hotspot.............................. 284
Setting up an Internet connection........ .347
Wi descreen cock pit instrument dis‐
play
Instrument clust er................................... 12
Wi ndow airbag............................................. 43 Wi
ndo ws
see Side windo ws
Wi ndo ws(care)......................................... .390
Wi ndscreen
Demisting.............................................. 151
Re placing the wiper blades.................... 14 4
Wi ndscreen
see Windsc reen
Wi ndscreen washer fluid
No tes....................................................4 46
Wi ndscreen washer sy stem
To pping up............................................. 386
Wi ndscreen wipers
Re placing the wiper blades.................... 14 4
Switching on/of f................................... 14 3
Wi ng
see Front wheel ar ch
Wi nter operation
Snow chains.......................................... .417
Wi nter tyres
Setting the permanent speed limit........ 203
Wi per blades
Ca re...................................................... 390 558
Index