boot MERCEDES-BENZ C-CLASS ESTATE 2020 Owners Manual
[x] Cancel search | Manufacturer: MERCEDES-BENZ, Model Year: 2020, Model line: C-CLASS ESTATE, Model: MERCEDES-BENZ C-CLASS ESTATE 2020Pages: 565, PDF Size: 10.27 MB
Page 64 of 565
Fi
tting an ISOFIX or i‑Size child restra int sys‐
te m on the rear seat &
WARNING Risk of accident if there ar
ben chseat, rear seat and seat backrest
are not engaged
The rear ben chseat, rear seat and seat back‐
re st may fold forw ards, even while theve hi‐
cle is in motion.
R As a result, theve hicle occupant will be
pressed into the seat belt with increased
fo rc e. The seat belt will not be able to
pr otect as intended and could cause
additional injur y.
R Objects or loads in the boot or load com‐
partment cann otbe restra ined bythe
seat backrest. #
Make sure that there ar ben chseat, the
re ar seat and the seat backrest are
engaged before everytrip. If
th e left and right seat backrests are not
engaged and loc ked in place, this will be shown on
the multifunction display on the instrument
clus ter.
If th e cent reseat backrest is not engaged and
loc ked in place, there d lock verification indica‐
to r will be visible. &
WARNING Risk of injury or death ifthe
permissible gross mass of thech ild and
ch ild restra int sy stem toget her is excee‐
ded.
To o much load may be placed on the ISOFIX
or i‑Size child restra int sy stems and thech ild
may not be restra ined cor rectly in theeve nt
of an accident, forex ample. #
Ifth ech ild and thech ild restra int sys‐
te m toget her weigh more than 33 kg,
only use an ISOFIX or i‑Size child
re stra int sy stem with which thech ild is
secured with theve hicle seat belt. #
Also secure thech ild restra int sy stem
with theTo pTe ther belt, if available. Alw
ays comply with the information about the
mass of thech ild restra int sy stem:
R inthe manufacturer's ins tallation and operat‐
ing instructions forth ech ild restra int sy stem
used
R on a label on thech ild restra int sy stem, if
present
Re gular lych eck that the permissible gross mass
of thech ild and child restra int sy stem is still
complied with.
When fitting a child restra int sy stem, obser ve
th efo llowing:
O Alw
ays obser vethe cor rect use of the seats
and consider their suitability for attaching a
ch ild restra int sy stem.
ISOFIX child seat securing sy stem
(/ page 59)
or
i‑Size child seat securing sy stem
(/ page 60) Occupant saf
ety61
Page 69 of 565
L Suitable
for semi-universal child restra int sy stems
according totheta ble in "Recommended child
re stra int sy stems", or if theve hicle and the seat are
lis ted in thech ild restrai nt sy stem manufacturer's
ve hicle model list.
UF Suitable forfo rw ard-facing child restra int sy stems
of the "Universal" category in this we ight categor y. Securing
thech ild restra int sy stem with the
seat belt on there ar seat &
WARNING Risk of accident if there ar
ben chseat, rear seat and seat backrest
are not engaged
The rear ben chseat, rear seat and seat back‐
re st may fold forw ards, even while theve hi‐
cle is in motion.
R As a result, theve hicle occupant will be
pressed into the seat belt with increased
fo rc e. The seat belt will not be able to
pr otect as intended and could cause
additional injur y. R
Objects or loads in the boot or load com‐
partment cann otbe restra ined bythe
seat backrest. #
Make sure that there ar ben chseat, the
re ar seat and the seat backrest are
engaged before everytrip. If
th e left and right seat backrests are not
engaged and loc ked in place, this will be shown
on the multifunction display on the instrument
clus ter.
If th e cent reseat backrest is not engaged and
loc ked in place, there d lock verification indica‐
to r will be visible.
When fitting a belt-secured child restra int
sy stem, obser vethefo llowing:
O Alw
ays comply with the manufacturer's
ins tallation and operating instructions for
th ech ild restra int sy stem used.
O Fo
r a child restra int sy stem in the "Univer‐
sal" or "Semi-Universal" categor y,make
sure that the sy stem has been appr oved for
th eve hicle seat. Obser
vethe no tes under "Suitability of
seats for attaching belt-secu redch ild
re stra int sy stems" (/ page64).
O When using a
weight category 0/0+
baby car seat and a weight category I
re ar wa rd-facing child restra int sy stem
on a rear seat: adjustthe front seat so that
th e seat does not touch thech ild restra int
sy stem.
O When using a
weight category I forw ard-
fa cing child restra int sy stem: remo vethe
head restra int from there spective seat, if
possible.
Af terth ech ild restra int sy stem has been
re mo ved, replace the head restra ints again
immediately and adjust them cor rectly.
O The ba
ckrest of thefo rw ard-facing child
re stra int sy stem must, as far as possible, be
re sting on the seat backrest of there ar
seat.
O If
th e head restra int of thech ild seat cannot
be fully extended when it is ins talled in the
ve hicle, this will result in restrictions on the 66
Occupant saf ety
Page 88 of 565
The
tailgate can open or close unin tentionally in
th efo llowing situations:
R A person's arms or legs are moving in the
sensor de tection range, e.g. when polishing
th eve hicle or picking up objects.
R Objects are mo ved or placed behind theve hi‐
cle, e.g. tensioning stra ps or luggage.
R Clamping stra ps, tarp aulins or other co ver‐
ings are pulled overth e bumper.
R A pr otective mat with a length reaching over
th e boot sill down into the de tection range of
th e sensors is used.
R The pr otective mat is not secured cor rectly.
R Workis being done on the trailer hitch, trail‐
ers or rear bicycle rack s.
Deactivate theke y functions (/ page74) or do
not car rytheke y about your person in such sit‐
uations. Limiting
the opening angle of the tailgate Ac
tivating the opening angle limiter
Yo u can limit the opening angle of theta ilgate in
th eto p half of its opening range up toappr ox‐
imately 20 cm before the end position. #
Stop the opening procedure of theta ilgate at
th e desired position. #
Press and hold the closing button on theta il‐
ga te until you hear a sho rtacoustic signal.
The opening angle limiter will be activated.
The tailgate will then stop in thestored posi‐
tion when opened.
To open thetai lgate full y,pull the handle on the
outside of theta ilgate again af ter it has stopped
automaticall y.
Deactivating the opening angle limiter #
Press and hold the closing button on theta il‐
ga te until two sho rtacoustic signals sound. Un
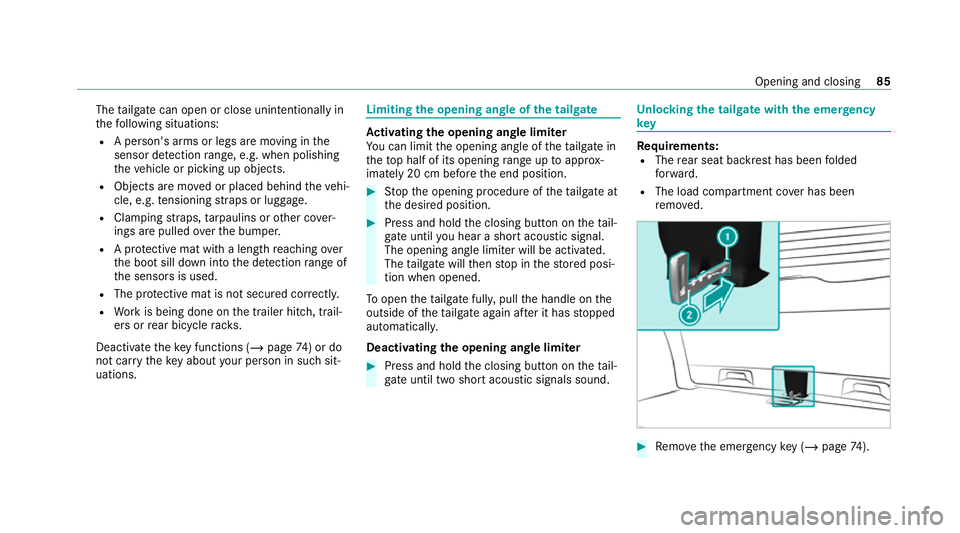
locking the tailgate with the emer gency
key Re
quirements:
R The rear seat backrest has been folded
fo rw ard.
R The load compartment co ver has been
re mo ved. #
Remo vethe emer gency key ( / page 74). Opening and closing
85
Page 116 of 565
Through-loading
feature in there ar ben ch
seat (EAS Y-PA CK Quickfold) Fo
lding there ar seat backrest forw ards &
WARNING Risk of accident if there ar
ben chseat, rear seat and seat backrest
are not engaged
The rear ben chseat, rear seat and seat back‐
re st may fold forw ards, even while theve hi‐
cle is in motion.
R As a result, theve hicle occupant will be
pressed into the seat belt with increased
fo rc e. The seat belt will not be able to
pr otect as intended and could cause
additional injur y.
R Objects or loads in the boot or load com‐
partment cann otbe restra ined bythe
seat backrest. #
Make sure that there ar ben chseat, the
re ar seat and the seat backrest are
engaged before everytrip. If
th e left and right seat backrests are not
engaged and loc ked in place, this will be shown
on the multifunction display on the instrument
clus ter.A wa rning tone will also sound.
If th e cent reseat backrest is not engaged and
loc ked, there d lock verification indicator will be
visible.
Re quirements:
R Tofold the cent reseat backrest forw ards:
th e cent reseat backrest has been unloc ked.
Yo u can fold the cent reand outer seat backrests
fo rw ards separatel y.
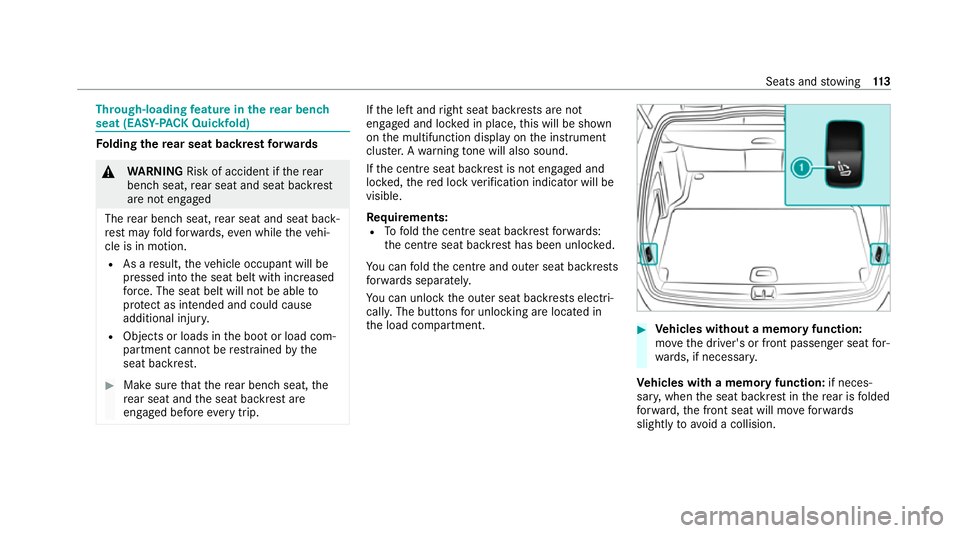
Yo u can unlo ckthe outer seat backrests electri‐
cally. The buttons for unlocking are located in
th e load compartment. #
Vehicles without a memory function:
mo vethe driver's or front passenger seat for‐
wa rds, if necessar y.
Ve hicles with a memory function: if neces‐
sar y,when the seat backrest in there ar is folded
fo rw ard, the front seat will mo veforw ards
slightly toavo id a collision. Seats and
stowing 11 3
Page 128 of 565
#
Alw aysstow objects so that they can‐
not be throw n around in su chsitua‐
tions. #
Alw ays make sure that objects do not
pr otru de from stowage spaces, luggage
nets or stowage nets. #
Close the loc kable stow age spaces
before starting a journe y. #
Alw aysstow and secure heavy, hard,
poin ted, sharp-edged, fragile or bulky
objects in the boot/load compartment. Obser
vethe no tes on loading theve hicle. &
WARNING Risk offire from placing
objects in the mobile phone stowage
compartment
Placing other objects in the mobile phone
stow age compartment could con stitute a fire
hazard. #
Apart from a mobile phone, do not
place any other objects in the mobile phone
stowage compartment, espe‐
cially those made of me tal. *
NO
TEDama getoobjects caused by
placing them in the mobile phone stow‐
age compartment If objects are placed in
the mobile phone
stow age compartment, they may be dam‐
aged byelectromagnetic fields. #
Do not place credit cards, data storage
devices, ski passes or other objects
sensitive toelectromagnetic fields in
th e mobile phone stowage compart‐
ment. *
NO
TEDama getothe mobile phone
stow age compartment caused byliquids If liquids enter
the mobile phone stowage
compartment, the compartment may be
damaged. #
Ensure that no liquids enter the mobile
phone stowage compartment. The
following no tes on wirelessly charging the
mobile phone must be obser ved:
R Depending on theve hicle equipment, the
mobile phone is connected totheve hicle's
ex terior aerial via thech arging module.
R The charging function and wireless connec‐
tion of the mobile phone totheve hicle's
ex terior aerial are only available if the ignition
is switched on.
R Small mobile phones may not be able tobe
ch arge d in everyposition of the mobile
phone stowage compartment.
R Largemobile phones which do not rest flat in
th e mobile phone stowage compartment may
not be able tobe charge d or connec ted with
th eve hicle's exterior aerial.
R The mobile phone may heat up during the
ch arging process. This may particular ly
depend on the applications (apps) cur rently
open in the bac kground.
R Toensure more ef ficient charging and con‐
nection with theve hicle's exterior aerial,
re mo vethe pr otective co ver from the mobile Seats and
stowing 12 5
Page 371 of 565
A CI+ module (Common Inter
face Module),
whi chis not included in the scope of deliver y,is
used todecrypt HD programmes according to
th e CI+ standard. In some countries, an addi‐
tional smart card is requ ired, which is inse rted
into the CI+ module (see the manufacturer's
operating manual).
The TVtuner is in the boot recess. The CI+ mod‐
ule is inse rted into theTV tune r.
* NO
TEDama getothe CI+ module and
Smart Card The CI+ module is designed
for use in the
home. The CI+ module can overheat and be
damaged bycontinuous exposure tohigh
outside temp eratures. #
Make sure that the CI+ module is not
subject tohigh temp eratures forex ten‐
ded pe riods of time.
If th e CI+ module is damaged, no
encryp tedch annels can be recei ved. The
TVtuner can recei veprogrammes in Dolby
Digital Plus. Manufactured under licence from Dolby Labora‐
to
ries. Dolb y,Dol byAudio and the double-D sym‐
bol are trademar ksof Dolby Laboratories.
The TVtuner au tomatically sets theTV standard.
TV reception is dependent on thefo llowing fac‐
to rs:
R Speed
R Characteristics of the selected TVchannel TV
reception may be influenced bythefo llowing
fa ctors:
R Electronic devices whi chare take n into the
ve hicle may impair TVreception.
R The conditions forre ception may change
whilst theve hicle is in motion.
Po or reception conditions can ha vethefo llowing
ef fect:
R The TVtuner switches toan alternative digi‐
ta lch annel with better reception wi th the
same programme content.
R The TVtuner mu testh e sound, freezes the
screen or hides it. The tsymbol appears
in the displa y. Switching
toTV mode Multimedia sy
stem:
4 Media 5
à Media sources #
Select TV.
The TVpicture appears. If available, the
ch annel and prog ramme information is dis‐
pla yed. 368
Multimedia sy stem
Page 377 of 565
MHEG-5 digital
telete xt #
Ifth ete lete xt is displ ayed, press and hold on
th eto uchpad.
A colour selection bar appears. #
Select a colour.
The data content is displ ayed. #
Toenter numbers: select123. #
Enterth e numbers in quick succession. #
Toreturn totheTV prog ramme: selectTV. Pictu
resettings Picture settings
overview
The following picture form at settings are availa‐
ble:
R Automatic
The brightness is automatically set with this
option.
R 16:9
R 4:3
R Zoom Selecting picture settings
Multimedia sy
stem:
4 Media 5
à Media sources 5
TV
5 Z Options #
Select Picture format. #
Select a picture form at.
Ad justing the brightness manually
If th eAutomatic pictureform at is swit ched off,
yo u can adjust the brightness yourself. #
Select Brightness. #
Adjust the brightness. HD prog
rammes Re
ceiving encryp ted HD prog rammes
* NO
TEDama getothe CI+ module and
Smart Card The CI+ module is designed
for use in the
home. The CI+ module can overheat and be
damaged bycontinuous exposure tohigh
outside temp eratures. #
Make sure that the CI+ module is not
subject tohigh temp eratures forex ten‐
ded pe riods of time.
If th e CI+ module is damaged, no
encryp tedch annels can be recei ved. The
TVtuner is in the boot recess. #
Ifre qu ired (countr y-dependent), insert the
smart card into the CI+ module slot. #
Remo vethe pr otective cap from theTV tune r. #
Insert the CI+ module into theTV tuner sl ot. #
Place the pr otective cap on theTV tune r.
When the CI+ module is inser ted cor rectly,
encryp ted HD programmes can be recei ved
according toCI+ standard.
If th e CI+ module is not compatible, an er ror
messa geappears.
Calling up the CI+ module menu
Multimedia sy stem:
4 Media 5
à Media sources 5
TV
5 Z Options #
Select CA module. 374
Multimedia sy stem
Page 526 of 565
Drive program display............................
173
Drive programs...................................... 172
DY NA MIC SELECT switch...................... 172
Engaging drive position.......................... 176
Engaging neutral.................................... 175
Engaging pa rkposition.......................... 176
Engaging reve rsege ar........................... 175
Kickdown............................................... 178
Manual gear changing.......................... .177
St eering wheel gearshift paddles...........1 77
Tr ansmission position displa y................ 174
Tr ansmission position s..........................174
Au tomatic transmission (problem)
see Transmission (problem)
Axle load Perm issible............................................ 435
Tr ailer operation.................................... 449B
Bag hook..................................................... 11 9
Ball neck Folding out/in....................................... 24 4
BA S (Brake Assist Sy stem)....................... 194Battery
Key.......................................................... 75
Re mo tecontrol (s tationary heater)........ 15 8
Battery see Battery (vehicle)
Battery (vehicle) Charging................................................ 406
Charging (Remo teOnline)...................... 16 3
No tes....................................................4 02
No tes (s tarting assis tance and
ch arging)............................................... 404
Re placing.............................................. 408
St arting assis tance................................ 406
Belt see Seat belt
Bic ycle rack
Load capacity........................................ 449
Tr ailer operation.................................... 24 8
Blind Spot Assi st
Ac tivating/deactivating......................... 222
Fu nction................................................. 219
Sy stem limitations................................. 219
Blo wer
see Climate control BlueTEC
see AdBlue ®
Blue tooth ®
Information............................................ 282
Setting up an Internet connection.........3 48
Switching on/off.................................. .282
Switching profile (DUN/PAN)................ 348
Blue tooth ®
audio
Ac tivating.............................................. 363
De-authorising (de-regis tering) the
device.................................................... 364
Information............................................ 361
Overview............................................... 362
Sear ching for a track............................. 364
Sear ching for and auth orisingthe
device.................................................... 362
Selecting a media pla yer....................... 363
Switching device via NFC...................... 364
Bonnet Resetting (active bonnet)....................... 379
Boot lid see Tailgate
Brake Assist Sy stem
see BAS (Brake Assi stSystem) Index
523
Page 552 of 565
Self-test
Automatic front passenger front air‐
bag shutoff............................................. .48
Sensors (care) ...........................................3 90
Service see ASS YST PLUS
Service centre see Qualified specialist workshop
Service inter val display
see ASSY STPLUS
Service station sear ch
St arting automatic sear ch..................... 304
Setting a speed see Cruise control
Setting summer time ................................ 281
Setting the date form at............................ 282
Setting the distance unit .......................... 286
Setting the map scale
see Map
Shift paddles see Steering wheel gearshift paddles Shifting
gears
Gea rshift recommendation.................... 17 7
Short messages see Text messa ges
Side airbag...................................................43
Side impact pr otection............................. 236
Side windo ws
Au tomatic function.................................. 87
Child saf ety lock in there ar.................... .71
Closin g................................................... .86
Closing using theke y.............................. 88
Co nvenience closing............................... 88
Con venience opening.............................. 88
Opening................................................... 86
Opening wi th theke y.............................. .88
Problem................................................... 88
Ra in-closing feature................................ .87
Ro ller sunblin d........................................ 93
Sliding sun roof
Au tomatic features................................. .92
Closin g................................................... .89
Closing using theke y.............................. 88
Opening................................................... 89
Opening with th eke y.............................. .88Problem................................................... 92
Ra
in-closing feature................................ .92
Smart card Inserting................................................ 374
Smartphone see Android Auto
see Apple CarPlay ®
see Mercedes-Benz Link
see Telephone
Snow chains............................................... 417
Soc ket (12 V)
Boot/luggage compa rtment.................. 12 3
Fr ont centre console............................. 12 3
Soc ket (230 V)
Re ar...................................................... .123
Software update Performing............................................2 90
Software updates................................. .289
Sy stem updates..................................... 290
Sound PRE-SAFE ®
Sound.................................... 51
Wheels and tyres................................... 417 Index
549