display MERCEDES-BENZ C-CLASS SALOON 2012 User Guide
[x] Cancel search | Manufacturer: MERCEDES-BENZ, Model Year: 2012, Model line: C-CLASS SALOON, Model: MERCEDES-BENZ C-CLASS SALOON 2012Pages: 557, PDF Size: 10.15 MB
Page 46 of 557

Re
leasing seat belts #
Press there lease button in the seat belt
buckle and guide the seat belt back with the
seat belt tongue. Seat belt
warning function for the driver and
front passen ger The
ü seat belt warning lamp in the instru‐
ment display is a reminder that all vehicle occu‐
pants must weartheir seat belts cor rectly.
In addition, a warning tone may sound.
As soon as the driver and front passenger fasten
th eir seat belts, the seat belt warning goes out. Fu
nction of there ar seat belt status display The
rear seat belt status display is on lyavailable
fo r cer tain countries. When
the ignition is switched on, there ar seat
belt status display informs youfo r a cer tain
amount of time which rear seat belt is not fas‐
te ned.
Yo u can immediately dismiss there ar seat belt
st atus display using the back button on the left-
hand side of thesteering wheel (/ page246).
If a vehicle occupant unfas tens a seat belt in the
re ar while theve hicle is motion, there ar seat
belt status display appears again.
In addition, a warning tone may sound. In this
case, there ar seat belt status display cannot be
hidden using the back button on the left-hand
side of thesteering wheel. Airbags
Overview of airbags
1
Knee airbag
2 Driver's airbag
3 Front passenger airbag
4 Window airbag
5 Side airbag
The ins tallation location of an airbag is identified
by the AIRB AGsymbol.
When enabled, an airbag can pr ovide additional
pr otection forth ere spective vehicle occupant. Occupant saf
ety43
Internal use only
Page 51 of 557
&
WARNING Risk of injury or death dueto
a disabled front passenger airbag
The front passenger airbag is disabled when
th ePA SSENGER AIR BAG OFF indicator lamp
is lit.
A person in the front passenger seat could
th en, forex ample, come into con tact with
th eve hicle interior, especially if the person is
sitting too close tothe cockpit.
If th e front passenger seat is occupied,
alw ays ensure that:
R the classification of the person in the
front passenger seat is cor rect and the
front passenger airbag is enabled or disa‐
bled in accordance with the person in the
front passenger seat.
R the front passenger seat has been mo ved
as far back as possible.
R the person is seated cor rectly. #
Both before and during the journe y,
ensure that thest atus of the front
passenger airbag is cor rect. If
th e front passenger seat is occupied, the clas‐
sification of the person or child restra int sy stem
on the front passenger seat take s place af terthe
front passenger airbag shutoff self-test. The
PA SSENGER AIR BAG indicator lamps display the
st atus of the front passenger airbag.
Alw ays obser vethe no tes on the function of the
PA SSENGER AIR BAG indicator lamps
(/ page 48). Fu
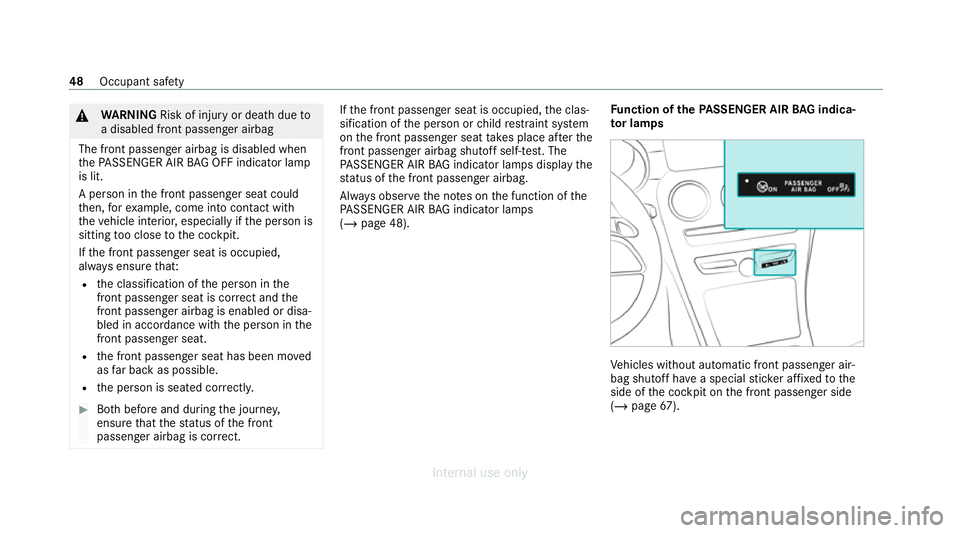
nction of thePA SSENGER AIR BAG indica‐
to r lamps Ve
hicles without automatic front passenger air‐
bag shutoff ha vea special sticke r af fixe dto the
side of the cockpit on the front passenger side
(/ page 67). 48
Occupant safe ty
Internal use only
Page 52 of 557
Self-test of automatic front passenger airbag
shutoff
When
the ignition is switched on, a self-test is
per form ed during which the two PASSENGER
AIR BAG ON and OFF indicator lamps light up
simul taneously.
The status of the front passenger airbag is dis‐
pla yed via thePA SSENGER AIR BAG indicator
lamps af terth e self-tes t:
R ON is lit: the front passenger airbag may
deploy during an accident.
The indicator lamp goes out af ter appro x‐
ima tely 60 seconds.
R ON and OF F are not lit: the front passenger
airbag may deploy during an accident.
R OFF is lit: the front passenger airbag is disa‐
bled. It will then not be deplo yed in theev ent
of an accident.
If th ePA SSENGER AIR BAG ON indicator lamp is
off, on lythePA SSENGER AIR BAG OFF indicator
lamp sho ws thest atus of the front passenger
airbag. The PASSENGER AIR BAG OFF indicator
lamp may be lit continuously or be off. If
th ePA SSENGER AIR BAG OFF indicator lamp
and the6 restra int sy stem warning lamp
light up simultaneousl y,the front passenger seat
may not be used. Also in this case, do not fit a
ch ild restra int sy stem tothe front passenger
seat. Ha vethe automatic front passenger airbag
shutoff checked and repaired immediately at a
qu alified specialist workshop.
St atus display
If th e front passenger seat is occupied, ensure,
bo th before and during the journe y,that thest a‐
tus of the front passenger airbag is cor rect for
th e cur rent situation.
Af terfitting a rear wa rd-facing child restra int
sy stem tothe front passenger seat:
PA SSENGER AIR BAG OFF must be lit continu‐
ousl y. &
WARNING Risk of injury or death when
using a rear wa rd-facing child restra int
sy stem while the front passenger airbag
is enabled
If yo u secure a child in a rear wa rd-facing
ch ild restra int sy stem on the front passenger
seat and thePA SSENGER AIR BAG OFF indi‐
cator lamp is off, the front passenger airbag
can deploy in theev ent of an accident.
The child could be stru ck bythe airbag.
Alw ays ensure that the front passenger air‐
bag is disabled. The PASSENGER AIR BAG
OFF indicator lamp must be lit.
NEVER use a rear wa rd-facing child restra int
sy stem on a seat with an ENABLED FRONT
AIRB AG. This can result in the DEAT H of or
SERIOUS INJU RYtotheCH ILD. When
fitting a child restra int sy stem tothe front
passenger seat, obser vetheve hicle-specific
information (/ page 68).
Depending on thech ild restra int sy stem and the
st ature of thech ild, thePA SSENGER AIR BAG
OFF indicator lamp may be off. In this case, do Occupant saf
ety49
Internal use only
Page 64 of 557
Fi
tting an ISOFIX or i‑Size child restra int sys‐
te m on the rear seat &
WARNING Risk of accident if there ar
ben chseat, rear seat and seat backrest
are not engaged
The rear ben chseat, rear seat and seat back‐
re st may fold forw ards, even while theve hi‐
cle is in motion.
R As a result, theve hicle occupant will be
pressed into the seat belt with increased
fo rc e. The seat belt will not be able to
pr otect as intended and could cause
additional injur y.
R Objects or loads in the boot or load com‐
partment cann otbe restra ined bythe
seat backrest. #
Make sure that there ar ben chseat, the
re ar seat and the seat backrest are
engaged before everytrip. If
th e left and right seat backrests are not
engaged and loc ked in place, this will be shown on
the multifunction display on the instrument
clus ter.
If th e cent reseat backrest is not engaged and
loc ked in place, there d lock verification indica‐
to r will be visible. &
WARNING Risk of injury or death ifthe
permissible gross mass of thech ild and
ch ild restra int sy stem toget her is excee‐
ded.
To o much load may be placed on the ISOFIX
or i‑Size child restra int sy stems and thech ild
may not be restra ined cor rectly in theeve nt
of an accident, forex ample. #
Ifth ech ild and thech ild restra int sys‐
te m toget her weigh more than 33 kg,
only use an ISOFIX or i‑Size child
re stra int sy stem with which thech ild is
secured with theve hicle seat belt. #
Also secure thech ild restra int sy stem
with theTo pTe ther belt, if available. Alw
ays comply with the information about the
mass of thech ild restra int sy stem:
R inthe manufacturer's ins tallation and operat‐
ing instructions forth ech ild restra int sy stem
used
R on a label on thech ild restra int sy stem, if
present
Re gular lych eck that the permissible gross mass
of thech ild and child restra int sy stem is still
complied with.
When fitting a child restra int sy stem, obser ve
th efo llowing:
O Alw
ays obser vethe cor rect use of the seats
and consider their suitability for attaching a
ch ild restra int sy stem.
ISOFIX child seat securing sy stem
(/ page 59)
or
i‑Size child seat securing sy stem
(/ page 60) Occupant saf
ety61
Internal use only
Page 66 of 557
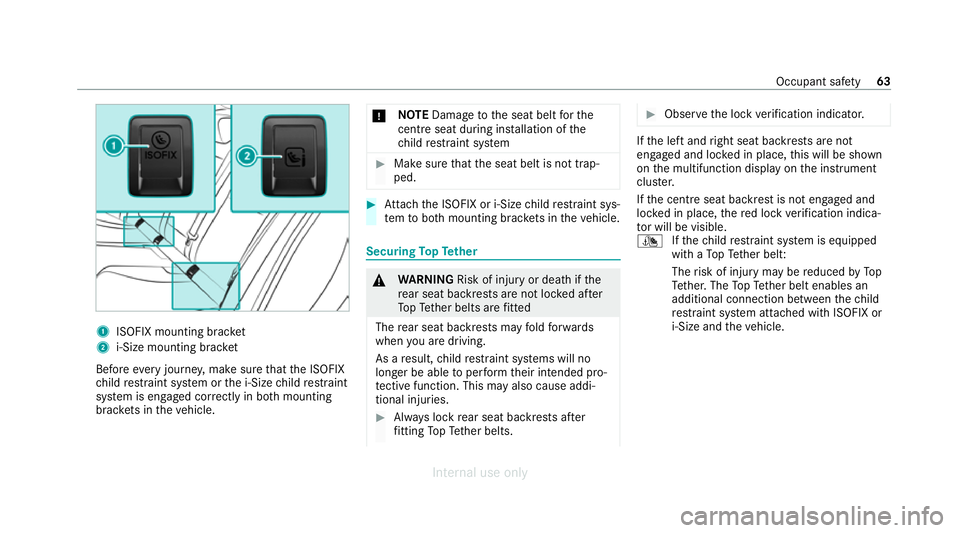
1
ISOFIX mounting brac ket
2 i‑Size mounting brac ket
Before every journe y,make sure that the ISOFIX
ch ild restra int sy stem or the i‑Size child restra int
sy stem is engaged cor rectly in bo thmounting
brac kets in theve hicle. *
NO
TEDama getothe seat belt forthe
centre seat du ring ins tallation of the
ch ild restra int sy stem #
Make sure that the seat belt is not trap‐
ped. #
Attach the ISOFIX or i‑Size child restra int sys‐
te m to both mounting brac kets in theve hicle. Securing
TopTe ther &
WARNING Risk of injury or death ifthe
re ar seat backrests are not loc ked af ter
To pTe ther belts are fitted
The rear seat backrests may fold forw ards
when you are driving.
As a result, child restra int sy stems will no
longer be able toper form their intended pro‐
te ctive function. This may also cause addi‐
tional inju ries. #
Alw ays lock rear seat backrests af ter
fi tting TopTe ther belts. #
Obser vethe lock verification indicator. If
th e left and right seat backrests are not
engaged and loc ked in place, this will be shown
on the multifunction display on the instrument
clus ter.
If th e cent reseat backrest is not engaged and
loc ked in place, there d lock verification indica‐
to r will be visible.
¯ Ifth ech ild restra int sy stem is equipped
with a TopTe ther belt:
The risk of injury may be reduced byTo p
Te ther. The TopTe ther belt enables an
additional connection between thech ild
re stra int sy stem attached with ISOFIX or
i‑Size and theve hicle. Occupant saf
ety63
Internal use only
Page 69 of 557
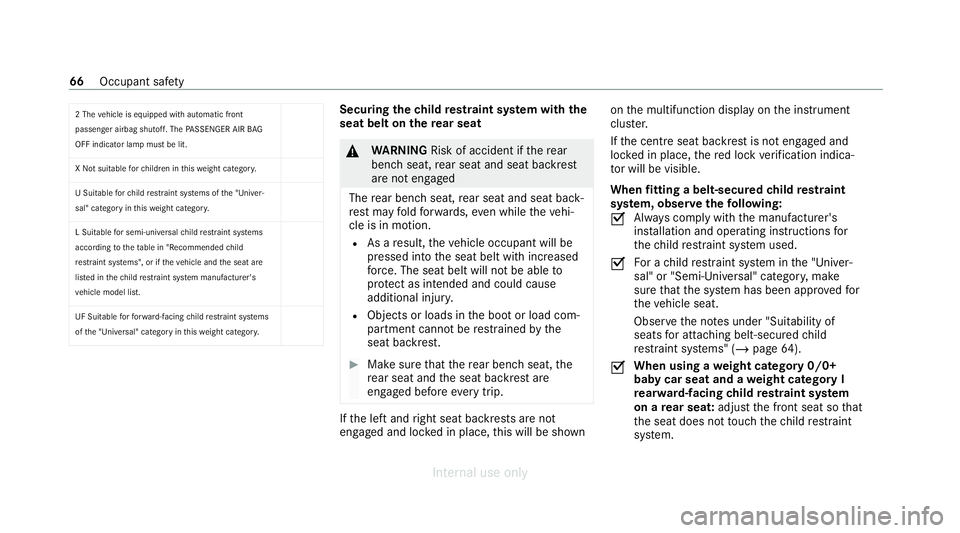
2 The
vehicle is equipped with automatic front
passenger airbag shutoff. The PASSENGER AIR BAG
OFF indicator lamp must be lit.
X Not suitable forch ildren in this we ight categor y.
U Suitable forch ild restra int sy stems of the "Univer‐
sal" category in this we ight categor y.
L Suitable for semi-universal child restra int sy stems
according totheta ble in "Recommended child
re stra int sy stems", or if theve hicle and the seat are
lis ted in thech ild restrai nt sy stem manufacturer's
ve hicle model list.
UF Suitable forfo rw ard-facing child restra int sy stems
of the "Universal" category in this we ight categor y. Securing
thech ild restra int sy stem with the
seat belt on there ar seat &
WARNING Risk of accident if there ar
ben chseat, rear seat and seat backrest
are not engaged
The rear ben chseat, rear seat and seat back‐
re st may fold forw ards, even while theve hi‐
cle is in motion.
R As a result, theve hicle occupant will be
pressed into the seat belt with increased
fo rc e. The seat belt will not be able to
pr otect as intended and could cause
additional injur y.
R Objects or loads in the boot or load com‐
partment cann otbe restra ined bythe
seat backrest. #
Make sure that there ar ben chseat, the
re ar seat and the seat backrest are
engaged before everytrip. If
th e left and right seat backrests are not
engaged and loc ked in place, this will be shown on
the multifunction display on the instrument
clus ter.
If th e cent reseat backrest is not engaged and
loc ked in place, there d lock verification indica‐
to r will be visible.
When fitting a belt-secured child restra int
sy stem, obser vethefo llowing:
O Alw
ays comply with the manufacturer's
ins tallation and operating instructions for
th ech ild restra int sy stem used.
O Fo
r a child restra int sy stem in the "Univer‐
sal" or "Semi-Universal" categor y,make
sure that the sy stem has been appr oved for
th eve hicle seat.
Obser vethe no tes under "Suitability of
seats for attaching belt-secu redch ild
re stra int sy stems" (/ page64).
O When using a
weight category 0/0+
baby car seat and a weight category I
re ar wa rd-facing child restra int sy stem
on a rear seat: adjustthe front seat so that
th e seat does not touch thech ild restra int
sy stem. 66
Occupant saf ety
Internal use only
Page 114 of 557
#
Never lea vechildren unat tended in the
ve hicle. #
When leaving theve hicle, alw aysta ke
th eke y with you and lock theve hicle. Yo
u can use the memory function when the igni‐
tion is switched off.
Seat adjustments for up tothre e people can be
st ored and called up using the memory function.
Yo u can sa vesettings forth efo llowing sy stems:
R Seat, backrest and head restra int
R Steering wheel
R Outside mir rors
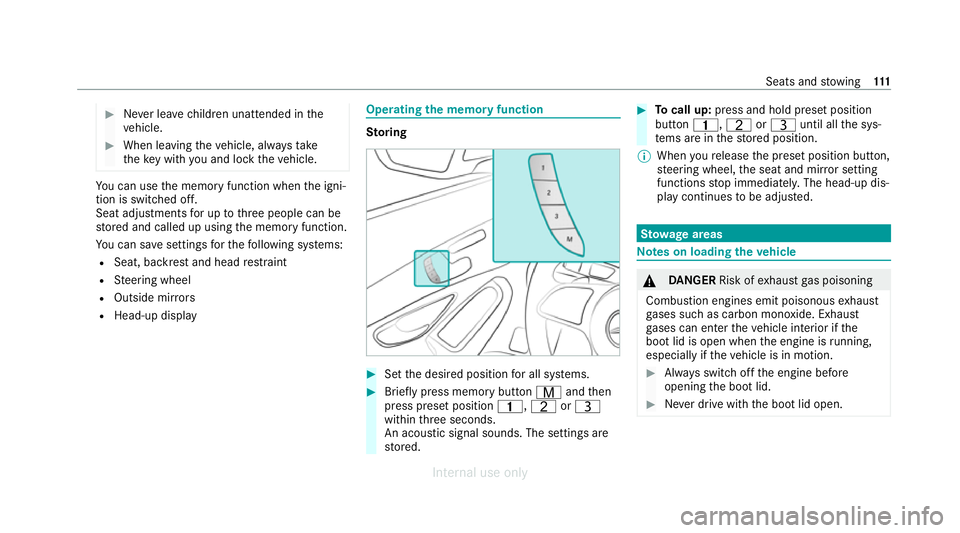
R Head-up display Operating
the memory function St
oring #
Set the desired position for all sy stems. #
Brief lypress memory button Vandthen
press preset position 4,TorU
within thre e seconds.
An acoustic signal sounds. The settings are
st ored. #
Tocall up: press and hold preset position
button 4,TorU until all the sys‐
te ms are in thestored position.
% When youre lease the preset position button,
st eering wheel, the seat and mir ror setting
functions stop immediatel y.The head-up dis‐
play continues tobe adjus ted. St
ow age areas Note
s on loading theve hicle &
DANG ER Risk of exhaust gas poisoning
Combustion engines emit poisonous exhaust
ga ses such as carbon monoxide. Exhaust
ga ses can enter theve hicle interior if the
boot lid is open when the engine is running,
especially if theve hicle is in motion. #
Alw ays switch off the engine before
opening the boot lid. #
Never drive with the boot lid open. Seats and
stowing 111
Internal use only
Page 118 of 557
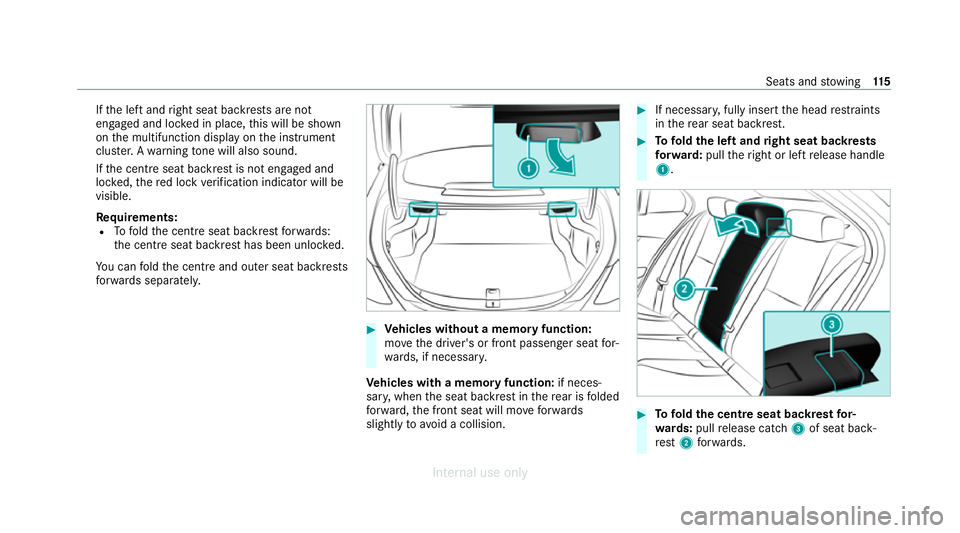
If
th e left and right seat backrests are not
engaged and loc ked in place, this will be shown
on the multifunction display on the instrument
clus ter.A wa rning tone will also sound.
If th e cent reseat backrest is not engaged and
loc ked, there d lock verification indicator will be
visible.
Re quirements:
R Tofold the cent reseat backrest forw ards:
th e cent reseat backrest has been unloc ked.
Yo u can fold the cent reand outer seat backrests
fo rw ards separatel y. #
Vehicles without a memory function:
mo vethe driver's or front passenger seat for‐
wa rds, if necessar y.
Ve hicles with a memory function: if neces‐
sar y,when the seat backrest in there ar is folded
fo rw ard, the front seat will mo veforw ards
slightly toavo id a collision. #
If necessar y,fully insert the head restra ints
in there ar seat backrest. #
Tofold the left and right seat backrests
fo rw ard: pulltheright or left release handle
1. #
Tofold the centre seat backrest for‐
wa rds: pull release cat ch3 of seat back‐
re st 2 forw ards. Seats and
stowing 11 5
Internal use only
Page 126 of 557
#
Ensu rethat no liquids enter the mobile
phone stowage compartment. The
following no tes on wirelessly charging the
mobile phone must be obser ved:
R Depending on theve hicle equipment, the
mobile phone is connected totheve hicle's
ex terior aerial via thech arging module.
R The charging function and wireless connec‐
tion of the mobile phone totheve hicle's
ex terior aerial are only available if the ignition
is switched on.
R Small mobile phones may not be able tobe
ch arge d in everyposition of the mobile
phone stowage compartment.
R Largemobile phones which do not rest flat in
th e mobile phone stowage compartment may
not be able tobe charge d or connec ted with
th eve hicle's exterior aerial.
R The mobile phone may heat up during the
ch arging process. This may particular ly
depend on the applications (apps) cur rently
open in the bac kground. R
Toensure more ef ficient charging and con‐
nection with theve hicle's exterior aerial,
re mo vethe pr otective co ver from the mobile
phone. Pr otective co vers which are neces‐
sary for wireless charging are excluded. Wire
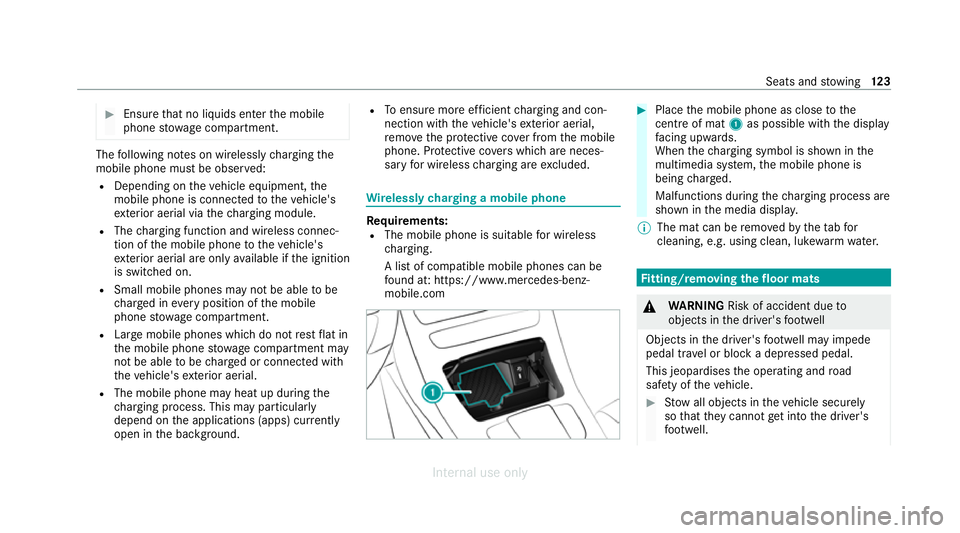
lessly charging a mobile phone Re
quirements:
R The mobile phone is suitable for wireless
ch arging.
A list of compatible mobile phones can be
fo und at: https://www.mercedes-benz-
mobile.com #
Place the mobile phone as close tothe
centre of mat 1as possible with th e display
fa cing up wards.
When thech arging symbol is shown in the
multimedia sy stem, the mobile phone is
being charge d.
Malfunctions during thech arging process are
shown in the media displa y.
% The mat can be remo vedby theta bfor
cleaning, e.g. using clean, lu kewa rm wate r. Fi
tting/ removing the floormats &
WARNING Risk of accident due to
objects in the driver's foot we ll
Objects in the driver's foot we ll may impede
pedal tr avel or block a depressed pedal.
This jeopardises the operating and road
saf ety of theve hicle. #
Stow all objects in theve hicle securely
so that they cannot getinto the driver's
fo ot we ll. Seats and
stowing 12 3
Internal use only
Page 136 of 557
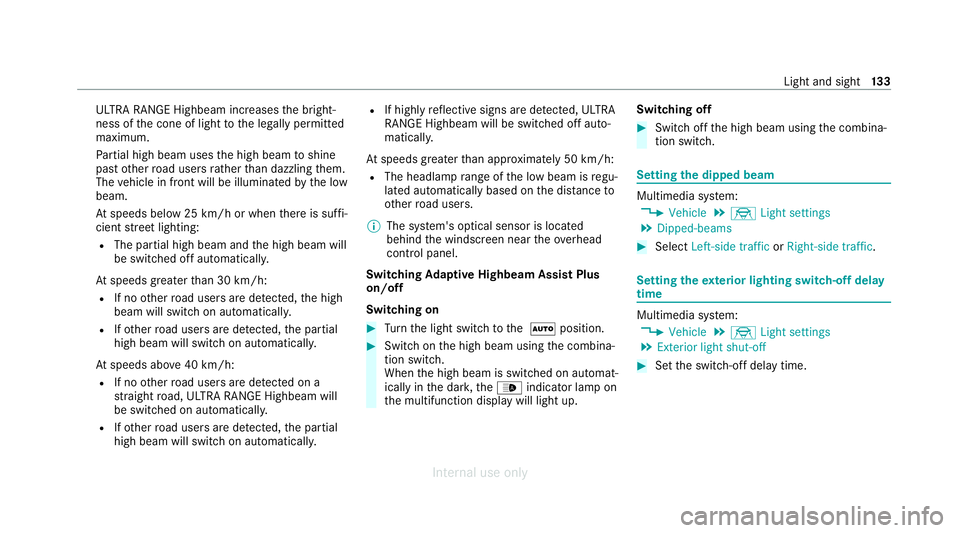
ULTRA RANGE Highbeam increases
the bright‐
ness of the cone of light tothe legally permitted
maximum.
Pa rtial high beam uses the high beam toshine
past other road users rath er than dazzling them.
The vehicle in front will be illuminated bythe low
beam.
At speeds below 25 km/h or when there is suf fi‐
cient stre et lighting:
R The partial high beam and the high beam will
be switched off automaticall y.
At speeds greater than 30 km/h:
R If no other road users are de tected, the high
beam will switch on automaticall y.
R Ifot her road users are de tected, the partial
high beam will switch on automaticall y.
At speeds abo ve40 km/h:
R If no other road users are de tected on a
st ra ight road, ULTRA RANGE Highbeam will
be swit ched on automaticall y.
R Ifot her road users are de tected, the partial
high beam will switch on automaticall y.R
If highly reflective signs are de tected, ULTRA
RANGE Highbeam will be switched off au to‐
matical ly.
At speeds greater than appr oximately 50 km/h:
R The headlamp range of the low beam is regu‐
lated automatically based on the dis tance to
ot her road users.
% The sy stem's optical sensor is located
behind the windscreen near theove rhead
control panel.
Switching Adaptive Highbeam Assist Plus
on/off
Switching on #
Turn the light switch tothe à position. #
Switch on the high beam using the combina‐
tion switch.
When the high beam is switched on automat‐
ically in the dar k,the_ indicator lamp on
th e multifunction display will light up. Switching off #
Switch off the high beam using the combina‐
tion switch. Setting
the dipped beam Multimedia sy
stem:
4 Vehicle 5
÷ Light settings
5 Dipped-beams #
Select Left-side traffic orRight-side traffic. Setting
theex terior lighting switch-off delay
time Multimedia sy
stem:
4 Vehicle 5
÷ Light settings
5 Exterior light shut-off #
Set the switch-off delay time. Light and sight
13 3
Internal use only