low beam MERCEDES-BENZ C-CLASS SALOON 2014 User Guide
[x] Cancel search | Manufacturer: MERCEDES-BENZ, Model Year: 2014, Model line: C-CLASS SALOON, Model: MERCEDES-BENZ C-CLASS SALOON 2014Pages: 489, PDF Size: 14.88 MB
Page 314 of 489

X
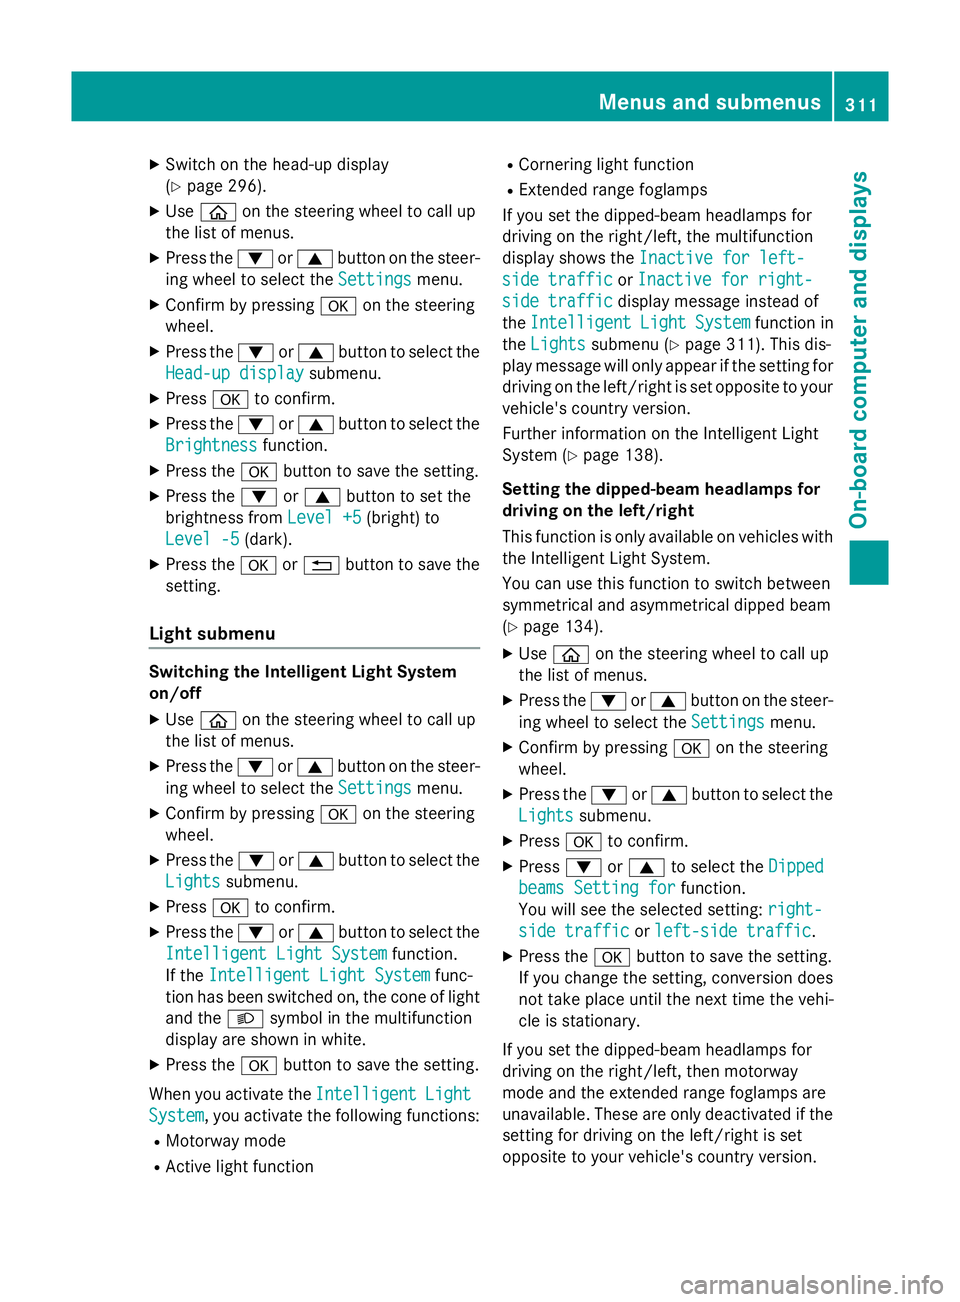
Switch on the head-up display
(Y page 296).
X Use ò on the steering wheel to call up
the list of menus.
X Press the :or9 button on the steer-
ing wheel to select the Settings
Settings menu.
X Confirm by pressing aon the steering
wheel.
X Press the :or9 button to select the
Head-up display
Head-up display submenu.
X Press ato confirm.
X Press the :or9 button to select the
Brightness
Brightness function.
X Press the abutton to save the setting.
X Press the :or9 button to set the
brightness from Level +5
Level +5(bright) to
Level -5
Level -5 (dark).
X Press the aor% button to save the
setting.
Light submenu Switching the Intelligent Light System
on/off
X Use ò on the steering wheel to call up
the list of menus.
X Press the :or9 button on the steer-
ing wheel to select the Settings
Settings menu.
X Confirm by pressing aon the steering
wheel.
X Press the :or9 button to select the
Lights
Lights submenu.
X Press ato confirm.
X Press the :or9 button to select the
Intelligent Light System
Intelligent Light System function.
If the Intelligent Light System
Intelligent Light System func-
tion has been switched on, the cone of light
and the Lsymbol in the multifunction
display are shown in white.
X Press the abutton to save the setting.
When you activate the Intelligent
IntelligentLight
Light
System
System , you activate the following functions:
R Motorway mode
R Active light function R
Cornering light function
R Extended range foglamps
If you set the dipped-beam headlamps for
driving on the right/left, the multifunction
display shows the Inactive for left-
Inactive for left-
side traffic side traffic orInactive for right-
Inactive for right-
side traffic
side traffic display message instead of
the Intelligent
Intelligent Light
LightSystem
System function in
the Lights
Lights submenu (Y page 311). This dis-
play message will only appear if the setting for
driving on the left/right is set opposite to your
vehicle's country version.
Further information on the Intelligent Light
System (Y page 138).
Setting the dipped-beam headlamps for
driving on the left/right
This function is only available on vehicles with
the Intelligent Light System.
You can use this function to switch between
symmetrical and asymmetrical dipped beam
(Y page 134).
X Use ò on the steering wheel to call up
the list of menus.
X Press the :or9 button on the steer-
ing wheel to select the Settings Settingsmenu.
X Confirm by pressing aon the steering
wheel.
X Press the :or9 button to select the
Lights
Lights submenu.
X Press ato confirm.
X Press :or9 to select the Dipped
Dipped
beams Setting for
beams Setting for function.
You will see the selected setting: right-
right-
side traffic
side traffic orleft-side traffic
left-side traffic.
X Press the abutton to save the setting.
If you change the setting, conversion does
not take place until the next time the vehi-
cle is stationary.
If you set the dipped-beam headlamps for
driving on the right/left, then motorway
mode and the extended range foglamps are
unavailable. These are only deactivated if the setting for driving on the left/right is set
opposite to your vehicle's country version. Menus and submenus
311On-board computer and displays Z
Page 315 of 489

A qualified specialist workshop can set the
dipped-beam headlamps for driving on the
left/right.
Instrument cluster submenu Selecting the unit of measurement for dis-
tance
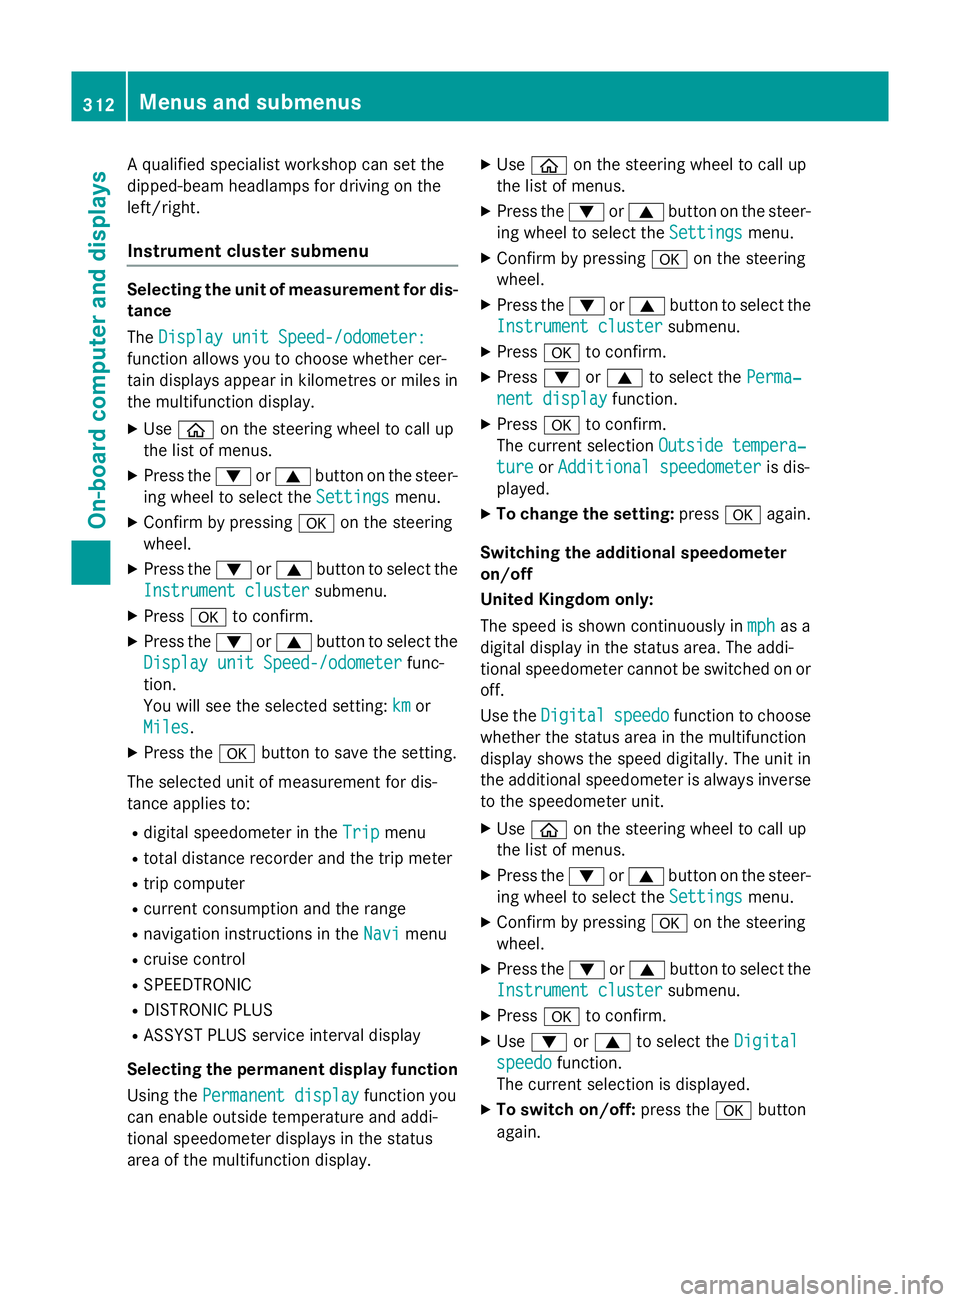
The Display unit Speed-/odometer:
Display unit Speed-/odometer:
function allows you to choose whether cer-
tain displays appear in kilometres or miles in the multifunction display.
X Use ò on the steering wheel to call up
the list of menus.
X Press the :or9 button on the steer-
ing wheel to select the Settings Settingsmenu.
X Confirm by pressing aon the steering
wheel.
X Press the :or9 button to select the
Instrument cluster
Instrument cluster submenu.
X Press ato confirm.
X Press the :or9 button to select the
Display unit Speed-/odometer
Display unit Speed-/odometer func-
tion.
You will see the selected setting: km kmor
Miles
Miles.
X Press the abutton to save the setting.
The selected unit of measurement for dis-
tance applies to:
R digital speedometer in the Trip
Tripmenu
R total distance recorder and the trip meter
R trip computer
R current consumption and the range
R navigation instructions in the Navi
Navi menu
R cruise control
R SPEEDTRONIC
R DISTRONIC PLUS
R ASSYST PLUS service interval display
Selecting the permanent display function
Using the Permanent display
Permanent display function you
can enable outside temperature and addi-
tional speedometer displays in the status
area of the multifunction display. X
Use ò on the steering wheel to call up
the list of menus.
X Press the :or9 button on the steer-
ing wheel to select the Settings
Settings menu.
X Confirm by pressing aon the steering
wheel.
X Press the :or9 button to select the
Instrument cluster Instrument cluster submenu.
X Press ato confirm.
X Press :or9 to select the Perma‐
Perma‐
nent display
nent display function.
X Press ato confirm.
The current selection Outside tempera‐
Outside tempera‐
ture
ture orAdditional speedometer
Additional speedometer is dis-
played.
X To change the setting: pressaagain.
Switching the additional speedometer
on/off
United Kingdom only:
The speed is shown continuously in mph mphas a
digital display in the status area. The addi-
tional speedometer cannot be switched on or off.
Use the Digital Digital speedo
speedofunction to choose
whether the status area in the multifunction
display shows the speed digitally. The unit in
the additional speedometer is always inverse to the speedometer unit.
X Use ò on the steering wheel to call up
the list of menus.
X Press the :or9 button on the steer-
ing wheel to select the Settings Settingsmenu.
X Confirm by pressing aon the steering
wheel.
X Press the :or9 button to select the
Instrument cluster
Instrument cluster submenu.
X Press ato confirm.
X Use : or9 to select the Digital
Digital
speedo
speedo function.
The current selection is displayed.
X To switch on/off: press theabutton
again. 312
Menus and submenusOn-board computer and displays
Page 335 of 489

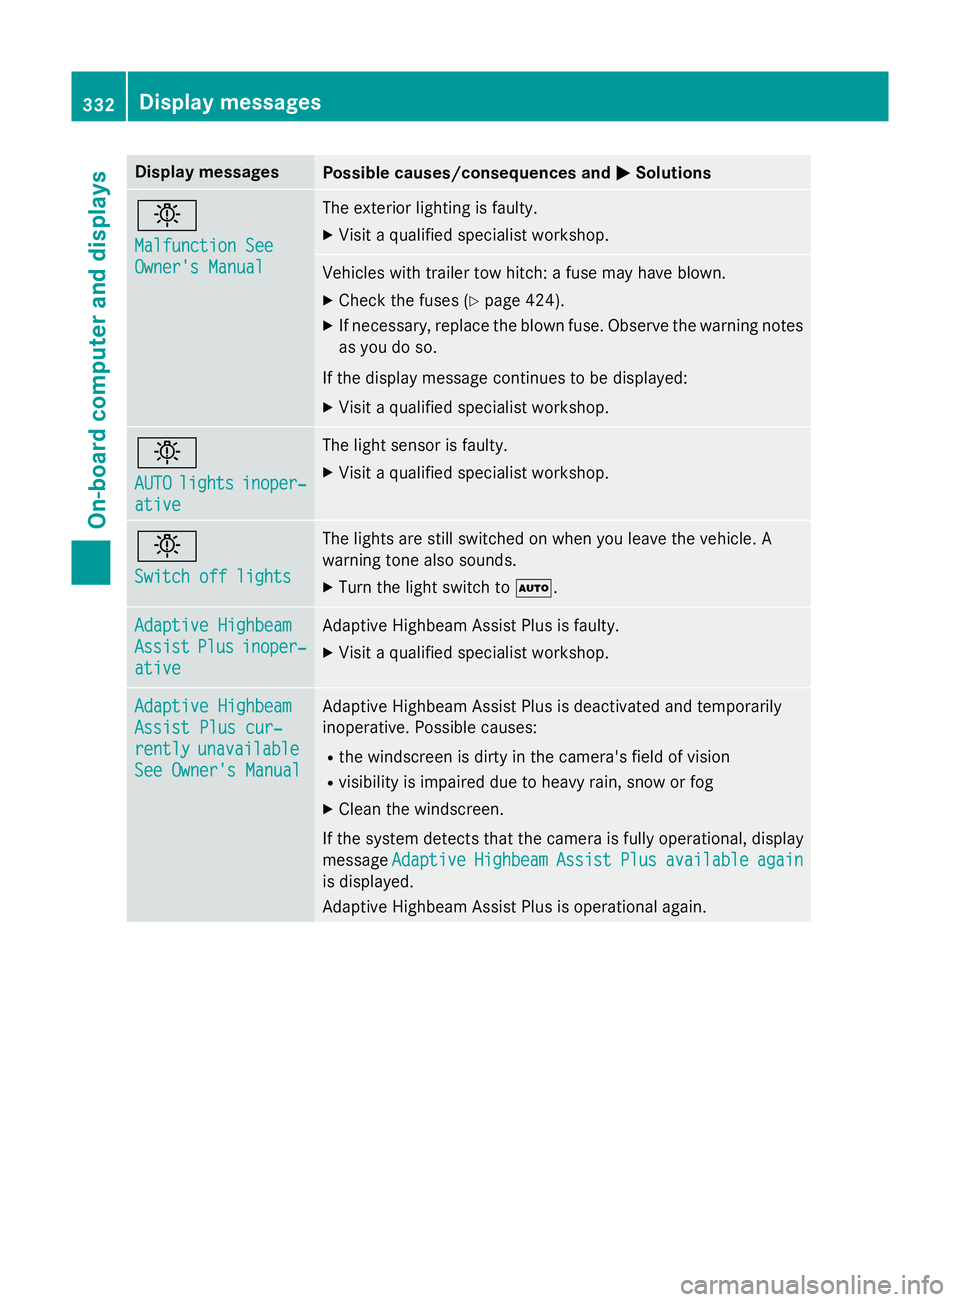
Display messages
Possible causes/consequences and
M
MSolutions b
Malfunction See Malfunction See
Owner's Manual Owner's Manual The exterior lighting is faulty.
X Visit a qualified specialist workshop. Vehicles with trailer tow hitch: a fuse may have blown.
X Check the fuses (Y page 424).
X If necessary, replace the blown fuse. Observe the warning notes
as you do so.
If the display message continues to be displayed: X Visit a qualified specialist workshop. b
AUTO AUTO
lights
lights inoper‐
inoper‐
ative
ative The light sensor is faulty.
X Visit a qualified specialist workshop. b
Switch off lights Switch off lights The lights are still switched on when you leave the vehicle. A
warning tone also sounds.
X Turn the light switch to Ã.Adaptive Highbeam Adaptive Highbeam
Assist Assist
Plus
Plusinoper‐
inoper‐
ative
ative Adaptive Highbeam Assist Plus is faulty.
X Visit a qualified specialist workshop. Adaptive Highbeam
Adaptive Highbeam
Assist Plus cur‐ Assist Plus cur‐
rently rently
unavailable
unavailable
See Owner's Manual
See Owner's Manual Adaptive Highbeam Assist Plus is deactivated and temporarily
inoperative. Possible causes:
R the windscreen is dirty in the camera's field of vision
R visibility is impaired due to heavy rain, snow or fog
X Clean the windscreen.
If the system detects that the camera is fully operational, display
message Adaptive
Adaptive Highbeam
HighbeamAssist
Assist Plus
Plusavailable
available again
again
is displayed.
Adaptive Highbeam Assist Plus is operational again. 332
Display
messagesOn-board computer and displays