symbol MERCEDES-BENZ C-Class SEDAN 2012 W204 Owner's Manual
[x] Cancel search | Manufacturer: MERCEDES-BENZ, Model Year: 2012, Model line: C-Class SEDAN, Model: MERCEDES-BENZ C-Class SEDAN 2012 W204Pages: 356, PDF Size: 13.49 MB
Page 2 of 356
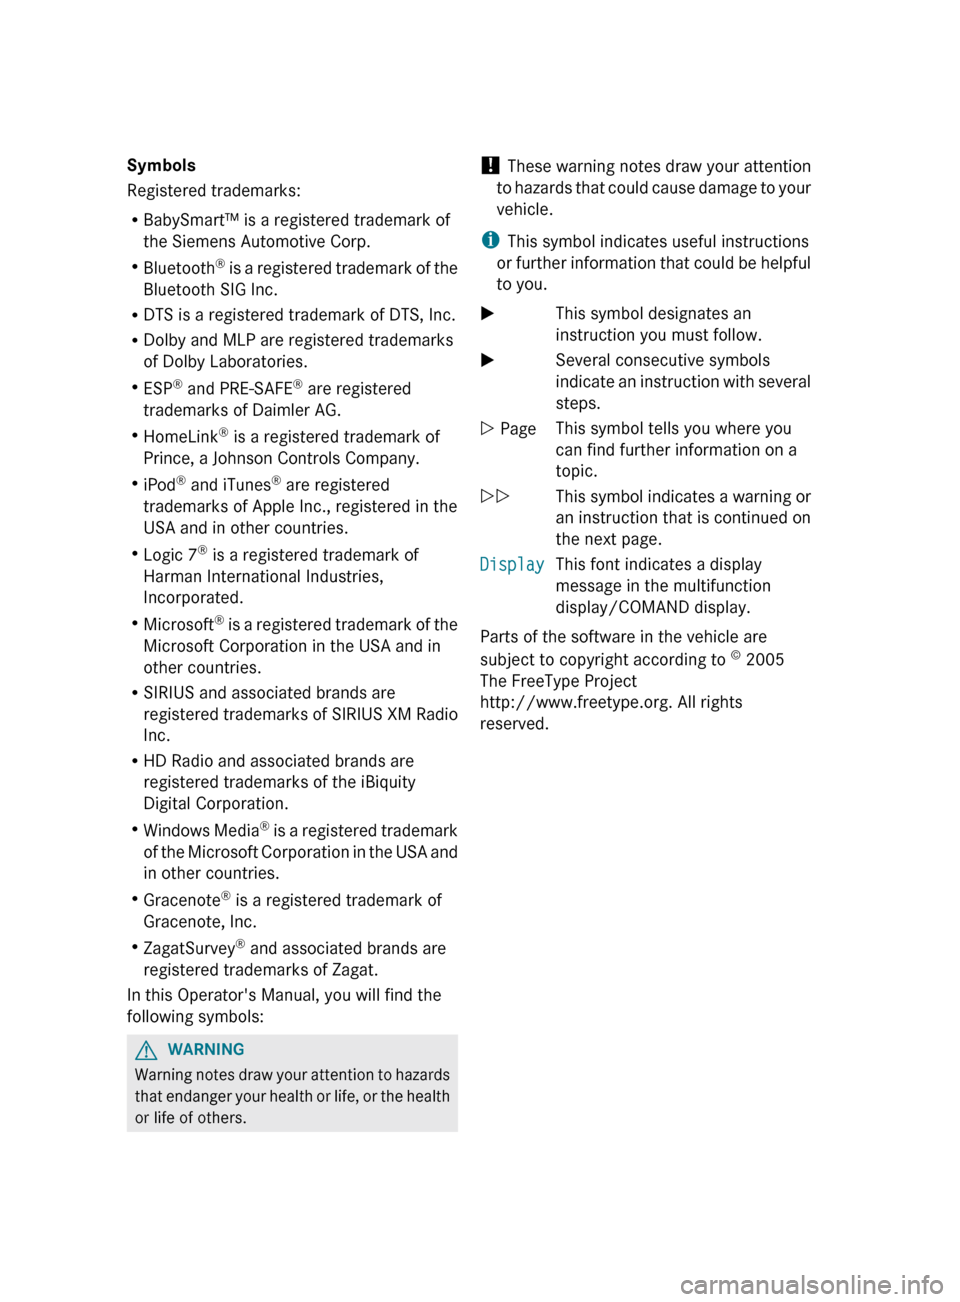
Symbols
Registered trademarks:
R BabySmart™ is a registered trademark of
the Siemens Automotive Corp.
R Bluetooth ®
is a registered trademark of the
Bluetooth SIG Inc.
R DTS is a registered trademark of DTS, Inc.
R Dolby and MLP are registered trademarks
of Dolby Laboratories.
R ESP ®
and PRE-SAFE ®
are registered
trademarks of Daimler AG.
R HomeLink ®
is a registered trademark of
Prince, a Johnson Controls Company.
R iPod ®
and iTunes ®
are registered
trademarks of Apple Inc., registered in the
USA and in other countries.
R Logic 7 ®
is a registered trademark of
Harman International Industries,
Incorporated.
R Microsoft ®
is a registered trademark of the
Microsoft Corporation in the USA and in
other countries.
R SIRIUS and associated brands are
registered trademarks of SIRIUS XM Radio
Inc.
R HD Radio and associated brands are
registered trademarks of the iBiquity
Digital Corporation.
R Windows Media ®
is a registered trademark
of the Microsoft Corporation in the USA and
in other countries.
R Gracenote ®
is a registered trademark of
Gracenote, Inc.
R ZagatSurvey ®
and associated brands are
registered trademarks of Zagat.
In this Operator's Manual, you will find the
following symbols:GWARNING
Warning notes draw your attention to hazards
that endanger your health or life, or the health
or life of others.
! These warning notes draw your attention
to hazards that could cause damage to your
vehicle.
i This symbol indicates useful instructions
or further information that could be helpful
to you.XThis symbol designates an
instruction you must follow.XSeveral consecutive symbols
indicate an instruction with several
steps.Y PageThis symbol tells you where you
can find further information on a
topic.YYThis symbol indicates a warning or
an instruction that is continued on
the next page.DisplayThis font indicates a display
message in the multifunction
display/COMAND display.
Parts of the software in the vehicle are
subject to copyright according to ©
2005
The FreeType Project
http://www.freetype.org. All rights
reserved.
Page 68 of 356
brake, take evasive action or accelerate
significantly, the vehicle may perform
automatic emergency braking. Automatic
emergency braking is not performed until
immediately prior to an accident that can no
longer be avoided.GWARNING
Even if PRE-SAFE ®
Brake slows the vehicle
before an imminent rear-end collision, the
system cannot avert a collision without the
intervention of the driver. There is a risk of an
accident. Brake according to the situation or
take evasive action. Delayed intervention by
the driver can lead to an accident.
GWARNING
PRE-SAFE ®
Brake cannot always detect
complex traffic situations properly.
In these cases, PRE-SAFE(R) Brake may:
R give an unnecessary warning and then
brake the vehicle
R neither give a warning nor intervene
There is a risk of an accident. Always pay
particular attention to the traffic situation and
be ready to brake, especially if PRE-SAFE(R)
Brake warns you. Terminate the intervention
in a non-critical driving situation.
In particular, the detection of obstacles can
be impaired if there is:
R dirt on the sensors or anything else
covering the sensors
R snow or heavy rain
R interference by other radar sources
R the possibility of strong radar reflections,
for example in parking garages
R a narrow vehicle traveling in front, e.g. a
motorbike
R a vehicle traveling in front on a different line
GWARNING
PRE-SAFE ®
Brake does not react:
R to people or animals
R to oncoming vehicles
R
to crossing traffic
R in curves
As a result, PRE-SAFE ®
Brake cannot
intervene in critical situations. There is a risk
of an accident. Always pay careful attention
to the traffic situation and be ready to brake.
In order to maintain the appropriate distance
to the vehicle in front and thus prevent a
collision, you must apply the brakes yourself.XTo activate/deactivate: activate or
deactivate PRE-SAFE ®
Brake in the on-
board computer ( Y page 205).
The Ä symbol appears in the
multifunction display as long as the HOLD
function is not activated ( Y page 172).
On vehicles with Parking Guidance, the
Ä symbol is displayed when
transmission position P is selected or if you
drive faster than 22 mph (35 km/h).
For PRE-SAFE ®
Brake to assist you when
driving, the radar sensor system must be
switched on ( Y page 208) and operational.
Following damage to the front end of the
vehicle, have the configuration and operation
of the radar sensors checked at a qualified
specialist workshop. This also applies to
collisions at low speeds where there is no
visible damage to the front of the vehicle.
Theft deterrent locking systems
Immobilizer
The immobilizer prevents your vehicle from
being started without the correct SmartKey.
When leaving the vehicle, always take the
SmartKey with you and lock the vehicle. The
engine can be started by anyone with a valid
SmartKey that is left inside the vehicle.
XTo activate with the SmartKey: remove
the SmartKey from the ignition lock.XTo activate with KEYLESS-GO: switch the
ignition off and open the driver's door.XTo deactivate: switch on the ignition.66Theft deterrent locking systemsSafety
Page 108 of 356
Useful information
i This Operator's Manual describes all
models and all standard and optional
equipment of your vehicle available at the
time of publication of the Operator's
Manual. Country-specific differences are
possible. Please note that your vehicle may
not be equipped with all features
described. This also applies to safety-
related systems and functions.
i Please read the information on qualified
specialist workshops ( Y page 24).
Exterior lighting
Important safety notes
For reasons of safety, Mercedes-Benz
recommends that you drive with the lights
switched on even during the daytime. In some
countries, operation of the headlamps varies
due to legal requirements and self-imposed
obligations.
Information about driving abroad
Converting to symmetrical low beam
when driving abroad: switch the headlamps
to symmetrical low beam in countries in
which traffic drives on the opposite side of the
road to the country where the vehicle is
registered. This prevents glare to oncoming
traffic. Symmetrical lights do not illuminate
as large an area of the edge of the road.
Have the headlamps converted at a qualified
specialist workshop, e.g. an authorized
Mercedes-Benz Center, as close to the border
as possible before driving in these countries.
Converting to asymmetrical low beam
after returning: have the headlamps
converted back to asymmetrical low beam at
a qualified specialist workshop, e.g. an
authorized Mercedes-Benz Center, as soon as
possible after crossing the border again.
Light switch
Operation
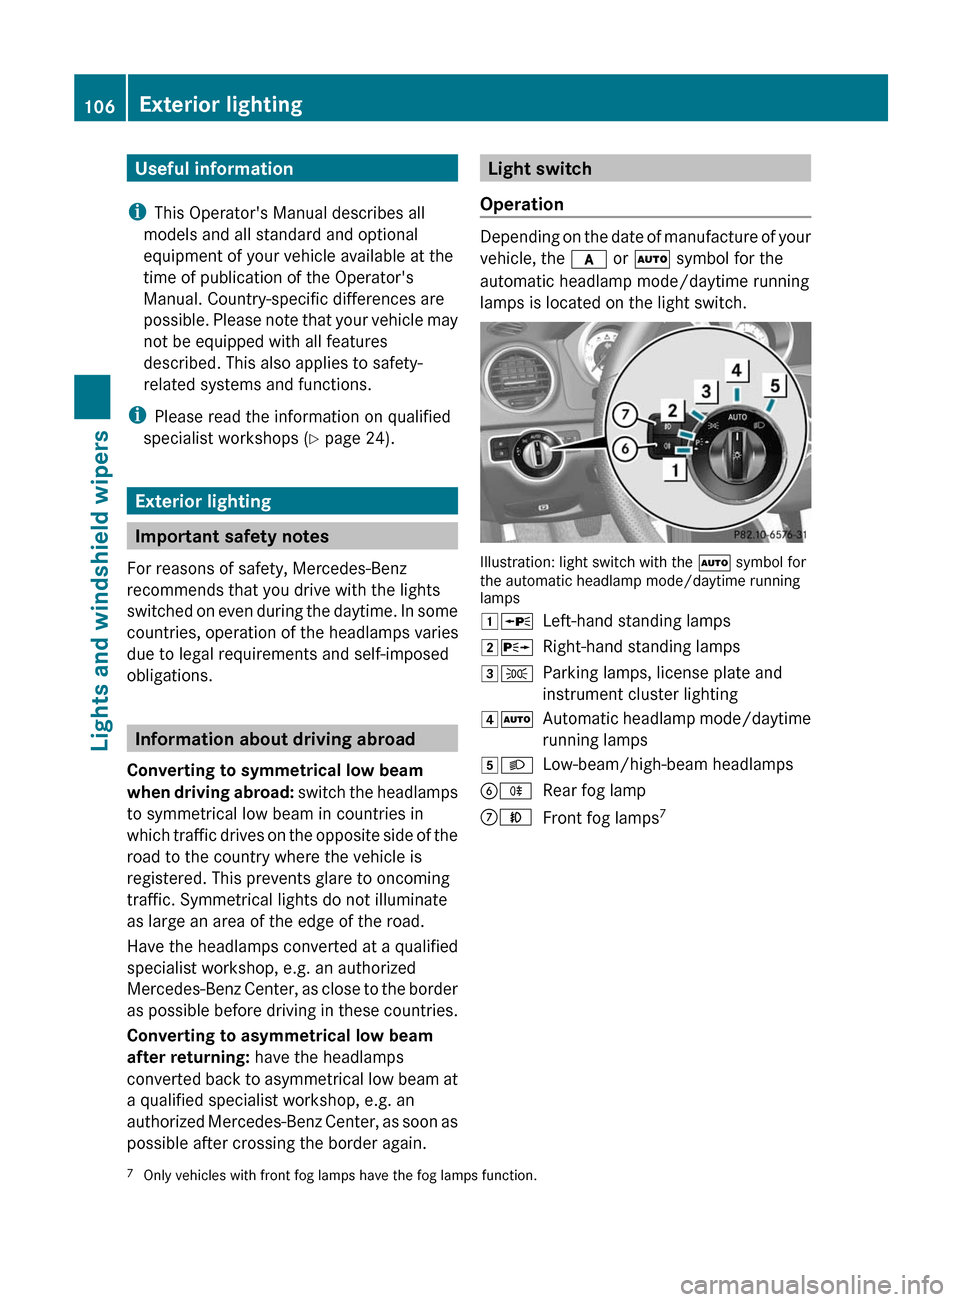
Depending on the date of manufacture of your
vehicle, the c or à symbol for the
automatic headlamp mode/daytime running
lamps is located on the light switch.
Illustration: light switch with the à symbol for
the automatic headlamp mode/daytime running
lamps
1 WLeft-hand standing lamps2XRight-hand standing lamps3TParking lamps, license plate and
instrument cluster lighting4 ÃAutomatic headlamp mode/daytime
running lamps5 LLow-beam/high-beam headlampsBRRear fog lampCNFront fog lamps 77
Only vehicles with front fog lamps have the fog lamps function.106Exterior lightingLights and windshield wipers
Page 109 of 356
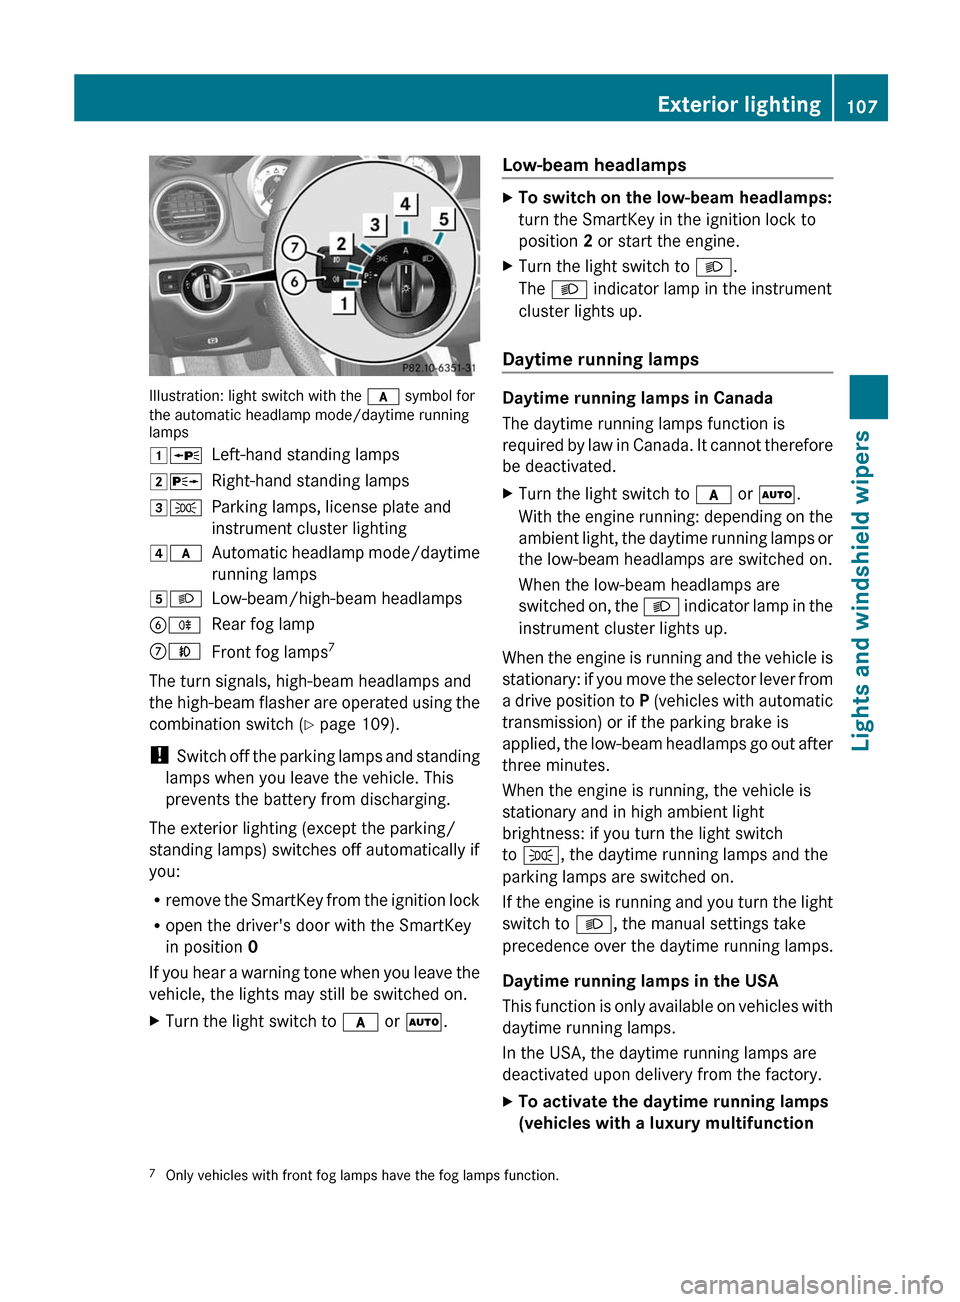
Illustration: light switch with the c symbol for
the automatic headlamp mode/daytime running
lamps
1 WLeft-hand standing lamps2XRight-hand standing lamps3TParking lamps, license plate and
instrument cluster lighting4 cAutomatic headlamp mode/daytime
running lamps5 LLow-beam/high-beam headlampsBRRear fog lampCNFront fog lamps 7
The turn signals, high-beam headlamps and
the high-beam flasher are operated using the
combination switch ( Y page 109).
! Switch off the parking lamps and standing
lamps when you leave the vehicle. This
prevents the battery from discharging.
The exterior lighting (except the parking/
standing lamps) switches off automatically if
you:
R remove the SmartKey from the ignition lock
R open the driver's door with the SmartKey
in position 0
If you hear a warning tone when you leave the
vehicle, the lights may still be switched on.
XTurn the light switch to c or à .Low-beam headlampsXTo switch on the low-beam headlamps:
turn the SmartKey in the ignition lock to
position 2 or start the engine.XTurn the light switch to L.
The L indicator lamp in the instrument
cluster lights up.
Daytime running lamps
Daytime running lamps in Canada
The daytime running lamps function is
required by law in Canada. It cannot therefore
be deactivated.
XTurn the light switch to c or à .
With the engine running: depending on the
ambient light, the daytime running lamps or
the low-beam headlamps are switched on.
When the low-beam headlamps are
switched on, the L indicator lamp in the
instrument cluster lights up.
When the engine is running and the vehicle is
stationary: if you move the selector lever from
a drive position to P (vehicles with automatic
transmission) or if the parking brake is
applied, the low-beam headlamps go out after
three minutes.
When the engine is running, the vehicle is
stationary and in high ambient light
brightness: if you turn the light switch
to T , the daytime running lamps and the
parking lamps are switched on.
If the engine is running and you turn the light
switch to L, the manual settings take
precedence over the daytime running lamps.
Daytime running lamps in the USA
This function is only available on vehicles with
daytime running lamps.
In the USA, the daytime running lamps are
deactivated upon delivery from the factory.
XTo activate the daytime running lamps
(vehicles with a luxury multifunction 7 Only vehicles with front fog lamps have the fog lamps function.Exterior lighting107Lights and windshield wipers
Page 131 of 356
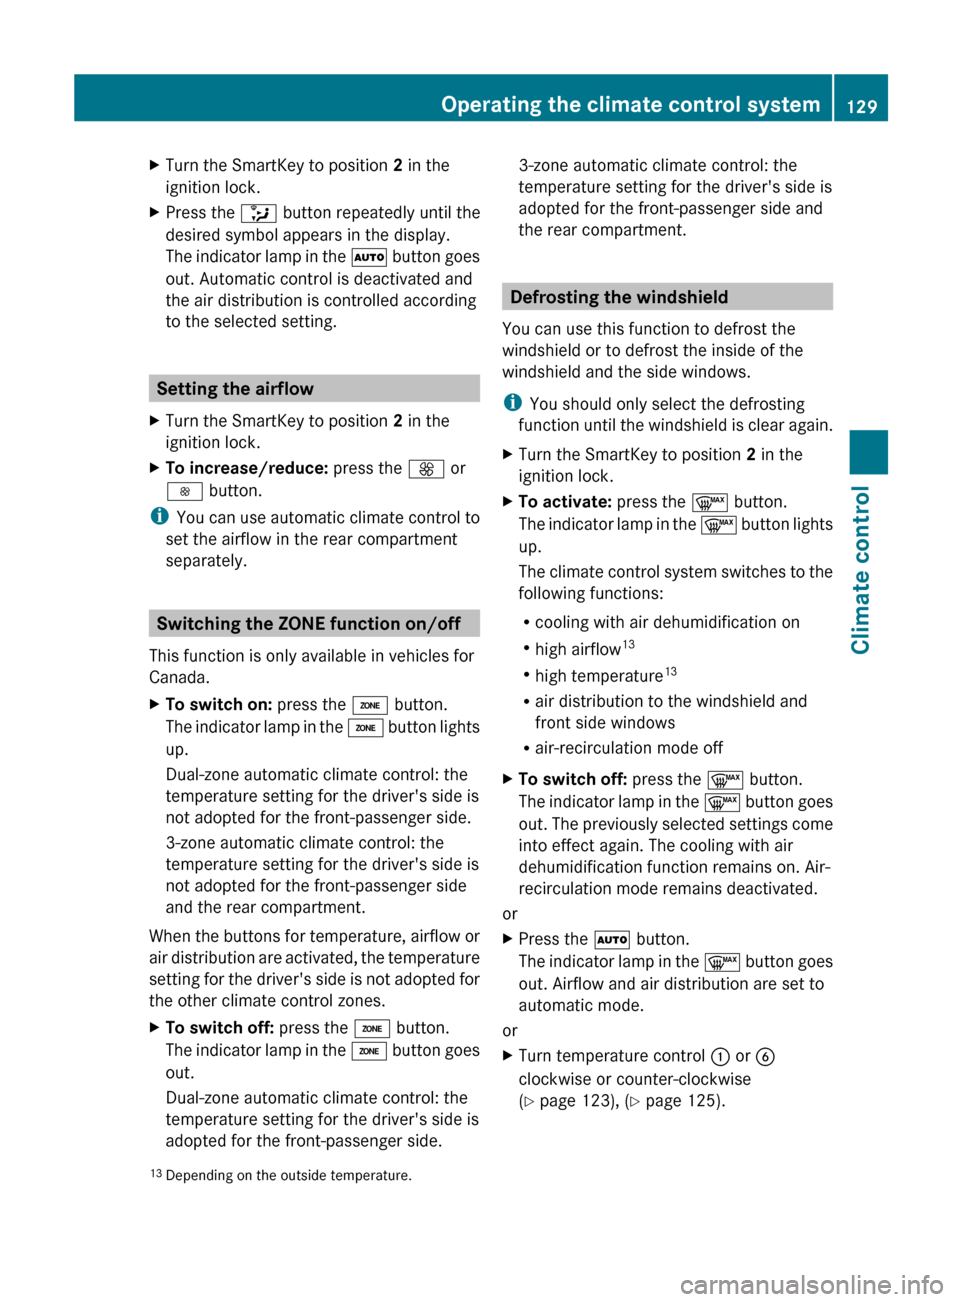
XTurn the SmartKey to position 2 in the
ignition lock.XPress the _ button repeatedly until the
desired symbol appears in the display.
The indicator lamp in the à button goes
out. Automatic control is deactivated and
the air distribution is controlled according
to the selected setting.
Setting the airflow
XTurn the SmartKey to position 2 in the
ignition lock.XTo increase/reduce: press the K or
I button.
i
You can use automatic climate control to
set the airflow in the rear compartment
separately.
Switching the ZONE function on/off
This function is only available in vehicles for
Canada.
XTo switch on: press the á button.
The indicator lamp in the á button lights
up.
Dual-zone automatic climate control: the
temperature setting for the driver's side is
not adopted for the front-passenger side.
3-zone automatic climate control: the
temperature setting for the driver's side is
not adopted for the front-passenger side
and the rear compartment.
When the buttons for temperature, airflow or
air distribution are activated, the temperature
setting for the driver's side is not adopted for
the other climate control zones.
XTo switch off: press the á button.
The indicator lamp in the á button goes
out.
Dual-zone automatic climate control: the
temperature setting for the driver's side is
adopted for the front-passenger side.3-zone automatic climate control: the
temperature setting for the driver's side is
adopted for the front-passenger side and
the rear compartment.
Defrosting the windshield
You can use this function to defrost the
windshield or to defrost the inside of the
windshield and the side windows.
i You should only select the defrosting
function until the windshield is clear again.
XTurn the SmartKey to position 2 in the
ignition lock.XTo activate: press the ¬ button.
The indicator lamp in the ¬ button lights
up.
The climate control system switches to the
following functions:
R cooling with air dehumidification on
R high airflow 13
R high temperature 13
R air distribution to the windshield and
front side windows
R air-recirculation mode offXTo switch off: press the ¬ button.
The indicator lamp in the ¬ button goes
out. The previously selected settings come
into effect again. The cooling with air
dehumidification function remains on. Air-
recirculation mode remains deactivated.
or
XPress the à button.
The indicator lamp in the ¬ button goes
out. Airflow and air distribution are set to
automatic mode.
or
XTurn temperature control : or B
clockwise or counter-clockwise
( Y page 123), ( Y page 125).13
Depending on the outside temperature.Operating the climate control system129Climate controlZ
Page 132 of 356
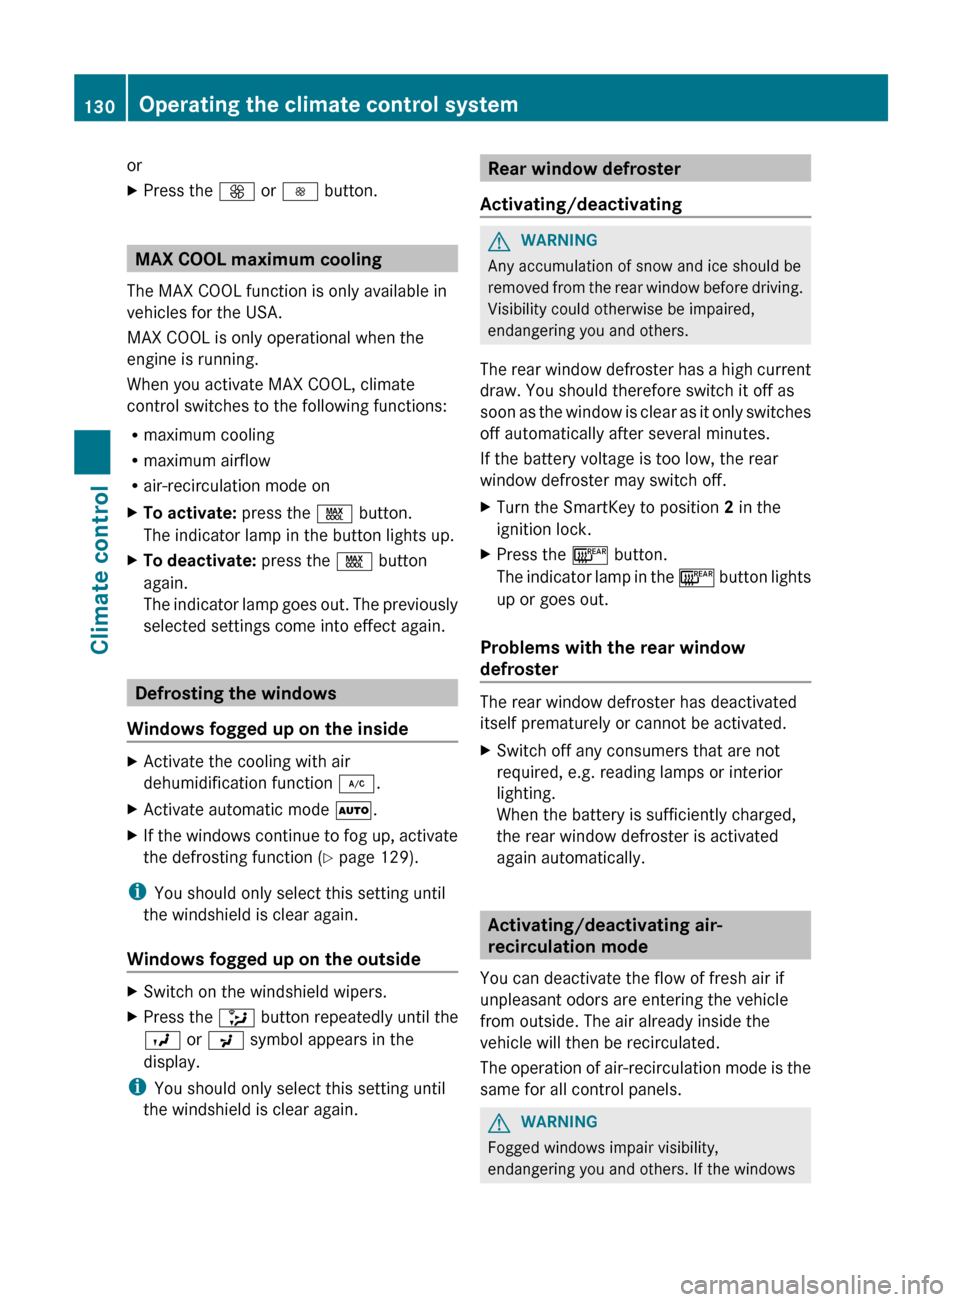
orXPress the K or I button.
MAX COOL maximum cooling
The MAX COOL function is only available in
vehicles for the USA.
MAX COOL is only operational when the
engine is running.
When you activate MAX COOL, climate
control switches to the following functions:
R maximum cooling
R maximum airflow
R air-recirculation mode on
XTo activate: press the Ù button.
The indicator lamp in the button lights up.XTo deactivate: press the Ù button
again.
The indicator lamp goes out. The previously
selected settings come into effect again.
Defrosting the windows
Windows fogged up on the inside
XActivate the cooling with air
dehumidification function ¿.XActivate automatic mode Ã.XIf the windows continue to fog up, activate
the defrosting function ( Y page 129).
i
You should only select this setting until
the windshield is clear again.
Windows fogged up on the outside
XSwitch on the windshield wipers.XPress the _ button repeatedly until the
O or P symbol appears in the
display.
i You should only select this setting until
the windshield is clear again.
Rear window defroster
Activating/deactivatingGWARNING
Any accumulation of snow and ice should be
removed from the rear window before driving.
Visibility could otherwise be impaired,
endangering you and others.
The rear window defroster has a high current
draw. You should therefore switch it off as
soon as the window is clear as it only switches
off automatically after several minutes.
If the battery voltage is too low, the rear
window defroster may switch off.
XTurn the SmartKey to position 2 in the
ignition lock.XPress the ¤ button.
The indicator lamp in the ¤ button lights
up or goes out.
Problems with the rear window
defroster
The rear window defroster has deactivated
itself prematurely or cannot be activated.
XSwitch off any consumers that are not
required, e.g. reading lamps or interior
lighting.
When the battery is sufficiently charged,
the rear window defroster is activated
again automatically.
Activating/deactivating air-
recirculation mode
You can deactivate the flow of fresh air if
unpleasant odors are entering the vehicle
from outside. The air already inside the
vehicle will then be recirculated.
The operation of air-recirculation mode is the
same for all control panels.
GWARNING
Fogged windows impair visibility,
endangering you and others. If the windows
130Operating the climate control systemClimate control
Page 171 of 356
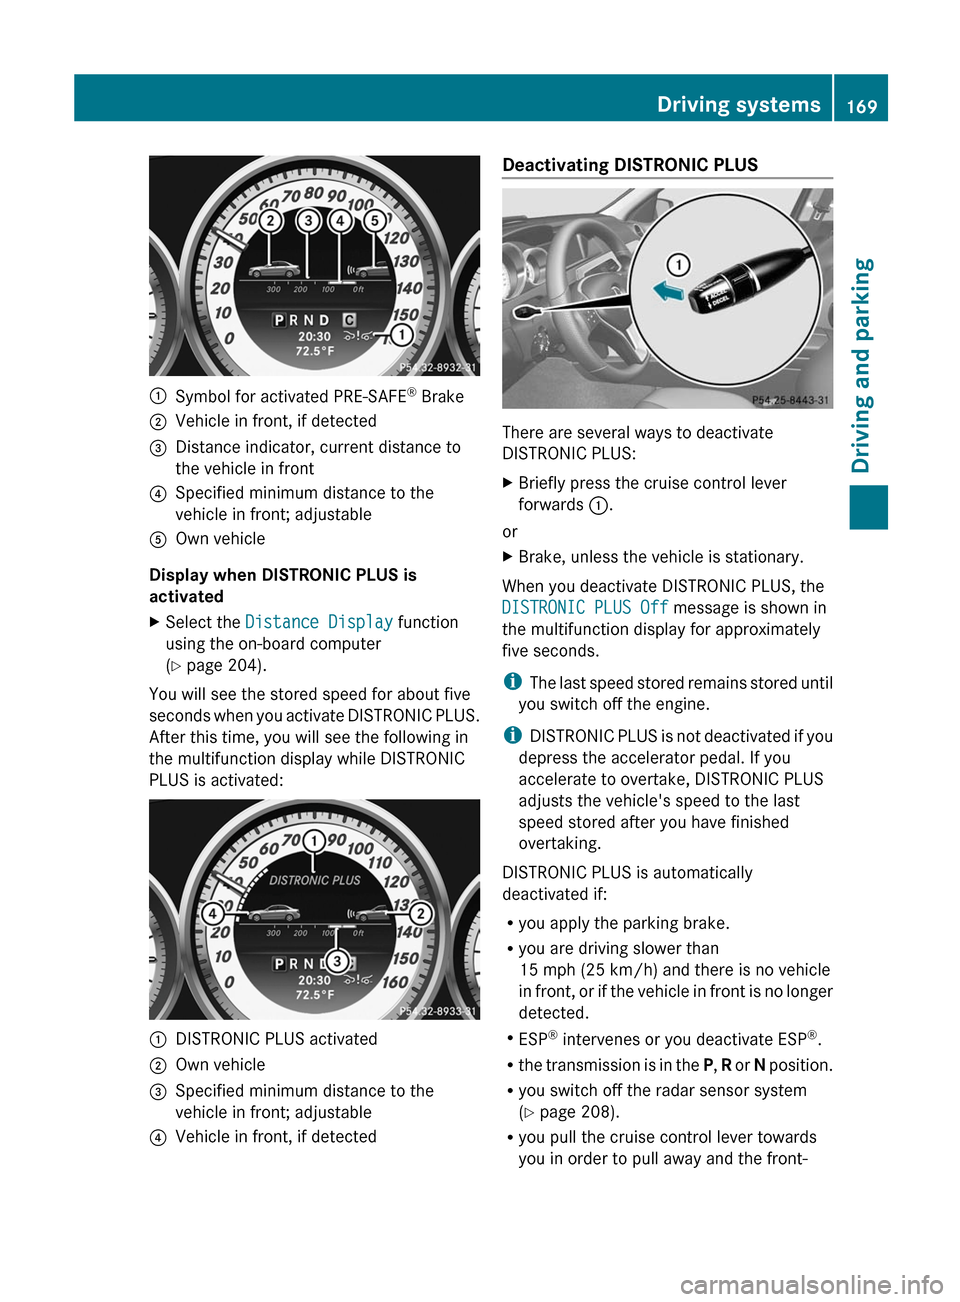
:Symbol for activated PRE-SAFE®
Brake;Vehicle in front, if detected=Distance indicator, current distance to
the vehicle in front?Specified minimum distance to the
vehicle in front; adjustableAOwn vehicle
Display when DISTRONIC PLUS is
activated
XSelect the Distance Display function
using the on-board computer
( Y page 204).
You will see the stored speed for about five
seconds when you activate DISTRONIC PLUS.
After this time, you will see the following in
the multifunction display while DISTRONIC
PLUS is activated:
:DISTRONIC PLUS activated;Own vehicle=Specified minimum distance to the
vehicle in front; adjustable?Vehicle in front, if detectedDeactivating DISTRONIC PLUS
There are several ways to deactivate
DISTRONIC PLUS:
XBriefly press the cruise control lever
forwards :.
or
XBrake, unless the vehicle is stationary.
When you deactivate DISTRONIC PLUS, the
DISTRONIC PLUS Off message is shown in
the multifunction display for approximately
five seconds.
i The last speed stored remains stored until
you switch off the engine.
i DISTRONIC PLUS is not deactivated if you
depress the accelerator pedal. If you
accelerate to overtake, DISTRONIC PLUS
adjusts the vehicle's speed to the last
speed stored after you have finished
overtaking.
DISTRONIC PLUS is automatically
deactivated if:
R you apply the parking brake.
R you are driving slower than
15 mph (25 km/h) and there is no vehicle
in front, or if the vehicle in front is no longer
detected.
R ESP ®
intervenes or you deactivate ESP ®
.
R the transmission is in the P, R or N position.
R you switch off the radar sensor system
( Y page 208).
R you pull the cruise control lever towards
you in order to pull away and the front-
Driving systems169Driving and parkingZ
Page 180 of 356
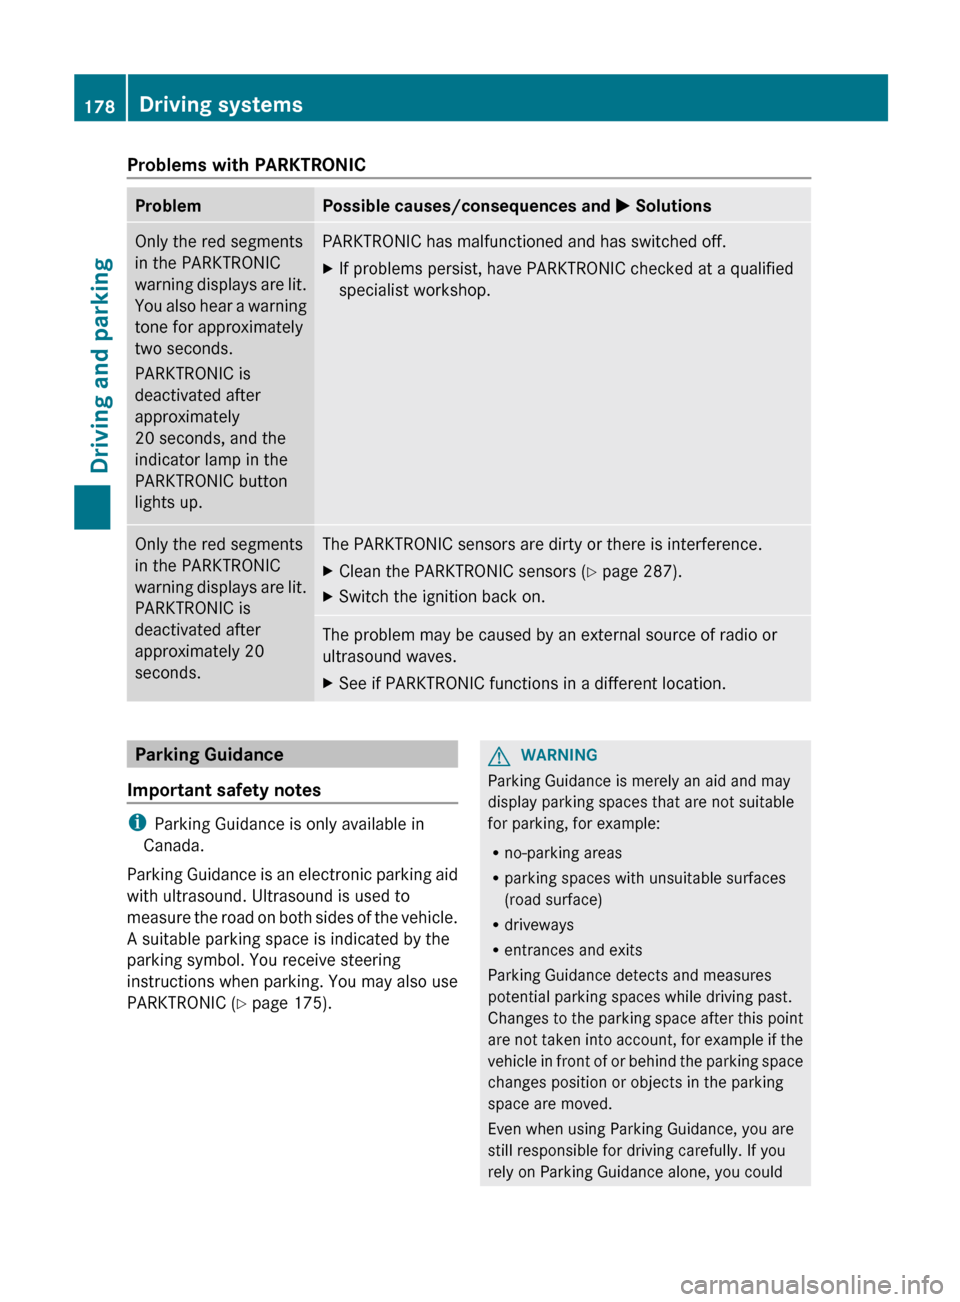
Problems with PARKTRONICProblemPossible causes/consequences and M SolutionsOnly the red segments
in the PARKTRONIC
warning displays are lit.
You also hear a warning
tone for approximately
two seconds.
PARKTRONIC is
deactivated after
approximately
20 seconds, and the
indicator lamp in the
PARKTRONIC button
lights up.PARKTRONIC has malfunctioned and has switched off.XIf problems persist, have PARKTRONIC checked at a qualified
specialist workshop.Only the red segments
in the PARKTRONIC
warning displays are lit.
PARKTRONIC is
deactivated after
approximately 20
seconds.The PARKTRONIC sensors are dirty or there is interference.XClean the PARKTRONIC sensors ( Y page 287).XSwitch the ignition back on.The problem may be caused by an external source of radio or
ultrasound waves.XSee if PARKTRONIC functions in a different location.Parking Guidance
Important safety notes
i Parking Guidance is only available in
Canada.
Parking Guidance is an electronic parking aid
with ultrasound. Ultrasound is used to
measure the road on both sides of the vehicle.
A suitable parking space is indicated by the
parking symbol. You receive steering
instructions when parking. You may also use
PARKTRONIC ( Y page 175).
GWARNING
Parking Guidance is merely an aid and may
display parking spaces that are not suitable
for parking, for example:
R no-parking areas
R parking spaces with unsuitable surfaces
(road surface)
R driveways
R entrances and exits
Parking Guidance detects and measures
potential parking spaces while driving past.
Changes to the parking space after this point
are not taken into account, for example if the
vehicle in front of or behind the parking space
changes position or objects in the parking
space are moved.
Even when using Parking Guidance, you are
still responsible for driving carefully. If you
rely on Parking Guidance alone, you could
178Driving systemsDriving and parking
Page 181 of 356
cause an accident and injure yourself and
others.
Safety always remains your responsibility and
you must continue paying careful attention to
your immediate surroundings when parking
and maneuvering.GWARNING
Objects located above the height range of
Parking Guidance will not be detected when
the parking space is measured. These objects
are not taken into account when the parking
procedure is calculated, e.g. overhanging
loads, tail sections or loading ramps of goods
vehicles. Under some circumstances, Parking
Guidance might therefore issue steering
instructions too soon. This may lead to a
collision. For this reason, you should avoid
using Parking Guidance in such situations.
GWARNING
Make sure that no persons or animals are in
the maneuvering range. Otherwise, they
could be injured.
! Pay particular attention to low objects or
objects with flat surfaces, such as trailer
drawbars, posts, cross beams and curbs.
These types of objects cannot be detected
by Parking Guidance and may damage the
vehicle.
When PARKTRONIC is deactivated, Parking
Guidance is also unavailable.
Use Parking Guidance for parking spaces:
R that are parallel to the direction of travel
R that are on straight roads, not bends
R that are on the same level as the road, i.e.
not on the pavement, for example. Parking
Guidance may not detect flat curbs
Parking tips:
R on narrow roads, drive past the parking
space as close as possible.
R parking spaces that are littered, overgrown
or partially occupied by trailer drawbars
might be identified incorrectly or not at all.
R snowfall or heavy rain may lead to a parking
space being measured inaccurately.
R pay attention to the PARKTRONIC
( Y page 177) warning messages during the
parking procedure.
R when transporting a load which protrudes
from your vehicle, you must not use Parking
Guidance.
R never use Parking Guidance with snow
chains or an emergency spare wheel
mounted.
R make sure that the tire pressures are
always correct. This has a direct effect on
the steering instructions.
R the way your vehicle is positioned in the
parking space after parking is dependent
on various factors. These include the
position and shape of the vehicles parked
in front and behind it and the conditions of
the location. In some cases, Parking
Guidance may guide you too far or not far
enough into a parking space. In some
cases, it may also lead you across or onto
the curb. If necessary, cancel the parking
procedure with Parking Guidance.
! If unavoidable, you should drive over
obstacles such as curbs slowly and not at
a sharp angle. Otherwise, you may damage
the wheels or tires.
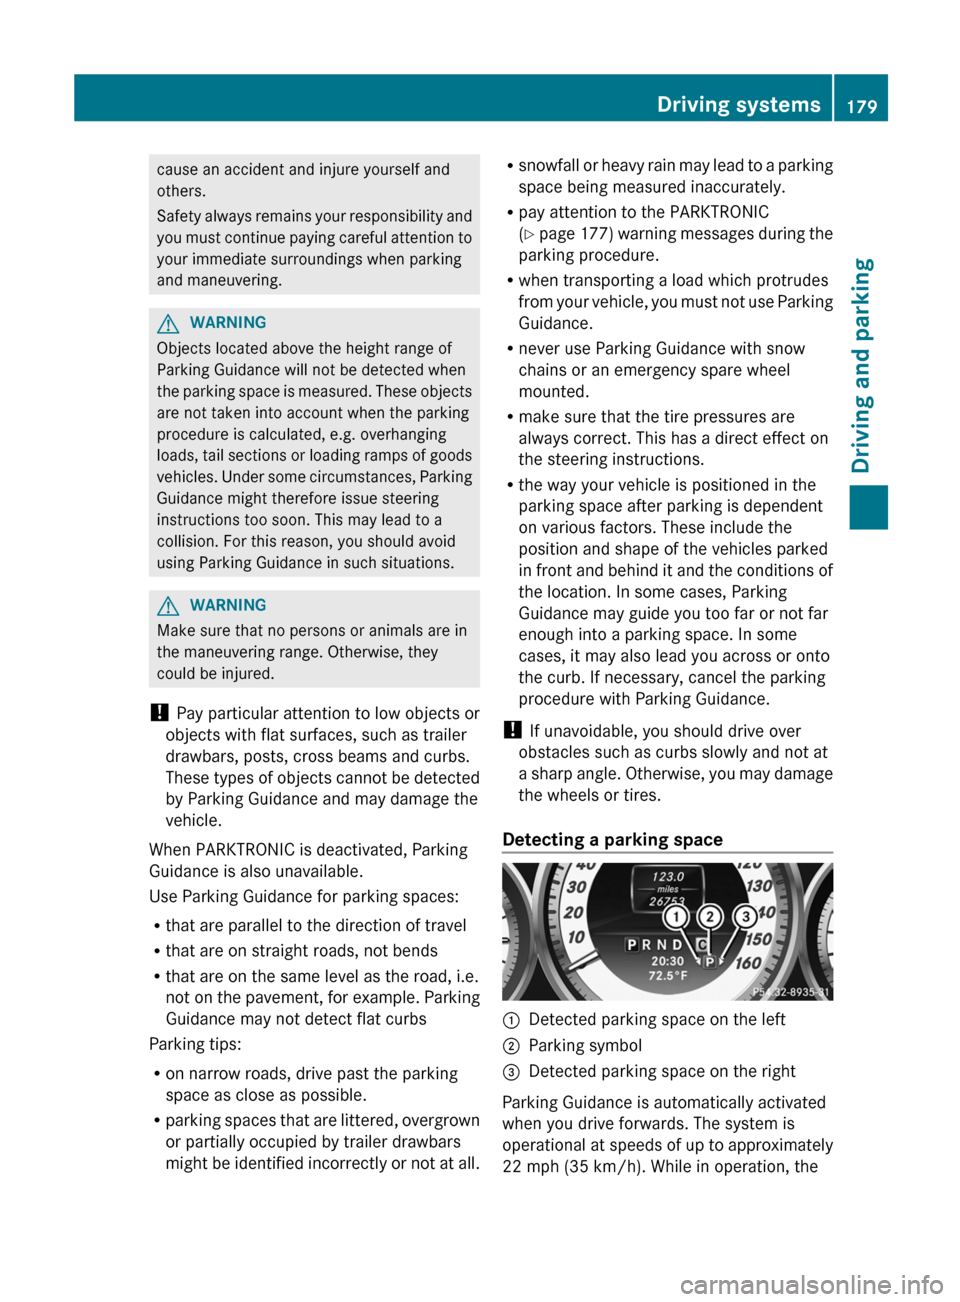
Detecting a parking space:Detected parking space on the left;Parking symbol=Detected parking space on the right
Parking Guidance is automatically activated
when you drive forwards. The system is
operational at speeds of up to approximately
22 mph (35 km/h). While in operation, the
Driving systems179Driving and parkingZ
Page 182 of 356
system independently locates and measures
parking spaces on both sides of the vehicle.
When driving at speeds below 19 mph
( 30 km/h), you will see parking symbol ; as
a status indicator in the instrument cluster.
When a parking space has been detected, an
arrow towards the right = or the left : also
appears. Parking Guidance only displays
parking spaces on the front-passenger side
as standard. Parking spaces on the driver's
side are displayed as soon as the turn signal
on the driver's side is activated. To park on
the driver's side, you must leave the driver's
side turn signal switched on until you have
engaged reverse gear.
Parking Guidance will only detect parking
spaces:
R that are parallel to the direction of travel
R that are at least 5 ft (1.5 m) wide
R that are at least 4.3 ft (1.3 m) longer than
your vehicle
A parking space is displayed while you are
driving past it, and until you are
approximately 50 ft (15 m) away from it.
ParkingGWARNING
The Parking Guidance is only an aid and may
not detect all obstacles. The Parking
Guidance does not relieve you of the
responsibility to pay attention. You are always
responsible for safety and must continue to
pay attention to your immediate surroundings
when parking and maneuvering. Otherwise,
you could endanger yourself and others.
XStop the vehicle when the parking space
symbol shows the desired parking space in
the instrument cluster.XShift the transmission to position R.
The following message appears in the
multifunction display: Check vehicle
surroundings Confirm with OK .XPress the a button on the multifunction
steering wheel to confirm.
The multifunction display switches to
Parking Guidance.
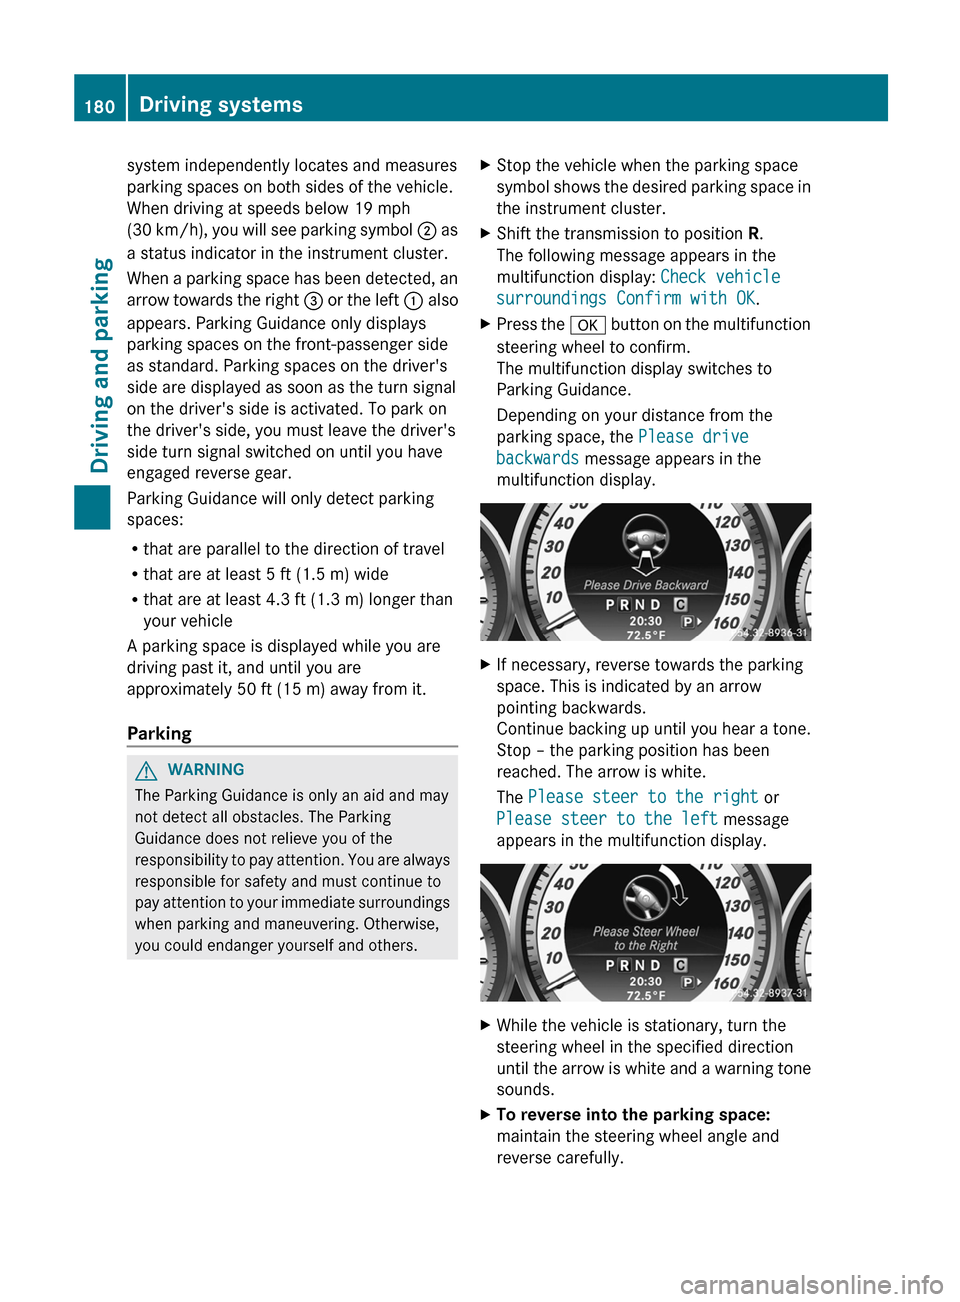
Depending on your distance from the
parking space, the Please drive
backwards message appears in the
multifunction display.XIf necessary, reverse towards the parking
space. This is indicated by an arrow
pointing backwards.
Continue backing up until you hear a tone.
Stop – the parking position has been
reached. The arrow is white.
The Please steer to the right or
Please steer to the left message
appears in the multifunction display.XWhile the vehicle is stationary, turn the
steering wheel in the specified direction
until the arrow is white and a warning tone
sounds.XTo reverse into the parking space:
maintain the steering wheel angle and
reverse carefully.180Driving systemsDriving and parking