tire size MERCEDES-BENZ C-Class SEDAN 2015 W205 Owner's Manual
[x] Cancel search | Manufacturer: MERCEDES-BENZ, Model Year: 2015, Model line: C-Class SEDAN, Model: MERCEDES-BENZ C-Class SEDAN 2015 W205Pages: 406, PDF Size: 7.62 MB
Page 21 of 406
Labeling (overview) ........................ 375
Load bearing index (definition) ...... 380
Load index .....................................3
77
Load index (definition) ................... 379
Maximum loaded vehicle weight
(definition) ..................................... 379
Maximum load on a tire (defini-
tion) ............................................... 380
Maximum permissible tire pres-
sure (definition) ............................ .380
Maximum tire load ......................... 377
Maximum tire load (definition) ....... 380
MOExtended tires .......................... 360
Optional equipment weight (defi-
nition) ............................................ 380
PSI (pounds per square inch) (def-
inition) .......................................... .380
Replacing ....................................... 381
Service life ..................................... 360
Sidewall (definition) ....................... 380
Speed rating (definition) ................ 379
Storing .......................................... .381
Structure and characteristics
(definition) ..................................... 378
Summer tires in winter .................. 360
Temperature .................................. 374
TIN (Tire Identification Number)
(definition) ..................................... 380
Tire bead (definition) ..................... .380
Tire pressure (definition) ................ 380
Tire pressures (recommended) ...... 379
Tire size (data) ............................... 386
Tire size designation, load-bearing capacity, speed rating .................... 375
Tire tread ....................................... 359
Tire tread (definition) ..................... 380
Total load limit (definition) ............. 381
Traction ......................................... 374
Traction (definition) ....................... 380
Tread wea r..................................... 374
Uniform Tire Quality Grading
Standards ...................................... 373
Uniform Tire Quality Grading
Standards (definition) .................... 379
Wear indicator (definition) ............. 380
Wheel and tire combination ........... 388
Wheel rim (definition) .................... 379
see Flat tire Top Tether
............................................ 62
Towing away Important safety guidelines ........... 351
Installing the towing eye ................ 352
Notes for 4MATIC vehicles ............ 354
Removing the towing eye ............... 353
With both axles on the ground ....... 353
With the rear axle raised ................ 353
Towing eye ......................................... 340
Tow-starting Emergency engine starting ............ 354
Important safety notes .................. 351
Transfer case ..................................... 171
Transmission see Automatic transmission
Transmission position display ......... 166
Transmission position display
(DIRECT SELECT lever) ...................... 166
Transporting the vehicle .................. 353
Trim pieces (cleaning instruc-
tions) .................................................. 336
Trip computer (on-board com-
puter) .................................................. 237
Trip odometer Calling up ....................................... 236
Resetting (on-board computer) ...... 237
Trunk
Emergency release .......................... 96
Important safety notes .................... 90
Locking separately ........................... 96
Opening/closing (automatically
from inside) ...................................... 95
Opening/closing (automatically
from outside) ................................... 92
Opening/closing (from outside,
HANDS-FREE ACCESS) .................... 93
Opening/closing (manually from
outside) ............................................ 91
Opening (automatically from
inside) .............................................. 95
Opening (automatically from out-
side) ................................................. 93
Trunk lid
Display message ............................ 280
Obstacle recognition ........................ 91
Opening/closing .............................. 90
Opening dimensions ...................... 403 Index
19
Page 23 of 406
Storing ........................................... 381
Tightening torque ........................... 386
Wheel size/tire size ....................... 386
Window curtain air bag
Display message ............................ 261
Operation ......................................... 51
Windows
see Side windows
Windshield
Defrosting ...................................... 147
Windshield washer fluid
see Windshield washer system
Windshield washer system
Adding washer fluid ....................... 327
Notes ............................................. 402
Windshield wipers
Problem (malfunction) ................... 136
Replacing the wiper blades ............ 134
Switching on/of f........................... 133
Winter driving
Important safety notes .................. 360
Slippery road surfaces ................... 182
Snow chains .................................. 361
Winter operation
Radiator cover ............................... 325
Summer tires ................................. 360
Winter tires
M+S tire s....................................... 360
Wiper blades
Cleaning ......................................... 333
Important safety notes .................. 134
Replacing ....................................... 134
Replacing (windshield) ................... 134
Wooden trim (cleaning instruc-
tions) .................................................. 336
Workshop see Qualified specialist workshop Index
21
Page 74 of 406
ETS/4ETS (Electronic Traction System)
i
Observe the "Important safety notes" sec-
tion (Y page 66).
ETS traction control is part of ESP ®
. On vehi-
cles with 4MATIC, 4ETS is part of ESP ®
.
Traction control brakes the drive wheels indi-
vidually if they spin. This enables you to pull
away and accelerate on slippery surfaces, for
example if the road surface is slippery on one side. In addition, more drive torque is trans-
ferred to the wheel or wheels with traction.
Traction control remains active, even if you
deactivate ESP ®
.
Important safety notes i
Observe the "Important safety notes" sec-
tion (Y page 66). G
WARNING
If ESP ®
is malfunctioning, ESP ®
is unable to
stabilize the vehicle. Additionally, further driv- ing safety systems are deactivated. This
increases the risk of skidding and an accident.
Drive on carefully. Have ESP ®
checked at a
qualified specialist workshop.
! If you test the parking brake using a brake
dynamometer, switch the ignition off.
Application of the brakes by ESP ®
may oth-
erwise destroy the brake system.
When towing the vehicle with the rear axle
raised, observe the notes on ESP ®
(Y page 353).
ESP ®
is deactivated if the warning lamp 00BB
in the instrument cluster lights up and:
R the vehicle is moving
R the ECO start/stop function is activated
If the 00E5 warning lamp lights up continu-
ously, ESP ®
is not available due to a malfunc-
tion.
Observe the information on warning lamps
(Y page 288) and display messages which
may be shown in the instrument cluster
(Y page 251). Only use wheels with the recommended tire
sizes. Only then will ESP
®
function properly.
Characteristics of ESP ® General information
If the
00E5 ESP warning lamp goes out before
beginning the journey, ESP ®
is automatically
active.
If ESP ®
intervenes, the 00E5ESP®
warning
lamp flashes in the instrument cluster.
If ESP ®
intervenes:
X Do not deactivate ESP ®
under any circum-
stances.
X Only depress the accelerator pedal as far as
necessary when pulling away.
X Adapt your driving style to suit the prevail-
ing road and weather conditions.
ECO start/stop function
The ECO start/stop function switches the
engine off automatically when the vehicle
stops moving. The engine starts automati-
cally when the driver wants to pull away again. ESP ®
remains in its previously selected sta-
tus. Example: if ESP®
was deactivated before
the engine was switched off, ESP ®
remains
deactivated when the engine is switched on
again.
Deactivating/activating ESP ® Important safety notes
i Observe the "Important safety notes" sec-
tion (Y page 66).
You can select between the following states
of ESP ®
:
R ESP ®
is activated.
R ESP ®
is deactivated. G
WARNING
If you deactivate ESP ®
, ESP ®
no longer sta-
bilizes the vehicle. There is an increased risk
of skidding and an accident. 72
Driving safety systemsSafety
Page 307 of 406
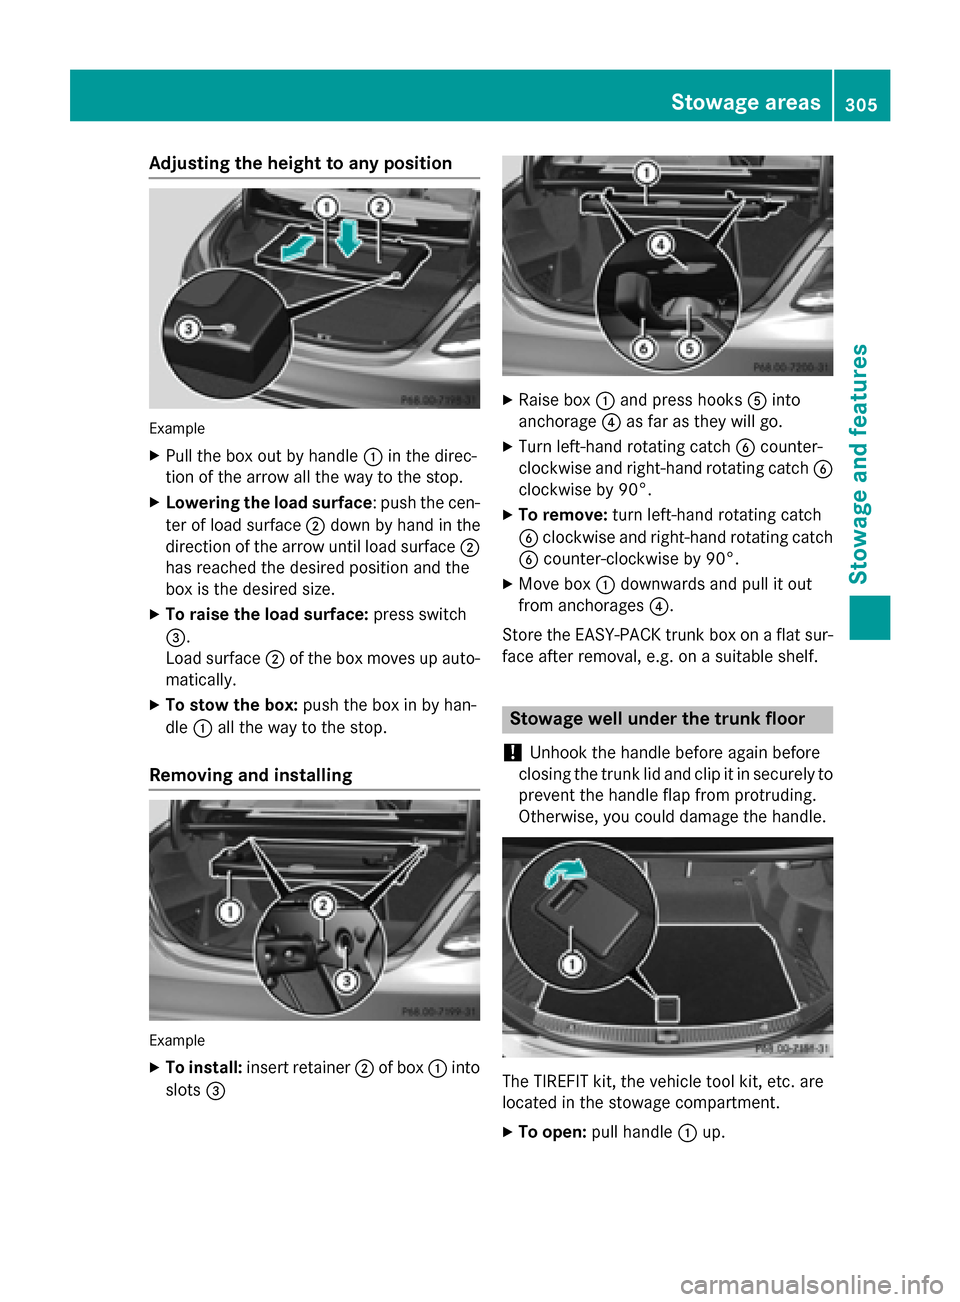
Adjusting the height to any position
Example
X Pull the box out by handle 0043in the direc-
tion of the arrow all the way to the stop.
X Lowering the load surface: push the cen-
ter of load surface 0044down by hand in the
direction of the arrow until load surface 0044
has reached the desired position and the
box is the desired size.
X To raise the load surface: press switch
0087.
Load surface 0044of the box moves up auto-
matically.
X To stow the box: push the box in by han-
dle 0043all the way to the stop.
Removing and installing Example
X To install: insert retainer 0044of box 0043into
slots 0087 X
Raise box 0043and press hooks 0083into
anchorage 0085as far as they will go.
X Turn left-hand rotating catch 0084counter-
clockwise and right-hand rotating catch 0084
clockwise by 90°.
X To remove: turn left-hand rotating catch
0084 clockwise and right-hand rotating catch
0084 counter-clockwise by 90°.
X Move box 0043downwards and pull it out
from anchorages 0085.
Store the EASY-PACK trunk box on a flat sur-
face after removal, e.g. on a suitable shelf. Stowage well under the trunk floor
! Unhook the handle before again before
closing the trunk lid and clip it in securely to
prevent the handle flap from protruding.
Otherwise, you could damage the handle. The TIREFIT kit, the vehicle tool kit, etc. are
located in the stowage compartment.
X To open: pull handle 0043up. Stowage areas
305Stowage and featu res Z
Page 343 of 406
Flat tire
Preparing the vehicle
Your vehicle may be equipped with: R MOExtended tires (tires with run-flat prop-
erties) (Y page 341)
Vehicle preparation is not necessary on
vehicles with MOExtended tires
R a TIREFIT kit (Y page 340)
Information on changing/mounting a wheel
(Y page 381).
X Stop the vehicle on solid, non-slippery and
level ground, as far away as possible from
traffic.
X Switch on the hazard warning lamps.
X Secure the vehicle against rolling away
(Y page 174).
X If possible, bring the front wheels into the
straight-ahead position.
X Switch off the engine.
X Remove the SmartKey from the ignition
lock.
or, in vehicles with KEYLESS-GO start-func-
tion or KEYLESS‑GO
X Open the driver's door.
The on-board electronics now have status
0. This is the same as the SmartKey having
been removed.
X Remove the Start/Stop button from the
ignition lock (Y page 157).
X All occupants must get out of the vehicle.
Make sure that they are not endangered as
they do so.
X Make sure that no one is near the danger
area while a wheel is being changed. Any-
one who is not directly assisting in the
wheel change should, for example, stand
behind the barrier.
X Get out of the vehicle. Pay attention to traf-
fic conditions when doing so.
X Close the driver's door. MOExtended tires (tires with run-flat
properties)
General notes With MOExtended tires (tires with run flat
characteristics), you can continue to drive
your vehicle even if there is a total loss of
pressure in one or more tires. The affected
tire must not show any clearly visible damage.
You can recognize MOExtended tires by the
MOExtended marking which appears on the
sidewall of the tire. You will find this marking next to the tire size designation, the load-
bearing capacity and the speed index
(Y page 375).
MOExtended tires may only be used in con-
junction with an active tire pressure loss
warning system or with an active tire pressure
monitor.
If the pressure loss warning message
appears in the multifunction display:
R Observe the instructions in the display
messages (Y page 277).
R Check the tire for damage.
R If driving on, observe the following notes.
The maximum driving distance is approx-
imately 50 mile s(80 km) when the vehicle is
partially laden and approximately 18 miles
(30 km) when the vehicle is fully laden.
In addition to the vehicle load, the driving dis- tance possible depends upon:
R Speed
R Road condition
R Outside temperature
The driving distance possible in run-flat mode may be reduced by extreme driving condi-
tions/maneuvers, or it can be increased
through a moderate style of driving.
The maximum permissible distance which
can be driven in run-flat mode is counted fromthe moment the tire pressure loss warning
appears in the multifunction display.
You must not exceed a maximum speed of
50 mph (80 km/h). Flat tire
341Roadside Assistance
Page 344 of 406
When replacing one or all tires, make sure
that you use only tires:
R of the size specified for the vehicle and
R marked "MOExtended"
If a tire has gone flat and cannot be replaced
with a MOExtended tire, a standard tire may
be used as a temporary measure. Make sure
that you use the proper size and type (sum-
mer or winter tire).
Vehicles equipped with MOExtended tires are
not equipped with a TIREFIT kit at the factory.
It is therefore recommended that you addi-
tionally equip your vehicle with a TIREFIT kit if you mount tires that do not feature run-flat
properties, e.g. winter tires. A TIREFIT kit may
be obtained from a qualified specialist work-
shop.
Important safety notes G
WARNING
When driving in emergency mode, the driving characteristics deteriorate, e.g. when corner-
ing, accelerating quickly and when braking.
There is a risk of an accident.
Do not exceed the stated maximum speed.
Avoid abrupt steering and driving maneuvers,
and driving over obstacles (curbs, potholes,
off-road). This applies in particular to a laden
vehicle.
Stop driving in emergency mode if:
R you hear banging noises.
R the vehicle starts to shake.
R you see smoke and smell rubber.
R ESP ®
is intervening constantly.
R there are tears in the sidewalls of the tire.
After driving in emergency mode, have the
wheel rims checked at a qualified specialist
workshop with regard to their further use. The defective tire must be replaced in every case. TIREFIT kit
Important safety notes TIREFIT is a tire sealant.
You can use TIREFIT to seal punctures of up to
0.16 in (4 mm), particularly those in the tire
tread. You can use TIREFIT at outside tem-
peratures down to 00F84 ‡ (00F820 †). G
WARNING
In the following situations, the tire sealant is
unable to provide sufficient breakdown assis- tance, as it is unable to seal the tire properly:
R there are cuts or punctures in the tire larger
than those mentioned above.
R the wheel rim is damaged.
R you have driven at very low tire pressures or
on a flat tire.
There is a risk of an accident.
Do not drive the vehicle. Contact a qualified
specialist workshop. G
WARNING
The tire sealant is harmful and causes irrita-
tion. It must not come into contact with your
skin, eyes or clothing or be swallowed. Do not inhale TIREFIT fumes. Keep tire sealant away
from children. There is a risk of injury.
If you come into contact with the tire sealant,
observe the following:
R Rinse off the tire sealant from your skin
immediately with water.
R If the tire sealant comes into contact with
your eyes, immediately rinse them thor-
oughly with clean water.
R If tire sealant is swallowed, immediately
rinse your mouth out thoroughly and drink
plenty of water. Do not induce vomiting,
and seek medical attention immediately.
R Immediately change out of clothing which
has come into contact with tire sealant.
R If an allergic reaction occurs, seek medical
attention immediately. 342
Flat tireRoadside Assistance
Page 360 of 406
Useful information
i This Operator's Manual describes all
models and all standard and optional equip- ment of your vehicle available at the time of
publication of the Operator's Manual.
Country-specific differences are possible.
Please note that your vehicle may not be
equipped with all features described. This
also applies to safety-related systems and
functions.
i Read the information on qualified special-
ist workshops (Y page 26). Important safety notes
G
WARNING
If wheels and tires of the wrong size are used, the wheel brakes or suspension components
may be damaged. There is a risk of an acci-
dent.
Always replace wheels and tires with those
that fulfill the specifications of the original
part.
When replacing wheels, make sure to use the
correct:
R designation
R model
When replacing tires, make sure to use the
correct:
R designation
R manufacturer
R model G
WARNING
A flat tire severely impairs the driving, steer-
ing and braking characteristics of the vehicle.
There is a risk of accident.
Tires without run-flat characteristics:
R do not drive with a flat tire.
R immediately replace the flat tire with your
emergency spare wheel or spare wheel, or
consult a qualified specialist workshop. Tires with run-flat characteristics:
R pay attention to the information and warn-
ing notices on MOExtended tires (tires with
run-flat characteristics).
Accessories that are not approved for your
vehicle by Mercedes-Benz or are not being
used correctly can impair the operating
safety.
Before purchasing and using non-approved
accessories, visit a qualified specialist work-
shop and inquire about:
R suitability
R legal stipulations
R factory recommendations
Information on the dimensions and types of
wheels and tires for your vehicle can be found in the "Wheel/tire combinations" section
(Y page 386).
Information on air pressure for the tires on
your vehicle can be found:
R on the vehicle's Tire and Loading Informa-
tion placard on the B-pillar (Y page 369)
R on the tire pressure label on the fuel filler
flap (Y page 172)
R under "Tire pressure" (Y page 361) Operation
Information on driving
If the vehicle is heavily loaded, check the tire pressures and correct them if necessary.
While driving, pay attention to vibrations,
noises and unusual handling characteristics,
e.g. pulling to one side. This may indicate that the wheels or tires are damaged. If you sus-
pect that a tire is defective, reduce your
speed immediately. Stop the vehicle as soon
as possible to check the wheels and tires for
damage. Hidden tire damage could also be
causing the unusual handling characteristics.
If you find no signs of damage, have the tires and wheels checked at a qualified specialist
workshop. 358
OperationWheels and tires
Page 362 of 406
approximately
00CDin(1.6 mm) has been
re ached. If this is the case, the tire is so worn
that it must be replaced. Selecting, mounting and replacing
tires
R Only mount tires and wheels of the same
type and make.
Exception: it is permissible to install a dif-
ferent type or make in the event of a flat
tire. Observe the "MOExtended tires (tires
with run-flat characteristics" section
(Y page 341).
R Only mount tires of the correct size onto
the wheels.
R Break in new tires at moderate speeds for
the first 60 miles (100 km). They only reach
their full performance after this distance.
R Do not drive with tires which have too little
tread depth, as this significantly reduces
the traction on wet roads (hydroplaning).
R Replace the tires after six years at the lat-
est, regardless of wear. MOExtended tires (tires with run-flat
properties)
With MOExtended tires (tires with run flat
characteristics), you can continue to drive
your vehicle even if there is a total loss of
pressure in one or more tires.
MOExtended tires may only be used in con-
junction with an active tire pressure loss
warning system or with an active tire pressure monitor and on wheels specifically tested by
Mercedes-Benz.
Notes on driving with MOExtended tires with
a flat tire (Y page 341).
i Vehicles equipped with MOExtended tires
are not equipped with a TIREFIT kit at the
factory. It is therefore recommended that
you additionally equip your vehicle with a
TIREFIT kit if you mount tires that do not
feature run-flat properties, e.g. winter tires. A TIREFIT kit can be obtained from a quali-
fied specialist workshop. Winter operation
General notes
Have your vehicle winter-proofed at a quali-
fied specialist workshop at the onset of win-
ter.
Observe the notes in the "Changing a wheel"
section (Y page 381). Driving with summer tires
At temperatures below 45 ‡(+7 †), summer
tires lose elasticity and therefore traction and braking power. Change the tires on your vehi-cle to M+S tires. Using summer tires at very
cold temperatures could cause cracks to
form, thereby damaging the tires perma-
nently. Mercedes-Benz cannot accept
responsibility for this type of damage. G
WARNING
Damaged tires can cause tire inflation pres-
sure loss. As a result, you could lose control of your vehicle. There is a risk of accident.
Check the tires regularly for signs of damage
and replace any damaged tires immediately. M+S tires
G
WARNING
M+S tires with a tire tread depth of less than
00CF in (4 mm) are not suitable for use in winter
and do not provide sufficient traction. There is
a risk of an accident.
M+S tires with a tread depth of less than 00CFin
(4 mm) must be replaced immediately.
At temperatures below 45 ‡(+7 †), use win-
ter tires or all-season tires. Both types of tire are identified by the M+S marking.
Only winter tires bearing the 004Dsnowflake
symbol in addition to the M+S marking pro- 360
Winter operationWheels and tires
Page 364 of 406
Follow recommended tire inflation pressures
and check the pressure of all the tires includ-
ing the spare wheel:
R monthly, at least
R if the load changes
R before beginning a long journey
R under different operating conditions, e.g.
off-road driving
If necessary, correct the tire pressure.
The specifications on the sample Tire and
Loading Information placard and tire pressure
tables are examples. Tire pressure specifica-
tions are vehicle-specific and may deviate
from the data shown here. The tire pressure
specifications that are valid for your vehicle
can be found on the Tire and Loading Infor-
mation placard and tire pressure table on the vehicle.
General notes The recommended tire pressures for the tires
mounted at the factory can be found on the
labels described here.
Further information on tire pressures can be
obtained at a qualified specialist workshop.
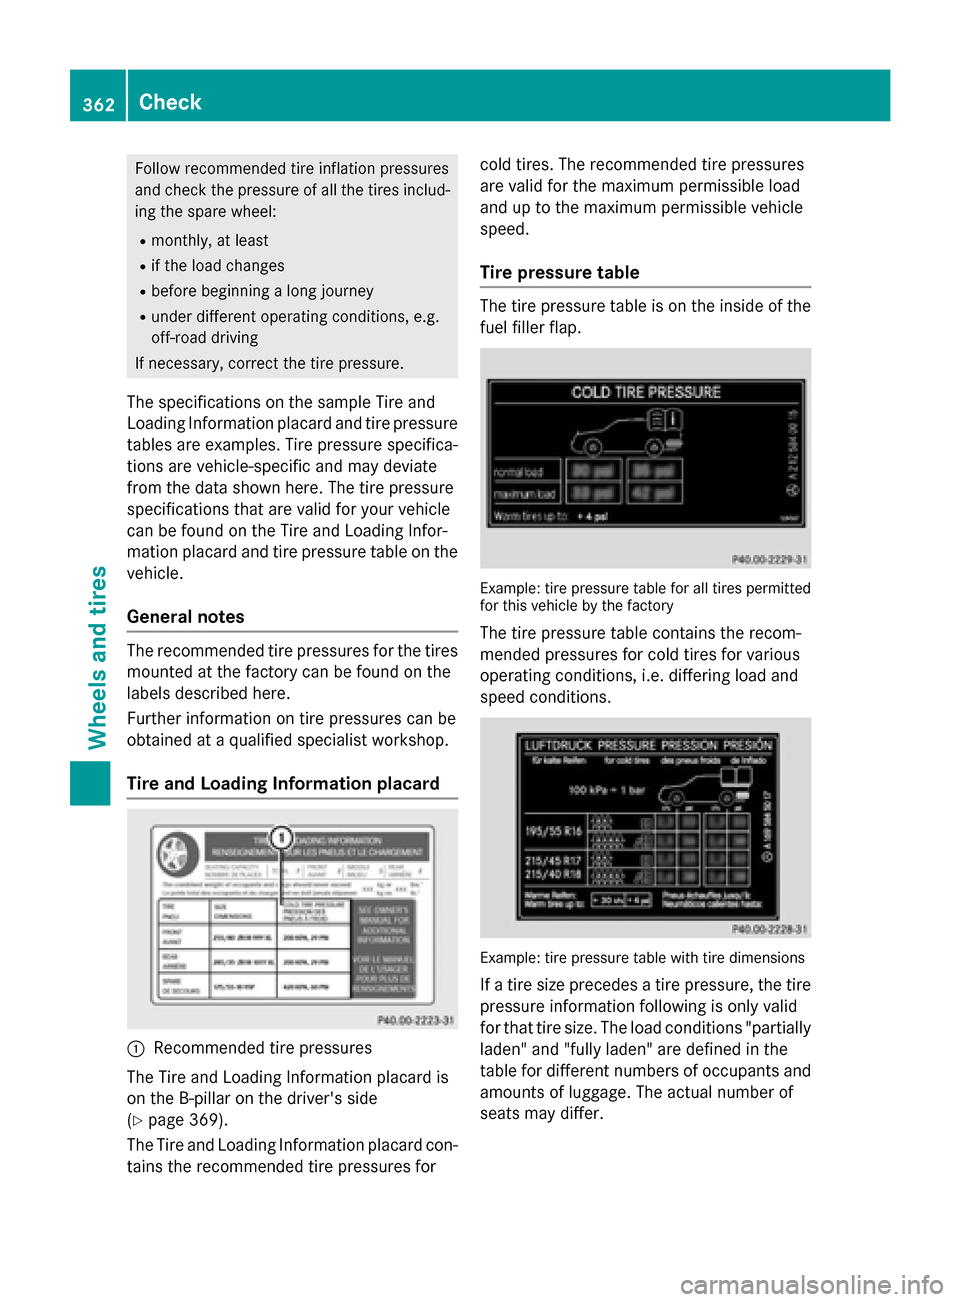
Tire and Loading Information placard 0043
Recommended tire pressures
The Tire and Loading Information placard is
on the B-pillar on the driver's side
(Y page 369).
The Tire and Loading Information placard con-
tains the recommended tire pressures for cold tires. The recommended tire pressures
are valid for the maximum permissible load
and up to the maximum permissible vehicle
speed.
Tire pressure table The tire pressure table is on the inside of the
fuel filler flap. Example: tire pressure table for all tires permitted
for this vehicle by the factory
The tire pressure table contains the recom-
mended pressures for cold tires for various
operating conditions, i.e. differing load and
speed conditions. Example: tire pressure table with tire dimensions
If a tire size precedes a tire pressure, the tirepressure information following is only valid
for that tire size. The load conditions "partially
laden" and "fully laden" are defined in the
table for different numbers of occupants and
amounts of luggage. The actual number of
seats may differ. 362
CheckWheels and tires
Page 365 of 406
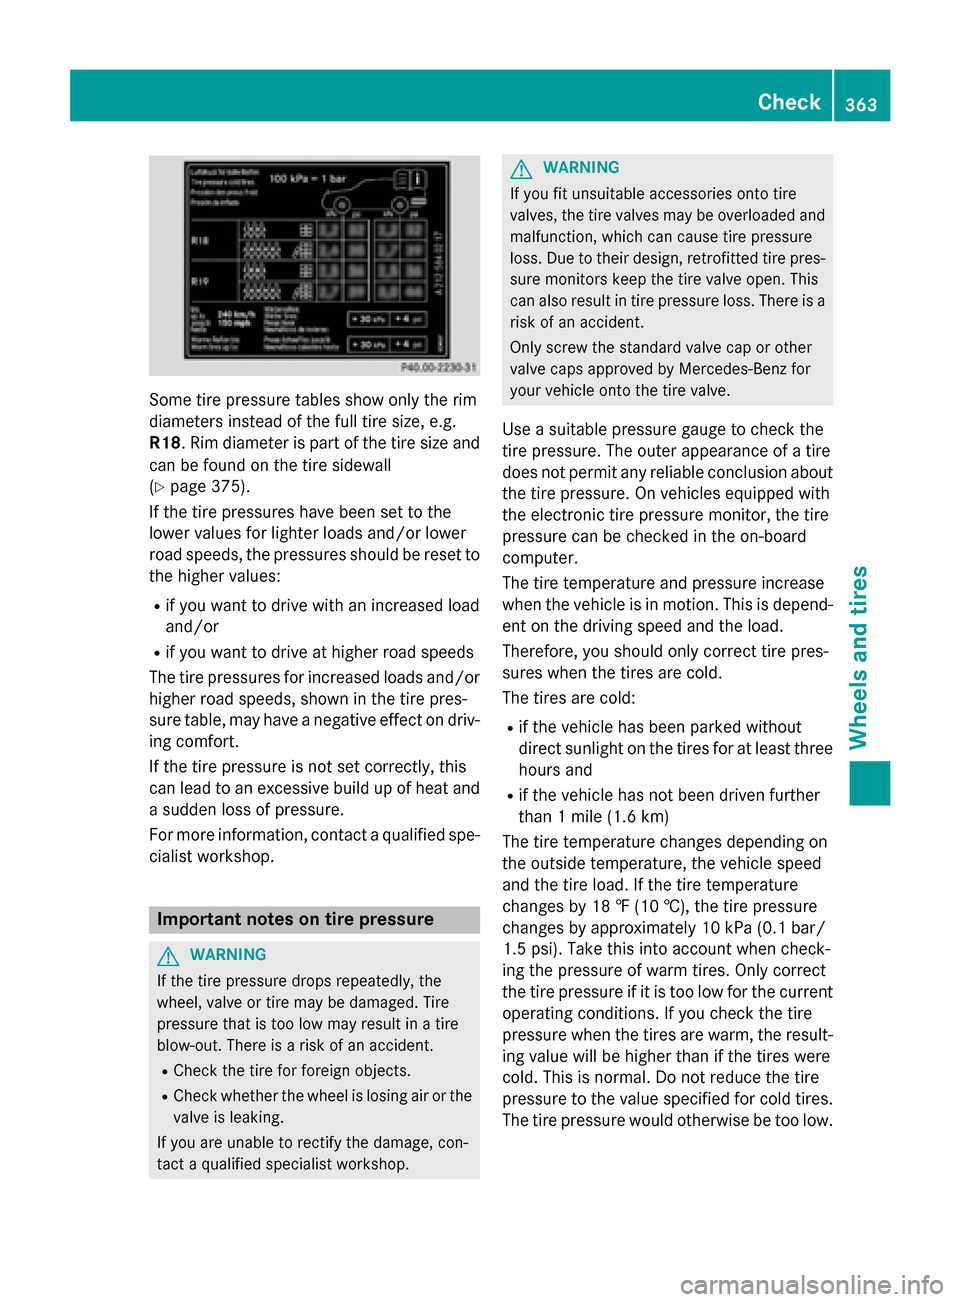
Some tire pressure tables show only the rim
diameters instead of the full tire size, e.g.
R18 . Rim diameter is part of the tire size and
can be found on the tire sidewall
(Y page 375).
If the tire pressures have been set to the
lower values for lighter loads and/or lower
road speeds, the pressures should be reset to
the higher values:
R if you want to drive with an increased load
and/or
R if you want to drive at higher road speeds
The tire pressures for increased loads and/or
higher road speeds, shown in the tire pres-
sure table, may have a negative effect on driv- ing comfort.
If the tire pressure is not set correctly, this
can lead to an excessive build up of heat and
a sudden loss of pressure.
For more information, contact a qualified spe- cialist workshop. Important notes on tire pressure
G
WARNING
If the tire pressure drops repeatedly, the
wheel, valve or tire may be damaged. Tire
pressure that is too low may result in a tire
blow-out. There is a risk of an accident. R Check the tire for foreign objects.
R Check whether the wheel is losing air or the
valve is leaking.
If you are unable to rectify the damage, con-
tact a qualified specialist workshop. G
WARNING
If you fit unsuitable accessories onto tire
valves, the tire valves may be overloaded and malfunction, which can cause tire pressure
loss. Due to their design, retrofitted tire pres- sure monitors keep the tire valve open. This
can also result in tire pressure loss. There is a
risk of an accident.
Only screw the standard valve cap or other
valve caps approved by Mercedes-Benz for
your vehicle onto the tire valve.
Use a suitable pressure gauge to check the
tire pressure. The outer appearance of a tire
does not permit any reliable conclusion about the tire pressure. On vehicles equipped with
the electronic tire pressure monitor, the tire
pressure can be checked in the on-board
computer.
The tire temperature and pressure increase
when the vehicle is in motion. This is depend-
ent on the driving speed and the load.
Therefore, you should only correct tire pres-
sures when the tires are cold.
The tires are cold:
R if the vehicle has been parked without
direct sunlight on the tires for at least three
hours and
R if the vehicle has not been driven further
than 1 mile (1.6 km)
The tire temperature changes depending on
the outside temperature, the vehicle speed
and the tire load. If the tire temperature
changes by 18 ‡ (10 †), the tire pressure
changes by approximately 10 kPa (0.1 bar/
1.5 psi). Take this into account when check-
ing the pressure of warm tires. Only correct
the tire pressure if it is too low for the current
operating conditions. If you check the tire
pressure when the tires are warm, the result- ing value will be higher than if the tires were
cold. This is normal. Do not reduce the tire
pressure to the value specified for cold tires. The tire pressure would otherwise be too low. Check
363Wheels and tires Z