car play MERCEDES-BENZ C-CLASS SEDAN 2018 COMAND Manual
[x] Cancel search | Manufacturer: MERCEDES-BENZ, Model Year: 2018, Model line: C-CLASS SEDAN, Model: MERCEDES-BENZ C-CLASS SEDAN 2018Pages: 174, PDF Size: 4.1 MB
Page 106 of 174
Addressbook
Introduction
Always pay attention to traffic conditions.
Familiariz eyourself wit hth eaddress book func-
tion sbefore beginning your journey.
You can use th emultimedia system when th e
road and traffic condition spermit .You could
otherwise become involved in an acciden tin
whic hyou or other scould be injured .
The address book displays all th econtact sfrom
th evarious source s(mobile phone ,memory
card, US Bdevice ,th ephone book of th emulti-
media system, navigation).
You can use th econtact sto mak etelephon e
calls, navigat eand to writ emessages.
If amobile phone is connecte dto th emultimedia
system and automatic calling up is activated
(
Ypage 108), th emobile phone's contact sare
displayed in th eaddress book .If you disconnect
th emobile phone from th emultimedia system,
these contact sare no longer displayed in th e
address book .
When you import ,save, edit or add contacts,
they will be saved in th emultimedia system.
These contact swill remain available eve nwhen
you connec tth emultimedia system to adiffer -
en tmobile phone .You can vie wthese contact s
eve nwithout amobile phone .
iThe address book can store atotal of 5,000
contacts:
R2000 entries are reserved for permanentl y
s
aved contact s
R3000 entries are reserved for contact sthat
you can load from th emobile phone
iBefor eselling your vehicle, delete th econ-
tacts saved in th emultimedia system usin g
th ereset function (
Ypage 43).
Calling up the address book
XTo call up thetelephon emenu: press th e
% button.
XTo display th emain function bar: slid e5 the
controller .
XTo selectPhone:tur nand press th econtroller .
XTo select AddressBoo k:tur nand press th e
controller .
XTo browse in th eaddress book :tur nth econ-
troller .
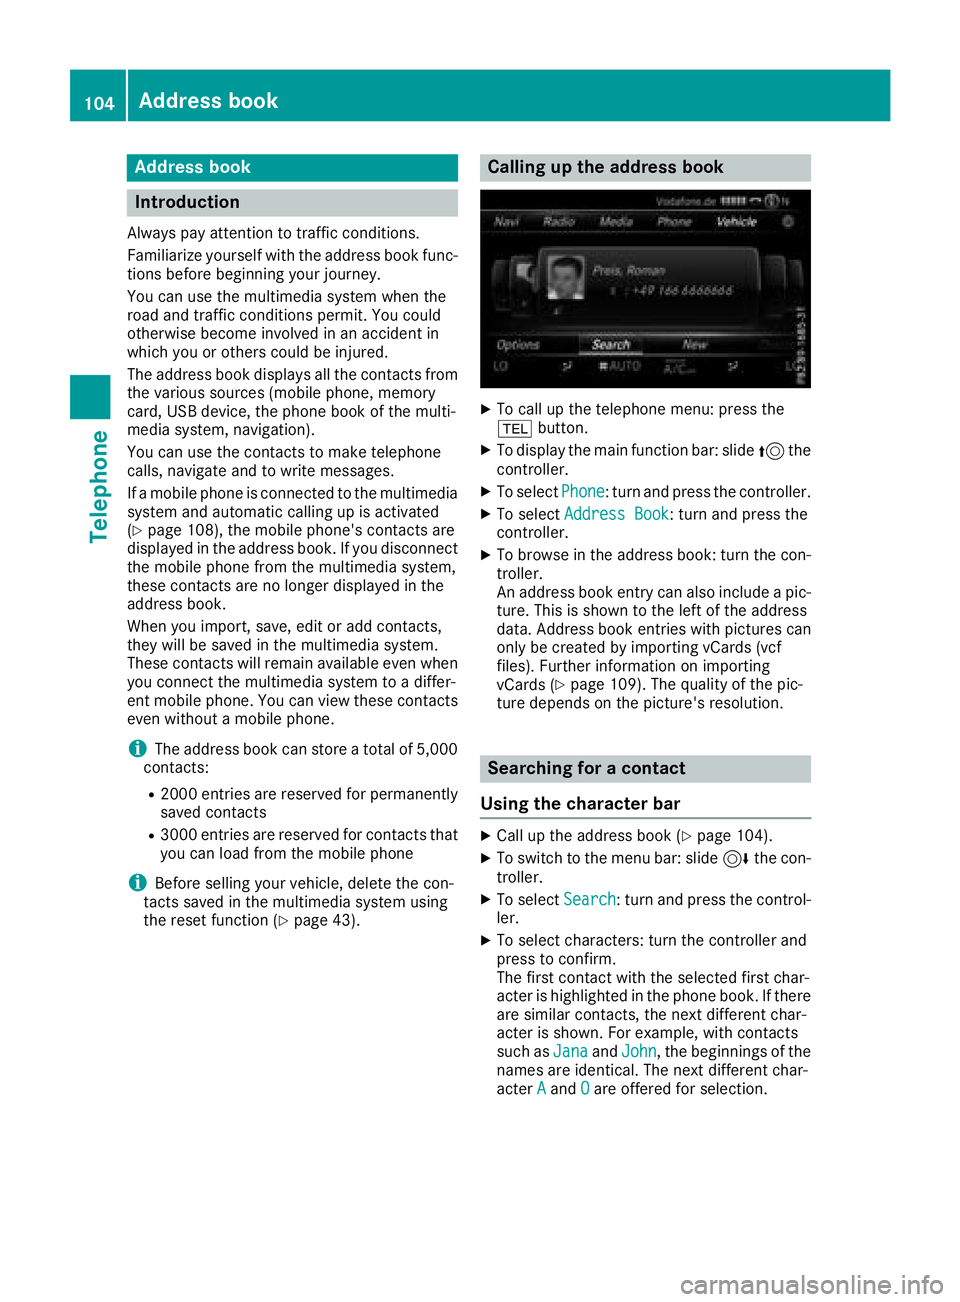
An address book entr ycan also include apic -
ture. This is shown to th elef tof th eaddress
data. Address book entries wit hpictures can
only be created by importing vCards (vc f
files). Further information on importing
vCards (
Ypage 109). The qualit yof th epic -
tur edepend son th epicture's resolution .
Searching for a contact
Using the cha racter bar
XCall up th eaddress book (Ypage 104).
XTo switch to th emen ubar: slid e6 thecon-
troller .
XTo select Search:tur nand press th econtrol -
ler .
XTo select characters: tur nth econtroller and
press to confirm .
The first contact wit hth eselected first char-
acter is highlighte din th ephone book .If there
are similar contacts, th enext differen tchar-
acter is shown. Fo rexample, wit hcontact s
suc has Jan a
and John,th ebeginning sof th e
names are identical. The next differen tchar-
acter A
andOare offere dfor selection .
104Address book
Telephone
Page 111 of 174
Importing contacts
Information and requirements
Contacts can be imported as vCards (vc ffiles). A
vCar dis an electronic business card. Amemory
card, US Bdevice or aBluetoot h
®connection
can be used for importing .
iUp to 2000 entries can be imported int oth e
address book . Amessage notifie syou when
th emaximum number is reached. In order to
be able to then import ne wcontacts, you have
to delet eexisting contact s (
Ypage 108).
SourceRequirements
Memory cardThe SD cardis inserted. It
contain simportable contact
details.
US BdeviceThe US Bdevice is inserted
int oth eUS Bport. It contain s
importable contact details.
Bluetoot h®
connection
If thesendin gof vCards is
supported via Bluetoot h®,
vCards can be received on
mobile phones or netbooks,
for example.
Bluetoot h
®must be activa-
te din th emultimedia system
and on th erespective device ;
see th emanufacturer' soper -
ating instructions.
iIf automatic calling up of th econtact sis
deactivated (Ypage 108), th eImportfro mPhoneoption is available.
Importing from the memory card or USB
device
Contacts imported from th ememory car dor
from aUS Bdevice are identifie dby th e¯
symbol.
The followin gcondition smust be fulfilled in
order to import vCards:
RvCards (vc ffiles) may be locate din th emain
directory or in folders. The multimedia system
allows for atargeted selection of th ecorre-
sponding directories.
RvCards must have th efile extension "vcf".
iThe multimedia system support svCards in
version s2. 1and 3.0.
XTo switch to th emen ubar in th etelephon e
men uor th eaddress book :slide 6thecon-
troller .
XTo select Options:tur nand press th econ-
troller .
XTo select Download Contacts:tur nand
press th econtroller .
XTo select FromMemory Car dorFro mUSBdevice:tur nand press th econtroller .
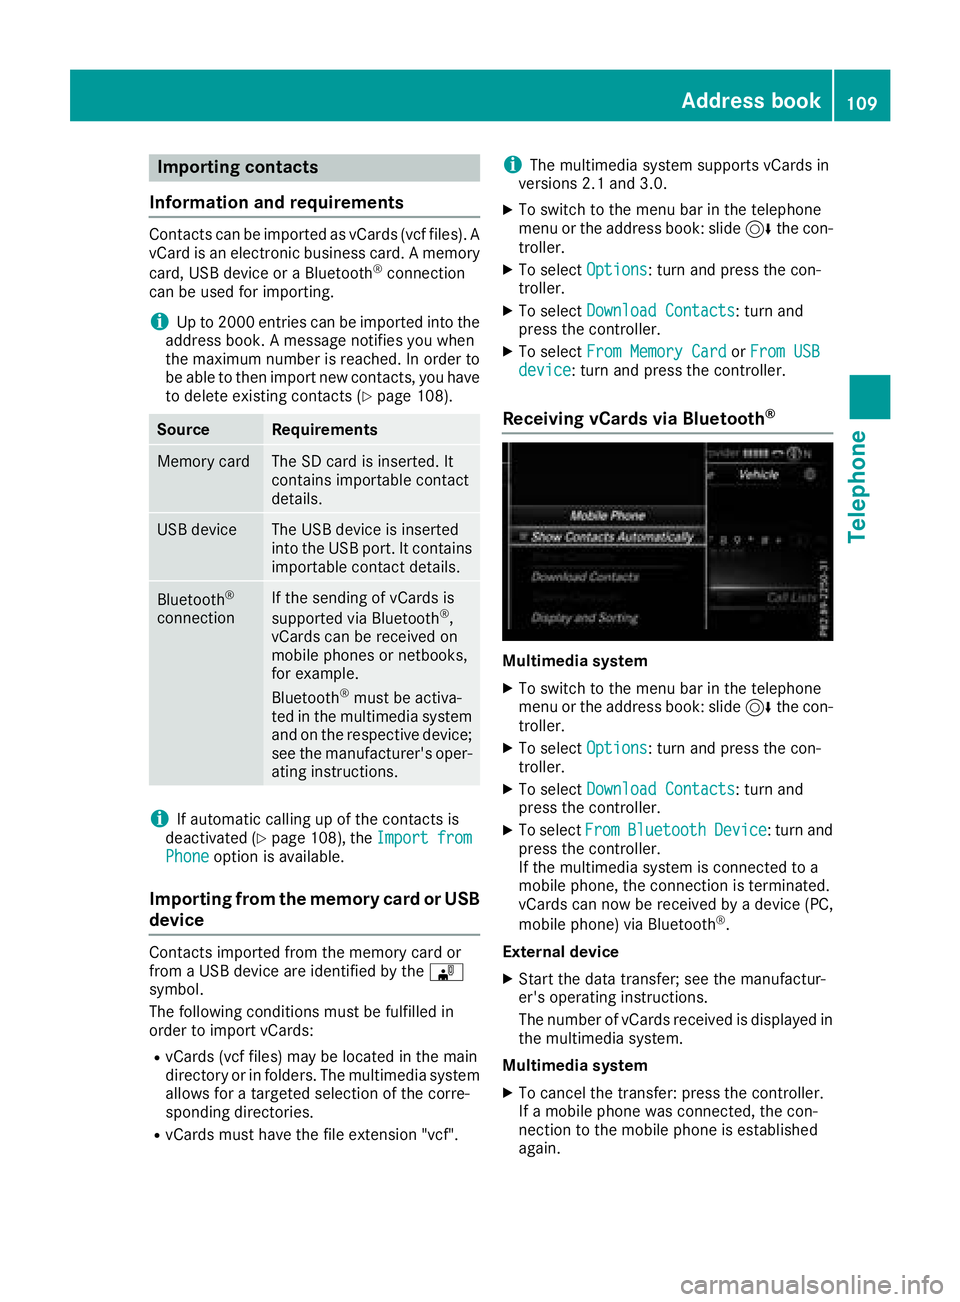
Receiving vCards via Bluetooth®
Multimedi asystem
XTo switch to th emen ubar in th etelephon e
men uor th eaddress book :slide 6thecon-
troller .
XTo select Options:tur nand press th econ-
troller .
XTo select Download Contacts:tur nand
press th econtroller .
XTo selectFromBluetoothDevice:tur nand
press th econtroller .
If th emultimedia system is connecte dto a
mobile phone, th econnection is terminated.
vCards can no wbe received by adevice (PC,
mobile phone) via Bluetoot h
®.
External device
XStart th edat atransfer ;see th emanufactur -
er' soperating instructions.
The number of vCards received is displayed in th emultimedia system.
Multimedi asystem
XTo cance lth etransfer :press th econtroller .
If amobile phon ewas connected, th econ-
nection to th emobile phon eis established
again .
Address book109
Telephone
Z
Page 112 of 174
Received vCards are identifiedby th e®
symbol in th eaddress book .
iIf you switch to another main function ,e.g.
navigation ,while receiving vCards, th erecep-
tion of vCards will be terminated.
Deleting imported contacts
XTo chang eto th emen ubar when in th e
address book or th etelephon emenu: slid e
6 thecontroller .
XTo select Options:tur nand press th econ-
troller .
XTo select Delete Contacts:tur nand press
th econtroller .
XSelecton eof th efollowin goptions:
RInternal Contacts
RImported fro mStorag eDevice
RImported fro mBluetooth Device s
RDownloadedfro mPhone
Turn and press th econtroller .
XTo select Yes:tur nand press th econtroller .
The contact sare deleted.
Closing the address book
XPress th e% buttonon eor mor etimes .
Call lists
Introduction
If your mobile phon esupport sth ePBAP Blue -
toot h®profile ,th ecall list sfrom th emobile
phon eare displayed in th emultimedia system.
When connecting th emobile phone, you may
hav eto confirm th econnection for th ePBAP
Bluetoot h
®profile.
If your mobile phon edoes no tsupport th ePBAP
Bluetoot h
®profile,th emultimedia system gen -
erates it sown call lists. These are no tth esam e
as th ecall list sin your mobile phone.
The call list soption is no tavailable unless a
mobile phon eis connecte dto th emultimedia
system.
If th econtact for an incoming call is no tsaved in
th eaddress book ,you can use th ecall list to
sav eth etelephon enumber .You can sav ethis telephon
enumber as ane wcontact in th e
address book or add it to an existing contact
(
Ypage 111).
iIf you connec t adifferen tmobile phon eto
th emultimedia system, th ecall list sfrom th e
ne wmobile phon eare displayed.
Opening the call list and selecting an
entry
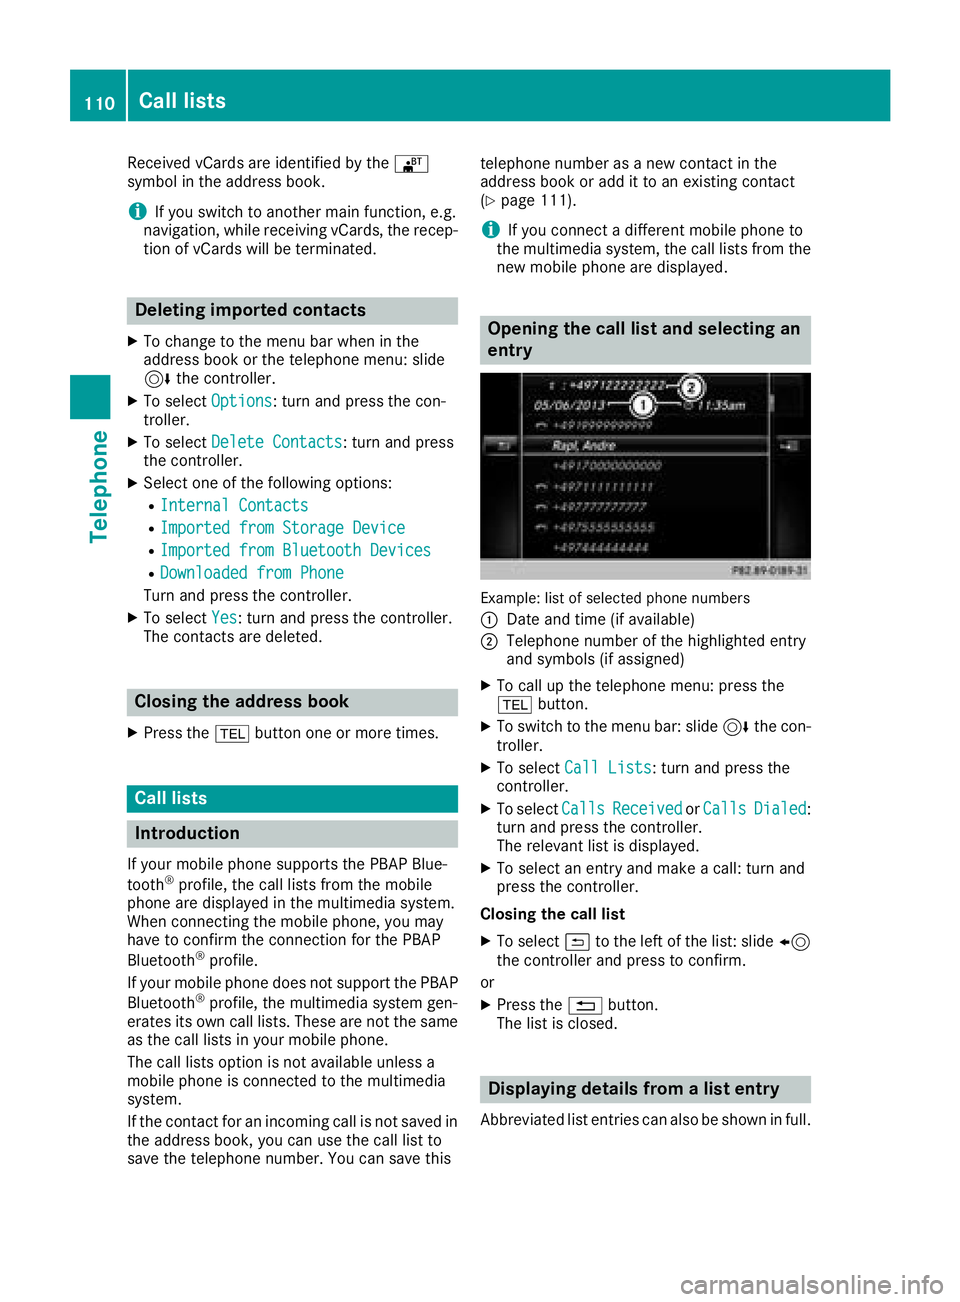
Example: list of selected phone number s
:
Dat eand time (if available)
;Telephon enumber of th ehighlighte dentr y
and symbols (if assigned)
XTo call up th etelephon emenu: press th e
% button.
XTo switch to th emen ubar: slid e6 thecon-
troller .
XTo select CallLists:tur nand press th e
controller .
XTo selectCallsReceivedorCallsDialed:
tur nand press th econtroller .
The relevan tlist is displayed.
XTo select an entr yand mak e acall:tur nand
press th econtroller .
Closin gth ecall list
XTo select &to th elef tof th elist :slid e8
th econtroller and press to confirm .
or
XPress th e% button.
The list is closed.
Displaying details from a list entry
Abbreviated list entries can also be shown in full.
110Call lists
Telephone
Page 124 of 174
If the mobile phone network provider provides
multiple access data options, the relevant
access data still has to be selected. This
depends on the data package used, for example.
To check whether the predetermined dial-in
data corresponds with the dial-in data providedby your mobile phone network provider, pro-
ceed as follows (
Ypage 123) and select Man‐ual Settings. The access data is displayed.
The access data for the mobile phone network
provider is selected once for the mobile phone
connected and is loaded again each time the
mobile phone is connected. Establishing a con-
nection (
Ypage 124).
You must set the access data of the mobile
phone network provider who provides the SIM
card and the associated data package (access
settings) for the connected mobile phone. The
access data remains the same when you are in a
different country (roaming). The access data of
another network is notselected.
Manually setting the access data of the
mobile phone network provider
XTo select Manual Settings: turn and press
the controller.
An overview of the provider settings appears.
XSet access data (Ypage 122).
XTo select ConfirmSettings: turn and press
the controller.
The access data for the mobile phone network
provider is selected once for the mobile phone
connected and is loaded again each time the
mobile phone is connected. Establishing a con-
nection (
Ypage 124).
You must set the access data of the mobile
phone network provider who provides the SIM
card and the associated data package (access
settings) for the connected mobile phone. The
access data remains the same when you are in a
different country (roaming). The access data of
another network is notselected.
Setting access data
Set the access data in accordance with your
data package. You can contact your mobile
phone network provider to obtain the precise
access data. Explanation of the access data
Input fieldMeaning
Phone Num‐ber:Access number for estab-
lishing the connection
The access number
depends on the mobile
phone used. For GSM/
UMTS mobile phones,
*99***1#
is used as a
standard.
AccessPoint:APN network access point
(A ccess PointName)
You can obtain this infor-
mation from your mobile
phone network provider.
Entry is not necessary for
all mobile phone network
providers and mobile
phones.
PDP Type:Internet protocol used.
You can obtain this infor-
mation from your mobile
phone network provider.
User ID:The user identification can
be obtained from your
mobile phone network pro-
vider.
Entry is not necessary for
all mobile phone network
providers.
Password:The password can be
obtained from your mobile
phone network provider.
Entry is not necessary for
all mobile phone network
providers.
Auto DNS:Automatic allocation of
DNS servers is activated. If
the function is deactivated,
the DNS server addresses
must be entered manually.
DNS ( Domain Name
Service).
DNS1:
DNS2:
Fields for entering the DNS
server addresses manually. The address can be
obtained from your mobile
phone network provider.
122Setting up an Internet connection (Canada)
Online and Internet functions
Page 136 of 174
subsidiaries. All other marks, channel names
and logos are the property of their respective
owners. All rights reserved.
Registering satellite radio
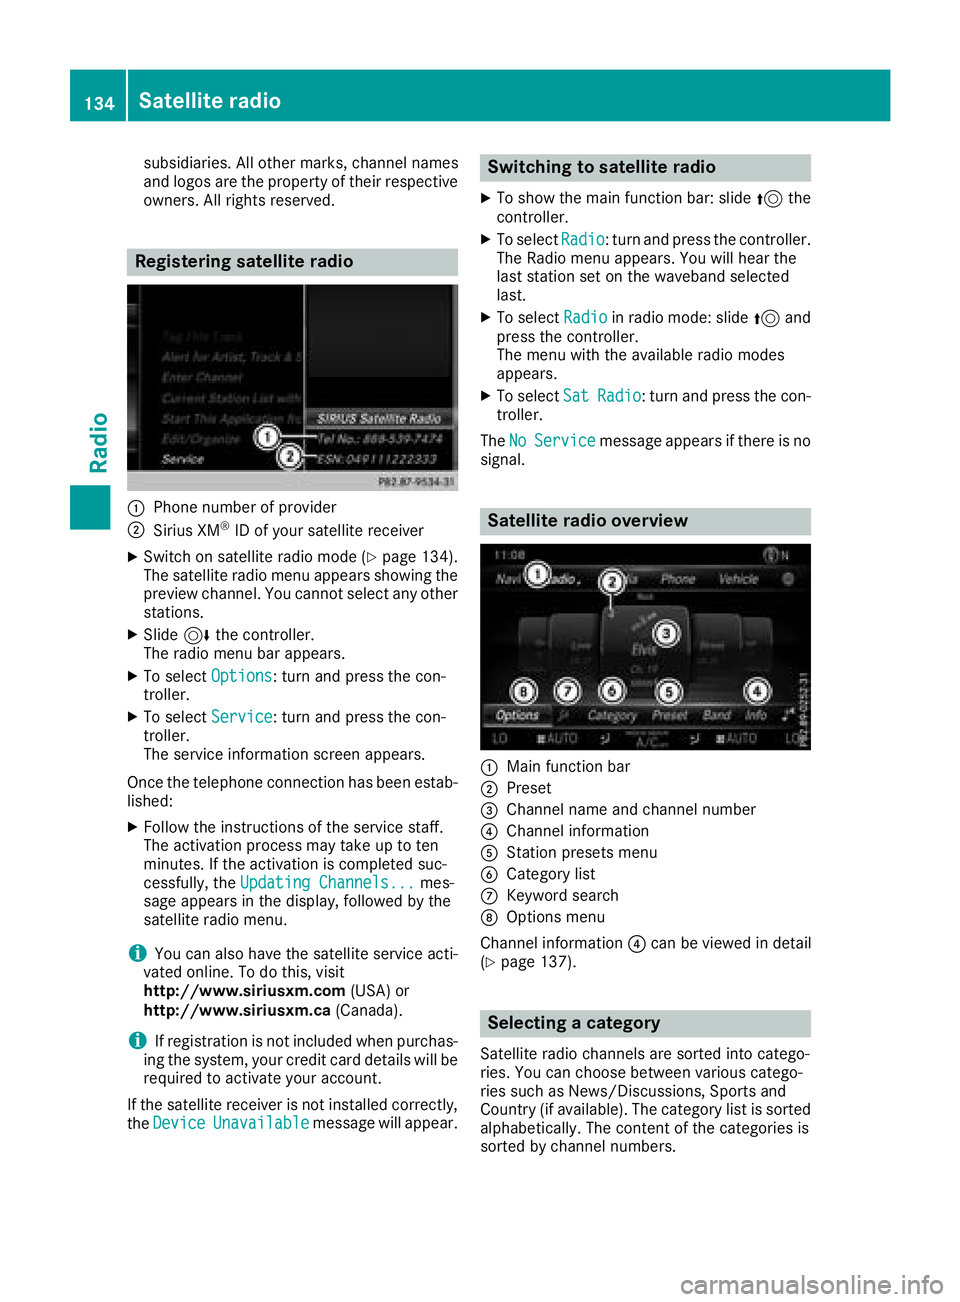
:Phone number of provider
;Sirius XM®ID of your satellite receiver
XSwitch on satellite radio mode (Ypage 134).
The satellite radio menu appears showing the
preview channel. You cannot select any other
stations.
XSlide 6the controller.
The radio menu bar appears.
XTo select Options: turn and press the con-
troller.
XTo select Service: turn and press the con-
troller.
The service information screen appears.
Once the telephone connection has been estab-
lished:
XFollow the instructions of the service staff.
The activation process may take up to ten
minutes. If the activation is completed suc-
cessfully, the Updating Channels...
mes-
sage appears in the display, followed by the
satellite radio menu.
iYou can also have the satellite service acti-
vated online. To do this, visit
http://www.siriusxm.com (USA) or
http://www.siriusxm.ca (Canada).
iIf registration is not included when purchas-
ing the system, your credit card details will be
required to activate your account.
If the satellite receiver is not installed correctly,
the Device
Unavailablemessage will appear.
Switching to satellite radio
XTo show the main function bar: slide 5the
controller.
XTo select Radio: turn and press the controller.
The Radio menu appears. You will hear the
last station set on the waveband selected
last.
XTo select Radioin radio mode: slide 5and
press the controller.
The menu with the available radio modes
appears.
XTo select SatRadio: turn and press the con-
troller.
The No
Servicemessage appears if there is no
signal.
Satellite radio overview
:Main function bar
;Preset
=Channel name and channel number
?Channel information
AStation presets menu
BCategory list
CKeyword search
DOptions menu
Channel information ?can be viewed in detail
(
Ypage 137).
Selecting a category
Satellite radio channels are sorted into catego-
ries. You can choose between various catego-
ries such as News/Discussions, Sports and
Country (if available). The category list is sorted alphabetically. The content of the categories is
sorted by channel numbers.
134Satellite radio
Radio
Page 140 of 174
Your multimediasyste mequipment
These operatin ginstruction sdescribe all th e
standar dan doptional equipment of your multi-
media system, as available at th etime of going
to press. Country-specifi cdifference sare pos -
sible. Bear in min dthat your vehicle may no t
feature all function sdescribed here. Thi salso
applies to safety-relevan tsystems an dfunc-
tions.
Read th einformation on qualifie dspecialis t
workshop sin th evehicle Operator's Manual.
Activating medi amode
General notes
There are severa lways to activat emedia sour-
ce susin gth emultimedia system. The relevant
section sof th eOperator's Manual describe th e
simples tway to activat e amedia source. Thi s
section describes all option sfo ractivatin g
media sources. If you wish to play external
media sources, th eassociated media men u
mus talready be turned on .
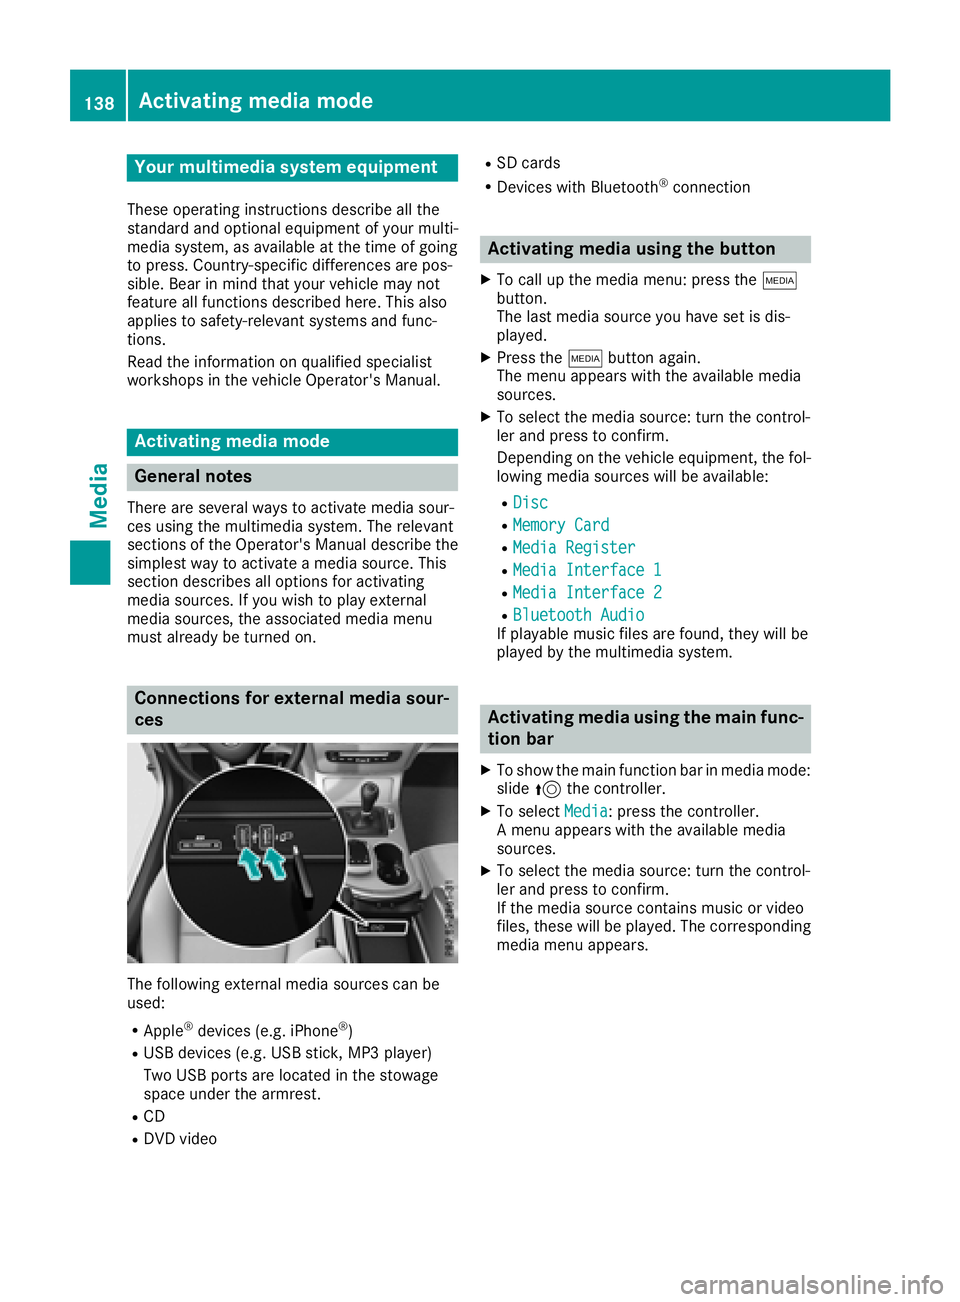
Connections for externa lmedi asour-
ces
The followin gexternal media sources can be
used :
RApple®devices (e.g. iPhon e®)
RUSBdevices (e.g. US Bstick, MP3 player)
Two US Bports are located in th estowag e
spac eunder th earmrest.
RCD
RDV Dvideo
RSD cards
RDevices wit hBluetoot h®connection
Activating medi ausing th ebutton
XTo cal lup th emedia menu: press th eÕ
button.
The last media sourc eyou hav eset is dis -
played.
XPress th eÕ buttonagain .
The men uappears wit hth eavailable media
sources.
XTo selec tth emedia source: turn th econtrol-
ler an dpress to confirm .
Dependin gon th evehicle equipment ,th efol-
lowing media sources will be available :
RDisc
RMemory Card
RMediaRegister
RMedi aInterfac e 1
RMediaInterfac e 2
RBluetoothAudi oIf playable music files are found ,they will be
playe dby th emultimedia system.
Activating medi ausing th emain func-
tion ba r
XTo showthemain function bar in media mode:
slid e5 thecontroller .
XTo selectMedi a:press th econtroller .
A men uappears wit hth eavailable media
sources.
XTo selec tth emedia source: turn th econtrol-
ler an dpress to confirm .
If th emedia sourc econtain smusic or video
files, these will be played. The correspondin g
media men uappears .
138Activating media mode
Media
Page 141 of 174
Activating media using the device list
XIn media mode, slide6 thecontroller .
The media men ubar is shown.
XTo select Devices:tur nand press th econ-
troller .
The available media source swill be shown.
The #dot indicates th ecurren tsetting .
XSelectth emedia source .
If th emedia source contain smusic or video
files, these will be played .The corresponding
media men uis shown.
Switching onautomatically
Afte rinserting aCD or DVD, th ecorresponding
media mod eis automatically switched on by th e
multimedia system.
If playable music file sare found, they will be
played by th emultimedia system.
If amedia playbac kfunction is already switched
on in th emultimedia system, this will be inter-
rupted and th eCD or DV Dmod emen uwill
appear .If another function ,suc has navigation ,
is bein goperated, th emedia men udoes no t
change. Only th emusic from th elast inserted
CD or DV Dwill be played .
Audio/video mode
Import ant safety notes
GWARNIN G
The CD/DV Ddrive is aclas s 1laser product.
If you open th ehousing of th eCD/DV Ddrive,
there is aris kof exposure to invisible laser
radiation .This laser radiation could damag e
your retina .There is aris kof injury.
Never open th ehousing .Always hav emain -
tenance and repair wor kcarrie dout at aquali-
fie dspecialis tworkshop .
GWARNING
If you handle adisc while driving, you may be
distracte dfrom th etraffic situation .You could
also lose control of th evehicle. There is aris k
of an accident.
Only handle adisc when th evehicl eis sta-
tionary.
Bear in min dthat at aspee dof only 30 mph
(approximately 50 km/h), th evehicl ecover s a
distanc eof 44 ft (approximately 14 m)per sec-
ond.
Notes on audio/video mode
Permissible data carriers
RCD audio, CD-R and CD-RW
RDVD-R, DVD-V and DVD-RW
RSD card
RUSB storage device
Permissible file systems
RISO 9660/Joliet standard for CDs
RUDF for video DVDs
RFAT16, FAT32, exFAT and NTFS for SD card
and USB storage media
Multisession CDs
For multisession CDs, the content of the first
session determines how the multimedia system
processes the CD. The multimedia system plays
only one CD session and gives priority to CD
sessions with audio files.
File structure of a data carrier
When you create a disc with compressed music files, the tracks can be organized in folders. A
folder may also contain subfolders. The disc
may contain no more than eight directory levels.
Files beyond the eighth level will not be recog-
nized by the system.
iThe multimedia system supports data carri-
ers with up to 50,000 files.
In the case of a data carrier with more than
64 GB of stored data, only files in folders with the following names are supported: Music,
Pictures, Video.
Track and file names
When you create a disc with compressed music
files, you can assign names to the tracks and
folders.
Audio/video mode139
Media
Z
Page 143 of 174
Playback problems may occur when playing
copied discs.
There may be playback problems if you play CDs
that you have copied yourself with a storage
capacity of more than 700 MB.
iThe multimedia system is able to play back
audio CDs in multichannel audio format.
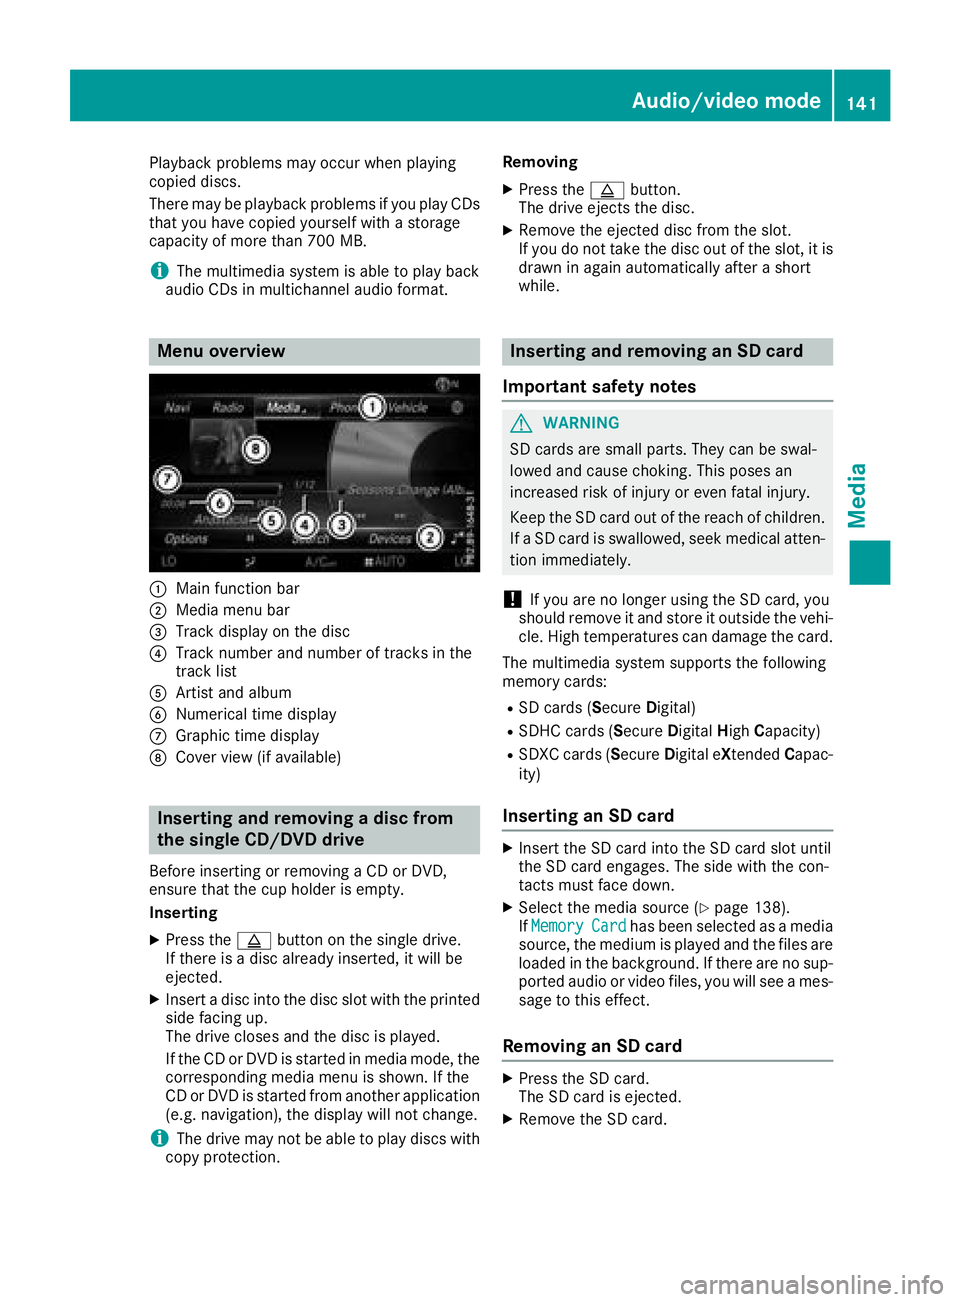
Menu overview
:Main function bar
;Media menu bar
=Track display on the disc
?Track number and number of tracks in the
track list
AArtist and album
BNumerical time display
CGraphic time display
DCover view (if available)
Inserting and removing a disc from
the single CD/DVD drive
Before inserting or removing a CD or DVD,
ensure that the cup holder is empty.
Inserting
XPress the þbutton on the single drive.
If there is a disc already inserted, it will be
ejected.
XInsert a disc into the disc slot with the printed
side facing up.
The drive closes and the disc is played.
If the CD or DVD is started in media mode, the
corresponding media menu is shown. If the
CD or DVD is started from another application
(e.g. navigation), the display will not change.
iThe drive may not be able to play discs with
copy protection. Removing
XPress the
þbutton.
The drive ejects the disc.
XRemove the ejected disc from the slot.
If you do not take the disc out of the slot, it is
drawn in again automatically after a short
while.
Inserting and removing an SD card
Important safety notes
GWARNING
SD cards are small parts. They can be swal-
lowed and cause choking. This poses an
increased risk of injury or even fatal injury.
Keep the SD card out of the reach of children. If a SD card is swallowed, seek medical atten-
tion immediately.
!If you are no longer using the SD card, you
should remove it and store it outside the vehi-
cle. High temperatures can damage the card.
The multimedia system supports the following
memory cards:
RSD cards ( SecureDigital)
RSDHC cards (Secure DigitalHighCapacity)
RSDXC cards (Secure Digital eXtendedCapac-
ity)
Inserting an SD card
XInsert the SD card into the SD card slot until
the SD card engages. The side with the con-
tacts must face down.
XSelect the media source (Ypage 138).
If MemoryCardhas been selected as a media
source, the medium is played and the files are
loaded in the background. If there are no sup-
ported audio or video files, you will see a mes-
sage to this effect.
Removing an SD card
XPress the SD card.
The SD card is ejected.
XRemove the SD card.
Audio/video mode141
Media
Z
Page 144 of 174
Connecting USB devices
There are two USB ports in the stowage space
under the armrest (Ypage 138).
XConnect the USB device to the USB port.
If the corresponding media menu is visible,
the medium is played and the files are loaded
in the background. If there are no supported
audio or video files, you will see a message to
this effect.
iMP3 players must support Media Transfer
Protocol (MTP).
Selecting the playback option
Playing similar tracks
XIn media mode, slide 6the controller.
XTo select Options: turn and press the con-
troller.
XTo select Play More Like This: turn and
press the controller.
The multimedia system automatically creates
and plays a track list with similar tracks. If
there are no similar tracks on the data
medium then the function cannot be selec-
ted.
XSelect the required track.
Selecting Play mode
XIn media mode, slide 6the controller.
XTo select Options: turn and press the con-
troller.
XTo select PlaybackMode: turn and press the
controller.
XSelect Normal Track Sequence.
The current track list is played in the order it is
stored on the data medium.
XSelect Random Track List.
The current track list is played in random
order.
XSelect Random Medium.
All tracks on the data medium are played in
random order.
Skipping to time
XIn media mode, slide 6the controller.
XTo select Options: turn and press the con-
troller.
XTo select Skip to Time: turn and press the
controller.
A menu appears.
XTo set the time: turn the controller.
Selecting an active partition
XIn media mode, slide 6the controller.
XTo select Options: turn and press the con-
troller.
XTo select Select Active Partition: turn
and press the controller.
You can select a partition on the USB data
carrier.
Showing track information
XIn media mode, slide 6the controller.
XTo select Options: turn and press the con-
troller.
XTo switch Show Track InformationonO
or off ª: turn and press the controller.
You display or hide information for Track,
Artist and Album in the main display field.
Saving files to Media Register
iWith the SaveFilestoMediaRegisteroption, you can transfer supported audio,
image or video files to the multimedia system
hard drive.
XIn media mode, slide 6the controller.
XTo select Options: turn and press the con-
troller.
XTo select the Save Files to Media Reg‐isteroption: turn and press the controller.
A menu appears (Ypage 146).
Managing Media Register
XIn media mode, slide 6the controller.
XTo select Options: turn and press the con-
troller.
XDelete or rename individual files in the Media
Register (Ypage 147).
142Audio/video mode
Media
Page 145 of 174
XDelete all files in the Media Register
(Ypage 147).
XCall up information on the preset
(Ypage 147).
Pausing/continuing playback
XTo pause playback:in audio or video mode,
slide 6the controller.
The media menu bar is shown.
XTo select Ëin the media menu bar: turn
and press the controller.
Playback is interrupted. The display changes
to Ì.
XTo continue playback: in audio or video
mode, slide 6the controller.
The media menu bar is shown.
XTo select Ìin the media menu bar: turn
and press the controller.
Playback is continued from the point of inter- ruption. The symbol changes to Ë.
Selecting a track
Selecting a track using the current
track list
XTo display the current track list: press the
controller in the media mode menu.
The category list appears.
XSelect Current Tracklist.
XTo select a track: turn the controller and press
to confirm.
Selecting a track by skipping to a track
XTo skip forwards or backwards to a track: in
the media mode menu, turn or briefly slide
9or8 the controller.
Entering a track number directly
XIn media mode, slide 6the controller.
XTo select Options: turn and press the con-
troller.
XTo select TrackNumber:: turn and press the
controller.
A menu appears.
XEnter the desired track number.
Searching for a track
XIn the media mode menu, slide 6the con-
troller.
The media menu bar is shown.
XTo select Search: turn and press the control-
ler.
The category list is shown.
XSelect a category, e.g. Genres.
Sub-categories appear with the selection of
the main category (depends on the multime-
dia system default settings and the music
tracks available).
XSelect a sub-category, for example Rock.
If the selected sub-category contains music
tracks, these will be displayed.
Gracenote®Media Database
General notes
This function is available in CD mode.
There is a version of Gracenote®music recog-
nition technology, Emeryville, California, USA on
the multimedia system hard disk. In media
mode, you will recognize this by the logo in the
bottom right-hand corner of the display.
If the audio CD does not contain any CD text
information, the multimedia system can use the
Gracenote
®Media Database to identify
unknown audio tracks when in CD mode.
Carrying out an Internet update of met-
adata
The Updating Metadata Via Internetoption allows any missing metadata for an audio
CD (e.g. cover, track, album, artist) to be uploa-
ded retrospectively to the internal Gracenote
®
database.
An Internet connection is required for this
(
Ypage 124).
Audio/video mode143
Media
Z