trunk MERCEDES-BENZ C320 2001 W203 Owner's Guide
[x] Cancel search | Manufacturer: MERCEDES-BENZ, Model Year: 2001, Model line: C320, Model: MERCEDES-BENZ C320 2001 W203Pages: 381, PDF Size: 19.92 MB
Page 296 of 381
287 Malfunction and warning messages
Te ch n i c a l
data Instruments
and controlsOperation DrivingInstrument
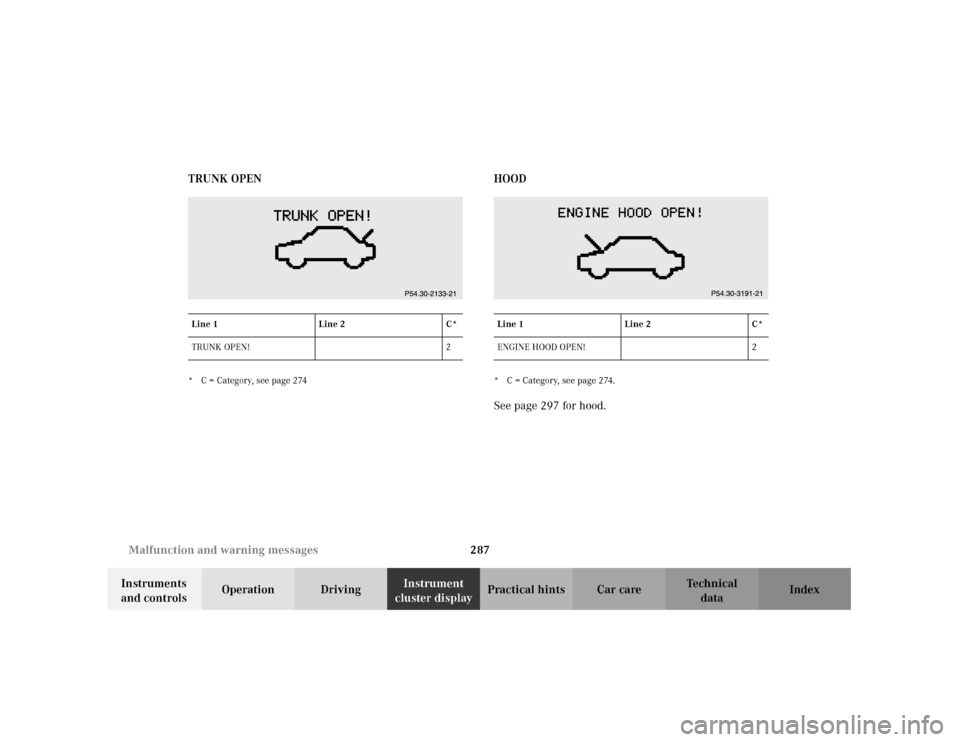
cluster displayPractical hints Car care Index TRUNK OPEN
* C = Category, see page 274
HOOD* C = Category, see page 274.See page 297 for hood.
Line 1 Line 2 C*
TRUNK OPEN! 2
Line 1 Line 2 C*
ENGINE HOOD OPEN! 2
Page 302 of 381
293 Contents - Practical hints
Te ch n i c a l
data Instruments
and controlsOperation DrivingInstrument
cluster displayPractical hintsCar care Index
Practical hintsFirst aid kit .....................................294
Stowing things in the vehicle ......294
Fuses ................................................295
Hood .................................................297
Checking engine oil level .............300
Automatic transmission fluid
level ............................................. 301
Coolant level ................................... 301
Adding coolant ...........................302
Windshield and headlamp washer
system .........................................302Spare wheel, vehicle tools, storage
compartment ............................. 304
Vehicle jack .................................... 305
Wheels ............................................ 306
Tire replacement ....................... 306
Rotating wheels ......................... 307
Spare wheel .................................... 308
Changing wheels ........................... 309
Tire inflation pressure .................. 315
Battery .............................................. 316
Jump starting .................................. 318
Towing the vehicle ........................ 321
Transmission selector lever,
manually unlocking .................. 325Exterior lamps ................................326
Replacing bulbs ..........................326
Trunk lamp ..................................... 331
Changing batteries in the electronic
main key .....................................332
Synchronizing remote
control ..........................................334
Emergency engine shut-down .....334
Fuel filler flap, manual release ...335
Replacing wiper blade insert .......337
Roof rack .........................................338
Page 303 of 381
294 First aid kit
Te ch n i c a l
data Instruments
and controlsOperation DrivingInstrument
cluster displayPractical hintsCar care Index
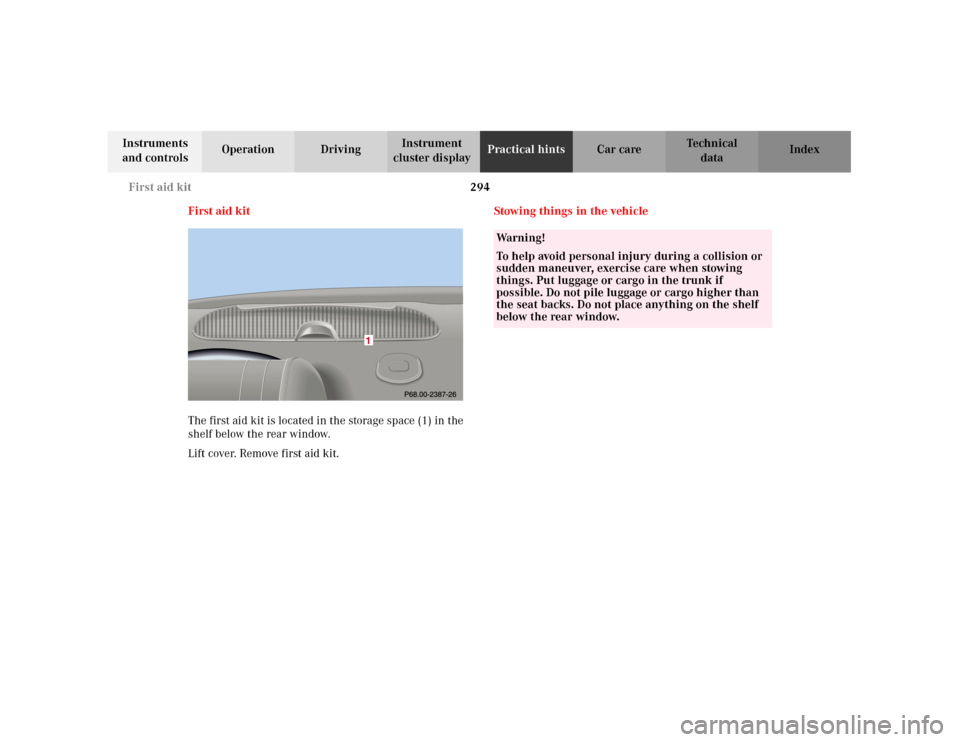
First aid kit
The first aid kit is located in the storage space (1) in the
shelf below the rear window.
Lift cover. Remove first aid kit.Stowing things in the vehicle
Wa r n i n g !
To help avoid personal injury during a collision or
sudden maneuver, exercise care when stowing
things. Put luggage or cargo in the trunk if
possible. Do not pile luggage or cargo higher than
the seat backs. Do not place anything on the shelf
below the rear window.
Page 304 of 381
295 Fuses
Te ch n i c a l
data Instruments
and controlsOperation DrivingInstrument
cluster displayPractical hintsCar care Index Fuses
Most of your vehicle’s electrical components are fused
with safety fuses. With the exception of the brake lights,
all individual lighting system components are
electronically fused. Before replacing a blown safety
fuse, determine the cause of the short circuit. Always
observe amperage and color of fuse.
The circuit for components is protected by a cycled
circuit breaker interrupted if too much current is being
drawn. The circuit closes automatically after a short
time; the circuit is broken again if the malfunction
reoccurs.
A lways us e a new fus e for re placeme nt. Never atte mp t to
repair or bridge a blown fuse.
A fuse chart is located in fuse box (1).
A fuse extractor is located in the auxiliary fuse box in
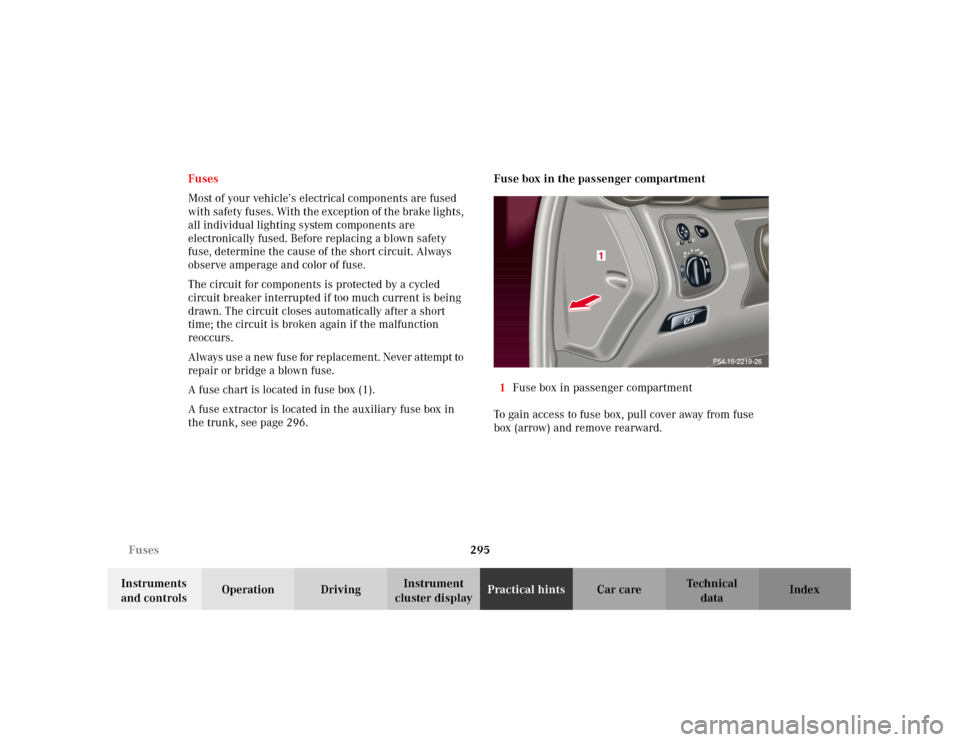
the trunk, see page 296.Fuse box in the passenger compartment
1Fuse box in passenger compartment
To gain access to fuse box, pull cover away from fuse
box (arrow) and remove rearward.
Page 305 of 381
296 Fuses
Te ch n i c a l
data Instruments
and controlsOperation DrivingInstrument
cluster displayPractical hintsCar care Index
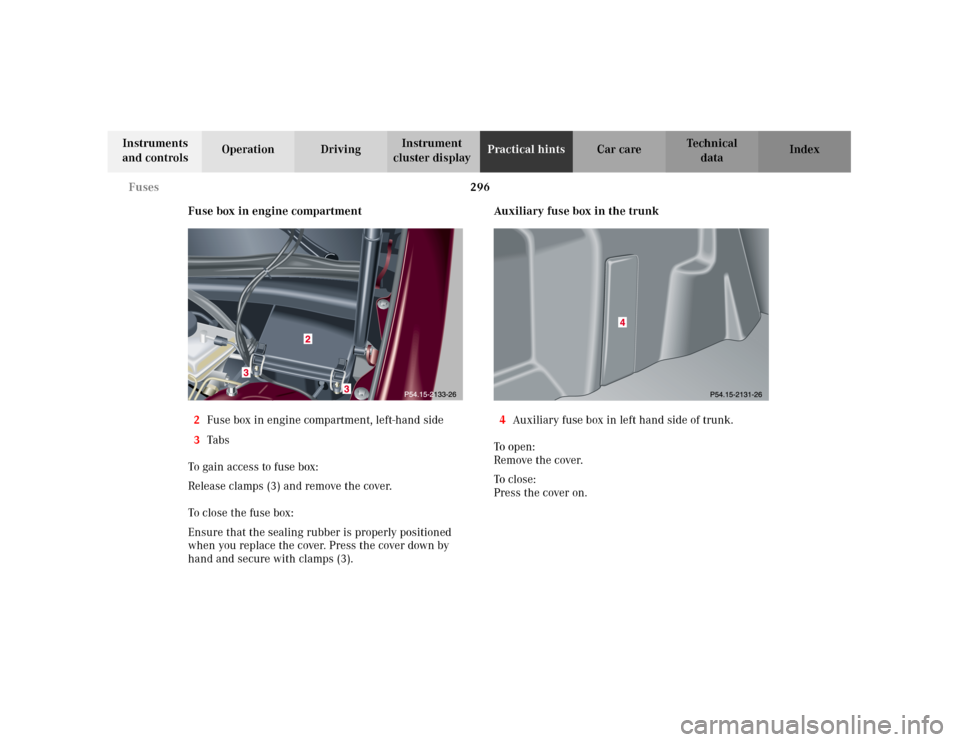
Fuse box in engine compartment
2Fuse box in engine compartment, left-hand side
3Ta bs
To gain access to fuse box:
Release clamps (3) and remove the cover.
To close the fuse box:
Ensure that the sealing rubber is properly positioned
when you replace the cover. Press the cover down by
hand and secure with clamps (3).Auxiliary fuse box in the trunk
4Auxiliary fuse box in left hand side of trunk.
To o p e n :
Remove the cover.
To c l o s e :
Press the cover on.
Page 313 of 381
304 Spare wheel
Te ch n i c a l
data Instruments
and controlsOperation DrivingInstrument
cluster displayPractical hintsCar care Index
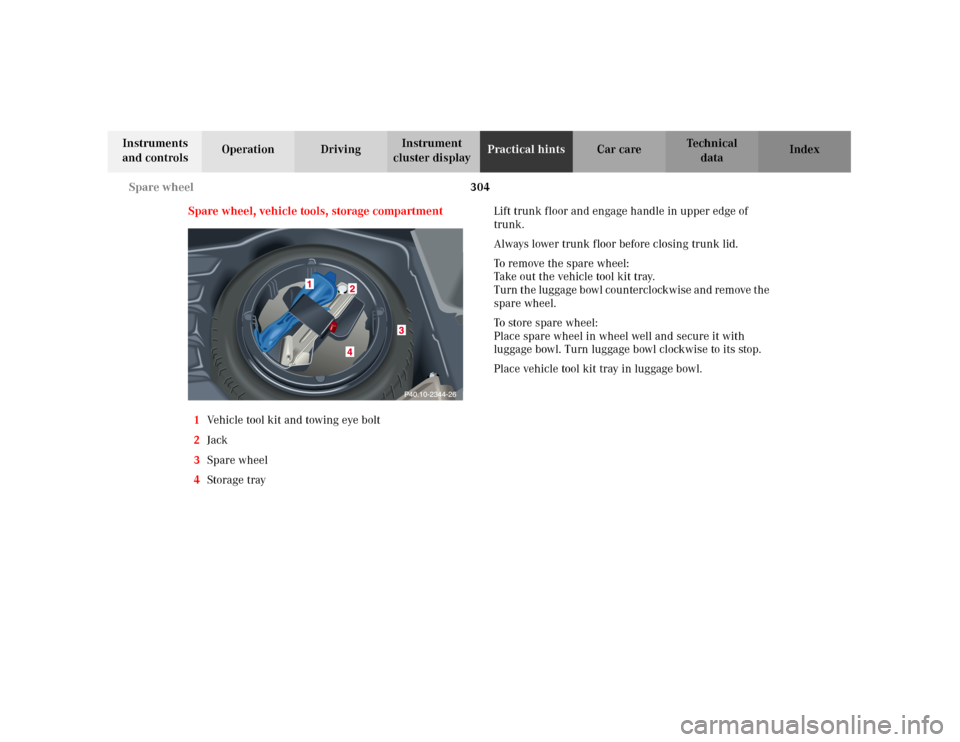
Spare wheel, vehicle tools, storage compartment
1Vehicle tool kit and towing eye bolt
2Jack
3Spare wheel
4Storage trayLift trunk floor and engage handle in upper edge of
trunk.
Always lower trunk floor before closing trunk lid.
To remove the spare wheel:
Take out the vehicle tool kit tray.
Turn t he luggage b owl coun ter clock wise an d re move t he
spare wheel.
To store spare wheel:
Place spare wheel in wheel well and secure it with
luggage bowl. Turn luggage bowl clockwise to its stop.
Place vehicle tool kit tray in luggage bowl.
Page 314 of 381
305 Jack
Te ch n i c a l
data Instruments
and controlsOperation DrivingInstrument
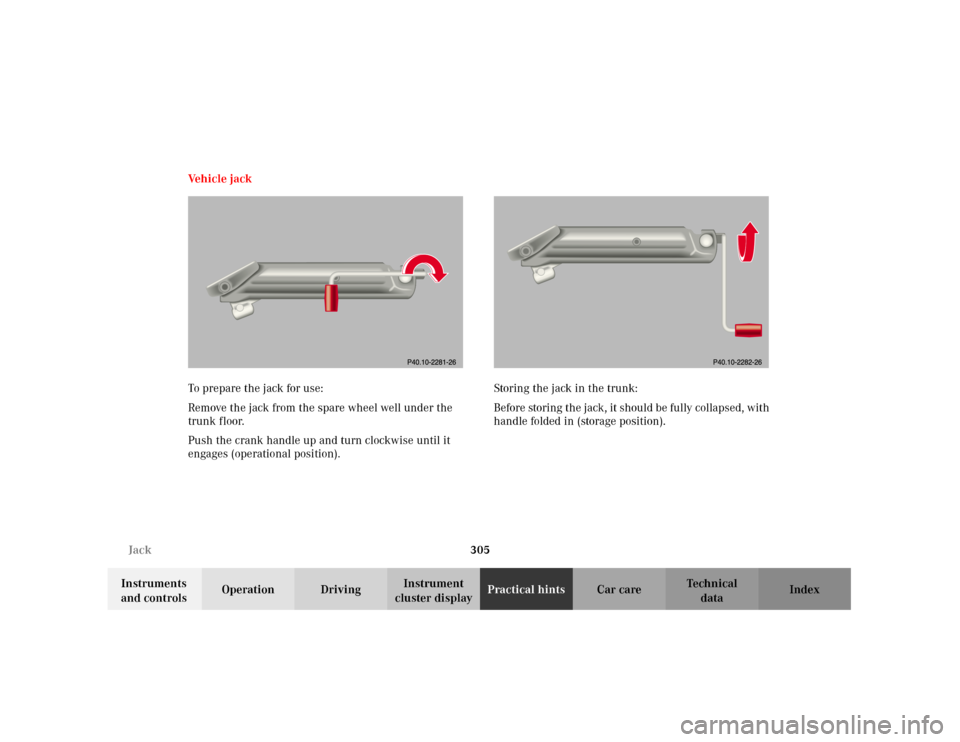
cluster displayPractical hintsCar care Index Ve h i c l e j a c k
To prepare the jack for use:
Remove the jack from the spare wheel well under the
trunk floor.
Push the crank handle up and turn clockwise until it
engages (operational position).Storing the jack in the trunk:
Before storing the jack, it should be fully collapsed, with
handle folded in (storage position).
Page 331 of 381
322 Towing the vehicle
Te ch n i c a l
data Instruments
and controlsOperation DrivingInstrument
cluster displayPractical hintsCar care Index
Important!
When towing the vehicle, please, note the following:
With the automatic central locking activated and the
electronic key in starter switch position 2, the vehicle
doors lock if the left front wheel as well as the right rear
wheel are turning at vehicle speeds of approximately
9 mph (15 km / h) or more.
To prevent the vehicle door locks from locking,
deactivate the automatic central locking. See
“VEHICLE” under “Individual settings” on page 119.
Towing of the vehicle should only be done using the
properly installed towing eye bolt. Never attach tow
cable, tow rope or tow rod to vehicle chassis, frame
or suspension parts.
Notes:
The selector lever will remain locked in position “P” and
the electronic key cannot be turned in the starter switch
if the battery is disconnected or discharged. See battery
on page 316 or jump starting on page 318.
Transmission selector lever, manually unlocking, see
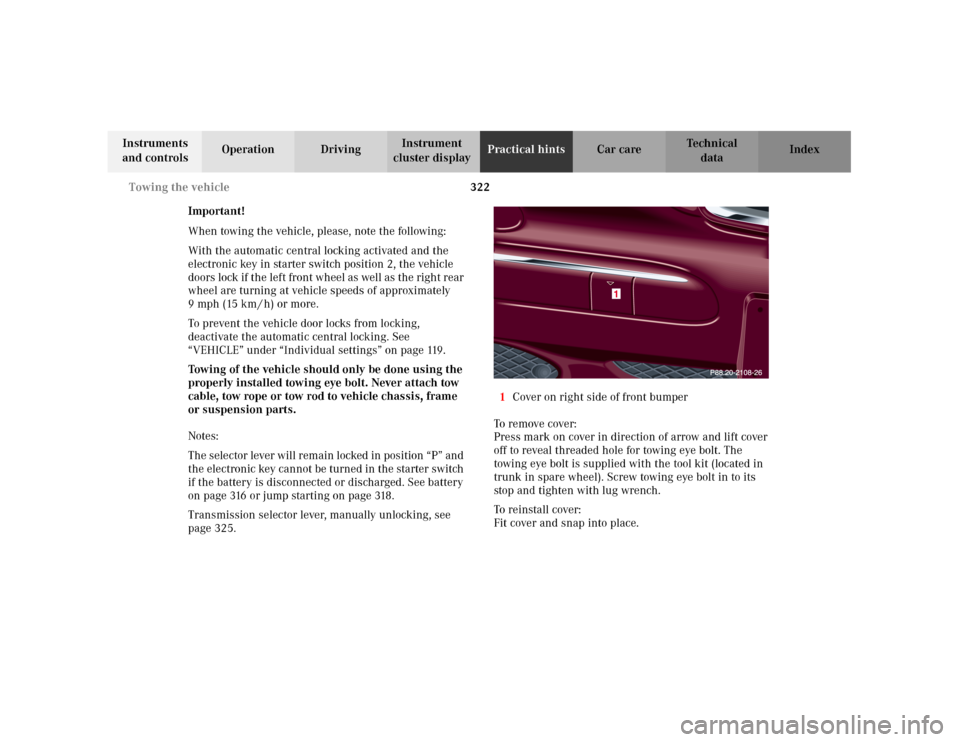
page 325.1Cover on right side of front bumper
To r e m ove c ove r :
Press mark on cover in direction of arrow and lift cover
off to reveal threaded hole for towing eye bolt. The
towing eye bolt is supplied with the tool kit (located in
trunk in spare wheel). Screw towing eye bolt in to its
stop and tighten with lug wrench.
To reinstall cover:
Fit cover and snap into place.
Page 332 of 381
323 Towing the vehicle
Te ch n i c a l
data Instruments
and controlsOperation DrivingInstrument
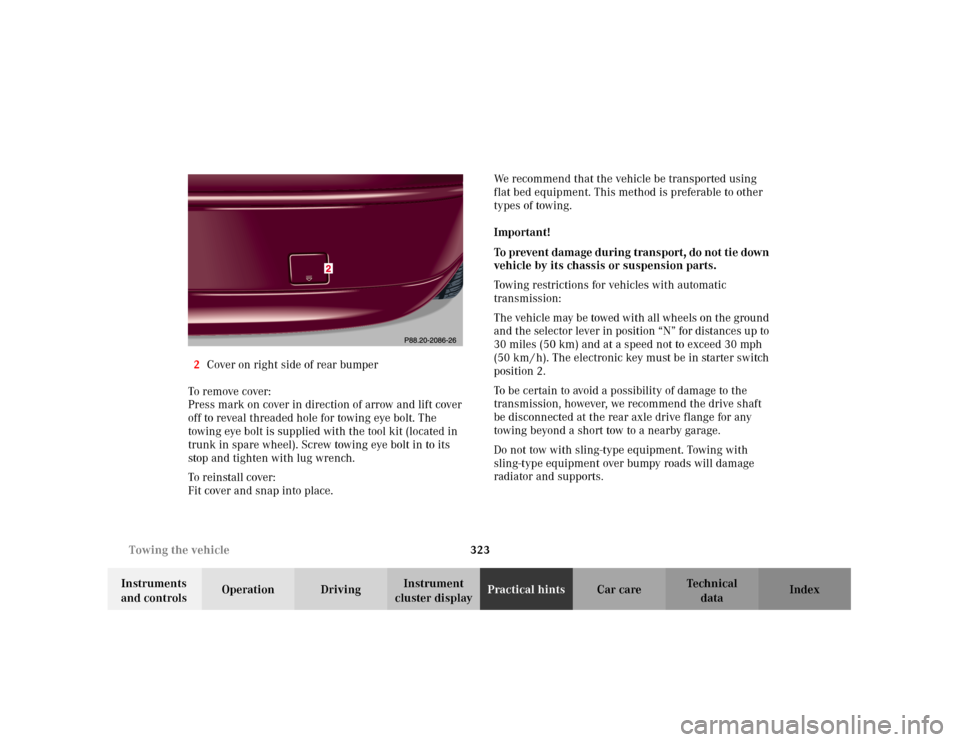
cluster displayPractical hintsCar care Index 2Cover on right side of rear bumper
To remove cover:
Press mark on cover in direction of arrow and lift cover
off to reveal threaded hole for towing eye bolt. The
towing eye bolt is supplied with the tool kit (located in
trunk in spare wheel). Screw towing eye bolt in to its
stop and tighten with lug wrench.
To reinstall cover:
Fit cover and snap into place.We recommend that the vehicle be transported using
flat bed equipment. This method is preferable to other
types of towing.
Important!
To prevent damage during transport, do not tie down
vehicle by its chassis or suspension parts.
Towing restrictions for vehicles with automatic
transmission:
The vehicle may be towed with all wheels on the ground
and the selector lever in position “N” for distances up to
30 miles (50 km) and at a speed not to exceed 30 mph
(50 km / h). The electronic key must be in starter switch
position 2.
To be certain to avoid a possibility of damage to the
transmission, however, we recommend the drive shaft
be disconnected at the rear axle drive flange for any
towing beyond a short tow to a nearby garage.
Do not tow with sling-type equipment. Towing with
sling-type equipment over bumpy roads will damage
radiator and supports.
Page 338 of 381
329 Exterior lamps
Te ch n i c a l
data Instruments
and controlsOperation DrivingInstrument
cluster displayPractical hintsCar care Index Taillamp assemblies
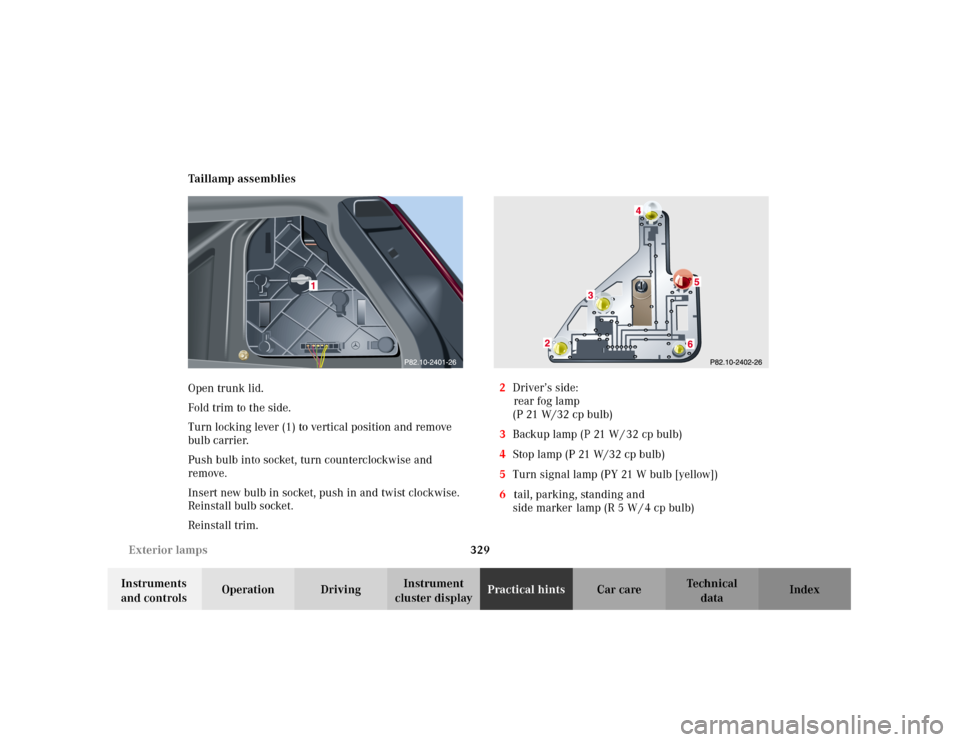
Open trunk lid.
Fold trim to the side.
Turn locking lever (1) to vertical position and remove
bulb carrier.
Push bulb into socket, turn counterclockwise and
remove.
Insert new bulb in socket, push in and twist clockwise.
Reinstall bulb socket.
Reinstall trim. 2Driver’s side:
rear fog lamp
(P 21 W/32 cp bulb)
3Backup lamp (P 21 W / 32 cp bulb)
4Stop lamp (P 21 W/32 cp bulb)
5Turn signal lamp (PY 21 W bulb [yellow])
6tail, parking, standing and
side marker lamp (R 5 W / 4 cp bulb)