key MERCEDES-BENZ CL-Class 2002 C215 Comand Manual
[x] Cancel search | Manufacturer: MERCEDES-BENZ, Model Year: 2002, Model line: CL-Class, Model: MERCEDES-BENZ CL-Class 2002 C215Pages: 251
Page 140 of 251
138 Telephone
AudioTelephoneNavigation
Index Info Services and
system settings Introduction
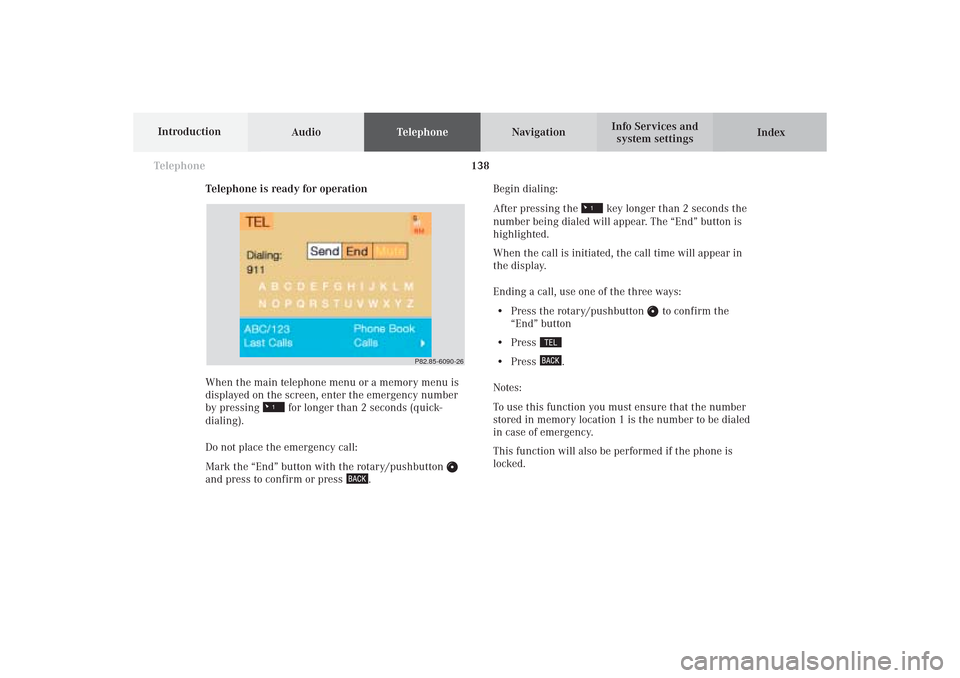
Telephone is ready for operation
When the main telephone menu or a memory menu is
displayed on the screen, enter the emergency number
by pressing for longer than 2 seconds (quick-
dialing).
Do not place the emergency call:
Mark the “End” button with the rotary/pushbutton
and press to confirm or press
.Begin dialing:
After pressing the
key longer than 2 seconds the
number being dialed will appear. The “End” button is
highlighted.
When the call is initiated, the call time will appear in
the display.
Ending a call, use one of the three ways:
• Press the rotary/pushbutton
to confirm the
“End” button
• Press
• Press
.
Notes:
To use this function you must ensure that the number
stored in memory location 1 is the number to be dialed
in case of emergency.
This function will also be performed if the phone is
locked.
P82.85-6090-26
08-TELEFON-25-US.pm509.07.2004, 14:24 Uhr 138
Page 142 of 251
140 Telephone
AudioTelephoneNavigation
Index Info Services and
system settings Introduction
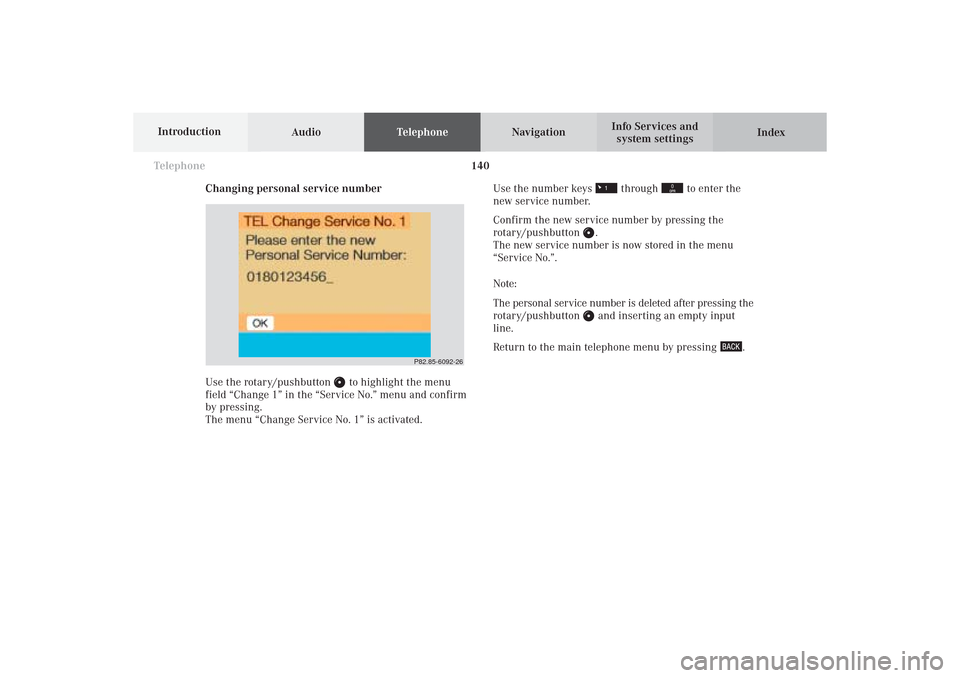
Changing personal service number
Use the rotary/pushbutton
to highlight the menu
field “Change 1” in the “Service No.” menu and confirm
by pressing.
The menu “Change Service No. 1” is activated.Use the number keys
through
to enter the
new service number.
Confirm the new service number by pressing the
rotary/pushbutton
.
The new service number is now stored in the menu
“Service No.”.
Note:
The personal service number is deleted after pressing the
rotary/pushbutton and inserting an empty input
line.
Return to the main telephone menu by pressing
.
P82.85-6092-26
08-TELEFON-25-US.pm509.07.2004, 14:24 Uhr 140
Page 151 of 251
149 Destination input
Introduction
Audio
Telephone
Navigation
Index Info Services and
system settings
NavigationNote:
When navigation is preparing for operation, various
error messages may appear:
• “Navigation cannot be activated. An error has
occurred.”
• “CD-Reading error. Please change CD” – remove the
current CD and insert the Navigation CD.
• “No CD. Please insert NAVI-CD type DX only” – you
did not insert a CD, insert the Navigation CD type
DX. Please use only a current navigation CD. A
navigation CD from an older model may not be
compatible and may cause an error message to be
displayed.
When the error has been corrected COMAND shows the
message “Activating Navigation. Please obey all traffic
rules”.
To change over to another system press the
corresponding key, e.g.
.Changing the Navigation CD
Press
to eject an inserted navigation CD.
Insert another navigation CD.
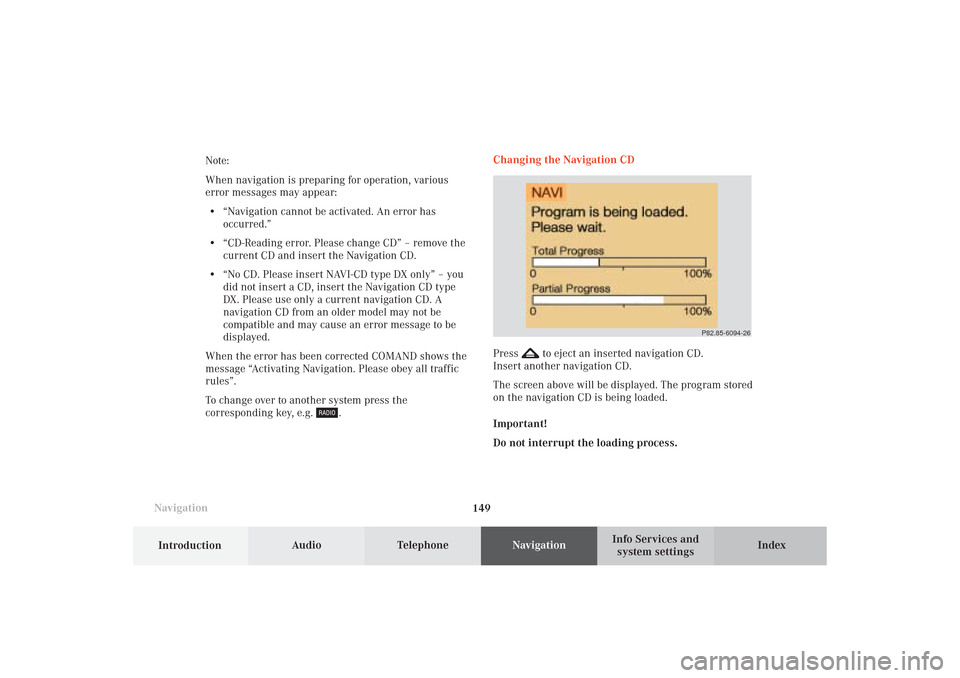
The screen above will be displayed. The program stored
on the navigation CD is being loaded.
Important!
Do not interrupt the loading process.
P82.85-6094-26
09-NAVI1-25-US.pm509.07.2004, 14:25 Uhr 149
Page 166 of 251
164
Destination input
Audio TelephoneNavigation
Index Info Services and
system settings Introduction
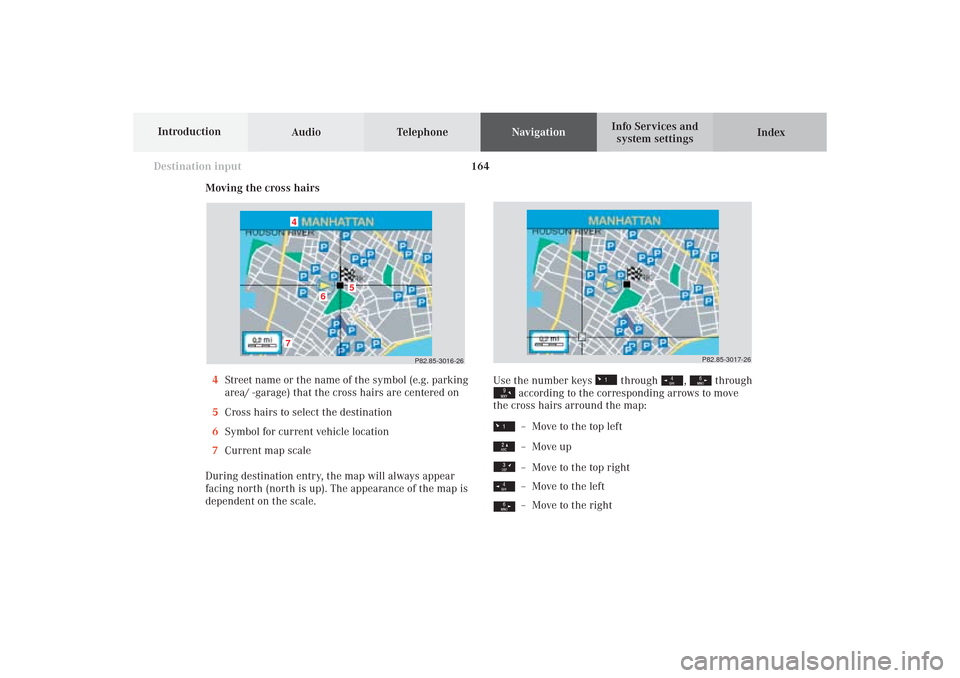
Moving the cross hairs
4Street name or the name of the symbol (e.g. parking
area/ -garage) that the cross hairs are centered on
5Cross hairs to select the destination
6Symbol for current vehicle location
7Current map scale
During destination entry, the map will always appear
facing north (north is up). The appearance of the map is
dependent on the scale.
P82.85-3016-26
7
6
5
4
Use the number keys
through
,
through
according to the corresponding arrows to move
the cross hairs arround the map:– Move to the top left– Move up– Move to the top right– Move to the left– Move to the right
P82.85-3017-26
09-NAVI1-25-US.pm509.07.2004, 14:27 Uhr 164
Page 167 of 251
165 Destination input
Introduction
Audio
Telephone
Navigation
Index Info Services and
system settings Notes:
Moving the cross hairs out towards the edge of the
screen with the cursor keys activates an adjacent
section of the map. It may take a few seconds to point
to each new map.
Adjacent map sections overlap somewhat so that
destinations on the edge of the map can be marked as
well.
– Move to the bottom left– Move down– Move to the bottom right
09-NAVI1-25-US.pm509.07.2004, 14:27 Uhr 165
Page 168 of 251
166
Destination input
Audio TelephoneNavigation
Index Info Services and
system settings Introduction
Altering the map scale
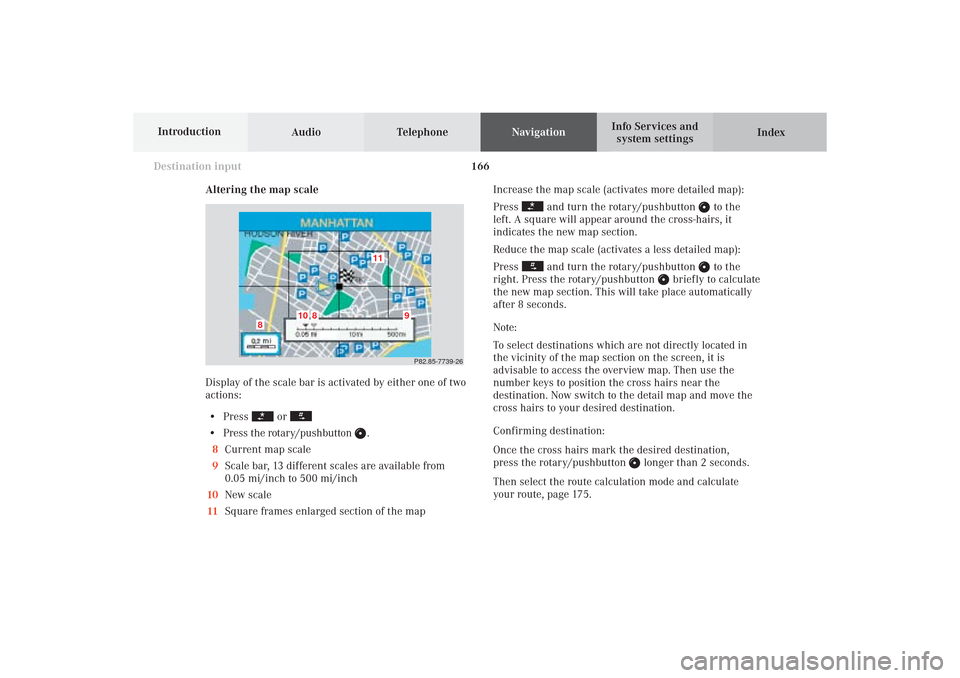
Display of the scale bar is activated by either one of two
actions:
• Press
or
• Press the rotary/pushbutton
.
8Current map scale
9Scale bar, 13 different scales are available from
0.05 mi/inch to 500 mi/inch
10New scale
11Square frames enlarged section of the mapIncrease the map scale (activates more detailed map):
Press
and turn the rotary/pushbutton
to the
left. A square will appear around the cross-hairs, it
indicates the new map section.
Reduce the map scale (activates a less detailed map):
Press
and turn the rotary/pushbutton
to the
right. Press the rotary/pushbutton
briefly to calculate
the new map section. This will take place automatically
after 8 seconds.
Note:
To select destinations which are not directly located in
the vicinity of the map section on the screen, it is
advisable to access the overview map. Then use the
number keys to position the cross hairs near the
destination. Now switch to the detail map and move the
cross hairs to your desired destination.
Confirming destination:
Once the cross hairs mark the desired destination,
press the rotary/pushbutton
longer than 2 seconds.
Then select the route calculation mode and calculate
your route, page 175.
P82.85-7739-26
11
10
8
8
9
09-NAVI1-25-US.pm509.07.2004, 14:27 Uhr 166
Page 169 of 251
167 Destination input
Introduction
Audio
Telephone
Navigation
Index Info Services and
system settings Destination entry via coordinates
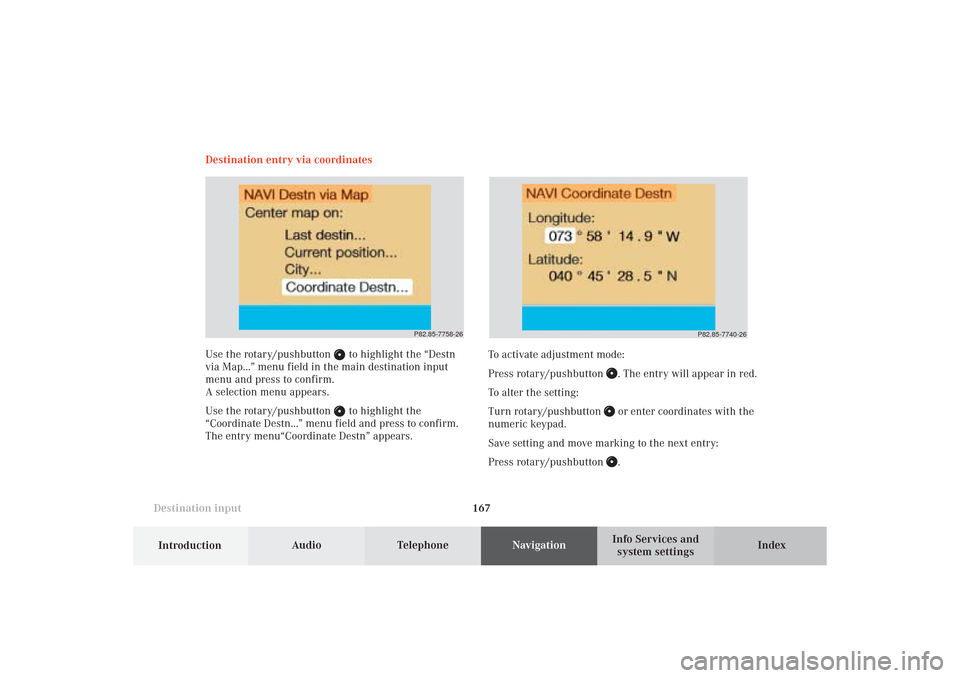
Use the rotary/pushbutton
to highlight the “Destn
via Map...” menu field in the main destination input
menu and press to confirm.
A selection menu appears.
Use the rotary/pushbutton to highlight the
“Coordinate Destn...” menu field and press to confirm.
The entry menu“Coordinate Destn” appears.
P82.85-7758-26
To activate adjustment mode:
Press rotary/pushbutton
. The entry will appear in red.
To alter the setting:
Turn rotary/pushbutton or enter coordinates with the
numeric keypad.
Save setting and move marking to the next entry:
Press rotary/pushbutton .
P82.85-7740-26
09-NAVI1-25-US.pm509.07.2004, 14:27 Uhr 167
Page 170 of 251
168
Destination input
Audio TelephoneNavigation
Index Info Services and
system settings Introduction
Subsequently repeat operating sequence and enter
coordinates completely.
Adjustment range:
Latitude: 0-89°; 0-59 min; 0-59 s; 0.1-0.9 s
Longitude: 0-179°; 0-59 min; 0-59 s; 0.1-0.9 s
By repeatedly pressing the key
it is possible to
change between northern latitude (N) and southern
latitude (S).
By repeatedly pressing the key it is possible to
change between western longitude (W) and eastern
longitude (E).
Confirming coordinate destination:
Press the rotary/pushbutton
longer than
2 seconds.
P82.85-7766-26
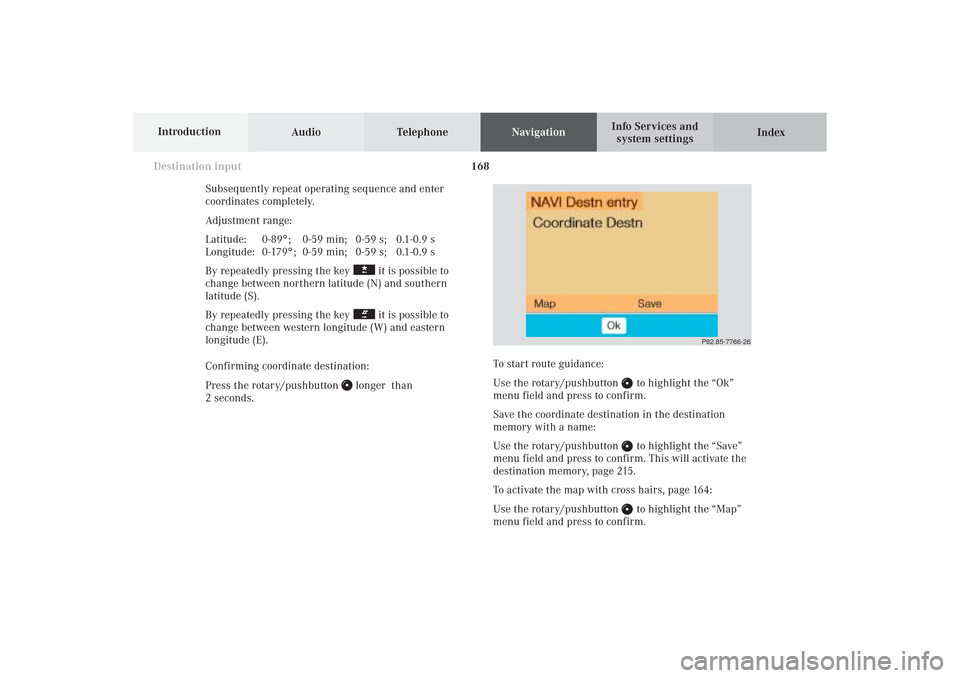
To start route guidance:
Use the rotary/pushbutton
to highlight the “Ok”
menu field and press to confirm.
Save the coordinate destination in the destination
memory with a name:
Use the rotary/pushbutton to highlight the “Save”
menu field and press to confirm. This will activate the
destination memory, page 215.
To activate the map with cross hairs, page 164:
Use the rotary/pushbutton to highlight the “Map”
menu field and press to confirm.
09-NAVI1-25-US.pm509.07.2004, 14:27 Uhr 168
Page 192 of 251
Audio TelephoneNavigation
Index Info Services and
system settings Introduction
Route guidance
190
Select the language for voice output, see the chapter on
Info Services and system settings.
Altering the voice output volume
While you are listening to a spoken recommendation,
alter its volume by pressing
/
on the rocker
switch.
This setting will then affect all of following voice
outputs.
Note:
During a voice output you can alter the sound level
with the steering wheel keys as well:
– Increase volume– Decrease volume
The minimum sound level depends on the current
audio volume. The audio volume differential between Voice output/
Audio source can be set individually, page 85. During
telephone/Tele Aid operation, navigation voice outputs
are muted.
To repeat the current spoken recommendation:
Press
.
To mute the current spoken recommendation:
Press briefly during a voice output. The next
announcement will be heard normally.
Switching the voice output on/off
Press longer than 2 seconds during a voice
output.
The following message will appear on the screen:
“Voice output is muted.”
The voice output will remain muted for the duration of
the current route guidance.
Switch the voice output on again:
• Press
• Automatically at the end of the current route
guidance
10-NAVI2-25-US.pm517.10.2001, 10:42 Uhr 190
Page 213 of 251
211
Route guidance
Introduction
Audio Telephone
Navigation
Index Info Services and
system settings
P82.85-2651-26
1
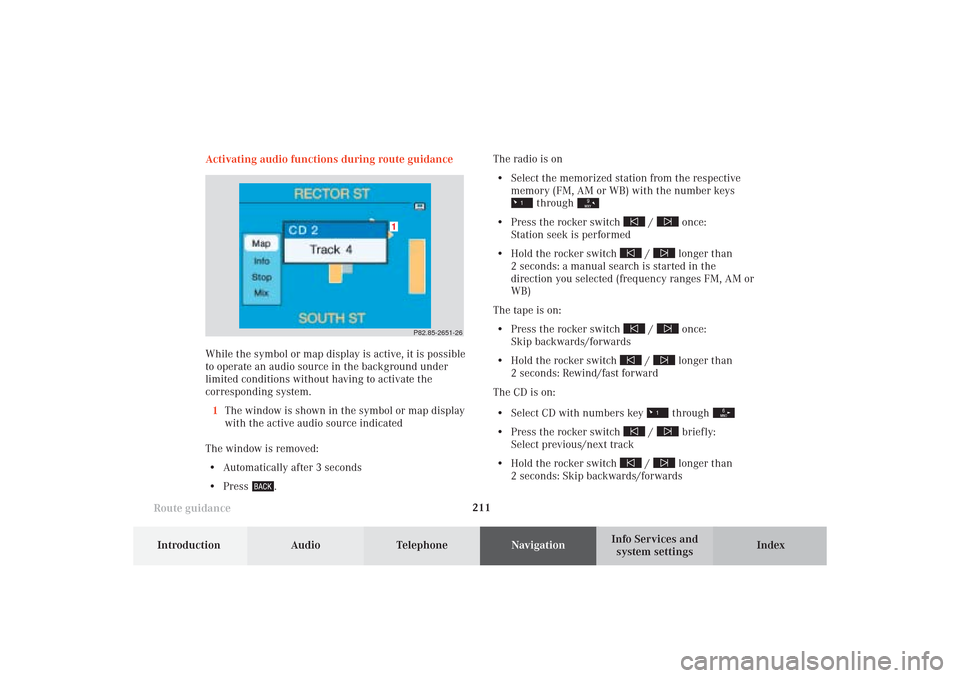
Activating audio functions during route guidance
While the symbol or map display is active, it is possible
to operate an audio source in the background under
limited conditions without having to activate the
corresponding system.
1The window is shown in the symbol or map display
with the active audio source indicated
The window is removed:
• Automatically after 3 seconds
• Press
.The radio is on
• Select the memorized station from the respective
memory (FM, AM or WB) with the number keys
through
• Press the rocker switch
/
once:
Station seek is performed
• Hold the rocker switch
/
longer than
2 seconds: a manual search is started in the
direction you selected (frequency ranges FM, AM or
WB)
The tape is on:
• Press the rocker switch
/
once:
Skip backwards/forwards
• Hold the rocker switch
/
longer than
2 seconds: Rewind/fast forward
The CD is on:
• Select CD with numbers key through
• Press the rocker switch
/
briefly:
Select previous/next track
• Hold the rocker switch
/
longer than
2 seconds: Skip backwards/forwards
10-NAVI2-25-US.pm517.10.2001, 10:43 Uhr 211