oil pressure MERCEDES-BENZ CL-Class 2011 C216 Owner's Manual
[x] Cancel search | Manufacturer: MERCEDES-BENZ, Model Year: 2011, Model line: CL-Class, Model: MERCEDES-BENZ CL-Class 2011 C216Pages: 480, PDF Size: 19.76 MB
Page 21 of 480
MB info call button ........................394
Remote vehicle locking ..................396
Roadside Assistance button ..........393
Self-test ......................................... 392
System .......................................... 391
Vehicle remote unlocking ..............396
Telephone
Accepting a call ............................. 338
Calling voicemail ............................ 185
Call waiting .................................... 185
Conference connection .................. 185
Ending an active call ......................185
Entering phone numbers ................ 184
Incoming call ................................. 184
Keypad ........................................... 110
Menu (on-board computer) ............338
Number from the phone book ........ 338
Outgoing call ................................. 184
redialing ......................................... 184
Redialing ........................................ 339
Rejecting/ending a call .................338
Sending DTMF tones ...................... 187
Single call ...................................... 185
Switching hands-free microphone
on/off ............................................ 185
Toggling ......................................... 185
Telephone basic menu
Bluetooth ®
interface ...................... 183
Telephone compartment .................. 385
Telephone number Entering ......................................... 184
Temperature
Coolant .......................................... 328
Engine oil (on-board computer) ...... 335
Outside temperature ...................... 329
Setting ........................................... 259
Setting (COMAND) .........................234
Theft deterrent locking system
Immobilizer ...................................... 68
Tilt/sliding sunroof
see Sliding sunroof
Time
Setting ........................................... 129
Time format
Setting ........................................... 130
Timer (on-board computer) .............. 336Time zone
Setting ........................................... 130
Tiredness assistant
see ATTENTION ASSIST
Tire pressure
Calling up (on-board computer) .....445
Checking manually ........................444
Display message ............................ 369
Maximum ....................................... 444
Notes ............................................. 442
Recommended ............................... 441
Tire pressure monitoring system
Function/notes ............................. 445
Restarting ...................................... 447
Warning lamp ................................. 381
Tires
Aspect ratio (definition) .................459
Average weight of the vehicle
occupants (definition) ....................458
Bar (definition) ............................... 458
Characteristics .............................. 457
Checking ........................................ 438
Definition of terms .........................457
Direction of rotation ......................461
Distribution of the vehicle
occupants (definition) ....................460
DOT, Tire Identification Number
(TIN) ............................................... 457
DOT (Department of
Transportation) (definition) ............458
Flat tire .......................................... 421
GAWR (Gross Axle Weight Rating)
(definition) ..................................... 458
GVW (Gross Vehicle Weight)
(definition) ..................................... 458
GVWR (Gross Vehicle Weight
Rating) (definition) .........................458
Increased vehicle weight due to
optional equipment (definition) ......458
Kilopascal (kPa) (definition) ...........459
Labeling (overview) ........................453
Load bearing index (definition) ......460
Load index ..................................... 456
Load index (definition) ...................459
Maximum loaded vehicle weight
(definition) ..................................... 459
Maximum load on a tire
(definition) ..................................... 459Index19
Page 333 of 480
Menus and submenus
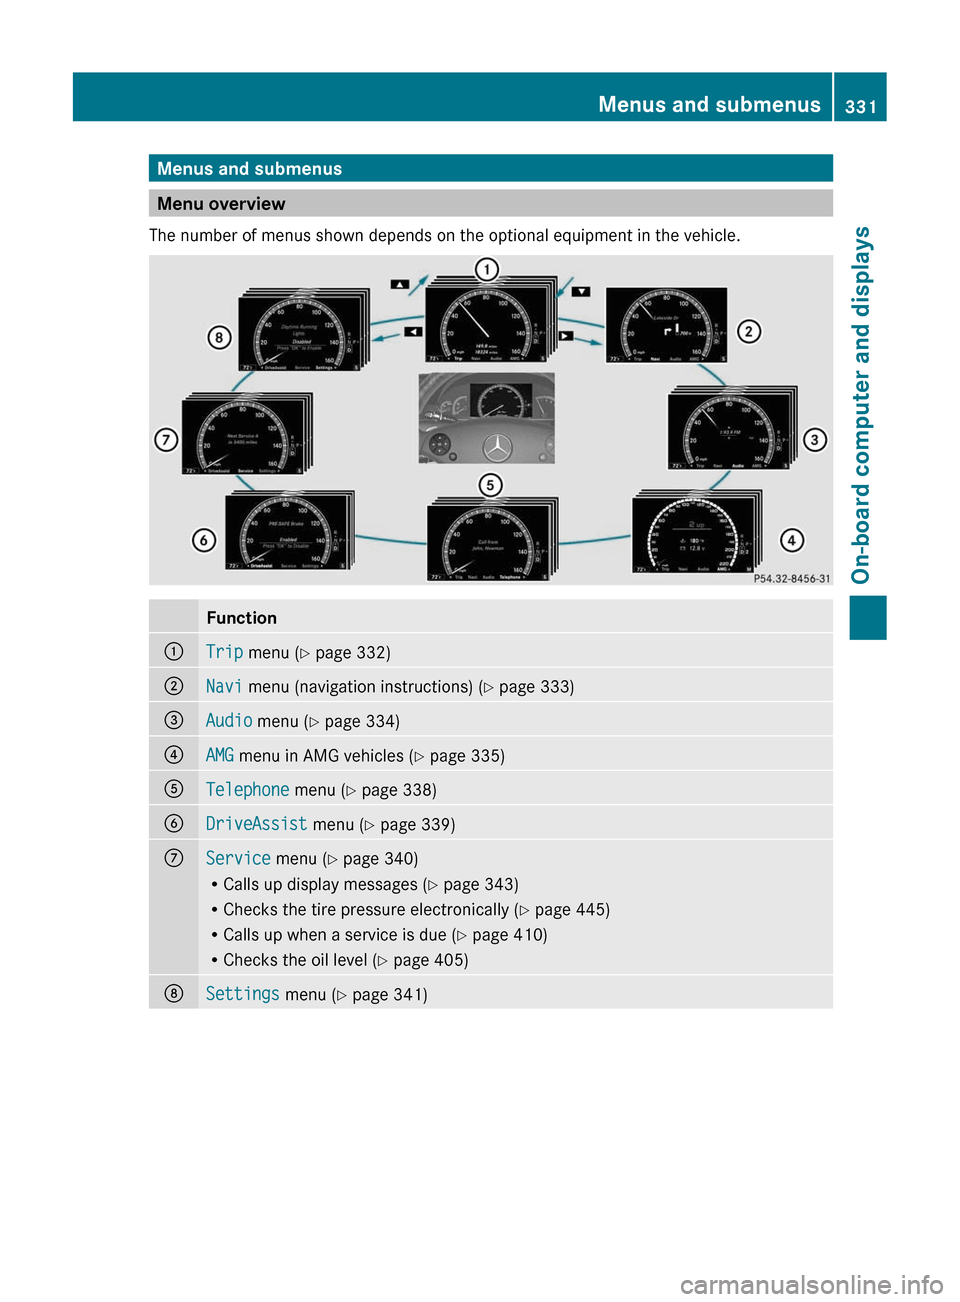
Menu overview
The number of menus shown depends on the optional equipment in the vehicle.
Function:Trip menu (Y page 332);Navi menu (navigation instructions) (Y page 333)=Audio menu (Y page 334)?AMG menu in AMG vehicles (Y page 335)ATelephone menu (Y page 338)BDriveAssist menu (Y page 339)CService menu (Y page 340)
RCalls up display messages (Y page 343)
RChecks the tire pressure electronically (Y page 445)
RCalls up when a service is due (Y page 410)
RChecks the oil level (Y page 405)
DSettings menu (Y page 341)Menus and submenus331On-board computer and displaysZ
Page 343 of 480
Rcall up display messages ( Y page 343)
R check the tire pressure electronically
( Y page 445)
R call up the service due date ( Y page 410)
R check the oil level ( Y page 405)
Menu settings
Introduction
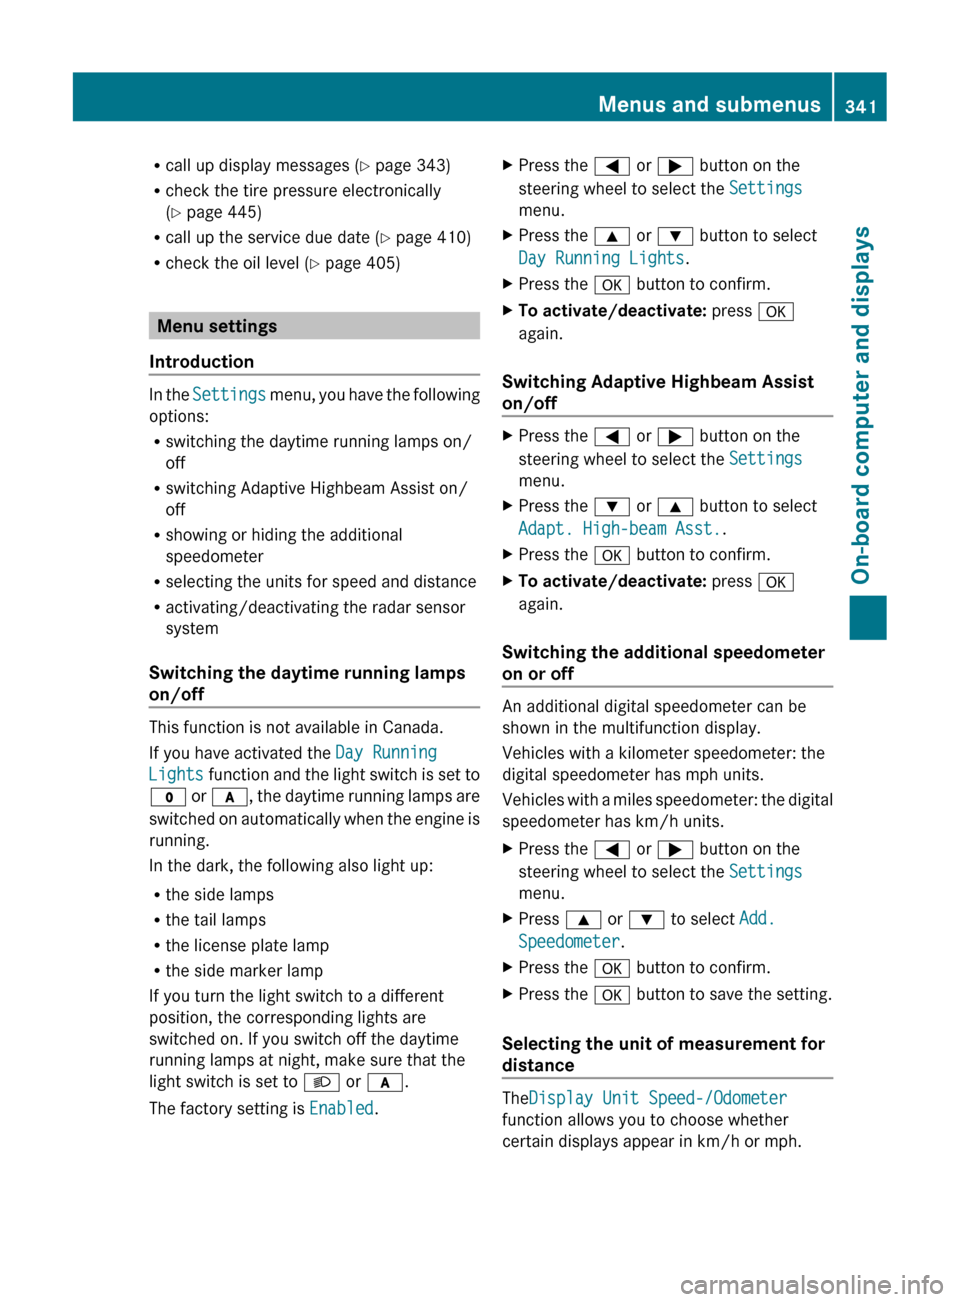
In the Settings menu, you have the following
options:
R switching the daytime running lamps on/
off
R switching Adaptive Highbeam Assist on/
off
R showing or hiding the additional
speedometer
R selecting the units for speed and distance
R activating/deactivating the radar sensor
system
Switching the daytime running lamps
on/off
This function is not available in Canada.
If you have activated the Day Running
Lights function and the light switch is set to
$ or c , the daytime running lamps are
switched on automatically when the engine is
running.
In the dark, the following also light up:
R the side lamps
R the tail lamps
R the license plate lamp
R the side marker lamp
If you turn the light switch to a different
position, the corresponding lights are
switched on. If you switch off the daytime
running lamps at night, make sure that the
light switch is set to L or c .
The factory setting is Enabled.
XPress the = or ; button on the
steering wheel to select the Settings
menu.XPress the 9 or : button to select
Day Running Lights .XPress the a button to confirm.XTo activate/deactivate: press a
again.
Switching Adaptive Highbeam Assist
on/off
XPress the = or ; button on the
steering wheel to select the Settings
menu.XPress the : or 9 button to select
Adapt. High-beam Asst. .XPress the a button to confirm.XTo activate/deactivate: press a
again.
Switching the additional speedometer
on or off
An additional digital speedometer can be
shown in the multifunction display.
Vehicles with a kilometer speedometer: the
digital speedometer has mph units.
Vehicles with a miles speedometer: the digital
speedometer has km/h units.
XPress the = or ; button on the
steering wheel to select the Settings
menu.XPress 9 or : to select Add.
Speedometer .XPress the a button to confirm.XPress the a button to save the setting.
Selecting the unit of measurement for
distance
The Display Unit Speed-/Odometer
function allows you to choose whether
certain displays appear in km/h or mph.
Menus and submenus341On-board computer and displaysZ
Page 364 of 480
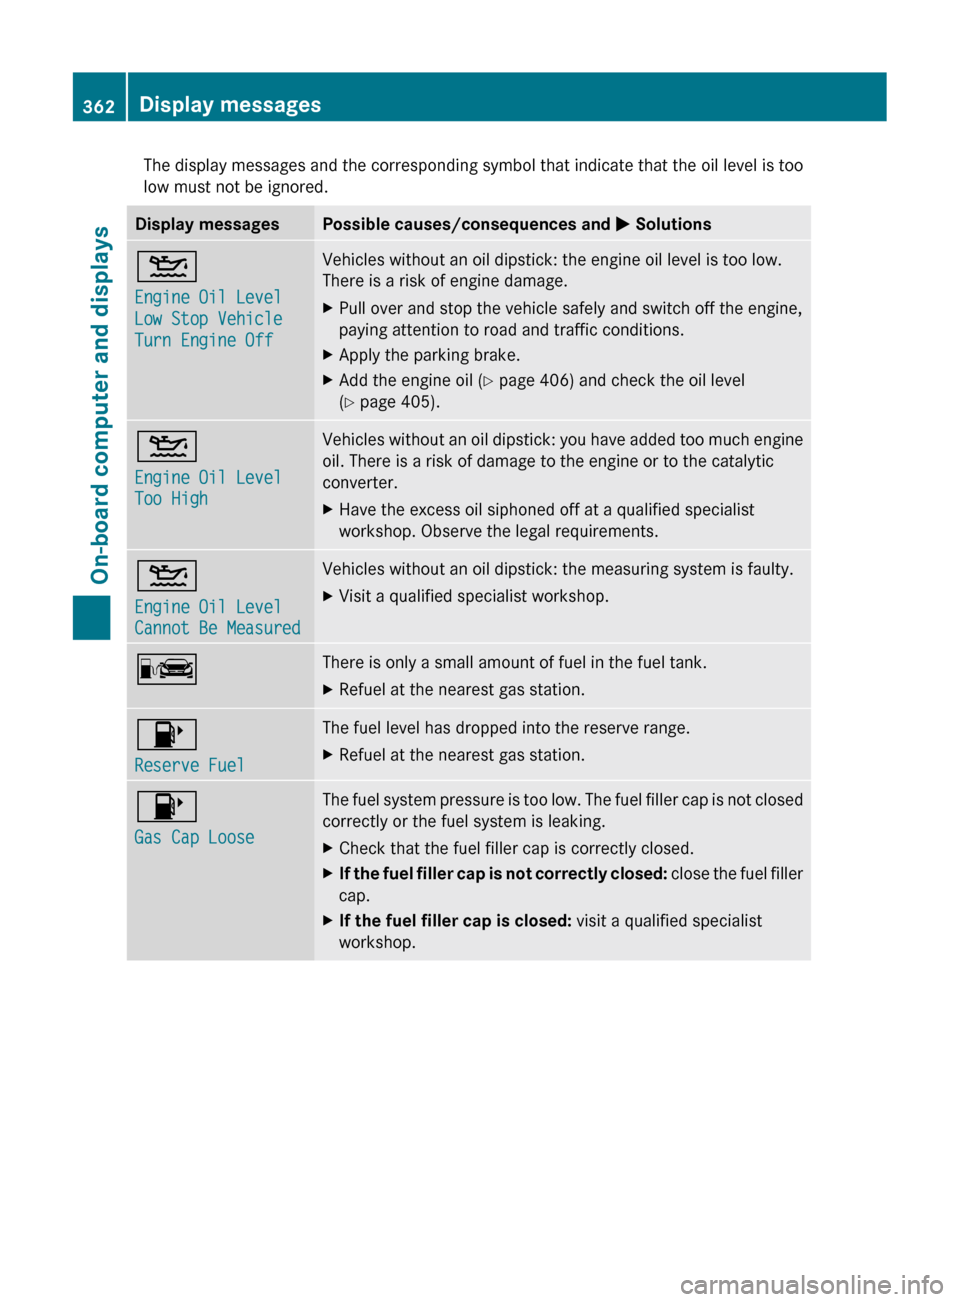
The display messages and the corresponding symbol that indicate that the oil level is too
low must not be ignored.Display messagesPossible causes/consequences and M Solutions4
Engine Oil Level
Low Stop Vehicle
Turn Engine OffVehicles without an oil dipstick: the engine oil level is too low.
There is a risk of engine damage.XPull over and stop the vehicle safely and switch off the engine,
paying attention to road and traffic conditions.XApply the parking brake.XAdd the engine oil ( Y page 406) and check the oil level
( Y page 405).4
Engine Oil Level
Too HighVehicles without an oil dipstick: you have added too much engine
oil. There is a risk of damage to the engine or to the catalytic
converter.XHave the excess oil siphoned off at a qualified specialist
workshop. Observe the legal requirements.4
Engine Oil Level
Cannot Be MeasuredVehicles without an oil dipstick: the measuring system is faulty.XVisit a qualified specialist workshop.CThere is only a small amount of fuel in the fuel tank.XRefuel at the nearest gas station.8
Reserve FuelThe fuel level has dropped into the reserve range.XRefuel at the nearest gas station.8
Gas Cap LooseThe fuel system pressure is too low. The fuel filler cap is not closed
correctly or the fuel system is leaking.XCheck that the fuel filler cap is correctly closed.XIf the fuel filler cap is not correctly closed: close the fuel filler
cap.XIf the fuel filler cap is closed: visit a qualified specialist
workshop.362Display messagesOn-board computer and displays
Page 409 of 480
The following causes engine failure or
damage to the exhaust system:
Rusing engine oils and oil filters that are
not specifically approved for the service
system
Rreplacing the engine oil and oil filter after
having exceeded the interval for
replacement prescribed by the
maintenance system
Rusing engine oil additives
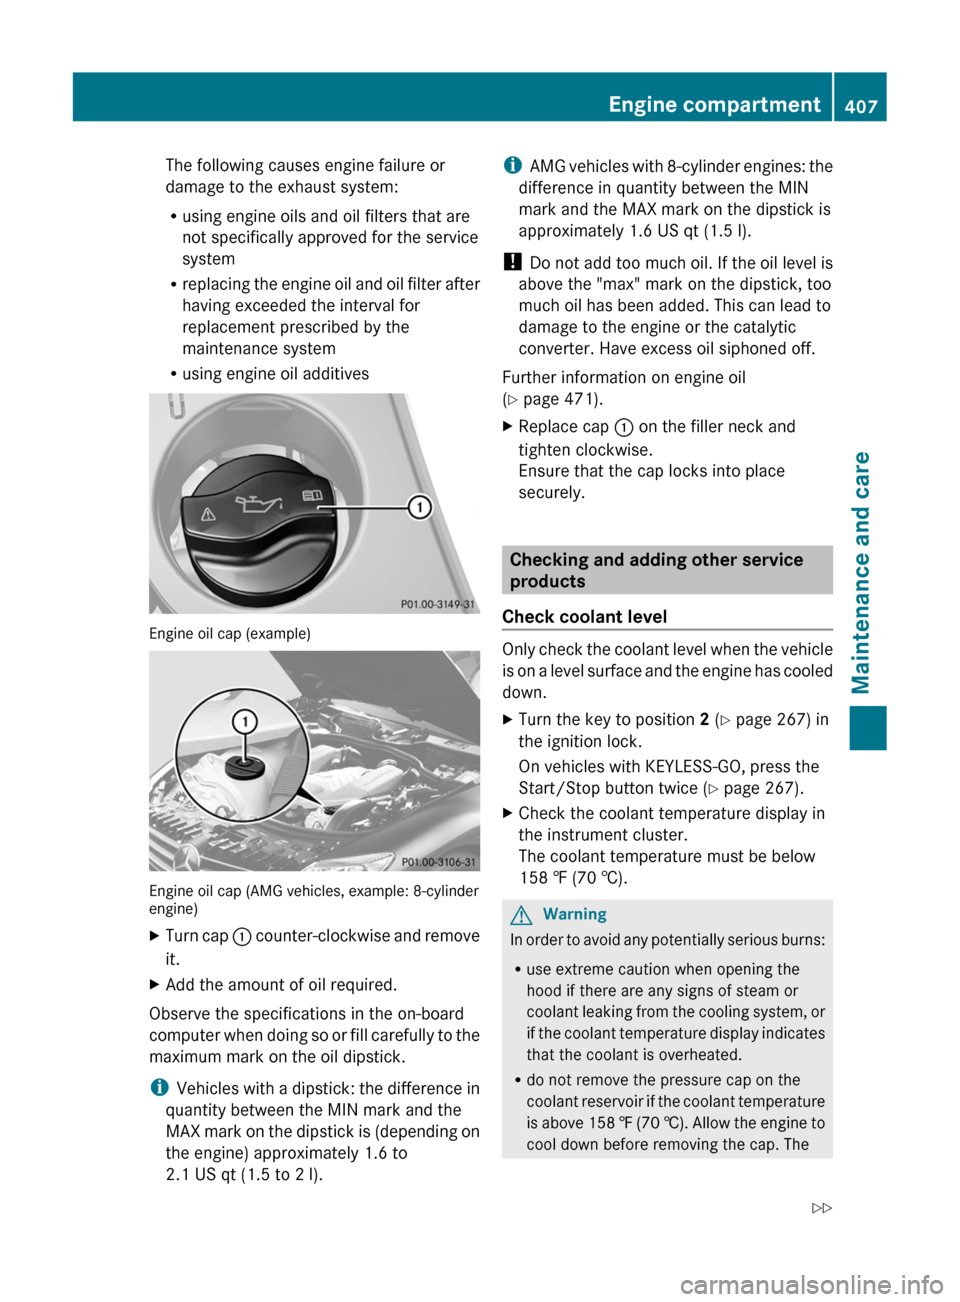
Engine oil cap (example)
Engine oil cap (AMG vehicles, example: 8-cylinderengine)
XTurn cap : counter-clockwise and remove
it.
XAdd the amount of oil required.
Observe the specifications in the on-board
computer when doing so or fill carefully to the
maximum mark on the oil dipstick.
iVehicles with a dipstick: the difference in
quantity between the MIN mark and the
MAX mark on the dipstick is (depending on
the engine) approximately 1.6 to
2.1 US qt (1.5 to 2 l).
iAMG vehicles with 8-cylinder engines: the
difference in quantity between the MIN
mark and the MAX mark on the dipstick is
approximately 1.6 US qt (1.5 l).
! Do not add too much oil. If the oil level is
above the "max" mark on the dipstick, too
much oil has been added. This can lead to
damage to the engine or the catalytic
converter. Have excess oil siphoned off.
Further information on engine oil
(Y page 471).
XReplace cap : on the filler neck and
tighten clockwise.
Ensure that the cap locks into place
securely.
Checking and adding other service
products
Check coolant level
Only check the coolant level when the vehicle
is on a level surface and the engine has cooled
down.
XTurn the key to position 2 (Y page 267) in
the ignition lock.
On vehicles with KEYLESS-GO, press the
Start/Stop button twice (Y page 267).
XCheck the coolant temperature display in
the instrument cluster.
The coolant temperature must be below
158 ‡ (70 †).
GWarning
In order to avoid any potentially serious burns:
Ruse extreme caution when opening the
hood if there are any signs of steam or
coolant leaking from the cooling system, or
if the coolant temperature display indicates
that the coolant is overheated.
Rdo not remove the pressure cap on the
coolant reservoir if the coolant temperature
is above 158 ‡ (70 †). Allow the engine to
cool down before removing the cap. The
Engine compartment407Maintenance and careZ
Page 417 of 480
Interior care
Cleaning the display
XBefore cleaning the display, make sure that
it is switched off and has cooled down.
XClean the display surface using a
commercially-available microfiber cloth
and TFT/LCD display cleaner.
XDry the display surface using a dry
microfiber cloth.
! For cleaning, do not use any of the
following:
Ralcohol-based thinner or gasoline
Rabrasive cleaning agents
Rcommercially-available household
cleaning agents
These may damage the display surface. Do
not put pressure on the display surface
when cleaning. This could lead to
irreparable damage to the display.
Cleaning Night View Assist Plus
! Never clean the camera lens. When
cleaning the field of vision of the driving
systems, make sure that you do not spray
glass cleaner on the camera lens. If the
camera lens is dirty, visit a qualified
specialist workshop, e.g. an authorized
Mercedes-Benz Center.
GWarning!
Please do not forget that your primary
responsibility is to drive the vehicle. A driver's
attention to the road must always be his/her
primary focus when driving. For your safety
and the safety of others, stop before trying to
remove window fogging or cleaning the
window in front of the Night View Assist Plus
camera.
Bear in mind that at a speed of just 30 mph
(approximately 50 km/h), your vehicle is
covering a distance of 44 feet (approximately
14 m) every second.
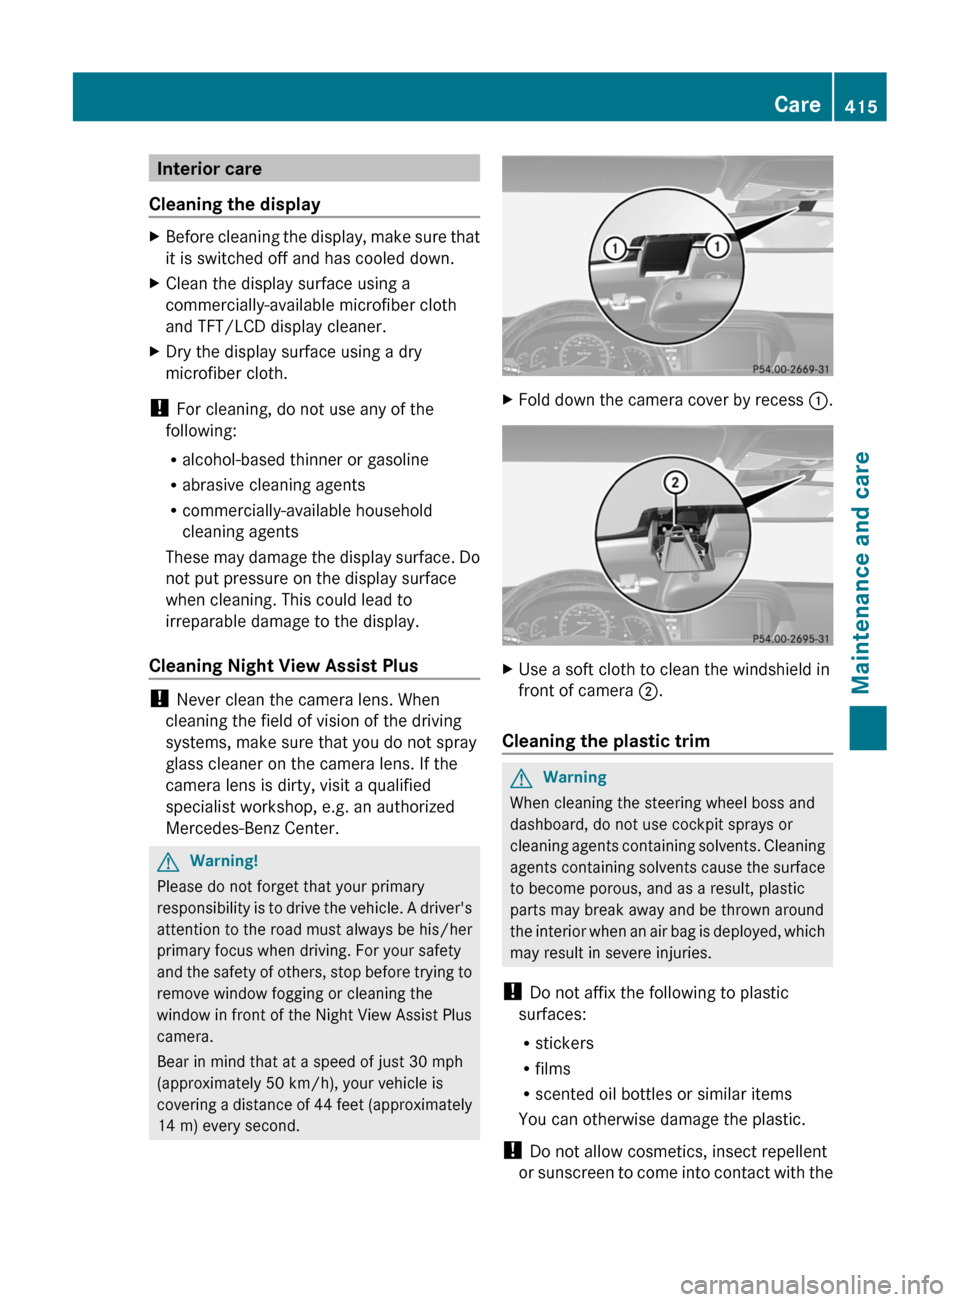
XFold down the camera cover by recess :.XUse a soft cloth to clean the windshield in
front of camera ;.
Cleaning the plastic trim
GWarning
When cleaning the steering wheel boss and
dashboard, do not use cockpit sprays or
cleaning agents containing solvents. Cleaning
agents containing solvents cause the surface
to become porous, and as a result, plastic
parts may break away and be thrown around
the interior when an air bag is deployed, which
may result in severe injuries.
! Do not affix the following to plastic
surfaces:
Rstickers
Rfilms
Rscented oil bottles or similar items
You can otherwise damage the plastic.
! Do not allow cosmetics, insect repellent
or sunscreen to come into contact with the
Care415Maintenance and careZ
Page 461 of 480
noseweight if applicable). The gross vehicle
weight rating is specified on the vehicle
identification plate on the B-pillar on the
driver's side.
Maximum loaded vehicle weight
The maximum weight is the sum of the
unladen weight of the vehicle, the weight of
the accessories, the maximum load and the
weight of the optional equipment installed at
the factory.
Kilopascal (kPa)
Metric unit for tire pressure. 6.9 kPa is the
equivalent of 1 psi. Another unit for tire
pressure is bar. 100 kilopascal (kPa) is the
equivalent of 1 bar.
Load index
In addition to the load bearing index, the load
index may also be imprinted on the sidewall
of the tire. This specifies the load bearing
capacity more precisely.
Unladen weight
The weight of a vehicle with standard
equipment including the maximum capacity
of fuel, oil and coolant. It also includes the air-
conditioning system and optional equipment
if these are installed on the vehicle, but does
not include passengers or luggage.
Maximum tire load
The maximum tire load in kilograms or
pounds is the maximum weight for which a
tire is approved.
Maximum permissible tire pressure
Maximum permissible tire pressure for one
tire.
Maximum load on one tire
Maximum load on one tire. This is calculated
by dividing the maximum axle load of one axle
by two.
PSI (pounds per square inch)
Standard unit of measurement for tire
pressure.
Aspect ratio
Relationship between tire height and tire
width in percent.
Tire pressure
Pressure inside the tire applying an outward
force to every square inch of the tire's
surface. The tire pressure is specified in
pounds per square inch (psi), in kilopascal
(kPa) or in bar. The tire pressure should only
be corrected when the tires are cold. For this,
the vehicle must have been stationary for at
least three hours or not have traveled more
than 1.6 km (1 mile) in this time.
Tire tread
The part of the tire that comes into contact
with the road.
Tire bead
The tire bead ensures that the tire sits
securely on the wheel. There are several steel
wires in the bead to prevent the tire from
coming loose from the wheel rim.
Term definition for tires and loading459Tires and wheelsZ
Page 463 of 480
If your vehicle's tire configuration allows, you
can rotate the wheels according to the
intervals in the tire manufacturer's warranty
book in your vehicle documents. If no
warranty book is available, the tires should be
rotated every 3000 to 6000 miles
(5000 to 10000 km), or earlier if tire wear
requires. Do not change the direction of
wheel rotation.
Clean the contact surfaces of the wheel and
the brake disc thoroughly every time a wheel
is interchanged. Check the tire pressures.
Information on changing a wheel and fitting
the spare wheel ( Y page 421).
! On vehicles installed with a tire pressure
monitor, electronic components are
located in the wheel.
Tire-mounting tools should not be applied
in the area of the valve, as this could
damage the electronic components.
Always have the tires changed at a qualified
specialist workshop, e.g. an authorized
Mercedes-Benz Center.
Direction of rotation
Tires with a specified direction of rotation
have additional benefits, e.g. if there is a risk
of hydroplaning. You will only gain these
benefits if the correct direction of rotation is
observed.
An arrow on the sidewall of the tire indicates
its correct direction of rotation.
You may install an emergency spare wheel/
spare wheel against the direction of rotation.
Observe the time restriction on use as well as
the speed limitation specified on the
emergency spare wheel/spare wheel.
Storing wheels
Store wheels that are not being used in a cool,
dry and preferably dark place. Protect the
tires from contact with oil, grease and fuel.
Cleaning the wheelsGWarning
Do not use power washers with circular jet
nozzles (concentrated-power jets) to clean
your vehicle, especially for cleaning tires. You
could otherwise damage the tires and cause
an accident.
Wheel/tire combinations
Points to remember
GWarning
Observe the "Important safety notes"
( Y page 438).
! For safety reasons, Mercedes-Benz
recommends that you only use tires,
wheels and accessories which have been
approved by Mercedes-Benz specifically
for your vehicle.
These tires have been specially adapted for
use with the control systems, such as ABS
or ESP ®
, and are marked as follows:
R MO = Mercedes-Benz Original
R MOE = Mercedes-Benz Original Extended
(tires with run-flat characteristics)
R MO1 = Mercedes-Benz Original (only
certain AMG tires)
Mercedes-Benz Original Extended tires
may only be used on wheels that have been
specifically approved by Mercedes-Benz.
Only use tires, wheels or accessories
tested and approved by Mercedes-Benz.
Certain characteristics, e.g. handling,
vehicle noise emissions or fuel
consumption, may otherwise be adversely
affected. In addition, when driving with a
load, tire dimension variations could cause
the tires to come into contact with the
bodywork and axle components. This could
result in damage to the tires or the vehicle.
Mercedes-Benz accepts no liability for
damage resulting from the use of tires,
Wheel/tire combinations461Tires and wheelsZ
Page 473 of 480
RETBE
R IPA
R TBA
For MTBE, the concentration should not
exceed 15%.
The concentration of methanol in gasoline
including other additives must not exceed 3%.
Using mixtures of methanol and ethanol is not
permitted. Gasohol, a mixture of 10% ethanol
and 90% unleaded gasoline can be used.
All of these mix fuels must fulfill the fuel
requirements, e.g.:
R knock resistance
R boiling point
R vapor pressure
Additives in gasoline
One of the major problems in engine design
is the creation of carbon deposits during the
process of burning fuel. Mercedes-Benz
recommends that you use fuel brands that
have the additives which prevent the build up
of carbon deposits.
If you use fuels without these additives for a
longer period of time, there may be a build up
of carbon deposits, especially on the inlet
valves and in the combustion chamber.
This could lead to engine running problems,
e.g.:
R warm-up hesitation
R unstable idle
R knocking/pinging
R misfire
R power loss
In areas where carbon deposits may be
encountered due to lack of availability of
gasoline which contains these additives,
Mercedes-Benz recommends the use of
additives approved for use in Mercedes-Benz
vehicles.
Consult an authorized Mercedes-Benz Center
or visit http://www.mbusa.com (USA only)
to view a list of approved products. Observe
the instructions for use on the product label.
Do not mix other fuel additives with fuel. This
causes unnecessary costs and could damage
the engine.
! Do not refuel with low-grade fuel and do
not use fuel additives that are not tested
and approved for Mercedes-Benz vehicles.
Damage or malfunctions can result that are
not covered:
R by the Mercedes-Benz Limited Warranty
R by an existing Limited Warranty
R by an extended Limited Warranty
Engine oil
Points to remember
The engine oils are matched to the
performance of Mercedes-Benz engines and
service intervals. For this reason, only use
engine oils and oil filters that are approved for
vehicles with a service system.
Contact an authorized Mercedes-Benz Center
or visit http://www.mbusa.com (USA only)
for a list of approved engine oils and oil filters.
! Never use engine oil or an oil filter of a
specification other than is necessary to
fulfill the prescribed service intervals. Do
not change the engine oil or oil filter in
order to achieve longer replacement
intervals than those prescribed. Otherwise,
you may cause damage to the engine or
exhaust gas aftertreatment; this is not
covered by the Mercedes-Benz Limited
Warranty.
Follow the instructions in the service
interval display regarding the oil change.
Otherwise, you may damage the engine and
the exhaust gas aftertreatment.
Mercedes-Benz recommends MOBIL OIL.
The table shows which engines oil have been
approved for your vehicle.
Service products and capacities471Technical dataZ