reset MERCEDES-BENZ CL-Class 2014 C217 Comand Manual
[x] Cancel search | Manufacturer: MERCEDES-BENZ, Model Year: 2014, Model line: CL-Class, Model: MERCEDES-BENZ CL-Class 2014 C217Pages: 274, PDF Size: 5.76 MB
Page 57 of 274
X
Turn 003C0012003D or slide 003600120008the COMAND
controller and press 0037to confirm.
The massage function runs for
approximately 15 to 25 minutes,
depending on the setting.
X To exit the menu: press the000Aback
button.
Adjusting the driving dynamics This function is available on vehicle model
series with a dynamic multicontour seat. X
Select the seat (Y page 52).
X Select Dynamic Seat by turning
003C0012003Dthe
COMAND controller and press 0037to
confirm.
As cale appears.
You can select:
R 0 : Off
R 1 :l
evel 1(mediu msetting)
R 2 :l
evel 2(high setting)
X Turn 003C0012003D or slide 003600120008the COMAND
controller and press 0037to confirm.
X To exit the menu: press the000Aback
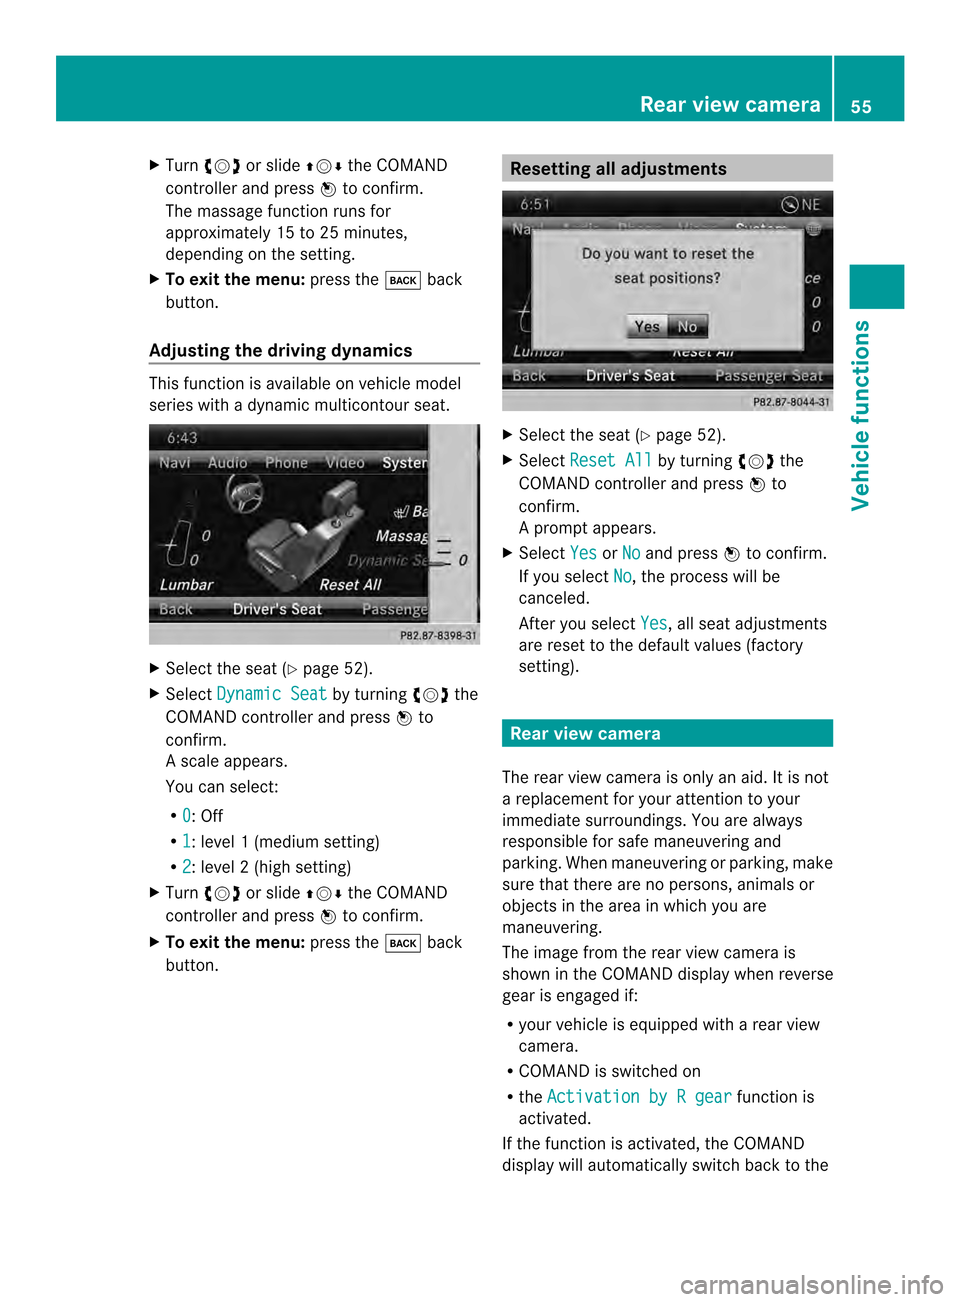
button. Resetting all adjustments
X
Select the seat (Y page 52).
X Select Reset All by turning
003C0012003Dthe
COMAND controller and press 0037to
confirm.
Ap rompt appears.
X Select Yes or
No and press
0037to confirm.
If you select No , the process will be
canceled.
After you select Yes , all seat adjustments
are reset to the default values (factory
setting). Rear view camera
The rear view camera is only an aid.Iti s not
a replacement for your attention to your
immediate surroundings. You are always
responsible for safe maneuvering and
parking. When maneuvering or parking, make
sure that there are no persons, animals or
objects in the area in which you are
maneuvering.
The image from the rear view camera is
shown in the COMAND displayw hen reverse
gear is engaged if:
R your vehicle is equipped with a rear view
camera.
R COMAND is switched on
R the Activation by R gear function is
activated.
If the function is activated, the COMAND
display will automatically switch back to the Rear view camera
55Vehicle functions
Page 77 of 274
X
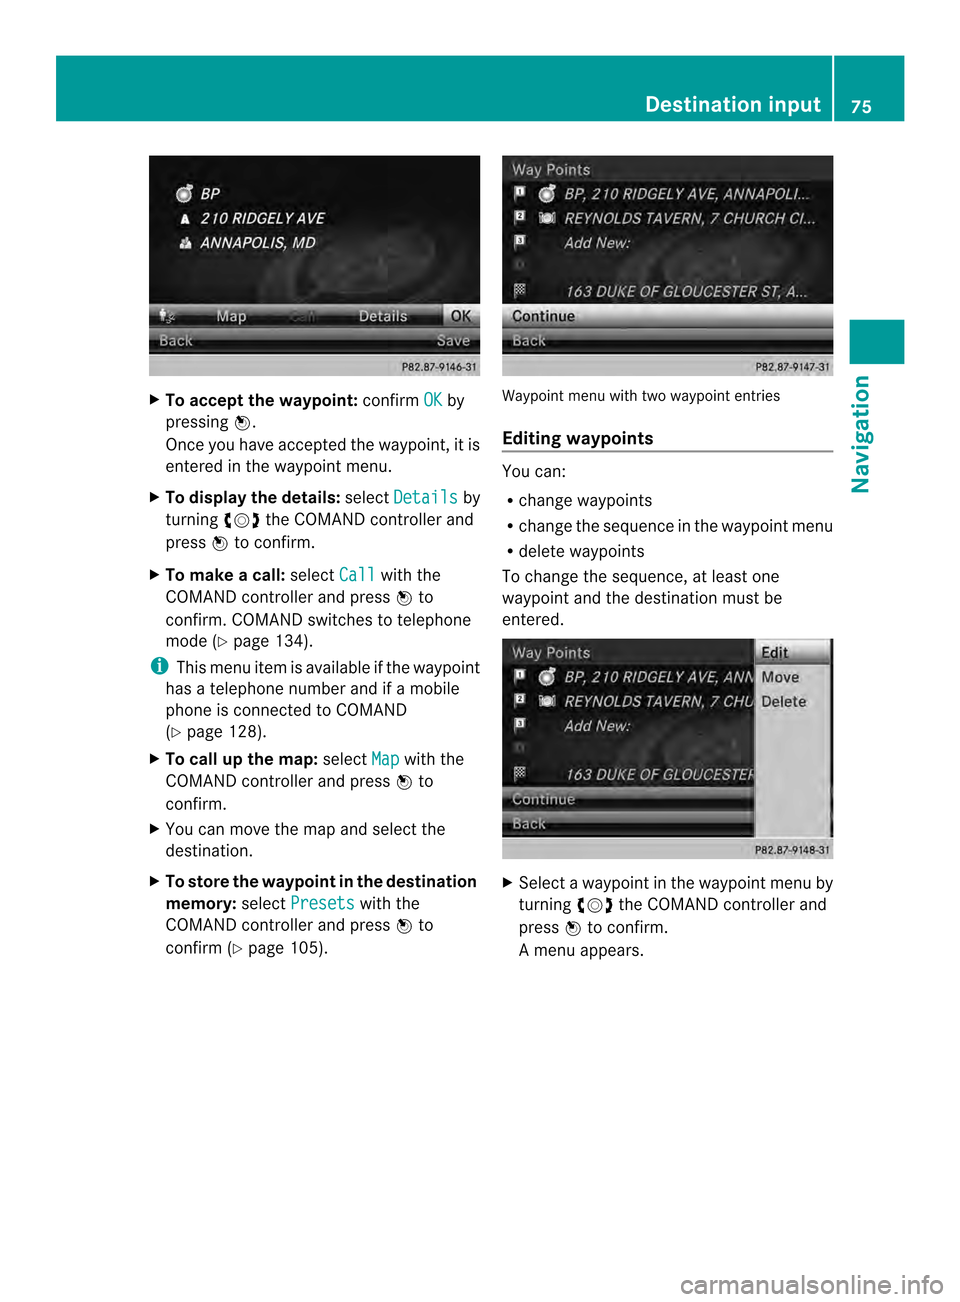
To accept the waypoint: confirmOK by
pressing 0037.
Once you have accepted the waypoint, it is
entered in the waypoint menu.
X To display the details: selectDetails by
turning 003C0012003Dthe COMAND controller and
press 0037to confirm.
X To make a call: selectCall with the
COMAND controller and press 0037to
confirm. COMAND switches to telephone
mode (Y page 134).
i This menu ite mis available if the waypoint
has a telephone number and if a mobile
phone is connected to COMAND
(Y page 128).
X To call up the map: selectMap with the
COMAND controller and press 0037to
confirm.
X You can move the map and select the
destination.
X To store the waypoint in the destination
memory: selectPresets with the
COMAND controller and press 0037to
confirm (Y page 105). Waypoint menu with two waypoint entries
Editing waypoints
You can:
R
change waypoints
R change the sequence in the waypoint menu
R delete waypoints
To change the sequence, at least one
waypoint and the destination must be
entered. X
Select a waypoint in the waypoint menu by
turning 003C0012003Dthe COMAND controller and
press 0037to confirm.
Am enu appears. Destination input
75Navigation Z
Page 99 of 274
the COMAND controlle
rand press 0037to
confirm.
The map with the crosshair appears.
X Proceed as described in the "Route
demonstration" section (Y page 95).
X To begin route calculation: selectStart in the menu by turning
003C0012003Dthe COMAND
controller and press 0037to confirm.
COMAND attempts to alig nthe recorded
route with the digital map. Changing route names and icons
X
Select Edit in the menu by turning
003C0012003D
the COMAND controller and press 0037to
confirm.
X To change the route name: select
Rename and press
0037to confirm.
i The name cannot be changed while the
vehicle is in motion.
X To change the icon: selectChange Icon and press
0037to confirm.
Observe the further information on managing
categories for personal POIs (Y page 84).
To change direction for route
calculation: you can set the icon for the
route to the starting point or to the
destination, thereby changing the direction
for route calculation.
During route calculation, one-way streets or
turn restrictions, for example, are taken into
account. Therefore, the outward and return
routes may differ from each other. X
Select Swap in the menu by turning
003C0012003D
the COMAND controller and press 0037to
confirm.
X To delete a route: selectDelete in the
menu by turning 003C0012003Dthe COMAND
controller and press 0037to confirm.
Ap rompt appears asking whethe rthe route
should be deleted.
X Select Yes or
No and press
0037to confirm.
If you select Yes , the route will be deleted.
If you select No , the process will be
canceled.
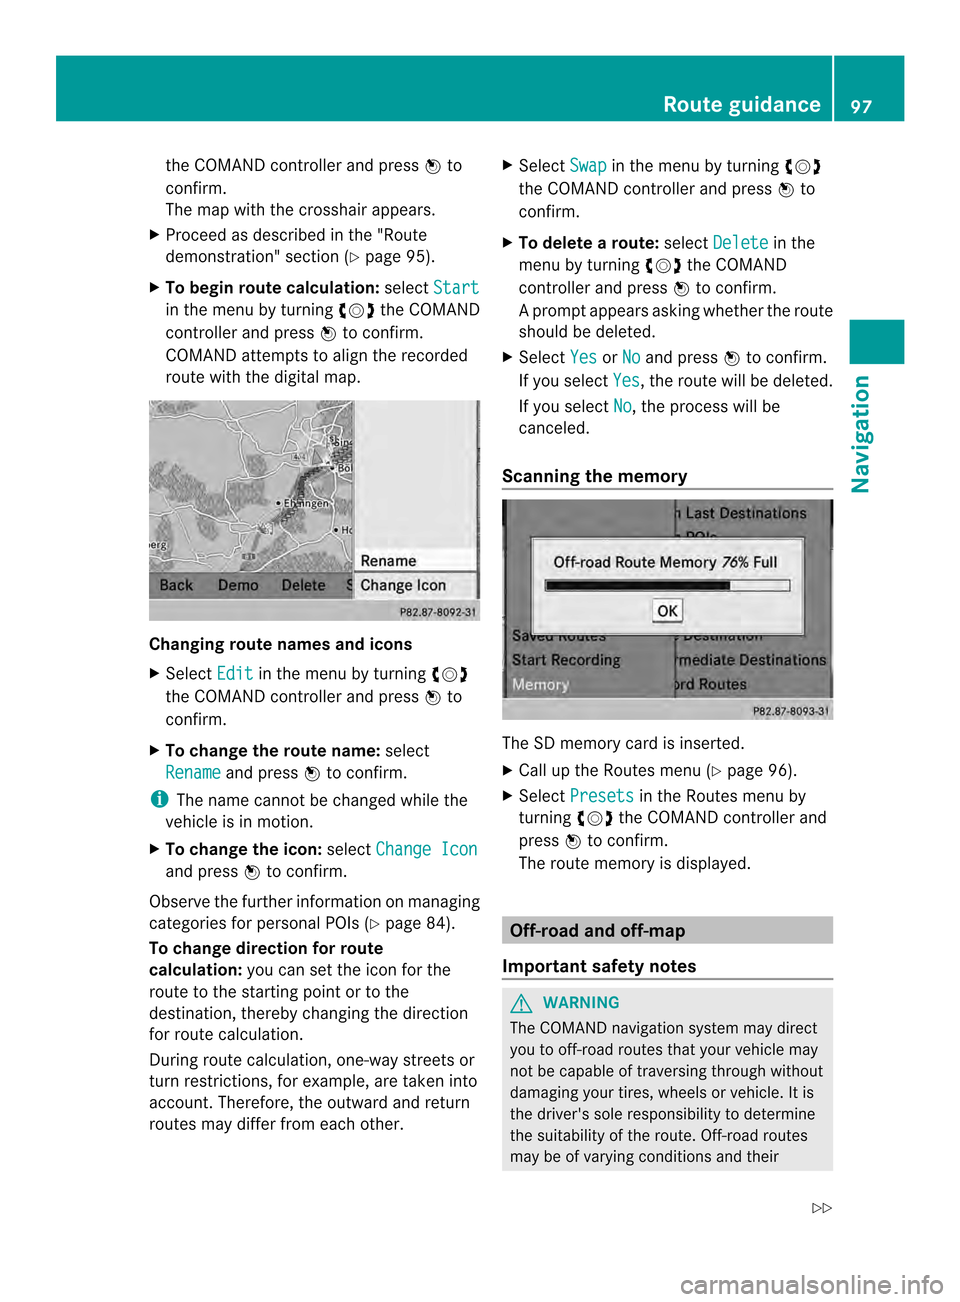
Scanning the memory The SD memory card is inserted.
X
Call up the Routes menu (Y page 96).
X Select Presets in the Routes menu by
turning 003C0012003Dthe COMAND controller and
press 0037to confirm.
The route memory is displayed. Off-road and off-map
Important safety notes G
WARNING
The COMAND navigation system may direct
you to off-road routes that your vehicle may
not be capable of traversing through without
damaging your tires, wheels or vehicle. It is
the driver's sole responsibility to determine
the suitability of the route. Off-road routes
may be of varying conditions and their Route guidance
97Navigation
Z
Page 137 of 274
Using the telephone basic menu
X
Call up the telephone basic menu
(Y page 133).
X Selec tthe digits one by one by turning
003C0012003D and sliding 003600120008the COMAND
controller and press 0037to confirm.
X To make a call: select°in the character
bar and press 0037to confirm.
or
X Press the 0016button on COMAND or on
the multifunction steering wheel.
Redialing X
Call up the telephone basic menu
(Y page 133).
X Select °in the character bar and press
0037 to confirm.
or
X If the telephone basic menu is displayed,
press the 0016button on COMAND.
In both cases, the calls dialed list appears.
The most recently dialed number is at the
top.
X To selectac all:turn 003C0012003D the COMAND
controller.
X To connect the call: press0037the
COMAND controller.
Using the call lis torCOMAND phone
book X
Open a call list and select an entry
(Y page 143).
or
X Call up the COMAND phone book and
select an entry (Y page 140).
X To make a call: press0037the COMAND
controller or the 0016button. Making a call via speed dial The speed dial list contains stored entries
from the phone book (Y
page 145).
Option 1:
X Hold down one of the number keys for
longer than two seconds.
The telephone basic menu displays the
selected entry. This initiates dialing.
Option 2:
X Call up the telephone basic menu
(Y page 133).
X Select Call Lists by sliding
00120008and
turning 003C0012003Dthe COMAND controller and
press 0037to confirm.
Am enu appears.
X Select Speed Dial Preset List by
turning 003C0012003Dthe COMAND controller and
press 0037to confirm.
The speed dial list appears.
X Select preset and press 0037to confirm.
The telephone basic menu displays the
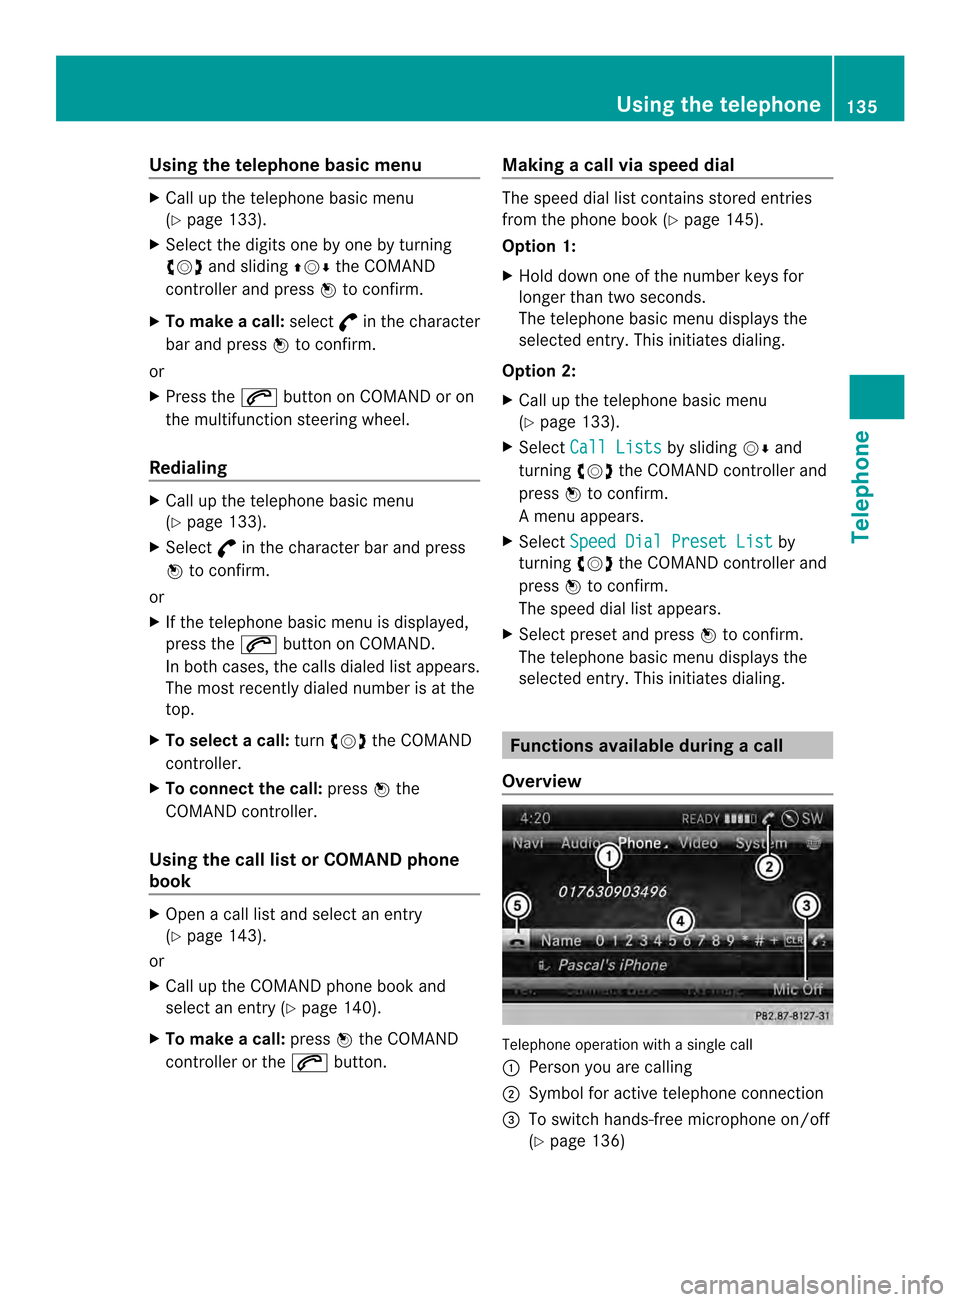
selected entry. This initiates dialing. Functions available during
acall
Overview Telephone operatio
nwith a single call
0001 Perso nyou are calling
0002 Symbol for active telephone connection
0014 To switch hands-free microphone on/off
(Ypage 136) Using the telephone
135Telephone Z
Page 147 of 274
call lists are generated and managed by
COMAND. You can delete these call lists in
COMAND.
If you download call lists from a Bluetooth
®
phone that supports the PBAP Bluetooth ®
profile, you cannot delete them from
COMAND.
X Select Call Lists in the telephone basic
menu by turning 003C0012003Dthe COMAND
controlle rand press 0037to confirm.
X Select Delete Call Lists and press
0037
to confirm.
Ap rompt appears asking whethe ryou wish
to delete all call lists.
X Select Yes or
No and press
0037to confirm.
If you select Yes , the call lists are deleted.
If you select No , the process will be
canceled.
i If you delete these call lists from the
mobile phone (see the separate mobile
phone operating instructions), COMAND
updates the call list display the next time it
connects. Using the speed dial list
Storing an entry
You can assign ten speed dial presets (0 –9)
to the speed dial list. There are two options
available for this purpose.
Option 1:
X Search for a phone book entry in the phone
book (Y page 140).
X If an entry has several phone numbers,
select the desired numbe rby turning
003C0012003D the COMAND controller. X
Selec tthe list symbol to the right of the
entry by sliding 00120035the COMAND
controller and press 0037to confirm.
Am enu appears.
X Select Speed Dial by turning
003C0012003Dthe
COMAND controller and press 0037to
confirm.
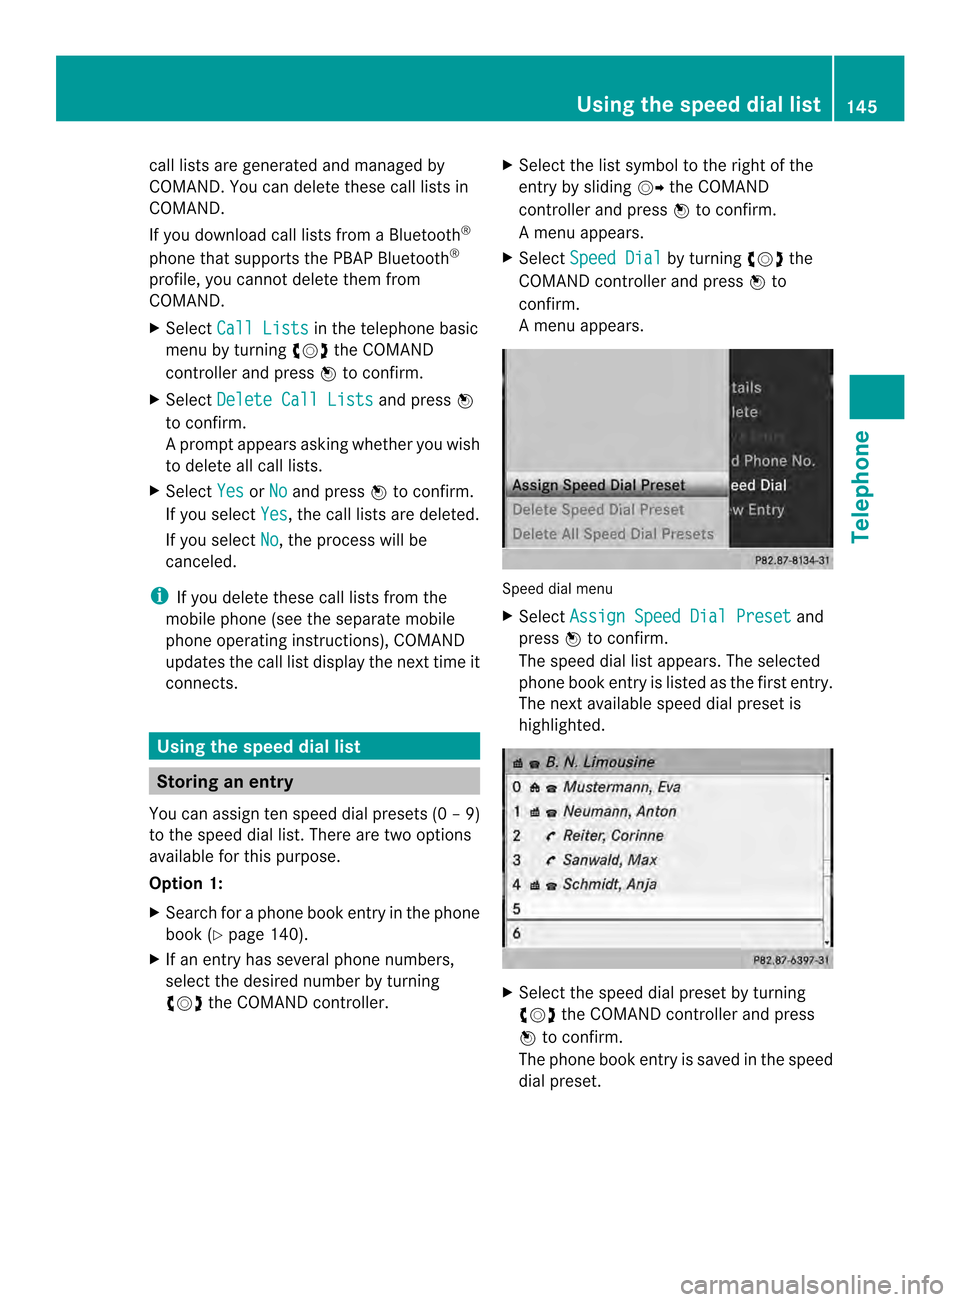
Am enu appears. Speed dial menu
X
Select Assign Speed Dial Preset and
press 0037to confirm.
The speed dial list appears. The selected
phone book entry is listed as the first entry.
The nexta vailable speed dial prese tis
highlighted. X
Select the speed dial preset by turning
003C0012003D the COMAND controller and press
0037 to confirm.
The phone book entry is saved in the speed
dial preset. Using the speed dial list
145Telephone Z
Page 148 of 274
Option 2:
X
Call up the telephone basic menu
(Y page 133).
X Select Call Lists by sliding
00120008and
turning 003C0012003Dthe COMAND controller and
press 0037to confirm.
X Select Speed Dial Preset List and
press 0037to confirm.
The speed dial list appears.
X Select the list symbol to the right of the
entry by sliding 00120035the COMAND
controller and press 0037to confirm.
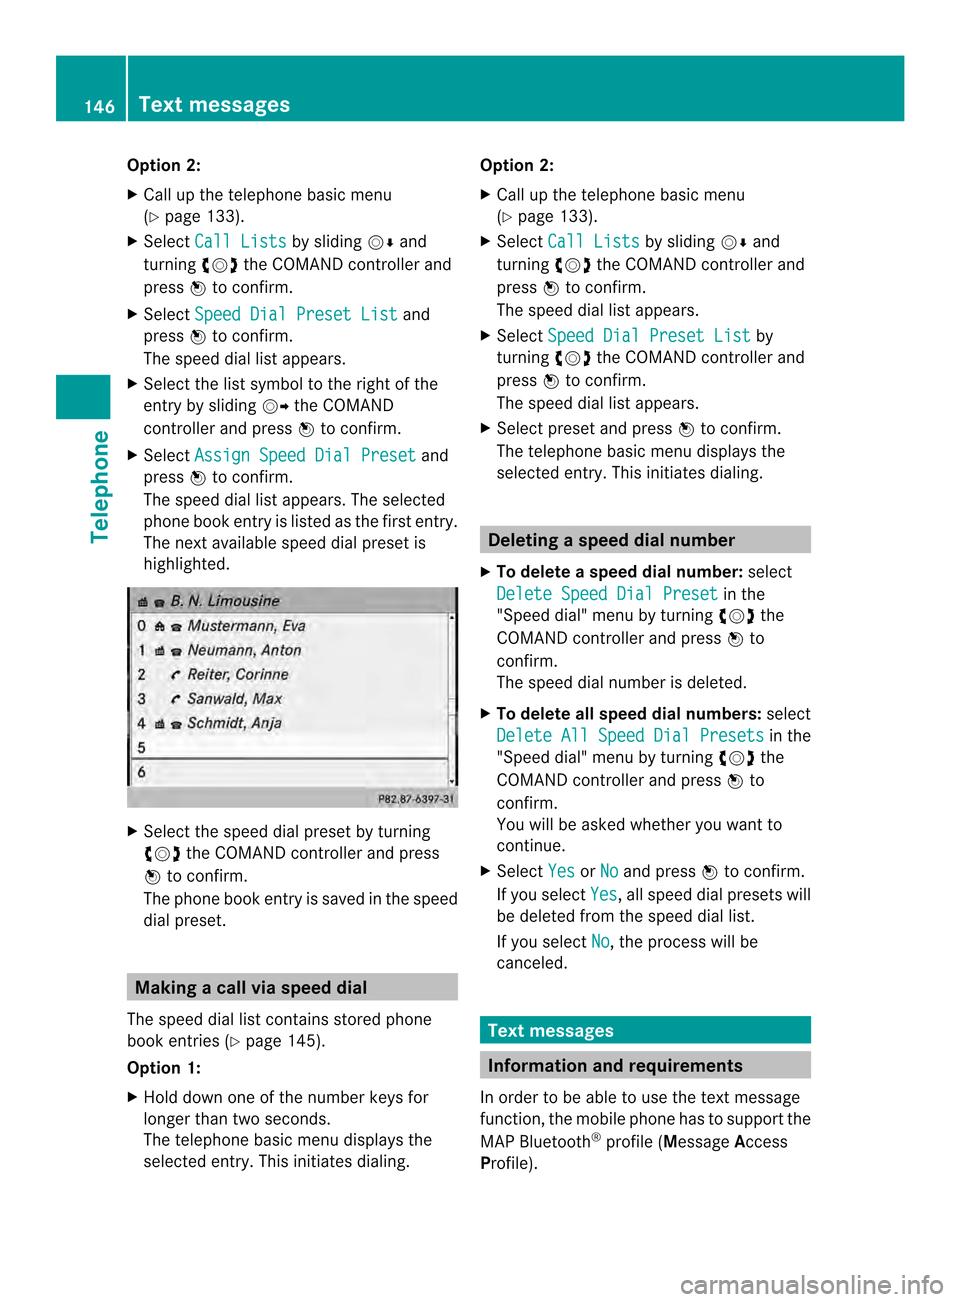
X Select Assign Speed Dial Preset and
press 0037to confirm.
The speed dial list appears. The selected
phone book entry is listed as the first entry.
The nexta vailable speed dial prese tis
highlighted. X
Select the speed dial preset by turning
003C0012003D the COMAND controller and press
0037 to confirm.
The phone book entry is saved in the speed
dial preset. Making a call via speed dial
The speed dial list contains stored phone
book entries (Y page 145).
Option 1:
X Hold down one of the number keys for
longer than two seconds.
The telephone basic menu displays the
selected entry. This initiates dialing. Option 2:
X Call up the telephone basic menu
(Y page 133).
X Select Call Lists by sliding
00120008and
turning 003C0012003Dthe COMAND controller and
press 0037to confirm.
The speed dial list appears.
X Select Speed Dial Preset List by
turning 003C0012003Dthe COMAND controller and
press 0037to confirm.
The speed dial list appears.
X Select preset and press 0037to confirm.
The telephone basic menu displays the
selected entry. This initiates dialing. Deleting
aspee ddial number
X To delete a speed dial number: select
Delete Speed Dial Preset in the
"Speed dial" menu by turning 003C0012003Dthe
COMAN Dcontroller and press 0037to
confirm.
The speed dial number is deleted.
X To delete all speed dial numbers: select
Delete All Speed Dial Presets in the
"Speed dial" menu by turning 003C0012003Dthe
COMAND controller and press 0037to
confirm.
You will be asked whether you want to
continue.
X Select Yes or
No and press
0037to confirm.
If you select Yes , all speed dial presets will
be deleted from the speed dial list.
If you select No , the process will be
canceled. Text messages
Information and requirements
In order to be able to use the text message
function, the mobile phone has to support the
MAP Bluetooth ®
profile (Message Access
Profile). 146
Text messagesTelephone
Page 151 of 274
X
Press 0037the COMAND controller while the
textm essage is being displayed.
X Select Save Number and press
0037to
confirm.
X Select New Entry and press
0037to confirm.
X Store the phone number (Y page 143)
Adding the sender of atext message to
an address book entry X
Press 0037the COMAND controller while the
text message is being displayed.
X Select Save Number and press
0037to
confirm.
X Select Add Phone No. and press
0037to
confirm.
X Proceed from the step "Select a number
category" ( Ypage 142).
Deleting atext message X
Select a text message in the text message
inbo xby turning 003C0012003Dthe COMAND
controller.
X Selec tthe list symbol to the right of the text
message by sliding 00120035the COMAND
controller and press 0037to confirm.
X Select Delete and press
0037to confirm.
Ad eletion prompt appears.
X Select Yes or
No and press
0037to confirm.
If you select Yes , the textm
essage is
deleted.
If you select No , the process will be
canceled.
i This delete function is not supported by
all mobile phones. The Delete failed.message appears.
Using the address book
Introduction
Always pay attention to traffic conditions. Before starting the journey, familiarize
yourself with the address book functions.
Only use COMAND when the road and traffic
conditions permit
.You could otherwise
become involved in an accident in which you
or others could be injured.
The address book organizes and stores
entries that are entered from different
sources (mobile phone, memory card, USB
device, COMAND phone book, navigation
system).
You can use these entries to make telephone
calls and for navigation.
i Number of contacts in the address
book: the address book can store a total of
4000 contacts.
1500 entries each are reserved in the
address book for:
R contacts from the mobile phone
R contacts that you create in COMAND or
import from other sources
The remaining 1,000 entries are assigned
by COMAND as necessary.
i Display of mobile phone contacts:
contacts downloaded from the mobile
phone remain in the address book even if
you disconnect the mobile phone from
COMAND. Contacts that have previously
been available can be displayed as soon as
the mobile phone is reconnected.
COMAND downloads the contacts again so
that any new contacts that have been
added to the mobile phone can be
displayed.
As soon as you connect a new mobile
phone to COMAND all the contacts from
the previous mobile phone are replaced by
those from the new phone's address book.
Address book entries remain stored when
the mobile phone is disconnected. For this
reason, delete your personal data using the
reset function before selling your vehicle,
for example (Y page 47). Using the address book
149Telephone Z
Page 155 of 274

X
Press 0037the COMAND controller to
confirm.
X Select Call and press
0037to confirm.
The phone makes the call. The display
switches to telephone mode. Storing the phone number as
aspeed
dial number
X Display details for an address boo kentry
(Y page 151).
X Select the phone numbe rdata field by
turning 003C0012003Dthe COMAND controller.
X Select the list symbol to the righ tofthe
data field by sliding 00120035the COMAND
controller and press 0037to confirm.
X Select Speed Dial and press
0037to
confirm.
You can now store the number in one of the
ten speed dial presets (Y page 145).Starting route guidance to an entry
Address book entry with navigable data This function is available as soon as you have
stored a destination in the destination
memory (Y
page 105).
X Search for an address book entry with the
0006 symbol and select it from the list
(Y page 150).
X Display details for an address book entry
(Y page 151).
X Select the address data field by turning
003C0012003D the COMAND controller and press
0037 to confirm.
Route guidance begins.
or
X Select the list symbol to the right of the
entry by sliding 00120035the COMAND
controller and press 0037to confirm.
X Select Navigate and press
0037to confirm.
Route guidance begins. Address book entry without navigable
data Route guidance can also be started for an
address book entry without the
0006symbol. If
the address data or designations do not
match the digital map, COMAND prompts you
to re-enter the address.
X Enter the destination address (Y page 63)
X Start route guidance.
The navigable address is automatically
added to the address book entry.
i This will provide you with an address book
entry that is suitable for navigation. The
next time the navigation is started, the
address data in the navigation, rather than
the postal address, is used if you have
changed address in the address entry
menu. Therefore, make sure that the
destination address is the desired
destination when starting navigation from
the address book. Voice tags
Introduction You can enter voice tags via the Voice Control
System (see the separate operating
instructions). Once you have assigned a voice
tag to an address book entry, you can call up
this entry with a voice command and dial a
phone number, for example. You can add one
voice tag per address book entry.
Adding or changing
avoice tag X
Search for an address book entry with or
without a voice tag ( ¦) (Ypage 150).
X Select the list symbol to the righ tofthe
entry by sliding 00120035the COMAND
controller and press 0037to confirm. Using the address book
153Telephone Z
Page 169 of 274

Importing
adestination/route When importing, you can choose whether you
want to save the destination as a personal POI
on an SD memory card or in the address book.
You can only save routes as personal POIs to
an SD memory card, but not in the address
book.
X Select Import in the menu with the
COMAND controller and press 0037to
confirm.
i If there is no SD memory card in the slot,
the As Personal POI menu ite
mis grayed
out.
X Insert the SD memory card (Y page 197).
X To save as apersonal POI: confirmAs Personal POI by pressing
0037the
COMAND controller.
The entry is saved as apersonal POI on the
SD memory card.
i You can use a personal POI in navigation
mode for route calculation (Y page 85).
You can also use a personal POI in another
vehicle for route calculation.
X To save to the address book: selectTo Address Book by turning
003C0012003Dthe
COMAND controller and press 0037to
confirm.
The entry is stored in the address book. Deleting
adestination/route from the
server X
Select an entry in the list by turning 003C0012003D
the COMAND controller and press 0037to
confirm.
X Select Delete and press
0037to confirm.
Aq uery appears asking whether the
destination or the route should be deleted.
X Select Yes or
No and press
0037to confirm. Options
Introduction
You can select options for the following
Mercedes-Ben zApps on COMAND:
R Local search (Y page 168)
R Destination/route download
(Y page 169)
You can reset the selected options to the
default settings (Y page 170). Options
167Online and Internet functions
Page 172 of 274
i
Routes and destinations are
automatically deleted on the server after
seven days. Conditions of use
You can review the terms of use for the
COMAND Mercedes-Ben zApps and
Google™.
X Select Terms and Conditions in the
options menu by sliding 003600120008the COMAND
controller and press 0037to confirm
(Y page 168).
X Select Mercedes-Benz Apps or
Google and press
0037to confirm.
The respective start page appears.
X Select Continue to view further content.
Resetting adjustments
With the reset function ,all Mercedes-Benz
Apps settings are reset to the factory
settings.
X Selec tthe 000C symbol in the main function
bar by turning 003C0012003Dthe COMAND
controller and press 0037to confirm.
The carousel view appears.
X Bring the Mercedes-Benz Apps panel to
the front by turning 003C0012003Dthe COMAND
controller and pressing 0037to confirm.
X Select Options by sliding
00120008and turning
003C0012003D the COMAND controller and press
0037 to confirm.
X Select Reset and press
0037to confirm.
Ap rompt appears asking whethe ryou
really wish to reset.
X Select Yes or
No and press
0037to confirm. Other services
Mercedes-Benz Mobile Website
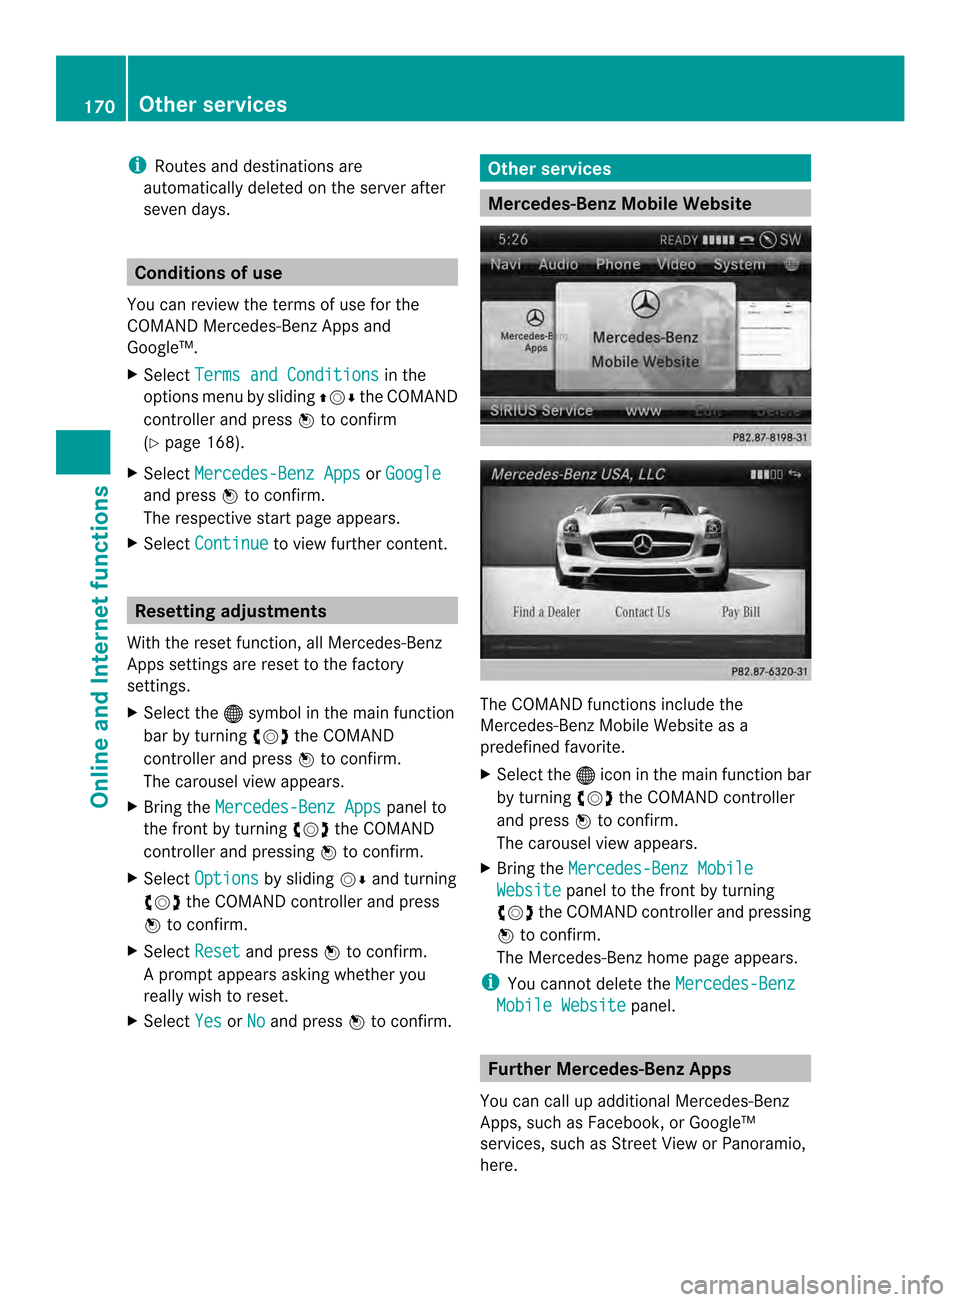
The COMAND functions include the
Mercedes-Benz Mobile Website as a
predefined favorite.
X
Select the 000Cicon in the main function bar
by turning 003C0012003Dthe COMAND controller
and press 0037to confirm.
The carousel view appears.
X Bring the Mercedes-Benz Mobile Website panel to the front by turning
003C0012003D the COMAND controller and pressing
0037 to confirm.
The Mercedes-Benz home page appears.
i You cannot delete the Mercedes-Benz Mobile Website panel.
Further Mercedes-Benz Apps
You can call up additional Mercedes-Benz
Apps, such as Facebook, or Google™
services, such as Street View or Panoramio,
here. 170
Other servicesOnline and Internet functions