sensor MERCEDES-BENZ CL-Class 2014 C217 User Guide
[x] Cancel search | Manufacturer: MERCEDES-BENZ, Model Year: 2014, Model line: CL-Class, Model: MERCEDES-BENZ CL-Class 2014 C217Pages: 494, PDF Size: 13.55 MB
Page 68 of 494
The brakes will function as usual once you
release the brake pedal. BAS is deactivated.
BAS PLUS (Brake Assist System
PLUS)
BAS PLUS is only available in vehicles
equipped with DISTRONIC PLUS.
i Observe the "Importan tsafety notes"
sectio n(Ypage 64).
BASP LUS provides braking assistance in
hazardous situations at speeds greater than
4m ph (7 km/h) and uses radar sensor
technology to assess the traffic situation.
With the help of the radar senso rsystem, BAS
PLUS can detect obstacles that are in the
path of your vehicle fo ranextended period of
time.
At speed supto40 mph (70 km/h) ,BAS PLUS
may also detect stationar yobstacles, for
example stopped or parked vehicles.
Should you approach an obstacle and BAS
PLUS has detected a risk of collision, BAS
PLUS calculates the brakin gforce necessary
to avoid a rear-end collision.
R When driving at aspee dabove 20 mph
(30 km/h):ify ou depress the brake pedal
sharply, BAS PLUS automatically raises the
brake pressure to a value adapted to the
traffic situation.
R When driving at a speed under 20 mph
(30 km/h):ify ou depress the brake pedal,
BAS PLUS is activated. Braking is
performed as late as possible.
If BAS PLUS demands particularly high
braking force, preventative passenger
protection measures (PRE-SAFE ®
) are
activated simultaneously.
X Keep the brake pedal depressed until the
emergency braking situation is over.
ABS prevents the wheels from locking. The brakes will work normally again if:
R
you release the brake pedal
R there is no longer any danger of a rear-end
collision
R no obstacle is detected in front of your
vehicle
BAS PLUS is then deactivated.
For BAS PLUS to assist you, the radar sensor
system must be operational. G
WARNING
Adaptive Brake Assist cannot always clearly
identify objects and complex traffic
situations. In these cases, Adaptive Brake
Assist may not intervene. There is a risk of an
accident.
Always pay careful attention to the traffic
situation and be ready to brake.
In particular, the detection of obstacles can
be impaired if there is:
R dirt on the sensors or anything else
covering the sensors
R snow or heavy rain
R interference by other radar sources
R there are strong radar reflections, for
example in parking garages
R a narrow vehicle traveling in front, e.g. a
motorbike
R a vehicle traveling in front on a different line
relative to the center of your vehicle G
WARNING
BAS PLUS does not react:
R to people or animals
R to oncoming vehicles
R to crossing traffic
R when cornering
As aresult, BAS PLUS may not intervene in all
critical situations. There is a risk of an
accident.
Always pay careful attention to the traffic
situation and be ready to brake. 66
Driving safet
ysystemsSafety
Page 69 of 494
Following damage to the front end of the
vehicle, have the configuration and operation
of the radar sensors checked at a qualified
specialist workshop. This also applies to
collisions at low speeds where there is no
visible damage to the front of the vehicle.
If BAS PLUS is not available due to a
malfunction in the radar senso rsystem, the
brake system remains available with full
brake boosting effect and BAS. ESP
®
(Electronic Stabilit yProgram)
Important safety notes i
Observe the "Important safety notes"
sectio n(Ypage 64). G
WARNING
If ESP ®
is malfunctioning, ESP ®
is unable to
stabilize the vehicle. Additionally, further
driving safety systems are deactivated. This
increases the risk of skidding and an accident.
Drive on carefully. Have ESP ®
checked at a
qualified specialist workshop.
! Vehicles with 4MATIC: switch off the
ignition when the parking brake is being
tested on a brake dynamometer.
Application of the brakes by ESP ®
may
otherwise destroy the brake system.
Vehicles without 4MATIC: when towing your
vehicle with the rear axle raised, it is
important that you observe the notes on
ESP ®
(Y page 448).
ESP ®
is deactivated if the åwarning lamp
in the instrument cluster lights up
continuously when the engin eis running.
If the ÷ warning lamp and the å
warning lamp are lit continuously, ESP ®
is not
available due to a malfunction.
Observe the information on warning lamps
(Y page 393) and displaym essages which
may be shown in the instrument cluster
(Y page 353). If ESP
®
detects that the vehicle is deviating
from the direction desired by the driver, one
or more wheels are braked to stabilize the
vehicle. The engine output is also modified to
keep the vehicle on the desired course within
physical limits. ESP ®
assists the driver when
pulling away on wet or slippery roads. ESP ®
can also stabilize the vehicle during braking.
If ESP ®
intervenes, the ÷ESP®
warning
lamp flashes in the instrument cluster.
If ESP ®
intervenes:
X Do not deactivate ESP ®
under any
circumstances.
X Only depress the accelerator pedal as far
as necessary when pulling away.
X Adapt your driving style to suit the
prevailing road and weather conditions.
i Only use wheels with the recommended
tire sizes. Only then will ESP ®
function
properly.
ETS/4ETS (Electronic Traction System) Traction control is part of ESP
®
.
Traction control brakes the drive wheels
individually if they spin. This enables you to
pull away and accelerate on slippery surfaces,
for example if the road surface is slippery on
one side. On vehicles with 4MATIC, more
drive torque is also transferred to the wheel
or wheels with traction.
Traction control remains active if you
deactivate ESP ®
.
Deactivating/activating ESP ® i
Observe the "Important safety notes"
section (Y page 64). G
WARNING
If you deactivate ESP ®
, ESP ®
no longer
stabilizes the vehicle. There is an increased
risk of skidding and an accident.
Only deactivate ESP ®
in the situations
described in the following. Driving safet
ysystems
67Safety Z
Page 71 of 494
you will be warned visually and acoustically
as well as by automati
cbraking. PRE-SAFE ®
Brake cannot prevent a collision without your
intervention.
Starting at a speed of around 4 mph
(7 km/h), this function warns you if you
rapidly approach a vehicle in front. An
intermittent warning tone will then sound and
the · distance warning lamp willl ight up
in the instrument cluster.
X Brake immediately in order to increase the
distance from the vehicle in front.
or
X Take evasive action provided it is safe to do
so.
Fro maspeed of approximately 4mph
(7 km/h), if the driver and front passenger
have fastened their seat belts, PRE-SAFE ®
Brake can brake the vehicle automatically at
speeds up to approximately 124 mph
(200 km/h).
Due to the nature of the system, particularly
complicated driving condition smay cause
unnecessary warnings or th eunnecessary
intervention of PRE-SAFE ®
Brake.
You can prevent the intervention of the PRE-
SAFE ®
Brake at any time by:
R depressing the accelerator peda lfurther.
R activating kickdown.
R releasing the brake pedal.
The braking action of PRE-SAFE ®
Brake is
ended automatically if:
R you maneuve rto avoid the obstacle.
R there is no longer any danger of a rear-end
collision.
R there is no longer an obstacle detected in
front of your vehicle.
With the help of the radar sensor system,
PRE-SAFE ®
Brake can detect obstacles that
are in front of your vehicle for an extended
period of time.
At speeds up to approximately
40 mph (70 km/h), PRE-SAFE ®
Brake can also detect stationary obstacles such as
stopped or parked vehicles.
If you approach an obstacle and PRE-SAFE
®
Brake detects a risk of collision, the system
will initially alert you both visually and
acoustically. If you do not brake or take
evasive action, the system will warn you by
automatically braking the vehicle gently. If
there is an increased risk of collision,
preventative passenger protection measures
(PRE-SAFE ®
) are activated (Y page 55). If a
risk of collision remains at speeds of over
20 mph (30 km/h) and you do not brake, take
evasive action or significantly accelerate,
automatic emergency braking may be
performed up to and including full brake
application. Automatic emergency braking is
not performed until immediately prior to an
accident that can no longer be avoided. G
WARNING
PRE-SAFE ®
Brake will initially brake your
vehicle by a partial application of the brakes
if a danger of collision is detected. There may
be a collision unless you also brake.
Automatic emergenc ybraking cannot prevent
a collision. There is a risk of an accident.
Always apply the brakes yourself and try to
take evasive action. G
WARNING
PRE-SAFE ®
Brake cannot always clearly
identify objects and complex traffic
conditions.
In these cases, PRE-SAFE ®
Brake may:
R give an unnecessary warning and then
brake the vehicle
R not give a warning or intervene
There is a risk of an accident.
Always pay particular attention to the traffic
situation and be ready to brake, especially if
PRE-SAFE ®
Brake warns you. Terminate the
intervention in a non-critical driving situation. Driving safety systems
69Safety Z
Page 72 of 494
In particular, the detection of obstacles can
be impaired if:
R
dirt on the sensors or anything else
covering the sensors
R snow or heavy rain
R interference by other radars ources
R there are strong radar reflections, for
example in parking garages
R a narrow vehicle traveling in front, e.g. a
motorbike
R a vehicle traveling in front on a different line
relative to the center of your vehicle G
WARNING
PRE-SAFE ®
Brake does not react:
R to people or animals
R to oncoming vehicles
R to crossing traffic
R when cornering
As a result, PRE-SAFE ®
Brake may neither
give warnings nor intervene in all critical
situations. There is a risk of an accident.
Always pay careful attention to the traffic
situation and be ready to brake.
In order to maintain an appropriate distance
from the vehicle in front and thus prevent a
collision, you must apply the brakes yourself.
X To activate/deactivate: activate or
deactivate PRE-SAFE ®
Brake in the on-
board computer (Y page 348).
After activation, the Äsymbol is
displayed on the left in the instrument
cluster.
For BAS PLUS to assist you, the radar sensor
system must be operational.
Following damage to the front end of the
vehicle, have the configuration and operation
of the radar sensors checked at a qualified
specialist workshop. This also applies to
collisions at low speeds where there is no
visible damage to the front of the vehicle. Theft deterrent locking system
Immobilizer
The immobilizer prevents your vehicle from
being started without the correct SmartKey.
When leaving the vehicle, always take the
SmartKey with you and lock the vehicle. The
engine can be started by anyone with a valid
SmartKey that is left inside the vehicle.
X To activate with the SmartKey: remove
the SmartKey from the ignition lock.
X To activate with KEYLESS-GO: switch the
ignition off and open the driver's door.
X To deactivate: switch on the ignition.
i The immobilizer is always deactivated
when you start the engine.
In the event that the engine cannot be
started when the starter battery is fully
charged, the immobilizer may be faulty.
Contact an authorized Mercedes-Benz
Center or call 1-800-FOR-MERCedes (in
USA) or 1-800-387-0100 (in Canada). ATA (anti-theft alarm system)
Av isual and audible alarm is triggered if the
alarm system is armed and you open:
R a door
R the vehicle with the mechanical key
R the trunk lid
R the hood
The alarm is not switched off, even if you
close the open door that has triggered it, for
example. 70
Theft deterrent locking systemSafety
Page 79 of 494
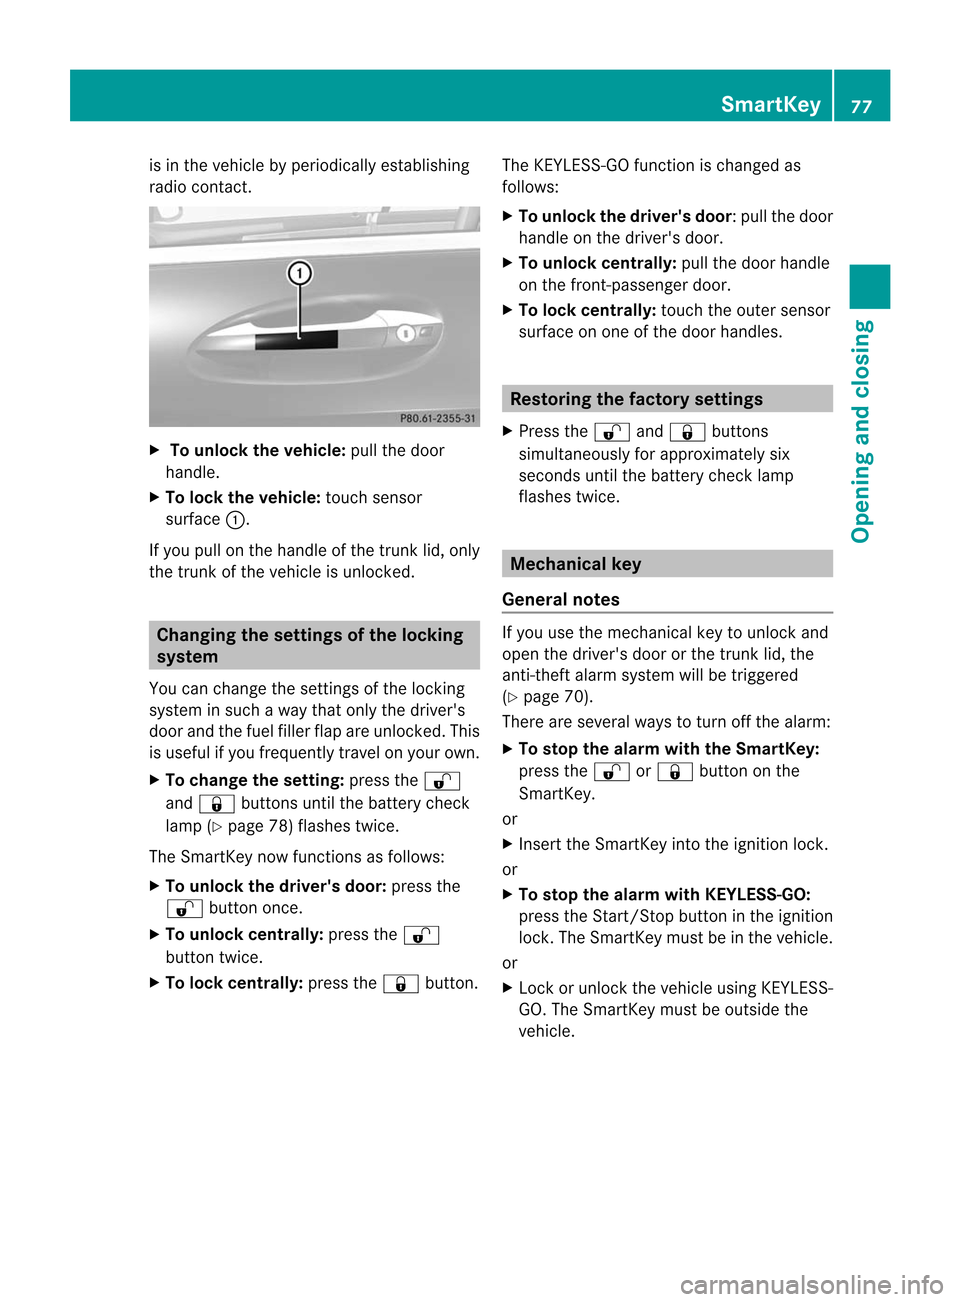
is in the vehicle by periodically establishing
radio contact.
X
To unlock the vehicle: pull the door
handle.
X To lock the vehicle: touch sensor
surface :.
If you pull on the handle of the trunk lid, only
the trunk of the vehicle is unlocked. Changing the settings of the locking
system
You can change the settings of the locking
system in such a way that only the driver's
door and the fuel filler flap are unlocked. This
is useful if you frequently travel on your own.
X To change the setting: press the%
and & buttons until the battery check
lamp ( Ypage 78) flashes twice.
The SmartKey now functions as follows:
X To unlock the driver's door: press the
% button once.
X To unlock centrally: press the%
button twice.
X To lock centrally: press the&button. The KEYLESS-GO function is changed as
follows:
X
To unlock the driver' sdoor :pull the door
handle on the driver's door.
X To unlock centrally: pull the door handle
on the front-passenger door.
X To lock centrally: touch the outer sensor
surface on one of the door handles. Restoring the factory settings
X Press the %and& buttons
simultaneously for approximately six
seconds until the battery check lamp
flashes twice. Mechanical key
General notes If you use the mechanical key to unlock and
open the driver's door or the trunk lid, the
anti-thef
talarm system will be triggered
(Y page 70).
There are several ways to tur noff the alarm:
X To stop the alarm with the SmartKey:
press the %or& button on the
SmartKey.
or
X Insert the SmartKey into the ignition lock.
or
X To stop the alarm with KEYLESS-GO:
press the Start/Stop button in the ignition
lock. The SmartKey must be in the vehicle.
or
X Lock or unlock the vehicle using KEYLESS-
GO. The SmartKey must be outside the
vehicle. SmartKey
77Opening and closing Z
Page 92 of 494
closing procedure, press and hold the
&
button.
Vehicles with KEYLESS-GO:
R Release the senso rsurface on the outside
door handle to stop the closing procedure.
R Immediately pull on the same outside door
handle and hold firmly. The door windows
and the sliding sunroo fwill open for as long
as the door handle is held but the door is
not opened.
Using the SmartKey i
The SmartKey must be close to the
driver's door handle.
X Point the tip of the SmartKey at the driver's
door handle.
X Loc kthe vehicle by pressing the &
button.
X Press and hold the &button until the
side windows and the sliding sunroof are
fully closed.
X Make sure that all the side windows and the
sliding sunroof are closed.
X To interrupt the conveniencec losing:
release the &button.
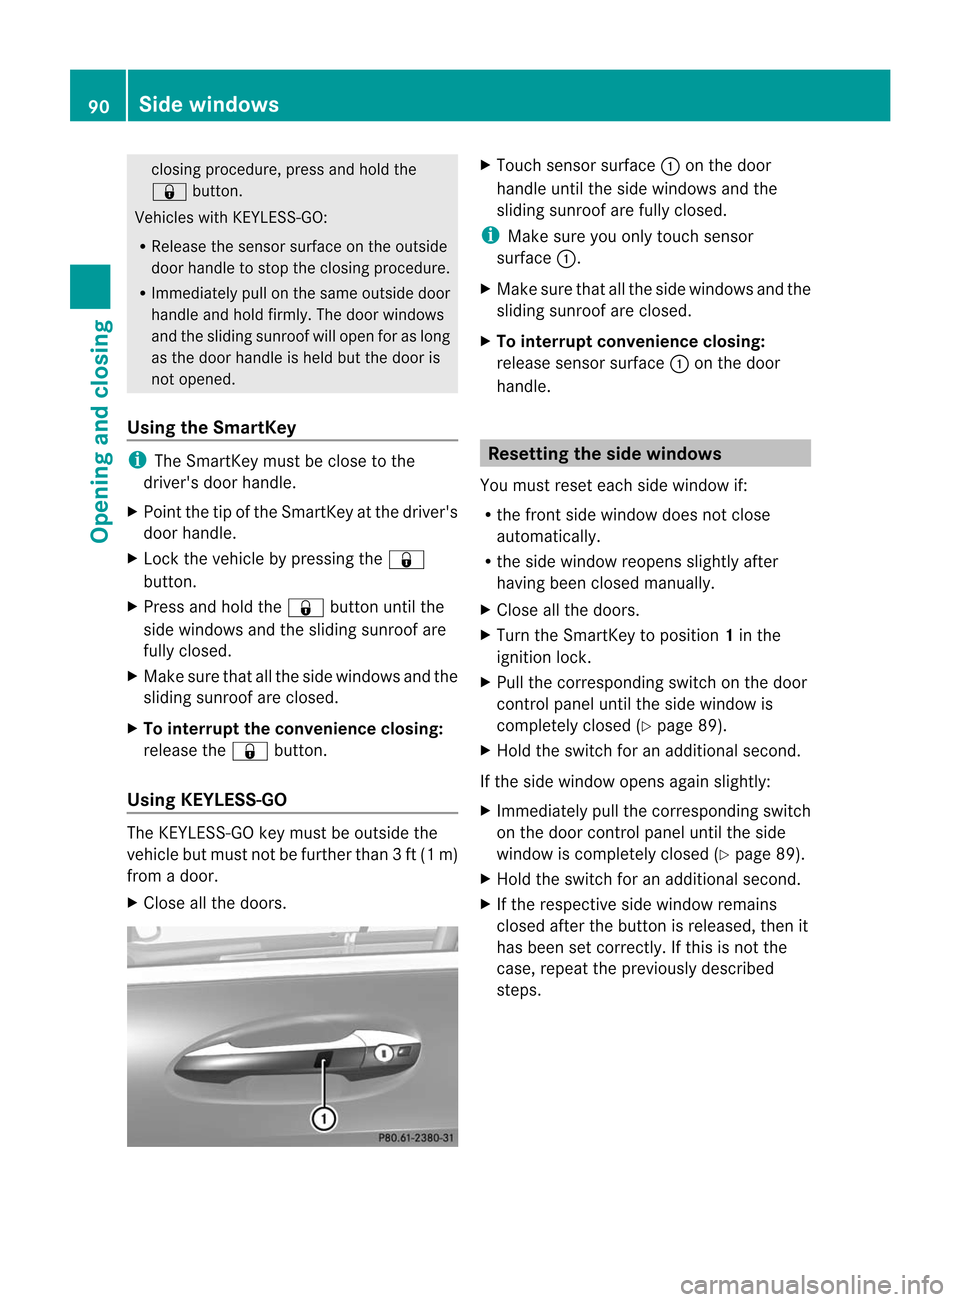
Using KEYLESS-GO The KEYLESS-GO key must be outside the
vehicle but must not be further than 3ft(1m)
from a door.
X Close all the doors. X
Touch sensor surface :on the door
handle until the side windows and the
sliding sunroo fare fully closed.
i Make sure you only touch sensor
surface :.
X Make sure that all the side windows and the
sliding sunroof are closed.
X To interrupt convenience closing:
release sensor surface :on the door
handle. Resetting the side windows
You must reset each side window if:
R the front side window does not close
automatically.
R the side window reopens slightly after
having been closed manually.
X Close all the doors.
X Turn the SmartKey to position 1in the
ignitio nlock.
X Pull the corresponding switch on the door
control panel until the side window is
completely closed (Y page 89).
X Hold the switch for an additional second.
If the side window opens again slightly:
X Immediately pull the corresponding switch
on the door control panel until the side
window is completely closed (Y page 89).
X Hold the switch for an additional second.
X If the respective side window remains
closed after the button is released, then it
has been set correctly. If this is not the
case, repeat the previously described
steps. 90
Side windowsOpening and closing
Page 107 of 494
should have a good overview of traffic
conditions.
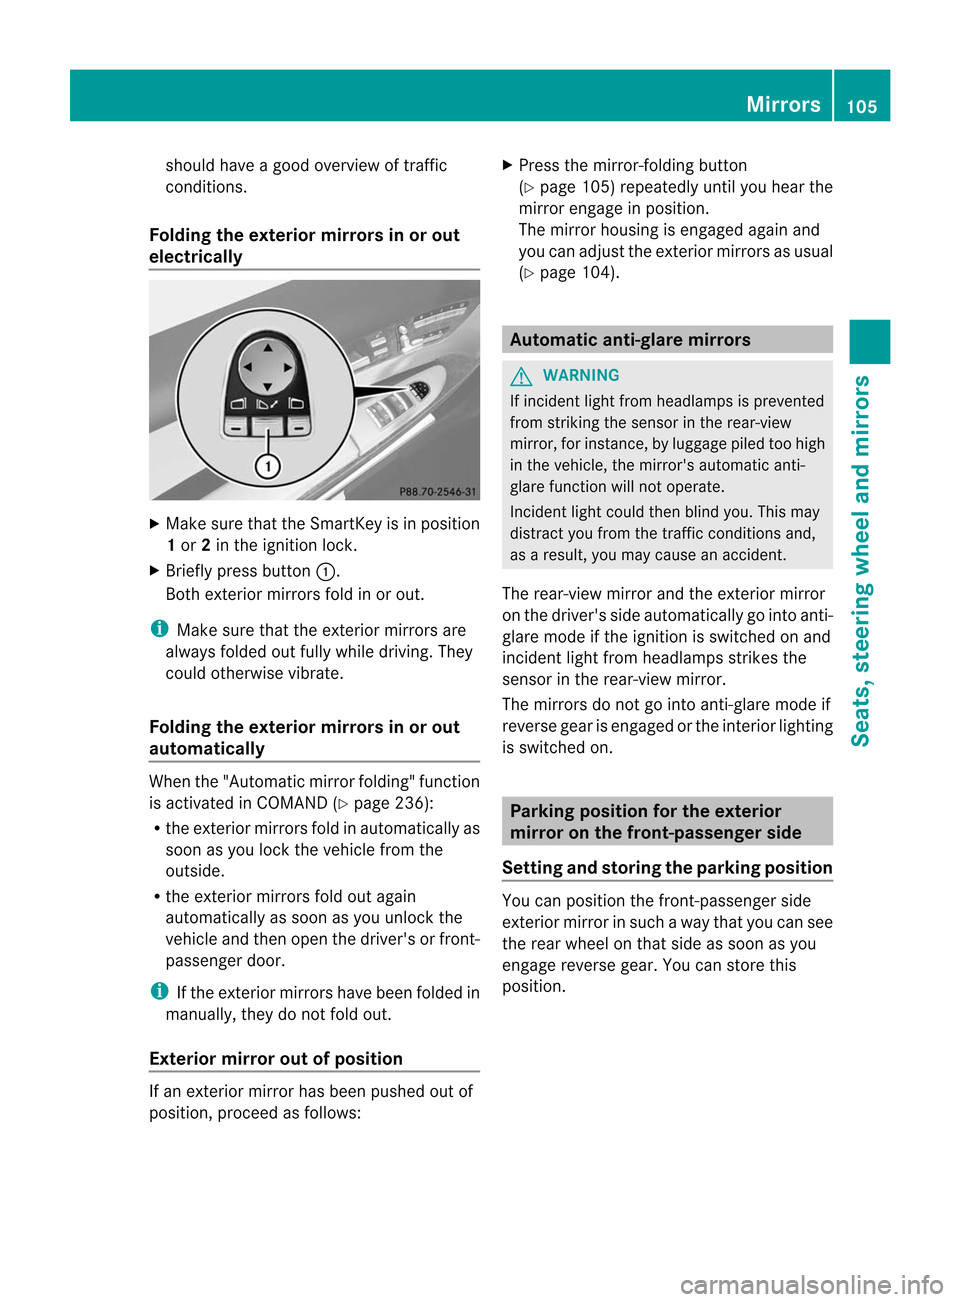
Folding the exterior mirrors in or out
electrically X
Make sure that the SmartKey is in position
1 or 2in the ignition lock.
X Briefly press button :.
Both exterior mirrors fold in or out.
i Make sure that the exterior mirrors are
always folded out fully while driving. They
could otherwise vibrate.
Folding the exterior mirrors in or out
automatically When the "Automatic mirror folding" function
is activated in COMAND (Y page 236):
R the exterior mirrors fold in automatically as
soon as you lock the vehicle from the
outside.
R the exterior mirrors fold out again
automatically as soon as you unlock the
vehicle and then open the driver's or front-
passenger door.
i If the exterior mirrors have been folded in
manually, they do not fold out.
Exterior mirror out of position If an exterior mirror has been pushed out of
position, proceed as follows: X
Press the mirror-folding button
(Y page 105) repeatedly until you hear the
mirror engage in position.
The mirror housing is engaged againa nd
you can adjus tthe exterior mirrors as usual
(Y page 104). Automatic anti-glare mirrors
G
WARNING
If incident light from headlamps is prevented
from striking the sensor in the rear-view
mirror, for instance, by luggage piled too high
in the vehicle, the mirror's automatic anti-
glare function will not operate.
Incident light could then blind you. This may
distract you from the traffic conditions and,
as a result, you may cause an accident.
The rear-view mirror and the exterior mirror
on the driver's side automatically go into anti-
glare mode if the ignition is switched on and
incident light from headlamps strikes the
sensor in the rear-view mirror.
The mirrors do not go into anti-glare mode if
reverse gear is engaged or the interior lighting
is switched on. Parking position for the exterior
mirror on the front-passenger side
Setting and storing the parking position You can position the front-passenger side
exterior mirror in such a way that you can see
the rear wheel on that side as soon as you
engage reverse gear. You can store this
position. Mirrors
105Seats, steering wheel and mirrors Z
Page 116 of 494
You can assign the following predefined
functions to the
hprogrammable button:
R ECO :y
ou can activate or deactivate the ECO
start/stop function.
R Massage, Driver's Seat :y
ou can switch
the massage function for the driver's seat
on and off.
R Massage, Front Passenger's Seat :
you can switch the massage function for
the front-passenger seat on and off.
R Massage, Driver's and Front Passenger's Seat : you can switch the
massage function for the driver's and front-
passenger seats on and off.
R Display OFF : you can switch the
COMAND display off or on.
R Tow-away Alarm : you can arm or
deactivate the tow-away alarm.
R Interior Motion Sensor :y
ou can arm or
deactivate the interior motion sensor.
R Tow-away Alarm and Interior Motion
Sensor :y
ou can arm or deactivate the tow-
away alarm and the interior motion sensor.
R Repeat Navigation Command :y
ou can
have the most recent recommendation by
the navigation system repeated.
X To assign the programmable button:
select Vehicle by sliding
VÆand turning
cVd the COMAND controller and press
W to confirm.
X Select System and press
Wto confirm.
X Select Favorites Button and press
Wto
confirm.
The list of predefined functions appears.
The #dot in front of the list entry indicates
the current setting.
X To change the setting: turncVd the
COMAND controller and select the desired
function.
X To store the setting and exit the menu:
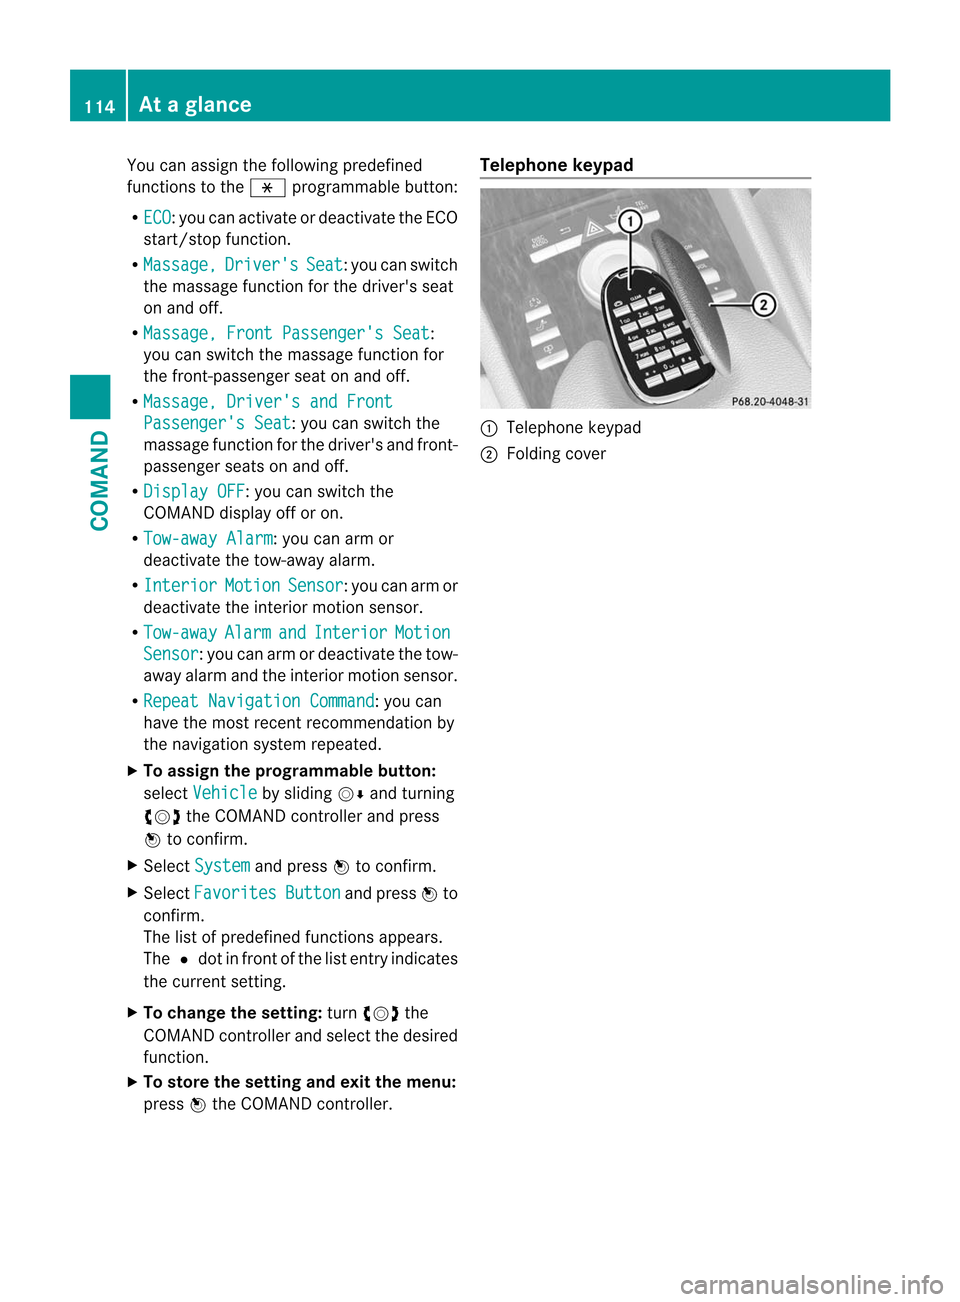
press Wthe COMAND controller. Telephone keypad
:
Telephone keypad
; Folding cover 114
At
ag lanceCOMAND
Page 118 of 494
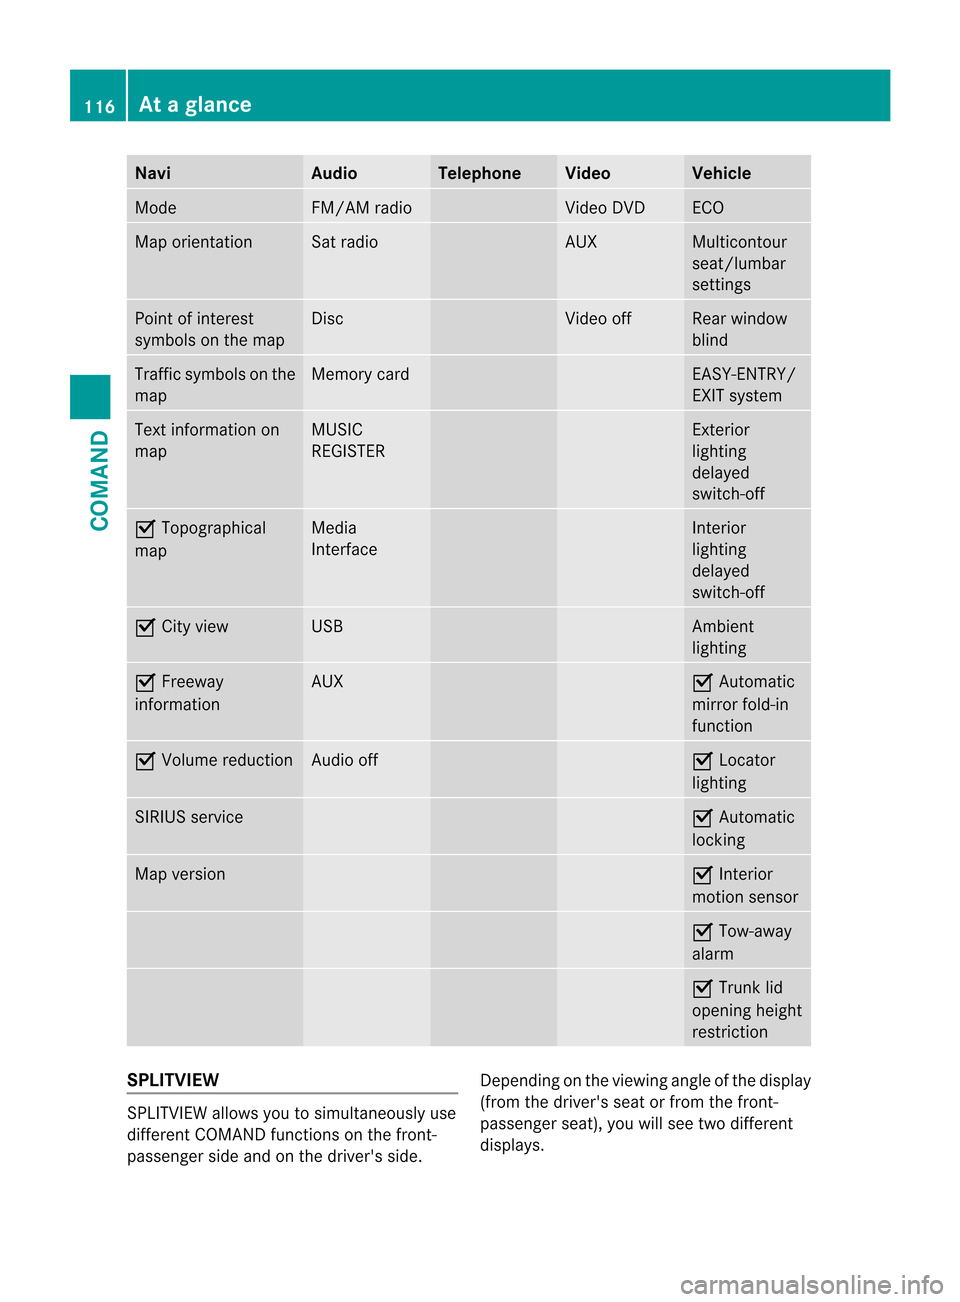
Navi Audio Telephone Video Vehicle
Mode FM/AM radio Video DVD ECO
Map orientation Sat radio AUX Multicontour
seat/lumbar
settings
Point of interest
symbols on the map Disc Video off Rear window
blind
Traffi
csymbols on the
map Memory card EASY-ENTRY/
EXIT system
Text information on
map MUSIC
REGISTER Exterior
lighting
delayed
switch-off
O
Topographical
map Media
Interface Interior
lighting
delayed
switch-off
O
City view USB Ambient
lighting
O
Freeway
information AUX O
Automatic
mirror fold-in
function O
Volume reduction Audio off O
Locator
lighting SIRIUS service O
Automatic
locking Map version O
Interior
motion sensor O
Tow-away
alarm O
Trunk lid
opening height
restriction SPLITVIEW
SPLITVIEW allows you to simultaneously use
different COMAND functions on the front-
passenger side and on the driver's side.
Depending on the viewing angle of the display
(from the driver's seat or from the front-
passenger seat), you will see two different
displays.116
At
ag lanceCOMAND
Page 133 of 494
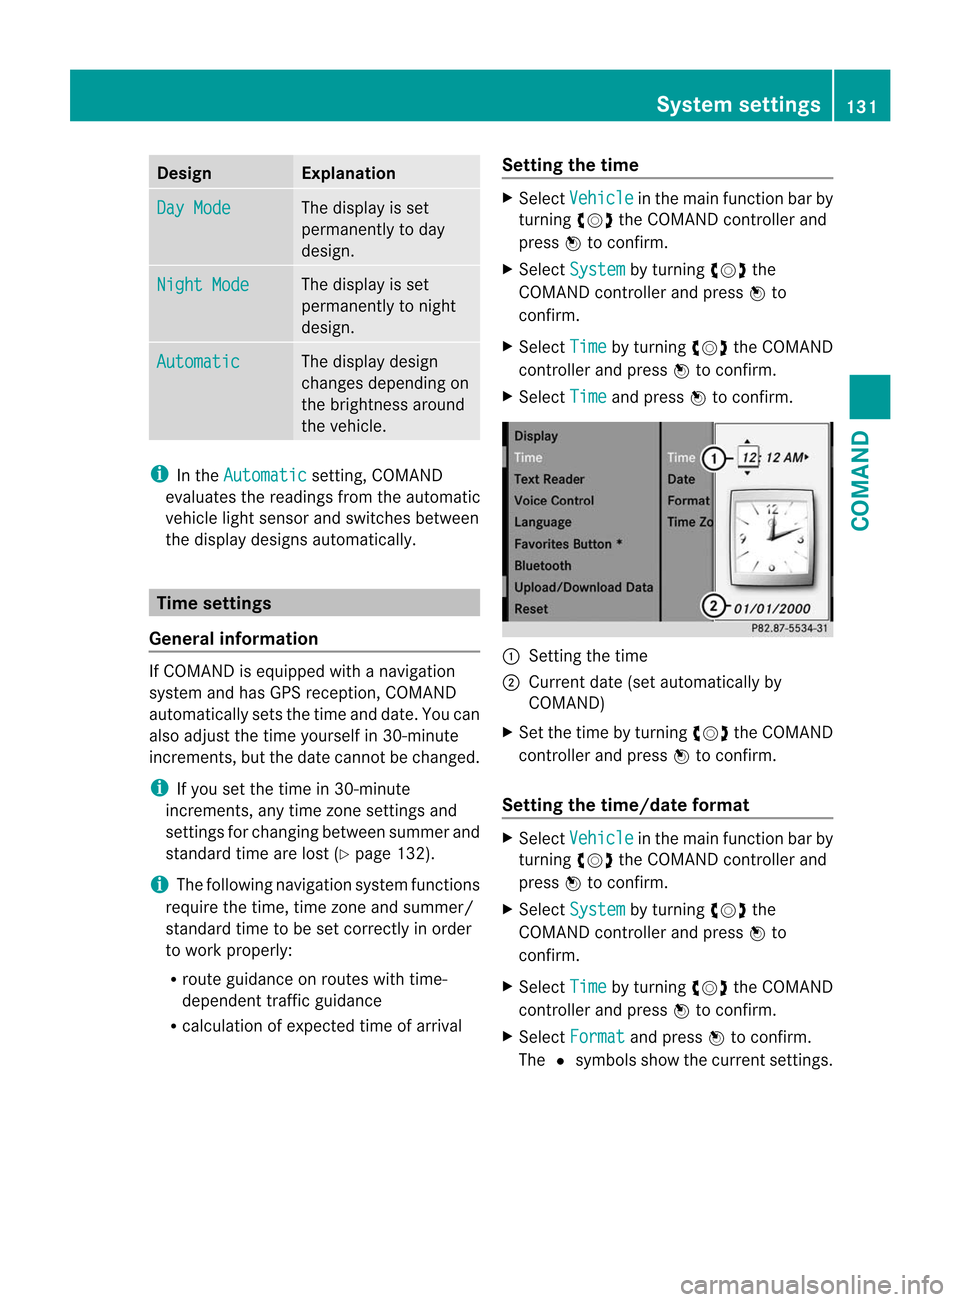
Design Explanation
Day Mode The display is set
permanently to day
design.
Night Mode The display is set
permanently to night
design.
Automatic The display design
changes depending on
the brightness around
the vehicle.
i
In the Automatic setting, COMAND
evaluates the readings from the automatic
vehicle ligh tsensor and switches between
the display designs automatically. Time settings
General information If COMAND is equipped with a navigation
system and has GPS reception, COMAND
automatically sets the time and date. You can
also adjust the time yourself in 30-minute
increments, but the date cannot be changed.
i If you set the time in 30-minute
increments, any time zone settings and
settings for changing between summer and
standard time are lost (Y page 132).
i The following navigation system functions
require the time, time zone and summer/
standard time to be set correctly in order
to work properly:
R route guidance on routes with time-
dependen ttraffic guidance
R calculation of expected time of arrival Setting the time X
Select Vehicle in the main function bar by
turning cVdthe COMAND controller and
press Wto confirm.
X Select System by turning
cVdthe
COMAND controller and press Wto
confirm.
X Select Time by turning
cVdthe COMAND
controller and press Wto confirm.
X Select Time and press
Wto confirm. :
Setting the time
; Current date (set automatically by
COMAND)
X Set the time by turning cVdthe COMAND
controller and press Wto confirm.
Setting the time/date format X
Select Vehicle in the main function bar by
turning cVdthe COMAND controller and
press Wto confirm.
X Select System by turning
cVdthe
COMAND controller and press Wto
confirm.
X Select Time by turning
cVdthe COMAND
controller and press Wto confirm.
X Select Format and press
Wto confirm.
The #symbols show the current settings. System settings
131COMAND Z