stop start MERCEDES-BENZ CL-Class 2014 C217 User Guide
[x] Cancel search | Manufacturer: MERCEDES-BENZ, Model Year: 2014, Model line: CL-Class, Model: MERCEDES-BENZ CL-Class 2014 C217Pages: 494, PDF Size: 13.55 MB
Page 71 of 494
you will be warned visually and acoustically
as well as by automati
cbraking. PRE-SAFE ®
Brake cannot prevent a collision without your
intervention.
Starting at a speed of around 4 mph
(7 km/h), this function warns you if you
rapidly approach a vehicle in front. An
intermittent warning tone will then sound and
the · distance warning lamp willl ight up
in the instrument cluster.
X Brake immediately in order to increase the
distance from the vehicle in front.
or
X Take evasive action provided it is safe to do
so.
Fro maspeed of approximately 4mph
(7 km/h), if the driver and front passenger
have fastened their seat belts, PRE-SAFE ®
Brake can brake the vehicle automatically at
speeds up to approximately 124 mph
(200 km/h).
Due to the nature of the system, particularly
complicated driving condition smay cause
unnecessary warnings or th eunnecessary
intervention of PRE-SAFE ®
Brake.
You can prevent the intervention of the PRE-
SAFE ®
Brake at any time by:
R depressing the accelerator peda lfurther.
R activating kickdown.
R releasing the brake pedal.
The braking action of PRE-SAFE ®
Brake is
ended automatically if:
R you maneuve rto avoid the obstacle.
R there is no longer any danger of a rear-end
collision.
R there is no longer an obstacle detected in
front of your vehicle.
With the help of the radar sensor system,
PRE-SAFE ®
Brake can detect obstacles that
are in front of your vehicle for an extended
period of time.
At speeds up to approximately
40 mph (70 km/h), PRE-SAFE ®
Brake can also detect stationary obstacles such as
stopped or parked vehicles.
If you approach an obstacle and PRE-SAFE
®
Brake detects a risk of collision, the system
will initially alert you both visually and
acoustically. If you do not brake or take
evasive action, the system will warn you by
automatically braking the vehicle gently. If
there is an increased risk of collision,
preventative passenger protection measures
(PRE-SAFE ®
) are activated (Y page 55). If a
risk of collision remains at speeds of over
20 mph (30 km/h) and you do not brake, take
evasive action or significantly accelerate,
automatic emergency braking may be
performed up to and including full brake
application. Automatic emergency braking is
not performed until immediately prior to an
accident that can no longer be avoided. G
WARNING
PRE-SAFE ®
Brake will initially brake your
vehicle by a partial application of the brakes
if a danger of collision is detected. There may
be a collision unless you also brake.
Automatic emergenc ybraking cannot prevent
a collision. There is a risk of an accident.
Always apply the brakes yourself and try to
take evasive action. G
WARNING
PRE-SAFE ®
Brake cannot always clearly
identify objects and complex traffic
conditions.
In these cases, PRE-SAFE ®
Brake may:
R give an unnecessary warning and then
brake the vehicle
R not give a warning or intervene
There is a risk of an accident.
Always pay particular attention to the traffic
situation and be ready to brake, especially if
PRE-SAFE ®
Brake warns you. Terminate the
intervention in a non-critical driving situation. Driving safety systems
69Safety Z
Page 73 of 494
i
If the alarm stays on for more than
30 seconds, the mbrace (USA only) or TELE
AID (Canada only) emergency call system
initiates a call to the Customer Assistance
Center automatically. The emergency call
system initiates the call provided that:
R you have subscribed to the mbrace/
TELE AID service.
R the mbrace/TELE AID service has been
activated properly.
R the required mobile phone, powers upply
and GPS are available. X
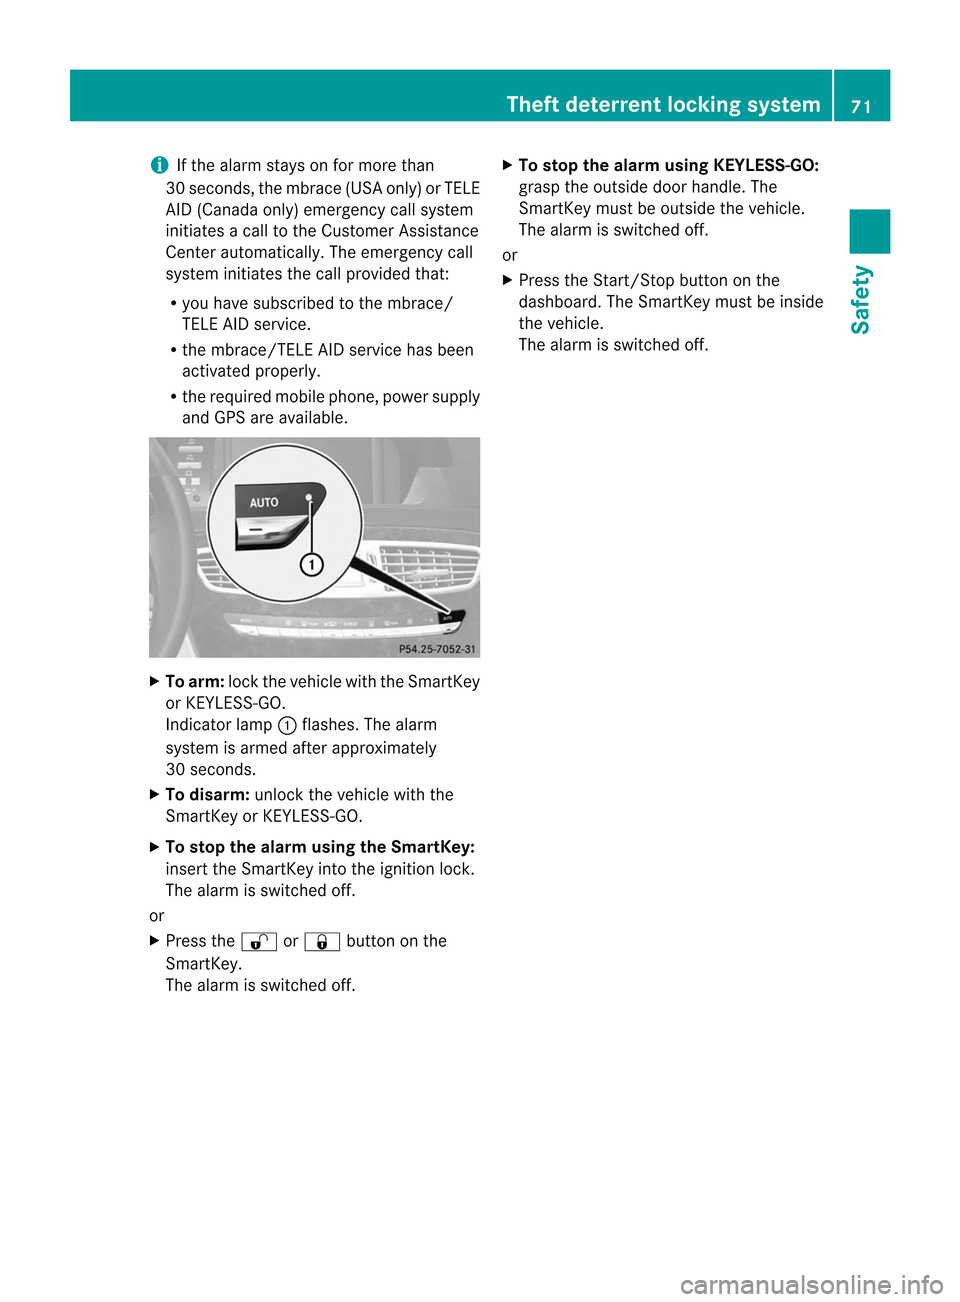
To arm: lockthe vehicle with the SmartKey
or KEYLESS-GO.
Indicator lamp :flashes. The alarm
system is armed after approximately
30 seconds.
X To disarm: unlock the vehicle with the
SmartKey or KEYLESS-GO.
X To stop the alarm using the SmartKey:
insert the SmartKey into the ignition lock.
The alarm is switched off.
or
X Press the %or& button on the
SmartKey.
The alarm is switched off. X
To stop the alarm using KEYLESS-GO:
grasp the outside door handle. The
SmartKey must be outside the vehicle.
The alarm is switched off.
or
X Press the Start/Stop button on the
dashboard. The SmartKey must be inside
the vehicle.
The alarm is switched off. Theft deterrent locking system
71Safety Z
Page 78 of 494
2. This device must be able to
accommodate interference that is
received, including interference which
could cause unwanted functions.
Unapproved modifications to this device
may lead to withdrawal of permissio
nto
operate it.
The product label with FCC ID and IC
certification number can be found in the
battery case of the SmartKey.
Important information for using
KEYLESS-GO R
You can use the KEYLESS-GO key as a
conventional key.
R You can combine KEYLESS-GO functions
with those of a conventional key, e.g. open
with KEYLESS-GO and close with the
& button.
R Always carry your KEYLESS-GO key on your
person.
R Never keep the KEYLESS-GO key with:
-electronic equipment, such as your
mobile phone or another key
- metal objects, such as coins or metal foil
This may impair the functioning of
KEYLESS-GO.
R To open or close the vehicle, the KEYLESS-
GO key should be no more than 3 ft (1 m)
from the door or trunk.
R If the vehicle is parked for more than
72 hours, the KEYLESS-GO function is
deactivated. Pull one of the outer door
handles and turn on the ignition to
reactivate the KEYLESS-GO function.
R When the KEYLESS-GO key is removed
from the vehicle, it is possible that the
system may not recognize it. In this case,
the vehicle cannot be locked or started with
KEYLESS-GO.
R If the KEYLESS-GO key has been removed
from the vehicle, e.g. if a passenger leaves
the vehicle with the KEYLESS-GO key:
- while someone is holding the Start/Stop
button or attempting to lock the vehicle using the outer door handle, the
Key Not Detected message will appear in
the multifunction display.
- while the engine is running, the red Key Not Detected message will appear in
the multifunction display as you pull
away. Find the KEYLESS-GO key and
change its position in the vehicle. Place
the KEYLESS-GO key in a location such
as the front-passenger seat, or carry it in
your shirt pocket.
R If you have started the engine using the
Start/Stop button, you can turn if off again
by:
-pressing the Start/Stop button again
- inserting the KEYLESS-GO key into the
ignition lock when the vehicle is
stationary and the automatic
transmission is in parking position P.
R You may accidentally unlock the vehicle if
the KEYLESS-GO key is within 3 ft (1 m) of
the vehicle and:
- a jet of water splashes an outer door
handle
or
- you are cleaning an outer door handle.
R Note that the engine can be started by any
vehicle occupant if a KEYLESS-GO key is in
the vehicle.
Option 1: there is a KEYLESS-GO key in the
vehicle and a KEYLESS-GO key outside the
vehicle. If you leave the KEYLESS-GO key
behind when you get out and lock the
vehicle, a message does not appear in the
multifunction display.
Option 2: there is a KEYLESS-GO key in the
vehicle but no KEYLESS-GO key outside the
vehicle. When you get out and try to lock
the vehicle, the Key Detected in Vehicle message appears in the
multifunction display .The vehicle is not
locked in this case.
When starting the engine and while driving,
KEYLESS-GO also checksw hether a valid key76
SmartKeyOpening and closing
Page 79 of 494
is in the vehicle by periodically establishing
radio contact.
X
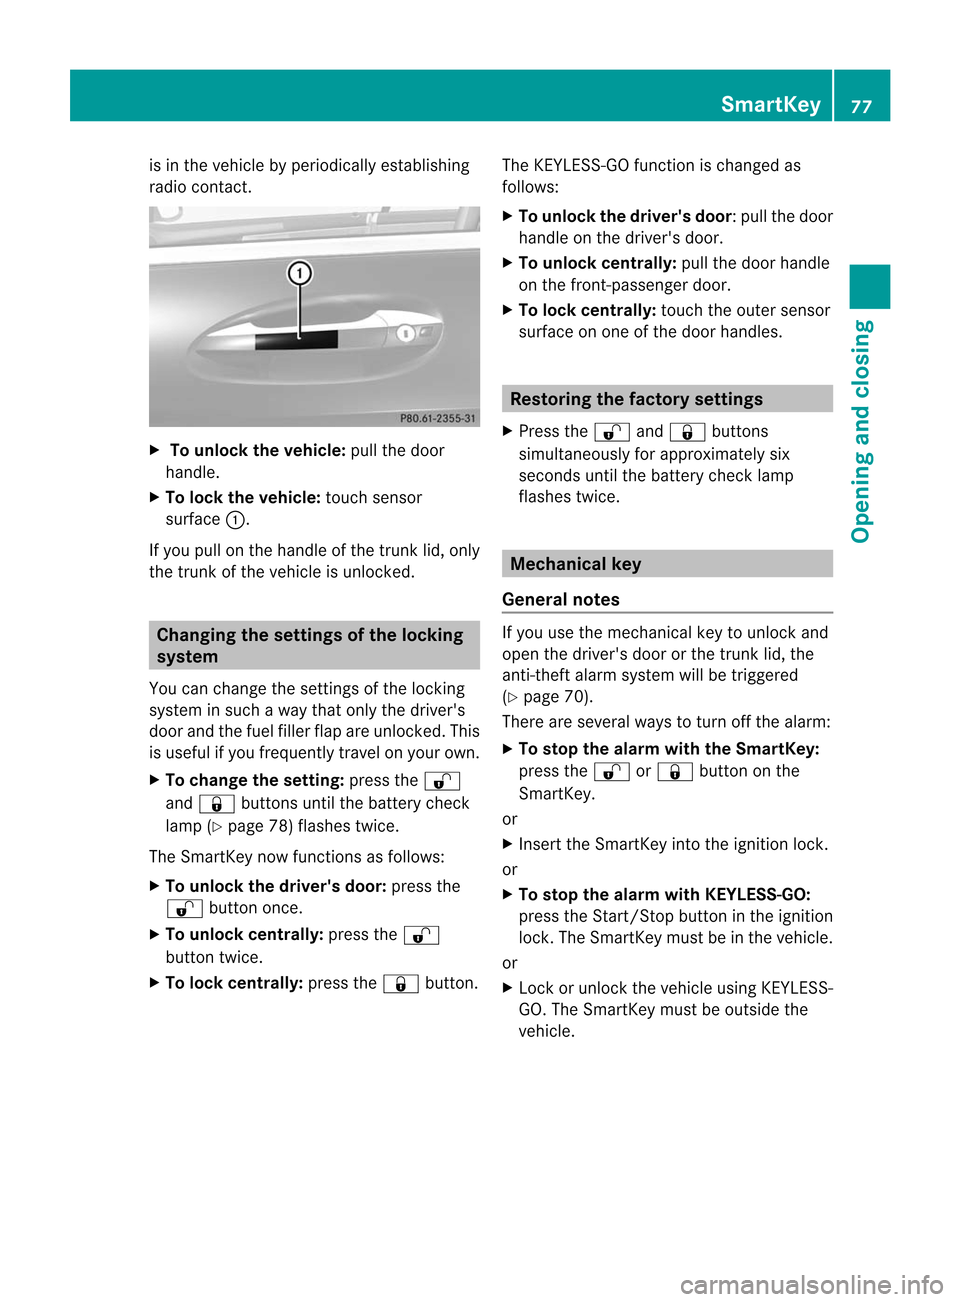
To unlock the vehicle: pull the door
handle.
X To lock the vehicle: touch sensor
surface :.
If you pull on the handle of the trunk lid, only
the trunk of the vehicle is unlocked. Changing the settings of the locking
system
You can change the settings of the locking
system in such a way that only the driver's
door and the fuel filler flap are unlocked. This
is useful if you frequently travel on your own.
X To change the setting: press the%
and & buttons until the battery check
lamp ( Ypage 78) flashes twice.
The SmartKey now functions as follows:
X To unlock the driver's door: press the
% button once.
X To unlock centrally: press the%
button twice.
X To lock centrally: press the&button. The KEYLESS-GO function is changed as
follows:
X
To unlock the driver' sdoor :pull the door
handle on the driver's door.
X To unlock centrally: pull the door handle
on the front-passenger door.
X To lock centrally: touch the outer sensor
surface on one of the door handles. Restoring the factory settings
X Press the %and& buttons
simultaneously for approximately six
seconds until the battery check lamp
flashes twice. Mechanical key
General notes If you use the mechanical key to unlock and
open the driver's door or the trunk lid, the
anti-thef
talarm system will be triggered
(Y page 70).
There are several ways to tur noff the alarm:
X To stop the alarm with the SmartKey:
press the %or& button on the
SmartKey.
or
X Insert the SmartKey into the ignition lock.
or
X To stop the alarm with KEYLESS-GO:
press the Start/Stop button in the ignition
lock. The SmartKey must be in the vehicle.
or
X Lock or unlock the vehicle using KEYLESS-
GO. The SmartKey must be outside the
vehicle. SmartKey
77Opening and closing Z
Page 87 of 494
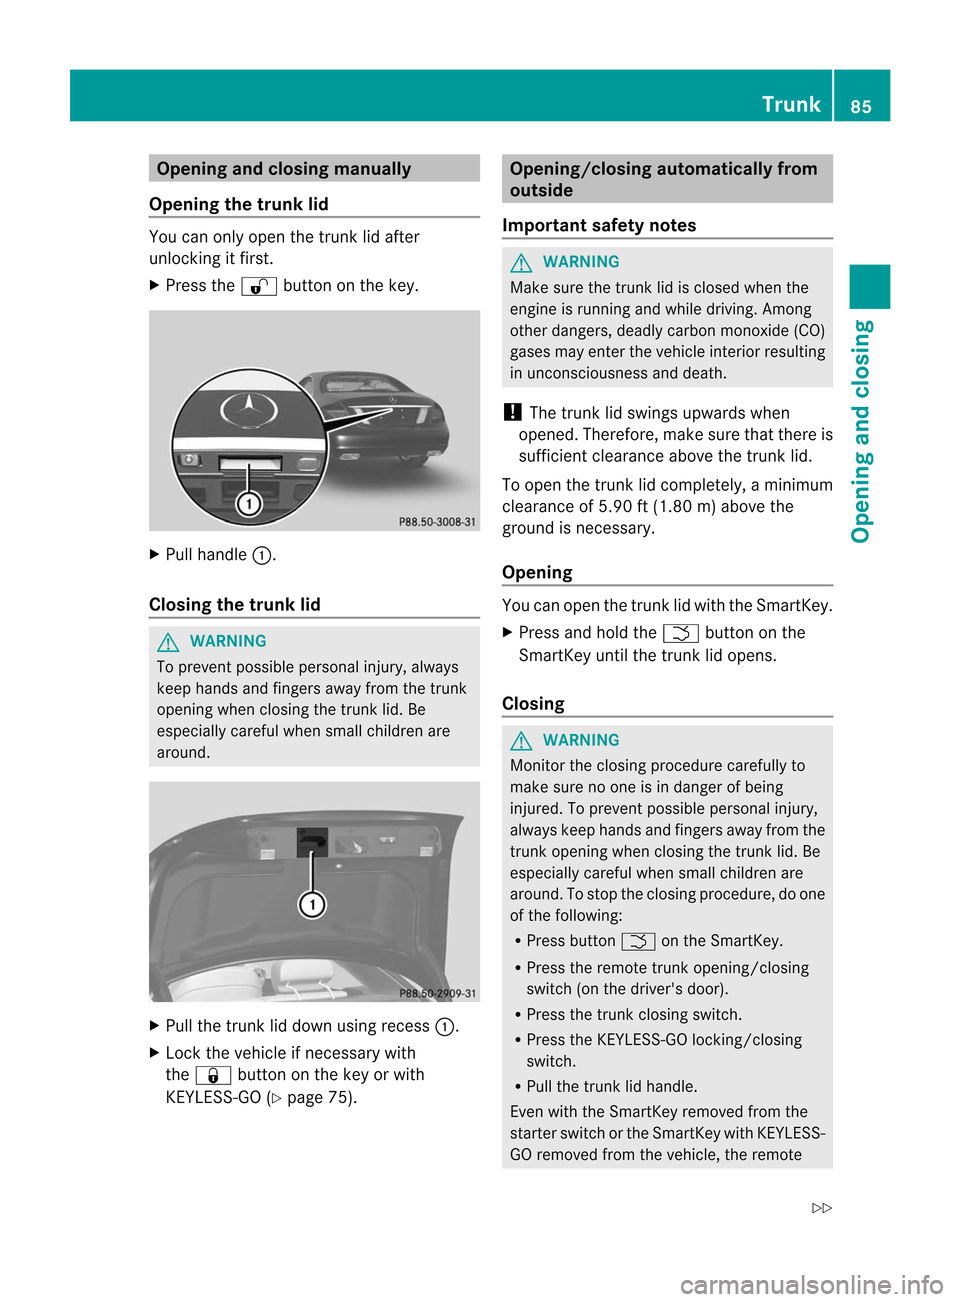
Opening and closing manually
Opening the trunk lid You can only open the trun
klid after
unlocking it first.
X Press the %button on the key. X
Pull handle :.
Closing the trunk lid G
WARNING
To prevent possible personal injury, always
keep hands and fingers away fro mthe trunk
opening when closing the trunk lid. Be
especially careful when small children are
around. X
Pull the trunk lid down using recess :.
X Lock the vehicle if necessary with
the & button on the key or with
KEYLESS-GO (Y page 75). Opening/closing automatically from
outside
Important safety notes G
WARNING
Make sure the trunk lid is closed when the
engine is running and while driving. Among
other dangers, deadly carbon monoxide (CO)
gases may enter the vehicle interior resulting
in unconsciousness and death.
! The trunk lid swings upwards when
opened. Therefore, make sure that there is
sufficient clearance above the trunk lid.
To open the trunk lid completely, a minimum
clearance of 5.90 ft (1.80 m) above the
ground is necessary.
Opening You can open the trunk lid with the SmartKey.
X
Press and hold the Fbutton on the
SmartKey until the trunk lid opens.
Closing G
WARNING
Monitor the closing procedure carefully to
make sure no one is in danger of being
injured. To prevent possible personal injury,
always keep hands and fingers away from the
trunk opening when closing the trunk lid. Be
especially careful when small children are
around. To stop the closing procedure, do one
of the following:
R Press button Fon the SmartKey.
R Press the remote trunk opening/closing
switch (on the driver's door).
R Press the trunk closing switch.
R Press the KEYLESS-GO locking/closing
switch.
R Pull the trunk lid handle.
Even with the SmartKey removed from the
starter switch or the SmartKey with KEYLESS-
GO removed from the vehicle, the remote Trunk
85Opening and closing
Z
Page 91 of 494
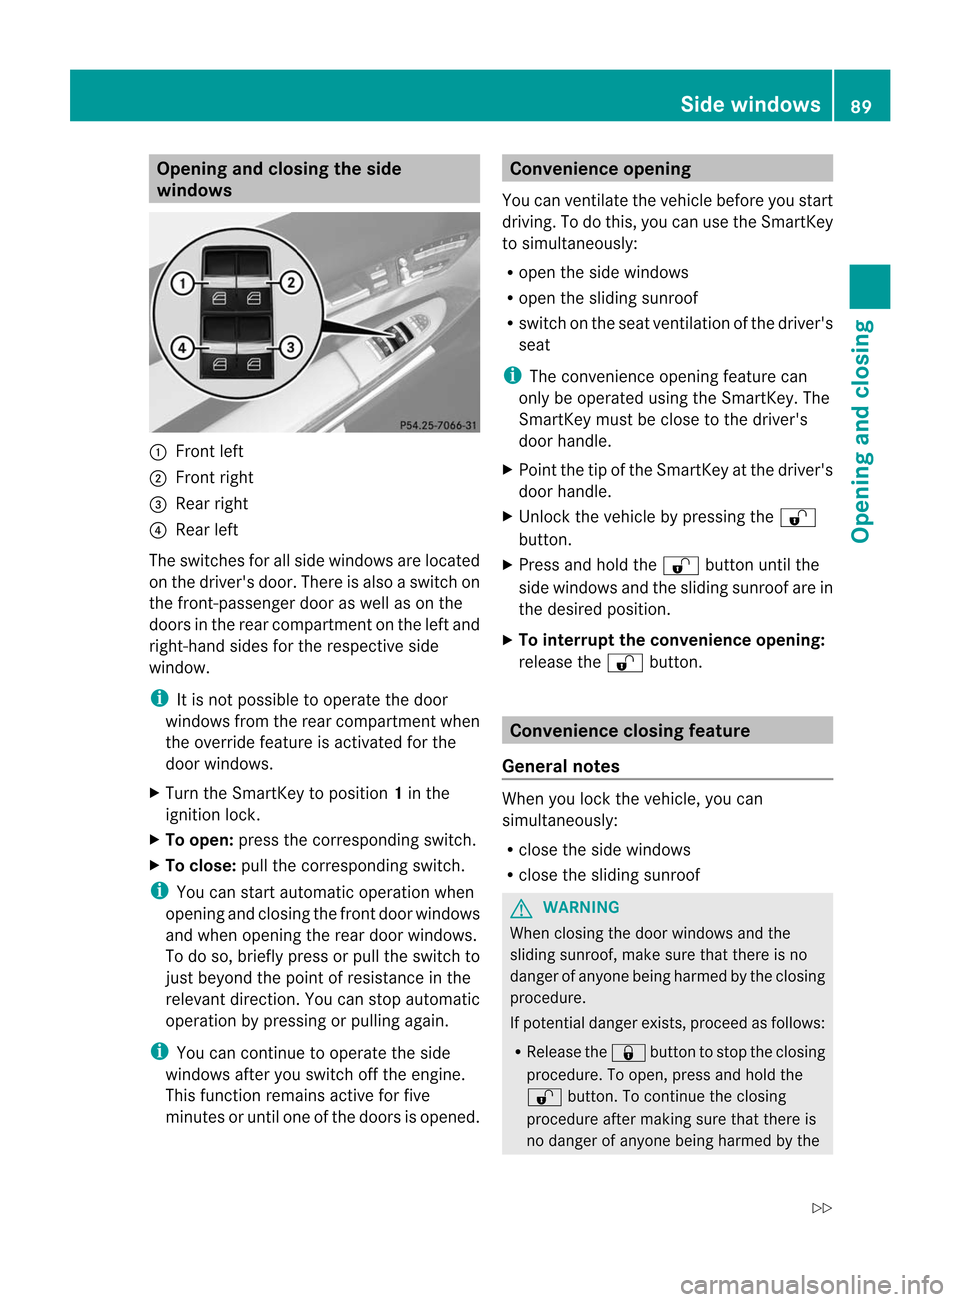
Opening and closing the side
windows
:
Front left
; Front right
= Rear right
? Rear left
The switches for all side windows are located
on the driver's door. There is also a switch on
the front-passenger door as well as on the
doors in the rear compartment on the left and
right-hand sides for the respective side
window.
i It is not possible to operate the door
windows from the rear compartment when
the override feature is activated for the
door windows.
X Turn the SmartKey to position 1in the
ignition lock.
X To open: press the corresponding switch.
X To close: pull the corresponding switch.
i You can start automatic operation when
opening and closing the fron tdoor windows
and when opening the rear door windows.
To do so, briefly press or pull the switch to
just beyond the point of resistance in the
relevant direction .You can stop automatic
operation by pressing or pulling again.
i You can continue to operate the side
windows after you switch off the engine.
This function remains active for five
minutes or until one of the doors is opened. Convenience opening
You can ventilate the vehicle before you start
driving. To do this, you can use the SmartKey
to simultaneously:
R open the side windows
R open the sliding sunroof
R switch on the seat ventilation of the driver's
seat
i The convenience opening feature can
only be operated using the SmartKey. The
SmartKey must be close to the driver's
door handle.
X Point the tip of the SmartKey at the driver's
door handle.
X Unlock the vehicle by pressing the %
button.
X Press and hold the %button until the
side windows and the sliding sunroof are in
the desired position.
X To interrupt the convenience opening:
release the %button. Convenience closing feature
General notes When you lock the vehicle, you can
simultaneously:
R
close the side windows
R close the sliding sunroof G
WARNING
When closing the door windows and the
sliding sunroof, make sure that there is no
danger of anyone being harmed by the closing
procedure.
If potential danger exists, proceed as follows:
R Release the &button to stop the closing
procedure. To open, press and hold the
% button. To continue the closing
procedure after making sure that there is
no danger of anyone being harmed by the Side windows
89Opening and closing
Z
Page 94 of 494
G
WARNING
When opening or closing the sliding sunroof,
make sure that there is no danger of anyone
being harmed by the opening/closing
procedure.
The sliding sunroof is equipped with
automatic operation and the anti-entrapment
feature. If the movement of the sliding sunroof
is blocked during the closing procedure, the
sliding sunroof will stop and open slightly.
The sliding sunroof operates differently when
the sliding sunroof switch is pressed and held.
See the "Problems with the sliding sunroof"
section for more details.
The opening/closing procedure of the sliding
sunroof can be immediately halted by
releasing the sliding sunroof switch or, if the
sliding sunroof switch was moved past the
resistance point and released ,by moving the
sliding sunroo fswitch in any direction. G
WARNING
The sliding sunroof is made out of glass. In the
even tofana ccident, the glass may shatter.
This may result in an opening in the roof.
In a vehicle rollover, occupants not wearing
thei rseat belts or not wearing them properly
may be thrown out of the opening. Such an
opening also presents a potential for injury for
occupants wearing their seat belts properly,
as entire body parts or portions of them may
protrude from the passenger compartment.
! Only open the sliding sunroof if it is free
of snow and ice. Otherwise, malfunctions
may occur.
Do not allow anything to protrude from the
sliding sunroof .Otherwise, the seals could
be damaged.
! If the sliding sunroo fcannot be opened or
closed due to a malfunction, contact a
qualified specialist workshop, e.g .an
authorized Mercedes-Ben zCenter.
! Do not forget that the weather can
change abruptly. Make certain that the sliding sunroof is closed when you leave the
vehicle. The vehicle electronics can be
damaged if water enters the vehicle
interior.
i Resonance noises can occur in addition
to the usual airflow noises when the sliding
sunroof is open. They are caused by minor
pressure fluctuations in the vehicle interior.
Change the position of the sliding sunroof
or open a side window slightly to reduce or
eliminate these noises. Operating the sliding sunroof
Opening and closing i
You can continue to operate the sliding
sunroof after switching off the engine or
removing the SmartKey from the ignition.
This function remains active for five
minutes or until one of the front doors is
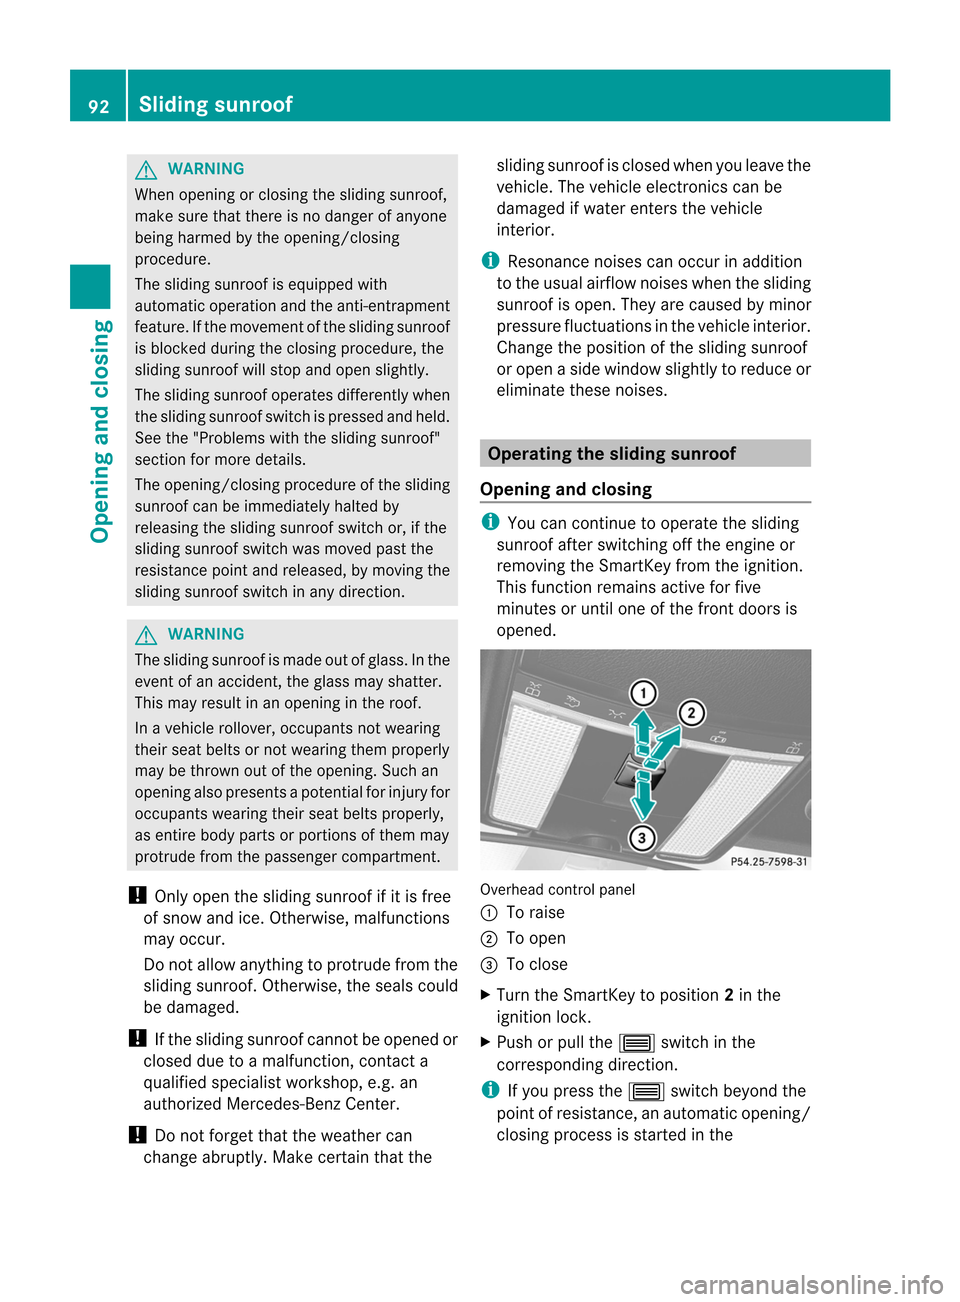
opened. Overhead control panel
:
To raise
; To open
= To close
X Turn the SmartKey to position 2in the
ignition lock.
X Push or pull the 3switch in the
corresponding direction.
i If you press the 3switch beyond the
point of resistance, an automatic opening/
closing process is started in the 92
Sliding sunroofOpening and closing
Page 116 of 494
You can assign the following predefined
functions to the
hprogrammable button:
R ECO :y
ou can activate or deactivate the ECO
start/stop function.
R Massage, Driver's Seat :y
ou can switch
the massage function for the driver's seat
on and off.
R Massage, Front Passenger's Seat :
you can switch the massage function for
the front-passenger seat on and off.
R Massage, Driver's and Front Passenger's Seat : you can switch the
massage function for the driver's and front-
passenger seats on and off.
R Display OFF : you can switch the
COMAND display off or on.
R Tow-away Alarm : you can arm or
deactivate the tow-away alarm.
R Interior Motion Sensor :y
ou can arm or
deactivate the interior motion sensor.
R Tow-away Alarm and Interior Motion
Sensor :y
ou can arm or deactivate the tow-
away alarm and the interior motion sensor.
R Repeat Navigation Command :y
ou can
have the most recent recommendation by
the navigation system repeated.
X To assign the programmable button:
select Vehicle by sliding
VÆand turning
cVd the COMAND controller and press
W to confirm.
X Select System and press
Wto confirm.
X Select Favorites Button and press
Wto
confirm.
The list of predefined functions appears.
The #dot in front of the list entry indicates
the current setting.
X To change the setting: turncVd the
COMAND controller and select the desired
function.
X To store the setting and exit the menu:
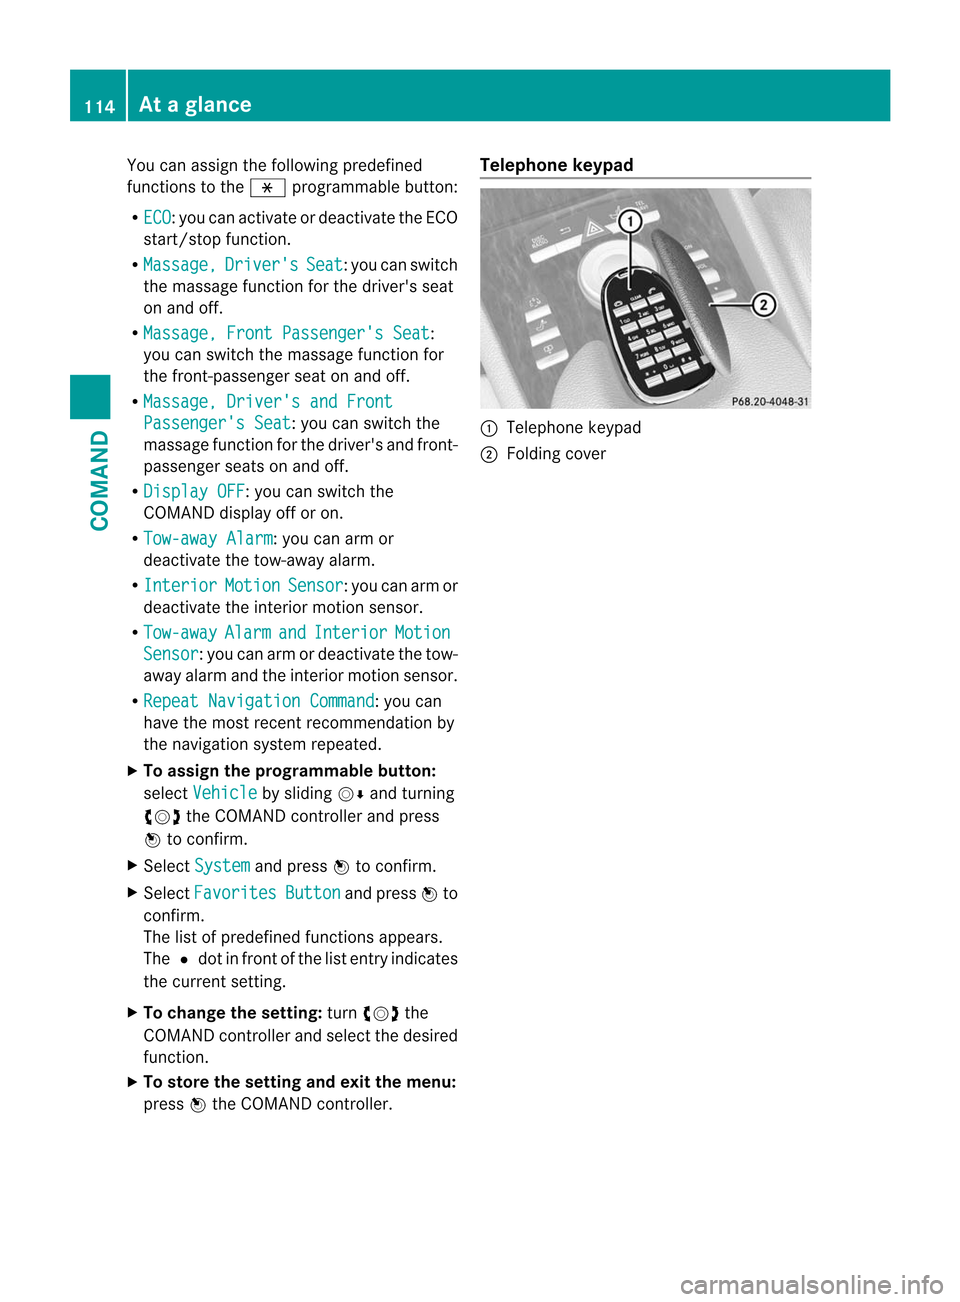
press Wthe COMAND controller. Telephone keypad
:
Telephone keypad
; Folding cover 114
At
ag lanceCOMAND
Page 146 of 494
X
In the address entry menu, confirm Startby pressing
W.
If no other route has been calculated, route
calculation starts immediately (Option 1). If
another route has already been calculated
(route guidance is active), a prompt
appears (option 2).
Option 1 –no route guidance active: route
calculatio nstarts. While route calculatio nis
in progress, an arrow will indicate the
direction to your destination. Below this, you
will see a message, e.g. Fast route isbeing calculated .
Once the route has been calculated, route
guidance begins. If the vehicle is traveling on
a non-digitized road, the system displays the
linear distance to the destination, the
direction of the destination and the StreetUnknown message. In this case, the display
will be grayed out.
Option 2 – route guidance is already
active: if route guidance is already active, a
prompt will appear asking whether you wish
to terminate the currently active route
guidance.
X Select Yes or
No and press
Wto confirm.
If you select Yes , COMAND will stop route
guidance and start route calculation for the
new destination.
If you select No , COMAND will continue
with the active route guidance.
i Route calculation takes a certain amount
of time. The time depends on the distance
fro mt he destination, for example.
COMAND calculates the route using the
digital map data.
The calculated route may differ from the
ideal route, e.g. due to roadwork or
incomplete map data. Please also refer to
the notes about the digital map
(Y page 176).
Entering and saving your home address
You can either enter your home address for
the first time (option 1) or edit a previously
stored home address (option 2). X
Option 1: enter the address, e.g. a city,
street and house number (Y page 141).
X Once you have entered the address, select
Save in the address entry menu by turning
cVd and sliding ZVÆthe COMAND
controller and press Wto confirm.
X Select Save as "My Address" and press
W to confirm.
COMAND stores your home address as My Address in the destination memory.
X Option 2: proceed as described under
"Option 1".
Ap rompt appears asking whethe rthe
current home address should be
overwritten.
X Select Yes and press
Wto confirm.
After selecting Yes , the
Save successful message appears.
Entering aZIP code
Entering a ZIP code will delete a previously
entered city.
X Select Zip Code in the address entry menu
by turning cVdand sliding ZVÆthe
COMAND controller and press Wto
confirm.
You see the list of zip codes with the
character bar.
X Enter a ZIP code. Instructions for entering
characters using city input as an example
can be found in the "Entering characters in
navigation mode (entering acity)" section
(Y page 122). 144
NavigationCOMAND
Page 150 of 494
switched on and the GPS signal is strong
enough.
Moving the map and selecting the
destination
X
To scroll the map: slideXVY, ZVÆor
aVb the COMAND controller.
X To set the map scale: as soon as you turn
cVd the COMAND controller, the scale bar
appears.
X Turn cVd until the desired scale is set.
Turning clockwise zooms out from the map;
turning counter-clockwise zooms in.
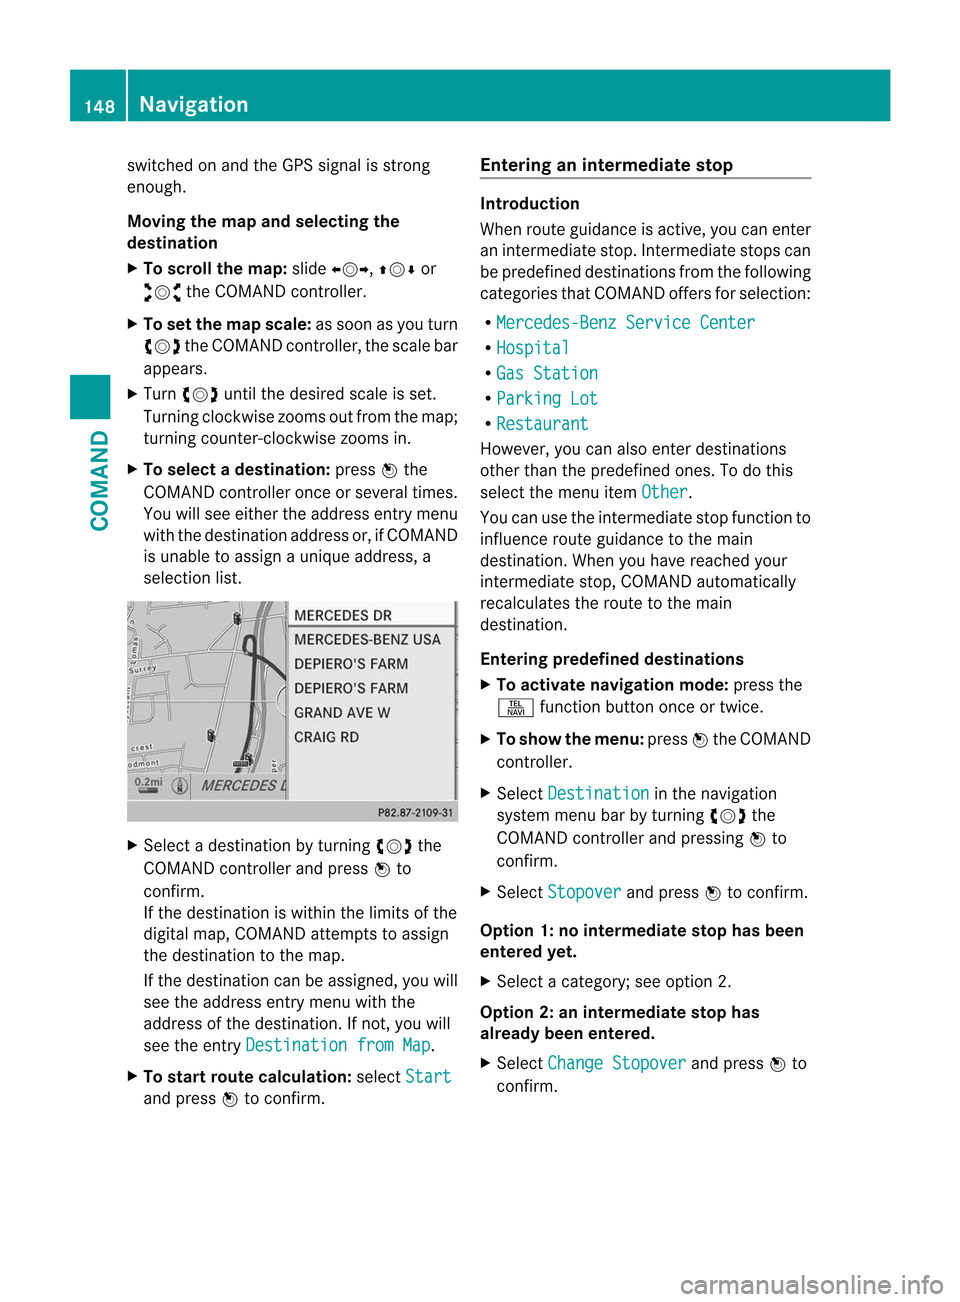
X To selectad estination:pressWthe
COMAND controller once or several times.
You will see either the address entry menu
with the destination address or, if COMAND
is unable to assign a unique address, a
selectio nlist. X
Selec tadestination by turning cVdthe
COMAND controller and press Wto
confirm.
If the destination is within the limits of the
digital map, COMAND attempts to assign
the destination to the map.
If the destination can be assigned, you will
see the address entry menu with the
address of the destination. If not, you will
see the entry Destination from Map .
X To start route calculation: selectStart and press
Wto confirm. Entering an intermediate stop Introduction
When route guidance is active, you can enter
an intermediate stop. Intermediate stops can
be predefined destinations from the following
categories that COMAND offers for selection:
R Mercedes-Benz Service Center R
Hospital R
Gas Station R
Parking Lot R
Restaurant However, you can also enter destinations
other than the predefined ones. To do this
select the menu item
Other .
You can use the intermediate stop function to
influence route guidance to the main
destination. When you have reached your
intermediate stop, COMAND automatically
recalculates the route to the main
destination.
Entering predefined destinations
X To activate navigation mode: press the
S function button once or twice.
X To show the menu: pressWthe COMAND
controller.
X Select Destination in the navigation
system menu bar by turning cVdthe
COMAND controller and pressing Wto
confirm.
X Select Stopover and press
Wto confirm.
Option 1: no intermediate stop has been
entered yet.
X Select a category; see option 2.
Option 2: an intermediate stop has
already been entered.
X Select Change Stopover and press
Wto
confirm. 148
NavigationCOMAND