check engine light MERCEDES-BENZ CL-Class 2014 C217 Owner's Manual
[x] Cancel search | Manufacturer: MERCEDES-BENZ, Model Year: 2014, Model line: CL-Class, Model: MERCEDES-BENZ CL-Class 2014 C217Pages: 494, PDF Size: 13.55 MB
Page 10 of 494
Defrosting the windows
.................266
Defrosting the windshield ..............265
Important safety notes ..................262
Indicator lamp ................................ 264
Mai nm enu .................................... .241
Maximum cooling .......................... 266
Notes on using automatic climate
control ........................................... 263
Overview of systems ......................262
Problems with cooling with air
dehumidification ............................ 264
Problem with the rear window
defroster ........................................ 266
Refrigerant ..................................... 489
Refrigerant filling capacity .............489
Setting the aird istribution.............265
Setting the airflow .........................265
Setting the airflow (COMAND) .......242
Setting the airv ents...................... 268
Setting the footwell temperature
(COMAND) ..................................... 242
Setting the temperature ................265
Switching air-recirculation mode
on/off ............................................ 267
Switching on/off ........................... 263
Switching residual hea ton/off ......267
Switching the rear window
defroster on/off ............................ 266
Cockpit
Overview .......................................... 34
see Instrument cluster
Color, setting (TV, video) ..................228
COMAND At a glance (overview) .................... 112
Back button ................................... 113
Basi cfunction s.............................. 126
Components .................................. 112
Display ........................................... 115
Exampl eofoperation ..................... 121
Function buttons ........................... 113
Menu overview .............................. 115
Remote control .............................. 119
Switching on/off ........................... 126
System settings ............................. 130
COMAND controller ...........................112COMAND display
Cleaning instructions .....................118
Folding in and swiveling .................118
Setting ........................................... 130
COMAND operating system .............. 112
Combination switch ..........................252
Compass function ............................. 176
Conference connection ..................... 189
Consumption statistics (on-board
computer) .......................................... 340
Contrast, setting (TV, video) ............228
Convenience closing feature ..............89
Convenience opening feature ............89
Convenience telephone Importing contacts ........................192
Convenience telephony ....................181
Introduction ................................... 181
Coolan t(engine)
Checkin gthe level ......................... 424
Display message ............................ 371
Filling capacity ............................... 488
Notes ............................................. 487
Temperature (on-board computer) .343
Temperature gauge ........................ 336
Cooling
see Climate control
Copy protection (CD/DVD) ...............218
Cornering light function Display message ............................ 367
Function/notes ............................. 254
Cruise control
Cruise control leve r....................... 297
Deactivating ................................... 298
Display message ............................ 382
Driving system ............................... 296
Function/notes ............................. 296
Important safety notes ..................296
Setting aspeed .............................. 297
Storing and maintaining current
speed ............................................. 297
Cup holder
Cente rconsole .............................. 403
Important safety notes ..................403
Rea rcompartmen t......................... 404
Customer Assistance Center (CAC) ...30
Customer Relations Department .......30 8
Index
Page 13 of 494
ECO start/stop function
Deactivating/activatin g................. 277
General information .......................276
Electrical fuses
see Fuses
Electronic brake force
distribution
see EBD (electronic brake force
distribution)
Electronic Stability Program
see ESP ®
(Electroni cStability Program)
Electronic Traction System
see ETS/4ETS (Electronic
Tractio nSystem)
Emergency locking
Vehicl e............................................. 83
Emergency release
Trunk ............................................... 87
Vehicle ............................................. 83
Emergency spare wheel
Storage location ............................ 436
Emergency Tensioning Devices
Function .......................................... .59
Safety guideline s............................. 45
Emissions control
Service and warranty information ....26
Engine
Check Engine warning lamp ........... 396
Display message ............................ 371
ECO start/stop function ................276
Engine number ............................... 483
Irregularr unning............................ 278
Jump-starting ................................. 445
Starting problems ..........................278
Starting the engine with the
SmartKey ....................................... 274
Starting with KEYLESS-GO .............275
Switching off .................................. 289
Tow-starting (vehicle) ..................... 449
Engine electronics
Problem (malfunction) ...................278
Engine emergency stop ....................451
Engine oil Adding ........................................... 423
Additives ........................................ 487
Checking the oil level ..................... 421 Checking the oil level using the
dipstick
.......................................... 421
Checking the oil level using the
on-board computer ........................422
Display message ............................ 373
Filling capacity ............................... 486
Notes about oil grades ................... 486
Notes on oil level/consumption ....421
Temperature (on-board computer) .343
Viscosity ........................................ 487
Entering the frequency .....................201
Entry Deleting ......................................... 124
Saving ............................................ 126
ESP ®
(Electronic Stability
Program) Deactivating/activating .................348
Deactivating/activating (notes) .......67
Display message ............................ 353
ETS/4ETS ........................................ 67
Function/notes ................................ 67
Important safety information ...........67
Warning lamp ................................. 393
ETS/4ETS (Electronic Traction
System) ................................................ 67
Exhaus tcheck ................................... 293
Exhaus ttail pipe (cleaning
instructions) ...................................... 431
Exterior lighting see Exterior lighting
Exterior mirror parking position
Adjusting (COMAND) .....................236
Exterior mirrors
Adjusting ....................................... 104
Dipping (automatic) .......................105
Folding in/ou t(automatically) .......105
Folding in/ou t(electrically) ...........105
Out of position (troubleshooting) ...105
Storing settings (memory function) 106
Storing the parking position ..........105
Eyeglasses compartment .................401 F
Factory setting (reset function) .......137
Fader, setting .................................... 128 Index
11
Page 22 of 494
Setting the volume
Telephone calls .............................. 127
Video AUX ..................................... 234
Side impact air bag .............................49
Side marker lamp (display
message) ............................................ 369
Side windows Cleaning ......................................... 430
Convenience closing feature ............89
Convenience opening feature ..........89
Important safety information ...........88
Opening/closing .............................. 89
Resetting ......................................... 90
Troubleshooting ............................... 91
Sliding sunroof
Important safety notes ....................91
Opening/closing .............................. 92
Resetting ......................................... 93
Troubleshooting ............................... 93
SmartKey
Changing the battery .......................78
Changing the programming .............77
Checking the battery .......................78
Convenience closing feature ............89
Convenience opening feature ..........89
Display message ............................ 387
Important safety notes ....................74
Malfunction ...................................... 80
Positions (ignition lock) .................273
Starting the engine ........................274
SMS message
see Text message
Snow chains ...................................... 457
Socket Glove box ...................................... .407
Sockets
Points to observe before use .........406
Trunk ............................................. 407
Soun dmenu ....................................... 128
Sounds see Soun dsettings
Sound settings
Balance and fader ..........................128
Calling up the sound menu ............128
Surround sound ............................. 129
Treble and bas s............................. 128Spare wheel
Notes/data .................................... 479
Storage location ............................ 436
see Emergency spare wheel
Specialist workshop ............................ 29
Speech control see Voice Control System
Speed, controlling
see Cruise control
Speedometer
Activating/deactivating the
additional speedometer .................350
Digita l............................................ 340
In the Instrument cluster .................35
Selecting the unit of measurement 350
see Instrument cluster
SPLITVIEW ......................................... 116
Spotlight function ............................. 322
SRS (Supplemental Restraint
System)
Display message ............................ 362
Introduction ..................................... 44
Warning lamp ................................. 395
Warning lamp (function) ................... 44
Standing lamps
Display message ............................ 369
Switching on/off ........................... 250
Starting (engine) ................................ 274
Station memory ................................. 201
Steering (display message) ..............387
Steering wheel Adjusting (electrically). ..................103
Button overview ............................... 37
Buttons (on-board computer) ......... 337
Cleaning ......................................... 433
Important safety notes ..................102
Paddle shifters ............................... 283
Steering wheel heating ..................103
Storing settings (memory function) 106
Steering wheel heating
Switching on/off ........................... 103
Steering wheel paddle shifters ........283
Stop function Audi oDVD ..................................... 212
Video DVD ..................................... 231
Stopwatch (RACETIMER) ................... 34420
Index
Page 46 of 494
Useful information
i This Operator's Manual describes all
models and all standard and optional
equipment of your vehicle available at the
time of publication of the Operator's
Manual. Country-specific differences are
possible. Please note that your vehicle may
not be equipped with all features
described. This also applies to safety-
related systems and functions.
i Please read the information on qualified
specialist workshops (Y page 29).Occupant safety
Overview of occupant safety
In this section, you will learn the most
important facts about the restraint system
components of the vehicle.
The restraint system consists of:
R seat belts
R child restraint systems
R LATCH-type (ISOFIX) child seat anchors
Additional protection is provided by:
R SRS (Supplemental Restrain tSystem)
R NECK-PRO head restraints
R PRE-SAFE ®
R Airb ag system component swith:
- PASSENGER AI RBAG OFF indicator lamp
- front-passenge rseat with Occupant
Classification System (OCS)
The differen tair bag systems work
independently of each other. The protective
functions of the system work in conjunction
with each other. Not all air bags are deployed
in an accident. G
WARNING
Modifications to or work improperly
conducted on restraint system components
or their wiring, as well as tampering with
interconnected electronic systems, can lead to the restraint systems no longer functioning
as intended.
Air bags or Emergency Tensioning Devices
(ETDs), for example, could deploy
inadvertently or fail to deploy in accidents
although the deceleration threshold for air
bag deploymen tis exceeded. Therefore,
never modify the restraint systems. Do not
tamper with electronic components or their
software.
i See "Children in the vehicle"
(Y page 59) for more information on
infants and children traveling with you in
the vehicle and restraints for infants and
children. SRS (Supplemental Restraint System)
Introduction SRS consists of:
R
the 6 SRS warning lamp
R air bags
R air bag control unit (with crash sensors)
R Emergency Tensioning Devices
R belt force limiters
SRS reduces the risk of occupants coming
into contact with the vehicle's interior in the
event of an accident. It can also reduce the
effect of the forces to which occupants are
subjected during an accident.
SRS warning lamp SRS functions are checked regularly when
you switch on the ignition and when the
engine is running. Therefore, malfunctions
can be detected in good time.
The
6 SRS warning lamp in the instrument
cluster lights up when the ignition is switched
on. It goes out no later than a few seconds
after the engine is started.
The SRS components are in operational
readiness if the 6SRS warning lamp is not
lit while the engine is running. 44
Occupant safetySafety
Page 47 of 494
G
WARNING
The SRS self-check has detected a
malfunction if the 6SRS indicator lamp:
R does not light up at all
R does not go out after approximately four
seconds after the engine is started
R comes on after the engine was started or
while driving.
For yours afety, Mercedes-Ben zstrongly
recommends tha tyou have the system
checked as soon as possible at an authorized
Mercedes-Benz Center. SRS may otherwise
fail to activate when it is needed in the event
of an accident, which could lead to serious or
fatal injuries. SRS might also be activated
unexpectedly and unnecessarily, which could
also result in injury.
In addition, work carried out improperly on
SRS may render SRS inoperative or cause
unintended air bag deployment. Work on the
SRS system should only be carried out by
qualified specialist personnel. Consult an
authorized Mercedes-Benz Center.
If it is necessary to modify an air bag system
to accommodate a person with disabilities,
contact an authorized Mercedes-Benz Center
for details. USA only: for further information
contact our Customer Assistance center at
1-800-FOR-MERCedes (1-800-367-6372).
Safety guidelines for seat belts,
Emergency Tensioning Devices (ETDs)
and air bags G
WARNING
R Damaged seat belts or seat belts that have
been subjected to stress in an accident
must be replaced. Their anchoring points
must also be checked. Only use seat belts
installed or supplied by an authorized
Mercedes-Benz Center.
R Air bags and pyrotechnic Emergency
Tensioning Devices (ETDs) contain
perchlorate material, which may require
special handling and regard for the environment.C
heck your national disposal
guidelines. California residents, see
www.dtsc.ca.gov/HazardousWaste/
Perchlorate/index.cfm.
R Air bags and ETDs are designed to function
on a one-time-only basis. An air bag or ETD
that has deployed must be replaced. PRE-
SAFE ®
has electrically operated reversible
belt tensioners in addition to the
pyrotechnic ETDs.
R Do not pass seat belts over sharp edges.
They could tear.
R Do not make any modification that could
change the effectiveness of the seat belts.
R Do not bleach or dye seat belts as this may
severely weaken them. In a crash they may
not be able to provide adequate protection.
R No modifications of any kind may be made
to any components or wiring of the SRS.
R Do not change or remove any component
or part of the SRS.
R Do not install additional trim material, seat
covers, badges, etc. to the:
-padded steering wheel boss
- knee bag covers
- front-passenger air bag cover
- outer side of front seat bolsters
- side trim next to the rear seat backrest
- roof lining trim
R Do not install additional electrical/
electronic equipment on or near SRS
components and wiring.
R Keep area between air bags and occupants
free of objects (e.g. packages, purses,
umbrellas, etc.).
R Do not hang items such as coat hangers
from the coat hooks or handles over the
door. These items may be thrown around in
the vehicle and cause head and other
injuries when the window curtain air bag is
deployed.
R Air bag system components will be hot after
an air bag has inflated. Do not touch them. Occupant safety
45Safety
Z
Page 67 of 494
systems can neither reduce the risk of
accident nor override the laws of physics.
Driving safety systems are merely aids
designed to assist driving. You are
responsible for the distance to the vehicle in
front, for vehicle speed and for braking in
good time. Always adapty our driving style to
suit the prevailing road and weather
conditions and maintain asafe distance from
the vehicle in front. Drive carefully.
i The driving safety systems described only
work as effectively as possible when there
is adequate contact between the tires and
the road surface. Pay particular attention
to the informatio nregarding tires,
recommended minimum tire tread depths
etc.int he "Wheels and tires" section
(Y page 454).
In wintry driving conditions, always use
winter tires (M+S tires) and if necessary,
snow chains. Only in this way will the
driving safety systems described in this
section work as effectively as possible. ABS (Anti-lockB
raking System)
Important safety notes i
Observe the "Important safety notes"
sectio n(Ypage 64). G
WARNING
If ABSi s faulty, the wheels could lock when
braking. The steerability and braking
characteristics may be severely impaired.
Additionally, further driving safety systems
are deactivated. There is an increased danger
of skidding and accidents.
Drive on carefully. Have ABS checked
immediately at a qualified specialist
workshop.
When ABS is malfunctioning, other systems,
including driving safety systems, will also
become inoperative. Observe the information
on the ABS warning lamp (Y page 391) anddisplay messages which may be shown in the
instrument cluster (Y
page 353).
ABS regulates brake pressure in such a way
that the wheels do not lock when you brake.
This allows you to continue steering the
vehicle when braking.
ABS works from a speed of about 5 mph
(8 km/h) upwards, regardless of road-surface
conditions. ABS works on slippery surfaces,
even if you only brake gently.
The ! warning lamp in the instrument
cluster lights up when the ignition is switched
on. It goes out when the engine is running.
Braking: X
If ABS intervenes: continue to depress the
brake pedal vigorously until the braking
situation is over.
X To make a full brake application:
depress the brake pedal with full force.
If ABS intervenes when braking, you will feel
a pulsing in the brake pedal.
The pulsating brake pedal can be an
indication of hazardous road conditions and
functions as a reminder to take extra care
while driving. BAS (Brake AssistS
ystem)
i Observe the "Important safety notes"
section (Y page 64). G
WARNING
If BAS is malfunctioning, the braking distance
in an emergency braking situation is
increased. There is a risk of an accident.
In an emergency braking situation, depress
the brake pedal with full force. ABS prevents
the wheels from locking.
BAS operates in emergency braking
situations. If you depress the brake pedal
quickly, BAS automatically boosts the braking
force, thus shortening the stopping distance. Driving safety systems
65Safety Z
Page 69 of 494
Following damage to the front end of the
vehicle, have the configuration and operation
of the radar sensors checked at a qualified
specialist workshop. This also applies to
collisions at low speeds where there is no
visible damage to the front of the vehicle.
If BAS PLUS is not available due to a
malfunction in the radar senso rsystem, the
brake system remains available with full
brake boosting effect and BAS. ESP
®
(Electronic Stabilit yProgram)
Important safety notes i
Observe the "Important safety notes"
sectio n(Ypage 64). G
WARNING
If ESP ®
is malfunctioning, ESP ®
is unable to
stabilize the vehicle. Additionally, further
driving safety systems are deactivated. This
increases the risk of skidding and an accident.
Drive on carefully. Have ESP ®
checked at a
qualified specialist workshop.
! Vehicles with 4MATIC: switch off the
ignition when the parking brake is being
tested on a brake dynamometer.
Application of the brakes by ESP ®
may
otherwise destroy the brake system.
Vehicles without 4MATIC: when towing your
vehicle with the rear axle raised, it is
important that you observe the notes on
ESP ®
(Y page 448).
ESP ®
is deactivated if the åwarning lamp
in the instrument cluster lights up
continuously when the engin eis running.
If the ÷ warning lamp and the å
warning lamp are lit continuously, ESP ®
is not
available due to a malfunction.
Observe the information on warning lamps
(Y page 393) and displaym essages which
may be shown in the instrument cluster
(Y page 353). If ESP
®
detects that the vehicle is deviating
from the direction desired by the driver, one
or more wheels are braked to stabilize the
vehicle. The engine output is also modified to
keep the vehicle on the desired course within
physical limits. ESP ®
assists the driver when
pulling away on wet or slippery roads. ESP ®
can also stabilize the vehicle during braking.
If ESP ®
intervenes, the ÷ESP®
warning
lamp flashes in the instrument cluster.
If ESP ®
intervenes:
X Do not deactivate ESP ®
under any
circumstances.
X Only depress the accelerator pedal as far
as necessary when pulling away.
X Adapt your driving style to suit the
prevailing road and weather conditions.
i Only use wheels with the recommended
tire sizes. Only then will ESP ®
function
properly.
ETS/4ETS (Electronic Traction System) Traction control is part of ESP
®
.
Traction control brakes the drive wheels
individually if they spin. This enables you to
pull away and accelerate on slippery surfaces,
for example if the road surface is slippery on
one side. On vehicles with 4MATIC, more
drive torque is also transferred to the wheel
or wheels with traction.
Traction control remains active if you
deactivate ESP ®
.
Deactivating/activating ESP ® i
Observe the "Important safety notes"
section (Y page 64). G
WARNING
If you deactivate ESP ®
, ESP ®
no longer
stabilizes the vehicle. There is an increased
risk of skidding and an accident.
Only deactivate ESP ®
in the situations
described in the following. Driving safet
ysystems
67Safety Z
Page 70 of 494

!
Avoid spinning the driven wheels for an
extended period with ESP ®
deactivated.
You could otherwise damage the drivetrain.
X To deactivate:(Y page 348).
The å ESP®
OFF warning lamp in the
instrument cluster lights up.
CL 63 AMG: deactivate ESP ®
when driving
on designated roads when the vehicle's
own oversteering and understeering
characteristics are desired. Driving without
ESP ®
requires an extremely qualified and
experienced driver who is able to cope with
these critical driving conditions.
X To activate:(Y page 348).
The å ESP®
OFF warning lamp in the
instrument cluster goes out.
ESP ®
is activated automaticallyw hen the
engine is started.
If ESP ®
is deactivated and one or more wheels
start to spin, the ÷ESP®
warning lamp in
the instrument cluster flashes. In such
situations, ESP ®
will not stabilize the vehicle.
It may be best to deactivate ESP ®
in the
following situations:
R when using snow chains
R in deep snow
R on sand or gravel
If you deactivate ESP ®
:
R ESP ®
no longer improves driving stability.
R traction control is still activated.
R ESP ®
still provides support when you
brake.
R the engine's torque is no longer limited, and
the drive wheels can spin. The spinning of
the wheels results in a cutting action, which
provides better grip.
Vehicles with ECO start/stop function: the
ECO start/stop function switches the engine
off automatically when the vehicle comes to
a stop. The engine starts automatically when
the driver wants to pull away again. ESP ®
remains in its previously selected status.
Example: if ESP ®
was deactivated before the engine was switched off, ESP
®
remains
deactivated when the engine is switched on
again. EBD (electronic brake force
distribution)
i Observe the "Important safety notes"
section (Y page 64). G
WARNING
If EBD has malfunctioned, the rear wheels can
still lock, e.g. under full braking. This
increases the risk of skidding and an accident.
You should therefore adapt your driving style
to the different handling characteristics. Have
the brake system checked at a qualified
specialist workshop.
Observe information regarding indicator and
warning lamps (Y page 391) as well as
display messages (Y page 357).
EBD monitors and controls the brake
pressure on the rear wheels to improve
driving stability while braking. ADAPTIVE BRAKE
ADAPTIVE BRAKE enhances braking safety
and offers increased braking comfort. In
addition to the braking function, ADAPTIVE
BRAKE also has the HOLD function
(Y page 308) and hill start assist
(Y page 275). PRE-SAFE
®
Brake
i Observe the "Important safety notes"
section (Y page 64).
PRE-SAFE ®
Brake is only available in vehicles
with DISTRONIC PLUS.
PRE-SAFE ®
Brake can help you to minimize
the risk of a collision with a vehicle ahead or
reduce the effects of such a collision. If PRE-
SAFE ®
Brake has detected a risk of collision, 68
Driving safety systemsSafety
Page 83 of 494
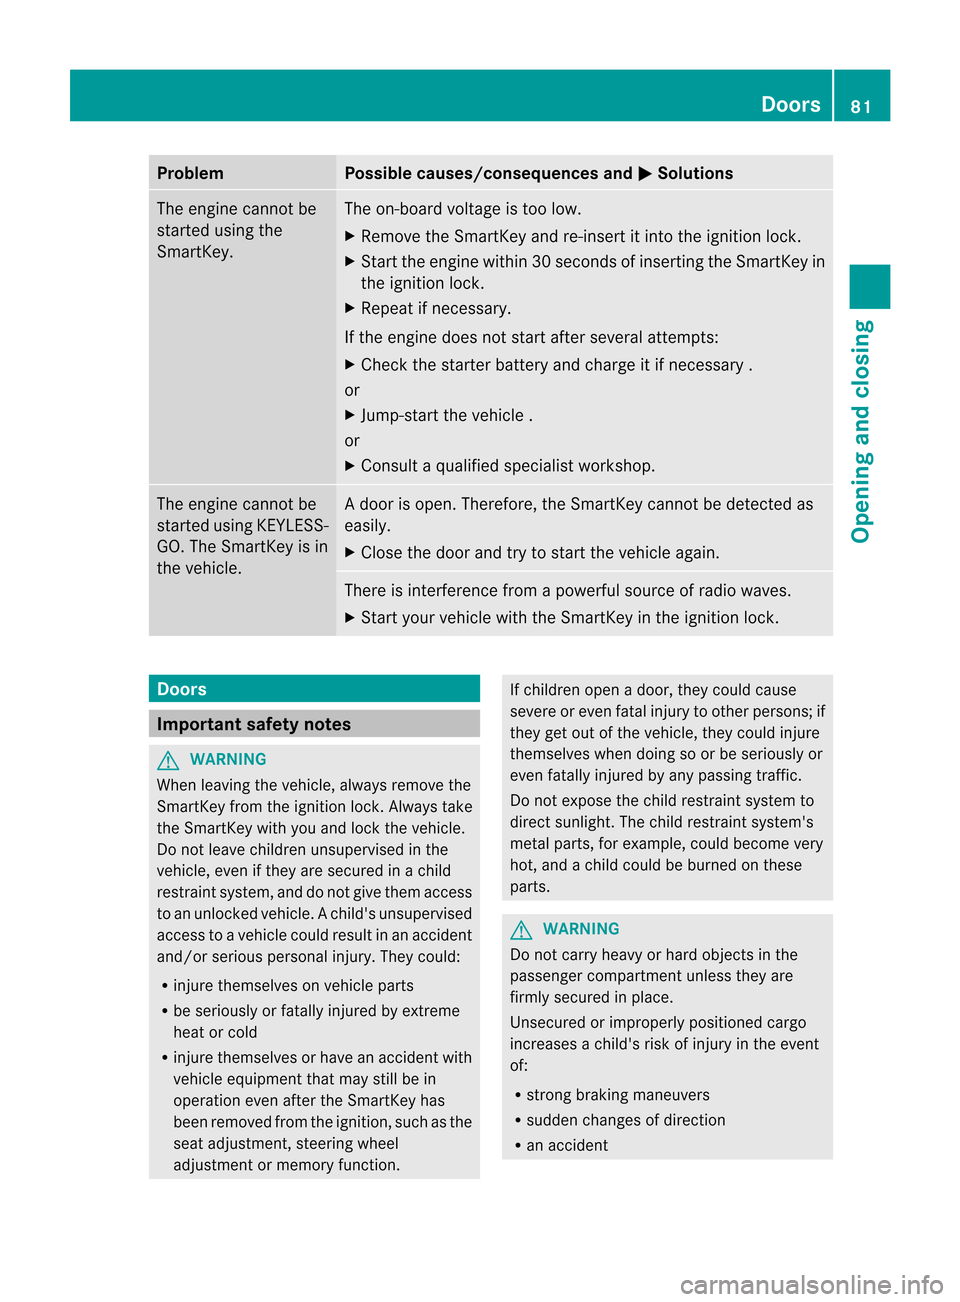
Problem Possible causes/consequences and
M Solutions
The engine cannot be
started using the
SmartKey. The on-board voltage is too low.
X
Remove the SmartKey and re-insert it into the ignition lock.
X Start the engine within 30 seconds of inserting the SmartKey in
the ignition lock.
X Repeatifn ecessary.
If the engine does not start after several attempts:
X Check the starter battery and charge it if necessary .
or
X Jump-start the vehicle .
or
X Consult a qualified specialist workshop. The engine cannot be
started using KEYLESS-
GO. The SmartKey is in
the vehicle. Ad
oor is open. Therefore, the SmartKey cannot be detected as
easily.
X Close the door and try to start the vehicle again. There is interference from a powerful source of radio waves.
X
Start your vehicle with the SmartKey in the ignition lock. Doors
Important safety notes
G
WARNING
When leaving the vehicle, always remove the
SmartKey from the ignition lock. Always take
the SmartKey with you and lock the vehicle.
Do not leave children unsupervised in the
vehicle, even if they are secured in a child
restraint system, and do not give them access
to an unlocked vehicle. Achild's unsupervised
access to a vehicle could result in an accident
and/or serious personal injury. They could:
R injure themselves on vehicle parts
R be seriously or fatally injured by extreme
heat or cold
R injure themselves or have an accident with
vehicle equipment that may still be in
operation even after the SmartKey has
been removed from the ignition, such as the
seat adjustment, steering wheel
adjustment or memory function. If children open a door, they could cause
severe or even fatal injury to other persons; if
they get out of the vehicle, they could injure
themselves when doing so or be seriously or
even fatally injured by any passing traffic.
Do not expose the child restraint system to
direct sunlight. The child restraint system's
metal parts, for example, could become very
hot, and a child could be burned on these
parts. G
WARNING
Do not carry heavy or hard objects in the
passenger compartmentu nless they are
firmly secured in place.
Unsecured or improperly positioned cargo
increases a child's risk of injury in the event
of:
R strong braking maneuvers
R sudden changes of direction
R an accident Doors
81Opening and closing Z
Page 179 of 494
Information about new versions of map
software can be obtained from an authorized
Mercedes-Benz Center.
You can have yourm ap software updated
there with a DVD, or you can update it
yourself.
Updating process G
WARNING
Never leave the engine running in enclosed
spaces. The exhaust gases contain toxic
carbon monoxide. Breathing in exhaust fumes
is a health hazard and can lead to
unconsciousness or death.
The update process can take a long time (over
an hour), depending on th esize of the digital
map. During this time, you will only be able to
switch on radio mode and to accept incoming
calls. The update will be completed more
quickly if the vehicle is stationary.
If the starter battery is not sufficiently
charged, COMAND may end the process
automatically. This protect sthe battery. If
this occurs, restart the update with the
engine running.
Displaying information on the map
version currently in use
X To activate navigation mode: press the
S function button once or twice.
X To show the menu: pressWthe COMAND
controller.
X Select Navi in the main function bar by
sliding VÆand turning cVdthe COMAND
controller and press Wto confirm.
X Select Map version and press
Wto
confirm.
Notes on handling DVDs
R Only hold DVDs by the edge.
R Handle DVDs carefully to prevent reading
errors.
R Avoid getting scratches, fingerprints and
dust on DVDs. R
Use a commercially-available cleaning
cloth to clean discs. When cleaning CDs,
you should wipe in straight lines from the
center outwards rather than in a circular
motion.
R Place DVDs back in their cases after use.
R Protect DVDs from heat and direct sunlight.
Map software copy protection
Map software for COMAND is subject to a
charge. The map software has just one
activation code which is usable in one vehicle
only, and is not transferable. You can obtain
the six-digit activation code from an
authorized Mercedes-Ben zCenter. If you
have lost the activation code, contact an
authorized Mercedes-BenzC enter. If
COMAND does not accept the activation
code that you have received, also contact an
authorized Mercedes-BenzC enter.
Your vehicle is supplied with map software at
the factory. Depending on the country, map
software for your region is either pre-installed
or the map software is supplied as a DVD.Y ou
do not require an activation code for the map
software that is provided with your vehicle.
If the map software on your vehicle has been
installed at the factory and you wish to
reinstall it, this also does not necessitate
entry of the activation code.
Installation process
X Load the map software DVD in the DVD
drive (Y page 209).
COMAND checks the DVD and shows a
corresponding message in the display.
Map software is not compatible with the
navigation system
You will see a message that the map software
cannot be installed.
X To confirm the message: pressW.
COMAND ejects the DVD.
X Take the DVD out of the slot.
X Insert a DVD which is compatible with the
vehicle’s navigation system. Navigation
177COMAND Z