check oil MERCEDES-BENZ CL-Class 2014 C217 Owner's Manual
[x] Cancel search | Manufacturer: MERCEDES-BENZ, Model Year: 2014, Model line: CL-Class, Model: MERCEDES-BENZ CL-Class 2014 C217Pages: 494, PDF Size: 13.55 MB
Page 13 of 494
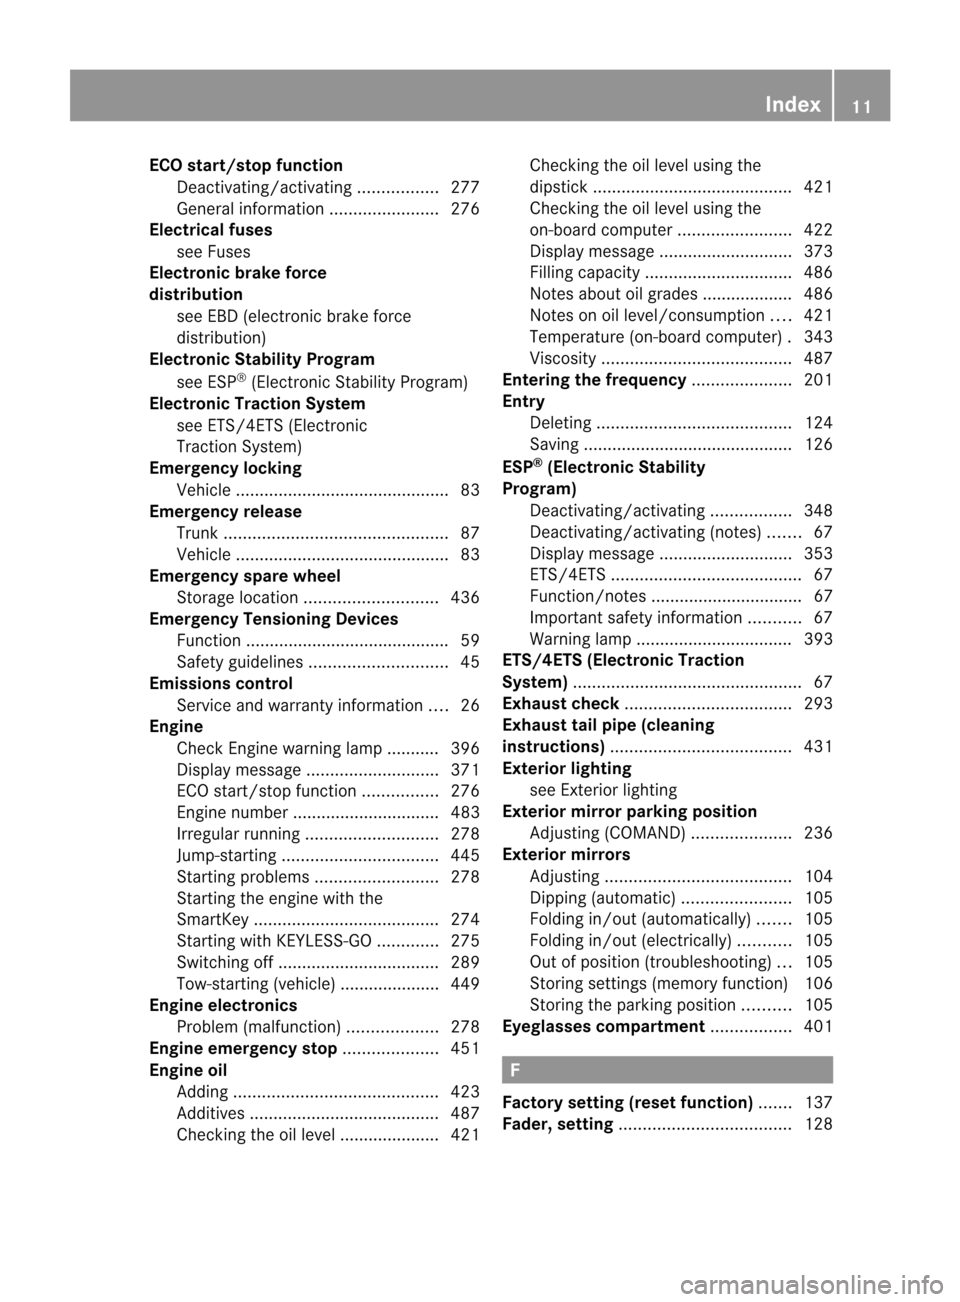
ECO start/stop function
Deactivating/activatin g................. 277
General information .......................276
Electrical fuses
see Fuses
Electronic brake force
distribution
see EBD (electronic brake force
distribution)
Electronic Stability Program
see ESP ®
(Electroni cStability Program)
Electronic Traction System
see ETS/4ETS (Electronic
Tractio nSystem)
Emergency locking
Vehicl e............................................. 83
Emergency release
Trunk ............................................... 87
Vehicle ............................................. 83
Emergency spare wheel
Storage location ............................ 436
Emergency Tensioning Devices
Function .......................................... .59
Safety guideline s............................. 45
Emissions control
Service and warranty information ....26
Engine
Check Engine warning lamp ........... 396
Display message ............................ 371
ECO start/stop function ................276
Engine number ............................... 483
Irregularr unning............................ 278
Jump-starting ................................. 445
Starting problems ..........................278
Starting the engine with the
SmartKey ....................................... 274
Starting with KEYLESS-GO .............275
Switching off .................................. 289
Tow-starting (vehicle) ..................... 449
Engine electronics
Problem (malfunction) ...................278
Engine emergency stop ....................451
Engine oil Adding ........................................... 423
Additives ........................................ 487
Checking the oil level ..................... 421 Checking the oil level using the
dipstick
.......................................... 421
Checking the oil level using the
on-board computer ........................422
Display message ............................ 373
Filling capacity ............................... 486
Notes about oil grades ................... 486
Notes on oil level/consumption ....421
Temperature (on-board computer) .343
Viscosity ........................................ 487
Entering the frequency .....................201
Entry Deleting ......................................... 124
Saving ............................................ 126
ESP ®
(Electronic Stability
Program) Deactivating/activating .................348
Deactivating/activating (notes) .......67
Display message ............................ 353
ETS/4ETS ........................................ 67
Function/notes ................................ 67
Important safety information ...........67
Warning lamp ................................. 393
ETS/4ETS (Electronic Traction
System) ................................................ 67
Exhaus tcheck ................................... 293
Exhaus ttail pipe (cleaning
instructions) ...................................... 431
Exterior lighting see Exterior lighting
Exterior mirror parking position
Adjusting (COMAND) .....................236
Exterior mirrors
Adjusting ....................................... 104
Dipping (automatic) .......................105
Folding in/ou t(automatically) .......105
Folding in/ou t(electrically) ...........105
Out of position (troubleshooting) ...105
Storing settings (memory function) 106
Storing the parking position ..........105
Eyeglasses compartment .................401 F
Factory setting (reset function) .......137
Fader, setting .................................... 128 Index
11
Page 24 of 494
Connecting a mobile phone
(general information
)..................... 183
De-authorizing a mobile phone ......186
Ending an active call ......................189
Entering anumbe r......................... 188
External authorization (Bluetooth ®
)1 85
Function restrictions ......................182
General notes ................................ 181
Keypad .......................................... .114
Menu (on-board computer) ............346
Number from the phone book ....... .346
Operating options ..........................182
Overview of functions ....................189
Reception and transmission
volume ........................................... 187
Redialing ........................................ 347
Rejecting/ending acall................. 346
Rejecting acall.............................. 187
Rejecting or accepting a waiting
call ................................................. 189
Safety notes .................................. 181
Sending DTMF tones ..................... .191
Switching hands-free microphone
on/off ............................................ 189
Toggling ......................................... 189
Using the telephone ....................... 187
see Bluetooth ®
see Call lists
Telephone mode
Redialing ........................................ 188
Telephone module with
Bluetooth ®
SIM Access Profile
see separate installation instructions
Temperature
Coolant .......................................... 336
Coolant (on-board computer) ......... 343
Engine oil (on-board computer) ...... 343
Outside temperature ..................... .337
Setting (climate control) ................265
Setting (COMAND) .........................240
Theft deterrent systems
ATA (Anti-Theft Alarm system) .........70
Immobilize r...................................... 70
Tilt/sliding sunroof
see Sliding sunroof Time
Setting ........................................... 131
Setting summer/standard time .....132
Setting the forma t......................... 131
Setting the time ............................. 131
Setting the time/date forma t........ 131
Setting the time zone ..................... 132
Timing (RACETIMER) .........................344
Tiredness assistant see ATTENTION ASSIST
Tire pressure
Calling up (on-board computer) .....461
Checking manually ........................461
Display message ............................ 382
Important safety notes ..................461
Maximum ....................................... 461
Notes ............................................. 459
Recommended ............................... 458
Tire pressure monitoring system
Checking the tire pressure
electronically ................................. 463
Function/notes ............................. 461
General notes ................................ 461
Important safety notes ..................462
Restarting ...................................... 464
Warning lamp ................................. 398
Warning message .......................... 463
Tires
Aspect ratio (definition) .................476
Average weight of the vehicle
occupants (definition) ....................474
Bar (definition) ............................... 474
Characteristics .............................. 474
Checking ........................................ 455
Definition of terms .........................474
Directio nofrotation ...................... 477
Display message ............................ 382
Distributio nofthe vehicle
occupants (definition) ....................476
DOT, Tire Identification Number
(TIN) .............................................. .473
DOT (Department of
Transportation) (definition) ............474
GAWR (Gross Axle Weight Rating)
(definition) ..................................... 475
GVW (Gross Vehicle Weight)
(definition) ..................................... 47522
Index
Page 78 of 494
2. This device must be able to
accommodate interference that is
received, including interference which
could cause unwanted functions.
Unapproved modifications to this device
may lead to withdrawal of permissio
nto
operate it.
The product label with FCC ID and IC
certification number can be found in the
battery case of the SmartKey.
Important information for using
KEYLESS-GO R
You can use the KEYLESS-GO key as a
conventional key.
R You can combine KEYLESS-GO functions
with those of a conventional key, e.g. open
with KEYLESS-GO and close with the
& button.
R Always carry your KEYLESS-GO key on your
person.
R Never keep the KEYLESS-GO key with:
-electronic equipment, such as your
mobile phone or another key
- metal objects, such as coins or metal foil
This may impair the functioning of
KEYLESS-GO.
R To open or close the vehicle, the KEYLESS-
GO key should be no more than 3 ft (1 m)
from the door or trunk.
R If the vehicle is parked for more than
72 hours, the KEYLESS-GO function is
deactivated. Pull one of the outer door
handles and turn on the ignition to
reactivate the KEYLESS-GO function.
R When the KEYLESS-GO key is removed
from the vehicle, it is possible that the
system may not recognize it. In this case,
the vehicle cannot be locked or started with
KEYLESS-GO.
R If the KEYLESS-GO key has been removed
from the vehicle, e.g. if a passenger leaves
the vehicle with the KEYLESS-GO key:
- while someone is holding the Start/Stop
button or attempting to lock the vehicle using the outer door handle, the
Key Not Detected message will appear in
the multifunction display.
- while the engine is running, the red Key Not Detected message will appear in
the multifunction display as you pull
away. Find the KEYLESS-GO key and
change its position in the vehicle. Place
the KEYLESS-GO key in a location such
as the front-passenger seat, or carry it in
your shirt pocket.
R If you have started the engine using the
Start/Stop button, you can turn if off again
by:
-pressing the Start/Stop button again
- inserting the KEYLESS-GO key into the
ignition lock when the vehicle is
stationary and the automatic
transmission is in parking position P.
R You may accidentally unlock the vehicle if
the KEYLESS-GO key is within 3 ft (1 m) of
the vehicle and:
- a jet of water splashes an outer door
handle
or
- you are cleaning an outer door handle.
R Note that the engine can be started by any
vehicle occupant if a KEYLESS-GO key is in
the vehicle.
Option 1: there is a KEYLESS-GO key in the
vehicle and a KEYLESS-GO key outside the
vehicle. If you leave the KEYLESS-GO key
behind when you get out and lock the
vehicle, a message does not appear in the
multifunction display.
Option 2: there is a KEYLESS-GO key in the
vehicle but no KEYLESS-GO key outside the
vehicle. When you get out and try to lock
the vehicle, the Key Detected in Vehicle message appears in the
multifunction display .The vehicle is not
locked in this case.
When starting the engine and while driving,
KEYLESS-GO also checksw hether a valid key76
SmartKeyOpening and closing
Page 288 of 494
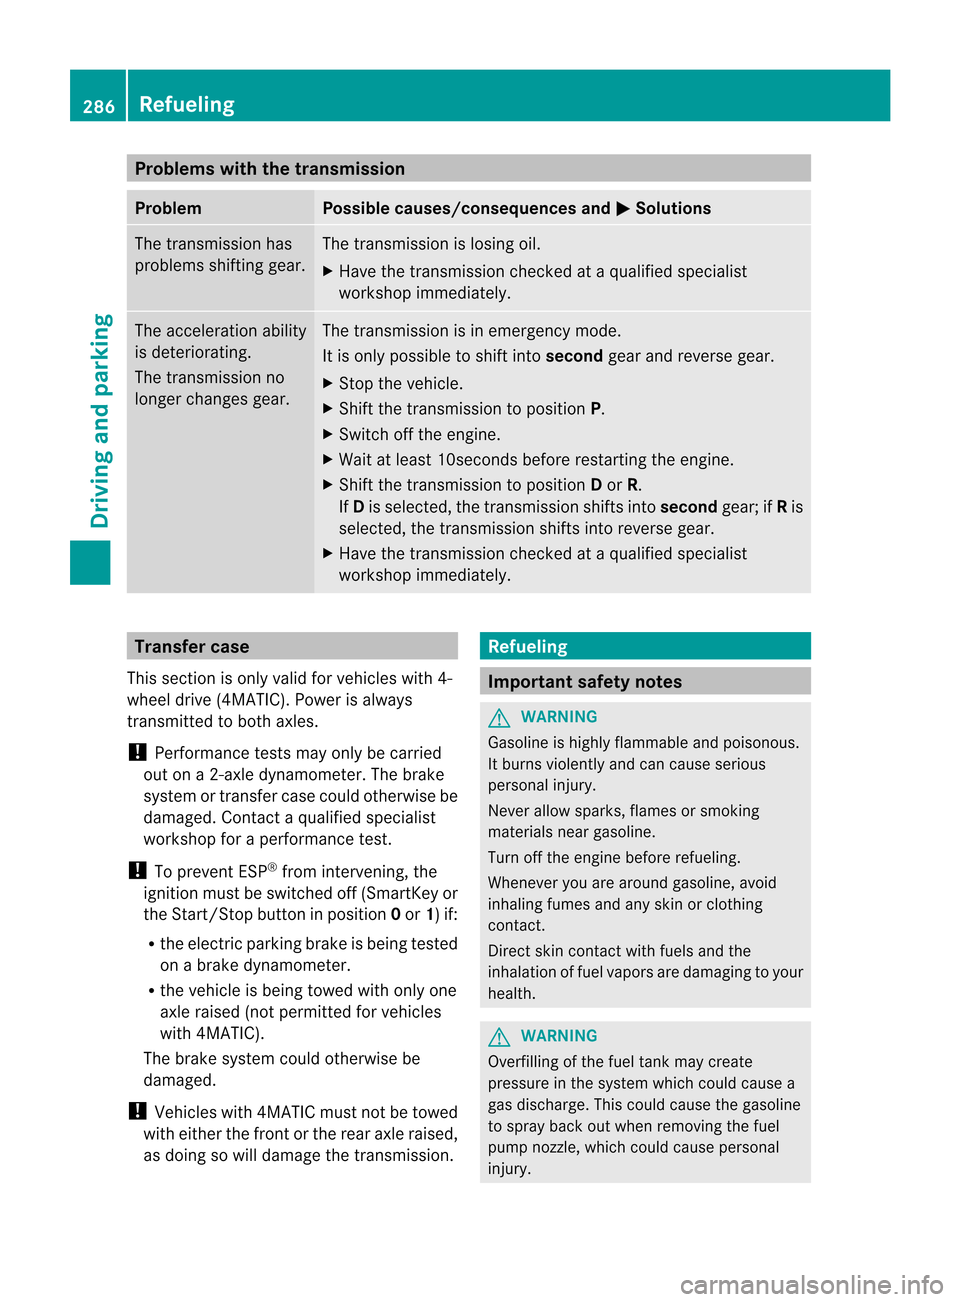
Problems with the transmission
Problem Possible causes/consequences and
M Solutions
The transmission has
problems shifting gear. The transmission is losing oil.
X
Have the transmission checked at a qualified specialist
workshop immediately. The acceleration ability
is deteriorating.
The transmission no
longer changes gear. The transmission is in emergency mode.
It is only possible to shift into
secondgear and reverse gear.
X Stop the vehicle.
X Shift the transmission to position P.
X Switch off the engine.
X Wait at least 10seconds before restarting the engine.
X Shift the transmission to position Dor R.
If D is selected, the transmission shifts into secondgear; ifRis
selected, the transmission shifts into reverse gear.
X Have the transmission checked at a qualified specialist
workshop immediately. Transfer case
This section is only valid for vehicles with 4-
wheel drive (4MATIC). Power is always
transmitted to both axles.
! Performance tests may only be carried
out on a 2-axle dynamometer. The brake
system or transfer case could otherwise be
damaged. Contact a qualified specialist
workshop for a performance test.
! To prevent ESP ®
from intervening, the
ignition must be switched off (SmartKey or
the Start/Stop button in position 0or 1) if:
R the electric parking brake is being tested
on a brake dynamometer.
R the vehicle is being towed with only one
axle raised (not permitted for vehicles
with 4MATIC).
The brake system could otherwise be
damaged.
! Vehicles with 4MATIC must not be towed
with either the front or the rear axle raised,
as doing so will damage the transmission. Refueling
Important safety notes
G
WARNING
Gasoline is highly flammable and poisonous.
It burns violently and can cause serious
personal injury.
Never allow sparks, flames or smoking
materials near gasoline.
Turn off the engine before refueling.
Whenever you are around gasoline, avoid
inhaling fumes and any skin or clothing
contact.
Direct skin contact with fuels and the
inhalation of fuel vapors are damaging to your
health. G
WARNING
Overfilling of the fuel tank may create
pressure in the system which could cause a
gas discharge. This could cause the gasoline
to spray back out when removing the fuel
pump nozzle, which could cause personal
injury. 286
RefuelingDriving and parking
Page 341 of 494
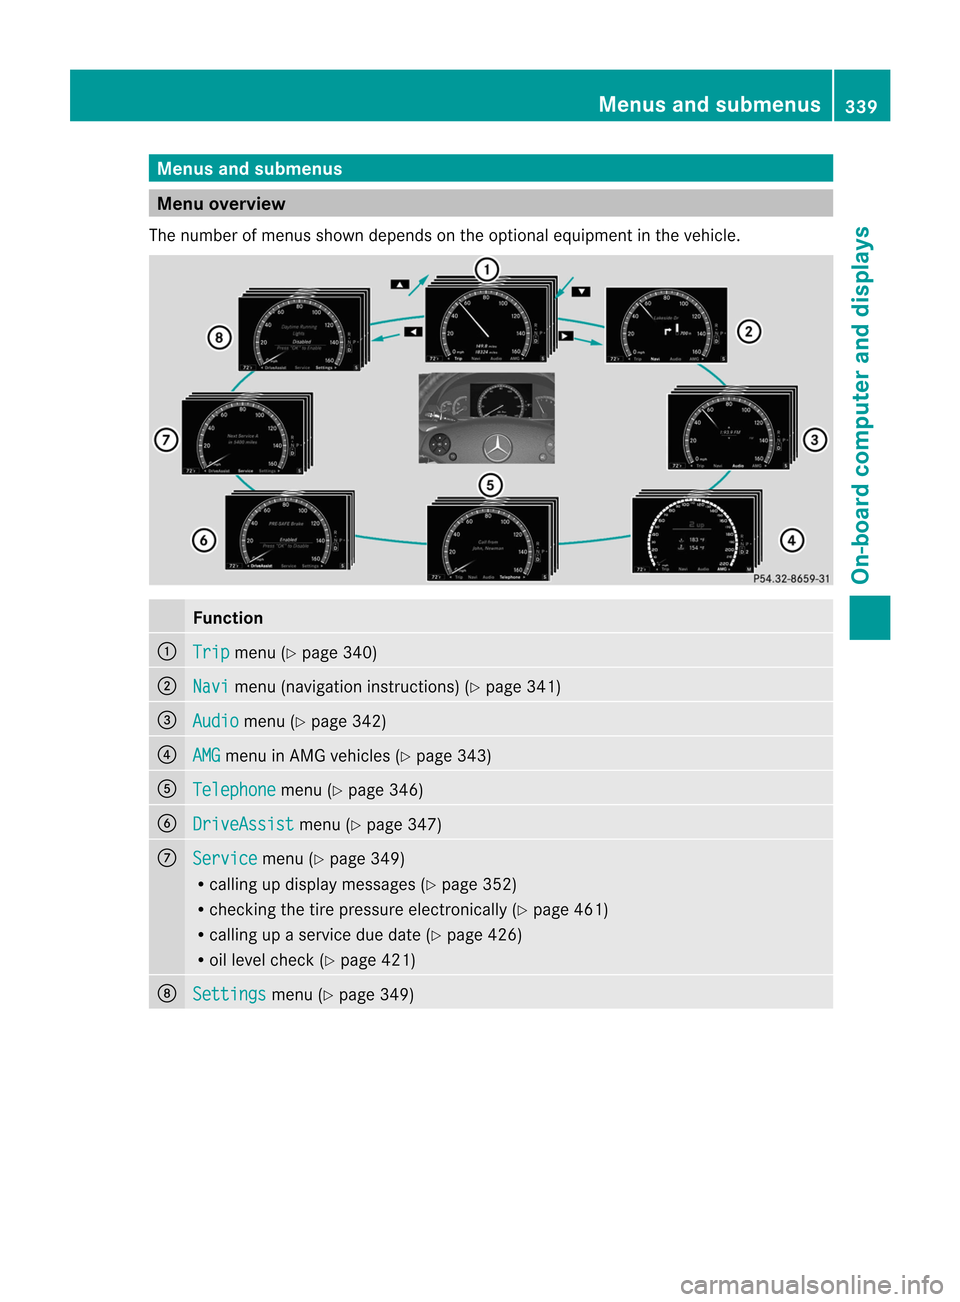
Menus and submenus
Menu overview
The number of menus show ndepends on the optional equipment in the vehicle. Function
:
Trip menu (Y
page 340) ;
Navi menu (navigation instructions) (Y
page 341)=
Audio menu (Y
page 342) ?
AMG menu in AMG vehicles (Y
page 343)A
Telephone menu (Y
page 346) B
DriveAssist menu (Y
page 347) C
Service menu (Y
page 349)
R calling up display messages ( Ypage 352)
R checking the tire pressure electronically (Y page 461)
R calling up a service due date (Y page 426)
R oil level chec k(Ypage 421) D
Settings menu (Y
page 349) Menus and submenus
339On-board computer and displays Z
Page 351 of 494
X
Press the =or; button on the
steering wheel to select the DriveAssistmenu.
X Press 9or: to select Blind Spot
Assist .
X Press the abutton.
The curren tselection is displayed.
X To activate/deactivate: press thea
button again.
Activating/deactivating Active Lane
Keeping Assist You can use the
Lane Keeping Assist function to activat
eor deactivate Active Lane
Keeping Assist (Y page 330).
X Press the =or; button on the
steering wheel to select the DriveAssistmenu.
X Press 9or: to select Lane Keeping Assist .
X Press the abutton.
The current selection is displayed.
X To activate/deactivate: press thea
button again.
When Active Lane Keeping Assist is activated,
the à symbol appears in the multifunction
display when the ignitio nis on. Maintenance menu
In the Service menu, you have the following
options:
R calling up display messages (Y page 352)
R checking the tire pressure electronically
(Y page 461)
R calling up a service due date
(Y page 426)
R checking the oil level (Y page 421) Settings menu
Introduction The
Settings menu can be used for:
R Switching the daytime running lamps on/
off
R switching Adaptive Highbeam Assist on/
off
R showing or hiding the additional
speedometer
R selecting the units for speed and distance
R activating/deactivating the radar sensor
system
Switching the daytime running lamps
on/off This function is not available in Canada.
If you have activated the
Daytime running
lights function and the light switch is in the
$ orc position, the daytime running
lamps are automatically switched on when
the engine is running.
Depending on the ambient light, the following
will additionally light up:
R parking lamps
R tail lamps
R license plate lamp
R side marker lamps
If you turn the light switch to a different
position, the corresponding lights are
switched on. If you switch off the daytime
running lamps at night, make sure that the
light switch is set to Lorc.
The factory setting is On .
X Press the =or; button on the
steering wheel to select the Settings menu.
X Press the 9or: button to select
daytime running lamps .
X Press the abutton to confirm.
X To activate/deactivate: pressa
again. Menus and submenus
349On-board computer and displays Z
Page 375 of 494
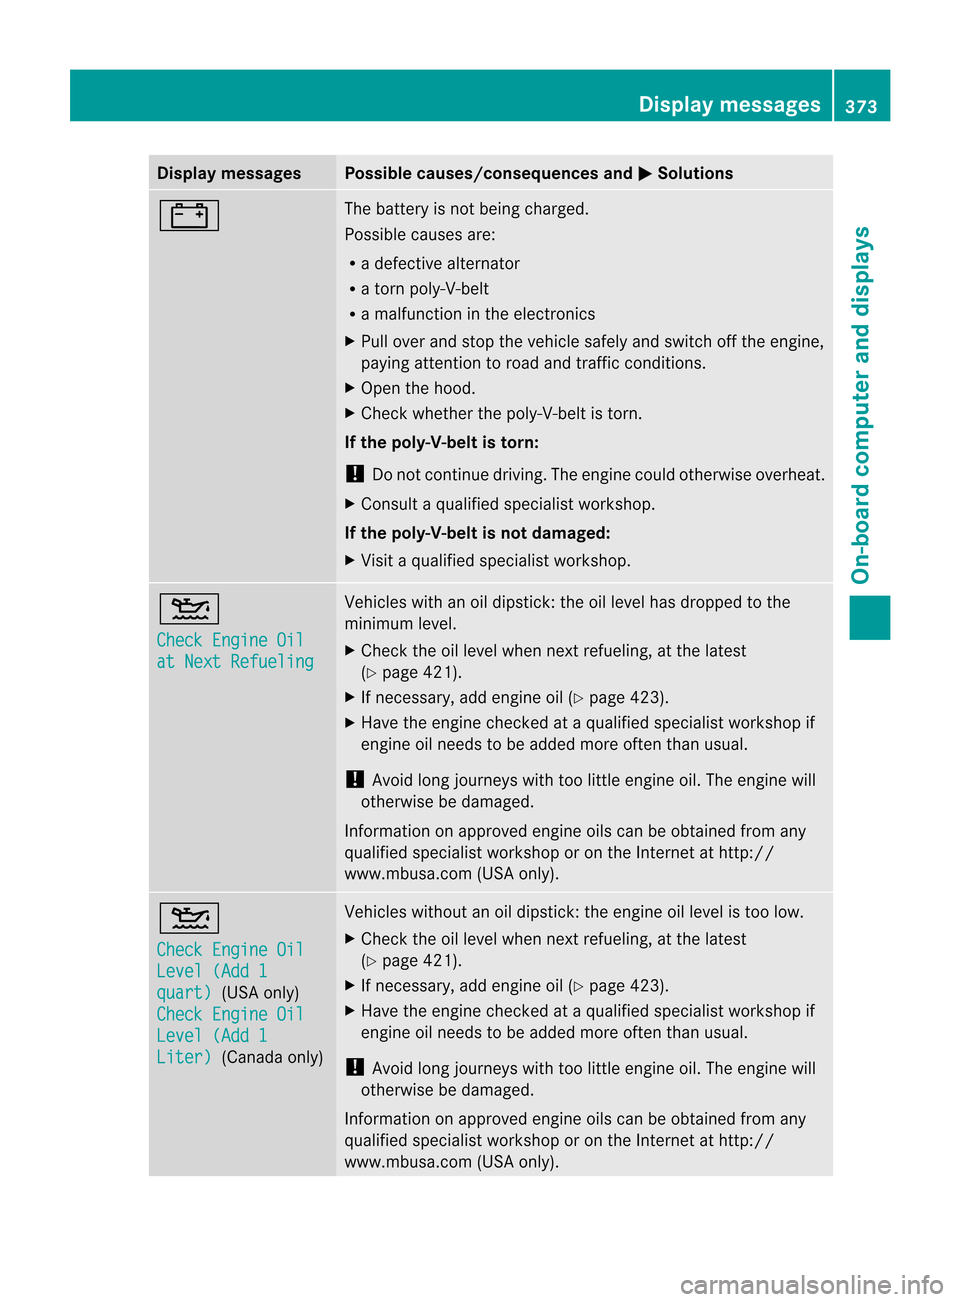
Display messages Possible causes/consequences and
M Solutions
# The battery is no
tbeing charged.
Possible causes are:
R a defective alternator
R a torn poly-V-belt
R a malfunction in the electronics
X Pull over and stop the vehicle safely and switch off the engine,
paying attention to road and traffic conditions.
X Open the hood.
X Check whether the poly-V-belt is torn.
If the poly-V-belt is torn:
! Do not continue driving. The engine could otherwise overheat.
X Consult a qualified specialist workshop.
If the poly-V-belt is not damaged:
X Visit a qualified specialist workshop. 4
Check Engine Oil
at Next Refueling Vehicles with an oil dipstick
:the oil level has dropped to the
minimum level.
X Check the oil level when next refueling, at the latest
(Y page 421).
X If necessary, add engine oil (Y page 423).
X Have the engine checked at a qualified specialist workshop if
engine oil needs to be added more often than usual.
! Avoid long journeys with too little engine oil. The engine will
otherwise be damaged.
Information on approved engine oils can be obtained from any
qualified specialist workshop or on the Internet at http://
www.mbusa.com (USA only). 4
Check Engine Oil
Level (Add 1
quart) (USA only)
Check Engine Oil Level (Add 1
Liter) (Canada only) Vehicles without an oil dipstick: the engine oil level is too low.
X
Check the oil level when next refueling, at the latest
(Y page 421).
X If necessary, add engine oil (Y page 423).
X Have the engine checked at a qualified specialist workshop if
engine oil needs to be added more often than usual.
! Avoid long journeys with too little engine oil. The engine will
otherwise be damaged.
Information on approved engine oils can be obtained from any
qualified specialist workshop or on the Internet at http://
www.mbusa.com (USA only). Display messages
373On-board computer and displays Z
Page 376 of 494
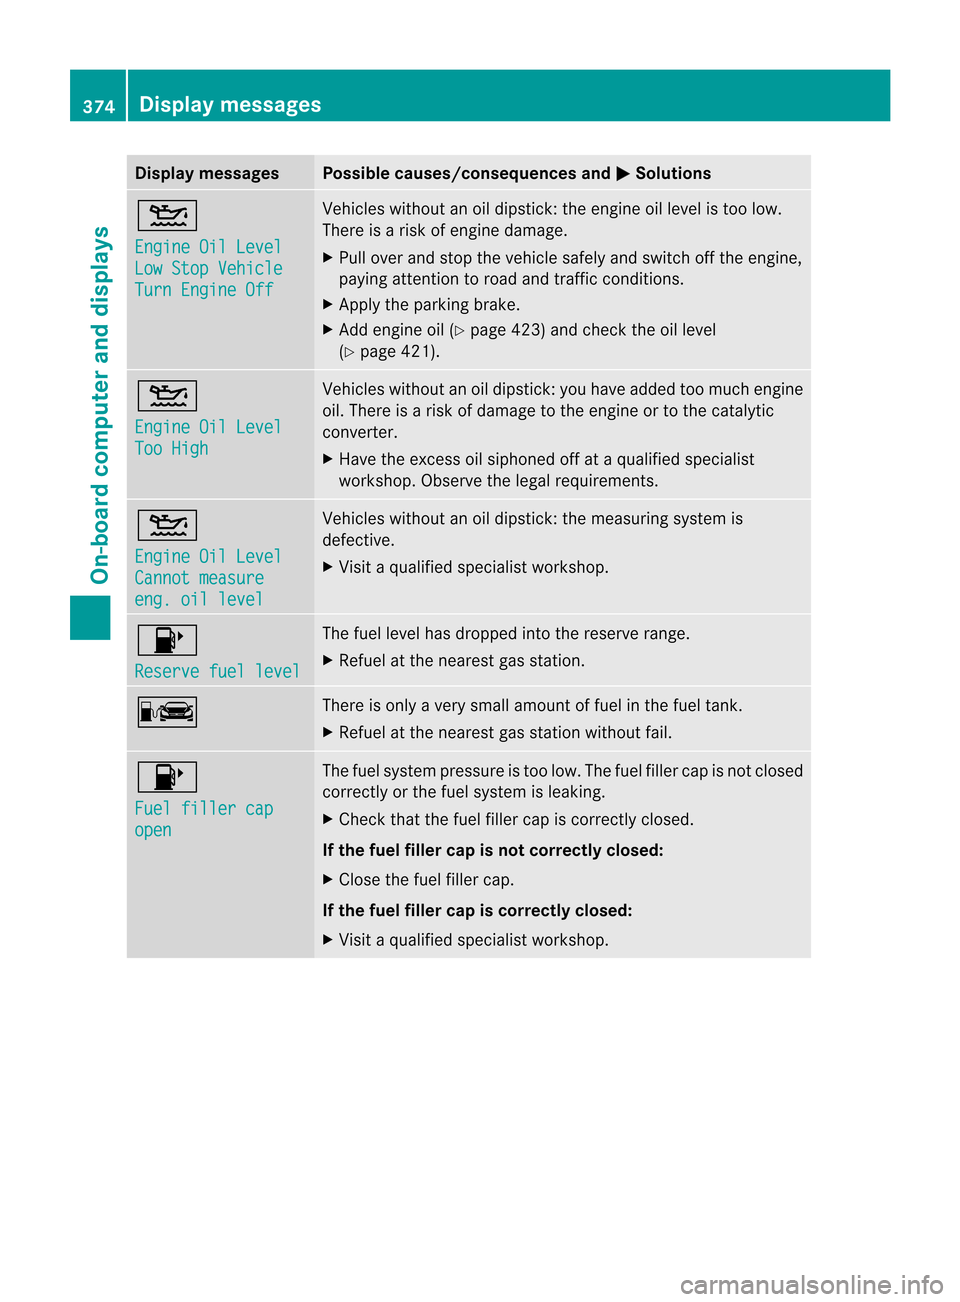
Display messages Possible causes/consequences and
M Solutions
4
Engine Oil Level
Low Stop Vehicle
Turn Engine Off Vehicles without an oil dipstick
:the engine oil level is too low.
There is a risk of engine damage.
X Pull over and stop the vehicle safely and switch off the engine,
paying attention to road and traffic conditions.
X Apply the parking brake.
X Add engine oil (Y page 423) and check the oil level
(Y page 421). 4
Engine Oil Level
Too High Vehicles without an oil dipstick: you have added too much engine
oil. There is a risk of damage to the engine or to the catalytic
converter.
X
Have the excess oil siphoned off at a qualified specialist
workshop. Observe the legal requirements. 4
Engine Oil Level
Cannot measure
eng. oil level Vehicles without an oil dipstick: the measuring system is
defective.
X
Visit a qualified specialist workshop. 8
Reserve fuel level The fuel level has dropped into the reserve range.
X
Refuel at the nearest gas station. C There is only a very small amount of fuel in the fuel tank.
X
Refuel at the nearest gas station without fail. 8
Fuel filler cap
open The fuel system pressure is too low. The fuel filler cap is not closed
correctly or the fuel system is leaking.
X
Check that the fuel filler cap is correctly closed.
If the fuel filler cap is not correctly closed:
X Close the fuel filler cap.
If the fuel filler cap is correctly closed:
X Visit a qualified specialist workshop. 374
Display messagesOn-board computer and displays
Page 379 of 494
Display messages Possible causes/consequences and
M Solutions
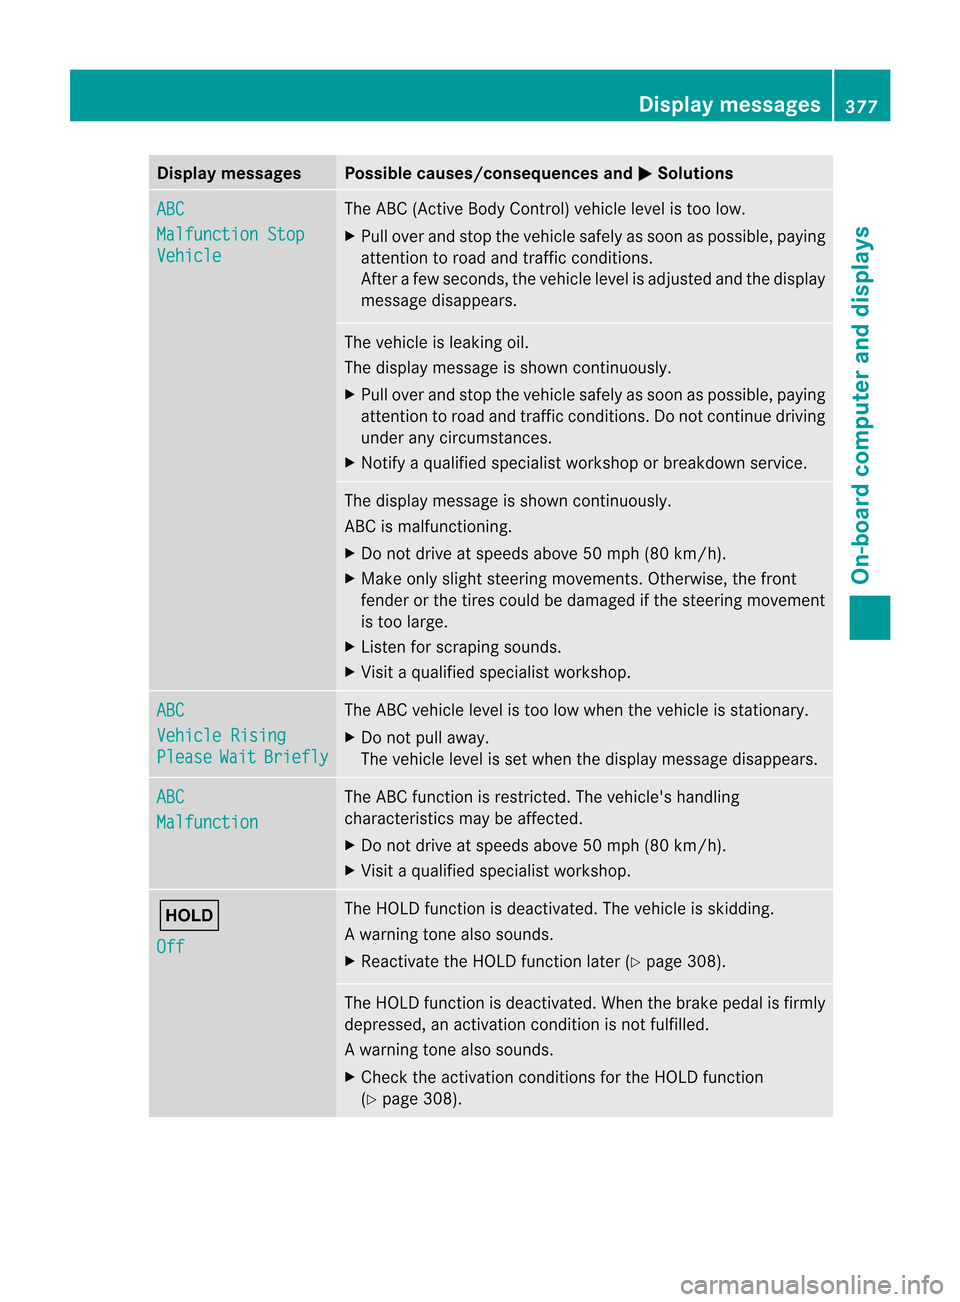
ABC
Malfunction Stop
Vehicle The ABC (Active Body Control) vehicle level is too low.
X
Pull ove rand stop the vehicle safely as soo nas possible, paying
attention to road and traffic conditions.
After a few seconds, the vehicle level is adjusted and the display
message disappears. The vehicle is leaking oil.
The display message is shown continuously.
X Pull over and stop the vehicle safely as soon as possible, paying
attention to road and traffic conditions. Do not continue driving
under any circumstances.
X Notify a qualified specialist workshop or breakdown service. The display message is shown continuously.
ABC is malfunctioning.
X Do not drive at speeds above 50 mph (80 km/h).
X Make only slight steering movements. Otherwise, the front
fender or the tires could be damaged if the steering movement
is too large.
X Listen for scraping sounds.
X Visit a qualified specialist workshop. ABC
Vehicle Rising
Please Wait Briefly The ABC vehicle level is too low when the vehicle is stationary.
X
Do not pull away.
The vehicle level is set when the display message disappears. ABC
Malfunction The ABC function is restricted. The vehicle's handling
characteristics may be affected.
X
Do not drive at speeds above 50 mph (80 km/h).
X Visit a qualified specialist workshop. ë
Off The HOLD function is deactivated. The vehicle is skidding.
Aw
arning tone also sounds.
X Reactivate the HOLD function later (Y page 308). The HOLD function is deactivated. When the brak
epedal is firmly
depressed, an activation condition is not fulfilled.
Aw arning tone also sounds.
X Check the activation conditions for the HOLD function
(Y page 308). Display messages
377On-board computer and displays Z
Page 423 of 494
X
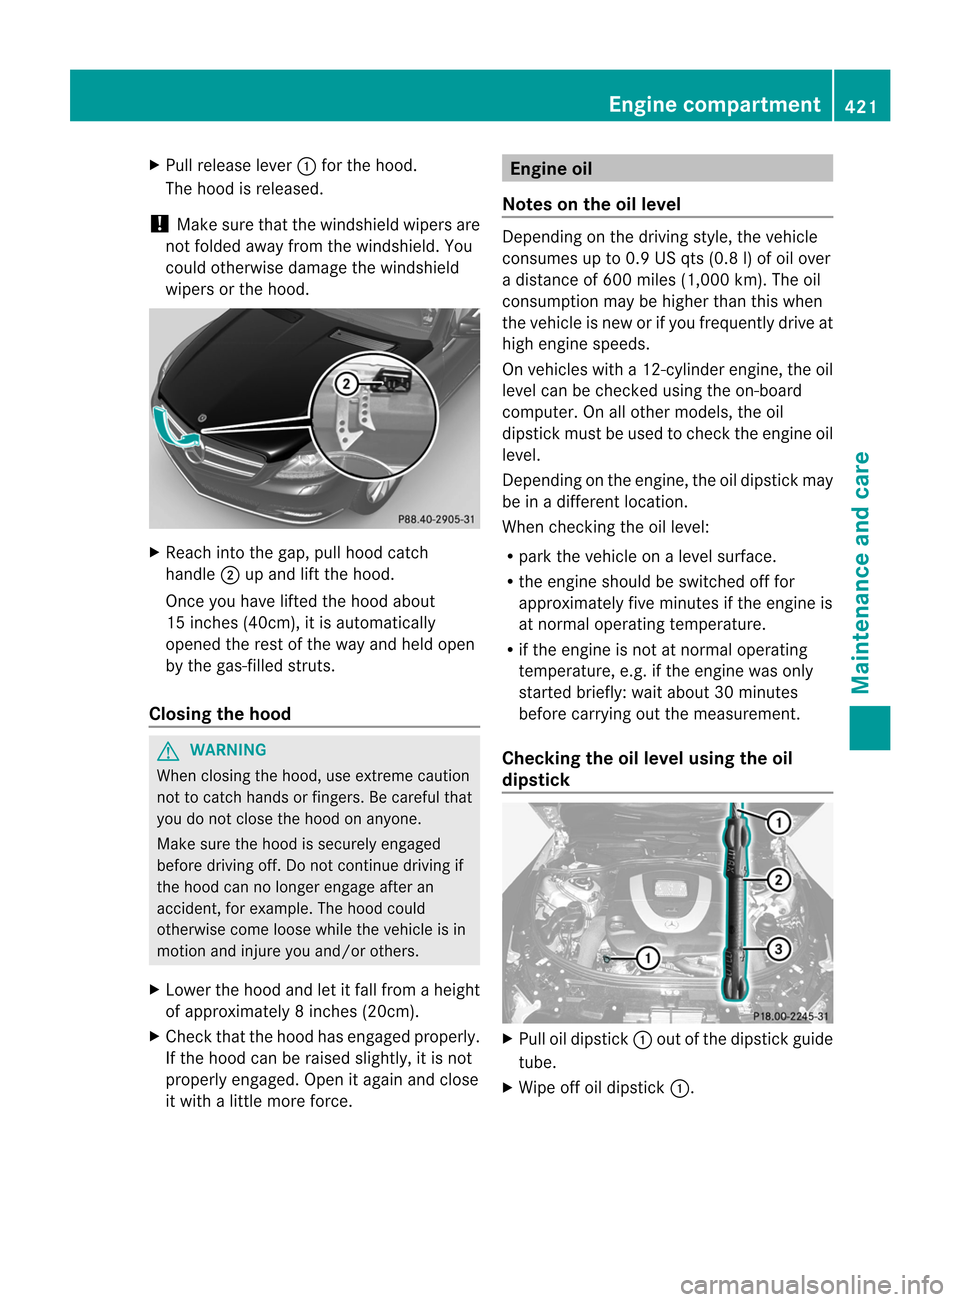
Pull release lever :for the hood.
The hood is released.
! Make sure that the windshield wipers are
not folded away from the windshield. You
could otherwise damage the windshield
wipers or the hood. X
Reach into the gap, pull hood catch
handle ;up and lift the hood.
Once you have lifted the hood about
15 inches (40cm), it is automatically
opened the rest of the way and held open
by the gas-filled struts.
Closing the hood G
WARNING
When closing the hood, use extreme caution
not to catch hands or fingers. Be careful that
you do not close the hood on anyone.
Make sure the hood is securely engaged
before driving off. Do not continue driving if
the hood can no longer engage after an
accident, for example. The hood could
otherwise come loose while the vehicle is in
motion and injure you and/or others.
X Lower the hood and let it fall from a height
of approximately 8inche s(20cm).
X Check that the hood has engaged properly.
If the hood can be raised slightly, it is not
properly engaged. Open it again and close
it with a little more force. Engine oil
Notes on the oil level Depending on the driving style, the vehicle
consumes up to 0.9 US qts
(0.8 l) of oil over
a distance of 600 miles (1,000 km). The oil
consumption may be highe rthan this when
the vehicle is new or if you frequently drive at
high engine speeds.
On vehicles with a 12-cylinder engine, the oil
level can be checked using the on-board
computer. On all other models, the oil
dipstick must be used to check the engine oil
level.
Depending on the engine, the oil dipstick may
be in a different location.
When checking the oil level:
R park the vehicle on a level surface.
R the engine should be switched off for
approximately five minutes if the engine is
at normal operating temperature.
R if the engine is not at normal operating
temperature, e.g. if the engine was only
started briefly: wait about 30 minutes
before carrying out the measurement.
Checking the oil level using the oil
dipstick X
Pull oil dipstick :out of the dipstick guide
tube.
X Wipe off oil dipstick :. Engine compartment
421Maintenance and care Z