fuel MERCEDES-BENZ CL COUPE 2009 Owner's Guide
[x] Cancel search | Manufacturer: MERCEDES-BENZ, Model Year: 2009, Model line: CL COUPE, Model: MERCEDES-BENZ CL COUPE 2009Pages: 421, PDF Size: 10.78 MB
Page 304 of 421
i
The tyre pressure values indicated by the
on-board computer may differ from those
measured at a filling station with a pressure
gauge. The tyre pressures shown by the on-
board computer refer to those measured at
sea level. The tyre pressure values indica-
ted by a pressure gauge when the vehicle
is at high altitude are higher than those
shown by the on-board computer. In this
case, do not reduce the tyre pressures.
i After a teach-in period, the tyre pressure
monitor automatically recognises new
wheels or new sensors. As long as a clear
allocation of the tyre pressure values to the
individual wheels is not possible, the dis-
play message Tyre Pressure Monitor
Active is shown instead of the tyre pres-
sure display. The tyre pressures are already
being monitored.
Restarting the tyre pressure monitor When you restart the tyre pressure monitor,
all existing warning messages are deleted and
the warning lamps go out. The monitor uses
the currently set tyre pressures as the speci-
fied values for monitoring.
In most cases, the tyre pressure monitor will
automatically detect the new reference val-
ues, e.g. if you have:
R changed the tyre pressure
R changed the wheels or tyres
R fitted new wheels or tyres
i You will find the menu overview on
(Y page 214).
If you wish to define the new reference values
manually:
X Use the table on the inside of the fuel filler
flap to ensure that the tyre pressure is set
correctly in all four tyres for the current
operating conditions. Also observe the notes in the section on
tyre pressures (Y
page 298).
X Make sure that the key is in position 2in
the ignition lock.
X Press the =or; button to select the
Service menu.
X Press the 9or: button to select
Tyre pressure.
X Press the abutton.
The current pressure in each individual tyre
is displayed, or the following message
appears:
Tyre pressures displayed after
driving a few minutes
X Press the :button.
The following message appears in the
multi-function display:
Use current pressure values as new
reference values
X Press the abutton.
The following message appears in the
multi-function display:
Tyre pressure monitor restarted
After a few minutes of driving, the current
pressures are adopted as the new monitor-
ing values.
Cancelling the restart X
Press the %button.
or
X Press the 9button to leave the menu.
Other messages in the multi-function
display If in multi-function display the following mes-
sages appear:
Please correct the tyre pressure
X
Check the tyre pressure on all four wheels
and correct it if necessary.
i If the wheel positions on the vehicle are
interchanged, the tyre pressures may be
displayed for the wrong positions for a Tyres and wheels
301Operation
216_AKB; 2; 3, en-GB
bjanott, Version: 2.11.7.7 2009-02-27T14:54:17+01:00 - Seite 301 Z
Dateiname: 6515230602_buchblock.pdf; erzeugt am 04. Mar 2009 11:16:28; WK
Page 309 of 421
waves. This may cause the maximum per-
missible water depth to be exceeded.
Failure to observe these notes may result
in damage to the engine, electrical systems
and transmission. Driving abroad
Points to remember
An extensive Mercedes-Benz Service network
is also available in other countries. The
Service Hotline's current telephone numbers
for use when you are abroad are to be found
in the "Service24h" chapter of the Service
Booklet.
Only low-octane fuel is available in certain
countries.
You can find further information about fuel
grades on (Y page 290). Symmetrical dipped beam
If your journey takes you to countries where
vehicles are driven on sides of the road oppo-
site to the country in which the vehicle is reg-
istered, your headlamps must be switched to
symmetrical dipped beam. Oncoming traffic
will be dazzled less.
X Have the headlamps switched over at a
qualified specialist workshop, e. g. a
Mercedes-Benz Service Centre. G
Risk of accident
Remember to set the headlamps back to
asymmetrical dipped beam when you return
to driving on the same side of the road as that
of the country in which your vehicle was reg-
istered. You may otherwise dazzle the oncom-
ing traffic and could cause an accident. Service
ASSYST PLUS service interval display
The ASSYST PLUS service interval display
informs you of the next service due date. The
service due date is shown in the multi-func-
tion display, for example:
Service A due in .. days
Service A due in .. km
Service A due
The letter indicates how much time the work-
shop will require to carry out the service work.
The letters displayed range from Afor a short
service duration to Hfor a long service dura-
tion.
The ASSYST PLUS service interval display
does not take into account any periods of
time during which the battery is disconnec-
ted.
To maintain the time-dependent service
schedule:
X Note down the service due date displayed
before disconnecting the battery.
or
X Subtract the battery disconnection periods
from the service date shown on the display
after reconnecting the battery. Hiding the service message
If the service due date has not yet been
exceeded, the service message disappears
automatically after a few seconds. You can
also hide the service message yourself.
X Press the %button on the multi-func-
tion steering wheel. Service due date exceeded
A display message is shown in the multi-func-
tion display, for example:
Service A due
Service A .. days overdue 306
ServiceOperation
216_AKB; 2; 3, en-GB
bjanott
,V ersion: 2.11.7.7
2009-02-27T14:54:17+01:00 - Seite 306
Dateiname: 6515230602_buchblock.pdf; erzeugt am 04. Mar 2009 11:16:29; WK
Page 312 of 421
cialist workshop immediately, e.g. a
Mercedes-Benz Service Centre.
X
Remove the following types of dirt immedi-
ately, whilst avoiding rubbing too hard.
Soak:
R
insect remains with insect remover
R bird droppings with water
and rinse off the treated surface after-
wards.
Remove:
R tree resin, oils, fuels and greases by rub-
bing gently with a cloth soaked in petro-
leum ether or lighter fluid.
R tar stains with tar remover
R wax with silicone remover
! Do not affix:
R stickers
R films
R magnetic plates or similar items
to painted surfaces. Otherwise, you could
damage the paintwork.
Cleaning the windows X
Clean the inside and outside of the win-
dows with a damp cloth and a cleaning
product approved and recommended by
Mercedes-Benz.
! Clean the water drainage channels of the
windscreen and the rear window at regular
intervals. Under certain circumstances,
deposits such as leaves, petals and pollen
may prevent water from draining away
leading to corrosion damage.
Cleaning the wiper blades G
Risk of injury
Before cleaning the windscreen or wiper
blades, turn the key to position 0in the igni-
tion lock or press the Start/Stop button* until all indicator lamps have gone out in the instru-
ment cluster. The windscreen wipers could
otherwise move and cause injury.
! Only fold the windscreen wipers away
from the windscreen when vertical. Other-
wise, you will damage the bonnet.
! Do not clean the wiper blades too often,
as this will result in damage to the graphite
coating. This could cause wiper noise.
X Fold the wiper arms away from the wind-
screen.
X Clean the wiper blades carefully with a
damp cloth.
X Fold the wiper arms back again before
switching on the ignition.
Cleaning the headlamps X
Clean the plastic lenses of the headlamps
with a wet sponge and windscreen washer
fluid or cleaning cloths.
! Only use washer fluid or cleaning cloths
suitable for plastic lenses. Unsuitable
washer fluid or cleaning cloths could
scratch or damage the plastic lenses of the
headlamps. Care
309Operation
* optional
216_AKB; 2; 3, en-GB
bjanott,
Version: 2.11.7.7 2009-02-27T14:54:17+01:00 - Seite 309 Z
Dateiname: 6515230602_buchblock.pdf; erzeugt am 04. Mar 2009 11:16:30; WK
Page 345 of 421
Display messages
Possible causes/consequences and
X
X Solutions  Close
doors to
lock vehi‐
cle At least one door is open.
X
Close all doors and lock the vehicle again. & inopera‐
tive Bat‐
tery low The on-board voltage is too low. The auxiliary heating/venti-
lation* has switched off or cannot be switched on.
X
Drive for a longer distance.
The battery is being charged. The auxiliary heating/venti-
lation *can be reactivated as soon as there is sufficient on-
board voltage. & inopera‐
tive
Refuel
vehicle The fuel level in the fuel tank is too low. The auxiliary heat-
ing* cannot be switched on.
X
Refuel at the nearest filling station. & inopera‐
tive See
Owner's
Manual
The auxiliary heating
*is temporarily malfunctioning or is
defective.
X When the vehicle is on a level surface and the engine has
cooled down, make up to four attempts to switch on the
auxiliary heating*, waiting several minutes between each
attempt.
X If the auxiliary heating* does not switch on, visit a qualified
specialist workshop. + Top up
coolant
See Own‐
er's Man‐
ual The coolant level is too low.
X
Top up the coolant, observing the warning notes before
doing so (Y page 294).
X Have the engine cooling system checked at a qualified spe-
cialist workshop if the coolant needs topping up more often
than usual. ? Coolant
Stop vehi‐
cle Turn
engine off The coolant is too hot.
X
Pull over and stop the vehicle safely and switch off the
engine, paying attention to road and traffic conditions.
X Make sure that the air supply to the radiator is not blocked,
e.g. by slush.
X Wait until the display message disappears before restarting
the engine. Otherwise, there is a risk of engine damage.
X Observe the coolant temperature gauge. 342
Display messagesPractical advice
* optional
216_AKB; 2; 3, en-GB
bjanott
,V ersion: 2.11.7.7
2009-02-27T14:54:17+01:00 - Seite 342
Dateiname: 6515230602_buchblock.pdf; erzeugt am 04. Mar 2009 11:16:38; WK
Page 351 of 421
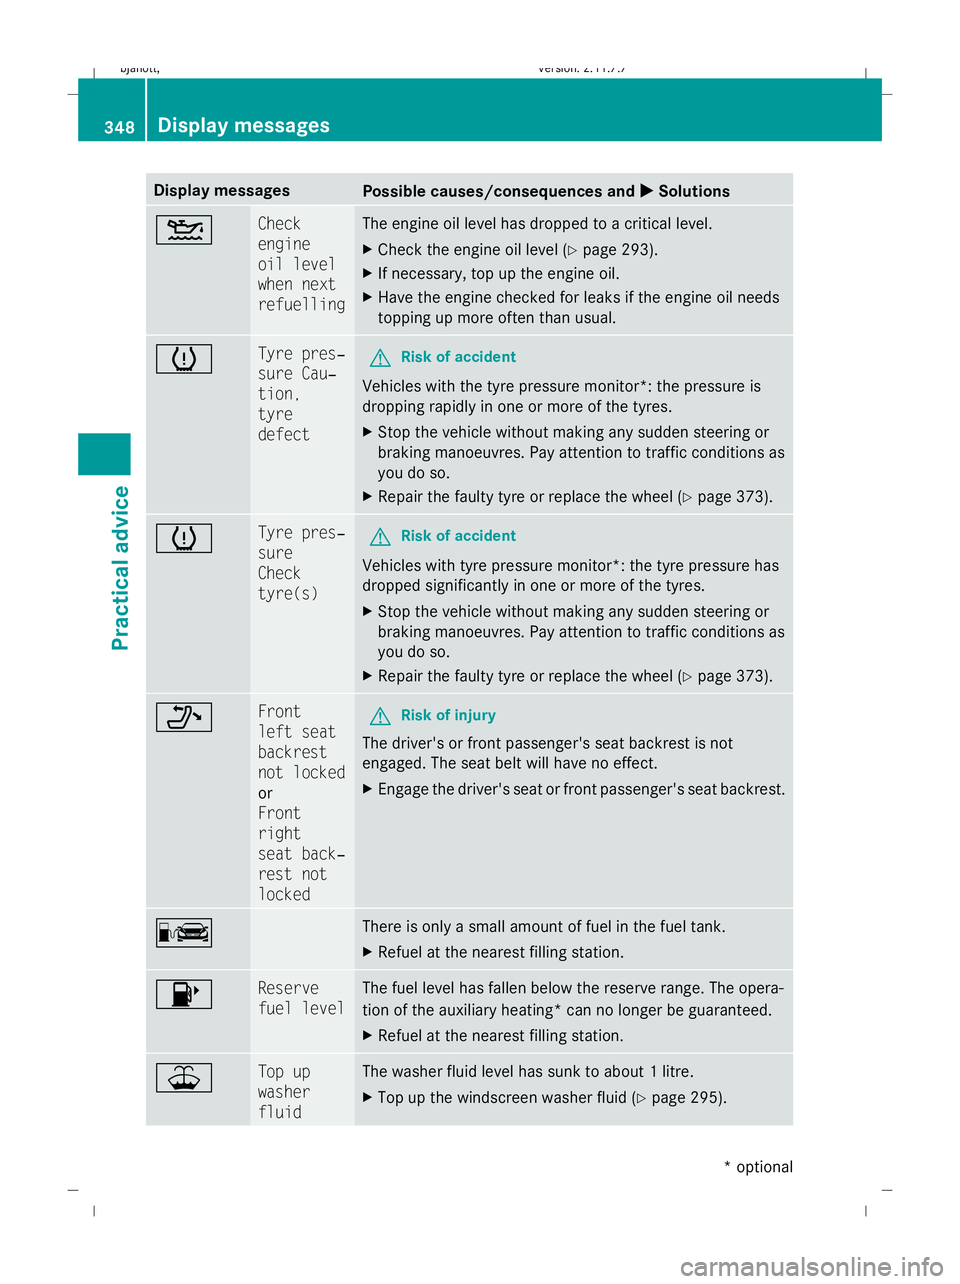
Display messages
Possible causes/consequences and
X
X Solutions 4 Check
engine
oil level
when next
refuelling The engine oil level has dropped to a critical level.
X
Check the engine oil level ( Ypage 293).
X If necessary, top up the engine oil.
X Have the engine checked for leaks if the engine oil needs
topping up more often than usual. h Tyre pres‐
sure Cau‐
tion,
tyre
defect
G
Risk of accident
Vehicles with the tyre pressure monitor*: the pressure is
dropping rapidly in one or more of the tyres.
X Stop the vehicle without making any sudden steering or
braking manoeuvres. Pay attention to traffic conditions as
you do so.
X Repair the faulty tyre or replace the wheel (Y page 373).h Tyre pres‐
sure
Check
tyre(s)
G
Risk of accident
Vehicles with tyre pressure monitor*: the tyre pressure has
dropped significantly in one or more of the tyres.
X Stop the vehicle without making any sudden steering or
braking manoeuvres. Pay attention to traffic conditions as
you do so.
X Repair the faulty tyre or replace the wheel (Y page 373)._ Front
left seat
backrest
not locked
or
Front
right
seat back‐
rest not
locked
G
Risk of injury
The driver's or front passenger's seat backrest is not
engaged. The seat belt will have no effect.
X Engage the driver's seat or front passenger's seat backrest. C There is only a small amount of fuel in the fuel tank.
X
Refuel at the nearest filling station. 8 Reserve
fuel level The fuel level has fallen below the reserve range. The opera-
tion of the auxiliary heating
* can nolonger be guaranteed.
X Refuel at the nearest filling station. ¥ Top up
washer
fluid The washer fluid level has sunk to about 1 litre.
X
Top up the windscreen washer fluid (Y page 295).348
Display messagesPractical advice
* optional
216_AKB; 2; 3, en-GB
bjanott
,V ersion: 2.11.7.7
2009-02-27T14:54:17+01:00 - Seite 348
Dateiname: 6515230602_buchblock.pdf; erzeugt am 04. Mar 2009 11:16:40; WK
Page 359 of 421
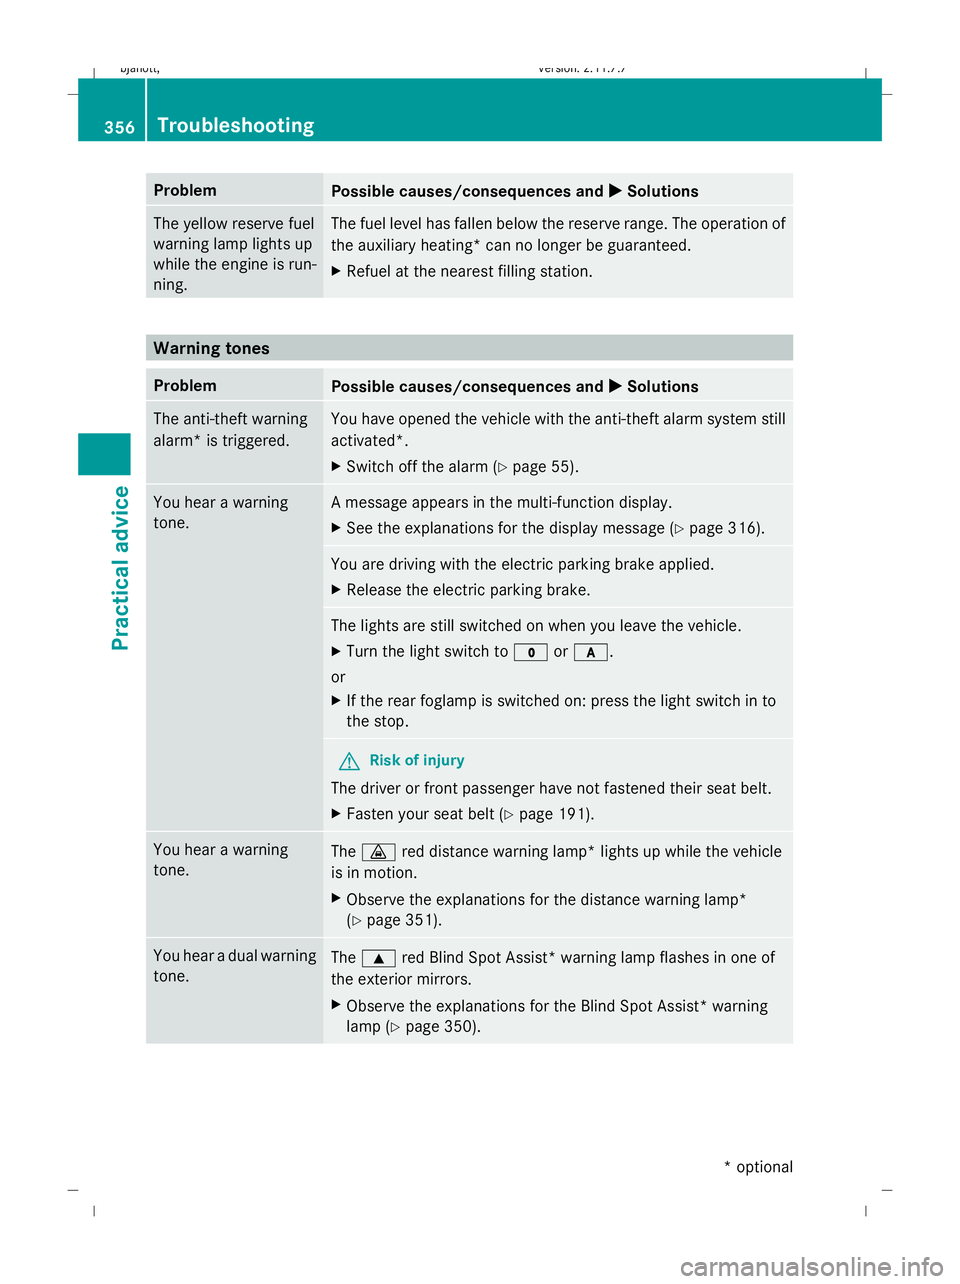
Problem
Possible causes/consequences and
X XSolutions The yellow reserve fuel
warning lamp lights up
while the engine is run-
ning. The fuel level has fallen below the reserve range. The operation of
the auxiliary heating* can no longer be guaranteed.
X
Refuel at the nearest filling station. Warning tones
Problem
Possible causes/consequences and
X XSolutions The anti-theft warning
alarm* is triggered. You have opened the vehicle with the anti-theft alarm system still
activated*.
X
Switch off the alarm (Y page 55).You hear a warning
tone. A message appears in the multi-function display.
X
See the explanations for the display message (Y page 316).You are driving with the electric parking brake applied.
X
Release the electric parking brake. The lights are still switched on when you leave the vehicle.
X
Turn the light switch to $orc.
or
X If the rear foglamp is switched on: press the light switch in to
the stop. G
Risk of injury
The driver or front passenger have not fastened their seat belt.
X Fasten your seat belt (Y page 191).You hear a warning
tone.
The
· red distance warning lamp* lights up while the vehicle
is in motion.
X Observe the explanations for the distance warning lamp*
(Y page 351). You hear a dual warning
tone.
The
9 red Blind Spot Assist* warning lamp flashes in one of
the exterior mirrors.
X Observe the explanations for the Blind Spot Assist* warning
lamp (Y page 350). 356
TroubleshootingPractical advice
* optional
216_AKB; 2; 3, en-GB
bjanott,
Version: 2.11.7.7 2009-02-27T14:54:17+01:00 - Seite 356
Dateiname: 6515230602_buchblock.pdf; erzeugt am 04. Mar 2009 11:16:41; WK
Page 360 of 421
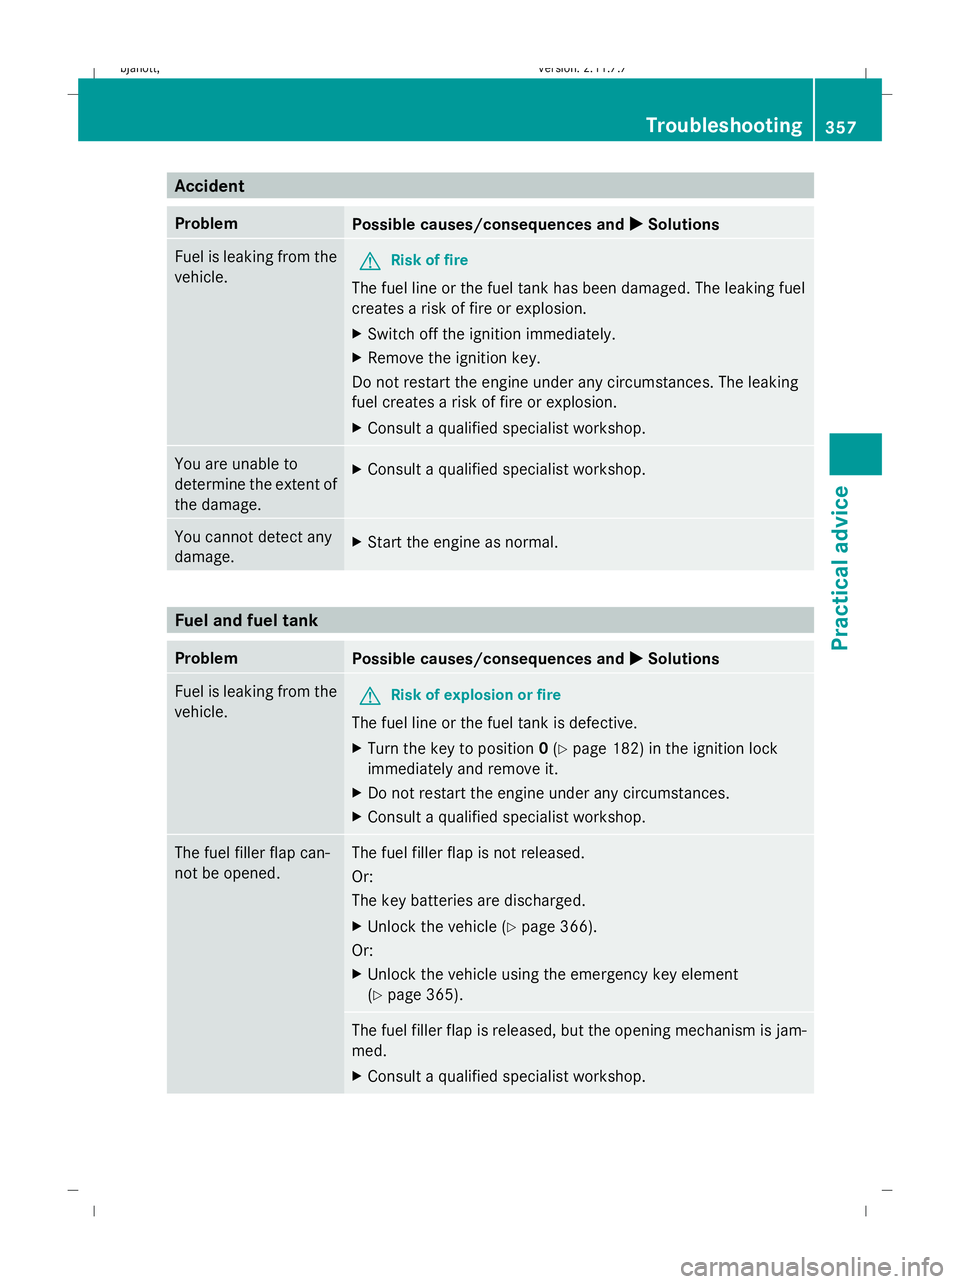
Accident
Problem
Possible causes/consequences and
X
X Solutions Fuel is leaking from the
vehicle.
G
Risk of fire
The fuel line or the fuel tank has been damaged. The leaking fuel
creates a risk of fire or explosion.
X Switch off the ignition immediately.
X Remove the ignition key.
Do not restart the engine under any circumstances. The leaking
fuel creates a risk of fire or explosion.
X Consult a qualified specialist workshop. You are unable to
determine the extent of
the damage.
X
Consult a qualified specialist workshop. You cannot detect any
damage.
X
Start the engine as normal. Fuel and fuel tank
Problem
Possible causes/consequences and
X
X Solutions Fuel is leaking from the
vehicle.
G
Risk of explosion or fire
The fuel line or the fuel tank is defective.
X Turn the key to position 0(Y page 182) in the ignition lock
immediately and remove it.
X Do not restart the engine under any circumstances.
X Consult a qualified specialist workshop. The fuel filler flap can-
not be opened. The fuel filler flap is not released.
Or:
The key batteries are discharged.
X
Unlock the vehicle (Y page 366).
Or:
X Unlock the vehicle using the emergency key element
(Y page 365). The fuel filler flap is released, but the opening mechanism is jam-
med.
X
Consult a qualified specialist workshop. Troubleshooting
357Practical advice
216_AKB; 2; 3, en-GB
bjanott,V ersion: 2.11.7.7
2009-02-27T14:54:17+01:00 - Seite 357 Z
Dateiname: 6515230602_buchblock.pdf; erzeugt am 04. Mar 2009 11:16:41; WK
Page 361 of 421
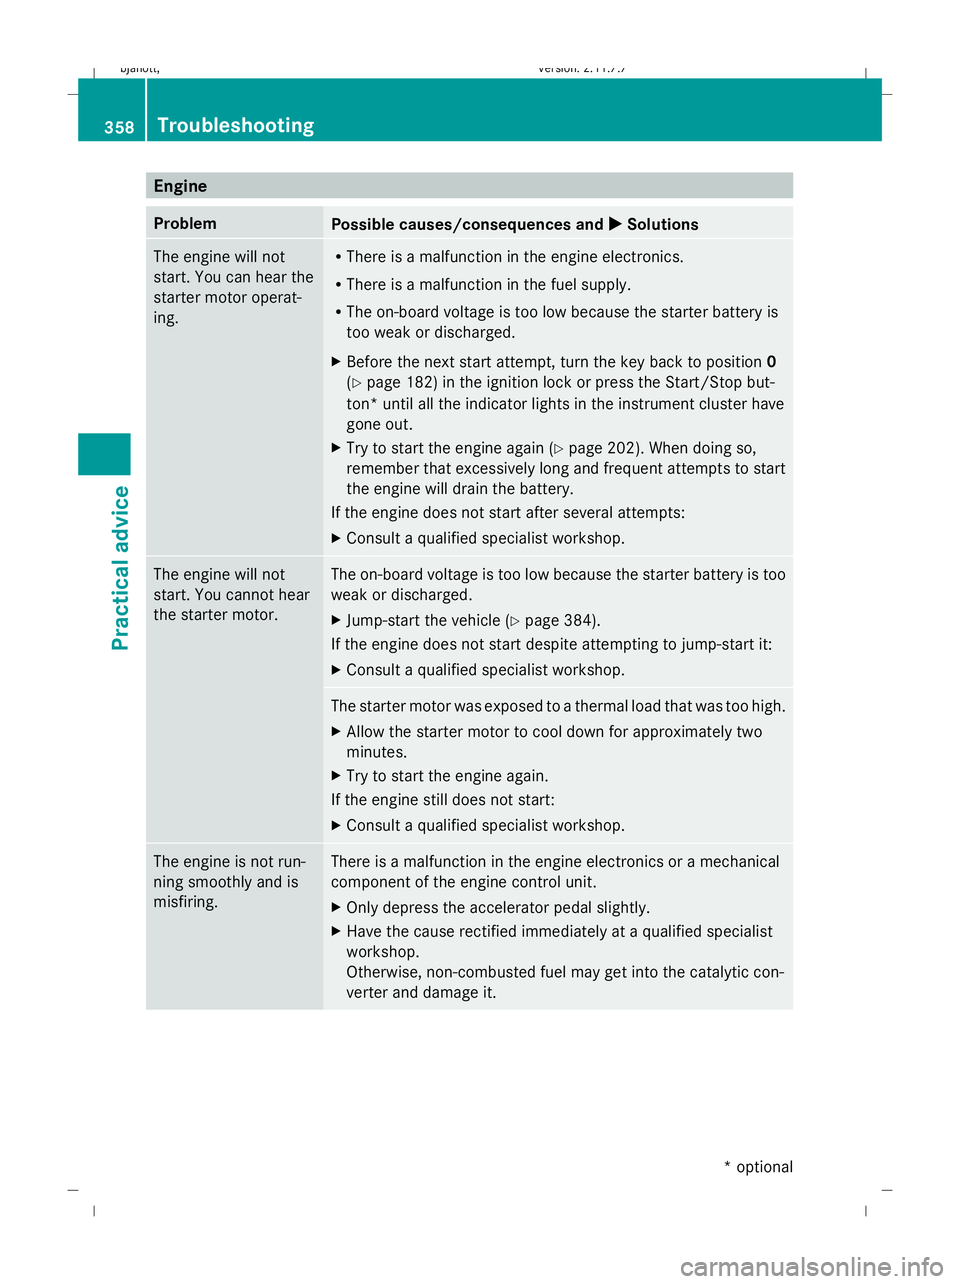
Engine
Problem
Possible causes/consequences and
X XSolutions The engine will not
start. You can hear the
starter motor operat-
ing. R
There is a malfunction in the engine electronics.
R There is a malfunction in the fuel supply.
R The on-board voltage is too low because the starter battery is
too weak or discharged.
X Before the next start attempt, turn the key back to position 0
(Y page 182) in the ignition lock or press the Start/Stop but-
ton* until all the indicator lights in the instrument cluster have
gone out.
X Try to start the engine again (Y page 202). When doing so,
remember that excessively long and frequent attempts to start
the engine will drain the battery.
If the engine does not start after several attempts:
X Consult a qualified specialist workshop. The engine will not
start. You cannot hear
the starter motor. The on-board voltage is too low because the starter battery is too
weak or discharged.
X
Jump-start the vehicle (Y page 384).
If the engine does not start despite attempting to jump-start it:
X Consult a qualified specialist workshop. The starter motor was exposed to a thermal load that was too high.
X
Allow the starter motor to cool down for approximately two
minutes.
X Try to start the engine again.
If the engine still does not start:
X Consult a qualified specialist workshop. The engine is not run-
ning smoothly and is
misfiring. There is a malfunction in the engine electronics or a mechanical
component of the engine control unit.
X
Only depress the accelerator pedal slightly.
X Have the cause rectified immediately at a qualified specialist
workshop.
Otherwise, non-combusted fuel may get into the catalytic con-
verter and damage it. 358
TroubleshootingPractical advice
* optional
216_AKB; 2; 3, en-GB
bjanott,
Version: 2.11.7.7 2009-02-27T14:54:17+01:00 - Seite 358
Dateiname: 6515230602_buchblock.pdf; erzeugt am 04. Mar 2009 11:16:42; WK
Page 367 of 421
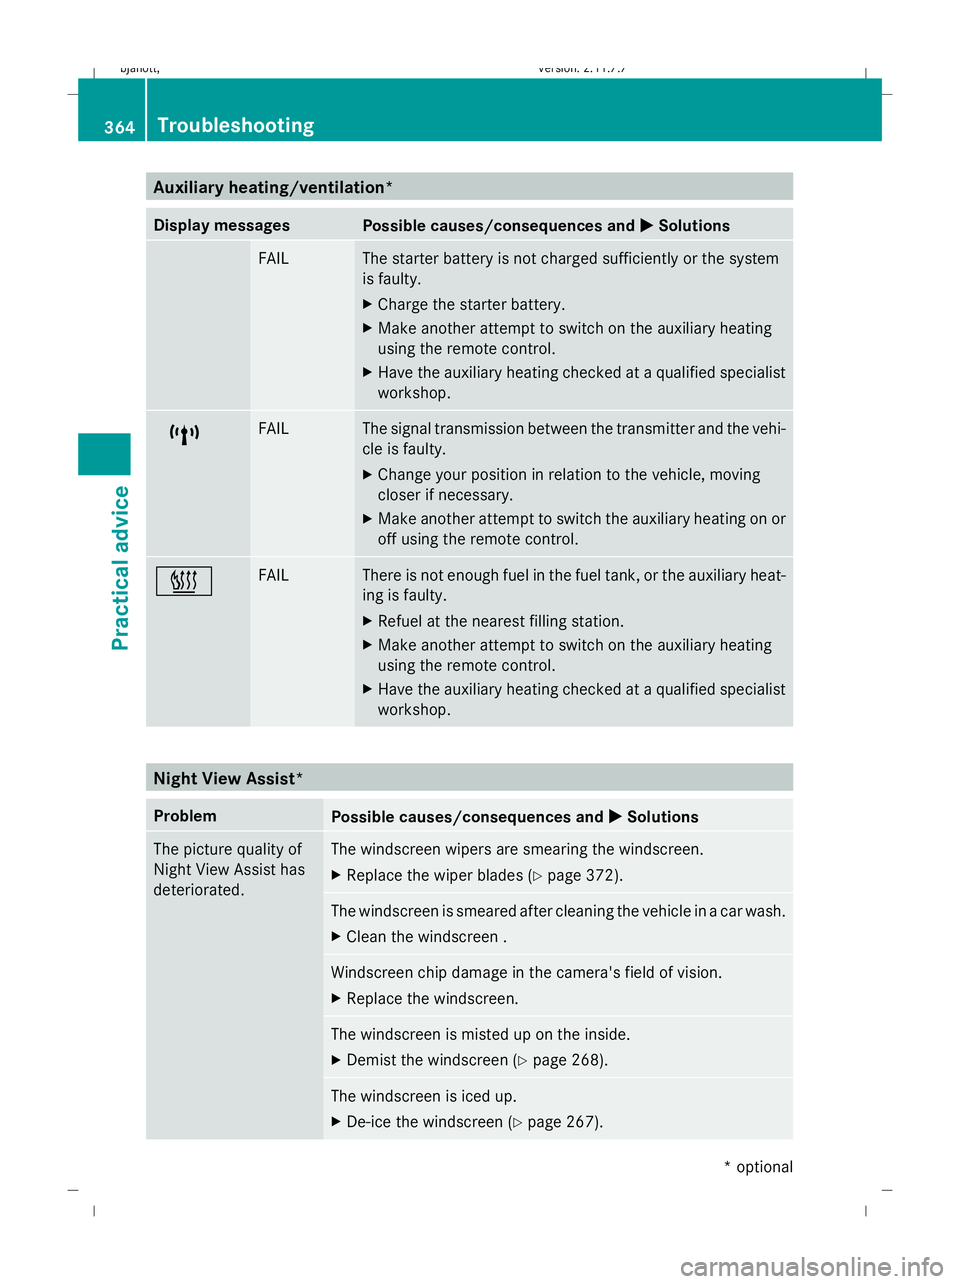
Auxiliary heating/ventilation*
Display messages
Possible causes/consequences and
X
X Solutions FAIL The starter battery is not charged sufficiently or the system
is faulty.
X
Charge the starter battery.
X Make another attempt to switch on the auxiliary heating
using the remote control.
X Have the auxiliary heating checked at a qualified specialist
workshop. $ FAIL The signal transmission between the transmitter and the vehi-
cle is faulty.
X
Change your position in relation to the vehicle, moving
closer if necessary.
X Make another attempt to switch the auxiliary heating on or
off using the remote control. © FAIL There is not enough fuel in the fuel tank, or the auxiliary heat-
ing is faulty.
X
Refuel at the nearest filling station.
X Make another attempt to switch on the auxiliary heating
using the remote control.
X Have the auxiliary heating checked at a qualified specialist
workshop. Night View Assist*
Problem
Possible causes/consequences and
X XSolutions The picture quality of
Night View Assist has
deteriorated. The windscreen wipers are smearing the windscreen.
X
Replace the wiper blades (Y page 372). The windscreen is smeared after cleaning the vehicle in a car wash.
X
Clean the windscreen . Windscreen chip damage in the camera's field of vision.
X
Replace the windscreen. The windscreen is misted up on the inside.
X
Demist the windscreen (Y page 268). The windscreen is iced up.
X
De-ice the windscreen (Y page 267).364
TroubleshootingPractical advice
* optional
216_AKB; 2; 3, en-GB
bjanott,
Version: 2.11.7.7 2009-02-27T14:54:17+01:00 - Seite 364
Dateiname: 6515230602_buchblock.pdf; erzeugt am 04. Mar 2009 11:16:43; WK
Page 379 of 421

G
Risk of accident
If the tyre pressure is now lower than 1.3 bar,
the tyre is too badly damaged. Do not drive
any further. Consult a qualified specialist
workshop which has the necessary specialist
knowledge and tools to carry out the work
required. Mercedes-Benz recommends that
you use a Mercedes-Benz Service Centre for
this purpose. In particular, work relevant to
safety or on safety-related systems must be
carried out at a qualified specialist workshop.
X If the tyre pressure is still at least 1.3 bar,
correct it (see fuel filler flap for values).
To increase the tyre pressure: switch on
the electric air pump.
To reduce the tyre pressure: open pres-
sure release screw Fon pressure
gauge G.
X Drive to the nearest workshop and have the
tyre changed there.
X Have the TIREFIT kit replaced as soon as
possible at a qualified specialist workshop,
e.g. at a Mercedes-Benz Service Centre. G
Risk of accident
Do not exceed the maximum speed of
80 km/h.
The "max. 80 km/h" label must be affixed in
the driver's field of vision.
The vehicle's handling characteristics may be
affected. H
Environmental note
Have the used TIREFIT kit disposed of profes-
sionally, e.g. at a Mercedes-Benz Service
Centre.
X Have the TIREFIT kit replaced every four
years at a qualified specialist workshop,
e.g. a Mercedes-Benz Service Centre. Version 2 X
Pull connector ?with cable and air pump
hose Aout of the housing.
X Screw air pump hose Aonto flange Bof
TIREFIT sealant filler bottle :.
X Place TIREFIT sealant filler bottle :head
downwards into recess ;of the electric
air pump. X
Remove the cap from valve Con the faulty
tyre.
X Screw filler hose Donto valve C.
X Insert plug ?into the socket of the ciga-
rette lighter* (Y page 282) or into a 12 V
power socket in your vehicle (Y page 282).
X Turn the key to position 2(Y page 182) in
the ignition lock. 376
Flat tyrePractical advice
* optional
216_AKB; 2; 3, en-GB
bjanott,
Version: 2.11.7.7 2009-02-27T14:54:17+01:00 - Seite 376
Dateiname: 6515230602_buchblock.pdf; erzeugt am 04. Mar 2009 11:16:48; WK