center console MERCEDES-BENZ CL500 2000 W140 User Guide
[x] Cancel search | Manufacturer: MERCEDES-BENZ, Model Year: 2000, Model line: CL500, Model: MERCEDES-BENZ CL500 2000 W140Pages: 424, PDF Size: 25.71 MB
Page 84 of 424
81 Seats
Te ch n ica l
data Instruments
and controlsOperationDrivingInstrument
cluster displayPractical hints Car care Index Power head restraints, rear
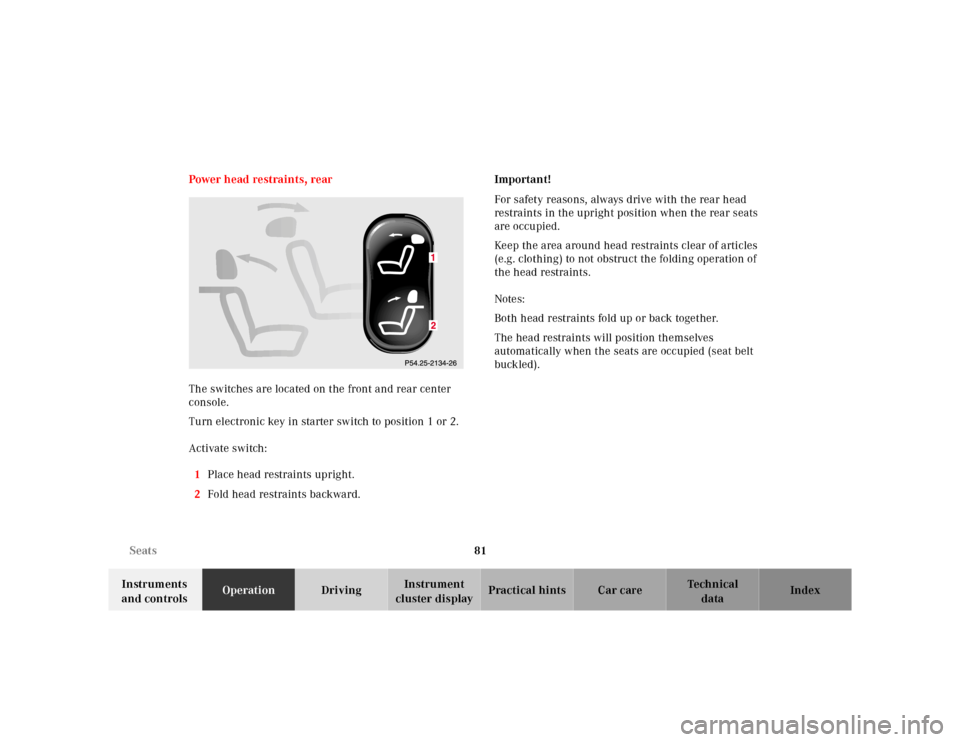
The switches are located on the front and rear center
console.
Turn electronic key in starter switch to position 1 or 2.
Activate switch:
1Place head restraints upright.
2Fold head restraints backward.Important!
For safety reasons, always drive with the rear head
restraints in the upright position when the rear seats
are occupied.
Keep the area around head restraints clear of articles
(e.g. clothing) to not obstruct the folding operation of
the head restraints.
Notes:
Both head restraints fold up or back together.
The head restraints will position themselves
automatically when the seats are occupied (seat belt
buckled).
Page 91 of 424
88 Restraint systems
Te ch n ica l
data Instruments
and controlsOperationDrivingInstrument
cluster displayPractical hints Car care Index
BabySmart
TM airbag deactivation system
Special BabySmart
TM compatible child seats, designed
for use with the Mercedes-Benz system and available at
any authorized Mercedes-Benz Center are required for
use with the BabySmart
TM airbag deactivation system.
With the special child seat properly installed, the
passenger front airbag will not deploy.
The 7 indicator lamp located on the center console
will be illuminated, except with electronic key removed
or in starter switch position 0. The system does not
deactivate the door mounted side impact airbag.
BabySmart
TM is a trademark of Siemens Automotive Corp.
Wa r n i n g !
USE CHILD RESTRAINTS PROPERLY.Children 12 years old and under must never ride in
the front seat, except in a Mercedes-Benz
authorized BabySmart
TM compatible child seat,
which operates with the BabySmart
TM system
installed in the vehicle to deactivate the passenger
front airbag when it is properly installed.
Otherwise they will be struck by the airbag when it
inflates in a crash. If this happens, serious or fatal
injury will result.According to accident statistics, children are safer
when properly restrained in the rear seating
positions than in the front seating positions.
Infants and small children must ride in the back
seats and be seated in an appropriate infant or
child restraint system, which is properly secured
with the vehicle’s seat belt, fully in accordance
with the child seat manufacturer’s instructions.A child’s risk of serious or fatal injuries is
significantly increased if the child restraints are
not properly secured in the vehicle and the child is
not properly secured in the child restraint.
Children too big for child restraint systems must
ride in back seats using regular seat belts. Position
shoulder belt across chest and shoulder, not face or
neck. A booster seat may be necessary to achieve
proper belt positioning.
Page 92 of 424
89 Restraint systems
Te ch n ica l
data Instruments
and controlsOperationDrivingInstrument
cluster displayPractical hints Car care Index Self-test BabySmart
TM without special child seat
installed
After turning electronic key in starter switch to
position 1 or 2, the 7 indicator lamp located on the
center console comes on for approx. 6 seconds and then
extinguishes.
If the indicator lamp should not come on or is
continuously lit, the system is not functioning. You must
see an authorized Mercedes-Benz Center before seating
any child on the front passenger seat. See page 296 for
notes on the 7 indicator lamp.
BabySmart
TM is a trademark of Siemens Automotive Corp.
Wa r n i n g !
The BabySmart
TM airbag deactivation system will
ONLY work with a special child seat designed to
operate with it. It will not work with child seats
which are not BabySmart
TM compatible.
Never place anything between seat cushion and
child seat (e.g. pillow), since it reduces the
effectiveness of the deactivation system.Follow the manufacturer’s instructions for
installation of special child seats.The passenger front airbag will not deploy only if
the 7 indicator lamp remains illuminated.Please be sure to check the indicator every time
you use the special system child seat. Should the
light go out while the restraint is installed, please
check installation. If the light remains out, do not
use the BabySmart
TM restraint to transport children
on the front passenger seat until the system has
been repaired.
Page 97 of 424
94 Restraint systems
Te ch n ica l
data Instruments
and controlsOperationDrivingInstrument
cluster displayPractical hints Car care Index
The driver and passenger front airbags are designed to
activate only in certain frontal impacts exceeding a
preset threshold. The front passenger airbag deploys
only if the front passenger seat is occupied and the
7indicator lamp on the center console is not
illuminated.Note:
Heavy objects on the front passenger seat can appear to
the “SRS” to indicate the presence of an occupant in
that seat which causes the passenger front airbag to
deploy in a crash exceeding the appropriate threshold.
Page 170 of 424
167 Automatic climate control
Te ch n ica l
data Instruments
and controlsOperationDrivingInstrument
cluster displayPractical hints Car care Index Automatic climate control
The system is always at operational readiness, except
when manually switched off.
The automatic climate control only operates with the
engine running.
The temperature selector should be left at the desired
temperature setting. The temperature selected is
reached as quickly as possible.
Th e system w il l not hea t or c ool a ny q uicker by setting a
higher or lower temperature.
The desired interior temperature and air distribution
can be selected separately for the left and right side of
the passenger compartment.
The automatic climate control removes considerable
moisture from the air during operation in the cooling
mode. It is normal for water to drip on the ground
through ducts in the underbody.
The air conditioning will not engage (no cooling) if the
economy modeS is selected, see page 173. Notes:
Do not obstruct the air flow by placing objects on the air
flow-through exhaust slots below the rear window.
Also keep the air intake grill in front of the windshield
free of snow and debris.
The storage compartment between the front seats can be
ventilated. See page 175 for notes on ventilating the
storage space under the armrest in the center console.
The air conditioner switches itself off for its own
protection if refrigerant is lost. No cooling will then take
place. Economy modeS cannot be switched off. Have
the air conditioner checked by a Mercedes-Benz Center
should this happen.
Dust filter
Nearly all dust particles and pollen are filtered out
before outside air enters the passenger compartment
through the air distribution system.
Page 178 of 424
175 Automatic climate control
Te ch n ica l
data Instruments
and controlsOperationDrivingInstrument
cluster displayPractical hints Car care Index Switching the automatic climate control on and off
To s wi tch o f f:
Press button0. The display shows “0”.
The fresh air supply to the vehicle interior is shut off.
While driving, use this setting only temporarily,
otherwise the windshield could fog up.
To s wi tch o n :
Press button0 orP or at least one of the U
buttons so that it pops out and then click it back in. Front center console storage compartment
ventilation
The front center console compartment has its own air
outlet.
To open: Slide the lever up.
To close: Slide the lever down.
The air volume is dependent on the setting of:
•air distribution control,
•air volume control,
•air outlets in the dashboard.
The air temperature is about the same as that of the
dashboard air outlets. It cannot be regulated separately.
Notes:
The compartment can get very warm due to its confined
space. When storing heat sensitive objects in the
compartment, close the air outlet while heating the
passenger compartment.
Do not allow articles to obstruct the air outlet in the
storage compartment.
Page 181 of 424
178 Interior equipment
Te ch n ica l
data Instruments
and controlsOperationDrivingInstrument
cluster displayPractical hints Car care Index
Power w indows
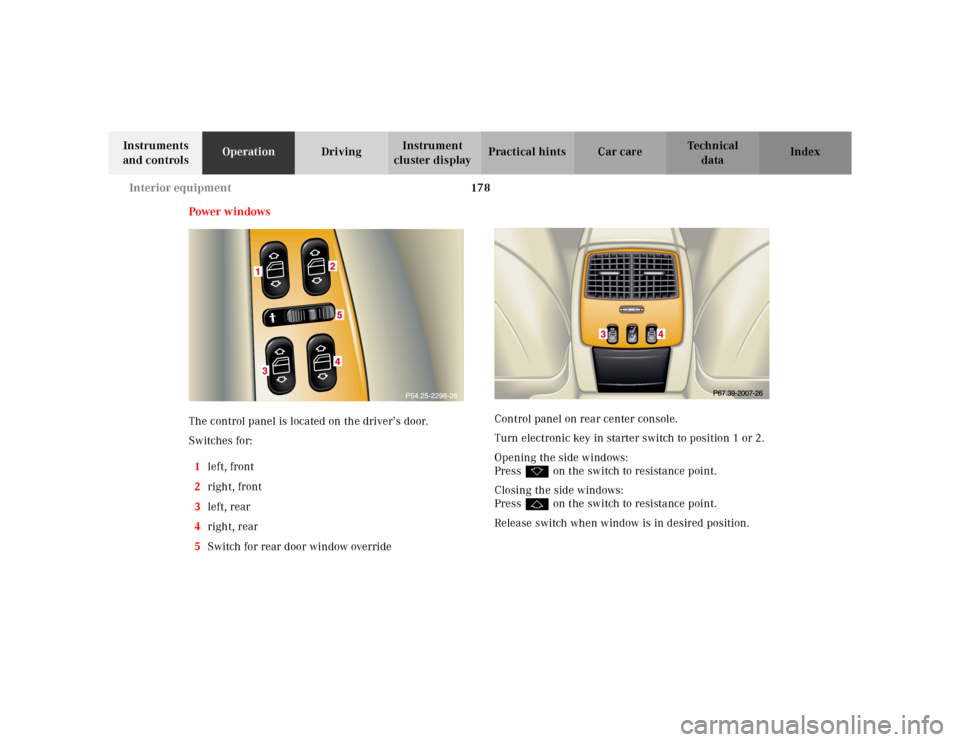
The control panel is located on the driver’s door.
Switches for:
1left, front
2right, front
3left, rear
4right, rear
5Switch for rear door window overrideControl panel on rear center console.
Turn electronic key in starter switch to position 1 or 2.
Opening the side windows:
Pressk on the switch to resistance point.
Closing the side windows:
Pressj on the switch to resistance point.
Release switch when window is in desired position.
3
3
3
3
Page 188 of 424
185 Interior equipment
Te ch n ica l
data Instruments
and controlsOperationDrivingInstrument
cluster displayPractical hints Car care Index To prevent the vehicle battery from being discharged
with doors open, all interior lamps switch off after
approximately 5 minutes.
6 Interior lamps, front:
Press rocker switch in to switch front interior and
reading lamps on. The front interior lighting stays
on while the rocker switch is pressed in.
Switching off the front interior lighting:
Press rocker switch to position (4) or (5).
Courtesy lighting
The interior of your vehicle is equipped with various
different lighting installations to help you to orient
yourself better in the dark.
Entrance lamps, exit lamps
With exterior lamps on or electronic key in starter
switch position 1, the lamps in the door trays illuminate.
The lights will remain on for approximately 5 minutes if
the electronic key is in starter switch position 0 and
exterior lamps are switched off.Footwell lighting
With exterior lamps on, the driver and front passenger
footwell is illuminated.
Center console lighting
Turn the electronic key in the starter switch to
position 1. The center console is illuminated from the
rear-view mirror.
Door entry lamps
The appropriate entry lamp switches on if a door is
opened in darkness and if the interior lighting is
switched to automatic function.
The entry lamp switches off automatically when the
door is closed.
Page 189 of 424
186 Interior equipment
Te ch n ica l
data Instruments
and controlsOperationDrivingInstrument
cluster displayPractical hints Car care Index
Rear window sunshade (optional)
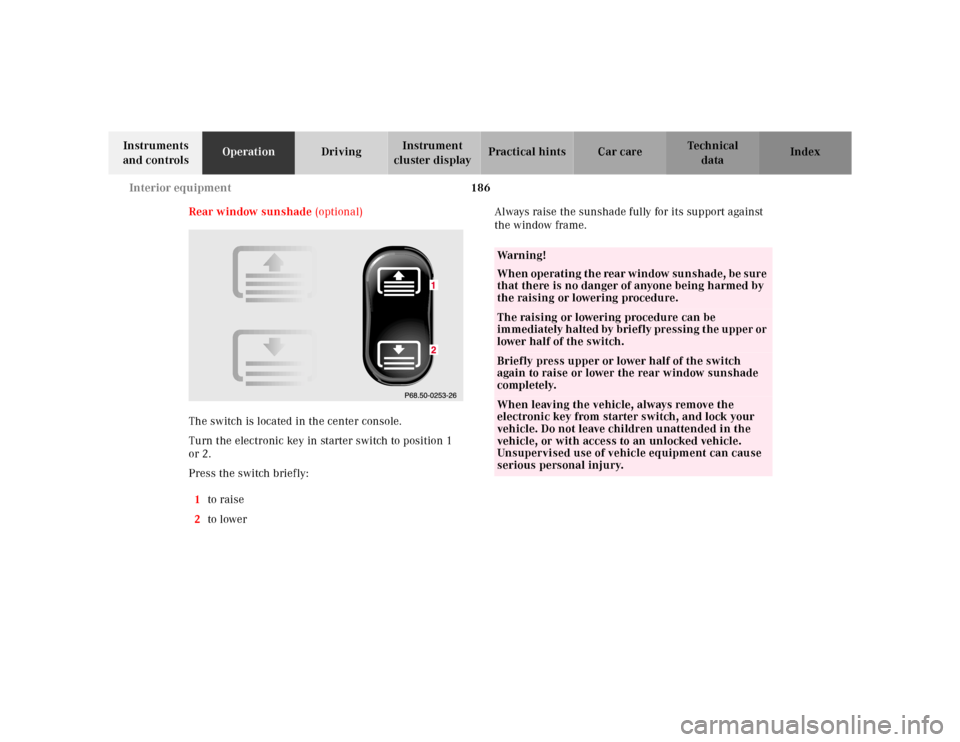
The switch is located in the center console.
Turn the electronic key in starter switch to position 1
or 2.
Press the switch briefly:
1to raise
2to lowerAlways raise the sunshade fully for its support against
the window frame.
Wa r n i n g !
When operating the rear window sunshade, be sure
that there is no danger of anyone being harmed by
the raising or lowering procedure.The raising or lowering procedure can be
immediately halted by briefly pressing the upper or
lower half of the switch.Briefly press upper or lower half of the switch
again to raise or lower the rear window sunshade
completely.When leaving the vehicle, always remove the
electronic key from starter switch, and lock your
vehicle. Do not leave children unattended in the
vehicle, or with access to an unlocked vehicle.
Unsupervised use of vehicle equipment can cause
serious personal injury.
Page 199 of 424
196 Interior equipment
Te ch n ica l
data Instruments
and controlsOperationDrivingInstrument
cluster displayPractical hints Car care Index
Ashtrays
Center console
To o pen :
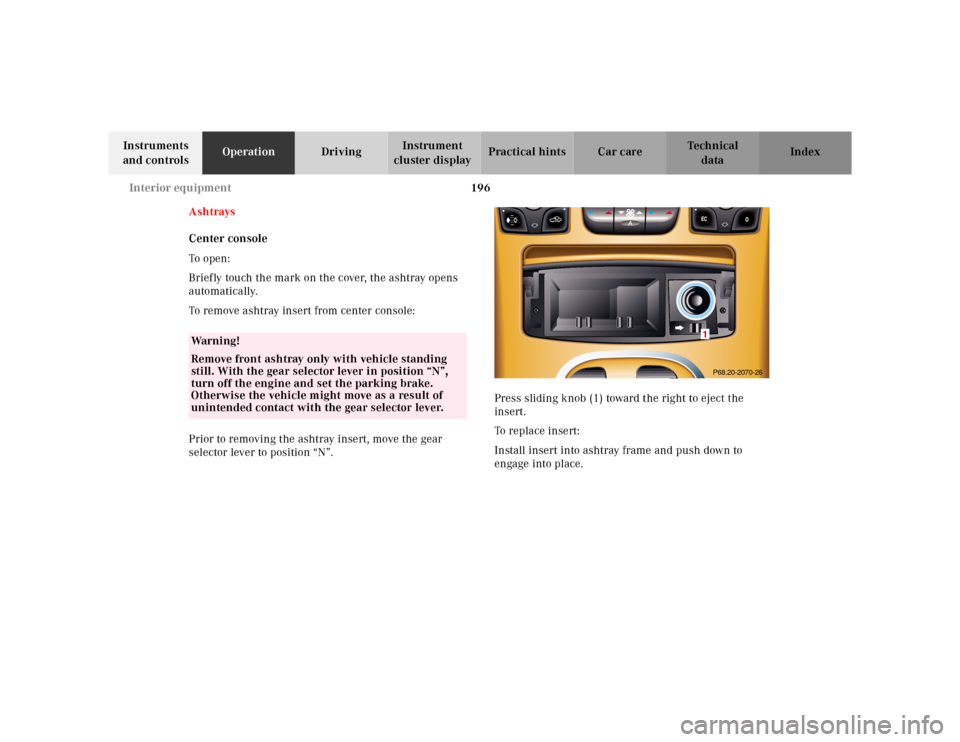
Briefly touch the mark on the cover, the ashtray opens
automatically.
To remove ashtray insert from center console:
Prior to removing the ashtray insert, move the gear
selector lever to position “N”.Press sliding knob (1) toward the right to eject the
insert.
To r e p l a c e i n s e r t :
Install insert into ashtray frame and push down to
engage into place.
Wa r n i n g !
Remove front ashtray only with vehicle standing
still. With the gear selector lever in position “N”,
turn off the engine and set the parking brake.
Otherwise the vehicle might move as a result of
unintended contact with the gear selector lever.
P68.20-2070-261