roof MERCEDES-BENZ CLA 2013 Owners Manual
[x] Cancel search | Manufacturer: MERCEDES-BENZ, Model Year: 2013, Model line: CLA, Model: MERCEDES-BENZ CLA 2013Pages: 352, PDF Size: 5.37 MB
Page 8 of 352
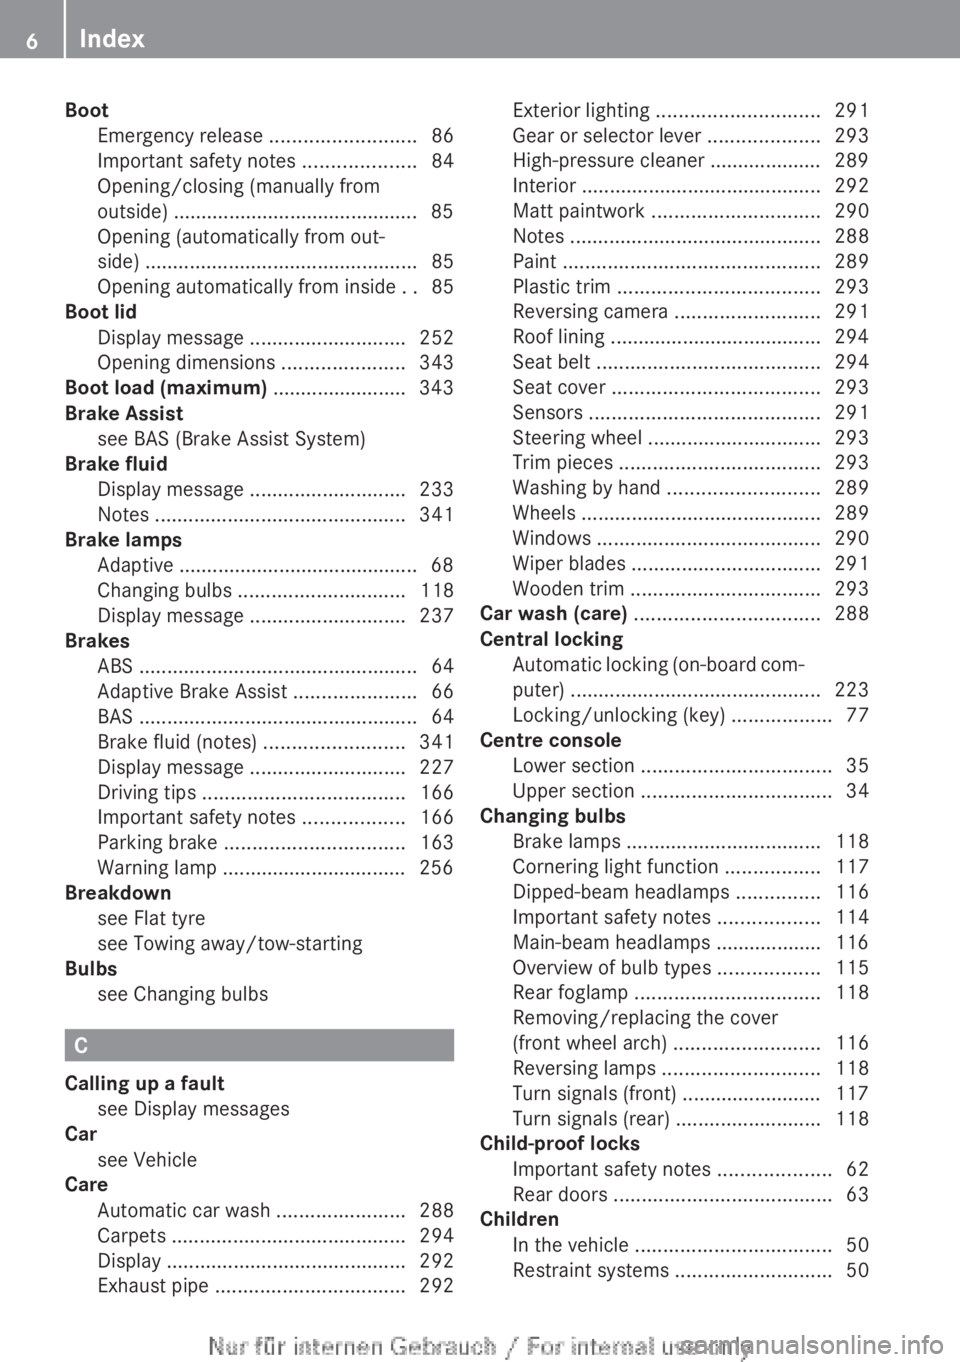
BootEmergency release ..........................86
Important safety notes ....................84
Opening/closing (manually from
outside) ............................................ 85
Opening (automatically from out-
side) ................................................. 85
Opening automatically from inside ..85
Boot lid
Display message ............................ 252
Opening dimensions ......................343
Boot load (maximum) ........................ 343
Brake Assist see BAS (Brake Assist System)
Brake fluid
Display message ............................ 233
Notes ............................................. 341
Brake lamps
Adaptive ........................................... 68
Changing bulbs .............................. 118
Display message ............................ 237
Brakes
ABS .................................................. 64
Adaptive Brake Assist ......................66
BAS .................................................. 64
Brake fluid (notes) .........................341
Display message ............................ 227
Driving tips .................................... 166
Important safety notes ..................166
Parking brake ................................ 163
Warning lamp ................................. 256
Breakdown
see Flat tyre
see Towing away/tow-starting
Bulbs
see Changing bulbs
C
Calling up a fault see Display messages
Car
see Vehicle
Care
Automatic car wash .......................288
Carpets .......................................... 294
Display ........................................... 292
Exhaust pipe .................................. 292
Exterior lighting ............................. 291
Gear or selector lever ....................293
High-pressure cleaner .................... 289
Interior ........................................... 292
Matt paintwork .............................. 290
Notes ............................................. 288
Paint .............................................. 289
Plastic trim .................................... 293
Reversing camera ..........................291
Roof lining ...................................... 294
Seat belt ........................................ 294
Seat cover ..................................... 293
Sensors ......................................... 291
Steering wheel ............................... 293
Trim pieces .................................... 293
Washing by hand ........................... 289
Wheels ........................................... 289
Windows ........................................ 290
Wiper blades .................................. 291
Wooden trim .................................. 293
Car wash (care) ................................. 288
Central locking Automatic locking (on-board com-
puter) ............................................. 223
Locking/unlocking (key) ..................77
Centre console
Lower section .................................. 35
Upper section .................................. 34
Changing bulbs
Brake lamps ................................... 118
Cornering light function .................117
Dipped-beam headlamps ...............116
Important safety notes ..................114
Main-beam headlamps ................... 116
Overview of bulb types ..................115
Rear foglamp ................................. 118
Removing/replacing the cover
(front wheel arch) .......................... 116
Reversing lamps ............................ 118
Turn signals (front) ......................... 117
Turn signals (rear) ..........................118
Child-proof locks
Important safety notes ....................62
Rear doors ....................................... 63
Children
In the vehicle ................................... 50
Restraint systems ............................ 506Index
Page 16 of 352
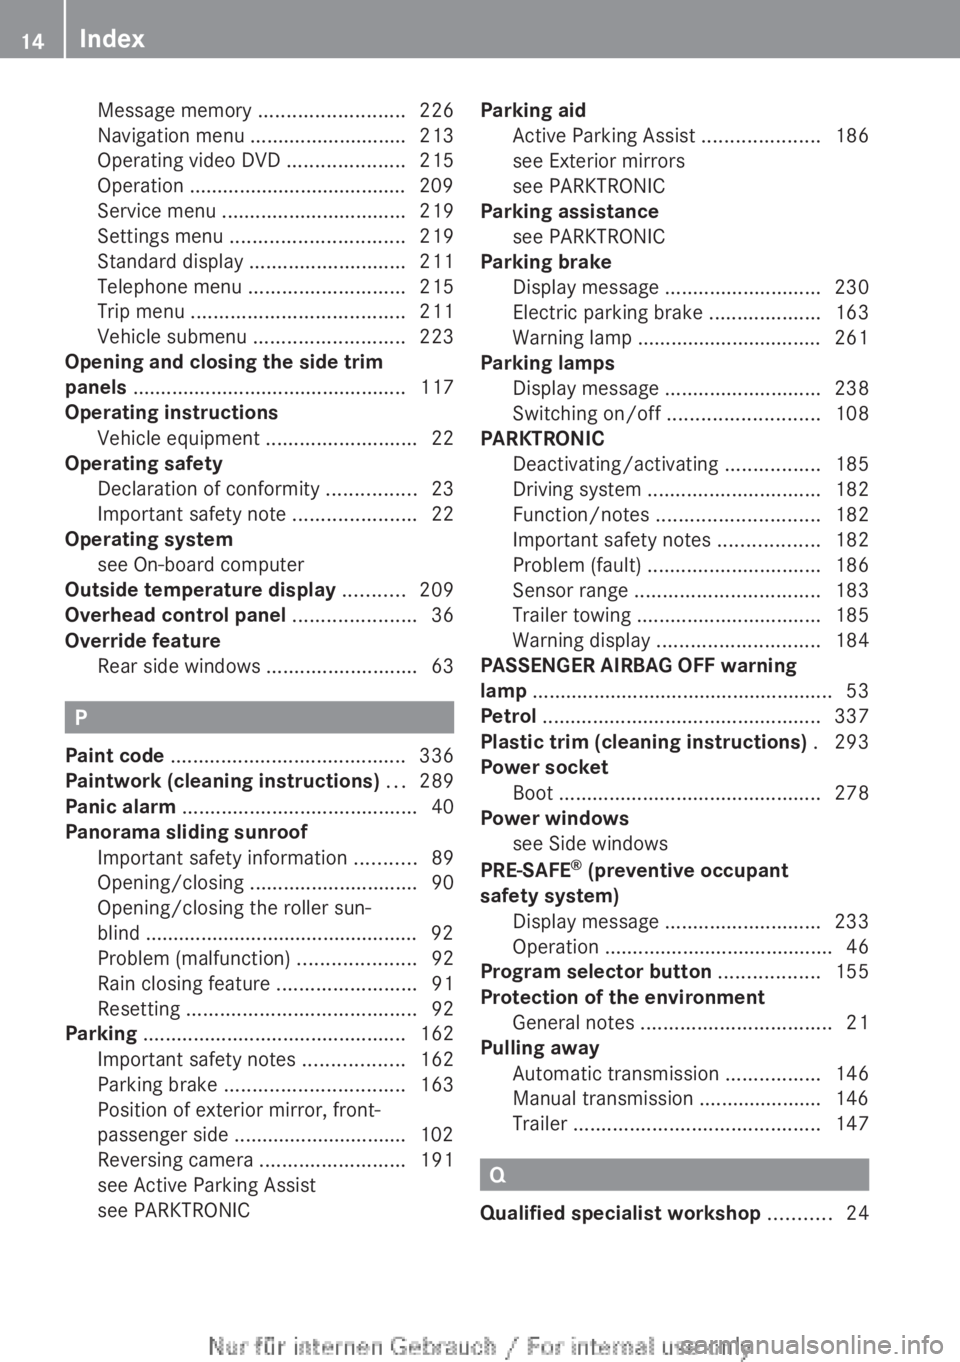
Message memory .......................... 226
Navigation menu ............................ 213
Operating video DVD .....................215
Operation ....................................... 209
Service menu ................................. 219
Settings menu ............................... 219
Standard display ............................ 211
Telephone menu ............................ 215
Trip menu ...................................... 211
Vehicle submenu ........................... 223
Opening and closing the side trim
panels ................................................. 117
Operating instructions Vehicle equipment ...........................22
Operating safety
Declaration of conformity ................23
Important safety note ......................22
Operating system
see On-board computer
Outside temperature display ........... 209
Overhead control panel ...................... 36
Override feature Rear side windows ...........................63
P
Paint code .......................................... 336
Paintwork (cleaning instructions) ... 289
Panic alarm .......................................... 40
Panorama sliding sunroof Important safety information ...........89
Opening/closing .............................. 90
Opening/closing the roller sun-
blind ................................................. 92
Problem (malfunction) .....................92
Rain closing feature .........................91
Resetting ......................................... 92
Parking ............................................... 162
Important safety notes ..................162
Parking brake ................................ 163
Position of exterior mirror, front-
passenger side ............................... 102
Reversing camera ..........................191
see Active Parking Assist
see PARKTRONIC
Parking aid
Active Parking Assist .....................186
see Exterior mirrors
see PARKTRONIC
Parking assistance
see PARKTRONIC
Parking brake
Display message ............................ 230
Electric parking brake ....................163
Warning lamp ................................. 261
Parking lamps
Display message ............................ 238
Switching on/off ........................... 108
PARKTRONIC
Deactivating/activating .................185
Driving system ............................... 182
Function/notes ............................. 182
Important safety notes ..................182
Problem (fault) ............................... 186
Sensor range ................................. 183
Trailer towing ................................. 185
Warning display ............................. 184
PASSENGER AIRBAG OFF warning
lamp ...................................................... 53
Petrol .................................................. 337
Plastic trim (cleaning instructions) . 293
Power socket Boot ............................................... 278
Power windows
see Side windows
PRE-SAFE ®
(preventive occupant
safety system) Display message ............................ 233
Operation ......................................... 46
Program selector button .................. 155
Protection of the environment General notes .................................. 21
Pulling away
Automatic transmission .................146
Manual transmission ...................... 146
Trailer ............................................ 147
Q
Qualified specialist workshop ........... 24
14Index
Page 17 of 352
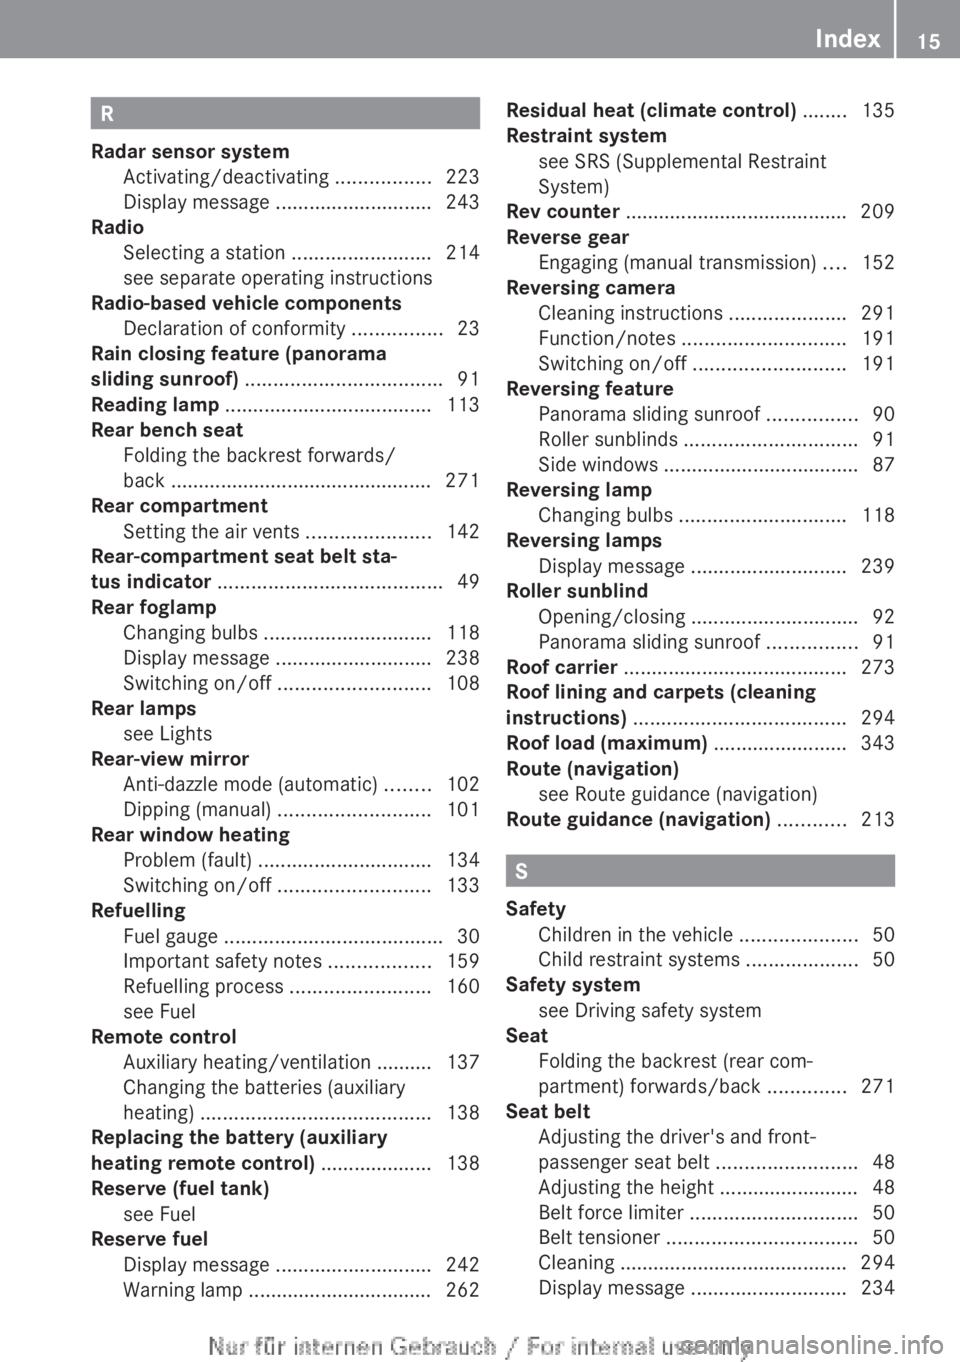
R
Radar sensor system Activating/deactivating .................223
Display message ............................ 243
Radio
Selecting a station .........................214
see separate operating instructions
Radio-based vehicle components
Declaration of conformity ................23
Rain closing feature (panorama
sliding sunroof) ................................... 91
Reading lamp ..................................... 113
Rear bench seat Folding the backrest forwards/
back ............................................... 271
Rear compartment
Setting the air vents ......................142
Rear-compartment seat belt sta-
tus indicator ........................................ 49
Rear foglamp Changing bulbs .............................. 118
Display message ............................ 238
Switching on/off ........................... 108
Rear lamps
see Lights
Rear-view mirror
Anti-dazzle mode (automatic) ........102
Dipping (manual) ........................... 101
Rear window heating
Problem (fault) ............................... 134
Switching on/off ........................... 133
Refuelling
Fuel gauge ....................................... 30
Important safety notes ..................159
Refuelling process .........................160
see Fuel
Remote control
Auxiliary heating/ventilation .......... 137
Changing the batteries (auxiliary
heating) ......................................... 138
Replacing the battery (auxiliary
heating remote control) .................... 138
Reserve (fuel tank) see Fuel
Reserve fuel
Display message ............................ 242
Warning lamp ................................. 262Residual heat (climate control) ........ 135
Restraint system see SRS (Supplemental Restraint
System)
Rev counter ........................................ 209
Reverse gear Engaging (manual transmission) ....152
Reversing camera
Cleaning instructions .....................291
Function/notes ............................. 191
Switching on/off ........................... 191
Reversing feature
Panorama sliding sunroof ................90
Roller sunblinds ............................... 91
Side windows ................................... 87
Reversing lamp
Changing bulbs .............................. 118
Reversing lamps
Display message ............................ 239
Roller sunblind
Opening/closing .............................. 92
Panorama sliding sunroof ................91
Roof carrier ........................................ 273
Roof lining and carpets (cleaning
instructions) ...................................... 294
Roof load (maximum) ........................ 343
Route (navigation) see Route guidance (navigation)
Route guidance (navigation) ............ 213
S
Safety Children in the vehicle .....................50
Child restraint systems ....................50
Safety system
see Driving safety system
Seat
Folding the backrest (rear com-
partment) forwards/back ..............271
Seat belt
Adjusting the driver's and front-
passenger seat belt .........................48
Adjusting the height ......................... 48
Belt force limiter .............................. 50
Belt tensioner .................................. 50
Cleaning ......................................... 294
Display message ............................ 234
Index15
Page 18 of 352
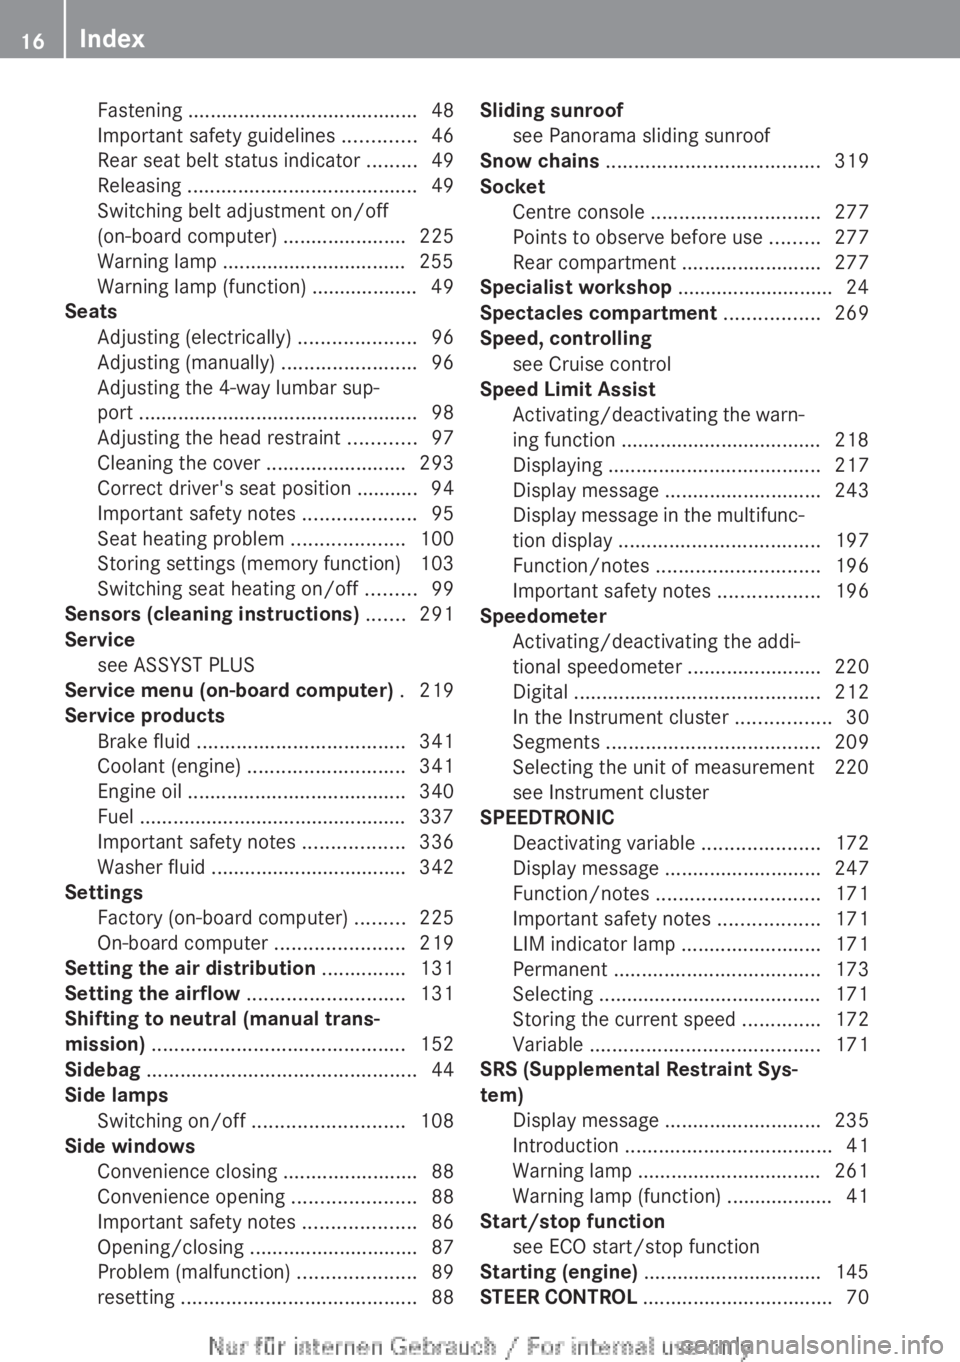
Fastening ......................................... 48
Important safety guidelines .............46
Rear seat belt status indicator .........49
Releasing ......................................... 49
Switching belt adjustment on/off
(on-board computer) ......................225
Warning lamp ................................. 255
Warning lamp (function) ................... 49
Seats
Adjusting (electrically) .....................96
Adjusting (manually) ........................96
Adjusting the 4-way lumbar sup-
port .................................................. 98
Adjusting the head restraint ............97
Cleaning the cover .........................293
Correct driver's seat position ........... 94
Important safety notes ....................95
Seat heating problem ....................100
Storing settings (memory function) 103
Switching seat heating on/off .........99
Sensors (cleaning instructions) ....... 291
Service see ASSYST PLUS
Service menu (on-board computer) . 219
Service products Brake fluid ..................................... 341
Coolant (engine) ............................ 341
Engine oil ....................................... 340
Fuel ................................................ 337
Important safety notes ..................336
Washer fluid ................................... 342
Settings
Factory (on-board computer) .........225
On-board computer .......................219
Setting the air distribution ............... 131
Setting the airflow ............................ 131
Shifting to neutral (manual trans-
mission) ............................................. 152
Sidebag ................................................ 44
Side lamps Switching on/off ........................... 108
Side windows
Convenience closing ........................88
Convenience opening ......................88
Important safety notes ....................86
Opening/closing .............................. 87
Problem (malfunction) .....................89
resetting .......................................... 88Sliding sunroof
see Panorama sliding sunroof
Snow chains ...................................... 319
Socket Centre console .............................. 277
Points to observe before use .........277
Rear compartment .........................277
Specialist workshop ............................ 24
Spectacles compartment ................. 269
Speed, controlling see Cruise control
Speed Limit Assist
Activating/deactivating the warn-
ing function .................................... 218
Displaying ...................................... 217
Display message ............................ 243
Display message in the multifunc-
tion display .................................... 197
Function/notes ............................. 196
Important safety notes ..................196
Speedometer
Activating/deactivating the addi-
tional speedometer ........................220
Digital ............................................ 212
In the Instrument cluster .................30
Segments ...................................... 209
Selecting the unit of measurement 220
see Instrument cluster
SPEEDTRONIC
Deactivating variable .....................172
Display message ............................ 247
Function/notes ............................. 171
Important safety notes ..................171
LIM indicator lamp .........................171
Permanent ..................................... 173
Selecting ........................................ 171
Storing the current speed ..............172
Variable ......................................... 171
SRS (Supplemental Restraint Sys-
tem) Display message ............................ 235
Introduction ..................................... 41
Warning lamp ................................. 261
Warning lamp (function) ................... 41
Start/stop function
see ECO start/stop function
Starting (engine) ................................ 145
STEER CONTROL .................................. 7016Index
Page 23 of 352
Protection of the environment
General notes
HEnvironmental note
Daimler's declared policy is one of compre-
hensive environmental protection.
Our objectives are to use the natural resour-
ces which form the basis of our existence on
this planet sparingly and in a manner which
takes the requirements of both nature and
humanity into consideration.
You too can help to protect the environment
by operating your vehicle in an environmen-
tally-responsible manner.
Fuel consumption and the rate of engine,
transmission, brake and tyre wear depend on
the following factors:
R operating conditions of your vehicle
R your personal driving style
You can influence both factors. Therefore,
please bear the following in mind:
Operating conditions:
R avoid short trips, as these increase fuel
consumption.
R observe the correct tyre pressure.
R do not carry any unnecessary weight in the
vehicle.
R remove the roof rack once you no longer
need it.
R a regularly serviced vehicle will contribute
to environmental protection. You should
therefore adhere to the service intervals.
R all maintenance work should be carried out
at a qualified specialist workshop.
Personal driving style:
R do not depress the accelerator pedal when
starting the engine.
R do not warm up the engine when the vehicle
is stationary.
R drive carefully and maintain a safe distance
from the vehicle in front.
R avoid frequent, sudden acceleration and
braking.
R change gear in good time and use each gear
only up to Ô of its maximum engine speed.
R switch off the engine in stationary traffic.
R monitor the vehicle's fuel consumption.
Returning an end-of-life vehicle
EU countries only:
Mercedes-Benz will take back your old vehicle
to dispose of it in an environmentally-respon-
sible manner in accordance with the Euro-
pean Union (EU) End of Life Vehicles Direc-
tive.
There is a network of return points and dis-
assembly plants available. You can return
your vehicle to these plants free of charge.
This makes a valuable contribution to the
recycling process and the conservation of
resources.
For further information on recycling old vehi-
cles, recovery and the terms of the policy,
visit the Mercedes-Benz homepage.
Genuine Mercedes-Benz parts
HEnvironmental note
Daimler AG also supplies reconditioned
assemblies and parts which are of the same
quality as new parts. For these, the same war-
ranty applies as for new parts.
! Airbags and seat belt tensioners, as well
as control units and sensors for these
restraint systems, may be installed in the
following areas of your vehicle:
R doors
R door pillars
R door sills
R seats
R dashboard
R instrument cluster
R centre console
Introduction21Z
Page 38 of 352
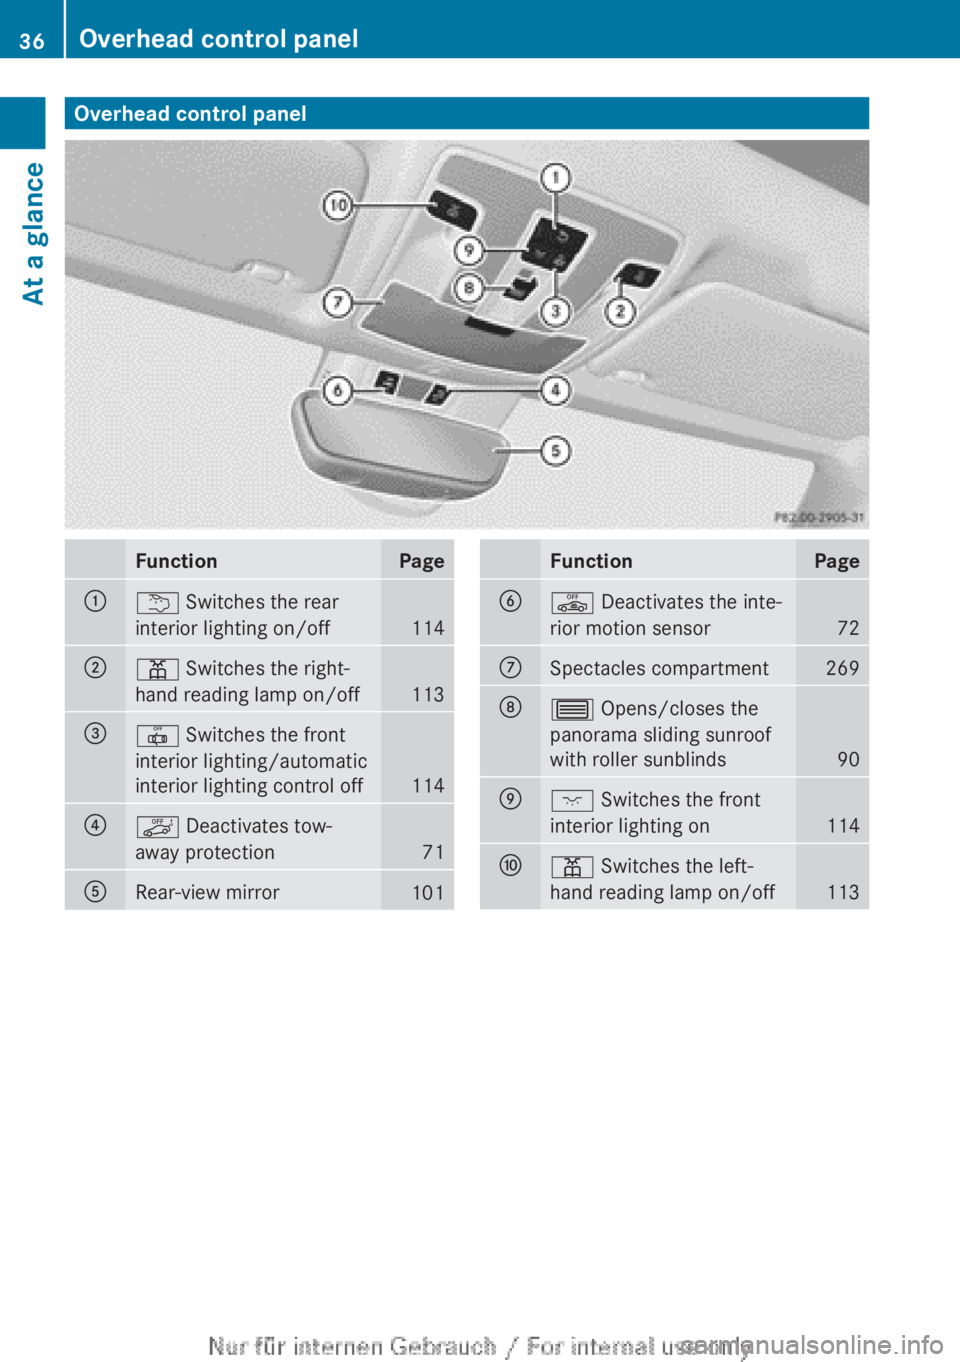
Overhead control panelFunctionPage:u Switches the rear
interior lighting on/off
114
;p Switches the right-
hand reading lamp on/off
113
=| Switches the front
interior lighting/automatic
interior lighting control off
114
?ë Deactivates tow-
away protection
71
ARear-view mirror101FunctionPageBê Deactivates the inte-
rior motion sensor
72
CSpectacles compartment269D3 Opens/closes the
panorama sliding sunroof
with roller sunblinds
90
Ec Switches the front
interior lighting on
114
Fp Switches the left-
hand reading lamp on/off
113
36Overhead control panelAt a glance
Page 47 of 352
nition may also be impaired. There is an
increased risk of injury, possibly even fatal.
Use only seat covers which have been specif-
ically approved for the respective seat by
Mercedes-Benz.GWARNING
Sensors to control the airbags are located in
the doors. Modifications or work not per-
formed correctly to the doors or door panel-
ling, as well as damaged doors, can lead to
the function of the sensors being impaired.
The airbags might therefore not function
properly any more. Consequently, the airbags
cannot protect vehicle occupants as they are
designed to do. This poses an increased risk
of injury.
Never modify the doors or parts of the doors.
Always have work on the doors or door pan-
elling carried out at a qualified specialist
workshop.
You should only use seat cover that have been
approved for your vehicle by Mercedes-Benz.
The seat covers must have a special tear
seam for sidebags. Otherwise, the sidebags
cannot deploy correctly and therefore cannot
provide the intended protection in the event
of an accident.
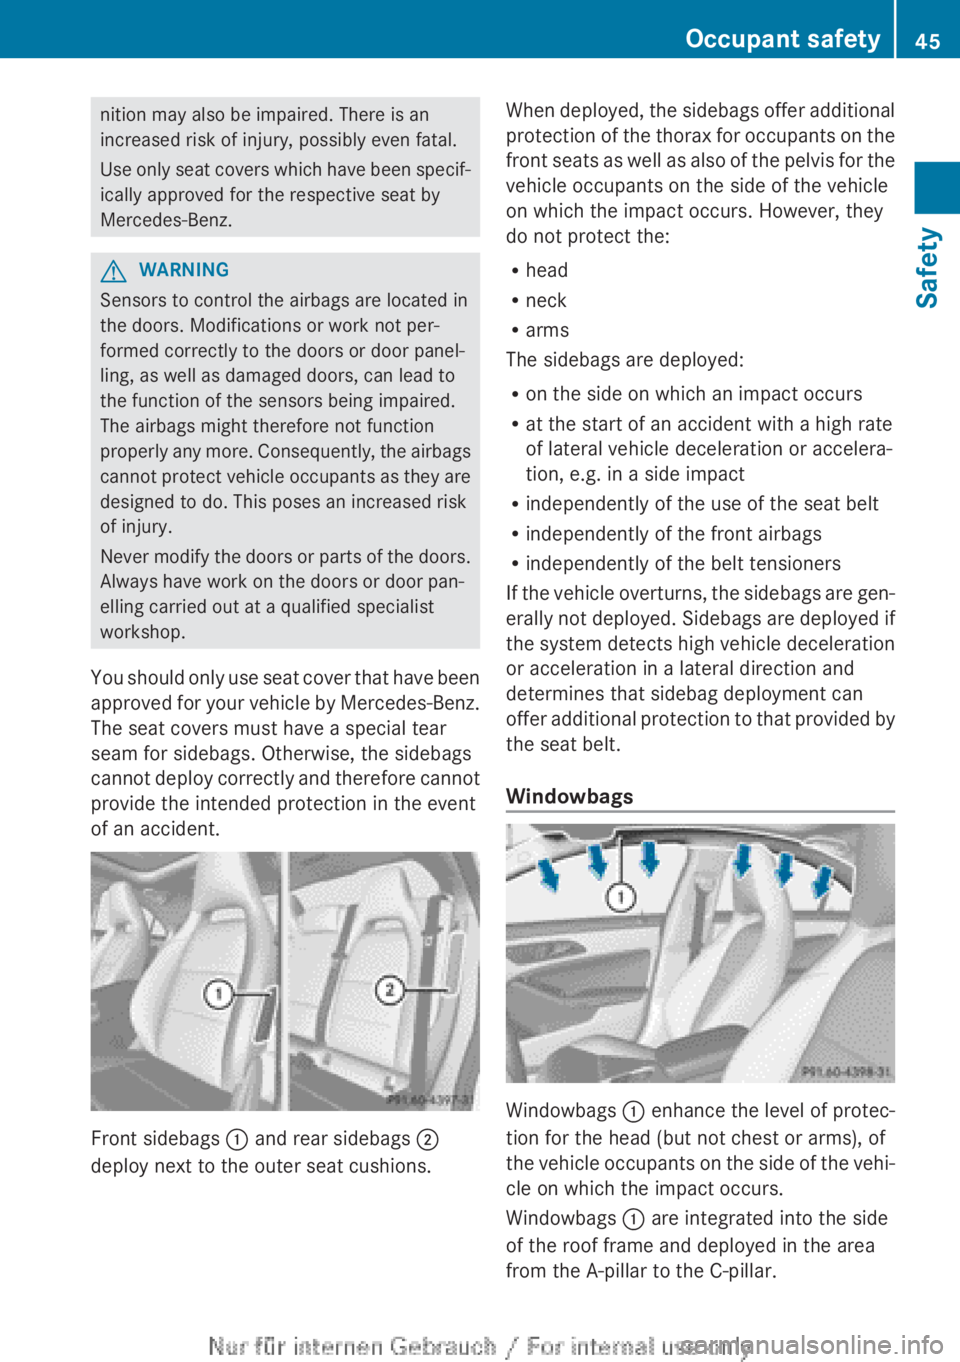
Front sidebags : and rear sidebags ;
deploy next to the outer seat cushions.
When deployed, the sidebags offer additional
protection of the thorax for occupants on the
front seats as well as also of the pelvis for the
vehicle occupants on the side of the vehicle
on which the impact occurs. However, they
do not protect the:
R head
R neck
R arms
The sidebags are deployed:
R on the side on which an impact occurs
R at the start of an accident with a high rate
of lateral vehicle deceleration or accelera-
tion, e.g. in a side impact
R independently of the use of the seat belt
R independently of the front airbags
R independently of the belt tensioners
If the vehicle overturns, the sidebags are gen-
erally not deployed. Sidebags are deployed if
the system detects high vehicle deceleration
or acceleration in a lateral direction and
determines that sidebag deployment can
offer additional protection to that provided by
the seat belt.
Windowbags
Windowbags : enhance the level of protec-
tion for the head (but not chest or arms), of
the vehicle occupants on the side of the vehi-
cle on which the impact occurs.
Windowbags : are integrated into the side
of the roof frame and deployed in the area
from the A-pillar to the C-pillar.
Occupant safety45SafetyZ
Page 48 of 352
Windowbags are deployed:
R at the start of an accident with a high rate
of lateral vehicle deceleration or accelera-
tion, e.g. in a side impact
R on the side on which an impact occurs
R on the driver's and the front passenger's
side if the vehicle overturns and the system
determines that deployment can offer addi-
tional protection to that provided by the
seat belt
R independently of the use of the seat belt
R regardless of whether the front-passenger
seat is occupied
R independently of the front airbags
PRE-SAFE ®
(anticipatory occupant
protection)
! Make sure that there are no objects in the
footwell or behind the seats when moving
the seat back. There is a risk that the seats
and/or the objects could be damaged.
PRE-SAFE ®
takes pre-emptive measures to
protect occupants in certain hazardous sit-
uations. Although your vehicle is equipped
with a PRE-SAFE ®
system, the possibility of
injury in the event of an accident cannot be
ruled out.
Always adapt your driving style to suit the
prevailing road and weather conditions and
maintain a safe distance from the vehicle in
front. Drive carefully.
PRE-SAFE ®
intervenes:
R when BAS activates, e.g. in emergency
braking situations.
R when adaptive Brake Assist intervenes
powerfully on vehicles with DISTRONIC
PLUS.
R in critical driving situations, e.g. when phys-
ical limits are exceeded and the vehicle
understeers or oversteers severely.
PRE-SAFE ®
takes the following measures
depending on the hazardous situation detec-
ted:
R the front seat belts are pre-tensioned.
R vehicles with the memory function: the
front-passenger seat is adjusted if it is in an
unfavourable position.
R if the vehicle skids, the panorama sliding
sunroof and the side windows are closed so
that only a small gap remains.
If the hazardous situation passes without
resulting in an accident, PRE-SAFE ®
slackens
the belt pretensioning. All settings made by
PRE-SAFE ®
can then be reversed.
If the seat belts are not released:XMove the backrest or seat back slightly, but
only when the vehicle is stationary.
Seat belt pretensioning is reduced and the
locking mechanism is released.
The seat-belt adjustment is an integral part of
the PRE-SAFE ®
convenience function. More
information about seat-belt adjustment can
be found under "Seat-belt adjustment"
( Y page 48).
Seat belts
Important safety notes
GWARNING
A seat belt which is not worn correctly, or
which has not been engaged in the seat belt
buckle correctly, cannot provide the intended
level of protection. Under certain circumstan-
ces, this could cause severe or even fatal inju-
ries in the event of an accident.
Therefore, make sure that all occupants — in
particular, pregnant women — wear their seat
belts correctly at all times.
R The seat belt must fit snugly on your body
and must not be twisted.Therefore, avoid
wearing bulky clothing, e.g. a winter coat.
The shoulder section of the belt must be
routed across the centre of your shoulder
46Occupant safetySafety
Page 59 of 352
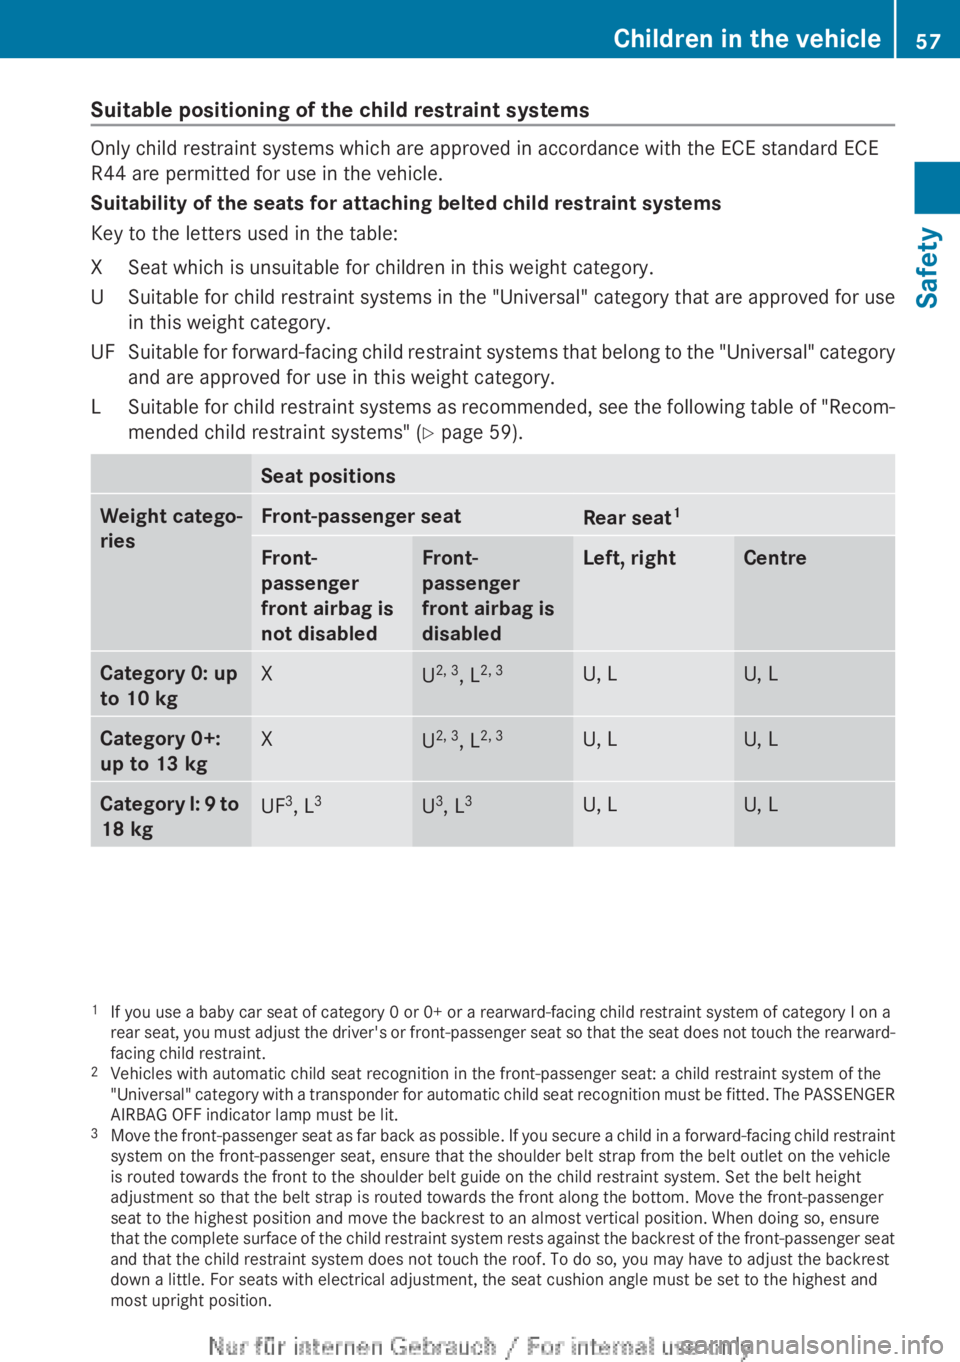
Suitable positioning of the child restraint systems
Only child restraint systems which are approved in accordance with the ECE standard ECE
R44 are permitted for use in the vehicle.
Suitability of the seats for attaching belted child restraint systems
Key to the letters used in the table:
XSeat which is unsuitable for children in this weight category.USuitable for child restraint systems in the "Universal" category that are approved for use
in this weight category.UFSuitable for forward-facing child restraint systems that belong to the "Universal" category
and are approved for use in this weight category.LSuitable for child restraint systems as recommended, see the following table of "Recom-
mended child restraint systems" ( Y page 59).Seat positionsWeight catego-
riesFront-passenger seatRear seat 1Front-
passenger
front airbag is
not disabledFront-
passenger
front airbag is
disabledLeft, rightCentreCategory 0: up
to 10 kgXU 2, 3
, L2, 3U, LU, LCategory 0+:
up to 13 kgXU 2, 3
, L2, 3U, LU, LCategory I:
9 to
18 kgUF 3
, L 3U3
, L 3U, LU, L1
If you use a baby car seat of category 0 or 0+ or a rearward-facing child restraint system of category I on a
rear seat, you must adjust the driver's or front-passenger seat so that the seat does not touch the rearward-
facing child restraint.
2 Vehicles with automatic child seat recognition in the front-passenger seat: a child restraint system of the
"Universal" category with a transponder for automatic child seat recognition must be fitted. The PASSENGER
AIRBAG OFF indicator lamp must be lit.
3 Move the front-passenger seat as far back as possible. If you secure a child in a forward-facing child restraint
system on the front-passenger seat, ensure that the shoulder belt strap from the belt outlet on the vehicle
is routed towards the front to the shoulder belt guide on the child restraint system. Set the belt height
adjustment so that the belt strap is routed towards the front along the bottom. Move the front-passenger
seat to the highest position and move the backrest to an almost vertical position. When doing so, ensure
that the complete surface of the child restraint system rests against the backrest of the front-passenger seat
and that the child restraint system does not touch the roof. To do so, you may have to adjust the backrest
down a little. For seats with electrical adjustment, the seat cushion angle must be set to the highest and
most upright position.Children in the vehicle57SafetyZ
Page 60 of 352
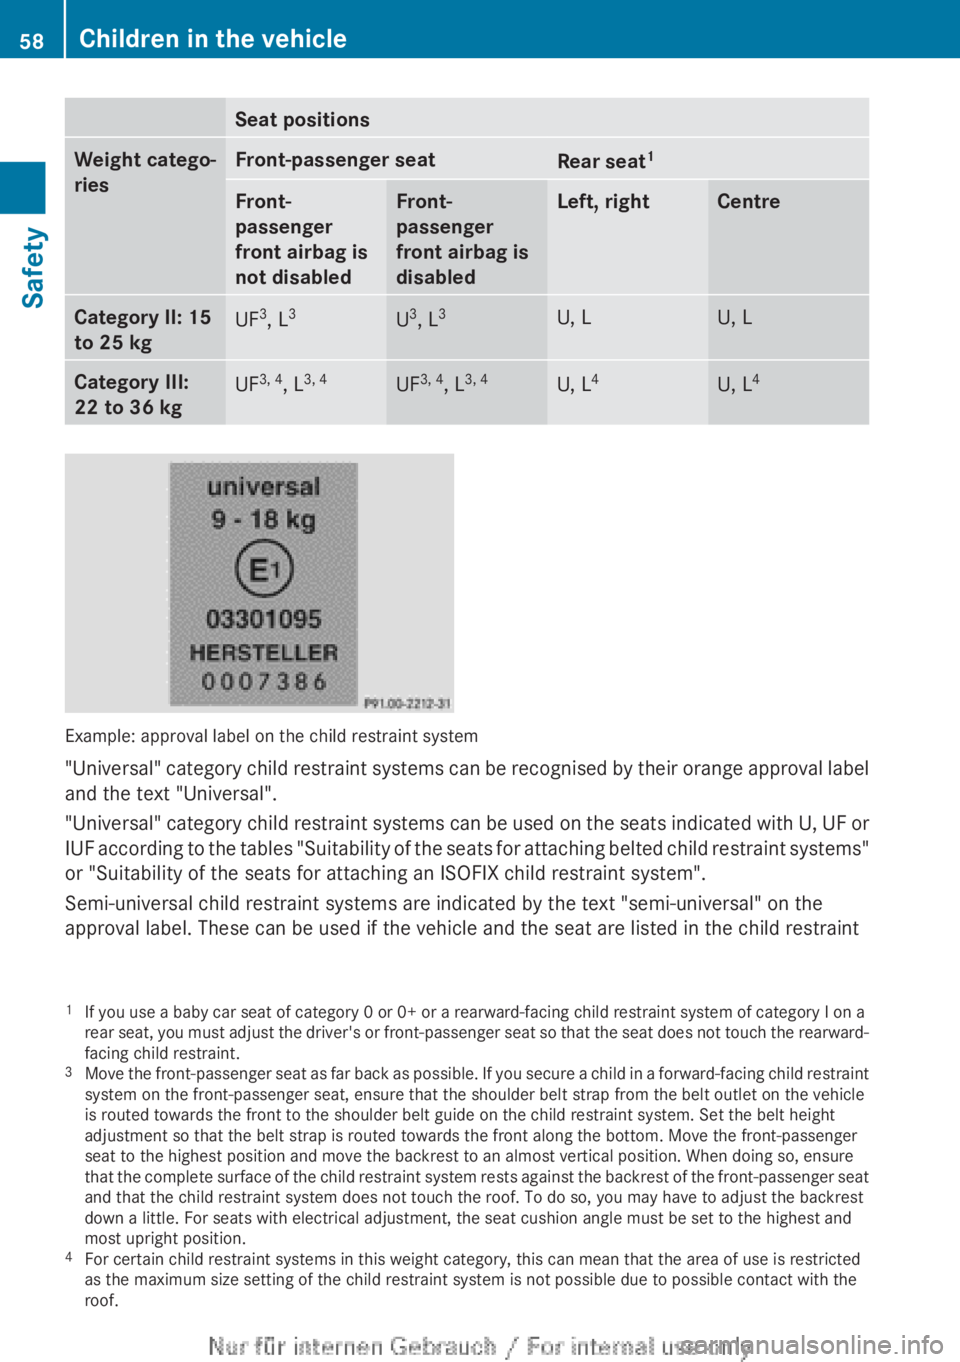
Seat positionsWeight catego-
riesFront-passenger seatRear seat 1Front-
passenger
front airbag is
not disabledFront-
passenger
front airbag is
disabledLeft, rightCentreCategory II: 15
to 25 kgUF 3
, L 3U3
, L 3U, LU, LCategory III:
22 to 36 kgUF 3, 4
, L3, 4UF 3, 4
, L3, 4U, L 4U, L4
Example: approval label on the child restraint system
" Universal" category child restraint systems can be recognised by their orange approval label
and the text "Universal".
" Universal" category child restraint systems can be used on the seats indicated with U, UF or
IUF according to the tables "Suitability of the seats for attaching belted child restraint systems"
or "Suitability of the seats for attaching an ISOFIX child restraint system".
Semi-universal child restraint systems are indicated by the text "semi-universal" on the
approval label. These can be used if the vehicle and the seat are listed in the child restraint
1 If you use a baby car seat of category 0 or 0+ or a rearward-facing child restraint system of category I on a
rear seat, you must adjust the driver's or front-passenger seat so that the seat does not touch the rearward-
facing child restraint.
3 Move the front-passenger seat as far back as possible. If you secure a child in a forward-facing child restraint
system on the front-passenger seat, ensure that the shoulder belt strap from the belt outlet on the vehicle
is routed towards the front to the shoulder belt guide on the child restraint system. Set the belt height
adjustment so that the belt strap is routed towards the front along the bottom. Move the front-passenger
seat to the highest position and move the backrest to an almost vertical position. When doing so, ensure
that the complete surface of the child restraint system rests against the backrest of the front-passenger seat
and that the child restraint system does not touch the roof. To do so, you may have to adjust the backrest
down a little. For seats with electrical adjustment, the seat cushion angle must be set to the highest and
most upright position.
4 For certain child restraint systems in this weight category, this can mean that the area of use is restricted
as the maximum size setting of the child restraint system is not possible due to possible contact with the
roof.58Children in the vehicleSafety