stop start MERCEDES-BENZ CLA 2013 Owners Manual
[x] Cancel search | Manufacturer: MERCEDES-BENZ, Model Year: 2013, Model line: CLA, Model: MERCEDES-BENZ CLA 2013Pages: 352, PDF Size: 5.37 MB
Page 7 of 352
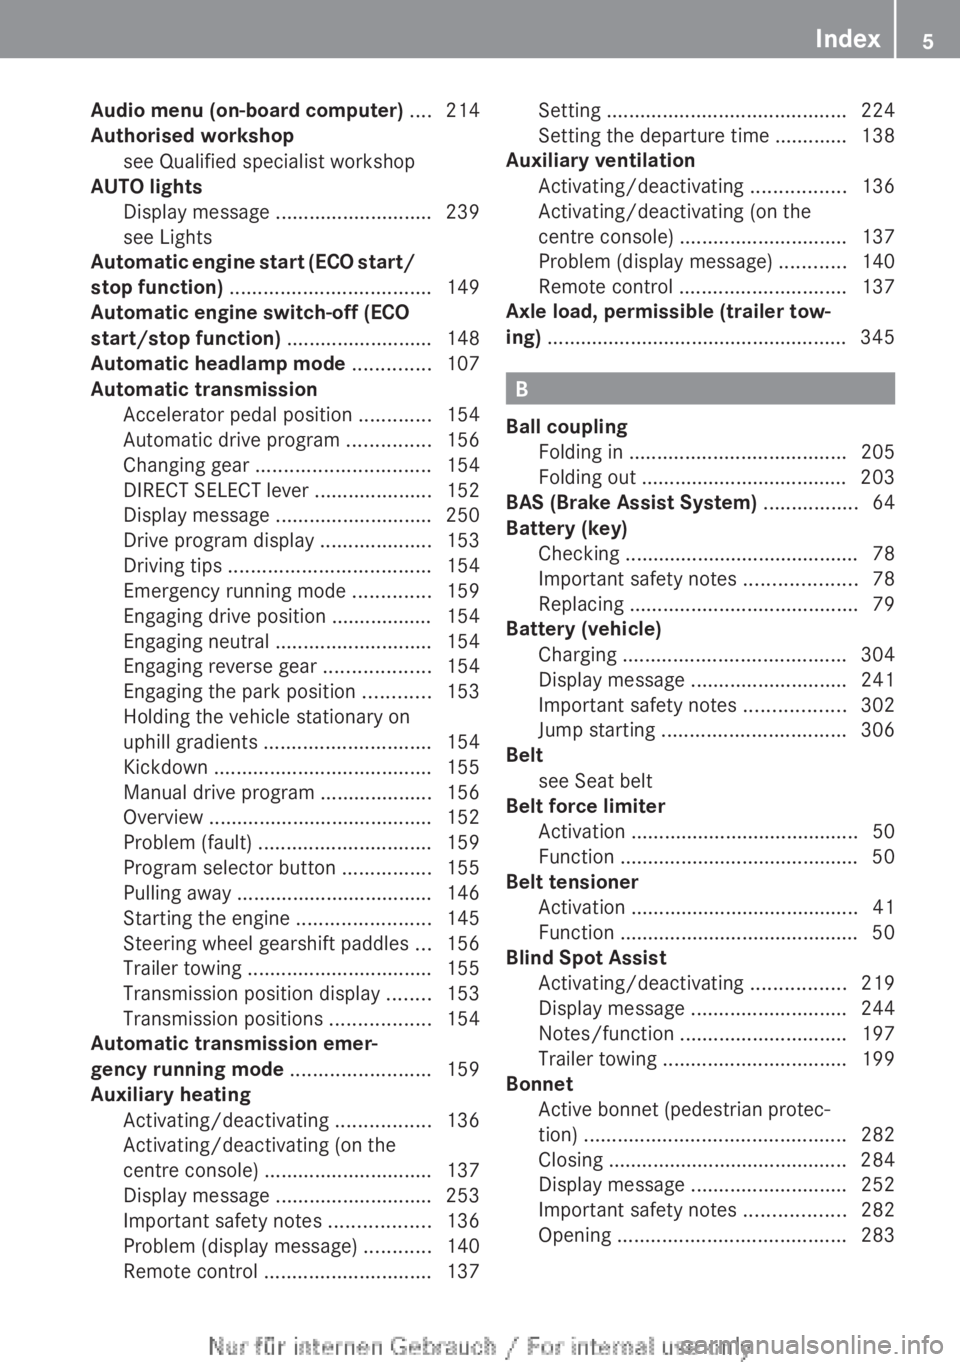
Audio menu (on-board computer) .... 214
Authorised workshop see Qualified specialist workshop
AUTO lights
Display message ............................ 239
see Lights
Automatic engine start (ECO start/
stop function) .................................... 149
Automatic engine switch-off (ECO
start/stop function) .......................... 148
Automatic headlamp mode .............. 107
Automatic transmission Accelerator pedal position .............154
Automatic drive program ...............156
Changing gear ............................... 154
DIRECT SELECT lever .....................152
Display message ............................ 250
Drive program display ....................153
Driving tips .................................... 154
Emergency running mode ..............159
Engaging drive position .................. 154
Engaging neutral ............................ 154
Engaging reverse gear ...................154
Engaging the park position ............153
Holding the vehicle stationary on
uphill gradients .............................. 154
Kickdown ....................................... 155
Manual drive program ....................156
Overview ........................................ 152
Problem (fault) ............................... 159
Program selector button ................155
Pulling away ................................... 146
Starting the engine ........................145
Steering wheel gearshift paddles ...156
Trailer towing ................................. 155
Transmission position display ........153
Transmission positions ..................154
Automatic transmission emer-
gency running mode ......................... 159
Auxiliary heating Activating/deactivating .................136
Activating/deactivating (on the
centre console) .............................. 137
Display message ............................ 253
Important safety notes ..................136
Problem (display message) ............140
Remote control .............................. 137Setting ........................................... 224
Setting the departure time ............. 138
Auxiliary ventilation
Activating/deactivating .................136
Activating/deactivating (on the
centre console) .............................. 137
Problem (display message) ............140
Remote control .............................. 137
Axle load, permissible (trailer tow-
ing) ...................................................... 345
B
Ball coupling Folding in ....................................... 205
Folding out ..................................... 203
BAS (Brake Assist System) ................. 64
Battery (key) Checking .......................................... 78
Important safety notes ....................78
Replacing ......................................... 79
Battery (vehicle)
Charging ........................................ 304
Display message ............................ 241
Important safety notes ..................302
Jump starting ................................. 306
Belt
see Seat belt
Belt force limiter
Activation ......................................... 50
Function ........................................... 50
Belt tensioner
Activation ......................................... 41
Function ........................................... 50
Blind Spot Assist
Activating/deactivating .................219
Display message ............................ 244
Notes/function .............................. 197
Trailer towing ................................. 199
Bonnet
Active bonnet (pedestrian protec-
tion) ............................................... 282
Closing ........................................... 284
Display message ............................ 252
Important safety notes ..................282
Opening ......................................... 283
Index5
Page 11 of 352
COLLISION PREVENTION ASSIST
PLUS ................................................ 67
Distance warning function ...............65
Electronic Brake-force Distribution ..70
ESP ®
(Electronic Stability Pro-
gram) ......................................... 68, 69
Important safety guidelines .............64
Driving safety systems
ABS (Anti-lock Braking System) .......64
ADAPTIVE BRAKE ............................. 70
Adaptive brake lamps ......................68
BAS (Brake Assist System) ..............64
ETS (Electronic Traction System) .....68
Overview .......................................... 63
Steering assistant STEER CON-
TROL ................................................ 70
Driving system
Active Parking Assist .....................186
Driving systems
ATTENTION ASSIST ........................195
Blind Spot Assist ............................ 197
Cruise control ................................ 168
Display message ............................ 242
Distronic Plus ................................ 173
HOLD function ............................... 181
Lane Keeping Assist ......................199
Lane package ................................ 197
PARKTRONIC ................................. 182
Reversing camera ..........................191
Speed Limit Assist .........................196
SPEEDTRONIC ............................... 171
Driving tips
Aquaplaning ................................... 167
Automatic transmission .................154
Brakes ........................................... 166
DISTRONIC PLUS ........................... 180
Downhill gradient ........................... 166
Driving abroad ............................... 106
Driving in winter ............................. 167
Driving on flooded roads ................167
Driving on wet roads ......................167
General .......................................... 165
Icy road surfaces ........................... 168
Limited braking efficiency on sal-
ted roads ....................................... 167
New brake pads/linings ................167
Running-in tips ............................... 144
Snow chains .................................. 319Symmetrical dipped beam .............106
Towing a trailer .............................. 201
Wet road surface ........................... 166
DVD audio (on-board computer) ...... 215
E
EASY-VARIO-PLUS system Luggage compartment enlarge-
ment .............................................. 271
EBD (electronic brake force distri-
bution) Display message ............................ 229
Function/notes ................................ 70
ECO display
Function/notes ............................. 165
On-board computer .......................212
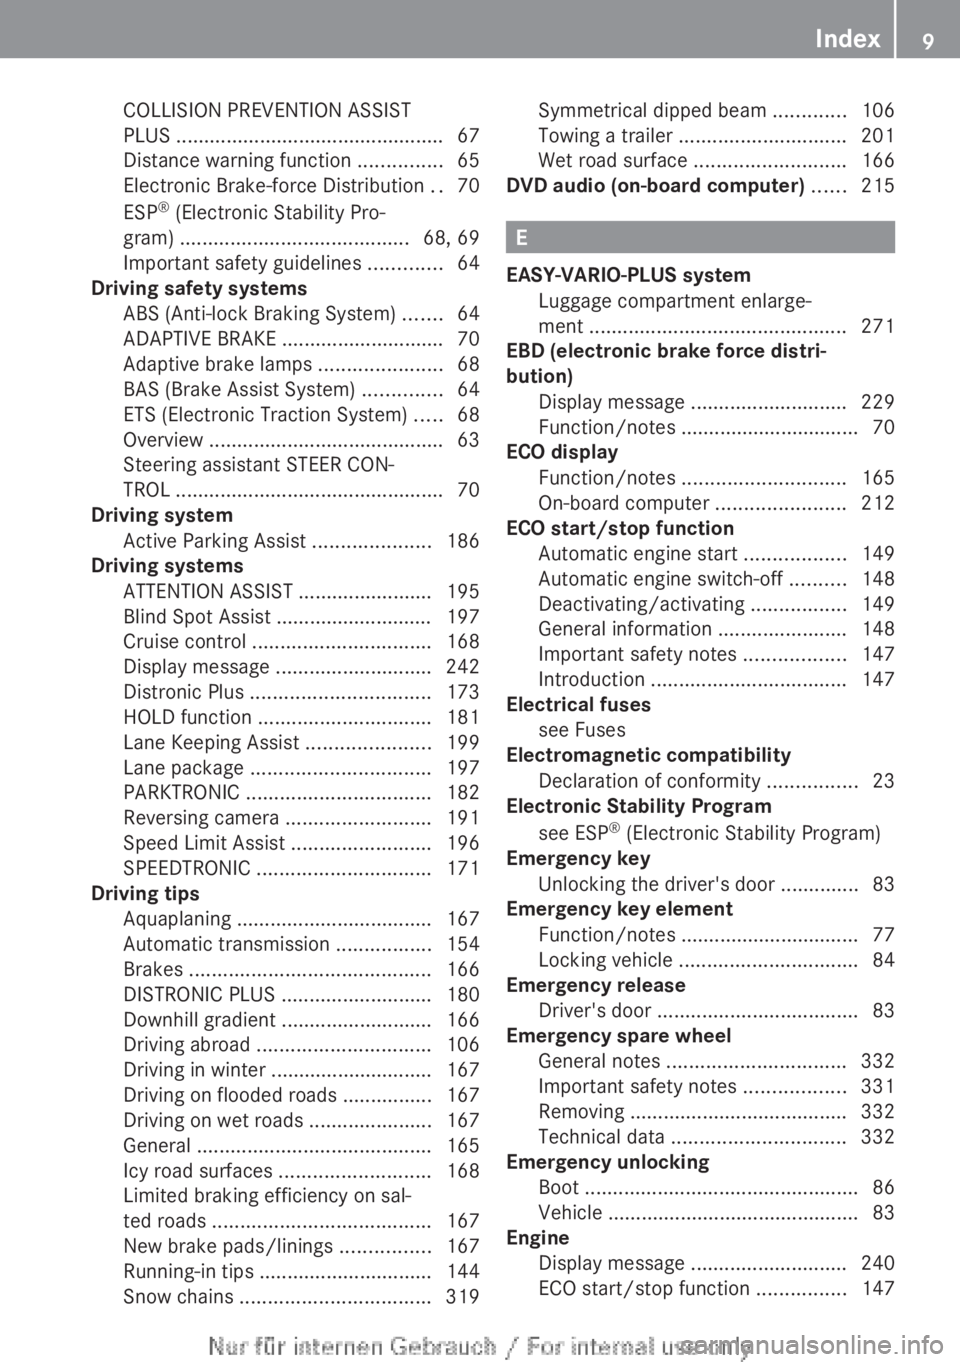
ECO start/stop function
Automatic engine start ..................149
Automatic engine switch-off ..........148
Deactivating/activating .................149
General information .......................148
Important safety notes ..................147
Introduction ................................... 147
Electrical fuses
see Fuses
Electromagnetic compatibility
Declaration of conformity ................23
Electronic Stability Program
see ESP ®
(Electronic Stability Program)
Emergency key
Unlocking the driver's door ..............83
Emergency key element
Function/notes ................................ 77
Locking vehicle ................................ 84
Emergency release
Driver's door .................................... 83
Emergency spare wheel
General notes ................................ 332
Important safety notes ..................331
Removing ....................................... 332
Technical data ............................... 332
Emergency unlocking
Boot ................................................. 86
Vehicle ............................................. 83
Engine
Display message ............................ 240
ECO start/stop function ................147
Index9
Page 12 of 352
Engine number ............................... 336
Jump-starting ................................. 306
Running irregularly .........................150
Starting problems ..........................150
Starting the engine with the key ....146
Stopping ........................................ 162
Tow-starting (vehicle) ..................... 311
Warning lamp (engine diagnostics) 262
Engine electronics
Notes ............................................. 334
Problem (fault) ............................... 150
Engine jump starting
see Jump starting (engine)
Engine oil
Additives ........................................ 341
Checking the oil level ..................... 284
Checking the oil level using the
dipstick .......................................... 284
Display message ............................ 242
Filling capacity ............................... 340
Notes about oil grades ................... 340
Notes on oil level/consumption ....284
Topping up ..................................... 285
Viscosity ........................................ 341
Environmental protection
Returning an end-of-life vehicle .......21
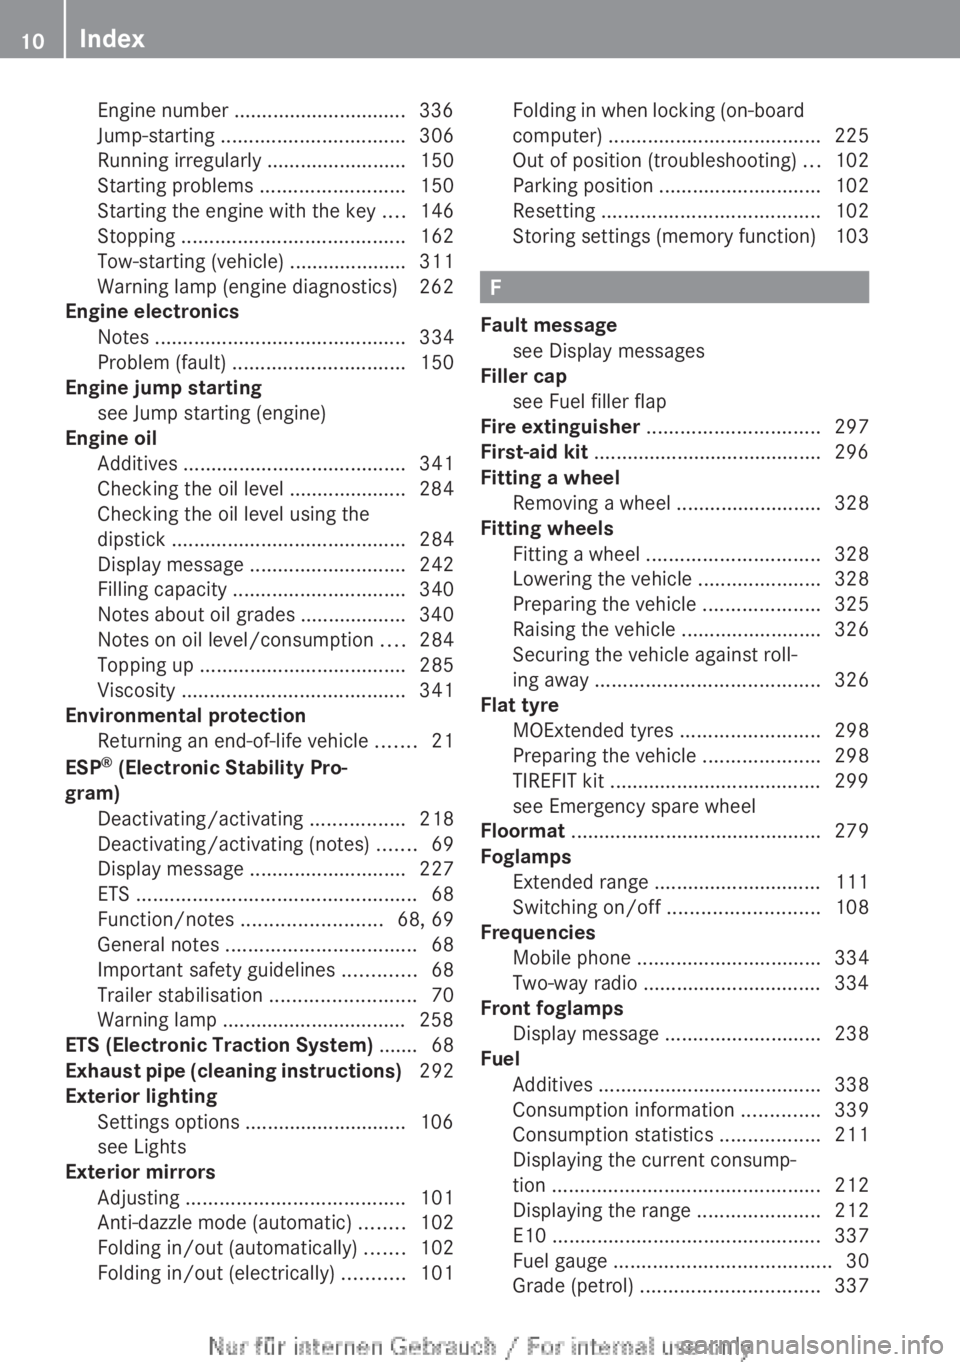
ESP ®
(Electronic Stability Pro-
gram) Deactivating/activating .................218
Deactivating/activating (notes) .......69
Display message ............................ 227
ETS .................................................. 68
Function/notes ......................... 68, 69
General notes .................................. 68
Important safety guidelines .............68
Trailer stabilisation ..........................70
Warning lamp ................................. 258
ETS (Electronic Traction System) ....... 68
Exhaust pipe (cleaning instructions) 292
Exterior lighting Settings options ............................. 106
see Lights
Exterior mirrors
Adjusting ....................................... 101
Anti-dazzle mode (automatic) ........102
Folding in/out (automatically) .......102
Folding in/out (electrically) ...........101Folding in when locking (on-board
computer) ...................................... 225
Out of position (troubleshooting) ...102
Parking position ............................. 102
Resetting ....................................... 102
Storing settings (memory function) 103
F
Fault message see Display messages
Filler cap
see Fuel filler flap
Fire extinguisher ............................... 297
First-aid kit ......................................... 296
Fitting a wheel Removing a wheel ..........................328
Fitting wheels
Fitting a wheel ............................... 328
Lowering the vehicle ......................328
Preparing the vehicle .....................325
Raising the vehicle .........................326
Securing the vehicle against roll-
ing away ........................................ 326
Flat tyre
MOExtended tyres .........................298
Preparing the vehicle .....................298
TIREFIT kit ...................................... 299
see Emergency spare wheel
Floormat ............................................. 279
Foglamps Extended range .............................. 111
Switching on/off ........................... 108
Frequencies
Mobile phone ................................. 334
Two-way radio ................................ 334
Front foglamps
Display message ............................ 238
Fuel
Additives ........................................ 338
Consumption information ..............339
Consumption statistics ..................211
Displaying the current consump-
tion ................................................ 212
Displaying the range ......................212
E10 ................................................ 337
Fuel gauge ....................................... 30
Grade (petrol) ................................ 337
10Index
Page 18 of 352
Fastening ......................................... 48
Important safety guidelines .............46
Rear seat belt status indicator .........49
Releasing ......................................... 49
Switching belt adjustment on/off
(on-board computer) ......................225
Warning lamp ................................. 255
Warning lamp (function) ................... 49
Seats
Adjusting (electrically) .....................96
Adjusting (manually) ........................96
Adjusting the 4-way lumbar sup-
port .................................................. 98
Adjusting the head restraint ............97
Cleaning the cover .........................293
Correct driver's seat position ........... 94
Important safety notes ....................95
Seat heating problem ....................100
Storing settings (memory function) 103
Switching seat heating on/off .........99
Sensors (cleaning instructions) ....... 291
Service see ASSYST PLUS
Service menu (on-board computer) . 219
Service products Brake fluid ..................................... 341
Coolant (engine) ............................ 341
Engine oil ....................................... 340
Fuel ................................................ 337
Important safety notes ..................336
Washer fluid ................................... 342
Settings
Factory (on-board computer) .........225
On-board computer .......................219
Setting the air distribution ............... 131
Setting the airflow ............................ 131
Shifting to neutral (manual trans-
mission) ............................................. 152
Sidebag ................................................ 44
Side lamps Switching on/off ........................... 108
Side windows
Convenience closing ........................88
Convenience opening ......................88
Important safety notes ....................86
Opening/closing .............................. 87
Problem (malfunction) .....................89
resetting .......................................... 88Sliding sunroof
see Panorama sliding sunroof
Snow chains ...................................... 319
Socket Centre console .............................. 277
Points to observe before use .........277
Rear compartment .........................277
Specialist workshop ............................ 24
Spectacles compartment ................. 269
Speed, controlling see Cruise control
Speed Limit Assist
Activating/deactivating the warn-
ing function .................................... 218
Displaying ...................................... 217
Display message ............................ 243
Display message in the multifunc-
tion display .................................... 197
Function/notes ............................. 196
Important safety notes ..................196
Speedometer
Activating/deactivating the addi-
tional speedometer ........................220
Digital ............................................ 212
In the Instrument cluster .................30
Segments ...................................... 209
Selecting the unit of measurement 220
see Instrument cluster
SPEEDTRONIC
Deactivating variable .....................172
Display message ............................ 247
Function/notes ............................. 171
Important safety notes ..................171
LIM indicator lamp .........................171
Permanent ..................................... 173
Selecting ........................................ 171
Storing the current speed ..............172
Variable ......................................... 171
SRS (Supplemental Restraint Sys-
tem) Display message ............................ 235
Introduction ..................................... 41
Warning lamp ................................. 261
Warning lamp (function) ................... 41
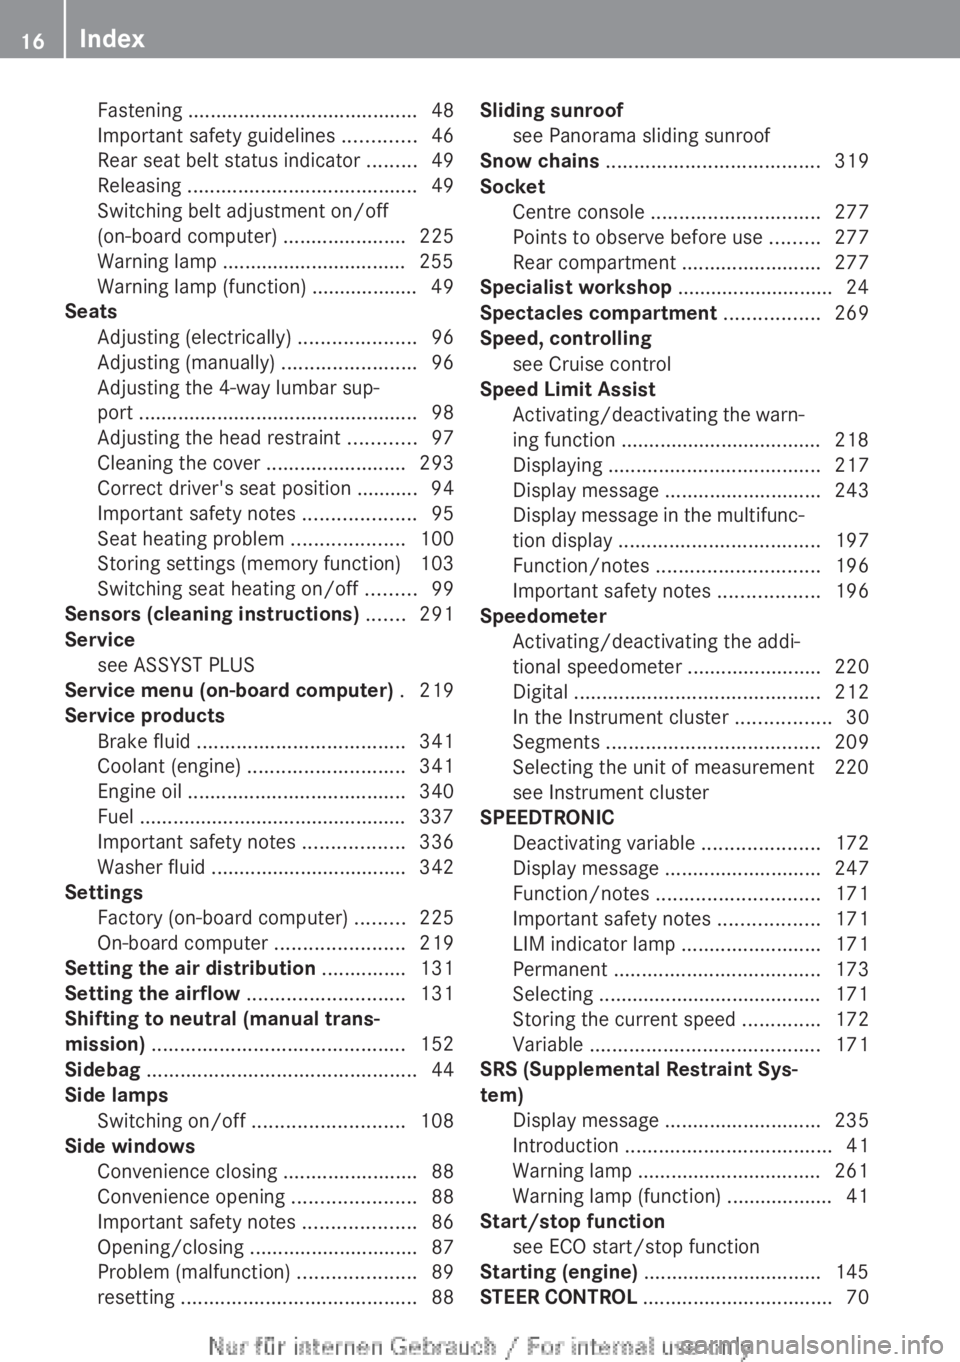
Start/stop function
see ECO start/stop function
Starting (engine) ................................ 145
STEER CONTROL .................................. 7016Index
Page 36 of 352
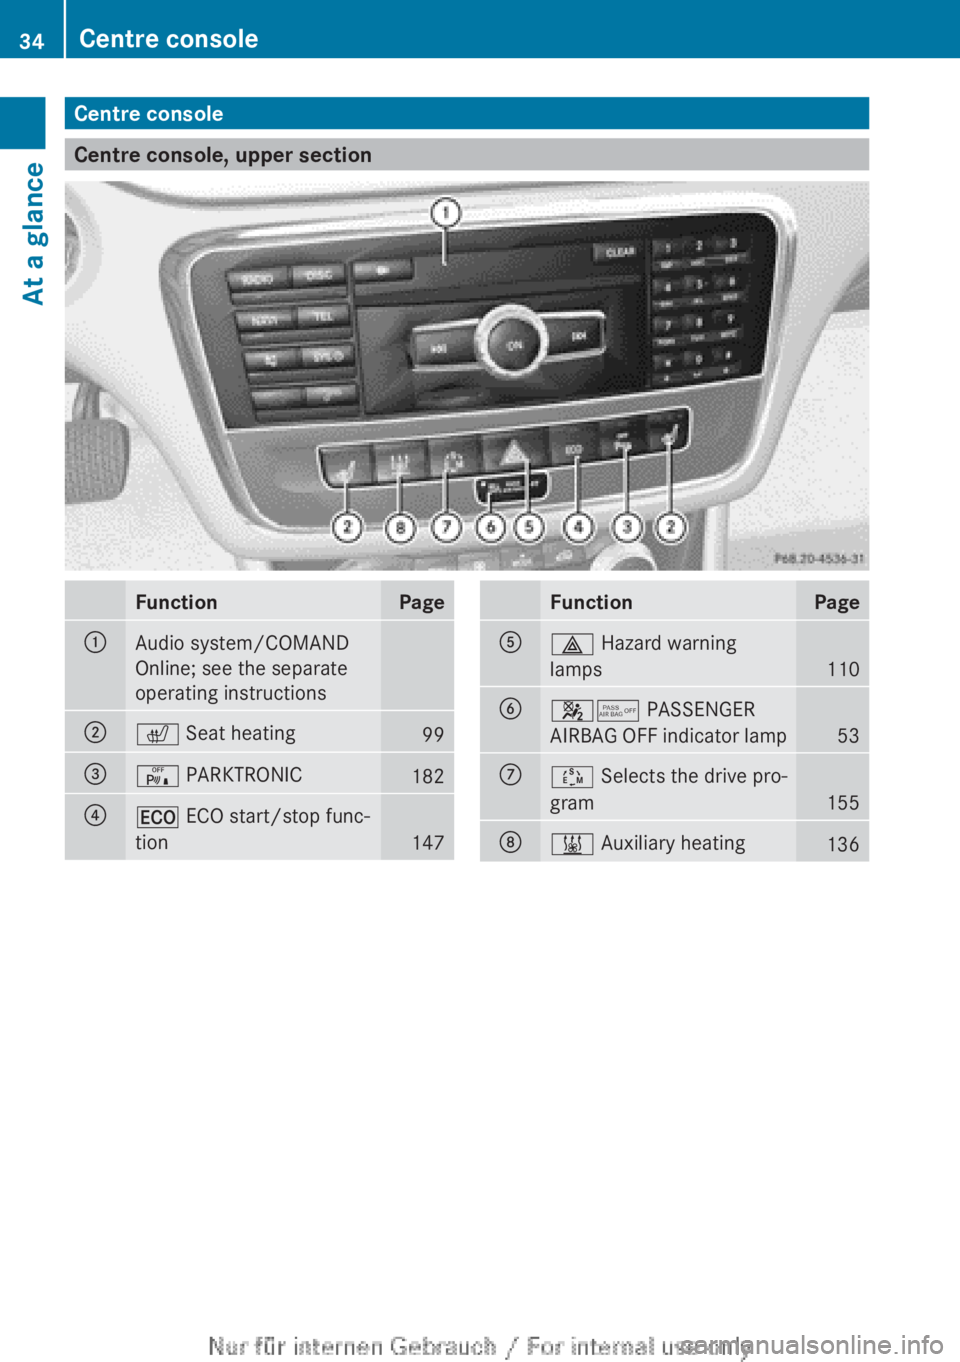
Centre console
Centre console, upper section
FunctionPage:Audio system/COMAND
Online; see the separate
operating instructions;c Seat heating99=c PARKTRONIC182?¤ ECO start/stop func-
tion
147
FunctionPageA£ Hazard warning
lamps
110
B45 PASSENGER
AIRBAG OFF indicator lamp
53
CÚ Selects the drive pro-
gram
155
D& Auxiliary heating13634Centre consoleAt a glance
Page 71 of 352
Observe the information on warning lamps
( Y page 258) and display messages which
may be shown in the instrument cluster
( Y page 227).
i Only use wheels with the recommended
tyre sizes. Only then will ESP ®
function
properly.
Characteristics of ESP ®
General notes
If the ÷ ESP warning lamp goes out before
beginning the journey, ESP ®
is automatically
active.
If ESP ®
intervenes, the ÷ ESP®
warning
lamp flashes in the instrument cluster.
If ESP ®
intervenes:
XDo not deactivate ESP ®
under any circum-
stances.XWhen pulling away, only depress the accel-
erator pedal as far as is necessary.XAdapt your driving style to suit the prevail-
ing road and weather conditions.
ECO start/stop function
The ECO start/stop function switches the
engine off automatically if the vehicle stops
moving. When pulling away again, the engine
starts automatically. ESP ®
remains in its pre-
viously selected status. Example: if ESP®
was deactivated before the engine was
switched off, ESP ®
remains deactivated when
the engine is switched on again.
Deactivating/activating ESP ®
Important safety notes
i Observe the "Important safety notes" sec-
tion ( Y page 64).
You can select between the following states
of ESP ®
:
R ESP ®
is activated.
R ESP ®
is deactivated.
GWARNING
If you deactivate ESP ®
, ESP ®
no longer sta-
bilises the vehicle. There is an increased risk
of skidding and an accident.
Only deactivate ESP ®
in the situations descri-
bed in the following.
It may be best to deactivate ESP ®
in the fol-
lowing situations:
R when using snow chains
R in deep snow
R on sand or gravel
i Activate ESP ®
as soon as the situations
described above no longer apply. ESP ®
will
otherwise not be able to stabilise the vehi-
cle if the vehicle starts to skid or a wheel
starts to spin.
Deactivating/activating ESP ®
You can deactivate or activate ESP ®
via the
on-board computer.
XTo deactivate: (Y page 218).
The å ESP®
OFF warning lamp in the
instrument cluster lights up.XTo activate: (Y page 218).
The å ESP®
OFF warning lamp in the
instrument cluster goes out.
Characteristics when ESP ®
is deactivated
If ESP ®
is deactivated and one or more wheels
start to spin, the ÷ ESP®
warning lamp in
the instrument cluster flashes. In such situa-
tions, ESP ®
will not stabilise the vehicle.
If you deactivate ESP ®
:
R ESP ®
no longer improves driving stability.
R engine torque is no longer limited and the
drive wheels are able to spin.
The spinning of the wheels results in a cut-
ting action for better traction on loose sur-
faces.
R ETS is still active.
R ESP ®
still provides support when you
brake.
Driving safety systems69SafetyZ
Page 73 of 352
Anti-theft systems
Immobiliser
The immobiliser prevents your vehicle from
being started without the correct key.
XTo activate: remove the key from the igni-
tion lock.XTo deactivate: switch on the ignition.
When leaving the vehicle, always take the key
with you and lock the vehicle. The engine can
be started by anyone with a valid key that is
left inside the vehicle.
i The immobiliser is always deactivated
when you start the engine.
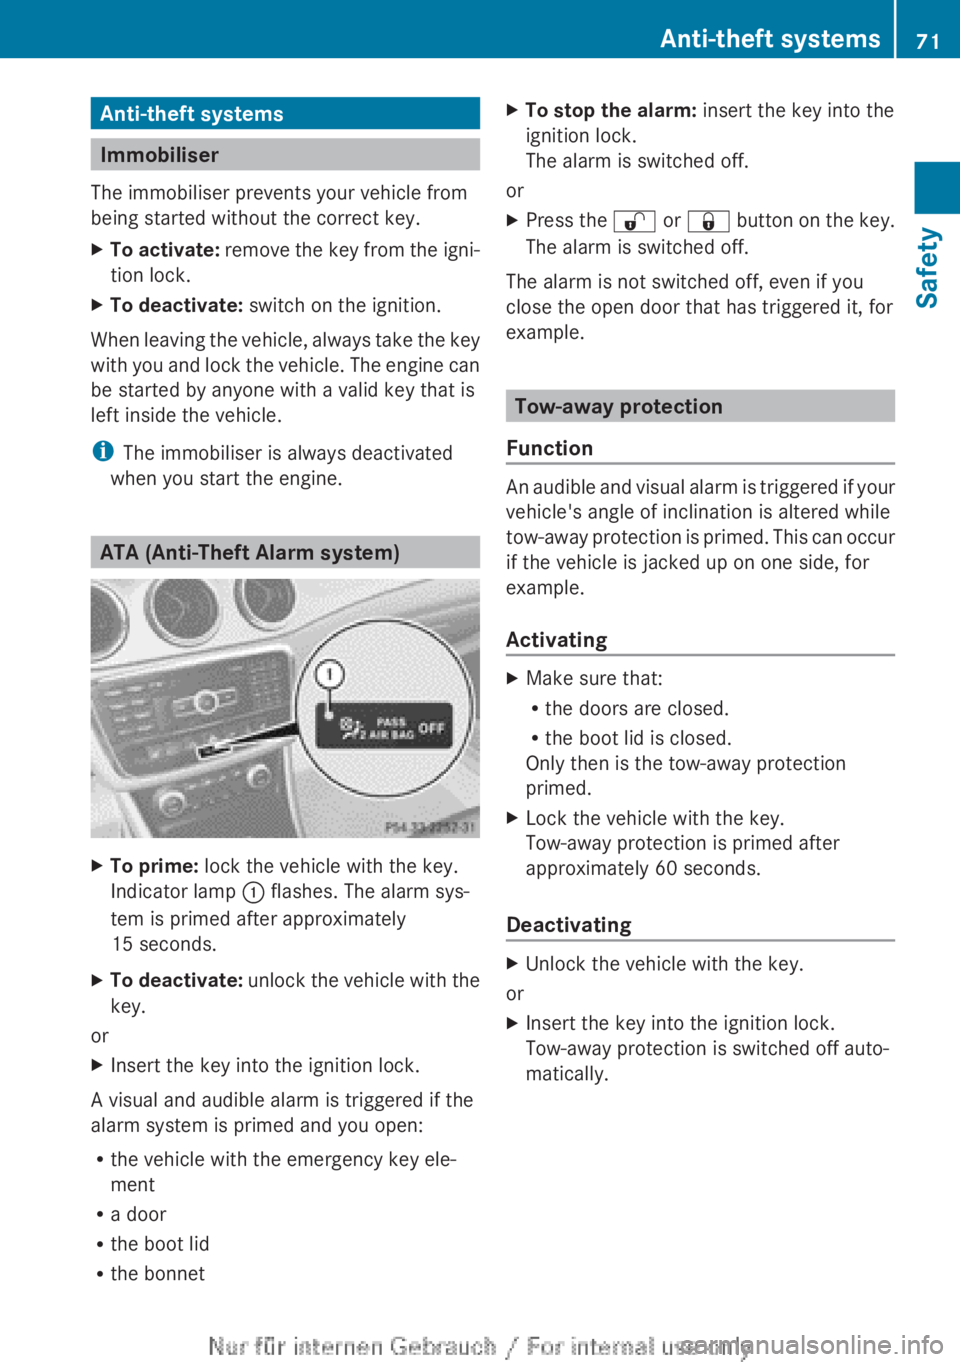
ATA (Anti-Theft Alarm system)
XTo prime: lock the vehicle with the key.
Indicator lamp : flashes. The alarm sys-
tem is primed after approximately
15 seconds.XTo deactivate: unlock the vehicle with the
key.
or
XInsert the key into the ignition lock.
A visual and audible alarm is triggered if the
alarm system is primed and you open:
R the vehicle with the emergency key ele-
ment
R a door
R the boot lid
R the bonnet
XTo stop the alarm: insert the key into the
ignition lock.
The alarm is switched off.
or
XPress the % or & button on the key.
The alarm is switched off.
The alarm is not switched off, even if you
close the open door that has triggered it, for
example.
Tow-away protection
Function
An audible and visual alarm is triggered if your
vehicle's angle of inclination is altered while
tow-away protection is primed. This can occur
if the vehicle is jacked up on one side, for
example.
Activating
XMake sure that:
R the doors are closed.
R the boot lid is closed.
Only then is the tow-away protection
primed.XLock the vehicle with the key.
Tow-away protection is primed after
approximately 60 seconds.
Deactivating
XUnlock the vehicle with the key.
or
XInsert the key into the ignition lock.
Tow-away protection is switched off auto-
matically.Anti-theft systems71SafetyZ
Page 89 of 352
Side window reversing feature
The side windows are equipped with an auto-
matic reversing feature. If a solid object
blocks or restricts a side window during the
closing process, the side window opens again
automatically. The automatic reversing fea-
ture is however only an aid and is no substi-
tute for your attention when closing a side
window.GWARNING
The reversing function does not react:
R to soft, light and thin objects, e.g. small fin-
gers
R over the last 4 mm of the closing movement
R during resetting
R when closing the side window again man-
ually immediately after automatic reversing
This means that the reversing function cannot
prevent someone being trapped in these sit-
uations. There is a risk of injury.
When closing make sure that no parts of the
body are in the closing area. If someone
becomes trapped, press the switch to open
the side window again.
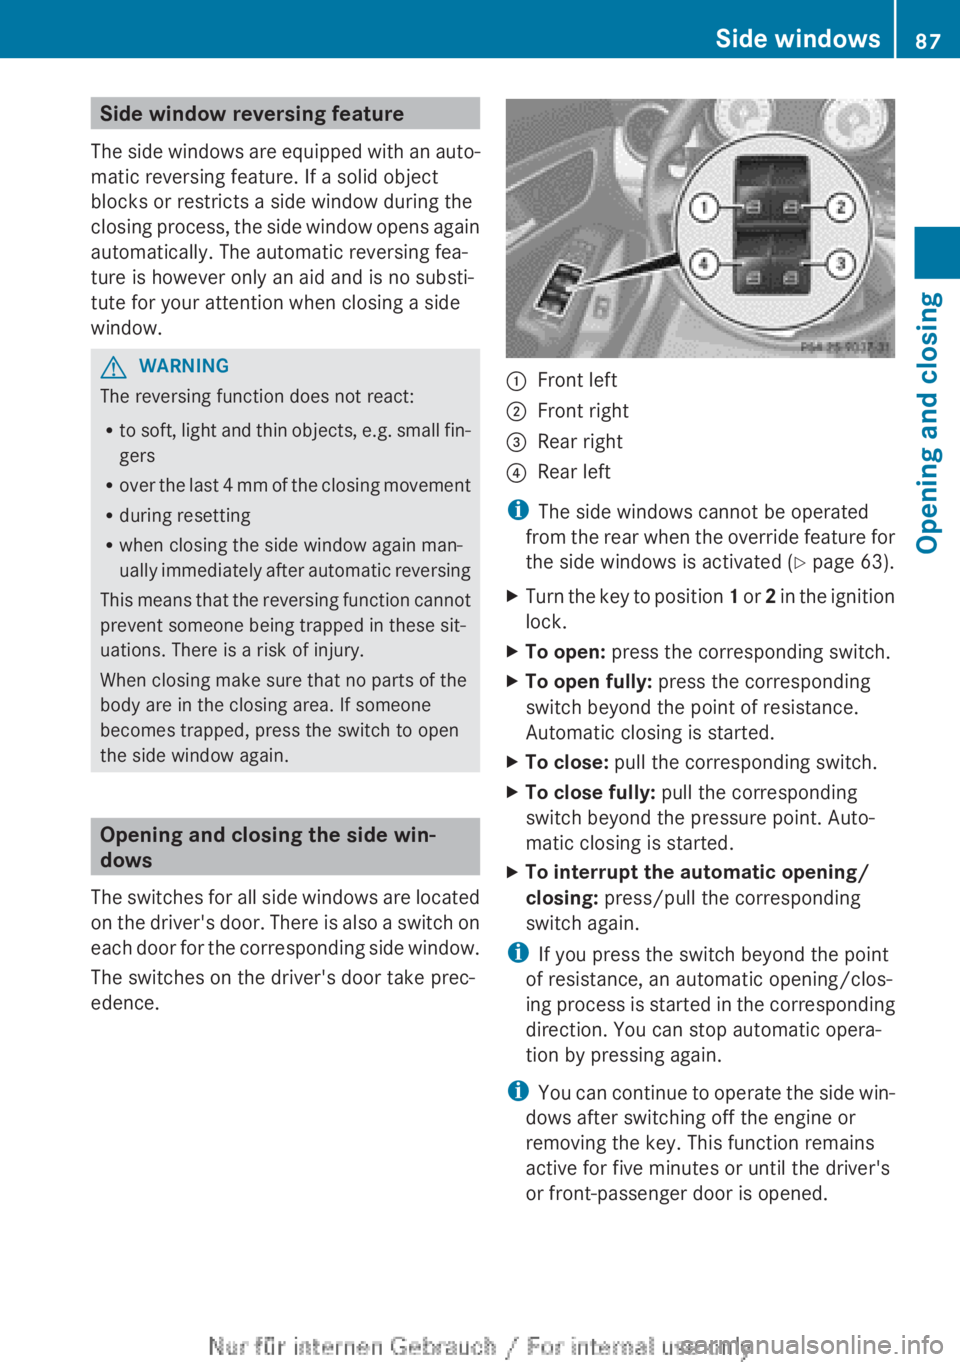
Opening and closing the side win-
dows
The switches for all side windows are located
on the driver's door. There is also a switch on
each door for the corresponding side window.
The switches on the driver's door take prec-
edence.
:Front left;Front right=Rear right?Rear left
i The side windows cannot be operated
from the rear when the override feature for
the side windows is activated ( Y page 63).
XTurn the key to position 1 or 2 in the ignition
lock.XTo open: press the corresponding switch.XTo open fully: press the corresponding
switch beyond the point of resistance.
Automatic closing is started.XTo close: pull the corresponding switch.XTo close fully: pull the corresponding
switch beyond the pressure point. Auto-
matic closing is started.XTo interrupt the automatic opening/
closing: press/pull the corresponding
switch again.
i If you press the switch beyond the point
of resistance, an automatic opening/clos-
ing process is started in the corresponding
direction. You can stop automatic opera-
tion by pressing again.
i You can continue to operate the side win-
dows after switching off the engine or
removing the key. This function remains
active for five minutes or until the driver's
or front-passenger door is opened.
Side windows87Opening and closingZ
Page 92 of 352
pressure fluctuations in the vehicle interior.
Change the position of the sliding sunroof
or open a side window slightly to reduce or
eliminate these noises.
Sliding sunroof reversing feature
The sliding sunroof is equipped with an auto-
matic reversing feature. If an object blocks or
restricts the sliding sunroof during the closing
process, the sliding sunroof opens again
automatically. The automatic reversing fea-
ture is however only an aid and is no substi-
tute for your attention when closing the slid-
ing roof.
GWARNING
The reversing function does not react:
R to soft, light and thin objects, e.g. small fin-
gers
R over the last 4 mm of the closing movement
R during resetting
R when closing the sliding sunroof again man-
ually immediately after automatic reversing
This means that the reversing function cannot
prevent someone being trapped in these sit-
uations. There is a risk of injury.
When closing make sure that no parts of the
body are in the closing area.
If someone is trapped:
R release the switch immediately or
R press the switch in any direction during the
automatic closing process
The closing process is stopped.
Operating the sliding sunroof
Opening and closing
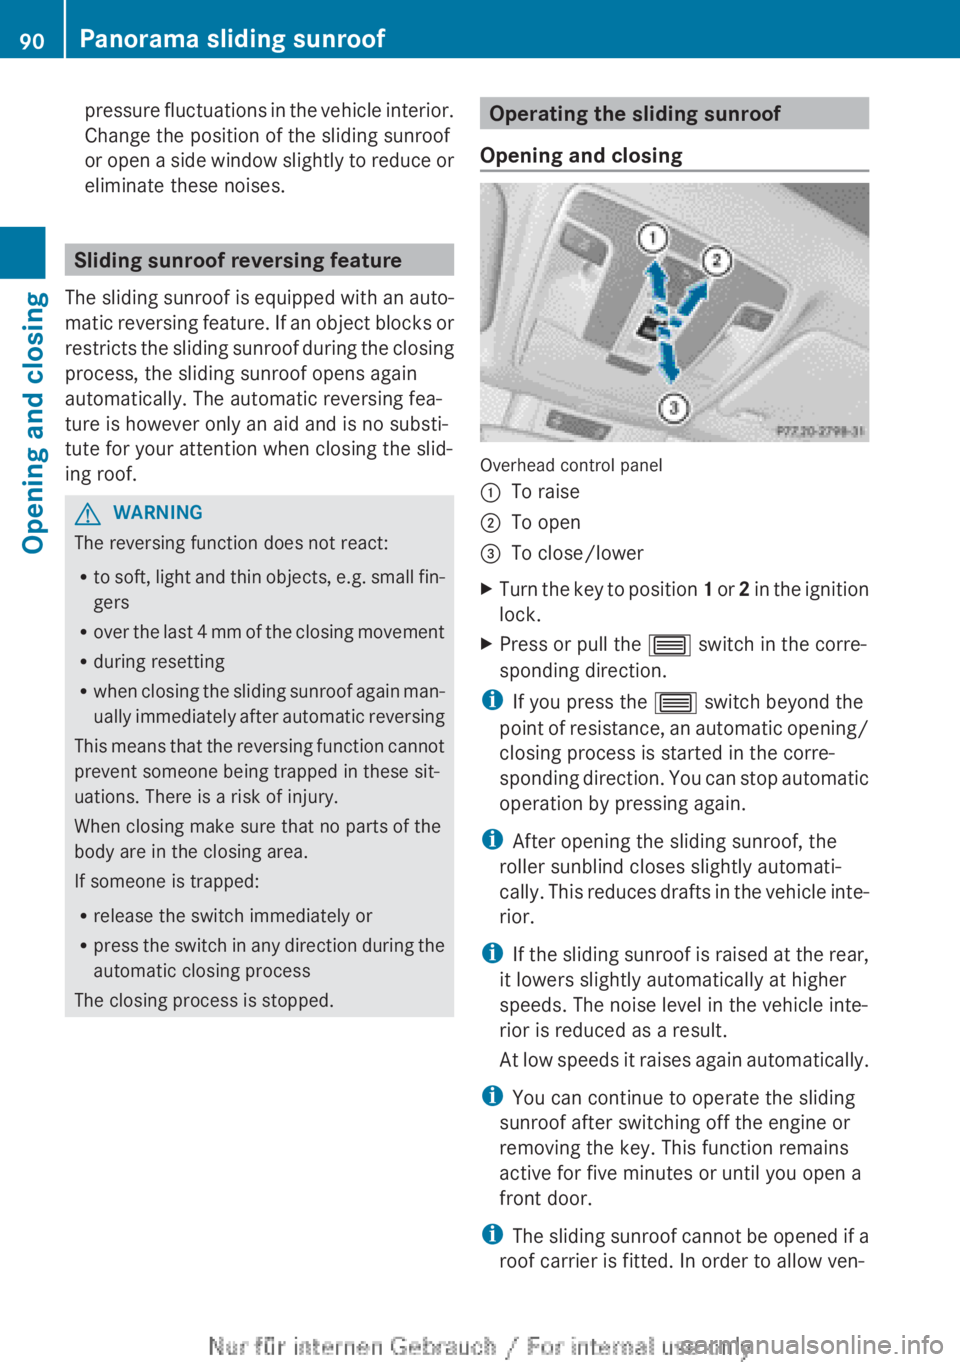
Overhead control panel
:To raise;To open=To close/lowerXTurn the key to position 1 or 2 in the ignition
lock.XPress or pull the 3 switch in the corre-
sponding direction.
i If you press the 3 switch beyond the
point of resistance, an automatic opening/
closing process is started in the corre-
sponding direction. You can stop automatic
operation by pressing again.
i After opening the sliding sunroof, the
roller sunblind closes slightly automati-
cally. This reduces drafts in the vehicle inte-
rior.
i If the sliding sunroof is raised at the rear,
it lowers slightly automatically at higher
speeds. The noise level in the vehicle inte-
rior is reduced as a result.
At low speeds it raises again automatically.
i You can continue to operate the sliding
sunroof after switching off the engine or
removing the key. This function remains
active for five minutes or until you open a
front door.
i The sliding sunroof cannot be opened if a
roof carrier is fitted. In order to allow ven-
90Panorama sliding sunroofOpening and closing
Page 93 of 352
tilation of the vehicle interior, you can raise
the sliding sunroof.
If contact is made with a roof carrier
approved by Mercedes-Benz, the sliding
sunroof lowers slightly but remains raised
at the rear.
Rain-closing feature
The rain-closing feature is only available for
vehicles with a rain sensor.
When the key is in position 0 in the ignition
lock or is removed, the sliding sunroof closes
automatically:
R if it starts to rain
R at extreme outside temperatures
R after six hours
R if there is a malfunction in the power supply
The sliding sunroof remains raised at the rear
in order to allow ventilation of the vehicle
interior.
i If the sliding sunroof is obstructed when
being closed by the rain-closing feature, it
opens again slightly. The rain-closing fea-
ture is then deactivated.
The sliding sunroof does not close if:
R it is raised at the rear.
R it is blocked.
R no rain is falling on the area of the wind-
screen being monitored by the rain sensor,
e.g. because the vehicle is under a bridge.
Operating the roller sunblinds for the
sliding sunroof
Important safety notes
GWARNING
When opening or closing the roller sunblind
parts of the body could be trapped between
the roller sunblind and the frame or sliding
sunroof. There is a risk of injury.
When opening or closing make sure that no
parts of the body are in the sweep of the roller
sunblind.
If someone is trapped:
R release the switch immediately or
R press the switch in any direction during the
automatic opening/closing process
The opening/closing process is stopped.
The roller sunblinds shield the vehicle interior
from sunlight. The two roller sunblinds can
only be opened and closed together when the
sliding sunroof is closed.
Roller sunblind reversing feature
The roller sunblinds are equipped with an
automatic reversing feature. If a solid object
blocks or restricts the roller blind during the
closing process, the roller blind opens again
automatically. However, the automatic
reversing feature is only an aid and does not
relieve you of the responsibility to pay atten-
tion when closing the roller blinds.
GWARNING
The reversing function does not react:
R to soft, light and thin objects, e.g. small fin-
gers
R when closing the roller sunblind again man-
ually immediately after automatic reversing
This means that the reversing function cannot
prevent someone being trapped in these sit-
uations. There is a risk of injury.
When closing make sure that no parts of the
body are in the sweep of the roller sunblind.
If someone is trapped:
R release the switch immediately or
R press the switch in any direction during the
automatic opening/closing process
The closing process is stopped.
Panorama sliding sunroof91Opening and closingZ