MERCEDES-BENZ CLA-Class 2014 C117 Comand Manual
Manufacturer: MERCEDES-BENZ, Model Year: 2014, Model line: CLA-Class, Model: MERCEDES-BENZ CLA-Class 2014 C117Pages: 270, PDF Size: 5.76 MB
Page 181 of 270
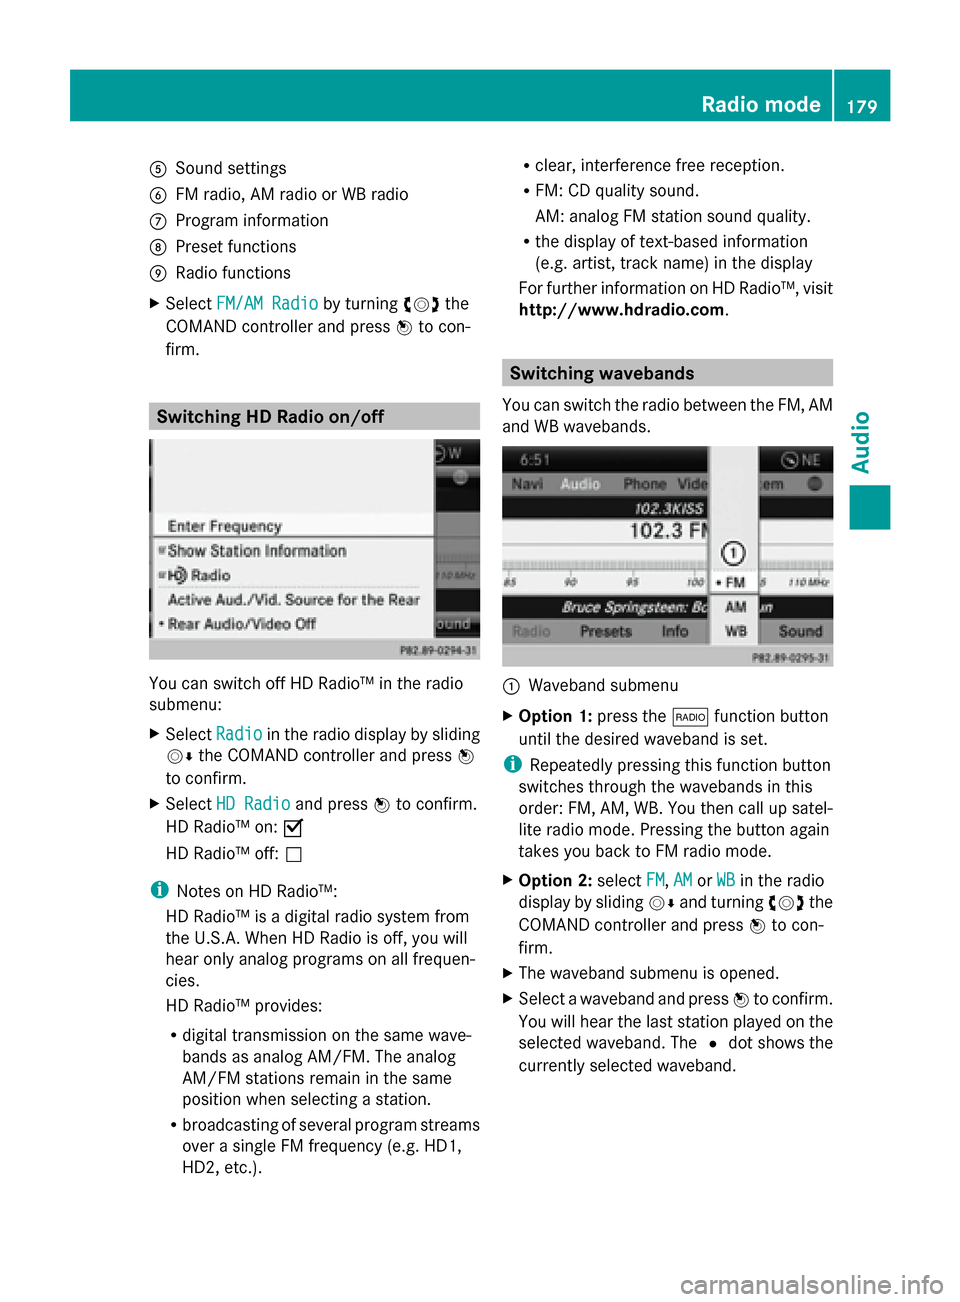
0083
Sound settings
0084 FM radio, AM radio or WB radio
006B Program information
006C Preset functions
006D Radio functions
X Select FM/AM Radio
FM/AM Radio by turning00790052007Athe
COMAND controller and press 0098to con-
firm. Switching HD Radio on/off
You can switch off HD Radio™ in the radio
submenu:
X Select Radio Radioin the radio display by sliding
00520064 the COMAND controller and press 0098
to confirm.
X Select HD Radio
HD Radio and press0098to confirm.
HD Radio™ on: 0073
HD Radio™ off: 0053
i Notes on HD Radio™:
HD Radio™ is a digital radio system from
the U.S.A. When HD Radio is off, you will
hear only analog programs on all frequen-
cies.
HD Radio™ provides:
R digital transmission on the same wave-
bands as analog AM/FM. The analog
AM/FM stations remain in the same
position when selecting a station.
R broadcasting of several program streams
over a single FM frequency (e.g. HD1,
HD2, etc.). R
clear, interference free reception.
R FM: CD quality sound.
AM: analog FM station sound quality.
R the display of text-based information
(e.g. artist, track name) in the display
For further information on HD Radio™, visit
http://www.hdradio.com . Switching wavebands
You can switch the radio between the FM, AM
and WB wavebands. 0043
Waveband submenu
X Option 1: press the002Afunction button
until the desired waveband is set.
i Repeatedly pressing this function button
switches through the wavebands in this
order: FM, AM, WB. You then call up satel-
lite radio mode. Pressing the button again
takes you back to FM radio mode.
X Option 2: selectFM FM,AM
AMorWB
WB in the radio
display by sliding 00520064and turning 00790052007Athe
COMAND controller and press 0098to con-
firm.
X The waveband submenu is opened.
X Select a waveband and press 0098to confirm.
You will hear the last station played on the
selected waveband. The 0036dot shows the
currently selected waveband. Radio mode
179Audio
Page 182 of 270
Selecting a station
Selects stations via the station search
function X
Press the 0048or0049 button.
or
X Turn 00790052007A or slide 009500520096the COMAND con-
troller while the display/selection window
in the radio display is active.
Station search scans up or down and stops
at the next station found.
Selecting station via the station presets X
Quick setting: press a number key, e.g.
0082.
X Directly in the station presets: select
Presets
Presets by sliding 00520064and turning 00790052007A
the COMAND controller and press 0098to
confirm.
or
X When the display/selection window is
active, press 0098the COMAND controller.
The station preset memory appears. The
0036 dot indicates under which preset the
currently selected station is stored.
X Select a station by turning 00790052007Aand press-
ing 0098to confirm or press a number key,
e.g. 0082.
Selecting stations by entering the fre-
quency manually X
Option 1: press the003Ebutton.
X Option 2: selectRadio Radio in the radio display
by sliding 00520064and turning 00790052007Athe
COMAND controller and press 0098to con-
firm.
X Select Enter Frequency
Enter Frequency and press0098to
confirm.
Irrespective of the option chosen, an input
menu will appear.
X Enter a frequency using the number keys.
COMAND sets the frequency entered. Waveband Frequency
AM (MF) 530 - 1700 kHz
FM (VHF) 87.7 - 107.9 MHz
WB (Weather Band) Weather report
channels
i
You can only enter currently permitted
numbers.
i If you enter a frequency in the FM or AM
wavebands which is outside the frequency
range, COMAND sets the next lower fre-
quency. Storing station
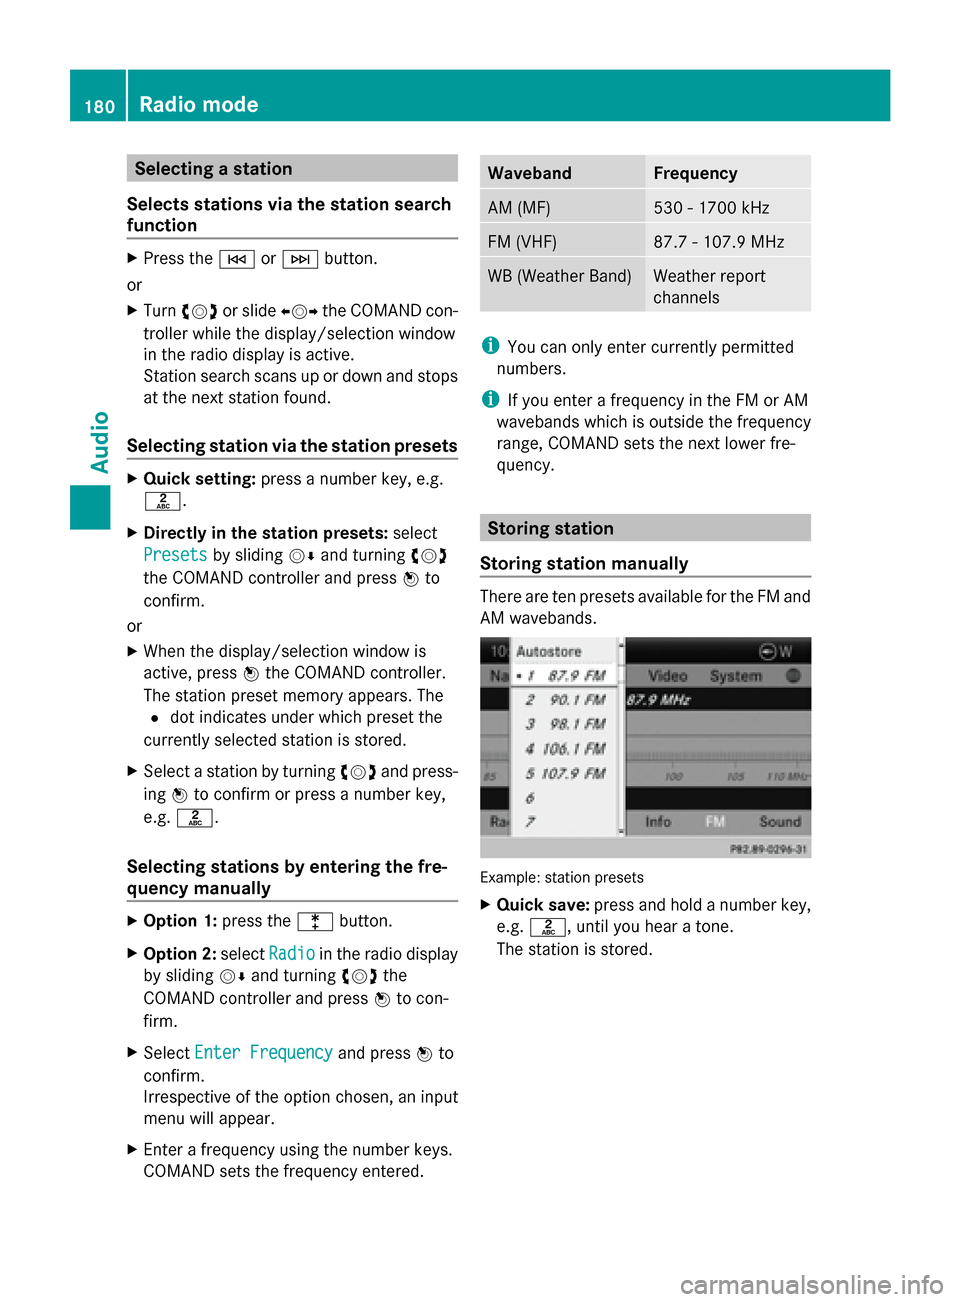
Storing station manually There are ten presets available for the FM and
AM wavebands.
Example: station presets
X
Quick save: press and hold a number key,
e.g. 0082, until you hear a tone.
The station is stored. 180
Radio modeAudio
Page 183 of 270
X
Directly in the station presets: press0098
the COMAND controller when the display/
selection window is active.
or
X Select Presets
Presets by sliding 00520064and turning
00790052007A the COMAND controller and press
0098 to confirm.
In both cases, the station presets appear.
The 0036dot indicates under which preset
the currently selected station is stored.
X Select a preset by turning 00790052007Athe
COMAND controller and press and hold
0098 until you hear a tone.
The station is stored under the preset.
Storing station automatically This function automatically stores stations
with adequate reception under the presets.
The search starts at the lowest frequency.
COMAND stores any stations found, begin-
ning with preset 1. When the highest fre-
quency is reached or 10 stations have been
found, the storing process ends. Any stations
stored manually under the presets will be lost.
COMAND may not occupy all memory slots
when storing.
X Option 1: press0098the COMAND controller
when the display/selection window is
active.
The channel preset memory appears.
X Option 2: selectPresets Presets by sliding 00520064
and turning 00790052007Athe COMAND controller
and press 0098to confirm.
The channel preset memory appears.
X Irrespective of the option, select Autos‐
Autos‐
tore
tore and press 0098to confirm.
In both cases, COMAND searches for sta-
tions that can be received. You will see a
message to this effect. The available sta-
tions are automatically stored in the preset
positions.
X To cancel storing: selectCancel
Cancel and
press 0098to confirm. Weather Band
Activating X
Press the 002Afunction button repeatedly
until the Weather Band is switched on.
or
X Select the currently set waveband FM FMor
AM
AM by sliding 00520064and turning 00790052007Athe
COMAND controller and press 0098to con-
firm.
X Select WB
WBfrom the menu and press 0098to
confirm.
Searching for a channel X
Quick select: turn00790052007A or slide 009500520096the
COMAND controller while the display/
selection window is active.
or
X Press the 0048or0049 button.
Channel search scans up or down and
stops at the next channel found.
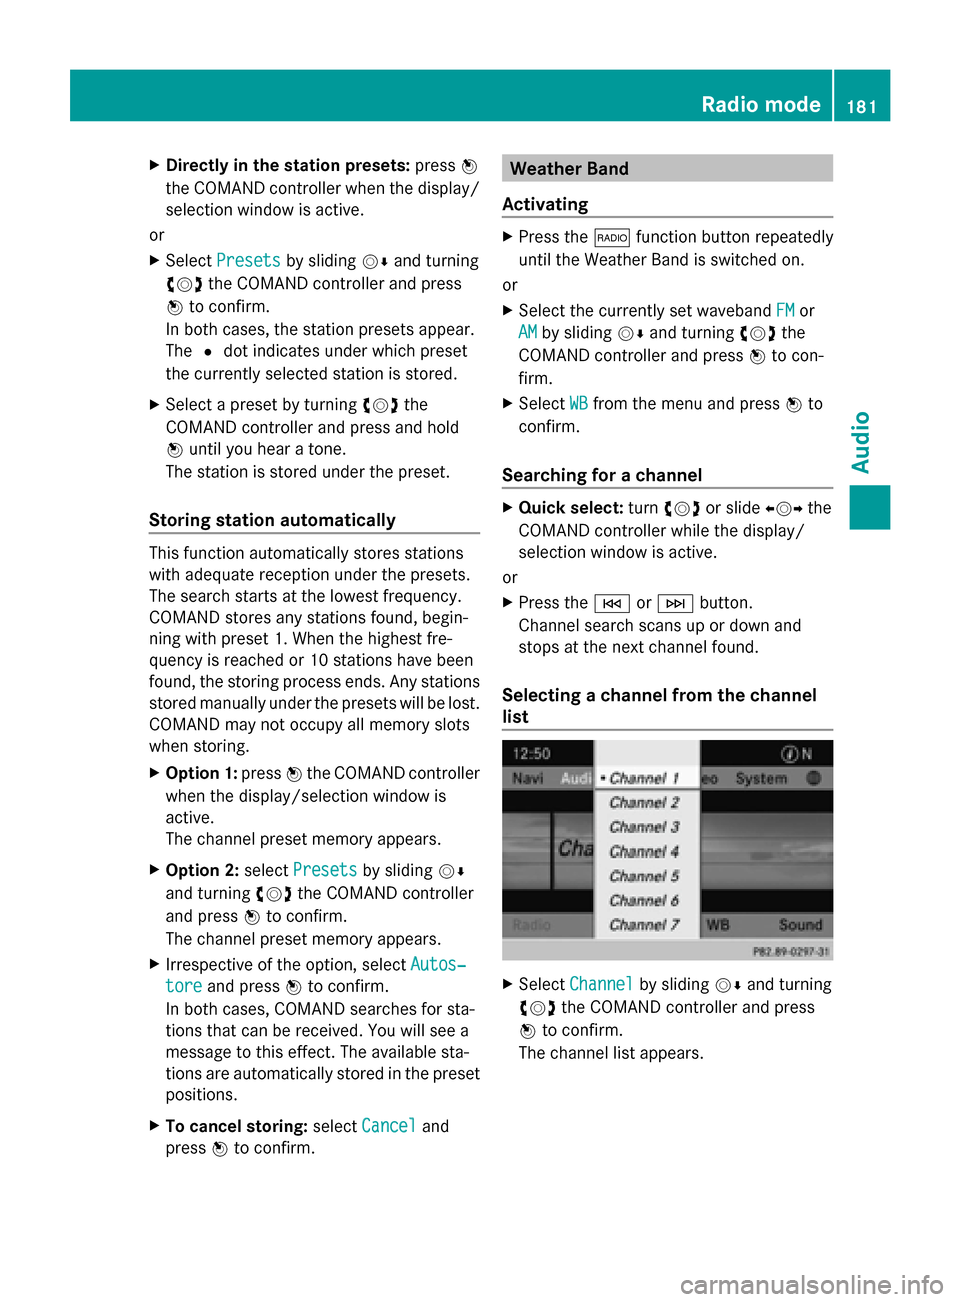
Selecting a channel from the channel
list X
Select Channel Channel by sliding 00520064and turning
00790052007A the COMAND controller and press
0098 to confirm.
The channel list appears. Radio
mode
181Audio
Page 184 of 270
X
Select a channel by turning 00790052007Athe
COMAND controller and press 0098to con-
firm.
or
X Press a number key on the control panel,
e.g. 0084, at any time. Displaying station information
This function is only available for analog FM
programs and digital AM/FM programs (HD
Radio™).
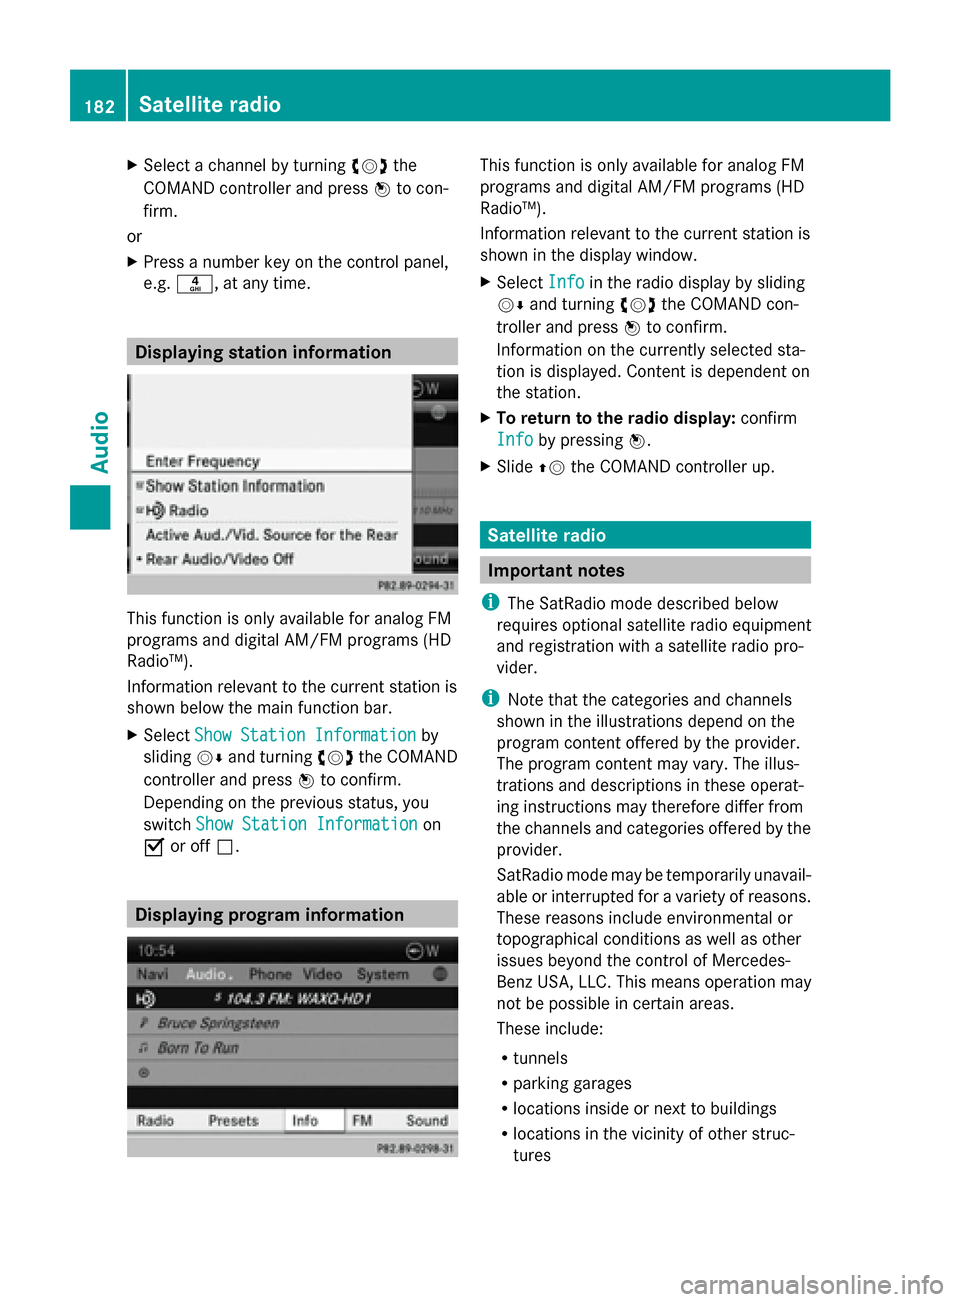
Information relevant to the current station is
shown below the main function bar.
X Select Show Station Information Show Station Information by
sliding 00520064and turning 00790052007Athe COMAND
controller and press 0098to confirm.
Depending on the previous status, you
switch Show Station Information
Show Station Information on
0073 or off 0053. Displaying program information This function is only available for analog FM
programs and digital AM/FM programs (HD
Radio™).
Information relevant to the current station is
shown in the display window.
X
Select Info Infoin the radio display by sliding
00520064 and turning 00790052007Athe COMAND con-
troller and press 0098to confirm.
Information on the currently selected sta-
tion is displayed. Content is dependent on
the station.
X To return to the radio display: confirm
Info
Info by pressing 0098.
X Slide 00970052the COMAND controller up. Satellite radio
Important notes
i The SatRadio mode described below
requires optional satellite radio equipment
and registration with a satellite radio pro-
vider.
i Note that the categories and channels
shown in the illustrations depend on the
program content offered by the provider.
The program content may vary. The illus-
trations and descriptions in these operat-
ing instructions may therefore differ from
the channels and categories offered by the
provider.
SatRadio mode may be temporarily unavail-
able or interrupted for a variety of reasons.
These reasons include environmental or
topographical conditions as well as other
issues beyond the control of Mercedes-
Benz USA, LLC. This means operation may
not be possible in certain areas.
These include:
R tunnels
R parking garages
R locations inside or next to buildings
R locations in the vicinity of other struc-
tures 182
Satellite radioAudio
Page 185 of 270
i
SIRIUS XM Radio offers more than 130
radio stations in digital quality, for example
100% commercial-free music, sports, news
and entertainment.
SIRIUS XM Radio employs a fleet of high-
performance satellites to broadcast around
the clock in the contiguous USA and Can-
ada.
The satellite radio program is available for
a monthly fee. Details are available from
the SIRIUS XM Service Center and at
http://www.sirius.com (USA) or
http://www.siriuscanada.com (Can-
ada). Registering SatRadio
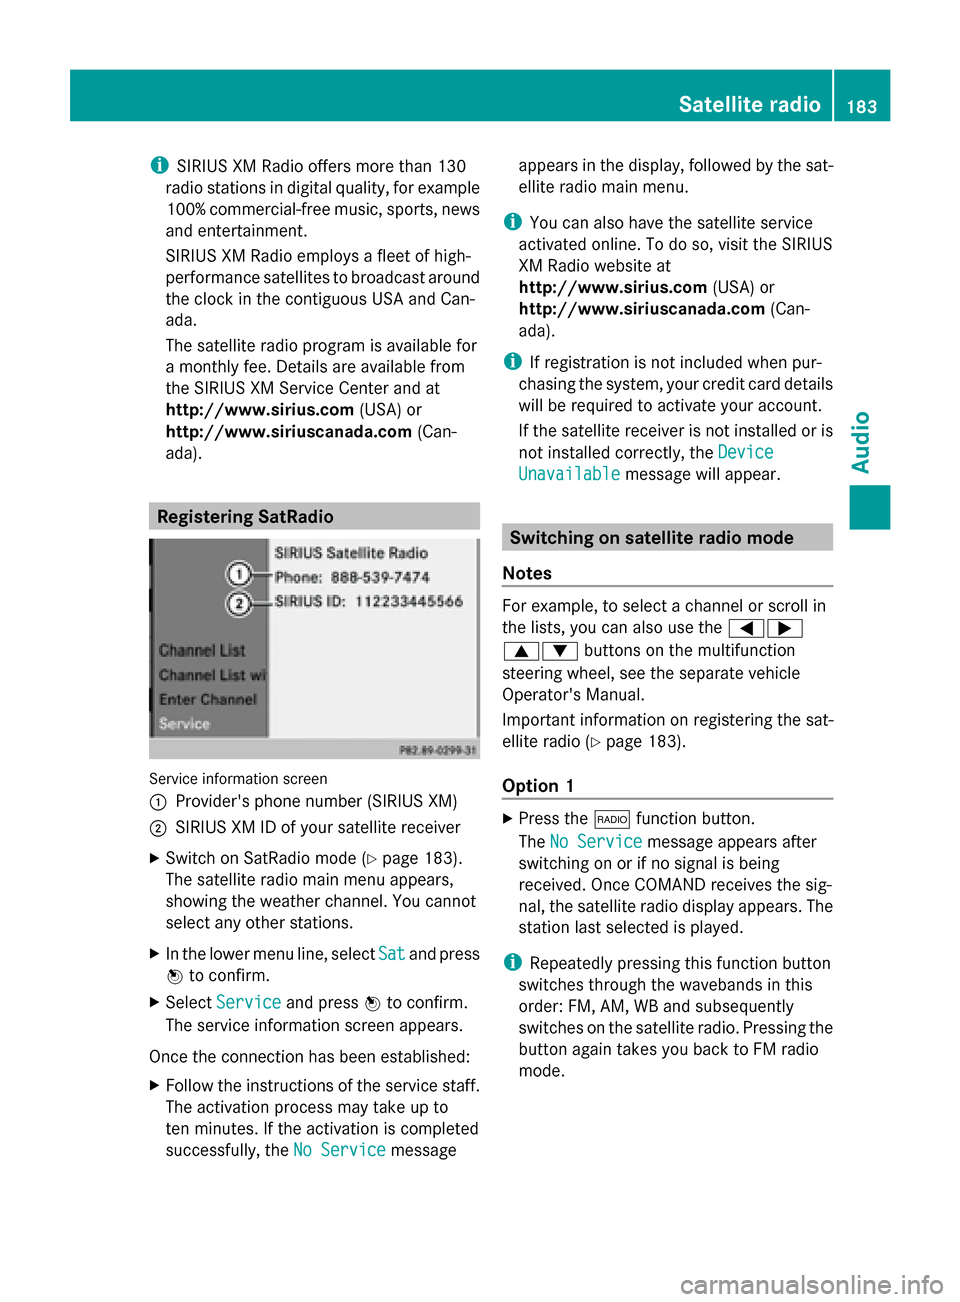
Service information screen
0043
Provider's phone number (SIRIUS XM)
0044 SIRIUS XM ID of your satellite receiver
X Switch on SatRadio mode (Y page 183).
The satellite radio main menu appears,
showing the weather channel. You cannot
select any other stations.
X In the lower menu line, select Sat
Sat and press
0098 to confirm.
X Select Service Service and press 0098to confirm.
The service information screen appears.
Once the connection has been established:
X Follow the instructions of the service staff.
The activation process may take up to
ten minutes. If the activation is completed
successfully, the No Service No Servicemessage appears in the display, followed by the sat-
ellite radio main menu.
i You can also have the satellite service
activated online. To do so, visit the SIRIUS
XM Radio website at
http://www.sirius.com (USA) or
http://www.siriuscanada.com (Can-
ada).
i If registration is not included when pur-
chasing the system, your credit card details
will be required to activate your account.
If the satellite receiver is not installed or is
not installed correctly, the Device Device
Unavailable
Unavailable message will appear. Switching on satellite radio mode
Notes For example, to select a channel or scroll in
the lists, you can also use the
00590065
00630064 buttons on the multifunction
steering wheel, see the separate vehicle
Operator's Manual.
Important information on registering the sat-
ellite radio (Y page 183).
Option 1 X
Press the 002Afunction button.
The No Service No Service message appears after
switching on or if no signal is being
received. Once COMAND receives the sig-
nal, the satellite radio display appears. The
station last selected is played.
i Repeatedly pressing this function button
switches through the wavebands in this
order: FM, AM, WB and subsequently
switches on the satellite radio. Pressing the
button again takes you back to FM radio
mode. Satellite radio
183Audio
Page 186 of 270
Option 2:
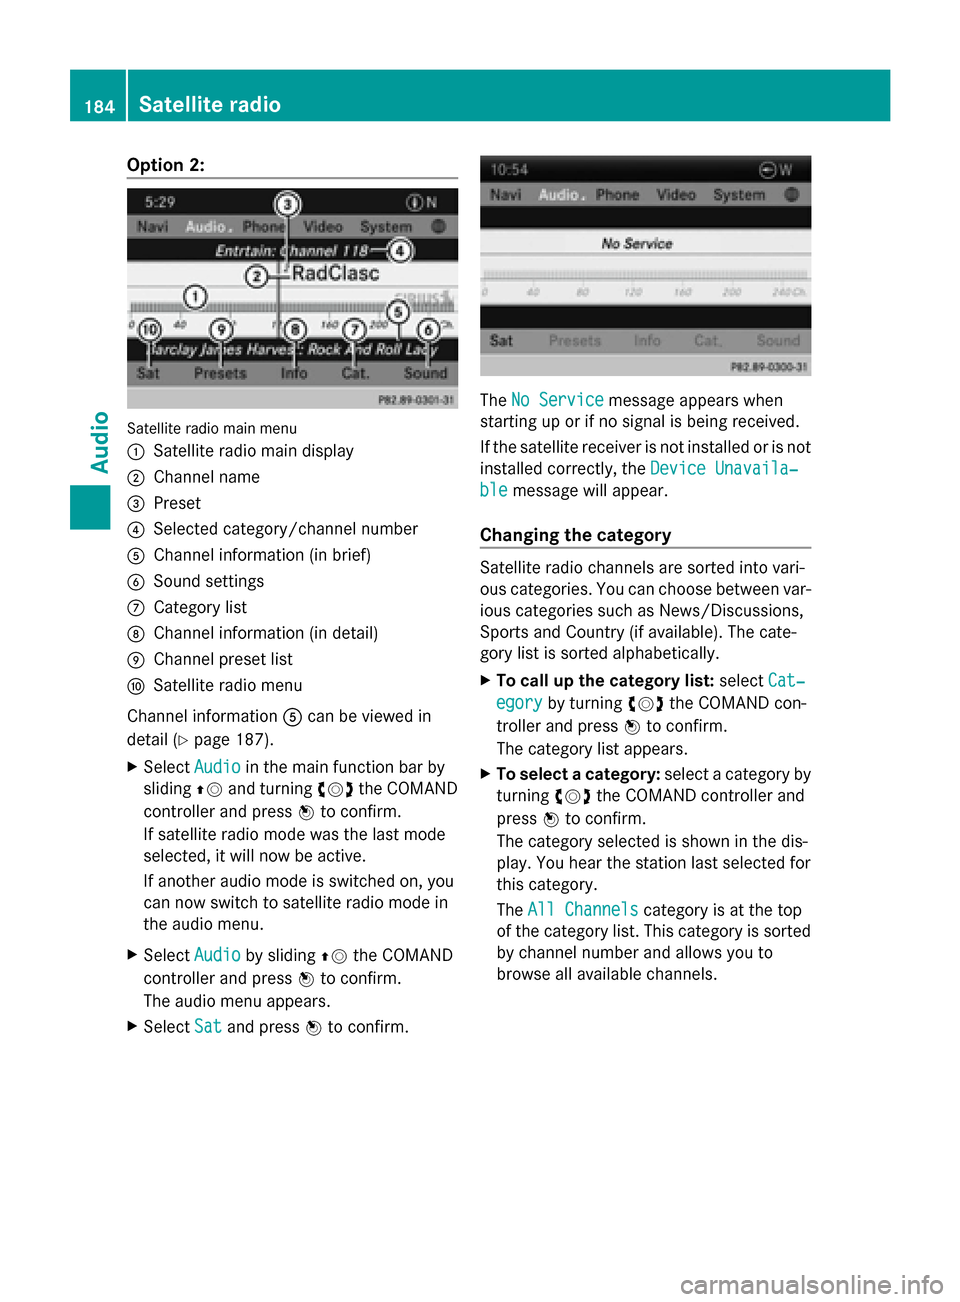
Satellite radio main menu
0043
Satellite radio main display
0044 Channel name
0087 Preset
0085 Selected category/channel number
0083 Channel information (in brief)
0084 Sound settings
006B Category list
006C Channel information (in detail)
006D Channel preset list
006E Satellite radio menu
Channel information 0083can be viewed in
detail (Y page 187).
X Select Audio
Audio in the main function bar by
sliding 00970052and turning 00790052007Athe COMAND
controller and press 0098to confirm.
If satellite radio mode was the last mode
selected, it will now be active.
If another audio mode is switched on, you
can now switch to satellite radio mode in
the audio menu.
X Select Audio
Audio by sliding 00970052the COMAND
controller and press 0098to confirm.
The audio menu appears.
X Select Sat Satand press 0098to confirm. The
No Service
No Service message appears when
starting up or if no signal is being received.
If the satellite receiver is not installed or is not
installed correctly, the Device Unavaila‐ Device Unavaila‐
ble
ble message will appear.
Changing the category Satellite radio channels are sorted into vari-
ous categories. You can choose between var-
ious categories such as News/Discussions,
Sports and Country (if available). The cate-
gory list is sorted alphabetically.
X To call up the category list: selectCat‐
Cat‐
egory egory by turning 00790052007Athe COMAND con-
troller and press 0098to confirm.
The category list appears.
X To select a category: select a category by
turning 00790052007Athe COMAND controller and
press 0098to confirm.
The category selected is shown in the dis-
play. You hear the station last selected for
this category.
The All Channels All Channels category is at the top
of the category list. This category is sorted
by channel number and allows you to
browse all available channels. 184
Satellite radioAudio
Page 187 of 270
Selecting a channel
Channel search
X
Turn 00790052007A or slide 009500520096the COMAND con-
troller while the display/selection window
in the SatRadio display is active.
or
X Press the 0048or0049 button.
COMAND searches in both directions
(ascending and descending) and stops at
the next channel found in the selected cat-
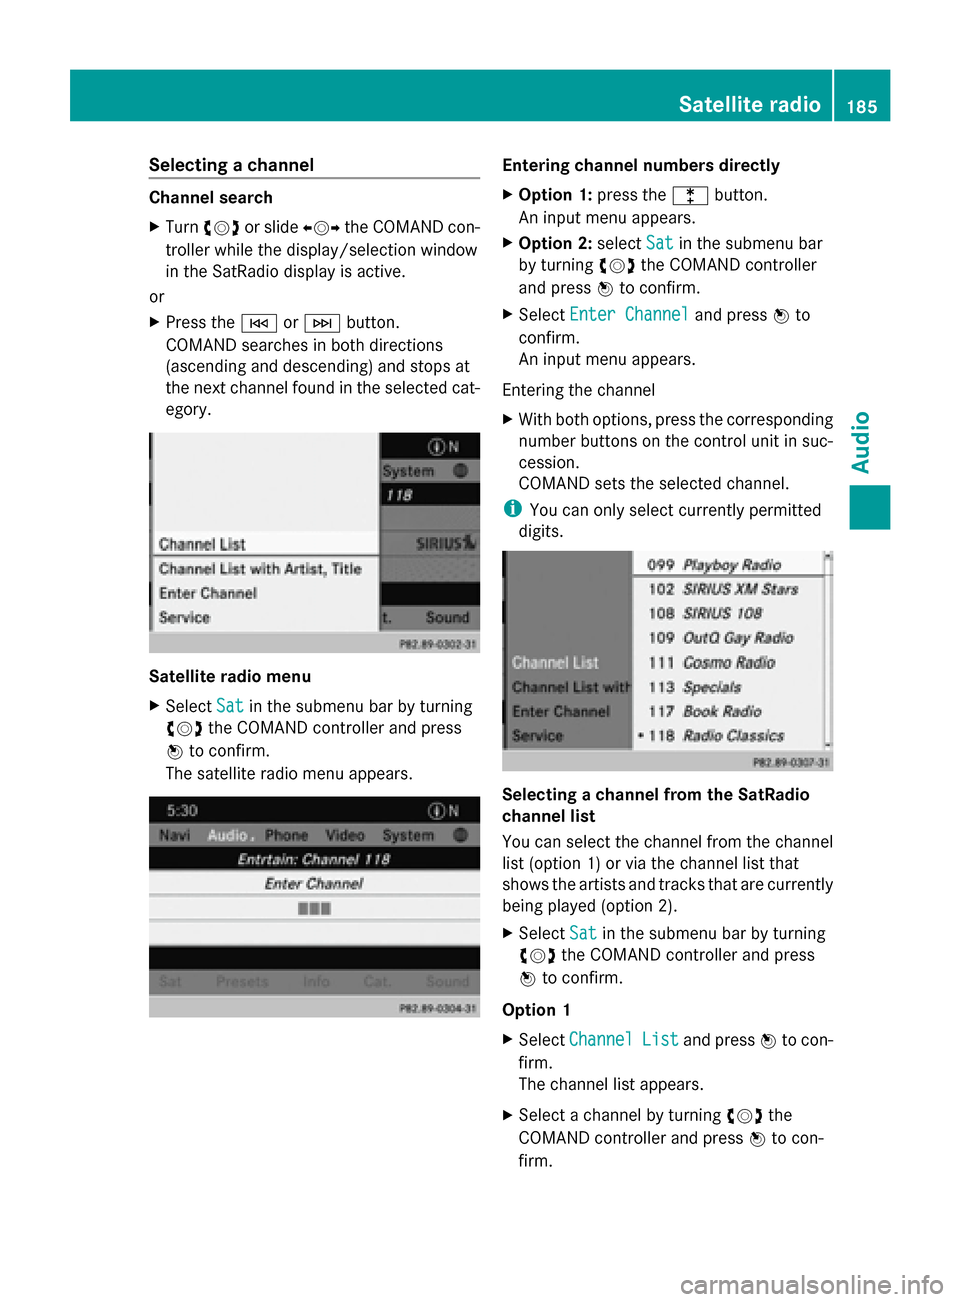
egory. Satellite radio menu
X
Select Sat
Sat in the submenu bar by turning
00790052007A the COMAND controller and press
0098 to confirm.
The satellite radio menu appears. Entering channel numbers directly
X
Option 1: press the003Ebutton.
An input menu appears.
X Option 2: selectSat Satin the submenu bar
by turning 00790052007Athe COMAND controller
and press 0098to confirm.
X Select Enter Channel
Enter Channel and press0098to
confirm.
An input menu appears.
Entering the channel
X With both options, press the corresponding
number buttons on the control unit in suc-
cession.
COMAND sets the selected channel.
i You can only select currently permitted
digits. Selecting a channel from the SatRadio
channel list
You can select the channel from the channel
list (option 1) or via the channel list that
shows the artists and tracks that are currently
being played (option 2).
X Select Sat Satin the submenu bar by turning
00790052007A the COMAND controller and press
0098 to confirm.
Option 1
X Select Channel Channel List
Listand press 0098to con-
firm.
The channel list appears.
X Select a channel by turning 00790052007Athe
COMAND controller and press 0098to con-
firm. Satellite radio
185Audio
Page 188 of 270
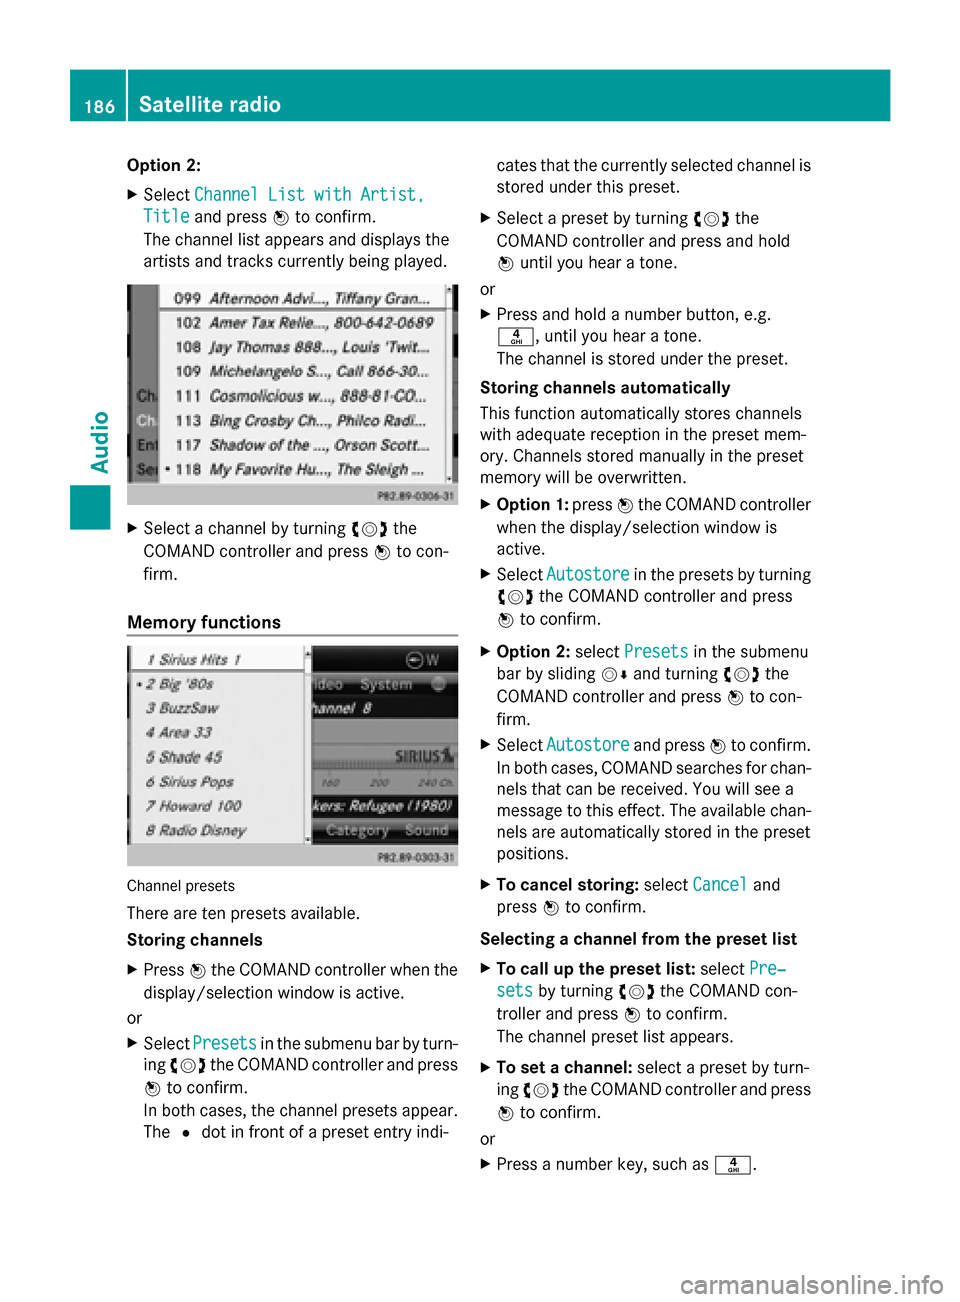
Option 2:
X
Select Channel List with Artist, Channel List with Artist,
Title
Title and press 0098to confirm.
The channel list appears and displays the
artists and tracks currently being played. X
Select a channel by turning 00790052007Athe
COMAND controller and press 0098to con-
firm.
Memory functions Channel presets
There are ten presets available.
Storing channels
X
Press 0098the COMAND controller when the
display/selection window is active.
or
X Select Presets Presets in the submenu bar by turn-
ing 00790052007A the COMAND controller and press
0098 to confirm.
In both cases, the channel presets appear.
The 0036dot in front of a preset entry indi- cates that the currently selected channel is
stored under this preset.
X Select a preset by turning 00790052007Athe
COMAND controller and press and hold
0098 until you hear a tone.
or
X Press and hold a number button, e.g.
0084, until you hear a tone.
The channel is stored under the preset.
Storing channels automatically
This function automatically stores channels
with adequate reception in the preset mem-
ory. Channels stored manually in the preset
memory will be overwritten.
X Option 1: press0098the COMAND controller
when the display/selection window is
active.
X Select Autostore
Autostore in the presets by turning
00790052007A the COMAND controller and press
0098 to confirm.
X Option 2: selectPresets
Presets in the submenu
bar by sliding 00520064and turning 00790052007Athe
COMAND controller and press 0098to con-
firm.
X Select Autostore Autostore and press0098to confirm.
In both cases, COMAND searches for chan-
nels that can be received. You will see a
message to this effect. The available chan-
nels are automatically stored in the preset
positions.
X To cancel storing: selectCancel Cancel and
press 0098to confirm.
Selecting a channel from the preset list
X To call up the preset list: selectPre‐ Pre‐
sets
sets by turning 00790052007Athe COMAND con-
troller and press 0098to confirm.
The channel preset list appears.
X To set a channel: select a preset by turn-
ing 00790052007A the COMAND controller and press
0098 to confirm.
or
X Press a number key, such as 0084.186
Satellite radioAudio
Page 189 of 270
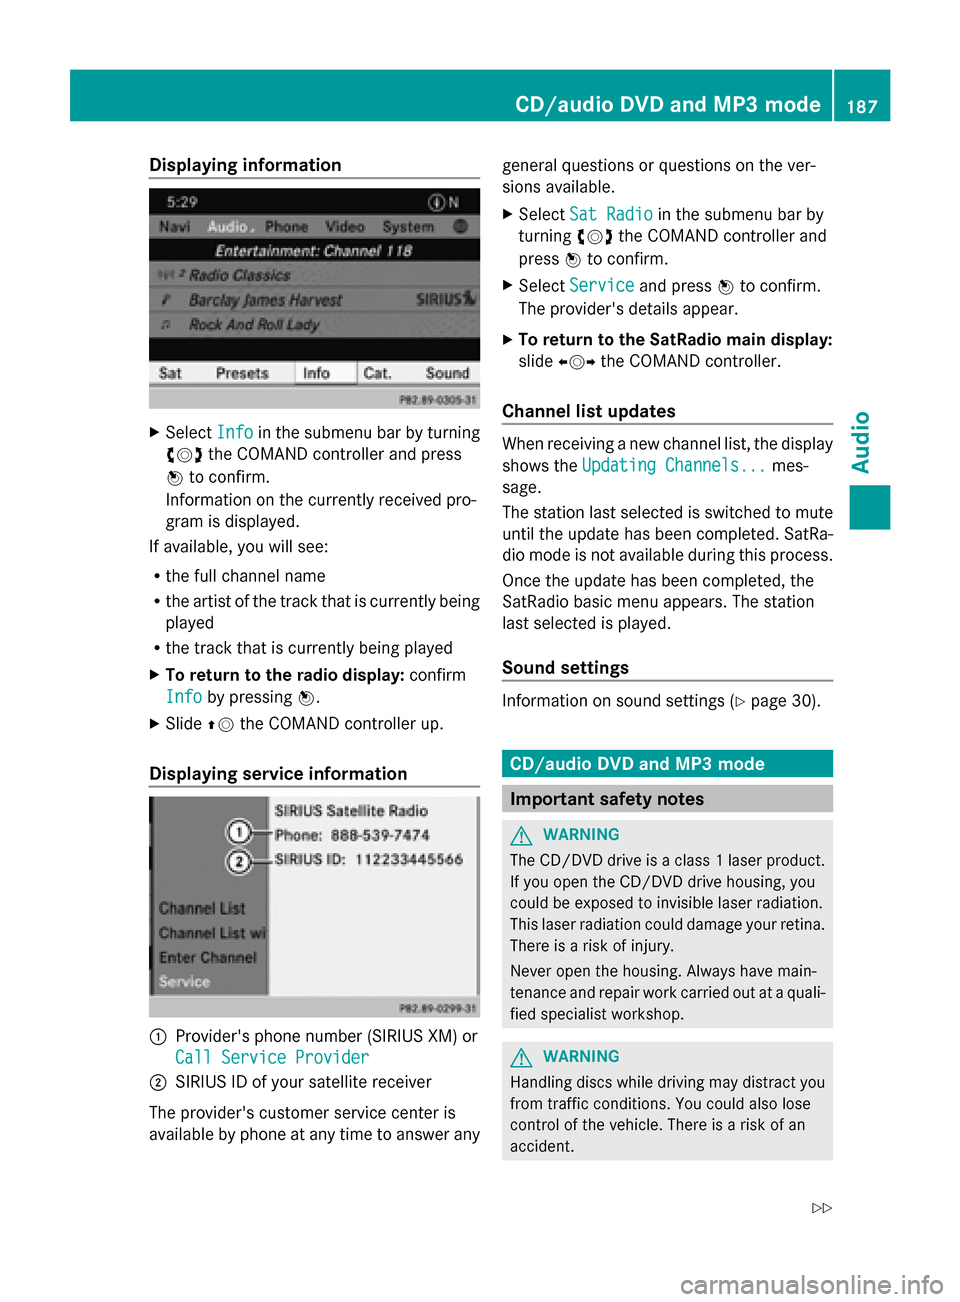
Displaying information
X
Select Info
Infoin the submenu bar by turning
00790052007A the COMAND controller and press
0098 to confirm.
Information on the currently received pro-
gram is displayed.
If available, you will see:
R the full channel name
R the artist of the track that is currently being
played
R the track that is currently being played
X To return to the radio display: confirm
Info
Info by pressing 0098.
X Slide 00970052the COMAND controller up.
Displaying service information 0043
Provider's phone number (SIRIUS XM) or
Call Service Provider
Call Service Provider
0044 SIRIUS ID of your satellite receiver
The provider's customer service center is
available by phone at any time to answer any general questions or questions on the ver-
sions available.
X
Select Sat Radio
Sat Radio in the submenu bar by
turning 00790052007Athe COMAND controller and
press 0098to confirm.
X Select Service Service and press 0098to confirm.
The provider's details appear.
X To return to the SatRadio main display:
slide 009500520096 the COMAND controller.
Channel list updates When receiving a new channel list, the display
shows the
Updating Channels... Updating Channels... mes-
sage.
The station last selected is switched to mute
until the update has been completed. SatRa-
dio mode is not available during this process.
Once the update has been completed, the
SatRadio basic menu appears. The station
last selected is played.
Sound settings Information on sound settings (Y
page 30). CD/audio DVD and MP3 mode
Important safety notes
G
WARNING
The CD/DVD drive is a class 1 laser product.
If you open the CD/DVD drive housing, you
could be exposed to invisible laser radiation.
This laser radiation could damage your retina.
There is a risk of injury.
Never open the housing. Always have main-
tenance and repair work carried out at a quali-
fied specialist workshop. G
WARNING
Handling discs while driving may distract you
from traffic conditions. You could also lose
control of the vehicle. There is a risk of an
accident. CD/audio DVD and MP3
mode
187Audio
Z
Page 190 of 270
Handle discs only when the vehicle is station-
ary.
Bear in mind that at a speed of just 30 mph
(approximately 50 km/h), your vehicle is cov-
ering a distance of 44 feet (approximately
14 m) every second. G
WARNING
SD cards are small objects measuring 24 x 32
x 2.1 mm. Small parts can be swallowed and
are a choking hazard. There is a risk of fatal
injury.
Keep SD cards out of the reach of children. If
an SD card is swallowed, seek immediate
medical attention. Inserting/ejecting CDs/DVDs
Notes If the CD/DVD has a printed side, this must
face upwards when the CD/DVD is inserted.
If neither side is printed, the side to be played
should face downwards. The system may not
be able to play CDs/DVDs with copy protec-
tion.
i If a medium contains other files in addi-
tion to music files, the loading time before
the first track starts to play may be longer.
Inserting a disc into the single DVD
drive X
Press the 0062eject button.
If there is a disc already inserted, it will be
ejected.
X Take the disc out of the slot.
X Insert a disc into the slot.
If the disc is correctly inserted and is a suit-
able disc, it is drawn in by the drive and
played. Ejecting a disc from the single DVD
drive X
Press the 0062eject button.
X Take the disc out of the slot.
If you do not take the disc out of the slot, it
is drawn in again automatically after a short
while and reloaded.
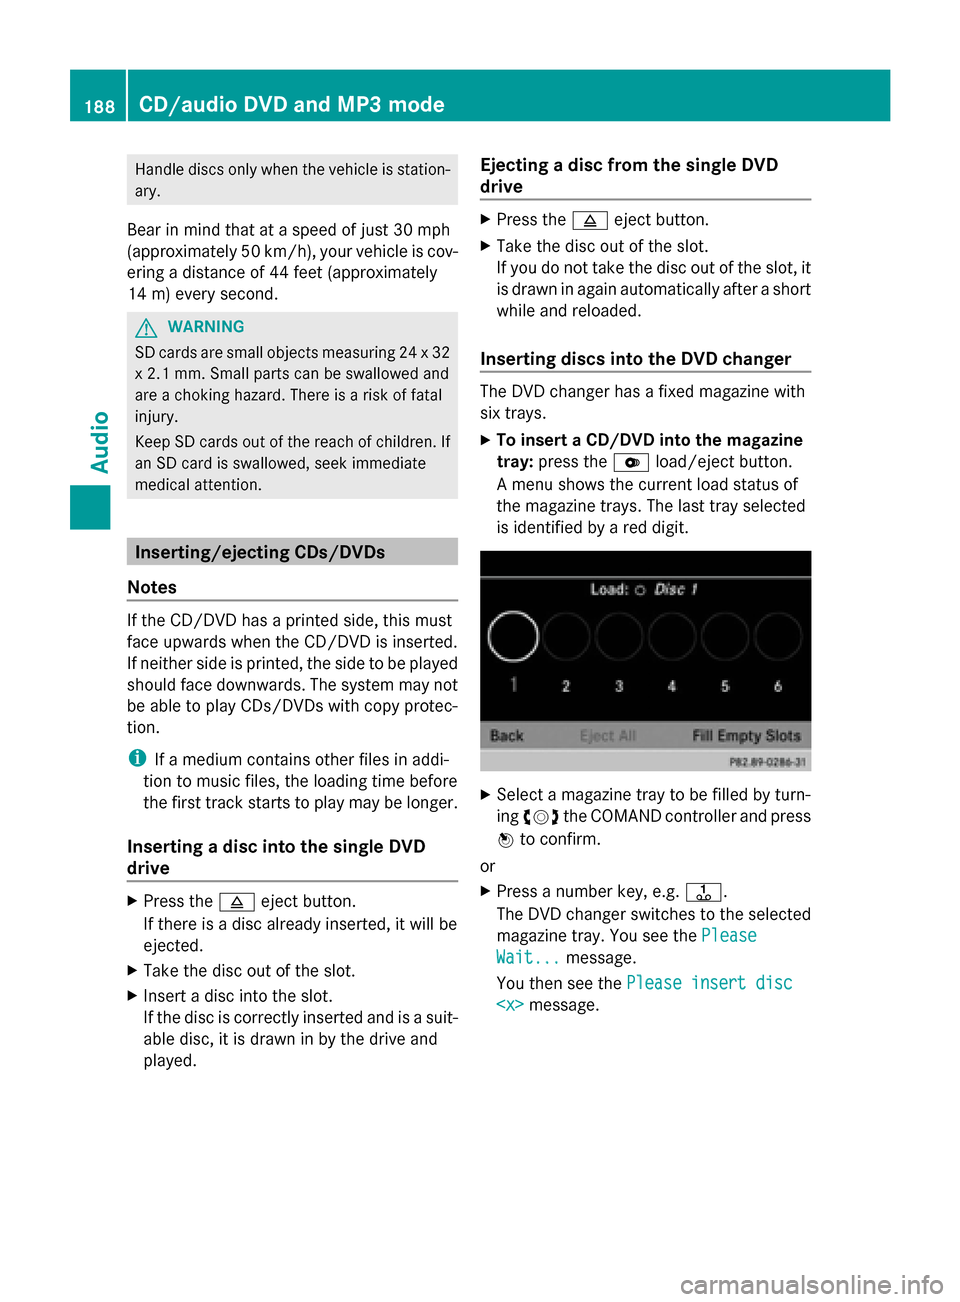
Inserting discs into the DVD changer The DVD changer has a fixed magazine with
six trays.
X
To insert a CD/DVD into the magazine
tray: press the 0065load/eject button.
A menu shows the current load status of
the magazine trays. The last tray selected
is identified by a red digit. X
Select a magazine tray to be filled by turn-
ing 00790052007A the COMAND controller and press
0098 to confirm.
or
X Press a number key, e.g. 0080.
The DVD changer switches to the selected
magazine tray. You see the Please Please
Wait...
Wait... message.
You then see the Please insert disc
Please insert disc
CD/audio DVD and MP3 modeAudio