reset MERCEDES-BENZ CLA-Class 2016 C117 Owner's Guide
[x] Cancel search | Manufacturer: MERCEDES-BENZ, Model Year: 2016, Model line: CLA-Class, Model: MERCEDES-BENZ CLA-Class 2016 C117Pages: 374, PDF Size: 8.19 MB
Page 225 of 374
Convenience
Switching the fold-in mirrors when lock-
ing feature on/off
This function is only available in Canada.
This function is only available when the vehi-
cle is equipped with the electrical fold-in func-tion.
When you activate the Auto.
MirrorFold‐
ingfunction, the exterior mirrors are folded
in when the vehicle is locked. If you unlock the
vehicle and then open the driver's or front-
passenger door, the exterior mirrors fold out
again.
If you have switched on the Auto. Mirror
Foldingfunction and you fold in the exterior
mirrors using the button on the door
(
Ypage 107), they will not fold out automat-
ically. The exterior mirrors can then only be
folded out using the button on the door.
XPress the =or; button on the steer-
ing wheel to select the Sett.
menu.
XPress the:or9 button to select the
Convenience
submenu.
XPress ato confirm.
XPress the :or9 button to select the
Auto. Mirror Folding
function.
If the Auto. Mirror Folding
function is
switched on, the multifunction display
shows the exterior mirror in orange.
XPress the abutton to save the setting.
Restoring the factory settings
XPress the =or; button on the steer-
ing wheel to select the Sett.
menu.
XPress the:or9 button to select the
Factory Setting
submenu.
XPress ato confirm.
The Reset All Settings?
function
appears.
XPress the :or9 button to select No
orYes.
XPress the abutton to confirm the selec-
tion.
If you have selected Yes
, the multifunction
display shows a confirmation message.
For safety reasons, the Daytime Running
Lightsfunction in theLightsubmenu is only
reset if the vehicle is stationary.
AMG menu (Mercedes-AMG vehicles)
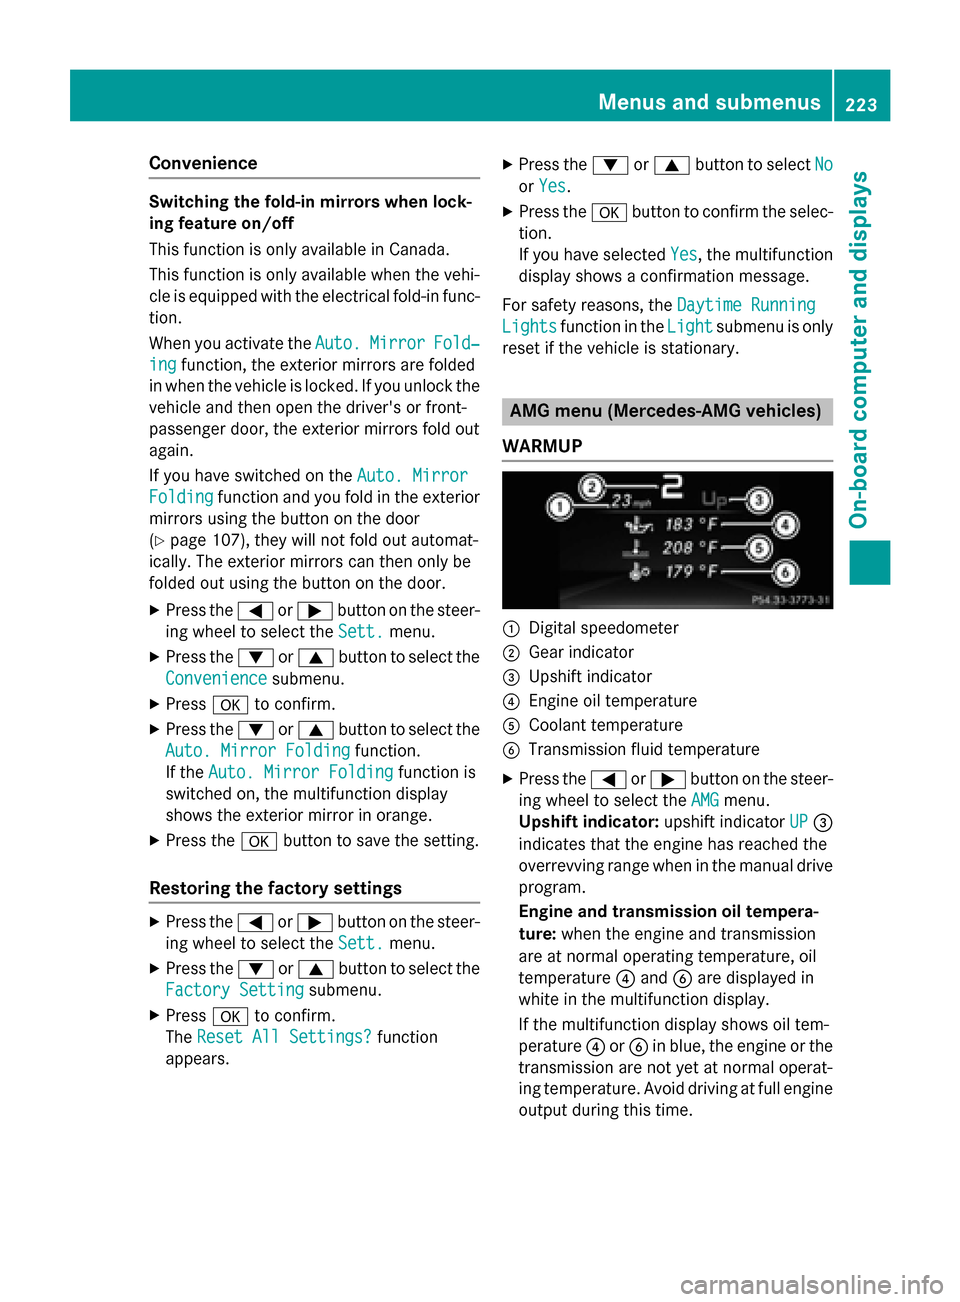
WARMUP
:Digital speedometer
;Gear indicator
=Upshift indicator
?Engine oil temperature
ACoolant temperature
BTransmission fluid temperature
XPress the =or; button on the steer-
ing wheel to select the AMG
menu.
Upshift indicator: upshift indicatorUP
=
indicates that the engine has reached the
overrevving range when in the manual drive
program.
Engine and transmission oil tempera-
ture: when the engine and transmission
are at normal operating temperature, oil
temperature ?and Bare displayed in
white in the multifunction display.
If the multifunction display shows oil tem-
perature ?orB in blue, the engine or the
transmission are not yet at normal operat-
ing temperature. Avoid driving at full engine
output during this time.
Menus and submenus223
On-board computer and displays
Z
Page 227 of 374
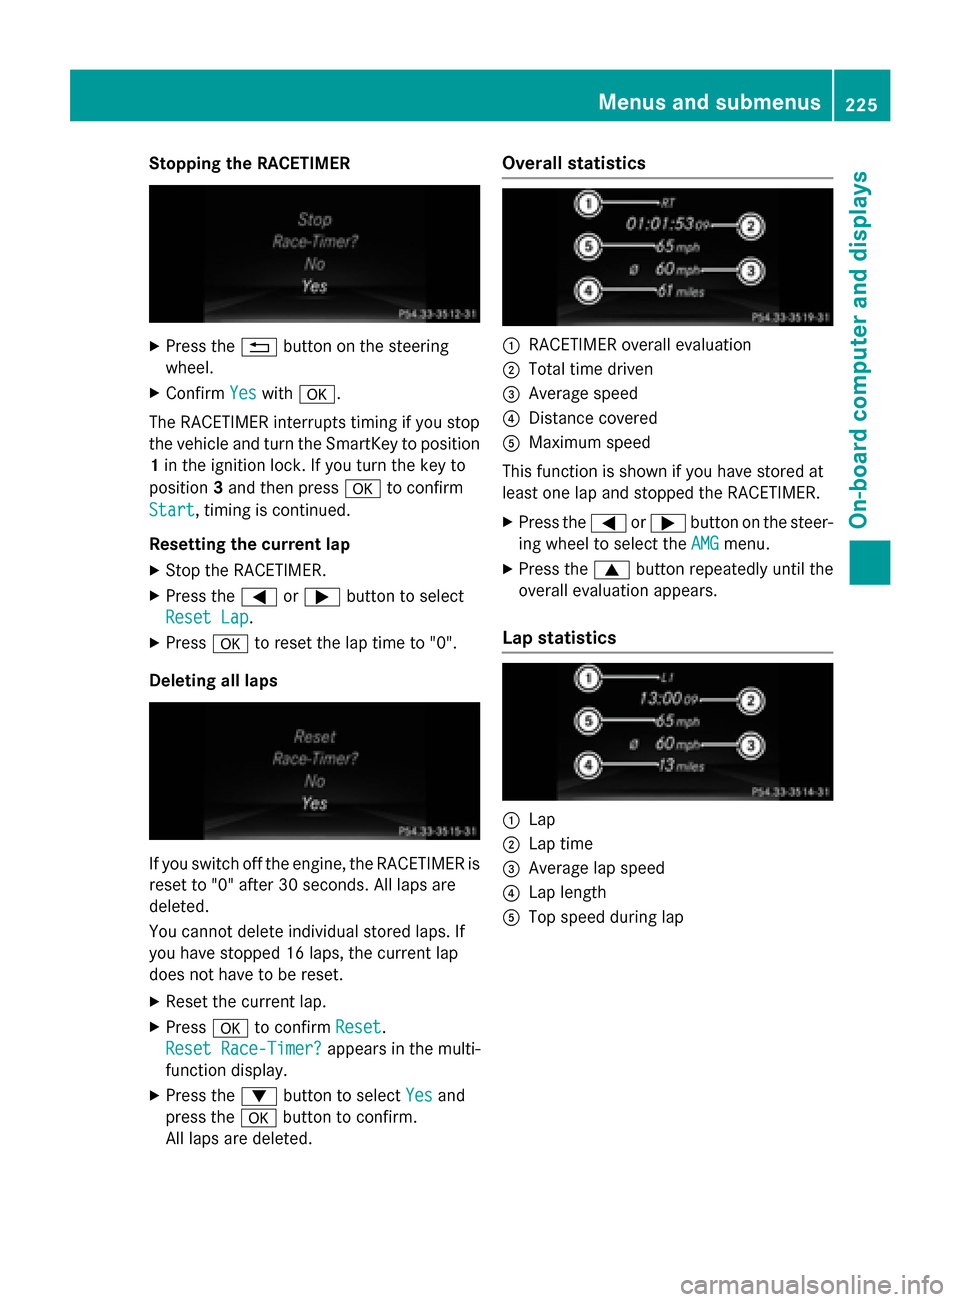
Stopping the RACETIMER
XPress the%button on the steering
wheel.
XConfirm Yeswitha.
The RACETIMER interrupts timing if you stop
the vehicle and turn the SmartKey to position
1 in the ignition lock. If you turn the key to
position 3and then press ato confirm
Start
, timing is continued.
Resetting the current lap
XStop the RACETIMER.
XPress the =or; button to select
Reset Lap
.
XPress ato reset the lap time to "0".
Deleting all laps
If you switch off the engine, the RACETIMER is
reset to "0" after 30 seconds. All laps are
deleted.
You cannot delete individual stored laps. If
you have stopped 16 laps, the current lap
does not have to be reset.
XReset the current lap.
XPress ato confirm Reset.
Reset Race-Timer?
appears in the multi-
function display.
XPress the :button to select Yesand
press the abutton to confirm.
All laps are deleted.
Overall statistics
:RACETIMER overall evaluation
;Total time driven
=Average speed
?Distance covered
AMaximum speed
This function is shown if you have stored at
least one lap and stopped the RACETIMER.
XPress the =or; button on the steer-
ing wheel to select the AMG
menu.
XPress the9button repeatedly until the
overall evaluation appears.
Lap statistics
:Lap
;Lap time
=Average lap speed
?Lap length
ATop speed during lap
Menus and submenus225
On-board computer and displays
Z
Page 303 of 374
Displaying service messages
XSwitchon th eignition .
XPress th e= or; buttonto selec tth e
Serv.
menu.
XPress th e9 or: buttonto selec tth e
ASSYST PLU S
submenuand confirm by
pressing th ea button.
The servic edue dat eappears in th emulti-
function display.
Information about Service
Resetting th eASSYS TPLUS service
interva ldisplay
!If th eASSYST PLU Sservic einterval dis -
play has been inadvertentl yreset ,this set -
ting can be correcte dat aqualified special-
ist workshop .
Hav eservic ewor kcarrie dout as described
in th eMaintenance Booklet .Thi smay oth-
erwise lead to increase dwear and damage
to th emajor assemblies or th evehicle.
A qualified specialis tworkshop ,e.g. an
authorized Mercedes-Ben zCenter, will reset
th eASSYST PLU Sservic einterval display
after th eservic ewor khas been carrie dout .
You can also obtain further information on
maintenance work, fo rexample.
Specia lservice requirement s
The specifiedmaintenance interval take sonly
th enormal operation of th evehicle into
account. Under arduous operatin gcondition s
or increase dload on th evehicle, mainte -
nance wor kmus tbe carrie dout more fre-
quently, fo rexample:
Rregular city drivin gwit hfrequent intermedi-
at estops
Rif th evehicle is primarily used to trave l
short distances
Ruse in mountainous terrain or on poo rroad
surfaces
Rif th eengin eis ofte nlef tidlin gfo rlon gperi-
ods
Under these or similar conditions, have, fo r
example, th eair filter, engin eoil and oil filte r
replaced or changed more frequently. Under
arduous operatin gconditions, th etires mus t
be checke dmore often. Further information
can be obtained at aqualified specialist work-
shop, e.g. an authorized Mercedes-Ben zCen -
ter.
Drivin gabroad
An extensive Mercedes-Ben zServic enetwor k
is also available in other countries. You can
obtain further information from any author -
ized Mercedes-Ben zCenter.
Car e
General notes
HEnvironmental not e
Dispose of empty packagin gand cleanin g
cloths in an environmentally responsible man -
ner.
!Fo rcleanin gyour vehicle, do no tuse any
of th efollowing :
Rdry, rough or har dcloths
Rabrasiv ecleanin gagents
Rsolvents
Rcleanin gagents containin gsolvents
Do no tscrub .
Do no ttouch th esurfaces or protective
films wit hhar dobjects ,e.g. arin gor ic e
scraper. You could otherwise scratch or
damage th esurfaces and protective film.
!Do no tpar kth evehicle fo ran extended
period straight after cleanin git,particularly
after havin gcleaned th ewheels wit hwhee l
cleaner. Wheel cleaners could caus e
increase dcorrosion of th ebrake discs and
brake pads/linings. Fo rthis reason ,you
Care301
Maintenance and care
Z
Page 319 of 374
electronic components, such as the
alternator, may be damaged.
Ryou first remove the negative terminal
clamp and then the positive terminal
clamp. Never swap the terminal clamps.
Otherwise, the vehicle's electronic sys-
tem may be damaged.
Rin vehicles with automatic transmission,
the transmission is locked in positionP
after disconnecting the battery. The vehi-
cle is secured against rolling away. You
can then no longer move the vehicle.
The battery and the cover of the positive
terminal clamp must be installed securely
during operation.
Comply with safety precautions and take pro- tective measures when handling batteries.
Risk of explosion.
Fire, open flames and smoking are
prohibited when handling the bat-
tery. Avoid creating sparks.
Battery acid is caustic. Avoid con-
tact with skin, eyes or clothing.
Wear suitable protective clothing,
especially gloves, apron and face-
guard.
Rinse any acid spills immediately
with clear water. Contact a physi-
cian if necessary.
Wear eye protection.
Keep children away.
Observe this Operator's Manual.
For safety reasons, Mercedes-Benz recom-
mends that you only use batteries which have
been tested and approved for your vehicle by Mercedes-Benz. These batteries provide
increased impact protection to prevent vehi-
cle occupants from suffering acid burns
should the battery be damaged in the event of
an accident.
In order for the battery to achieve the maxi-
mum possible service life, it must always be
sufficiently charged.
Like other batteries, the vehicle battery may
discharge over time if you do not use the
vehicle. In this case, have the battery discon- nected at a qualified specialist workshop. You
can also charge the battery with a charger
recommended by Mercedes-Benz. Contact a
qualified specialist workshop for further infor- mation.
Have the battery condition of charge checked
more frequently if you use the vehicle mainly
for short trips or if you leave it standing idle
for a lengthy period. Consult a qualified spe-
cialist workshop if you wish to leave your
vehicle parked for a long period of time.
Only replace a battery with a battery that has
been recommended by Mercedes-Benz.
Remove the SmartKey if you park the vehicle
and do not require any electrical consumers.
The vehicle will then use very little energy,
thus conserving battery power.
If the power supply has been interrupted, e.g.
if you reconnect the battery, you will have to:
Rset the clock via Audio 20 or COMAND (see
separate operating instructions).
Rreset the function for folding the exterior
mirrors in/out automatically, by folding the
mirrors out once (
Ypage 108).
Charging the battery
GWARNING
During charging and jump-starting, explosive
gases can escape from the battery. There is a risk of an explosion.
Particularly avoid fire, open flames, creating
sparks and smoking. Ensure there is sufficient
Battery (vehicle)317
Breakdown assistance
Z
Page 326 of 374
XDepress and hold the brake pedal.
XShift the automatic transmission to posi-
tionN.
XLeave the SmartKey in position 2in the
ignition lock.
XRelease the brake pedal.
XRelease the electric parking brake.
XSwitch on the hazard warning lamps
(
Ypage 117).
iIn order to signal a change of direction
when towing the vehicle with the hazard
warning lamps switched on, use the com-
bination switch as usual. In this case, only
the indicator lamps for the direction of
travel flash. After resetting the combina-
tion switch, the hazard warning lamp starts
flashing again.
Transporting the vehicle
4MATIC vehicles/vehicles with auto-
matic transmission
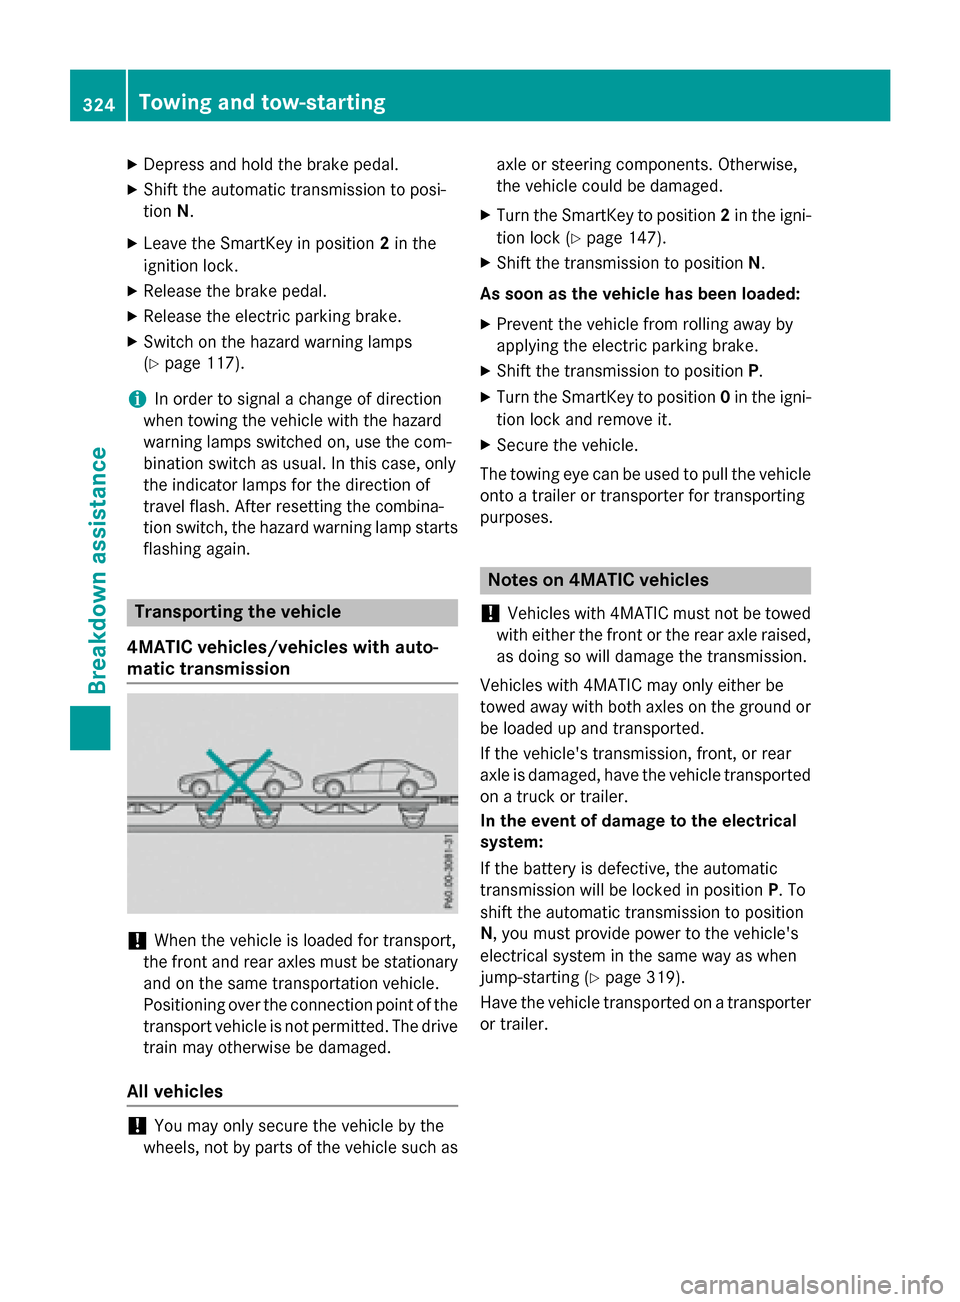
!When the vehicle is loaded for transport,
the front and rear axles must be stationary
and on the same transportation vehicle.
Positioning over the connection point of the
transport vehicle is not permitted. The drive
train may otherwise be damaged.
All vehicles
!You may only secure the vehicle by the
wheels, not by parts of the vehicle such as axle or steering components. Otherwise,
the vehicle could be damaged.
XTurn the SmartKey to position
2in the igni-
tion lock (
Ypage 147).
XShift the transmission to position N.
As soon as the vehicle has been loaded:
XPrevent the vehicle from rolling away by
applying the electric parking brake.
XShift the transmission to position P.
XTurn the SmartKey to position 0in the igni-
tion lock and remove it.
XSecure the vehicle.
The towing eye can be used to pull the vehicle
onto a trailer or transporter for transporting
purposes.
Notes on 4MATIC vehicles
!
Vehicles with 4MATIC must not be towed
with either the front or the rear axle raised,
as doing so will damage the transmission.
Vehicles with 4MATIC may only either be
towed away with both axles on the ground or
be loaded up and transported.
If the vehicle's transmission, front, or rear
axle is damaged, have the vehicle transported
on a truck or trailer.
In the event of damage to the electrical
system:
If the battery is defective, the automatic
transmission will be locked in position P. To
shift the automatic transmission to position
N, you must provide power to the vehicle's
electrical system in the same way as when
jump-starting (
Ypage 319).
Have the vehicle transported on a transporter
or trailer.
324Towing and tow-starting
Breakdown assistance
Page 335 of 374
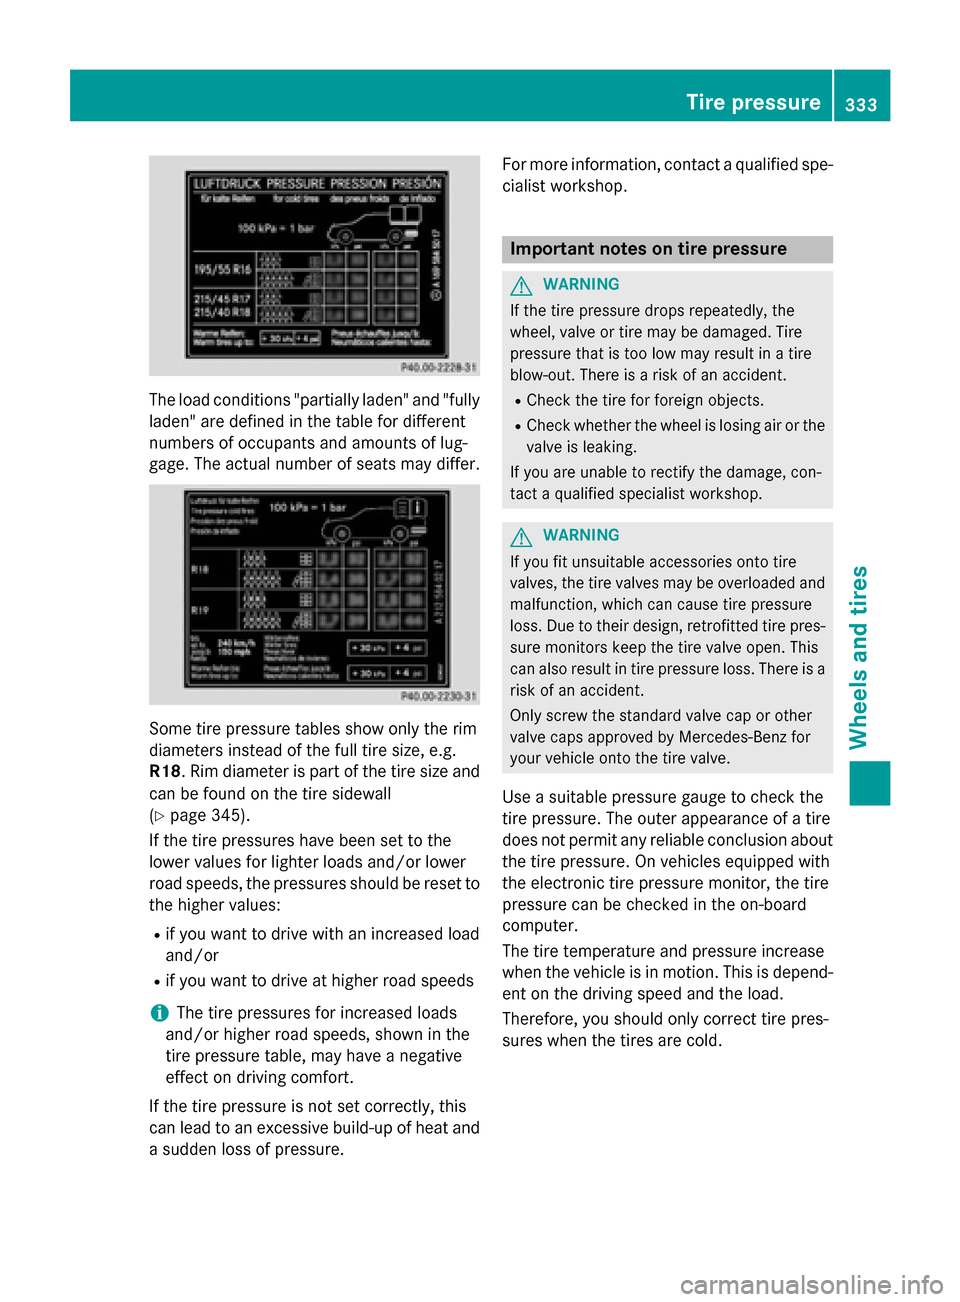
The load conditions "partially laden" and "fully
laden" are defined in the table for different
numbers of occupants and amounts of lug-
gage. The actual number of seats may differ.
Some tire pressure tables show only the rim
diameters instead of the full tire size, e.g.
R18. Rim diameter is part of the tire size and
can be found on the tire sidewall
(
Ypage 345).
If the tire pressures have been set to the
lower values for lighter loads and/or lower
road speeds, the pressures should be reset to
the higher values:
Rif you want to drive with an increased load
and/or
Rif you want to drive at higher road speeds
iThe tire pressures for increased loads
and/or higher road speeds, shown in the
tire pressure table, may have a negative
effect on driving comfort.
If the tire pressure is not set correctly, this
can lead to an excessive build-up of heat and
a sudden loss of pressure. For more information, contact a qualified spe-
cialist workshop.
Important notes on tire pressure
GWARNING
If the tire pressure drops repeatedly, the
wheel, valve or tire may be damaged. Tire
pressure that is too low may result in a tire
blow-out. There is a risk of an accident.
RCheck the tire for foreign objects.
RCheck whether the wheel is losing air or the valve is leaking.
If you are unable to rectify the damage, con-
tact a qualified specialist workshop.
GWARNING
If you fit unsuitable accessories onto tire
valves, the tire valves may be overloaded and
malfunction, which can cause tire pressure
loss. Due to their design, retrofitted tire pres- sure monitors keep the tire valve open. This
can also result in tire pressure loss. There is a
risk of an accident.
Only screw the standard valve cap or other
valve caps approved by Mercedes-Benz for
your vehicle onto the tire valve.
Use a suitable pressure gauge to check the
tire pressure. The outer appearance of a tire
does not permit any reliable conclusion about
the tire pressure. On vehicles equipped with
the electronic tire pressure monitor, the tire
pressure can be checked in the on-board
computer.
The tire temperature and pressure increase
when the vehicle is in motion. This is depend-
ent on the driving speed and the load.
Therefore, you should only correct tire pres-
sures when the tires are cold.
Tire pressure333
Wheels and tires
Z