Position key MERCEDES-BENZ CLA-Class 2017 C117 Owner's Manual
[x] Cancel search | Manufacturer: MERCEDES-BENZ, Model Year: 2017, Model line: CLA-Class, Model: MERCEDES-BENZ CLA-Class 2017 C117Pages: 318, PDF Size: 8.02 MB
Page 4 of 318
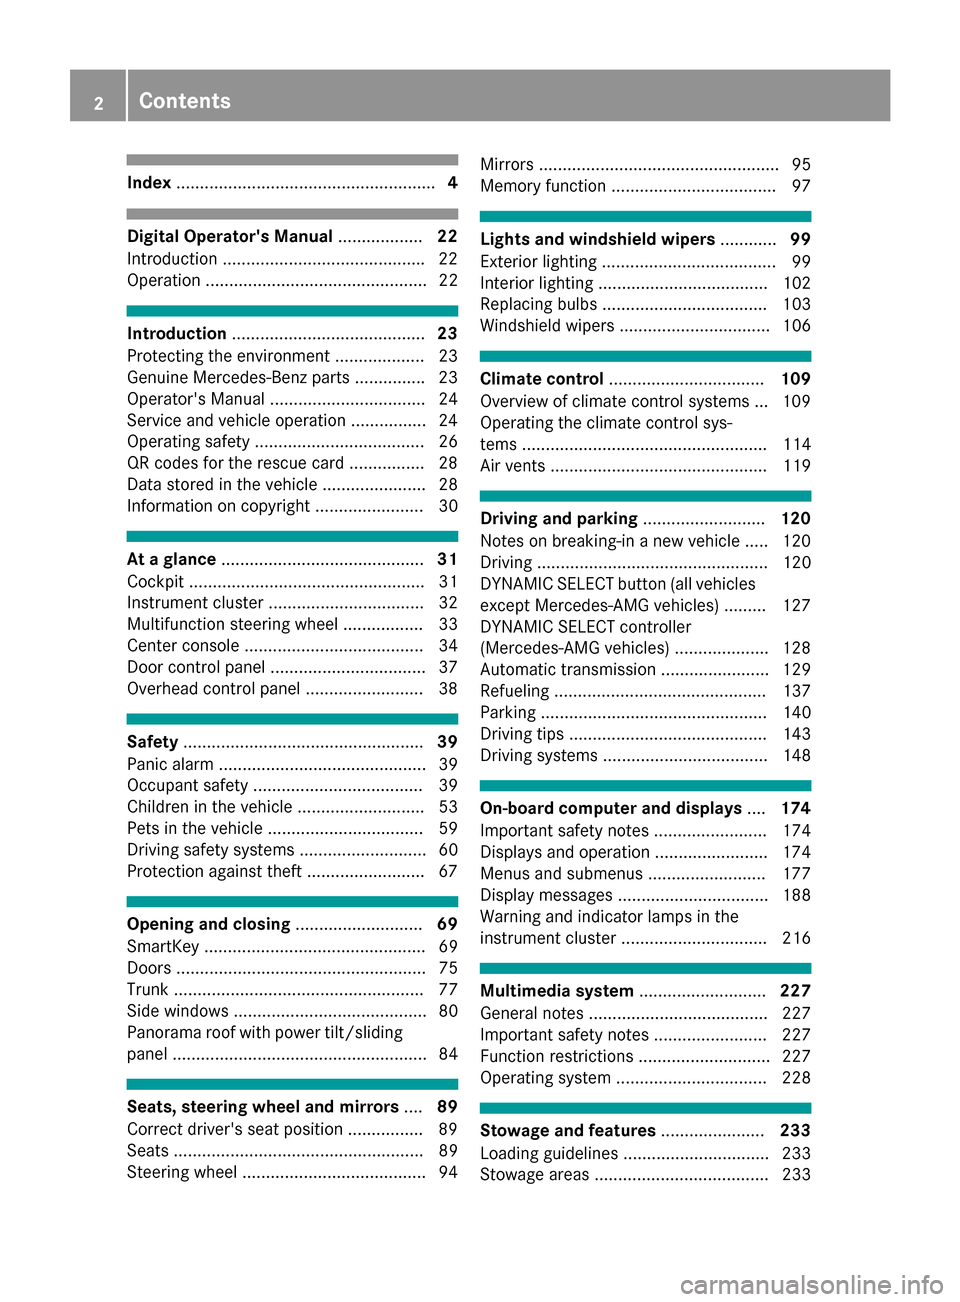
Index....................................................... 4
Digital Operator's Manual..................22
Introduction .......................................... .22
Operation ............................................... 22
Introduction ......................................... 23
Protecting the environment ...................2 3
Genuine Mercedes-Benz parts .............. .23
Operator's Manual ................................. 24
Service and vehicle operation ................2 4
Operating safety .................................... 26
QR codes for the rescue card ................2 8
Data stored in the vehicle ...................... 28
Information on copyright ....................... 30
At a glance ........................................... 31
Cockpit .................................................. 31
Instrument cluster ................................. 32
Multifunction steering wheel ................. 33
Center console ...................................... 34
Door control panel ................................. 37
Overhead control panel .........................3 8
Safety................................................... 39
Panic alarm ............................................ 39
Occupant safety .................................... 39
Children in the vehicle ........................... 53
Pets in the vehicle ................................. 59
Driving safety systems ........................... 60
Protection against theft .........................6 7
Opening and closing...........................69
SmartKey ............................................... 69
Doors ..................................................... 75
Trunk ..................................................... 77
Side windows ......................................... 80
Panorama roof with power tilt/sliding
panel ...................................................... 84
Seats, steering wheel and mirrors ....89
Correct driver's seat position ............... .89
Seats ..................................................... 89
Steering wheel ....................................... 94 Mirrors ................................................... 95
Memory function ................................... 97
Lights and windshield wipers
............99
Exterior lighting ..................................... 99
Interior lighting .................................... 102
Replacing bulbs ................................... 103
Windshield wipers ................................ 106
Climate control ................................. 109
Overview of climate control systems ... 109
Operating the climate control sys-
tems .................................................... 114
Air vents .............................................. 119
Driving and parking ..........................120
Notes on breaking-in a new vehicle ..... 120
Driving ................................................. 120
DYNAMIC SELECT button (all vehicles
except Mercedes-AMG vehicles) ......... 127
DYNAMIC SELECT controller
(Mercedes-AMG vehicles) .................... 128
Automatic transmission ....................... 129
Refueling ............................................. 137
Parking ................................................ 140
Driving tips .......................................... 143
Driving systems ................................... 148
On-board computer and displays ....174
Important safety notes ........................ 174
Displays and operation ........................ 174
Menus and submenus ......................... 177
Display messages ................................ 188
Warning and indicator lamps in the
instrument cluster ............................... 216
Multimedia system ...........................227
General notes ...................................... 227
Important safety notes ........................ 227
Function restrictions ............................ 227
Operating system ................................ 228
Stowage and features ......................233
Loading guidelines ............................... 233
Stowage areas ..................................... 233
2Contents
Page 7 of 318
Hiding a service message .............. 258
Information about Service .............258
Resetting the service interval dis-
play ................................................ 258
Service message ............................ 258
Special service requirements ......... 258
ATA (Anti-Theft Alarm system)
Activating/deactivating ................... 67
Function ...........................................6 7
Switching off the alarm .................... 67
ATTENTION ASSIST
Activating/deactivating ................. 183
Display message ............................ 205
Function/notes ............................. 169
Audio 20
Switching on/off ........................... 228
Audio menu (on-board computer) .... 180
Audio system
see separate operating instructions
Authorized Mercedes-Benz Center
see Qualified specialist workshop
Authorized workshop
see Qualified specialist workshop
AUTO lights
Display message ............................ 201
see Lights
Automatic car wash (care) ............... 259
Automatic engine start (ECO start/
stop function) .................................... 125
Automatic engine switch-off (ECO
start/stop function) .......................... 125
Automatic headlamp mode ................ 99
Automatic transmission
Accelerator pedal position ............. 132
Changing gear ............................... 132
DIRECT SELECT lever ..................... 129
Drive program ................................ 133
Drive program display .................... 129
Driving tips .................................... 132
DYNAMIC SELECT button (all vehi-
cles except Mercedes-AMG vehi-
cles) ............................................... 127
DYNAMIC SELECT controller
(Mercedes-AMG vehicles) .............. 128
Emergency running mode .............. 137
Engaging drive position .................. 131
Engaging neutral ............................ 130 Engaging park position
(Mercedes-AMG vehicles) .............. 131
Engaging park position automati-
cally ...............................................
130
Eng
aging reverse gear ................... 130
Engaging the park position ............ 129
Holding the vehicle stationary on
uphill gradients .............................. 133
Kickdown ....................................... 133
Manual shifting .............................. 135
Oil temperature (on-board com-
puter, Mercedes-AMG vehicles) ..... 185
Overview ........................................ 129
Problem (malfunction) ................... 137
Pulling away ................................... 124
Selector lever ................................ 131
Starting the engine ........................ 123
Steering wheel paddle shifters ...... 135
Transmission position display ........ 131
Transmission position display
(DIRECT SELECT lever) ................... 129
Transmission positions .................. 132
Automatic transmission emer-
gency mode ....................................... 137
B
Back button ....................................... 228
Backup lamp
Display message ............................ 200
BAS (Brake Assist System) ................. 60
Battery (SmartKey)
Checking .......................................... 72
Important safety notes .................... 72
Replacing ......................................... 72
Battery (vehicle)
Charging ........................................ 273
Display message ............................ 203
Important safety notes .................. 271
Jump starting ................................. 273
Belt
see Seat belts
Blind Spot Assist
Activating/deactivating (on-
board computer) ............................ 183
Display message ............................ 206
Notes/function .............................. 171
Index5
Page 12 of 318
Starting the engine with the
SmartKey ....................................... 123
Starting with the Start/Stop but-
ton ................................................. 123
Switching off .................................. 140
Tow-starting (vehicle) ..................... 279
Engine electronics
Problem (malfunction) ................... 126
Engine jump starting
see Jump starting (engine)
Engine oil
Adding ........................................... 256
Additives ........................................ 312
Checking the oil level ..................... 255
Checking the oil level using the
dipstick .......................................... 255
Display message ............................ 204
Filling capacity ............................... 312
Notes about oil grades ................... 311
Notes on oil level/consumption .... 255
Temperature (on-board computer,
Mercedes-AMG vehicles) ............... 185
Entering an address
see also Digital Operator's Man-
ual .................................................. 227
ESP
®(Electronic Stability Pro-
gram)
AMG menu (on-board computer) ... 186
Characteristics ................................. 64
Deactivating/activating (button
in Mercedes-AMG vehicles) ............. 65
Deactivating/activating (except
Mercedes‑ AMG vehicles) ................. 64
Deactivating/activating (on-
board computer, except
Mercedes-AMG vehicles) ............... 182
Display message ............................ 189
Function/notes ................................ 63
General notes .................................. 63
Important safety information ........... 63
Trailer stabilization ........................... 66
Warning lamp ................................. 219
ETS/4ETS (Electronic Traction Sys-
tem) ...................................................... 63
Exhaust
see Exhaust pipe
Exhaust check ................................... 143 Exhaust pipe
Cleaning ......................................... 263
Exterior lighting
Cleaning ......................................... 262
see Lights
Exterior mirrors
Adjusting ......................................... 95
Dipping (automatic) ......................... 96
Folding in when lo cking (
on-board
computer) ...................................... 185
Folding in/out (automatically) ......... 96
Folding in/out (electrically) ............. 96
Out of position (troubleshooting) ..... 96
Setting ............................................. 96
Storing settings (memory func-
tion) ................................................. 98
Storing the parking position ............. 97
Eyeglasses compartment ................. 234
F
Favorites
Overview ........................................ 229
Filler cap
see Refueling
Flat tire
MOExtended tires .......................... 267
Preparing the vehicle ..................... 266
TIREFIT kit ...................................... 268
Floormats ........................................... 253
Frequencies
Mobile phone ................................. 307
Two-way radio ................................ 307
Fuel
Additives ........................................ 311
Consumption statistics .................. 177
Displaying the current consump-
tion ................................................ 178
Displaying the range ...................... 178
Driving tips .................................... 143
E10 ................................................ 310
Fuel gauge ....................................... 32
Grade (gasoline) ............................ 310
Important safety notes .................. 310
Problem (malfunction) ................... 139
Refueling ........................................ 137
Tank content/reserve fuel ............. 310
10Index
Page 13 of 318
Fuel filler flapOpening ........................................ .138
Fuel level
Calling up the range (on-board
computer) ...................................... 178
Fuel tank
Capacity ........................................ 310
Problem (malfunction) ................... 139
Fuses
Allocation chart .............................2 80
Before changing .............................2 79
Fuse box in the engine compart-
ment .............................................. 280
Fuse box in the front-passenger
footwell .......................................... 280
Important safety notes .................. 279
G
Garage door opener
Clearing the memory ..................... 251
General notes ................................ 249
Important safety notes .................. 249
Opening/closing the garage door .. 251
Problems when programming ........2 51
Programming (button in the rear-
view mirror) ................................... 249
Synchronizing the rolling code ....... 250
Gasoline ............................................. 310
Gear indicator (on-board com-
puter, Mercedes-AMG vehicles) ....... 185
Genuine parts ...................................... 23
Glove box ...........................................2 34
Google™ Local Search
see also Digital Operator's Man-
ual ..................................................2 27
H
Handbrake
see Parking brake
HANDS-FREE ACCESS .......................... 78
Hazard warning lamps
Display message ............................ 214
Switching on/off ........................... 101
Head restraints
Adjusting ......................................... 91
Adjusting (manually) ........................ 92 Adjusting (rear) ................................ 92
Headlamps
Fogging up ..................................... 102
see Automatic headlamp mode
Heating
see Climate control
High beam flasher .............................1 00
High-beam headlamps
Adaptive Highbeam Assist ............. 101
Display message ............................ 200
Replacing bulbs .............................1 05
Switching on/off ........................... 100
Hill start assist .................................. 124
HOLD function
Activating ....................................... 156
Deactivating ................................... 156
Display message ............................ 205
Function/notes .............................1 56
Home address
see also Digital Operator's Man-
ual ..................................................2 27
Hood
Closing ...........................................2 55
Display message ............................ 213
Important safety notes .................. 254
Opening ......................................... 254
Horn ...................................................... 31
Hydroplaning ..................................... 147
I
Ignition lock
see Key positions
Immobilizer .......................................... 67
Indicator lamp
Replacing bulbs (rear) .................... 105
Indicator lamps
see Warning and indicator lamps
Indicators
see Turn signals
Instrument cluster
Overview .......................................... 32
Settings ......................................... 183
Warning and indicator lamps ........... 32
Instrument cluster lighting .............. 174
Interior lighting
Control ...........................................1 03
Overview ........................................ 102
Index11
Page 14 of 318
Readinglamp ................................ .102
iPod®
see also Digital Operator's Man-
ual ..................................................2 27
J
Jack
Storage location ............................ 266
Using ............................................. 303
Jump starting (engine) ......................273
K
Key positions
Start/Stop button .......................... 121
KEYLESS-GO
Convenience closing feature ............ 82
Deactivation ..................................... 70
Locking ............................................ 70
Unlocking ......................................... 70
Kickdown
Driving tips ....................................1 33
Manual gearshifting ....................... 137
Knee bag .............................................. 45
L
Lamps
see Warning and indicator lamps
Lane Keeping Assist
Activating/deactivating (on-
board computer) ............................ 183
Display message ............................ 205
Function/information .................... 172
Lane Tracking package ..................... 171
Lap time (RACETIMER) ...................... 186
LATCH-type (ISOFIX) child seat
anchors ................................................ 56
License plate lamp (display mes-
sage) ................................................... 200
Light function, active
Display message ............................ 201
Light sensor (display message) ....... 201
Lights
Adaptive Highbeam Assist ............. 101
Automatic headlamp mode .............. 99
Fogged up headlamps .................... 102
Hazard warning lamps ................... 101 High beam flasher .......................... 100
High-beam headlamps ................... 100
Light switch ..................................... 99
Low-beam headlamps .................... 100
Parking lamps ................................ 100
Rear fog lamp ................................ 100
Setting exterior lighting ................... 99
Standing lamps .............................. 100
Switching the daytime running
lamps on/off (on-board com-
puter) ............................................. 184
Turn signals ................................... 100
Loading guidelines ............................ 233
Locking
see Central locking
Locking (doors)
Automatic ........................................ 76
Emergency locking ........................... 76
From inside (central locking but-
ton) .................................................. 75
Locking centrally
see Central locking
Locking verification signal (on-
board computer) ............................... 185
Low-beam headlamps
Display message ............................ 199
Replacing bulbs ............................. 104
Switching on/off ........................... 100
Lumbar support
Adjusting the 4-way lumbar sup-
port .................................................. 92
M
M+S tires ............................................ 284
Malfunction message
see Display messages
Matte finish (cleaning instruc-
tions) .................................................. 261
mbrace
Call priority .................................... 245
Display message ............................ 194
Downloading destinations
(COMAND) ..................................... 245
Downloading routes ....................... 248
Emergency call .............................. 243
General notes ................................ 242
Geo fencing ................................... 248
12Index
Page 19 of 318
Setting the airflow............................1 16
Setting the date/time format
see also Digital Operator's Man-
ual ..................................................2 27
Setting the language
see also Digital Operator's Man-
ual ..................................................2 27
Setting the time
see also Digital Operator's Man-
ual ..................................................2 27
Settings
Factory (on-board computer) ......... 185
On-board computer ....................... 183
SETUP (on-board computer) ............. 186
Side impact air bag .............................4 5
Side marker lamp (display mes-
sage) ................................................... 201
Side windows
Cleaning ......................................... 261
Convenience closing feature ............ 82
Convenience opening feature ..........8 2
Important safety information ........... 80
Opening/closing .............................. 81
Problem (malfunction) .....................8 3
Resettin g........................................ .83
Reversin gfeature ............................ .81
SIRIUS services
see also Digital Operator's Man-
ual .................................................. 227
Sliding sunroof
see Panorama roof with power
tilt/sliding panel
SmartKey
Changing the battery ....................... 72
Changing the programming .............7 1
Checking the battery ...................... .72
Convenience closing feature ............ 82
Convenience opening feature .......... 82
Dis play message ............................ 214
Door central locking/unlo ckin
g ......
.69
Important safety notes .................... 69
KEYLESS-GO start function .............. 70
Loss .................................................7 3
Mechanical key ................................ 71
Positions (ignition lock) ................. 121
Problem (malfunction) ..................... 73
Starting the engine ........................ 123 SmartKey positions (ignition lock)
.. 121
SMS
see also Digital Operator's Man-
ual .................................................. 227
Snow chains ...................................... 285
Sockets
Center console .............................. 241
General notes ................................ 241
Rear compartment .........................2 42
Trunk ............................................. 242
Sound
Switching on/off ........................... 228
Special seat belt retractor .................. 54
Specialist workshop ............................ 27
Speed, controlling
see Cruise control
Speedometer
Activating/deactivating the addi-
tional speedometer ........................ 184
Digital ............................................ 178
In the Instrument cluster ................. 32
Segments ...................................... 174
Selecting the display unit ...............1 83
SPORT handling mode
Deactivating/activating
(Mercedes-AMG vehicles) ................ 65
Warning lamp ................................. 220
Standing lamps
Display message ............................ 200
Switching on/off ........................... 100
Start-off assist
Activating ....................................... 157
Important safety notes .................. 157
Start/Stop button
Removing ....................................... 122
Starting the engine ........................ 123
Start/stop function
see ECO start/stop function
Starting (engine) ................................ 122
STEER CONTROL .................................. 66
Steering
Display message ............................ 214
Ste
ering assistant STEER CON-
TROL
see STEER CONTROL
Steering wheel
Adjusting (manually) ........................ 94
Index17
Page 22 of 318
Removingth etowin geye .............. .277
Towing a trailer
ESP
®(Electronic Stability Pro-
gram) ............................................... 66
Towing away
Important safety guidelines ........... 276
Installing the towing eye ................ 277
Notes for 4MATIC vehicles ............ 279
Removing the towing eye ...............2 77
Transporting the vehicle ................ 278
With both axles on the ground ....... 278
With front axle raised ..................... 277
Towing eye ......................................... 266
Traffic reports
see also Digital Operator's Man-
ual ..................................................2 27
Transmission
see Automatic transmission
Transmission position display
(DIRECT SELECT lever) ......................129
Transporting the vehicle .................. 278
Trim pieces (cleaning instruc-
tions) ..................................................2 64
Trip computer (on-board com-
puter) ..................................................1 77
Trip odometer
Calling up ....................................... 177
Resetting (on-board computer) ...... 178
Trunk
Emergency release .......................... 80
Emergency release button ...............8 0
Important safety notes .................... 77
Opening (automatically from out-
side) .................................................7 8
Opening (from outside the vehi-
cle, HANDS-FREE ACCESS) .............. 78
Opening automatically from
inside ............................................... 79
Opening/closing (manually from
outside) ............................................ 77
Trunk emergency release button .......80
Trunk lid
Display message ............................ 213
Opening dimensions ...................... 314
Trunk load (maximum) ...................... 314
Turn signals
Display message ............................ 199 Replacing bulbs (front) ................... 105
Swi
tching o
n/off ........................... 100
Two-way radio
Frequencies ................................... 307
Installation ..................................... 307
Transmission output (maximum) .... 307
Type identification plate
see Vehicle identification plate
U
UnlockingEmergency unlocking ....................... 76
From inside the vehicle (central
unlocking button) ............................. 75
Upshift indicator (on-board com-
puter, Mercedes-AMG vehicles) ....... 185
USB devices
Connecting to the Media Inter-
face ............................................... 232
V
Vanity mirror (in the sun visor) ........ 240
Vehicle
Correct use ...................................... 27
Data acquisition ............................... 28
Display message ............................ 211
Equipment ....................................... 24
Individual settings .......................... 183
Limited Warranty ............................. 28
Loading .......................................... 292
Locking (in an emergency) ............... 76
Locking (SmartKey) .......................... 69
Lowering ........................................ 305
Maintenance .................................... 25
Parking for a long period ................ 142
Pulling away ................................... 124
Raising ........................................... 303
Reporting problems .........................2 7
Securing from rolling away ............ 302
Transporting .................................. 278
Unlocking (in an emergency) ........... 76
Unlocking (SmartKey) ...................... 69
Vehicle data ................................... 314
Vehicle data
Roof load (maximum) ..................... 314
Trunk load (maximum) ................... 314
20Index
Page 41 of 318
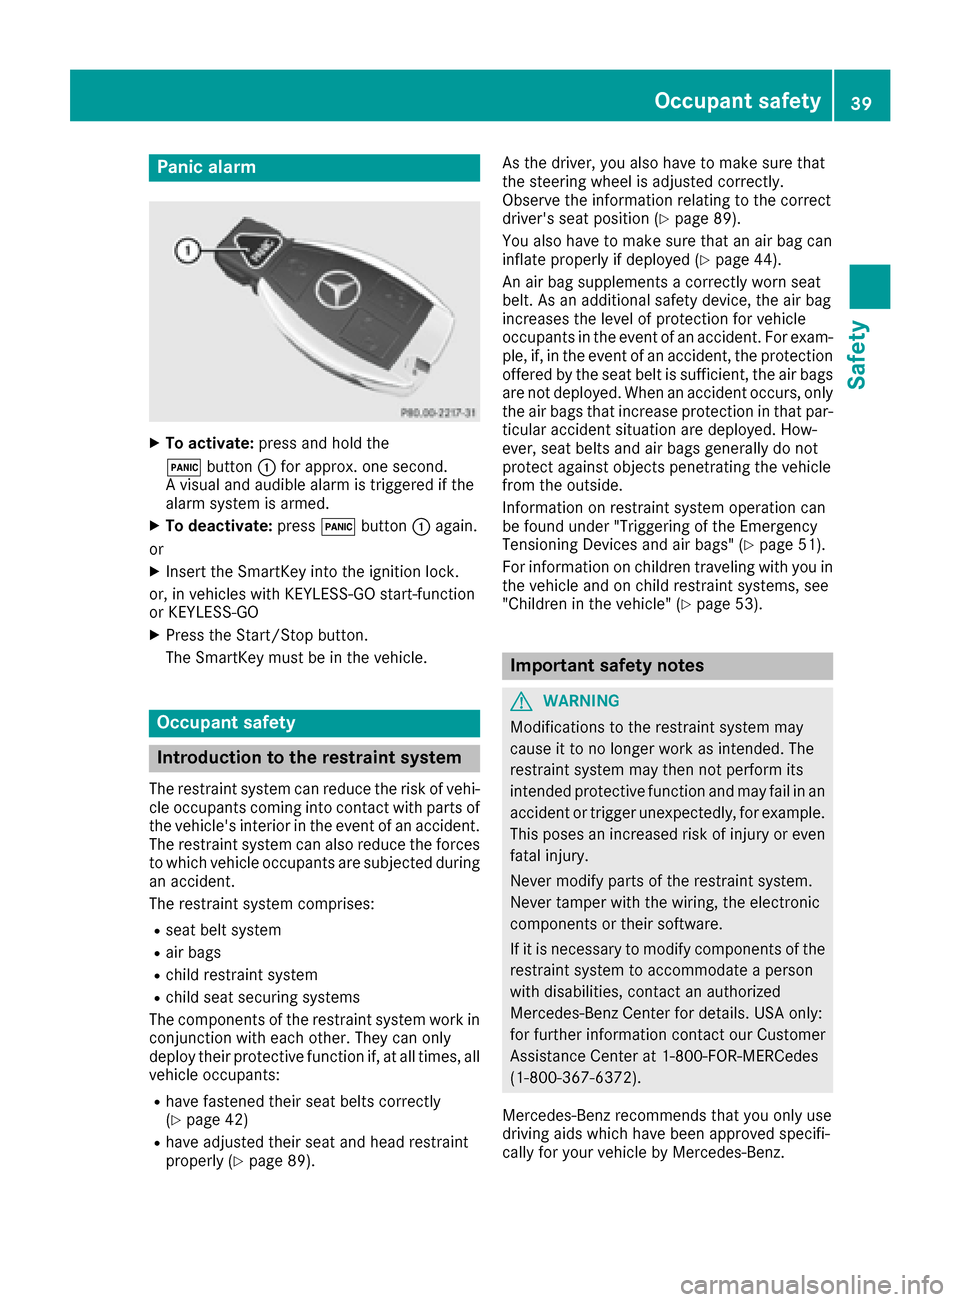
Panic alarm
XTo activate:press and hold the
! button :for approx. one second.
A visual and audible alarm is triggered if the
alarm system is armed.
XTo deactivate: press!button :again.
or
XInsert the SmartKey into the ignition lock.
or, in vehicles with KEYLESS-GO start-function
or KEYLESS ‑GO
XPress the Start/Stop button.
The SmartKey must be in the vehicle.
Occupant safety
Introduction to the restraint system
The restraint system can reduce the risk of vehi-
cle occupants coming into contact with parts of
the vehicle's interior in the event of an accident.
The restraint system can also reduce the forces to which vehicle occupants are subjected during
an accident.
The restraint system comprises:
Rseat belt system
Rair bags
Rchild restraint system
Rchild seat securing systems
The components of the restraint system work in
conjunction with each other. They can only
deploy their protective function if, at all times, all vehicle occupants:
Rhave fastened their seat belts correctly
(Ypage 42)
Rhave adjusted their seat and head restraint
properly (Ypage 89). As the driver, you also have to make sure that
the steering wheel is adjusted correctly.
Observe the information relating to the correct
driver's seat position (
Ypage 89).
You also have to make sure that an air bag can
inflate properly if deployed (
Ypage 44).
An air bag supplements a correctly worn seat
belt. As an additional safety device, the air bag
increases the level of protection for vehicle
occupants in the event of an accident. For exam-
ple, if, in the event of an accident, the protection
offered by the seat belt is sufficient, the air bags are not deployed. When an accident occurs, only
the air bags that increase protection in that par-ticular accident situation are deployed. How-
ever, seat belts and air bags generally do not
protect against objects penetrating the vehicle
from the outside.
Information on restraint system operation can
be found under "Triggering of the Emergency
Tensioning Devices and air bags" (
Ypage 51).
For information on children traveling with you in
the vehicle and on child restraint systems, see
"Children in the vehicle" (
Ypage 53).
Important safety notes
GWARNING
Modifications to the restraint system may
cause it to no longer work as intended. The
restraint system may then not perform its
intended protective function and may fail in an
accident or trigger unexpectedly, for example.
This poses an increased risk of injury or even fatal injury.
Never modify parts of the restraint system.
Never tamper with the wiring, the electronic
components or their software.
If it is necessary to modify components of the
restraint system to accommodate a person
with disabilities, contact an authorized
Mercedes-Benz Center for details. USA only:
for further information contact our Customer
Assistance Center at 1-800-FOR-MERCedes
(1‑800‑367‑6372).
Mercedes-Benz recommends that you only use
driving aids which have been approved specifi-
cally for your vehicle by Mercedes-Benz.
Occupant safety39
Safety
Z
Page 49 of 318
Requirements
To be classified correctly, the front passenger
must sit:
Rwith the seat belt fastened correctly
Rin an almost upright position with their back
against the seat backrest
Rwith their feet resting on the floor, if possible
If the front passenger does not observe these
conditions, OCS may produce a false classifica-
tion, e.g. because the front passenger:
Rtransfers their weight by supporting them-
selves on a vehicle armrest
Rsits in such a way that their weight is raised
from the seat cushion
If it is absolutely necessary to install a child
restraint system on the front-passenger seat, be
sure to observe the correct positioning of the
child restraint system. Never place objects
under or behind the child restraint system, e.g. a
cushion. The entire base of the child restraint
system must always rest on the seat cushion of
the front-passenger seat. The backrest of the
forward-facing child restraint system must lie as
flat as possible against the backrest of the front-
passenger seat.
The child restraint system must not touch the
roof or be subjected to a load by the head
restraint. Adjust the angle of the seat backrest
and the head restraint position accordingly.
Only then can OCS be guaranteed to function
correctly. Always observe the child restraint sys-
tem manufacturer's instal
lation and operating
instructions.
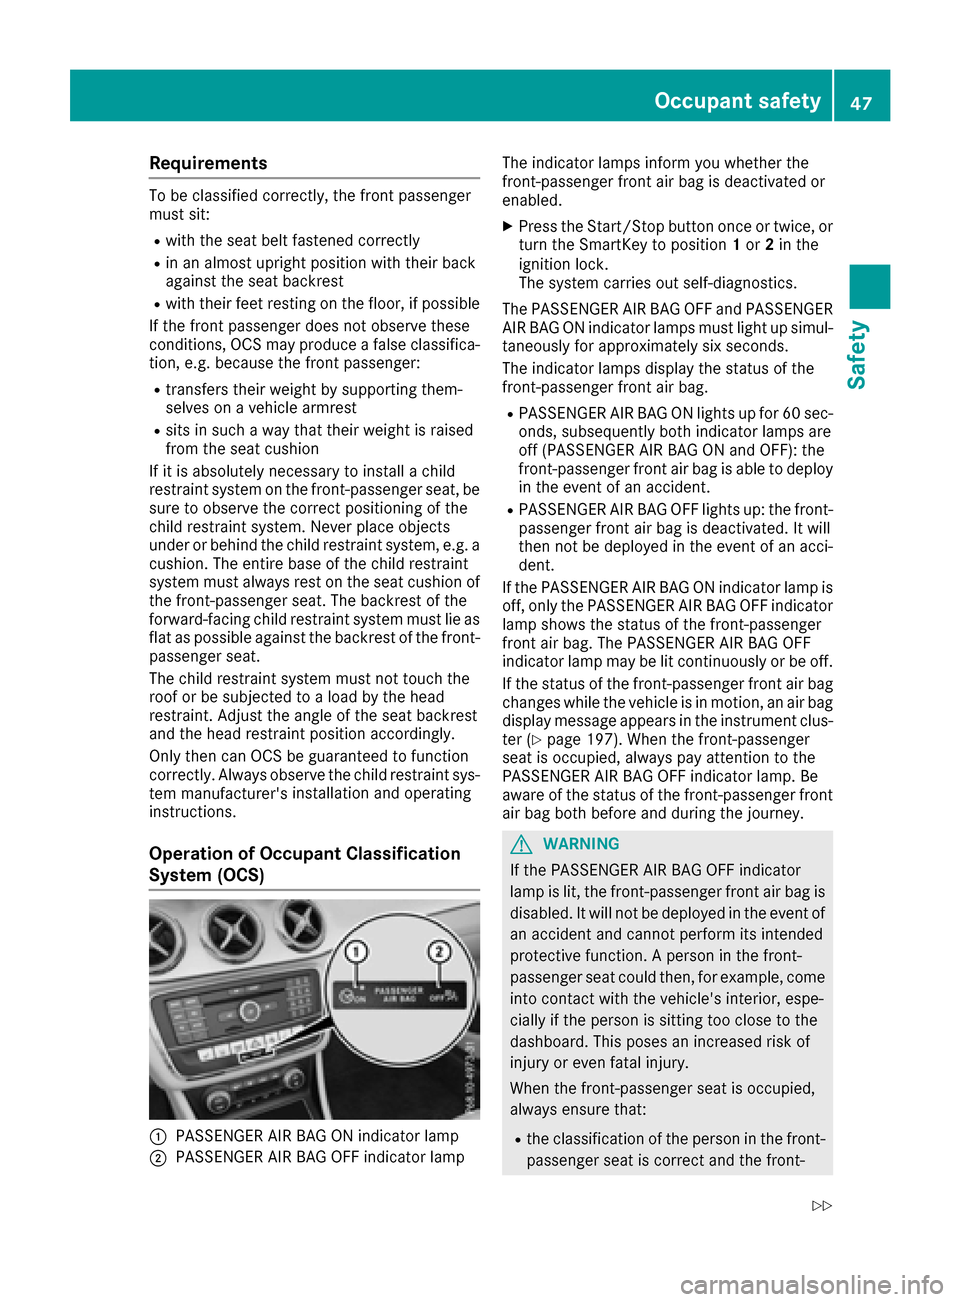
Operation of Occupant Classification
System (OCS)
:PASSENGER AIR BAG ON indicator lamp
;PASSENGER AIR BAG OFF indicator lamp The indicator lamps inform you whether the
front-passenger front air bag is deactivated or
enabled.
XPress the Start/Stop button once or twice, or
turn the SmartKey to position 1or 2in the
ignition lock.
The system carries out self-diagnostics.
The PASSENGER AIR BAG OFF and PASSENGER
AIR BAG ON indicator lamps must light up simul-
taneously for approximately six seconds.
The indicator lamps display the status of the
front-passenger front air bag.
RPASSENGER AIR BAG ON lights up for 60 sec-
onds, subsequently both indicator lamps are
off (PASSENGER AIR BAG ON and OFF): the
front-passenger front air bag is able to deploy
in the event of an accident.
RPASSENGER AIR BAG OFF lights up: the front-
passenger front air bag is deactivated. It will
then not be deployed in the event of an acci-
dent.
If the PASSENGER AIR BAG ON indicator lamp is
off, only the PASSENGER AIR BAG OFF indicator lamp shows the status of the front-passenger
front air bag. The PASSENGER AIR BAG OFF
indicator lamp may be lit continuously or be off.
If the status of the front-passenger front air bag
changes while the vehicle is in motion, an air bag
display message appears in the instrument clus-
ter (
Ypage 197). When the front-passenger
seat is occupied, always pay attention to the
PASSENGER AIR BAG OFF i
ndicator lamp. Be
aware of the status of the front-passenger front air bag both before and during the journey.
GWARNING
If the PASSENGER AIR BAG OFF indicator
lamp is lit, the front-passenger front air bag is
disabled. It will not be deployed in the event of
an accident and cannot perform its intended
protective function. A person in the front-
passenger seat could then, for example, come
into contact with the vehicle's interior, espe-
cially if the person is sitting too close to the
dashboard. This poses an increased risk of
injury or even fatal injury.
When the front-passenger seat is occupied,
always ensure that:
Rthe classification of the person in the front- passenger seat is correct and the front-
Occupant safety47
Safety
Z
Page 56 of 318
GWARNING
If you leave children unsupervised in the vehi-
cle, they could set it in motion by, for example:
Rrelease the parking brake.
Rshift the automatic transmission out of the
parking position P.
Rstart the engine.
In addition, they may operate vehicle equip-
ment and become trapped. There is a risk of
an accident and injury.
When leaving the vehicle, always take the
SmartKey with you and lock the vehicle. Never
leave children unsupervised in the vehicle.
GWARNING
If persons, particularly children are subjected to prolonged exposure to extreme heat or
cold, there is a risk of injury, possibly even
fatal. Never leave children unattended in the
vehicle.
GWARNING
If the child restraint system is subjected to
direct sunlight, parts may get very hot. Chil-
dren may burn themselves on these parts,
particularly on the metal parts of the child
restraint system. There is a risk of injury.
If you leave the vehicle, taking the child with
you, always ensure that the child restraint
system is not exposed to direct sunlight. Pro- tect it with a blanket, for example. If the child
restraint system has been exposed to direct
sunlight, let it cool down before securing the
child in it. Never leave children unattended in
the vehicle.
Always ensure that all vehicle occupants have
their seat belts fastened correctly and are sitting
properly. Particular attention must be paid to
children.
Observe the safety notes on the seat belt
(
Ypage 41) and the notes on correct use of seat
belts (Ypage 42).
A booster seat may be necessary to achieve
proper seat belt positioning for children over
41 lbs (18 kg) until they reach a height where a three-point seat belt can be properly fastened
without a booster seat.
Special seat belt retractor
GWARNING
If the seat belt is released while driving, the
child restraint system will no longer be
secured properly. The special seat belt retrac- tor is disabled and the inertia real draws in a
portion of the seat belt. The seat belt cannot
be immediately refastened. There is an
increased risk of injury, possibly even fatal.
Stop the vehicle immediately, paying atten-
tion to road and traffic conditions. Reactivate
the special seat belt retractor and secure the
child restraint system properly.
All seat belts except the driver's seat belt are
equipped with a special seat belt retractor.
When activated, the special seat belt retractor
ensures that the seat belt will not slacken once
the child restraint system has been secured.
Installing a child restraint system:
XAlways comply with the child restraint system
manufacturer's installation instructions.
XPull the seat belt smoothly from the belt out-
let.
XEngage the seat belt tongue in the belt buckle.
Activating the special seat belt retractor:
XPull the seat belt out fully and let the inertia
reel retract it again.
While the seat belt is retracting, you should
hear a ratcheting sound. The special seat belt
retractor is activated.
XPush the child seat restraint system down so
that the seat belt is tight and does not loosen.
Removing a child restraint system and deacti-
vating the special seat belt retractor:
XAlways comply with the child restraint system
manufacturer's installation instructions.
XPress the release button of the belt buckle,
hold the belt tongue firmly and guide it back
towards the belt outlet.
The special seat belt retractor is deactivated.
54Children in the vehicle
Safety