fuel cap MERCEDES-BENZ CLA COUPE 2018 Owner's Manual
[x] Cancel search | Manufacturer: MERCEDES-BENZ, Model Year: 2018, Model line: CLA COUPE, Model: MERCEDES-BENZ CLA COUPE 2018Pages: 326, PDF Size: 5.59 MB
Page 12 of 326
Starting (important safety notes)... 123
Starting problems .......................... 127
Starting the engine with the
SmartKey ....................................... 124
Starting via smartphone ................ 124
Starting with the Start/Sto pbut-
ton ................................................. 124
Switching off .................................. 141
Tow-starting (vehicle )..................... 284
Engine electronics
Problem (malfunction) ................... 127
Engine jump starting
see Jump starting (engine)
Engine oil
Adding ........................................... 259
Additives ........................................ 318
Checking the oill evel ..................... 258
Checking the oill evel using the
dipstick .......................................... 258
Displa ymessage ............................ 206
Filling capacity ............................... 318
Notesa boutoilgrade s................... 317
Notesono illevel/consumption .... 258
Temperature (on-board computer,
Mercedes-AMGv ehicles) ............... 188
Entering an address
see also Digital Operator's Man-
ual.................................................. 229
ESP
®(ElectronicS tability Pro-
gram)
Activating/deactivating (on-
board computer) ............................ 219
AMG menu (on-board computer) ... 188
Characteristics ................................. 65
Deactivating/activating (button
in Mercedes-AMGv ehicles) ............. 66
Deactivating/activating (except
Mercedes‑ AMG vehicles) ................. 65
Deactivating/activating (on-
board computer, except
Mercedes-AMGv ehicles) ............... 185
Displa ymessage ............................ 192
Function/note s................................ 64
Generaln otes .................................. 64
Important safety information ........... 64
Trailer stabilization ........................... 67
Warning lamp ................................. 221 ETS/4ETS (ElectronicT
raction Sys-
tem) ...................................................... 64
Exhaust
see Exhaus tpipe
Exhaustc heck................................... 144
Exhaustp ipe
Cleaning ......................................... 266
Ex terio
r lighting
Cleaning ......................................... 265
see Lights
Exterior mirrors
Adjusting ......................................... 96
Dipping (automatic) ......................... 97
Folding in when locking (on-board
computer) ...................................... 188
Folding in/out (automatically )......... 97
Folding in/out (electrically) ............. 97
Outofp osition (troubleshooting )..... 97
Setting ............................................. 97
Storing settings (memory func-
tion) ................................................. 99
Storing the parking position ............. 98
Eyeglassesc ompartment ................. 238
F
Favorites
Overview ........................................ 231
Filler cap
see Refueling
First-aidk it......................................... 270
Flat tire
MOExtended tire s.......................... 271
Preparing the vehicl e..................... 271
TIREFIT kit ...................................... 272
Floormats ........................................... 256
Frequencies
Mobil ephone ................................. 313
Two-way radio ................................ 313
Fuel
Additives ........................................ 317
Consumption statistics .................. 180
Displaying the current consump-
tion ................................................ 180
Displaying the rang e...................... 180
Driving tip s.................................... 144
E10 ................................................ 316
Fue lgauge ....................................... 33
10Index
Page 13 of 326
Grade (gasoline) ............................ 316
Importantsafety note s................. .316
Problem (malfunction) .................. .140
Refueling ........................................ 138
Tank content/reserve fuel ............. 316
Fue lfiller flap
Opening ......................................... 139
Fue llevel
Calling up the range (on-board
computer) ...................................... 180
Fue ltank
Capacity ........................................ 316
Problem (malfunction) ................... 140
Fuses
Allocation chart .............................2 85
Before changing .............................2 84
Fuse box in the engine compart-
ment .............................................. 285
Fuse box in the front-passenger
footwell .......................................... 285
Important safety notes .................. 284
G
Garage door opener
Clearing the memory ..................... 254
General notes ................................ 252
Important safety notes .................. 252
Opening/closing the garage door .. 254
Problems whe nprogramming ........2 54
Programming (button in the rear-
view mirror) ................................... 252
Synchronizing the rolling code ....... 253
Gasoline ............................................. 316
Gear indicator (on-board com-
puter, Mercedes-AMG vehicles) ....... 188
Genuine parts ...................................... 24
Glove box ...........................................2 38
Google™L ocal Search
see also Digita lOperator's Man-
ua l..................................................2 29
H
Handbrake
see Parking brake
HANDS-FRE EACCES S.......................... 79 Hazard warning lamps
Display message ............................ 216
Switching on/off ........................... 102
Head restraints
Adjusting ......................................... 92
Adjusting (manually). ....................... 93
Adjusting (rear) ................................ 93
Headlamps
Fogging up ..................................... 103
see Automatic headlamp mode
Heating
see Climate control
High beam flasher .............................1 01
High-beam headlamps
Adaptive Highbeam Assist ............. 102
Display message ............................ 203
Replacing bulbs .............................1 06
Switching on/off ........................... 101
Hill start assist .................................. 125
HOLD function
Activating ....................................... 157
Activatio nconditions ..................... 157
Deactivating ................................... 157
Display message ............................ 207
Function/notes .............................1 57
Home address
see also Digita lOperator's Man-
ua l..................................................2 29
Hood
Closing ...........................................2 58
Display message ............................ 215
Important safety notes .................. 257
Opening ......................................... 257
Horn ...................................................... 32
Hydroplaning ..................................... 148
I
Ignitionlock
see Key positions
Immobilizer .......................................... 68
Indicator lamp
Replacing bulbs (rear) .................... 106
Indicator lamps
see Warning and indicator lamps
Indicators
see Turn signals
Index11
Page 20 of 326
Start-off assistActivating ....................................... 158
Important safety notes .................. 158
Start/Stop button
Removing ....................................... 123
Starting the engine ........................ 124
Start/stop function
see ECO start/stop function
Starting (engine) ................................ 123
STEER CONTROL ..................................6 8
Steering
Display message ............................2 16
Steering assistant STEE RCON-
TROL
see STEER CONTROL
Steering wheel
Adjusting (manually). ....................... 95
Butto noverview ............................... 34
Buttons (on-board computer) ......... 177
Cleaning ......................................... 267
Important safety notes .................... 95
Paddle shifters ............................... 136
Steering whee lpaddle shifters ........ 136
Stopwatch (RACETIMER) ................... 189
Stowag ecom partments
Armrest (front) ............................... 238
Armrest (under )............................. 239
Center console .............................. 238
Center console (rear) ..................... 239
Cu ph olders ................................... 242
Eyeglasses compartment ............... 238
Glove box ....................................... 238
Important safety information ......... 237
Mapp ockets .................................. 239
Stowag enet ................................... 239
Stowag enet....................................... 239
Stowag ewellb enea th the trunk
floor .................................................... 241
Summert ires..................................... 289
Sun visor ............................................ 243
Suspension setting
AMG adaptive sport suspension
system ........................................... 159
Switchin gair-recirculatio nmode
on/off ................................................. 119
Switchin gonmediam ode
Via the device list .......................... 235T
Tachometer ........................................ 176
Tail lamps
Displa ymessage ............................ 203
see Lights
Tank
see Fue ltank
Tank content
Fuelgauge ....................................... 33
Technical data
Capacities ...................................... 315
Information .................................... 313
Tires/wheels ................................. 312
Vehicl edata. .................................. 320
Telephone
Accepting acall( multifunction
steering wheel) .............................. 184
Authorizing amobilephone (con-
necting) ......................................... 233
Authorizing amobil ephone via the
device manager (connecting) ......... 234
Connecting amobilephone
(device manager )........................... 234
Connecting amobilephone (gen-
erali nformation) ............................ 233
Displa ymessage ............................ 216
Introduction ................................... 183
Menu (on-board computer) ............ 183
Numbe rfrom the phone boo k........ 184
Redialing ........................................ 184
Rejecting/ending acall. ................ 184
see also Digital Operator's Man-
ua l.................................................. 229
Temperature
Coolant .......................................... 177
Coolant (on-board computer,
Mercedes-AMGv ehicles) ............... 188
Engine oil( on-board computer,
Mercedes-AMGv ehicles) ............... 188
Outsid etemperature ...................... 176
Setting (climate control )................ 116
Transmission oil( on-board com-
puter, Mercedes-AMGv ehicles) ..... 188
Through-loadin gfeature ................... 239
Timing (RACETIMER) ......................... 189
Tire pressure
Calling up (on-board computer) ..... 294
18Index
Page 141 of 326
You must make sure that fuel does not comeint oc ontac twith your skin ,eyes or clothing
and that it is not swallowed. Do not inhale fuel
vapors.K eep fuel away from children.
If you or others com eintoc ontac twith fuel,
observet he following:
RWash away fuel from skin immediately
using soap and water.
RIf fuel comes int ocontac twith your eyes,
immediately rinse the mthoroughly with
clean water. Seek medical assistanc ewith-
out delay.
RIf fuel is swallowed, seek medical assis-
tance without delay. Do not induc evomit-
ing.
RImmediately change out of clothing which
has com eintoc ontac twith fuel.
GWARNING
Electrostatic buildup can create sparksa nd
ignit efuel vapors.T here isarisk of fire and
explosion.
Always touc hthe vehicle body beforeo pening
the fuel filler flap or touching the fuel pump
nozzle. An yexisting electrostatic buildup is
thereby discharged.
!Do not use diesel to refuel vehicles with a
gasolinee ngine. Do not switc honthe ignition
if you accidentally refuel with the wrongf uel.
Otherwise, the fuel will enter the fuel system. Even small amount softhe wrongf uel could
result in damage to the fuel syste mand the
engine. Notify aqualified specialis tworkshop
and have the fuel tan kand fuel lines drained
completely.
!Overfilling the fuel tan kcould damage the
fuel system.
!Take care not to spill any fuel on painted
surfaces. You could otherwise damage the
paintwork.
!Use afilter when adding fuel from afuel can.
The fuel lines and/or the fuel injection system
could otherwise be blocked by particles from
the fuel can. Do not get int
othe vehicle again during the refu-
eling process. Otherwise, electrostatic charge
could build up again.
If you overfill the fuel tank, fuel could spray out
when the fuel pump nozzle is removed.
For further information on fuel and fuel quality
(
Ypage 315).
Refueling
Genera linformation
Pay attention to the importan tsafetyn otes
(Ypage 138).
The fuel filler flap is unlocked/locked automat-
ically when you unlock/lock the vehicle with the
SmartKey.
The position of the fuel filler cap is displayed
æ in the instrumentc luster. The arrow on the
filling pump indicates the side of the vehicle.
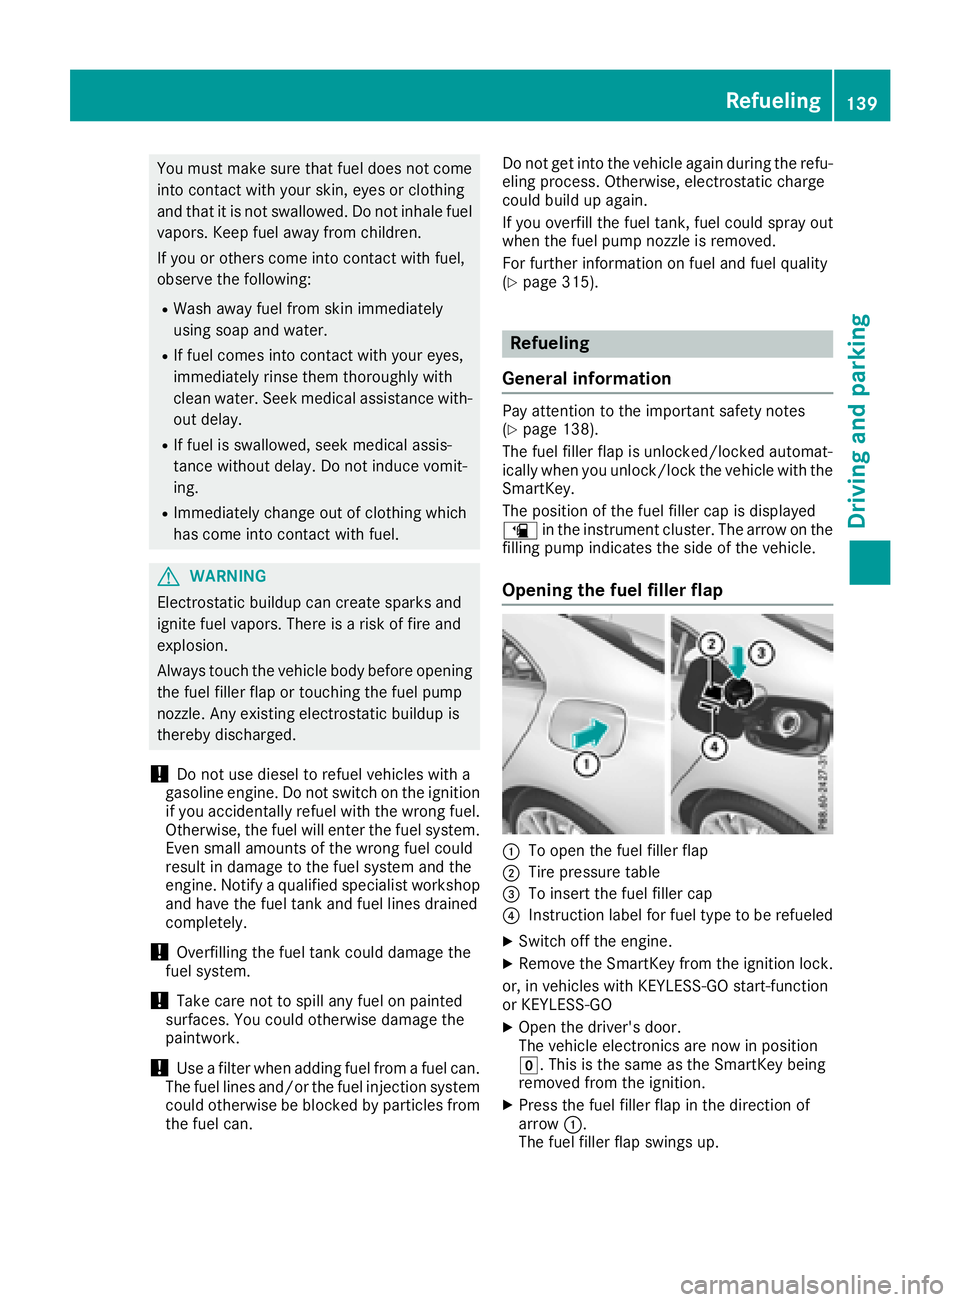
Opening th efuel filler flap
:To open the fuel filler flap
;Tire pressure table
=To inser tthe fuel filler cap
?Instruction label for fuel type to be refueled
XSwitch off the engine.
XRemove the SmartKey from the ignition lock.
or, in vehicles with KEYLESS-GO start-function
or KEYLESS‑ GO
XOpen the driver's door.
The vehicle electronics are now in position
g.This is the same as the SmartKey being
removed from the ignition.
XPress the fuel filler flap in the direction of
arrow :.
The fuel filler flap swings up.
Refueling139
Driving and parking
Z
Page 142 of 326
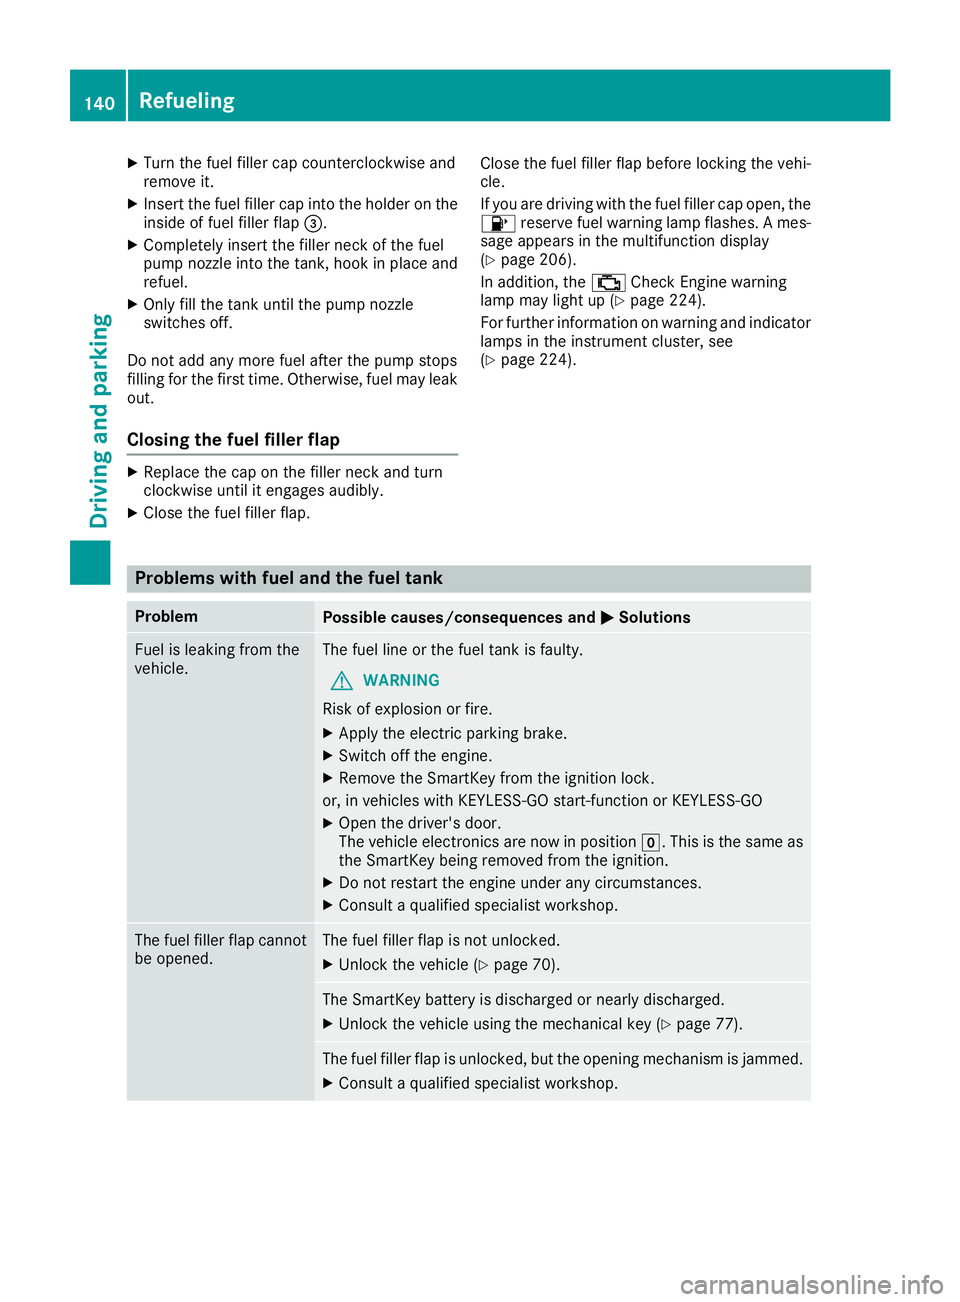
XTurn the fuel filler cap counterclockwise and
remove it.
XInsert the fuel filler cap into the holder on theinside of fuel filler flap =.
XCompletely insert the filler neck of the fuel
pump nozzle into the tank ,hook in place and
refuel.
XOnly fill the tank until the pump nozzle
switches off.
Do not add any more fuel after the pump stops
filling for the first time. Otherwise, fuel may leak
out.
Closing the fuel filler flap
XReplace the cap on the filler neck and turn
clockwise until it engages audibly.
XClose the fuel filler flap. Close the fuel filler flap before lockingt
he vehi-
cle.
If you are driving with the fuel filler cap open, the
8 reserve fuel warning lamp flashes. Ames-
sage appears in the multifunction display
(
Ypage 206).
In addition, the ;Check Engine warning
lamp may light up (
Ypage 224).
For further information on warning and indicator
lamps in the instrument cluster, see
(
Ypage 224).
Problems with fuel and the fuel tank
ProblemPossible causes/consequences and MSolutions
Fuel is leaking from the
vehicle.The fuel line or the fuel tank is faulty.
GWARNING
Risk of explosion or fire.
XApply the electric parking brake.
XSwitch off the engine.
XRemove the SmartKey from the ignition lock.
or, in vehicles with KEYLESS-GO start-function or KEYLESS ‑GO
XOpen the driver's door.
The vehicle electronics are now in positiong.This is the same as
the SmartKey being removed from the ignition.
XDo not restart the engine under any circumstances.
XConsult aqualified specialist workshop.
The fuel filler flap cannot
be opened.The fuel filler flap is not unlocked.
XUnlock the vehicle (Ypage 70).
The SmartKey battery is discharged or nearly discharged.
XUnlock the vehicle using the mechanical key (Ypage 77).
The fuel filler flap is unlocked, but the opening mechanism is jammed.
XConsult aqualified specialist workshop.
140Refueling
Driving and parking
Page 209 of 326
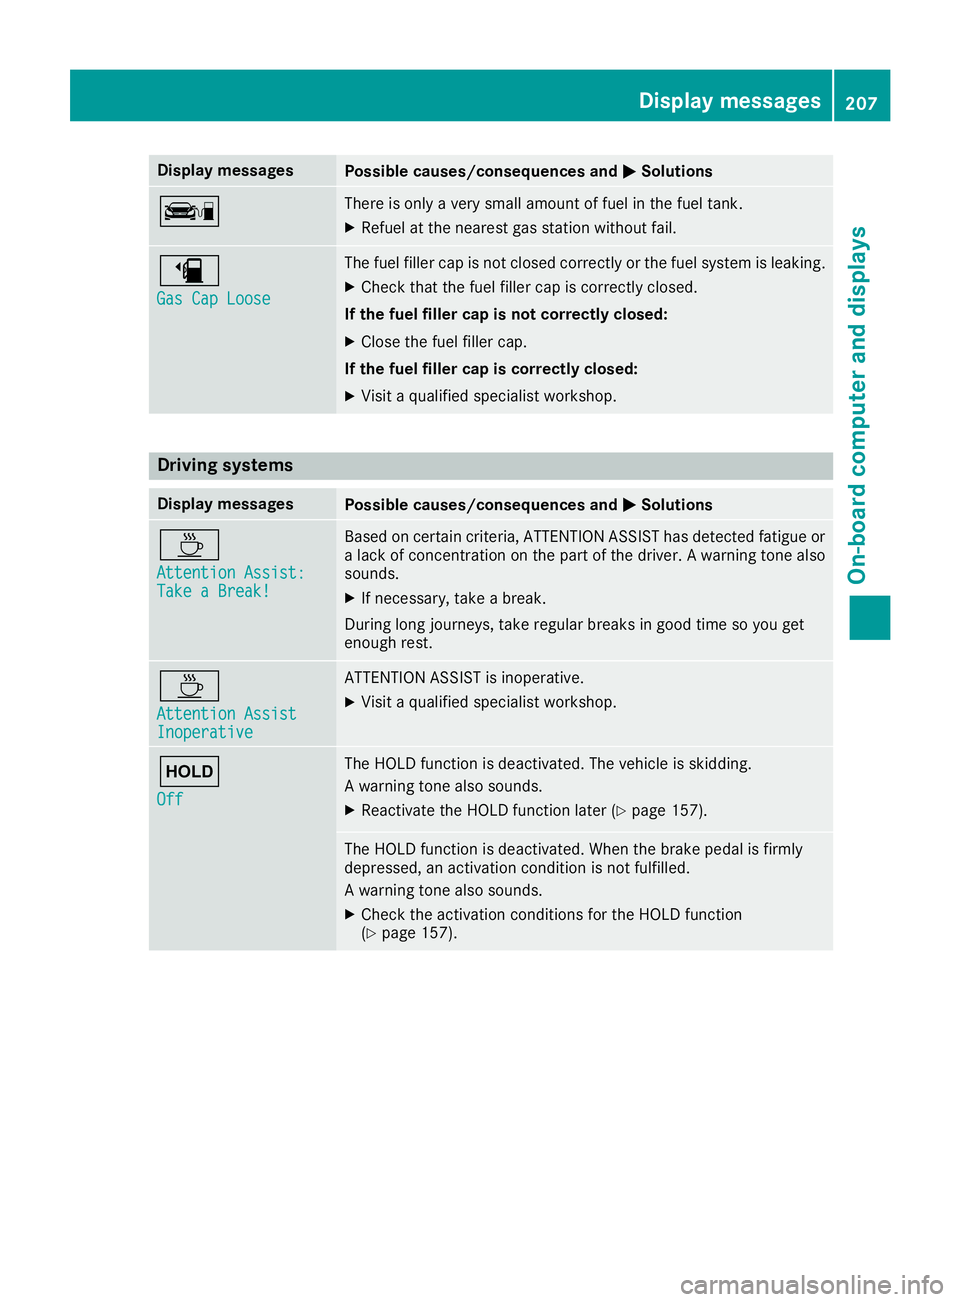
Display messagesPossible causes/consequences andMSolutions
çThere is onlyaverys mall amount of fuel in th efuel tank.
XRefue lattheneares tgas station without fail .
æ
Gas Cap Loose
The fuel filler cap is no tclosed correctl yorthefuel system is leaking .
XCheckthatthe fuel filler cap is correctl yclosed .
If th efuelfiller cap is not correctl yclosed :
XClosethe fuel filler cap .
If th efuelfiller cap is correctl yclosed :
XVisitaqualified specialist workshop .
Driving systems
Display messagesPossible causes/consequences and MSolutions
À
Attention Assist:TakeaB reak!
Based on certain criteria, ATTENTION ASSIST has detecte dfatigue or
al ack of concentration on th epart of th edriver .Aw arning tone also
sounds.
XIf necessary, tak eabreak.
During lon gjou rneys, tak eregular breaks in goo dtimesoy ou get
enough rest.
À
Attention AssistInoperative
ATTENTION ASSIST is inoperative.
XVisit aqualified specialist workshop .
ë
Off
The HOLD function is deactivated. The vehicl eisskidding.
Aw arning tone also sounds.
XReactivat ethe HOLD function later (Ypage 157).
The HOLD function is deactivated. Whe nthe brak epedal is firmly
depressed, an activation condition is no tfulfilled .
Aw arning tone also sounds.
XChec kthe activation condition sfor th eHOLDf unction
(Ypage 157).
Display messages20 7
On-boardc omputer andd isplays
Z
Page 227 of 326
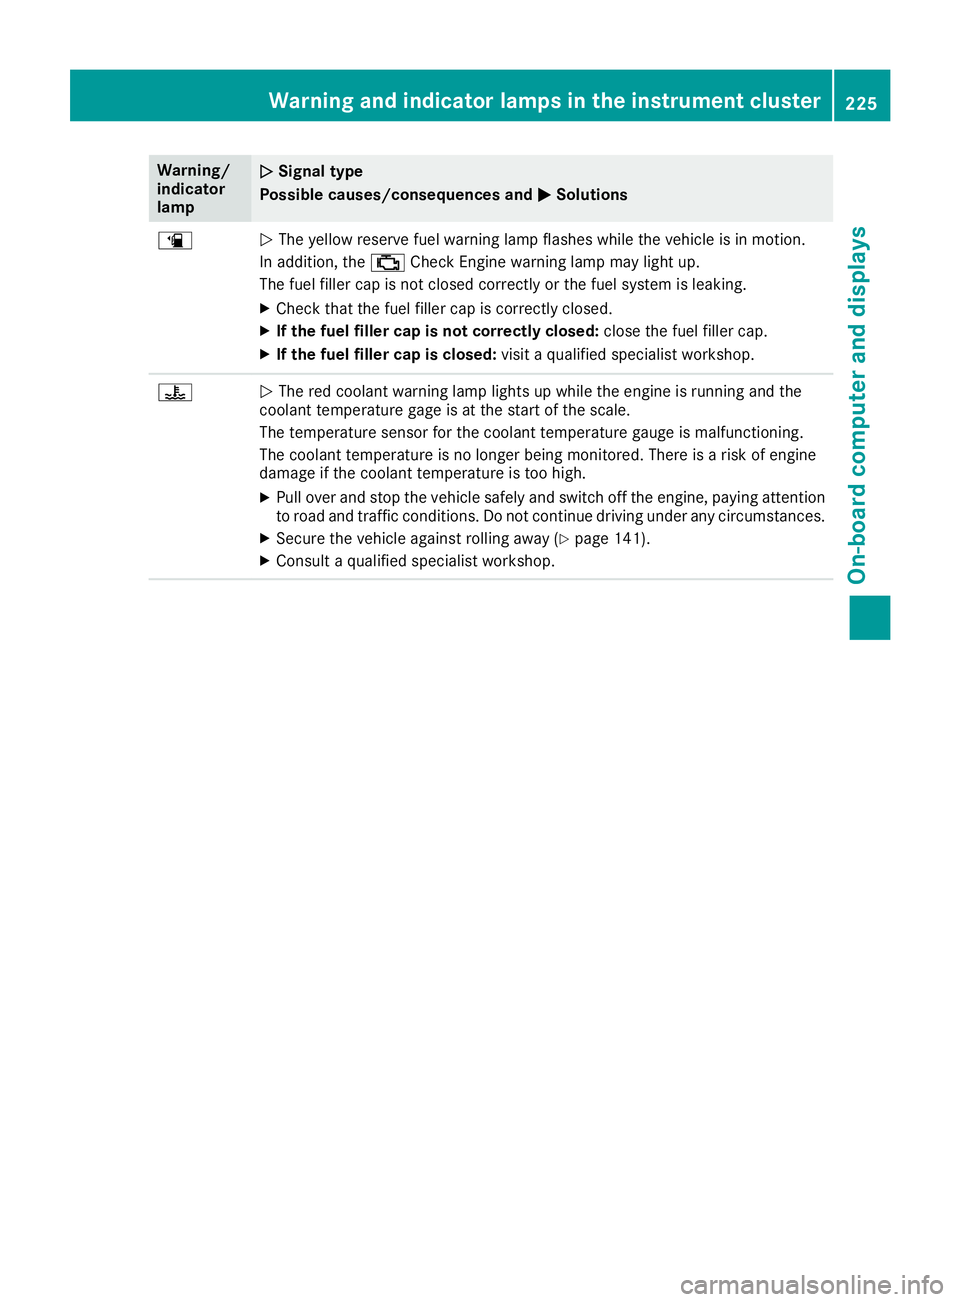
Warning/
indicator
lampNSignal type
Possiblec auses/consequences and M
Solutions
æNThe yellow reserve fuel warning lamp flashes while the vehicleisinm otion.
In addition, the ;Check Engine warning lamp may light up.
The fuel filler cap is not closed correctly or the fuel system is leaking.
XCheck that the fuel filler cap is correctly closed.
XIf the fuel filler cap is not correctly closed: close the fuel filler cap.
XIf the fuel filler cap is closed:visitaqualified specialist workshop.
?NThe red coolant warning lamp lights up while the engine is running and the
coolant temperature gage is at the start of the scale.
The temperature sensor for the coolant temperature gauge is malfunctioning.
The coolant temperature is no longer being monitored.T here isarisk of engine
damage if the coolant temperature is too high.
XPul lover and stop the vehicles afelyand switch off the engine, paying attention
to road and traffic conditions. Do not continue driving under any circumstances.
XSecure the vehiclea gainst rolling away(Ypage141).
XConsult aqualified specialist workshop.
Warning and indicator lamps in the instrument cluster225
On-board computer and displays
Z
Page 277 of 326
Ifat ire pressure of 200 kPa (2.0 bar/29 psi) has
been attained after ten minutes:
XSwitch off the tire inflation compressor.
XUnscrew the fillerh ose from the valve of the
faulty tire.
Note that tire sealant may escape when you
unscrew the fillerh ose.
XUSA only:Stow the tire sealant bottle and the
tire inflation compressor.
XPull away immediately.
XStop after driving for approximately ten
minutes and check the tire pressure with the
tire inflation compressor.
The tire pressure must now be at least
130 kPa (1.3 bar/19 psi).
GWARNING
If the required tire pressure is not reached
after driving for ashort period,t he tire is too
badlyd amaged. The tire sealant cannot repair
the tire in this instance. Damaged tires and a
tire pressure that is too low can significantly
impair the vehicle's braking and driving char-
acteristics. There is arisk of accident.
Do not continue driving. Contact aqualified
specialist workshop.
iUSA only: In cases such as the one men-
tioned above,c ontact an authorized
Mercedes-Benz Center. Or call
1-800-FOR-MERCedes (in the USA) or
1-800-387-0100 (in Canada).
XUSA only: Correct the tire pressure if it is still
at least 130 kPa (1.3 bar/19 psi). See the Tire
and Loading Information placard on the driv-
er's side B-pillarort he tire pressure table in
the fuel fillerf lap for values.
XTo increase the tire pressure: switch on the
tire inflation compressor.
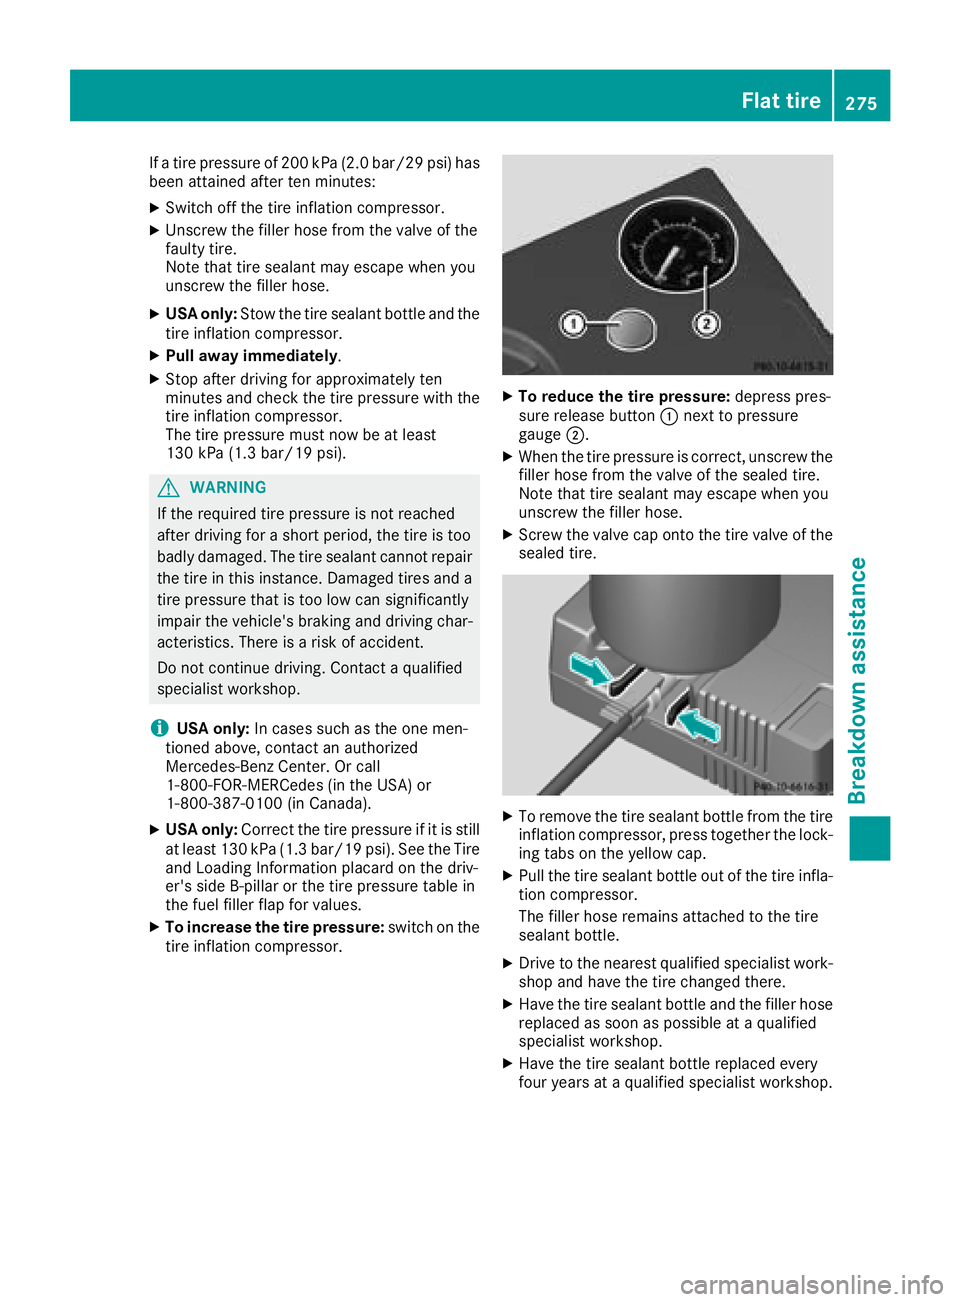
XTo reduce the tire pressure: depresspres-
sure release button :next to pressure
gauge ;.
XWhen the tire pressure is correct, unscrew the
fillerhose from the valve of the sealed tire.
Note that tire sealant may escape when you
unscrew the fillerh ose.
XScrew the valve cap onto the tire valve of the
sealed tire.
XTo remove the tire sealant bottle from the tire
inflation compressor, press together the lock-
ing tabs on the yellow cap.
XPullthe tire sealant bottle out of the tire infla-
tion compressor.
The fillerh ose remains attached to the tire
sealant bottle.
XDrive to the nearest qualifieds pecialist work-
shop and have the tire changed there.
XHave the tire sealant bottle and the fillerh ose
replaced as soon as possible at aqualified
specialist workshop.
XHave the tire sealant bottle replaced every
four years at aqualifieds pecialist workshop.
Flat tire275
Breakdowna ssistance
Z
Page 281 of 326
GWARNING
During charging and jump-starting, explosive gasesc an escapefrom the battery .There is arisk
of an explosion.
Particularl yavoi dfire, open flames, creating sparks and smoking. Ensure there is sufficient ven-
tilation while charging and jump-starting. Do not leano verabattery.
GWARNING
During the charging process,ab attery produces hydrogen gas. If ashort circui toccurs or sparks
are created ,the hydrogen gas can ignite. There is arisk of an explosion.
RMake sure that the positive terminal of aconnected battery does not come into contact with
vehiclep arts.
RNever place metal objects or tools on abattery.
RIt is important that you observe the described order of the battery terminal swhen connecting
and disconnecting abattery.
RWhen jump-starting, make sure that the battery polesw ith identical polarity are connected.
RIt is particularlyimportant to observe the described order when connecting and disconnecting
the jumper cables.
RNever connect or disconnect the battery terminal swhile the engine is running.
GWARNING
Ad ischarged battery can freeze at temperatures below freezing point. When jump-starting the
vehicleorc harging the battery,g asescan escapef rom the battery.T here isarisk of an explosion.
Allow the frozen battery to thaw out before charging it or jump-starting.
!Avoid repeated and lengthy starting attempts. Otherwise, the catalytic converter coul dbe
damaged by the non-combusted fuel.
If the indicator/warning lamp sdonot light up in the instrument cluster at low temperatures, it is very
likelyt hat the discharged battery has frozen. In this case you may neither jump-start the vehiclen or
charge the battery.L et the battery thaw first. The service life of athawed-out battery may be shorter.
The starting characteristics can be impaired,p articularlyatlow temperatures. Have the thawed-out
battery checked at aqualified specialist workshop.
Do not start the vehicleu singarapi dc harging device. If you rvehicle's battery is discharged, the
engine can be jump-started from another vehicleorf romasecond battery using jumper cables.
Observe the following points:
RThe battery is not accessible in all vehicles. If the other vehicle's battery is not accessible,j ump-
start the vehicleu singasecond battery or ajump-starting device.
RYou may only jump-start the vehiclew hen the engine and exhaust system are cold.
RDo not start the engine if the battery is frozen. Let the battery thaw first.
ROnly jump-start from batterieswitha12Vv oltagerating.
ROnly use jumper cables that are not damaged and have asufficient cross-section and insulated
terminal clamps.
RMake sure that the two vehicles do not touch.
Jump-starting279
Breakdown assistance
Z
Page 294 of 326
If the tire pressures have been set to the lower
values for lighter loadsand/or lowerroad
speeds, the pressures shoul dbereset to the
higher values:
Rif you want to drive with an increased load
and/or
Rif you want to drive at higher speeds
iThe tire pressures for increased loadsa nd/
or higher road speeds, shown in the tire pres-
sure table, may have anegative effect on driv-
ing comfort.
If the tire pressure is not set correctly, this can
leadtoane xcessive build up of heat and asud-
den loss of pressure.
For more information, contact aqualifieds pe-
cialist workshop.
Important notes on tire pressure
GWARNING
If the tire pressure drops repeatedly,t he
wheel,v alve or tire may be damaged. Tire
pressure that is too low may resultinatire
blow-out. There is arisk of an accident.
RCheck the tire for foreign objects.
RCheck whether the wheel is losing air or the
valve is leaking.
If you are unabl etorectify the damage, con-
tact aqualifieds pecialist workshop.
GWARNING
If you fit unsuitable accessorieso nto tire
valves ,the tire valves may be overloaded and
malfunction, which can cause tire pressure
loss. Due to their design, retrofitted tire pres- sure monitors keep the tire valve open. This
can also resultint ire pressure loss. There is a
risk of an accident.
Only screw the standard valve cap or other
valve caps approved by Mercedes-Benz for
you rvehicle onto the tire valve.
Use asuitable pressure gauge to check the tire
pressure. The outer appearance of atire does
not permit any reliable conclusion aboutt he tire
pressure. On vehiclese quipped with the elec-
tronic tire pressure monitor, the tire pressure
can be checked in the on-board computer. The tire temperature and pressure increase
when the vehicle is in motion. This is dependent
on the driving speed and the load.
Therefore, you shoul
donly correct tire pres-
sures when the tires are cold.
The tires are cold:
Rif the vehicle has been parked with the tires
out of direct sunlight for at least three hours
and
Rif the vehicle has been driven less than 1mile
(1.6 km)
The tire temperature changes depending on the
outsidet emperature ,the vehicle speed and the
tire load.Ift he tire temperature changes by
18 ‡(10 †), the tire pressure changes by
approximately 10 kPa (0.1 bar/1.5 psi).T ake
this into account when checking the pressure of
warm tires. Only correct the tire pressure if it is
too low for the current operating conditions. If
you check the tire pressure when the tires are
warm, the resulting valuew illbehigherthan if
the tires were cold. This is normal. Do not
reduce the tire pressure to the values pecified
for cold tires. The tire pressure would otherwise
be too low.
Observe the recommended tire pressures for
cold tires:
Ron the Tire and Loading Information placard
on the B-pillaront he driver's side
Rin the tire pressure table in the fuel fillerf lap
(Ypage 139)
Underinflated or overinflated tires
Underinflated tires
GWARNING
Tires with pressure that is too low can over-
heat and burst as aconsequence. In addition,
they also suffer from excessive and/or irreg-
ularw ear, which can severelyi mpair the brak-
ing propertiesa nd the driving characteristics.
There is arisk of an accident.
Avoid tire pressures that are too low in all the
tires, including the spare wheel.
Underinflated tires may:
Roverheat, leading to tire defects
Radversely affect handling
292Tire pressure
Wheelsa nd tires