MERCEDES-BENZ CLK-CLASS 2001 Owners Manual
Manufacturer: MERCEDES-BENZ, Model Year: 2001, Model line: CLK-CLASS, Model: MERCEDES-BENZ CLK-CLASS 2001Pages: 325, PDF Size: 8.4 MB
Page 151 of 325
148 Interior equipment
Te ch n ica l
data Instruments
and controlsOperationDrivingInstrument
cluster displayPractical hints Car care Index
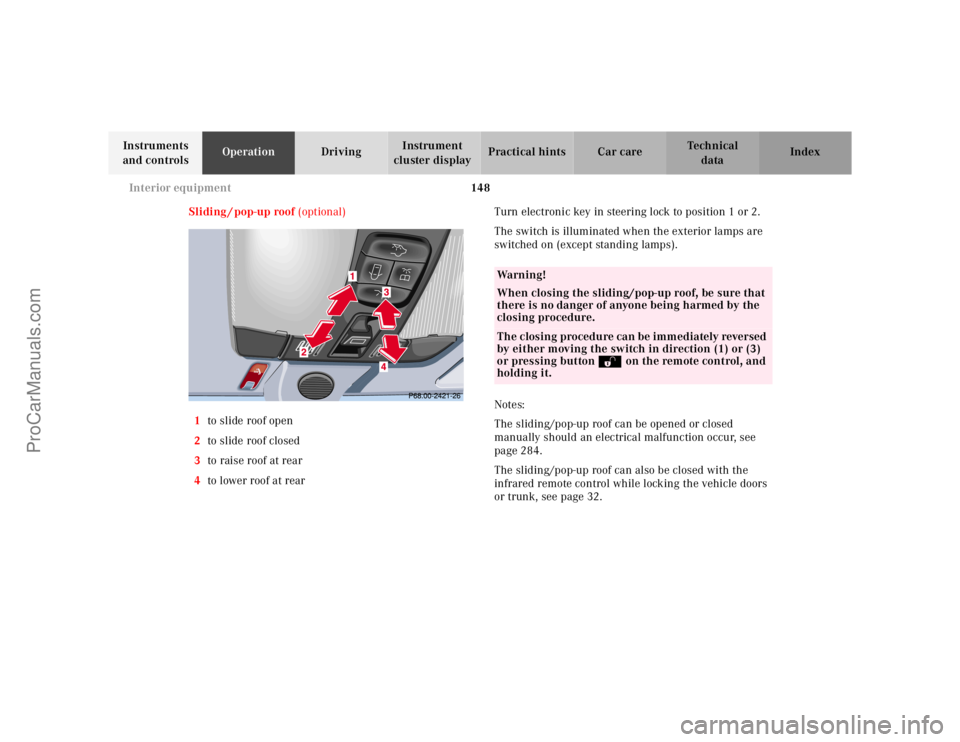
Sliding / pop-up roof (optional)
1to slide roof open
2to slide roof closed
3to raise roof at rear
4to lower roof at rearTurn electronic key in steering lock to position 1 or 2.
The switch is illuminated when the exterior lamps are
switched on (except standing lamps).
Notes:
The sliding/pop-up roof can be opened or closed
manually should an electrical malfunction occur, see
page 284.
The sliding/pop-up roof can also be closed with the
infrared remote control while locking the vehicle doors
or trunk, see page 32.
Wa r n i n g !
When closing the sliding/pop-up roof, be sure that
there is no danger of anyone being harmed by the
closing procedure.The closing procedure can be immediately reversed
by either moving the switch in direction (1) or (3)
or pressing button Πon the remote control, and
holding it.
ProCarManuals.com
Page 152 of 325
149 Interior equipment
Te ch n ica l
data Instruments
and controlsOperationDrivingInstrument
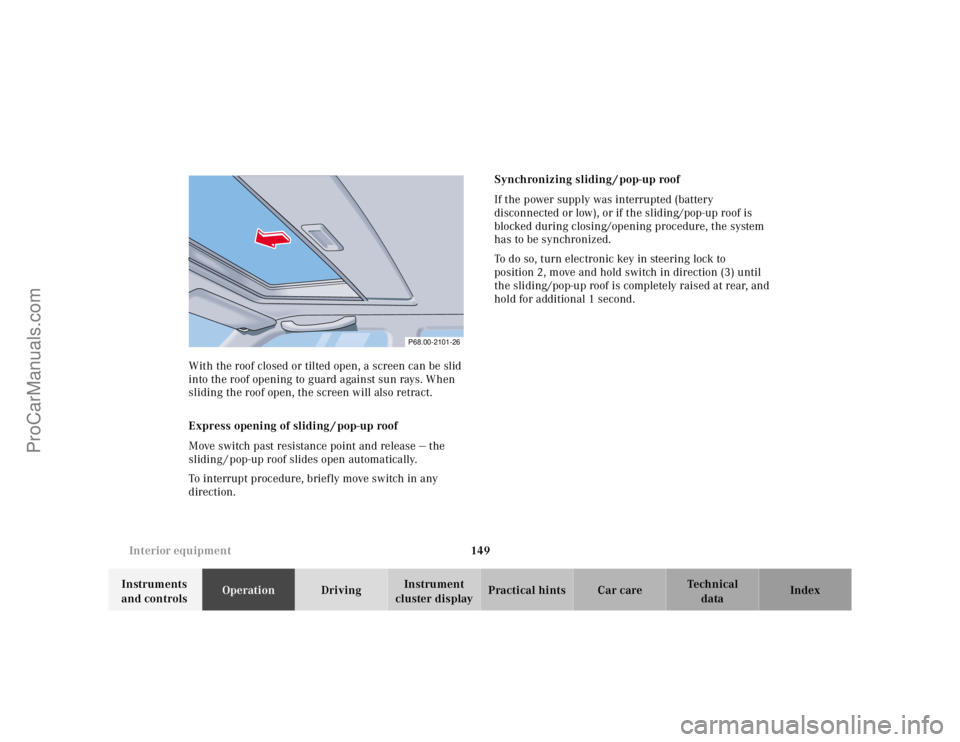
cluster displayPractical hints Car care Index With the roof closed or tilted open, a screen can be slid
into the roof opening to guard against sun rays. When
sliding the roof open, the screen will also retract.
Express opening of sliding / pop-up roof
Move switch past resistance point and release — the
sliding / pop-up roof slides open automatically.
To interrupt procedure, brief ly move switch in any
direction.Synchronizing sliding / pop-up roof
If the power supply was interrupted (battery
disconnected or low), or if the sliding/pop-up roof is
blocked during closing/opening procedure, the system
has to be synchronized.
To do so, turn electronic key in steering lock to
position 2, move and hold switch in direction (3) until
the sliding/pop-up roof is completely raised at rear, and
hold for additional 1 second.
P68.00-2101-26
ProCarManuals.com
Page 153 of 325
150 Interior equipment
Te ch n ica l
data Instruments
and controlsOperationDrivingInstrument
cluster displayPractical hints Car care Index
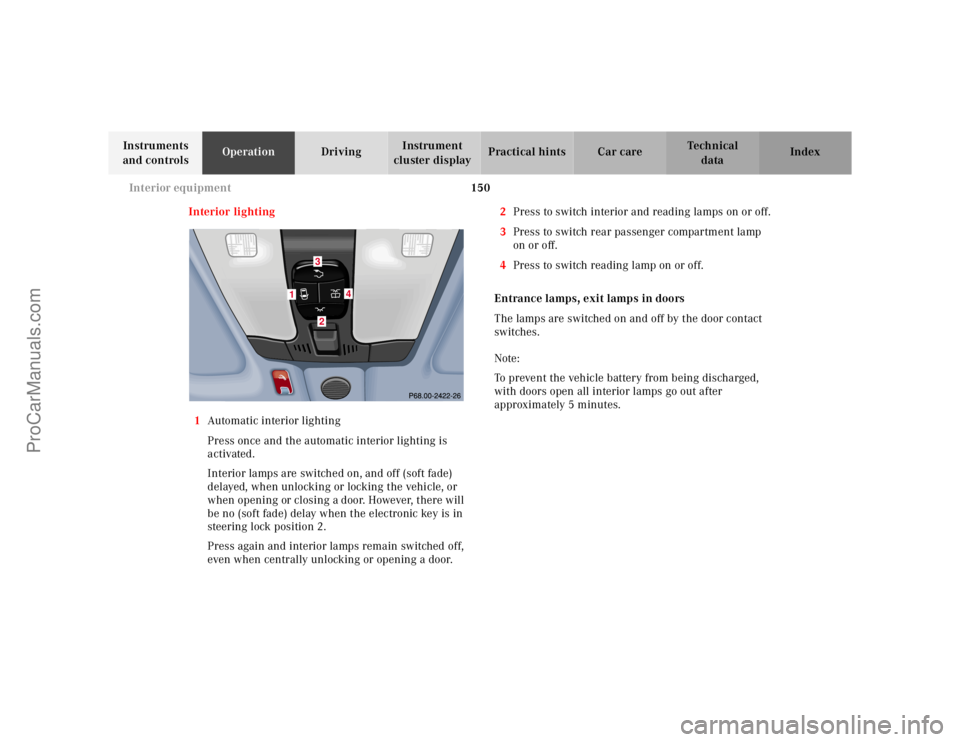
Interior lighting
1Automatic interior lighting
Press once and the automatic interior lighting is
activated.
Interior lamps are switched on, and off (soft fade)
delayed, when unlocking or locking the vehicle, or
when opening or closing a door. However, there will
be no (soft fade) delay when the electronic key is in
steering lock position 2.
Press again and interior lamps remain switched off,
even when centrally unlocking or opening a door.2Press to switch interior and reading lamps on or off.
3Press to switch rear passenger compartment lamp
on or off.
4Press to switch reading lamp on or off.
Entrance lamps, exit lamps in doors
The lamps are switched on and off by the door contact
switches.
Note:
To prevent the vehicle battery from being discharged,
with doors open all interior lamps go out after
approximately 5 minutes.
1
4
32
ProCarManuals.com
Page 154 of 325
151 Interior equipment
Te ch n ica l
data Instruments
and controlsOperationDrivingInstrument
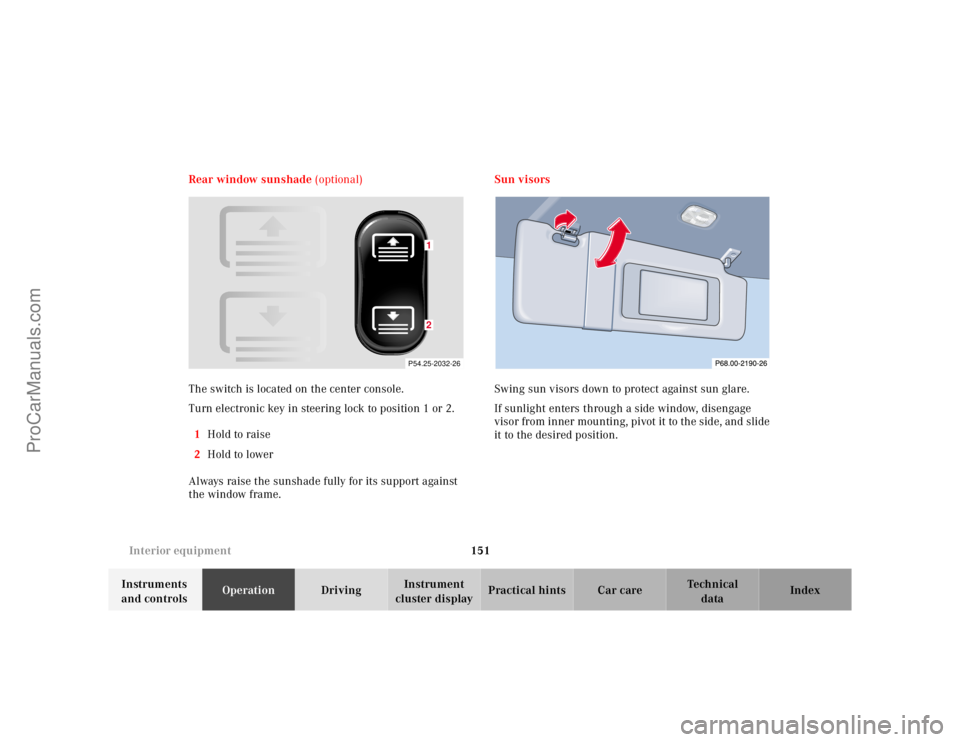
cluster displayPractical hints Car care Index Rear window sunshade (optional)
The switch is located on the center console.
Turn electronic key in steering lock to position 1 or 2.
1Hold to raise
2Hold to lower
Always raise the sunshade fully for its support against
the window frame.Sun visors
Swing sun visors down to protect against sun glare.
If sunlight enters through a side window, disengage
visor from inner mounting, pivot it to the side, and slide
it to the desired position.
P54.25-2032-26
12
ProCarManuals.com
Page 155 of 325
152 Interior equipment
Te ch n ica l
data Instruments
and controlsOperationDrivingInstrument
cluster displayPractical hints Car care Index
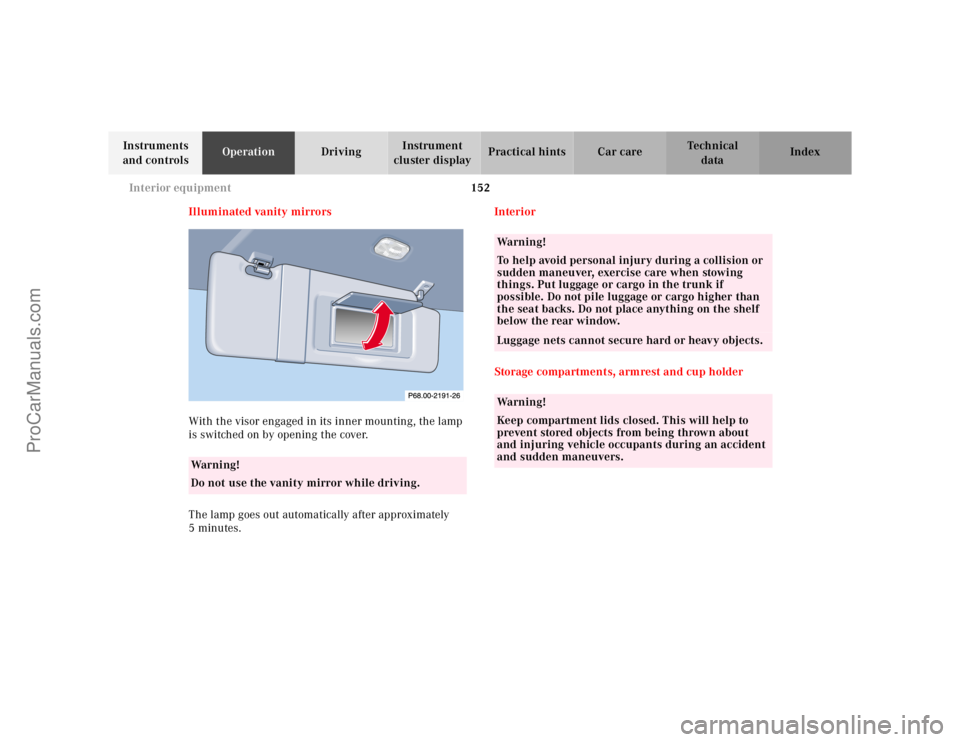
Illuminated vanity mirrors
With the visor engaged in its inner mounting, the lamp
is switched on by opening the cover.
The lamp goes out automatically after approximately
5minutes.Interior
Storage compartments, armrest and cup holder
Wa r n i n g !
Do not use the vanity mirror while driving.
Wa r n i n g !
To help avoid personal injury during a collision or
sudden maneuver, exercise care when stowing
things. Put luggage or cargo in the trunk if
possible. Do not pile luggage or cargo higher than
the seat backs. Do not place anything on the shelf
below the rear window.Luggage nets cannot secure hard or heavy objects.Wa r n i n g !
Keep compartment lids closed. This will help to
prevent stored objects from being thrown about
and injuring vehicle occupants during an accident
and sudden maneuvers.
ProCarManuals.com
Page 156 of 325
153 Interior equipment
Te ch n ica l
data Instruments
and controlsOperationDrivingInstrument
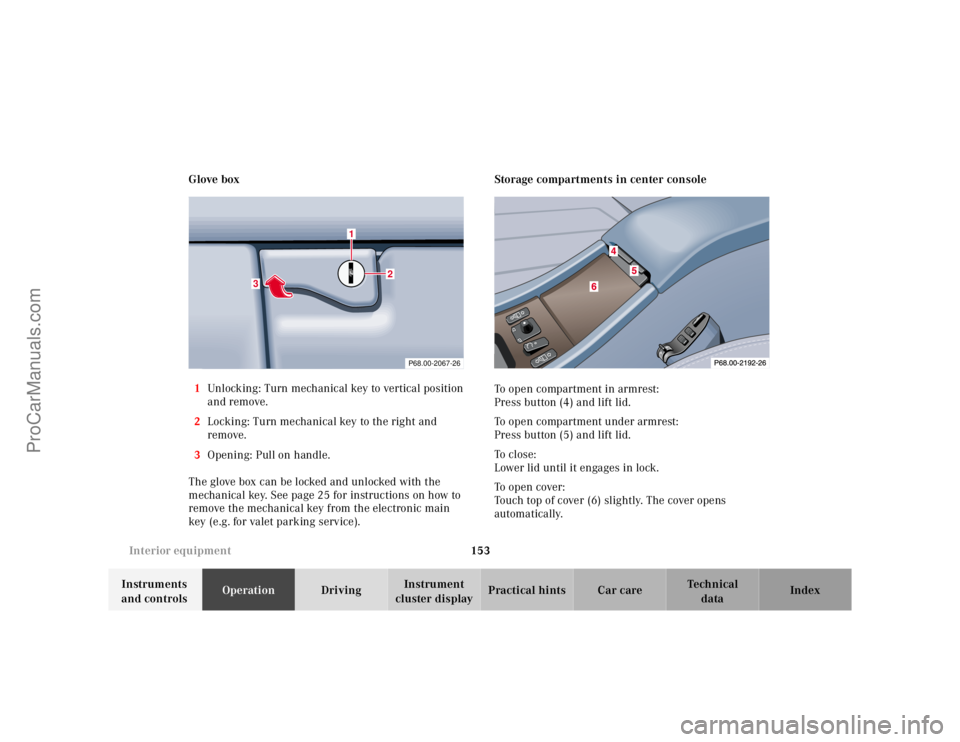
cluster displayPractical hints Car care Index Glove box
1Unlocking: Turn mechanical key to vertical position
and remove.
2Locking: Turn mechanical key to the right and
remove.
3Opening: Pull on handle.
The glove box can be locked and unlocked with the
mechanical key. See page 25 for instructions on how to
remove the mechanical key from the electronic main
key (e.g. for valet parking service).Storage compartments in center console
To open compartment in armrest:
Press button (4) and lift lid.
To open compartment under armrest:
Press button (5) and lift lid.
To c l o s e :
Lower lid until it engages in lock.
To o p e n c o ve r :
Touch top of cover (6) slightly. The cover opens
automatically.
P68.00-2067-26
3
1
2
ProCarManuals.com
Page 157 of 325
154 Interior equipment
Te ch n ica l
data Instruments
and controlsOperationDrivingInstrument
cluster displayPractical hints Car care Index
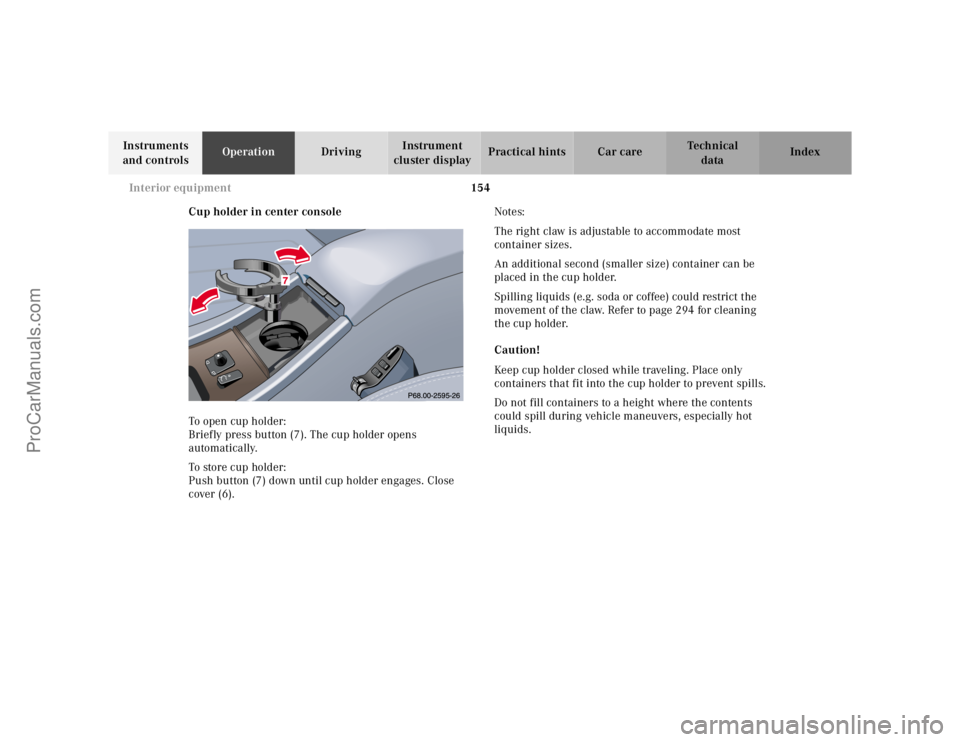
Cup holder in center console
To open cup holder:
Briefly press button (7). The cup holder opens
automatically.
To store cup holder:
Push button (7) down until cup holder engages. Close
cover (6).Notes:
The right claw is adjustable to accommodate most
container sizes.
An additional second (smaller size) container can be
placed in the cup holder.
Spilling liquids (e.g. soda or coffee) could restrict the
movement of the claw. Refer to page 294 for cleaning
the cup holder.
Caution!
Keep cup holder closed while traveling. Place only
containers that fit into the cup holder to prevent spills.
Do not fill containers to a height where the contents
could spill during vehicle maneuvers, especially hot
liquids.
ProCarManuals.com
Page 158 of 325
155 Interior equipment
Te ch n ica l
data Instruments
and controlsOperationDrivingInstrument
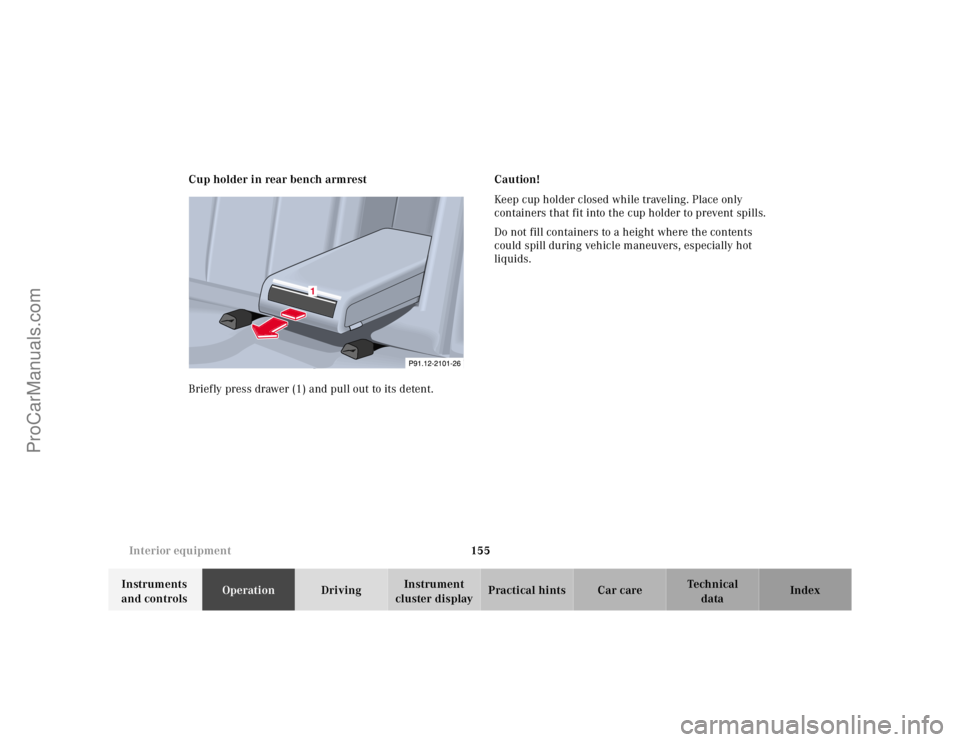
cluster displayPractical hints Car care Index Cup holder in rear bench armrest
Briefly press drawer (1) and pull out to its detent.Caution!
Keep cup holder closed while traveling. Place only
containers that fit into the cup holder to prevent spills.
Do not fill containers to a height where the contents
could spill during vehicle maneuvers, especially hot
liquids.
1
ProCarManuals.com
Page 159 of 325
156 Interior equipment
Te ch n ica l
data Instruments
and controlsOperationDrivingInstrument
cluster displayPractical hints Car care Index
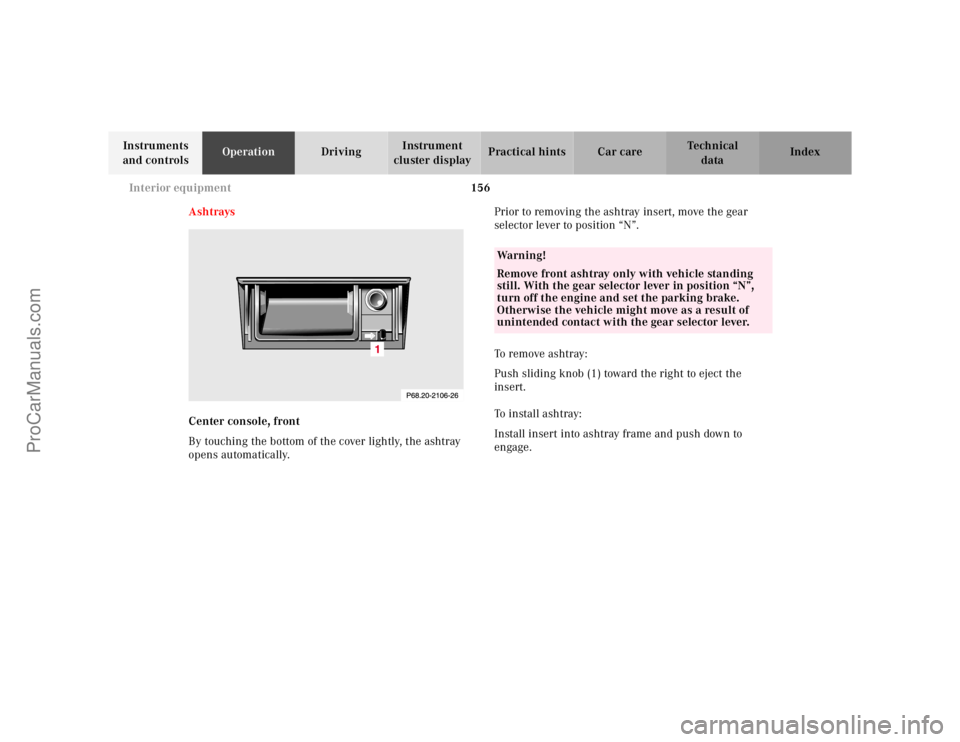
Ashtrays
Center console, front
By touching the bottom of the cover lightly, the ashtray
opens automatically.Prior to removing the ashtray insert, move the gear
selector lever to position “N”.
To remove ashtray:
Push sliding knob (1) toward the right to eject the
insert.
To i n st a l l a s h t r ay :
Install insert into ashtray frame and push down to
engage.
Wa r n i n g !
Remove front ashtray only with vehicle standing
still. With the gear selector lever in position “N”,
turn off the engine and set the parking brake.
Otherwise the vehicle might move as a result of
unintended contact with the gear selector lever.
ProCarManuals.com
Page 160 of 325
157 Interior equipment
Te ch n ica l
data Instruments
and controlsOperationDrivingInstrument
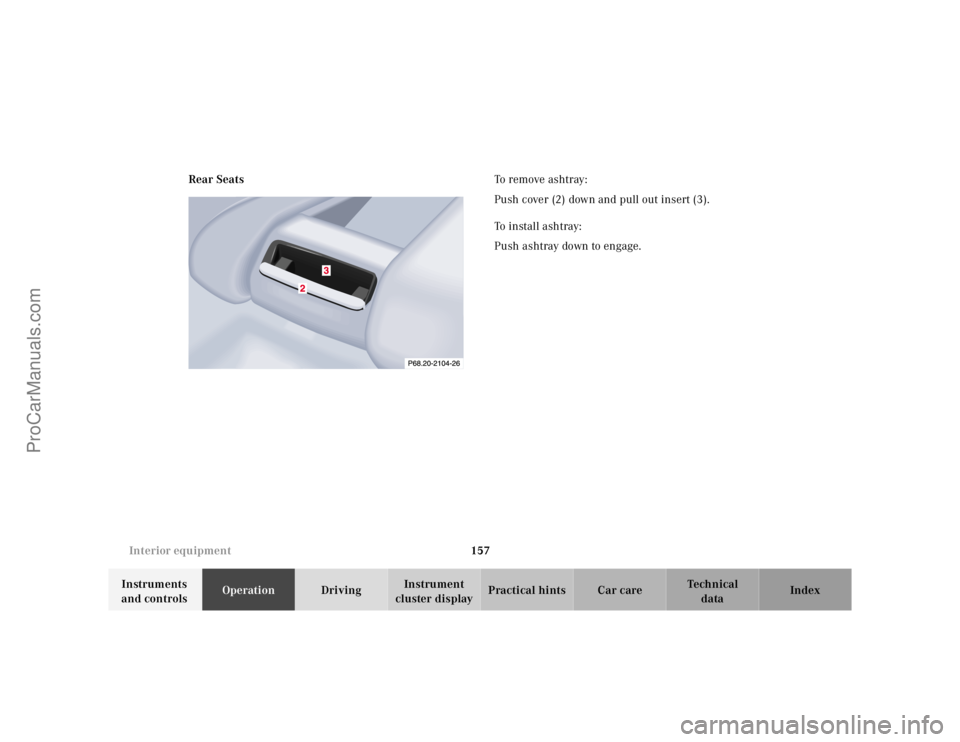
cluster displayPractical hints Car care Index Rear SeatsTo remove ashtray:
Push cover (2) down and pull out insert (3).
To i n st a l l a s h t r ay :
Push ashtray down to engage.
ProCarManuals.com