engine MERCEDES-BENZ CLK-CLASS 2002 Owner's Manual
[x] Cancel search | Manufacturer: MERCEDES-BENZ, Model Year: 2002, Model line: CLK-CLASS, Model: MERCEDES-BENZ CLK-CLASS 2002Pages: 341, PDF Size: 10.67 MB
Page 111 of 341
108 Engine oil level indicator
Te ch n i c a l
data Instruments
and controlsOperationDrivingInstrument
cluster displayPractical hints Car care Index
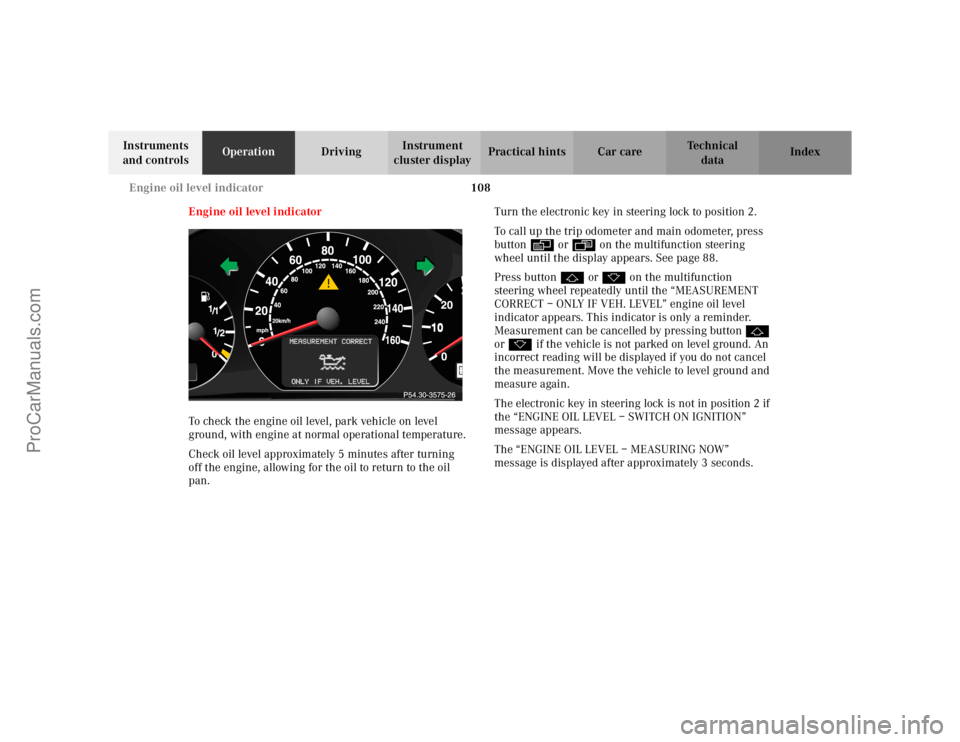
Engine oil level indicator
To check the engine oil level, park vehicle on level
ground, with engine at normal operational temperature.
Check oil level approximately 5 minutes after turning
off the engine, allowing for the oil to return to the oil
pan.Turn the electronic key in steering lock to position 2.
To call up the trip odometer and main odometer, press
button è or ÿ on the multifunction steering
wheel until the display appears. See page 88.
Press button j or k on the multifunction
steering wheel repeatedly until the “MEASUREMENT
CORRECT – ONLY IF VEH. LEVEL” engine oil level
indicator appears. This indicator is only a reminder.
Measurement can be cancelled by pressing button j
or k if the vehicle is not parked on level ground. An
incorrect reading will be displayed if you do not cancel
the measurement. Move the vehicle to level ground and
measure again.
The electronic key in steering lock is not in position 2 if
the “ENGINE OIL LEVEL – SWITCH ON IGNITION”
message appears.
The “ENGINE OIL LEVEL – MEASURING NOW”
message is displayed after approximately 3 seconds.
ProCarManuals.com
Page 112 of 341
109 Engine oil level indicator
Te ch n i c a l
data Instruments
and controlsOperationDrivingInstrument
cluster displayPractical hints Car care Index One of the following messages will subsequently appear
on the indicator:
“ENGINE OIL LEVEL – O.K.”
No oil needs to be added.
“ENGINE OIL LEVEL – ADD 1.0 QUART”
(Canada: 1.0 L)
“ENGINE OIL LEVEL – ADD 1.5 QUART”
(Canada: 1.5 L)
“ENGINE OIL LEVEL – ADD 2.0 QUART”
(Canada: 2.0 L)
See page 252 for instructions on adding engine oil.
“ENGINE OIL LEVEL – REDUCE OIL LEVEL”
Do not overfill the engine.
Excessive oil must be siphoned or drained off. It could
cause damage to the engine and catalytic converter not
covered by the Mercedes-Benz Limited Warranty.
The message “MEASURING NOT POSSIBLE” will be
displayed if a proper oil level check cannot be
performed. The engine oil level check can be repeated
after a short time.Perform the engine oil level check with the dipstick, if it
cannot be completed via the multifunction display.
Seepage252.
In this case we recommend that you have the system
checked at a Mercedes-Benz Center.
Note:
See malfunction and warning messages on page 230
and page 240 if an engine oil level indicator appears on
the multifunction display when the engine is running.
The engine oil level cannot be checked while the engine
is running. The “ENGINE OIL LEVEL – NOT WHEN
ENGINE ON” message will appear.
Engine oil consumption
Engine oil consumption checks should only be made
after the break-in period. During the break-in period,
higher oil consumption may be noticed and is normal.
Frequent driving at high engine speeds results in
increased consumption.
ProCarManuals.com
Page 113 of 341
110 Exterior lamp switch
Te ch n i c a l
data Instruments
and controlsOperationDrivingInstrument
cluster displayPractical hints Car care Index
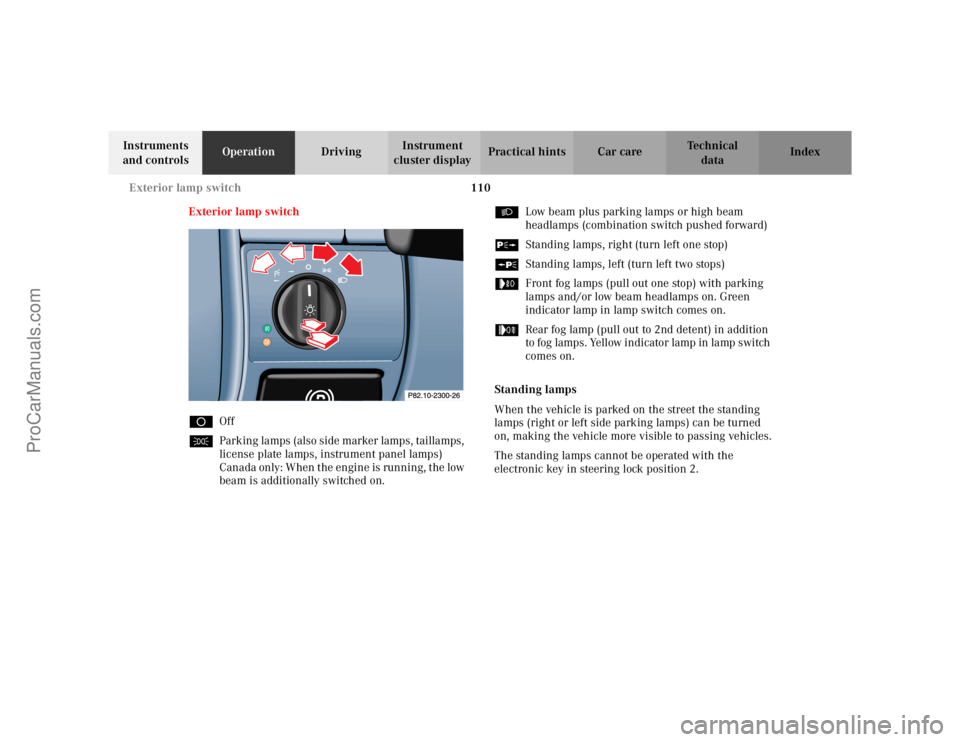
Exterior lamp switch
DOff
CParking lamps (also side marker lamps, taillamps,
license plate lamps, instrument panel lamps)
Canada only: When the engine is running, the low
beam is additionally switched on.BLow beam plus parking lamps or high beam
headlamps (combination switch pushed forward)
ˆStanding lamps, right (turn left one stop)
‚Standing lamps, left (turn left two stops)
…Front fog lamps (pull out one stop) with parking
lamps and/or low beam headlamps on. Green
indicator lamp in lamp switch comes on.
„Rear fog lamp (pull out to 2nd detent) in addition
to fog lamps. Yellow indicator lamp in lamp switch
comes on.
Standing lamps
When the vehicle is parked on the street the standing
lamps (right or left side parking lamps) can be turned
on, making the vehicle more visible to passing vehicles.
The standing lamps cannot be operated with the
electronic key in steering lock position 2.
ProCarManuals.com
Page 114 of 341
111 Exterior lamp switch
Te ch n i c a l
data Instruments
and controlsOperationDrivingInstrument
cluster displayPractical hints Car care Index Notes:
With the electronic key removed and the driver’s door
open, a warning sounds and the message “SWITCH OFF
LIGHTS” in the multifunction indicator appears if the
vehicle’s exterior lamps (except standing lamps) are not
switched off.
Fog lamps will operate with the parking lamps and/or
the low beam headlamps on. Fog lamps should only be
used in conjunction with low beam headlamps. Consult
your State or Province Motor Vehicle Regulations
regarding allowable lamp operation.
Fog lamps are automatically switched off when the
exterior lamp switch is turned to position D.Daytime running lamps (Canada only)
When the engine is running and the selector lever is in
a driving position, the low beam headlamps (includes
parking lamps, side marker lamps, taillamps and
license plate lamps) are automatically switched on.
When shifting from a driving position to position “N”
or “P”, the low beam switches off (2 seconds delay).
For nighttime driving the exterior lamp switch should
be turned to position B to permit activation of the
high beam headlamps.
Night security illumination
When exiting the vehicle after driving with the exterior
lamps on, they switch on again for added illumination
for approximately 30 seconds after closing the last door.
ProCarManuals.com
Page 120 of 341
117 Automatic climate control
Te ch n i c a l
data Instruments
and controlsOperationDrivingInstrument
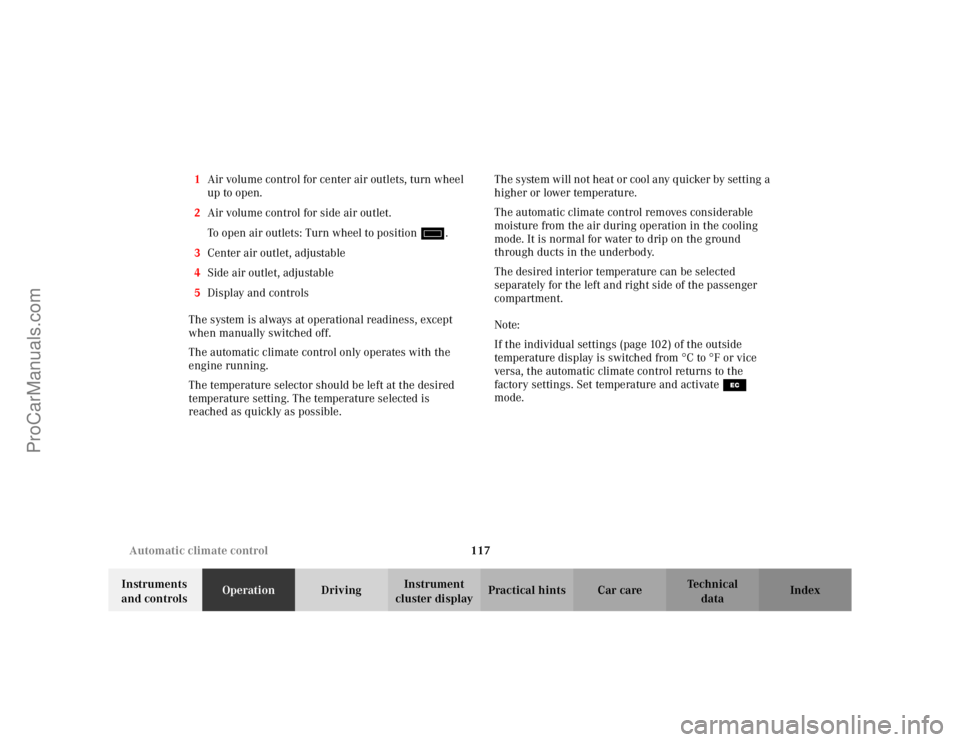
cluster displayPractical hints Car care Index 1Air volume control for center air outlets, turn wheel
up to open.
2Air volume control for side air outlet.
To open air outlets: Turn wheel to position i.
3Center air outlet, adjustable
4Side air outlet, adjustable
5Display and controls
The system is always at operational readiness, except
when manually switched off.
The automatic climate control only operates with the
engine running.
The temperature selector should be left at the desired
temperature setting. The temperature selected is
reached as quickly as possible.The system will not heat or cool any quicker by setting a
higher or lower temperature.
The automatic climate control removes considerable
moisture from the air during operation in the cooling
mode. It is normal for water to drip on the ground
through ducts in the underbody.
The desired interior temperature can be selected
separately for the left and right side of the passenger
compartment.
Note:
If the individual settings (page 102) of the outside
temperature display is switched from °C to
°F or vice
versa, the automatic climate control returns to the
factory settings. Set temperature and activate S
mode.
ProCarManuals.com
Page 121 of 341
118 Automatic climate control
Te ch n i c a l
data Instruments
and controlsOperationDrivingInstrument
cluster displayPractical hints Car care Index
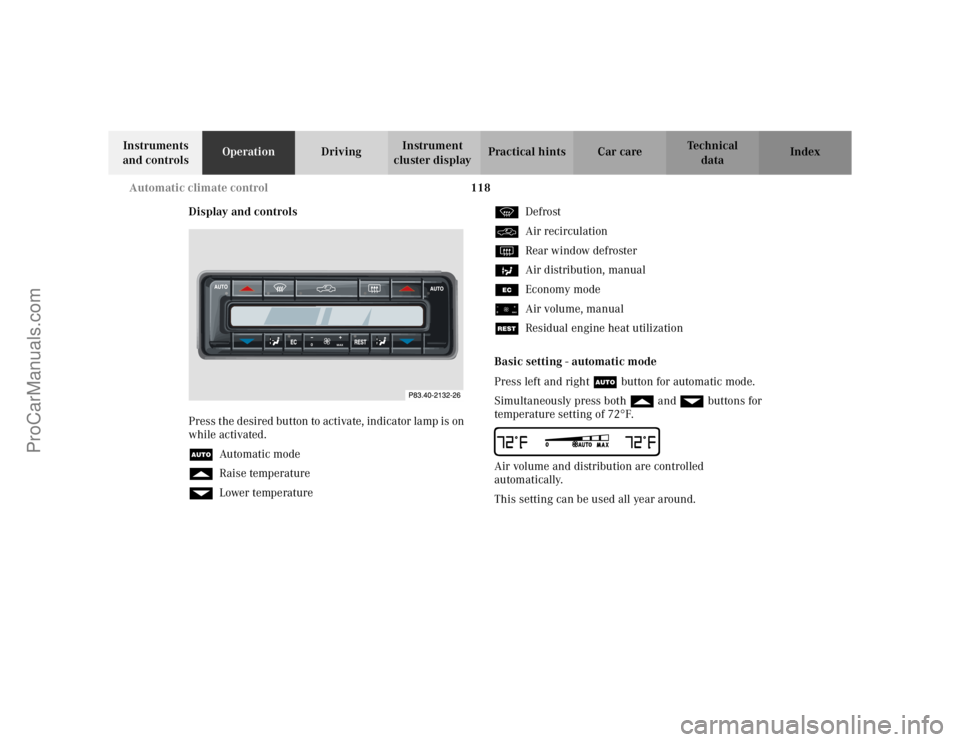
Display and controls
Press the desired button to activate, indicator lamp is on
while activated.
UAutomatic mode
fRaise temperature
gLower temperaturePDefrost
OAir recirculation
FRear window defroster
bAir distribution, manual
SEconomy mode
ïAir volume, manual
TResidual engine heat utilization
Basic setting - automatic mode
Press left and right U button for automatic mode.
Simultaneously press both f and g buttons for
temperature setting of 72
°F.
Air volume and distribution are controlled
automatically.
This setting can be used all year around.
0
MAX
ProCarManuals.com
Page 124 of 341
121 Automatic climate control
Te ch n i c a l
data Instruments
and controlsOperationDrivingInstrument
cluster displayPractical hints Car care Index Air recirculation
This mode can be selected to temporarily reduce the
entry of annoying odors or dust into the vehicle’s
interior.
Outside air is not supplied to the vehicle’s interior.
To s el ect , p res s O button.
To cancel, press O button again.
The system will automatically switch from recirculated
air to fresh air
•after approx. 5 minutes at outside temperatures
below approx. 41
°F (5
°C),
•after approx. 30 minutes at outside temperatures
above approx. 41
°F (5
°C),
•after approx. 5 minutes, if button S is pressed.
If the windows should fog up from the inside, switch
from recirculated air back to fresh air.
At high outside temperatures, the system automatically
engages the recirculated air mode thereby increasing
the cooling capacity performance, switching to partially
fresh air within 30 minutes.Residual engine heat utilization
With the engine switched off, it is possible to continue
heating the interior for a short while.
Air volume and distribution are controlled
automatically.
To s e l e c t :
Turn electronic key in steering lock to position 1 or 0 or
remove key.
Press T button
This function selection will not activate if the battery
charge level is insufficient.
To c a n c e l :
Press T button.
The system will automatically shut off
•if you turn electronic key in steering lock to
position 2,
•after approx. 30 minutes,
•if the battery voltage drops.
ProCarManuals.com
Page 153 of 341
150 Interior equipment
Te ch n i c a l
data Instruments
and controlsOperationDrivingInstrument
cluster displayPractical hints Car care Index
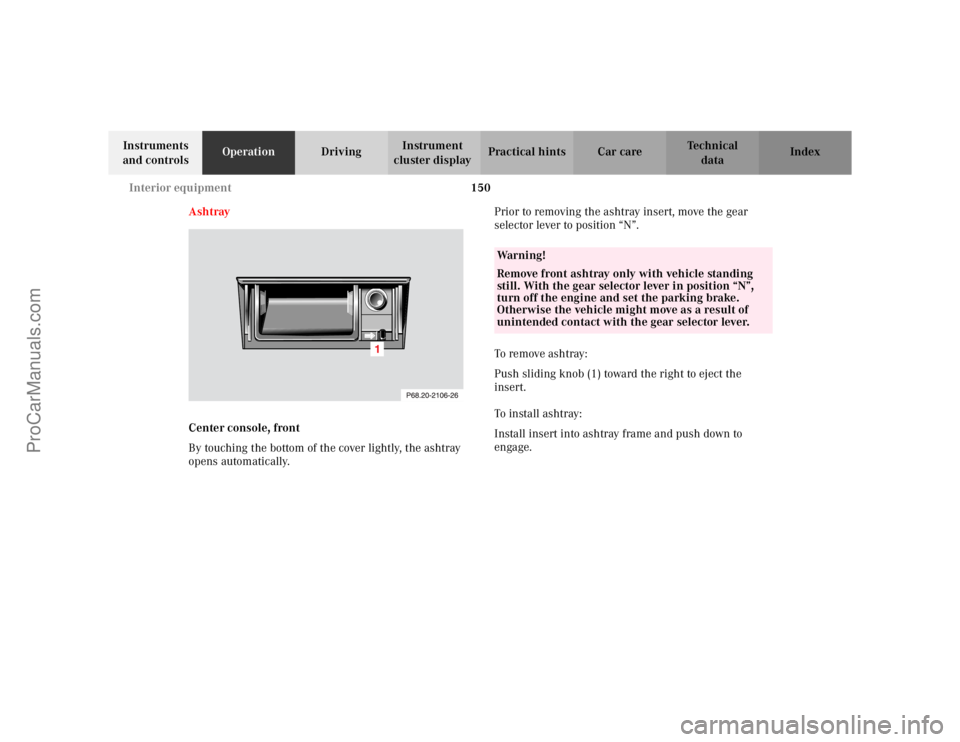
Ashtray
Center console, front
By touching the bottom of the cover lightly, the ashtray
opens automatically.Prior to removing the ashtray insert, move the gear
selector lever to position “N”.
To remove ashtray:
Push sliding knob (1) toward the right to eject the
insert.
To install ashtray:
Install insert into ashtray frame and push down to
engage.
Wa r n i n g !
Remove front ashtray only with vehicle standing
still. With the gear selector lever in position “N”,
turn off the engine and set the parking brake.
Otherwise the vehicle might move as a result of
unintended contact with the gear selector lever.
ProCarManuals.com
Page 156 of 341
153 Telephone
Te ch n i c a l
data Instruments
and controlsOperationDrivingInstrument
cluster displayPractical hints Car care Index Te l e p h o n e , ge n e ra lNote:
See separate instruction manual for instructions on how
to operate the telephone.
Cellular telephone
The vehicle is prepared for the installation of a cellular
telephone. For further information and installation
contact your authorized Mercedes-Benz Center.
Wa r n i n g !
A driver’s attention to the road must always be his/
her primary focus when driving. For your safety
and the safety of others, we recommend that you
pull over to a safe location and stop before placing
or taking a telephone call. If you choose to use the
telephone while driving, please use the hands-free
device and only use the telephone when road,
weather and traffic conditions permit.Some jurisdictions prohibit the driver from using a
cellular telephone while driving a vehicle.Bear in mind that at a speed of just 30 mph
(approximately 50 km/h), your vehicle is covering
a distance of approximately 50 feet (approximately
14 m ) e v e r y s e c o n d . Never operate radio transmitters equipped with a
built-in or attached antenna (i.e. without being
connected to an external antenna) from inside the
vehicle while the engine is running. Doing so could
lead to a malfunction of the vehicle’s electronic
system, possibly resulting in an accident and
personal injury.
Wa r n i n g !
Some jurisdictions prohibit the driver from using a
cellular telephone while driving a vehicle. Whether
or not prohibited by law, for safety reasons, the
driver should not use the cellular telephone while
the vehicle is in motion. Stop the vehicle in a safe
location before answering or placing a call.
ProCarManuals.com
Page 168 of 341
165 Soft top
Te ch n i c a l
data Instruments
and controlsOperationDrivingInstrument
cluster displayPractical hints Car care Index If the indicator lamp in the soft top switch blinks slowly
while activating the switch,
•the battery voltage may be insufficient – start
engine and let it run while activating switch,
•the system may be overheated (for example after
lowering or raising the soft top approx. 5
consecutive times) – after approx. 10 minutes the
soft top switch may be activated again.
If indicator lamp in the soft top switch blinks rapidly
while activating the switch,
•the trunk lid and/or the luggage cover may be open,
and need to be closed,
•the soft top is still locked during the opening
procedure and needs to be unlocked,
•the opening/closing procedure is interrupted.
In this case the soft top needs to be synchronized.
Turn electronic key in steering lock back to
position 0, and then to position 2. Activate soft top
switch again. The soft top should now be operational
again.
If the indicator lamp continues to blink, raise the soft
top manually, see page 288. Have the system checked at your authorized
Mercedes-Benz Center as soon as possible.
Notes:
If the roll bar was raised automatically, the process of
raising or lowering the soft top will take somewhat
longer, as the roll bar must first be lowered.
Whenever possible, park vehicle in the shade as
continuous exposure to sun rays can prematurely
deteriorate the soft top material.
The soft top may become moldy and receive permanent
creases if it is kept in the storage compartment for an
extended period.
Therefore, we recommend raising and airing it
thoroughly with the side windows open (do not expose
it to the sun) at regular intervals during the wet and
cold seasons.
To prevent damage, the soft top must be dry and clean
before lowering it into the storage compartment. There
is the possibility of sharp-edged dirt particles damaging
the soft top or scratching the rear window.
ProCarManuals.com