tire pressure MERCEDES-BENZ CLK55AMG 2001 C208 Owner's Manual
[x] Cancel search | Manufacturer: MERCEDES-BENZ, Model Year: 2001, Model line: CLK55AMG, Model: MERCEDES-BENZ CLK55AMG 2001 C208Pages: 329, PDF Size: 11.53 MB
Page 7 of 329

4 Contents
Malfunction and indicator lamps
in the center console ................232
AIRBAG OFF
indicator lamp .............................232
Malfunction and warning
messages in the
multifunction display ...............233
DISPLAY DEFECTIVE
(engine control unit) ..................234
DISPLAY DEFECTIVE
(several systems) ........................234
BATTERY/ALTERNATOR ...........235
ABS-SYSTEM ...............................236
BRAKE ASSIST ...........................236
BRAKE LINING WEAR ..............237
BRAKE FLUID .............................237
PARKING BRAKE .......................238
ENGINE FAN ...............................238
COOLANT
(coolant level) .............................239
COOLANT TEMP.
(coolant temperature) ................240
LIGHTING SYSTEM .................... 241LIGHT SENSOR .......................... 242
STEER. WHEEL ADJUST. .......... 242
ENGINE OIL LEVEL ................... 243
ELEC. STABIL. PROGRAM.
(Electronic stability
program) ..................................... 244
REMOVE KEY ............................. 244
WASHER FLUID ......................... 245
TELE AID ..................................... 246
Practical hintsFirst aid kit ..................................... 248
Shelf below rear window .............. 248
Stowing things in
the vehicle ................................. 248
Fuses ............................................... 249
Hood ................................................ 251
Checking engine oil level ............. 253
Automatic transmission
fluid level ................................... 254
Coolant level ................................... 254
Adding coolant ........................... 255Windshield washer / headlamp
cleaning system ........................256
Windshield and
headlamp washer
fluid mixing ratio .......................256
Spare wheel, vehicle tools,
storage compartment ................257
Vehicle jack .....................................258
Wheels .............................................259
Tire replacement ........................259
Rotating wheels ..........................260
Spare wheel .................................... 261
Changing wheels ...........................262
Tire inflation pressure ..................267
Battery .............................................268
Jump starting ..................................270
Towing the vehicle .........................272
Transmission selector lever,
manually unlocking ................... 274
Exterior lamps ................................275
Headlamp assembly ................... 276
Taillamp assemblies ..................278
Adjusting headlamp aim ...............280
Page 206 of 329
203 Driving instructions
Te ch n ica l
data Instruments
and controlsOperationDrivingInstrument
cluster displayPractical hints Car care Index Driving instructions
Drive sensibly – save fuel
Fue l consumption, to a g rea t ex tent, depends on driv ing
habits and operating conditions.
To save fuel you should:
•keep tires at the recommended inflation pressures,
•remove unnecessary loads,
•remove roof rack when not in use,
•allow engine to warm up under low load use,
•avoid frequent acceleration and deceleration,
•have all maintenance work performed at regular
intervals by an authorized Mercedes-Benz Center.
Fuel consumption is also increased by driving in cold
weather, in stop-and-go traffic, on short trips and in hilly
country.Drinking and driving
Pedals
Wa r n i n g !
Drinking or taking drugs and driving can be a very
dangerous combination. Even a small amount of
alcohol or drugs can affect your reflexes,
perceptions and judgement.The possibility of a serious or even fatal accident is
sharply increased when you drink or take drugs
and drive.Please don’t drink or take drugs and drive or allow
anyone to drive after drinking or taking drugs.Wa r n i n g !
Keep driver’s foot area clear at all times. Objects
stored in this area may impair pedal movement.
Page 210 of 329
207 Driving instructions
Te ch n ica l
data Instruments
and controlsOperationDrivingInstrument
cluster displayPractical hints Car care Index Specified tire pressures must be maintained. This
applies particularly if the tires are subjected to high
loads (e.g. high speeds, heavy loads, high ambient
temperatures).
Aquaplaning
Depending on the depth of the water layer on the road,
aquaplaning may occur, even at low speeds and with
new tires. Reduce vehicle speed, avoid track grooves in
the road and apply brakes cautiously in the rain.Tire traction
The safe speed on a wet, snow covered or icy road is
always lower than on a dry road.
You should pay particular attention to the condition of
the road whenever the outside temperatures are close to
the freezing point.
We rec omme nd M+S rated rad ia l-ply tires for t he winter
season for all four wheels to insure normal balanced
handling characteristics. On packed snow, they can
reduce your stopping distance as compared with
summer tires. Stopping distance, however, is still
considerably greater than when the road is not snow or
ice covered.
Wa r n i n g !
Do not drive with a flat tire. A flat tire affects the
ability to steer or brake the vehicle. You may lose
control of the vehicle. Continued driving with a flat
tire or driving at high speed with a flat tire will
cause excessive heat build-up and possibly a fire.
Wa r n i n g !
If ice has formed on the road, tire traction will be
substantially reduced. Under such weather
conditions, drive, steer and brake with extreme
caution.
Page 218 of 329
215 Driving systems
Te ch n ica l
data Instruments
and controlsOperationDrivingInstrument
cluster displayPractical hints Car care Index Brake assist system (BAS)The BAS is designed to maximize the vehicle’s braking
capability during emergency braking maneuvers by
having maximum power boost applied to the brakes
more quickly in emergency braking conditions than
might otherwise be afforded solely by the driver’s
braking style. This can help reduce braking distances
over what ordinary driving and braking style might do.
The BAS complements the antilock brake system (ABS).
Applying the brakes very quickly results in maximum
BA S a ssistance.
To receive the benefit of the system you must apply
continuous full braking power during the stopping
sequence. Do not reduce brake pedal pressure.
Once the brake pedal is released, the BAS is deactivated.
The malfunction indicator lamp for the electronic
stability program (ESP) is combined with the BAS
malfunction indicator lamp.
Wa r n i n g !
BAS cannot prevent the natural laws of physics
from acting on the vehicle, nor can it increase
braking efficiency beyond that afforded by the
condition of the vehicle brakes and tires or the
traction afforded. The BAS cannot prevent
accidents, including those resulting from excessive
speed in turns, following another vehicle too
closely, or aquaplaning. Only a safe, attentive, and
skillful driver can prevent accidents. The
capabilities of a BAS equipped vehicle must never
be exploited in a reckless or dangerous manner
which could jeopardize the user’s safety or the
safety of others.
Page 227 of 329
224 What you should know at the gas station
Te ch n ica l
data Instruments
and controlsOperationDrivingInstrument
cluster displayPractical hints Car care Index
•Engine oil
Engine oil level check, see page 114 and page 253.
Fill quantity between upper and lower dipstick
marking level: 2.1 US qt. (2.0 l).
Recommended engine oils, see Approved Service
Products sheet.
• Coolant
For normal replenishing, use water (potable water
quality).
For further information (e.g. anticorrosion/
antifreeze), see page 305.
•Spark plugs
Approved spark plugs, see page 303.
• Tire pressure
For tire pressure, refer to tire pressure label inside
the fuel filler flap. See page 267 for further details.• Air conditioner
R-134a refrigerant and special PAG lubricant, see
page 305.
•Bulbs
High and low beams: H7 (55 W),
low beam: Xenon (optional)
fog lamps: H1 (55 W),
turn signal lamps,
front 1156 NA (26.9/5 W/32/4 cp),
parking and standing lamps, front: H 6W (6 W),
side marker lamps, front: 5 W/4 cp,
turn signal lamps, rear: 21 W/24 cp,
stop, tail, parking and side marker lamps: 21/4 W,
tail and parking lamp: 5 W/4 cp,
rear fog lamp, driver’s side: 21 W/32 cp,
backup lamps: 21 W/32 cp,
license plate lamps: 5 W/4 cp.
Page 250 of 329
247 Contents – Practical hints
Te ch n ica l
data Instruments
and controlsOperation DrivingInstrument
cluster displayPractical hintsCar care Index
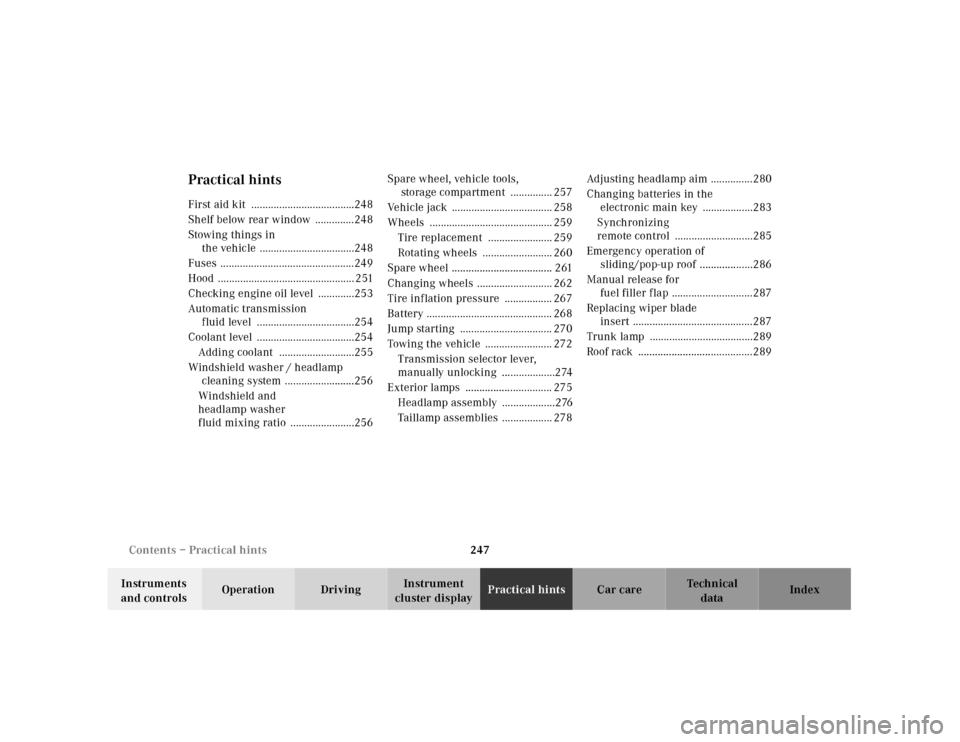
Practical hintsFirst aid kit .....................................248
Shelf below rear window ..............248
Stowing things in
the vehicle ..................................248
Fuses ................................................249
Hood ................................................. 251
Checking engine oil level .............253
Automatic transmission
fluid level ...................................254
Coolant level ...................................254
Adding coolant ...........................255
Windshield washer / headlamp
cleaning system .........................256
Windshield and
headlamp washer
fluid mixing ratio .......................256Spare wheel, vehicle tools,
storage compartment ............... 257
Vehicle jack .................................... 258
Wheels ............................................ 259
Tire replacement ....................... 259
Rotating wheels ......................... 260
Spare wheel .................................... 261
Changing wheels ........................... 262
Tire inflation pressure ................. 267
Battery ............................................. 268
Jump starting ................................. 270
Towing the vehicle ........................ 272
Transmission selector lever,
manually unlocking ...................274
Exterior lamps ............................... 275
Headlamp assembly ...................276
Taillamp assemblies .................. 278Adjusting headlamp aim ...............280
Changing batteries in the
electronic main key ..................283
Synchronizing
remote control ............................285
Emergency operation of
sliding/pop-up roof ...................286
Manual release for
fuel filler flap .............................287
Replacing wiper blade
insert ...........................................287
Trunk lamp .....................................289
Roof rack .........................................289
Page 263 of 329
260 Tires, Wheels
Te ch n ica l
data Instruments
and controlsOperation DrivingInstrument
cluster displayPractical hintsCar care Index
Rotating wheels
Wheel rotation applies only when winter tires are
mounted on all four wheels.
The wheels can be rotated according to the degree of
tire wear while retaining the same direction of travel.
Rotating, however, should be carried out as
recommended by the tire manufacturer, before the
characteristic tire wear pattern (shoulder wear on front
wheels and tread center wear on rear wheels) becomes
visible, as otherwise the driving properties deteriorate.
Important!
Unidirectional tires must always be mounted with arrow
on tire sidewall pointing in direction of vehicle forward
movement.Notes:
Thoroughly clean the inner side of the wheels any time
you rotate the wheels or wash the vehicle underside.
The use of retread tires is not recommended. Retread
tires may adversely affect the handling characteristics
and safety of the vehicle.
Dented or bent rims can cause tire pressure loss and
dam age to t he tire bead s. For this reason, ch eck rims for
damage at regular intervals. The rim f langes must be
checked for wear before a tire is mounted. Remove
burrs, if any.
Check and ensure proper tire inflation pressure after
rotating the wheels. For tire inflation pressure see
inside of fuel filler flap and also page 267.
Page 268 of 329
265 Tires, Wheels
Te ch n ica l
data Instruments
and controlsOperation DrivingInstrument
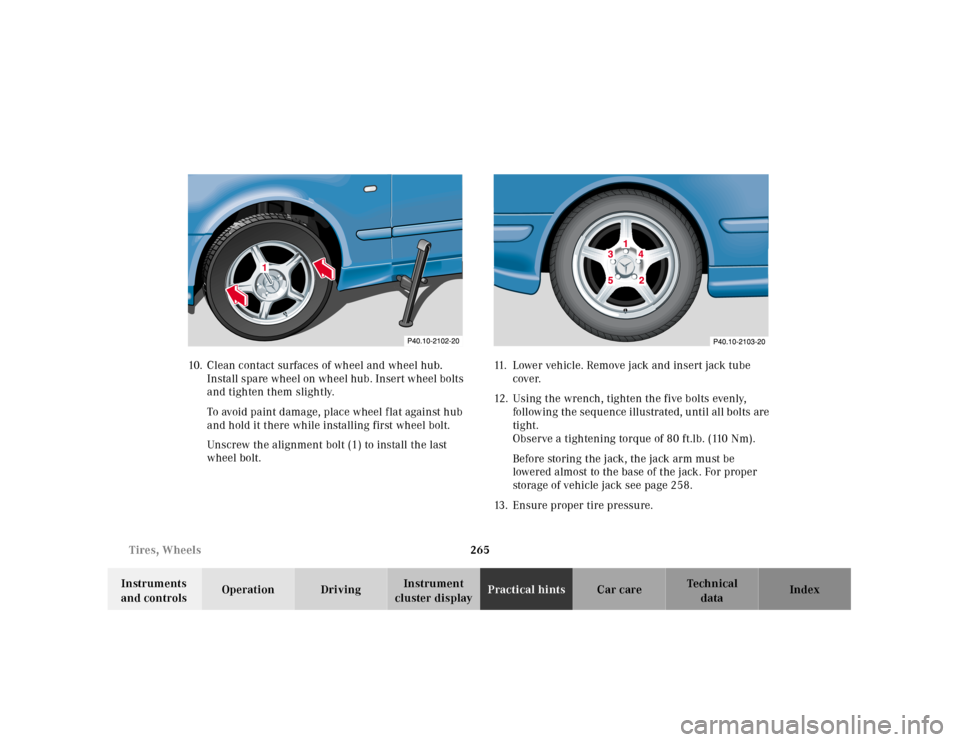
cluster displayPractical hintsCar care Index 10. Clean contact surfaces of wheel and wheel hub.
Install spare wheel on wheel hub. Insert wheel bolts
and tighten them slightly.
To avoid paint damage, place wheel f lat against hub
and hold it there while installing first wheel bolt.
Unscrew the alignment bolt (1) to install the last
wheel bolt.11. Lower vehicle. Remove jack and insert jack tube
cover.
12. Using the wrench, tighten the five bolts evenly,
following the sequence illustrated, until all bolts are
tight.
Observe a tightening torque of 80 ft.lb. (110 Nm).
Before storing the jack, the jack arm must be
lowered almost to the base of the jack. For proper
storage of vehicle jack see page 258.
13. Ensure proper tire pressure.
1
1
Page 270 of 329
267 Tires, Wheels
Te ch n ica l
data Instruments
and controlsOperation DrivingInstrument
cluster displayPractical hintsCar care Index Tire inflation pressure
A table (see fuel filler f lap) lists the tire inflation
pressures specified for Mercedes-Benz recommended
tires as well as for the varying operating conditions.
Important!
Tire pressure changes by approx. 1.5 psi (0.1 bar) per
18°F (10°C) of air temperature change. Keep this in
mind when checking tire pressure inside a garage –
especially in the winter.
Example:
If garage temperature = approx. +68°F (+20°C) and
ambient temperature = approx. +32°F (0°C) then the
adjusted air pressure = specified air pressure +3 psi
(+0.2 bar).Tire pressures listed for light loads are minimum values
offering high driving comfort. Increased inflation
pressures for heavy loads produce favorable handling
characteristics with lighter loads and are perfectly
permissible. The ride of the vehicle, however, will
become somewhat harder.
Tire temperature and pressure increase with the vehicle
speed. Tire pressure should therefore only be checked
and corrected on cold tires. Correct tire pressure in
warm tires only if pressure has dropped below the
pressure listed in the table and the respective operating
conditions are taken into consideration.
An underinflated tire due to a slow leak (e.g. due to a
nail in the tire) may cause damage such as tread
separation, bulging etc.. Regular tire pressure checks
(including the spare tire) at intervals of no more than
14 days are therefore essential.
Page 271 of 329
268 Battery
Te ch n ica l
data Instruments
and controlsOperation DrivingInstrument
cluster displayPractical hintsCar care Index
If a tire constantly loses air, it should be inspected for
damage.
The spare tire should be checked periodically for
condition and inflation. Spare tire will age and become
worn over time even if never used, and thus should be
inspected and replaced when necessary.Battery
Important!
Battery replacement information:
The maintenance-free battery is located in the trunk
under the trunk floor.
The service life of the battery is dependent on its
condition of charge. The battery should always be kept
sufficiently charged, in order to last an optimum length
of time.
Wa r n i n g !
Do not overinflate tires. Overinflating tires can
result in sudden deflation (blowout) because they
are more likely to become punctured or damaged
by road debris, potholes etc.. Follow recommended
inflation pressures.Do not overload the tires by exceeding the specified
vehicle capacity weight (as indicated by the label
on the driver’s door latch post). Overloading the
tires can overheat them, possibly causing a
blowout.
Wa r n i n g !
Failure to follow these instructions can result in
severe injury or death.Never lean over batteries while connecting, you
might get injured.Battery fluid contains sulfuric acid. Do not allow
this fluid to come in contact with eyes, skin or
cloth ing. In c ase it does, im mediately f lush affected
area with water and seek medical help if necessary.A battery will also produce hydrogen gas, which is
flammable and explosive. Keep flames or sparks
away from battery, avoid improper connection of
jumper cables, smoking etc..