winter tires MERCEDES-BENZ CLS 2016 Owners Manual
[x] Cancel search | Manufacturer: MERCEDES-BENZ, Model Year: 2016, Model line: CLS, Model: MERCEDES-BENZ CLS 2016Pages: 342, PDF Size: 10.12 MB
Page 23 of 342
Reporting problem s ........................ .2 9
Securing from rolling away ............ 321
Towing away .................................. 296
Transporting .................................. 298
Unlocking (in an emergency) ........... 83
Unlocking (SmartKey) ...................... 76
Vehicle data ................................... 336
Vehicle data ....................................... 336
Vehicle dimensions ........................... 336
Vehicle emergency locking ................ 83
Vehicle identification number
see VIN
Vehicle identification plate .............. 330
Vehicle level
AIRMATIC ...................................... 166
Vehicle level (display message) ....... 224
Vehicle tool kit .................................. 286
Video
Operating the DVD ......................... 202
see also Digital Operator's Man-
ual .................................................. 245
VIN
Seat ............................................... 331
Type plate ...................................... 330
Voice Control System
see Separate operating instructions
W
Warning and indicator lamps
ABS ................................................ 238
Brakes ........................................... 237
Check Engine ................................. 241
Coolant .......................................... 241
Distance warning ........................... 243
ESP ®
.............................................. 238
ESP ®
OFF ....................................... 239
Fuel tank ........................................ 241
General notes ................................ 235
Overview .......................................... 34
PASSENGER AIR BAG OFF ............... 42
Reserve fuel ................................... 241
Restraint system ............................ 240
Seat belt ........................................ 236
SPORT handling mode ................... 240
Tire pressure monitor .................... 244
Warranty .............................................. 26 Washer fluid
Display message ............................ 234
Wheel and tire combinations
Tires ............................................... 325
Wheel bolt tightening torque ........... 324
Wheel chock ...................................... 321
Wheels
Changing a wheel .......................... 320
Checking ........................................ 301
Cleaning ......................................... 281
Emergency spare wheel ................. 326
Important safety notes .................. 301
Information on driving .................... 301
Interchanging/changing ................ 320
Mounting a new wheel ................... 324
Mounting a wheel .......................... 321
Removing a wheel .......................... 323
Storing ........................................... 321
Tightening torque ........................... 324
Wheel size/tire size ....................... 325
Window curtain air bag
Operation ......................................... 49
Windows
see Side windows
Windshield
Defrosting ...................................... 122
Windshield washer fluid
see Windshield washer system
Windshield washer system
Adding washer fluid ....................... 277
Important safety notes .................. 335
Windshield wipers
Problem (malfunction) ................... 113
Replacing the wiper blades ............ 112
Switching on/off ........................... 111
Winter driving
Important safety notes .................. 303
Slippery road surfaces ................... 152
Snow chains .................................. 303
Winter tires
M+S tires ....................................... 303
Wiper blades
Cleaning ......................................... 282
Important safety notes .................. 112
R e
placing ....................................... 112
Wooden trim (cleaning instruc-
tions) .................................................. 284 Index 21
Page 66 of 342
Never leave animals unattended in the vehi-
cle. Always secure animals properly during
the journey, e.g. use a suitable animal trans-
port box.
Driving safety systems
Overview of driving safety systems In this section, you will find information about
the following driving safety systems: R
ABS ( A nti-lock B raking S ystem)
( Y
page 64)R
BAS ( B rake A ssist S ystem) ( Y
page 65)R
BAS PLUS ( B rake A ssist S ystem PLUS) with
Cross-Traffic Assist ( Y
page 65)R
COLLISION PREVENTION ASSIST PLUS
( Y
page 67)R
ESP ®
( E lectronic S tability P rogram)
( Y
page 69)R
EBD ( E lectronic B rake force D istribution)
( Y
page 72)R
ADAPTIVE BRAKE ( Y
page 72)R
PRE-SAFE ®
Brake ( Y
page 73)
Important safety notes If you fail to adapt your driving style or if you are
inattentive, the driving safety systems can nei-
ther reduce the risk of an accident nor override
the laws of physics. Driving safety systems are
merely aids designed to assist driving. You are
responsible for maintaining the distance to the
vehicle in front, for vehicle speed, for braking in
good time, and for staying in lane. Always adapt
your driving style to suit the prevailing road and
weather conditions and maintain a safe distance
from the vehicle in front. Drive carefully.
The driving safety systems described only work
as effectively as possible when there is ade-
quate contact between the tires and the road
surface. Please pay special attention to the
notes on tires, recommended minimum tire
tread depths, etc. ( Y
page 301).
In wintry driving conditions, always use winter
tires (M+S tires) and if necessary, snow chains.
Only in this way will the driving safety systems
described in this section work as effectively as
possible. ABS (Anti-lock Braking System)
General information ABS regulates brake pressure in such a way that
the wheels do not lock when you brake. This
allows you to continue steering the vehicle when
braking.
The �% ABS warning lamp in the instrument
cluster lights up when the ignition is switched
on. It goes out when the engine is running.
ABS works from a speed of about 5 mph
(8 km/h), regardless of road-surface conditions.
ABS works on slippery surfaces, even when you
only brake gently.
Important safety notes
i Observe the "Important safety notes" sec-
tion ( Y
page 64).
G WARNING
If ABS is faulty, the wheels could lock when
braking. The steerability and braking charac-
teristics may be severely impaired. Addition-
ally, further driving safety systems are deac-
tivated. There is an increased danger of skid-
ding and accidents.
Drive on carefully. Have ABS checked imme-
diately at a qualified specialist workshop.
When ABS is malfunctioning, other systems,
including driving safety systems, will also
become inoperative. Observe the information
on the ABS warning lamp ( Y
page 238) and dis-
play messages which may be shown in the
instrument cluster ( Y
page 213).
Braking X
If ABS intervenes: continue to depress the
brake pedal vigorously until the braking sit-
uation is over. X
To make a full brake application: depress
the brake pedal with full force.
If ABS intervenes when braking, you will feel a
pulsing in the brake pedal.
The pulsating brake pedal can be an indication
of hazardous road conditions, and functions as a
reminder to take extra care while driving.64
Driving safety systems
Safety
Page 154 of 342
The AMG brake systems are designed for heavy
loads. This may lead to noise when braking. This
will depend on: R
Speed R
Braking force R
Environmental conditions, such as tempera-
ture and humidity
The wear of individual components of the brake
system, such as the brake pads/linings or brake
discs, depends on the individual driving style
and operating conditions.
For this reason, it is impossible to state a mile-
age that will be valid under all circumstances. An
aggressive driving style will lead to high wear.
You can obtain further information about this
from your authorized Mercedes-Benz Center.
New and replaced brake pads and discs only
reach their optimum braking effect after several
hundred kilometers of driving. Compensate for
this by applying greater force to the brake pedal.
Keep this in mind, and adapt your driving and
braking accordingly during this break-in period.
Excessive heavy braking results in correspond-
ingly high brake wear. Observe the brake wear
warning lamp in the instrument cluster and note
any brake status messages in the multifunction
display. Especially for high performance driving,
it is important to maintain and have the brake
system checked regularly.
Driving on wet roads
Hydroplaning If water has accumulated to a certain depth on
the road surface, there is a danger of hydro-
planing occurring, even if: R
you drive at low speeds. R
the tires have adequate tread depth.
For this reason, in the event of heavy rain or in
conditions in which hydroplaning may occur,
you must drive in the following manner: R
lower your speed. R
avoid ruts. R
avoid sudden steering movements. R
brake carefully. Driving on flooded roads
! Do not drive through flooded areas. Check
the depth of any water before driving through
it. Drive slowly through standing water. Oth-
erwise, water may enter the vehicle interior or
the engine compartment. This can damage
the electronic components in the engine or
the automatic transmission. Water can also
be drawn in by the engine's air suction nozzles
and this can cause engine damage.
Winter driving
G WARNING
If you shift down on a slippery road surface in
an attempt to increase the engine's braking
effect, the drive wheels could lose their grip.
There is an increased danger of skidding and
accidents.
Do not shift down for additional engine brak-
ing on a slippery road surface.
G DANGER
If the exhaust pipe is blocked or adequate
ventilation is not possible, poisonous gases
such as carbon monoxide (CO) may enter the
vehicle. This is the case, e.g. if the vehicle
becomes trapped in snow. There is a risk of
fatal injury.
If you leave the engine or the auxiliary heating
running, make sure the exhaust pipe and area
around the vehicle are clear of snow. To
ensure an adequate supply of fresh air, open a
window on the side of the vehicle that is not
facing into the wind.
Have your vehicle winter-proofed at a qualified
specialist workshop at the onset of winter.
Drive particularly carefully on slippery road sur-
faces. Avoid sudden acceleration, steering and
braking maneuvers. Do not use the cruise con-
trol or DISTRONIC PLUS.
If the vehicle threatens to skid or cannot be
stopped when moving at low speed: X
Shift the transmission to position N .
The outside temperature indicator is not
designed to serve as an ice-warning device and
is therefore unsuitable for that purpose.152
Driving tips
Driving and parking
Page 172 of 342
! Never tow the vehicle with one axle raised.
This may damage the transfer case. Damage
of this sort is not covered by the Mercedes-
Benz Limited Warranty. All wheels must
remain either on the ground or be fully raised.
Observe the instructions for towing the vehi-
cle with all wheels in full contact with the
ground.
i In wintry driving conditions, the maximum
effect of 4MATIC can only be achieved if you
use winter tires (M+S tires), with snow chains
if necessary.
4MATIC ensures that all four wheels are perma-
nently driven. Together with ESP ®
, it improves
the traction of your vehicle whenever a drive
wheel spins due to insufficient grip.
PARKTRONIC
Important safety notes PARKTRONIC is an electronic parking aid with
ultrasonic sensors. It monitors the area around
your vehicle using six sensors in the front
bumper and six sensors in the rear bumper.
PARKTRONIC indicates visually and audibly the
distance between your vehicle and an object.
PARKTRONIC is only an aid. It is not a replace-
ment for your attention to your immediate sur-
roundings. You are always responsible for safe
maneuvering, parking and exiting a parking
space. When maneuvering, parking or pulling
out of a parking space, make sure that there are
no persons, animals or objects in the area in
which you are maneuvering.
! When parking, pay particular attention to
objects above or below the sensors, such as
flower pots or trailer drawbars. PARKTRONIC
does not detect such objects when they are in
the immediate vicinity of the vehicle. You
could damage the vehicle or the objects.
The sensors may not detect snow and other
objects that absorb ultrasonic waves.
Ultrasonic sources such as an automatic car
wash, the compressed-air brakes on a truck
or a pneumatic drill could cause PARKTRONIC
to malfunction.
PARKTRONIC may not function correctly on
uneven terrain. PARKTRONIC is activated automatically when
you: R
switch on the ignition R
shift the transmission to position D , R or NR
release the parking brake
PARKTRONIC is deactivated at speeds above
11 mph (18 km/h). It is reactivated at lower
speeds.
Range of the sensors General notes PARKTRONIC does not take objects into con-
sideration that are: R
below the detection range, e.g. people, ani-
mals or objects. R
above the detection range, e.g. overhanging
loads, truck overhangs or loading ramps.
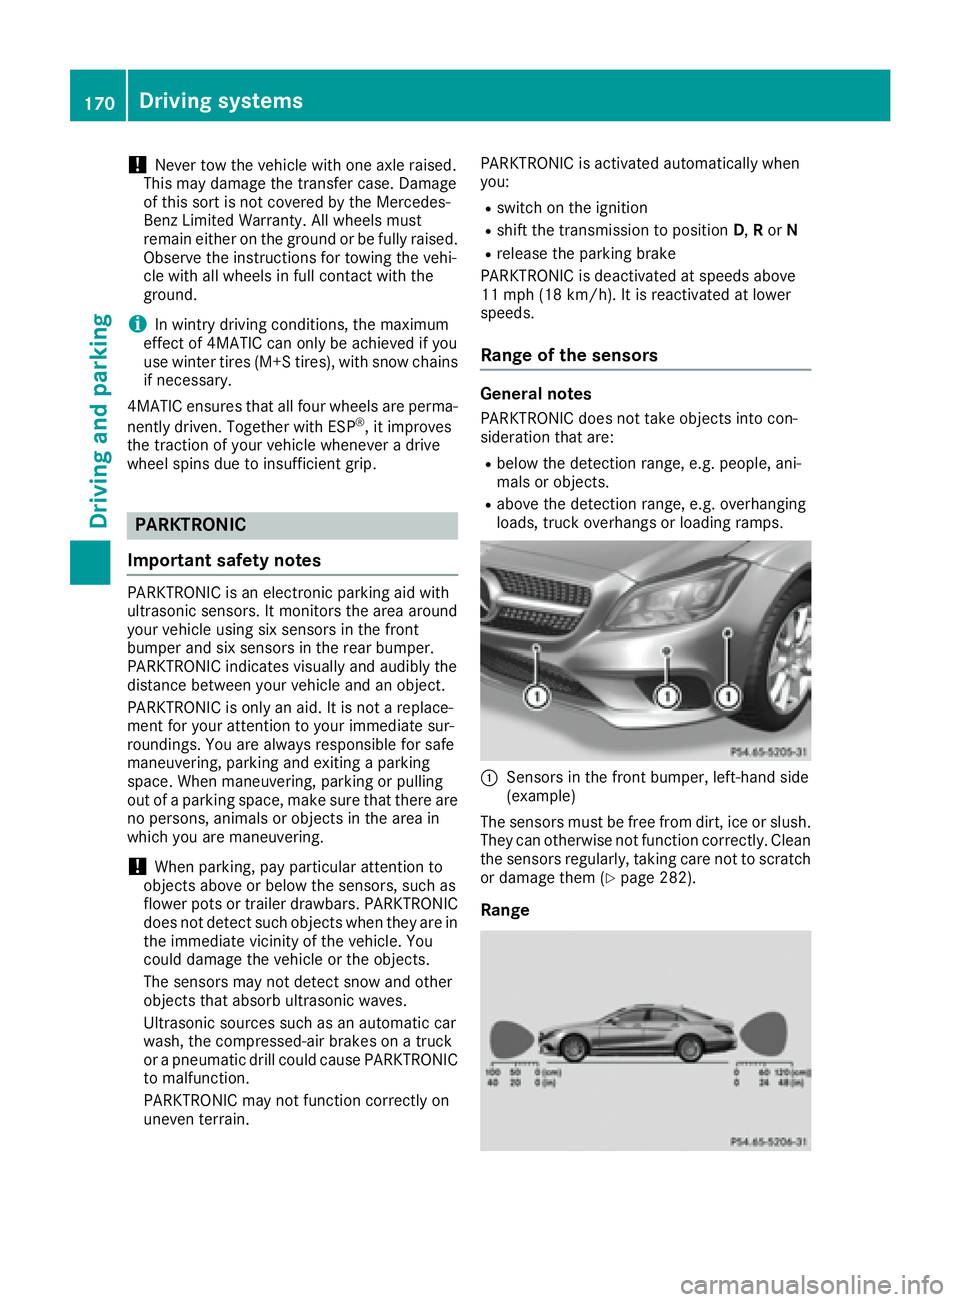
�C
Sensors in the front bumper, left-hand side
(example)
The sensors must be free from dirt, ice or slush.
They can otherwise not function correctly. Clean
the sensors regularly, taking care not to scratch
or damage them ( Y
page 282).
Range170
Driving systems
Driving and parking
Page 282 of 342
X
Releas e th e brak e pedal .X
Releas e th e parking brake.X
Switc h off th e ignition and leav e th e SmartKey
in th e ignition lock.
You can wash th e vehicl e in an automatic car
wash from th e ver y start .
If th e vehicl e is ver y dirty, pre-was h it before
cleaning it in an automatic car wash.
Afte r usin g an automatic car wash, wipe off wax
from th e windshield and th e wiper blades. This
will preven t smears and reduce wipin g noises
caused by residue on th e windshield.
Washing by hand In som e countries, washing by han d is only
allowe d at specially equipped washing bays.
Observ e th e legal requirements in eac h country.X
Do no t use hot water and do no t wash th e
vehicl e in direct sunlight.X
Use a sof t spong e to clean.X
Use a mild cleaning agent, suc h as a car
shampoo approve d by Mercedes-Benz.X
Thoroughly hos e down th e vehicl e wit h a gen -
tl e je t of water.X
Do no t poin t th e water je t directly towards th e
air inlet .X
Use plenty of water and rinse out th e spong e
frequently. X
Rins e th e vehicl e wit h clean water and dry
thoroughly wit h a chamois.X
Do no t let th e cleaning agen t dry on th e paint-
work.
Carefully remove all deposit s of road salt as
soo n as possibl e when driving in winter.
Power washers
G WARNIN G
The water je t from a circular je t nozzle (dir t
blasters ) can caus e invisible exterio r damag e
to th e tires or chassi s components. Compo-
nent s damaged in this way may fail unexpect-
edly. There is a ris k of an accident.
Do no t use power washers wit h circular je t
nozzles to clean th e vehicle. Hav e damaged
tires or chassi s component s replace d imme-
diately. ! Always maintai n a distanc e of at least
11.8 in (30 cm) between th e vehicl e and th e
powe r washe r nozzle. Information about th e
correc t distanc e is available from th e equip -
men t manufacturer.
Mov e th e powe r washe r nozzle around when
cleaning your vehicle.
Do no t aim directly at any of th e following:R
tires R
door gaps , roo f gaps , joints, etc.R
electrical component sR
battery R
connectors R
lights R
seals R
trim R
ventilation slot s
Damaged seals or electrical component s can
lead to leak s or failures .
Cleaning the paintwork
! Do no t affix: R
stickers R
film s R
magnetic plates or similar items
to painte d surfaces. You could otherwise
damag e th e paintwork .
Scratches, corrosiv e deposits, areas affecte d by
corrosio n and damag e caused by inadequat e
car e canno t always be completely repaired. In
suc h cases, visit a qualified specialist workshop. X
Remove dirt immediately, wher e possible,
while avoidin g rubbing to o hard.X
Soak insec t remain s wit h insec t remove r and
rinse off th e treated areas afterwards .X
Soak bird droppings wit h water and rinse off
th e treated areas afterwards .X
Remove coolant, brak e fluid , tree resin, oils ,
fuel s and greases by rubbing gentl y wit h a
cloth soaked in petroleum ether or lighte r
fluid . X
Use tar remove r to remove tar stains. X
Use silicon e remove r to remove wax.
If water no longer forms "beads " on th e pain t
surface, use th e pain t car e products recommen -
ded and approve d by Mercedes-Benz . This is th e
cas e approximately every three to fiv e months,280
Care
Maintenance and care
Page 289 of 342
i Example: equipment and country-specific
variations possible.
Vehicles with alloy wheels and hub caps On vehicles with alloy wheels and hub caps, a
socket is also provided.
Flat tire
Preparing the vehicle Your vehicle may be equipped with: R
MOExtended tires (tires with run-flat proper-
ties) ( Y
page 287)
Vehicle preparation is not necessary on vehi-
cles with MOExtended tires R
a TIREFIT kit ( Y
page 286)R
an emergency spare wheel ( Y
page 326)
Vehicles equipped with MOExtended tires are
not equipped with a TIREFIT kit at the factory. It
is therefore recommended that you additionally
equip your vehicle with a TIREFIT kit if you mount
tires that do not feature run-flat properties, e.g.
winter tires. A TIREFIT kit may be obtained from
a qualified specialist workshop.
Information on changing and mounting wheels
( Y
page 320). X
Stop the vehicle on solid, non-slippery and
level ground, as far away as possible from
traffic. X
Switch on the hazard warning lamps. X
Secure the vehicle against rolling away
( Y
page 146). X
If possible, bring the front wheels into the
straight-ahead position. X
Vehicles with AIRMATIC: make sure that "nor-
mal" level is selected ( Y
page 166).X
Switch off the engine. X
Remove the SmartKey from the ignition lock.
or, on vehicles with KEYLESS ‑ GO:X
Open the driver's door.
T he on-board electronics now have status 0 .
This is the same as the SmartKey having been
removed. X
Remove the Start/Stop button from the igni-
tion lock ( Y
page 127).X
Make sure that the passengers are not endan-
gered as they do so. Make sure that no one is
near the danger area while a wheel is being changed. Anyone who is not directly assisting
in the wheel change should, for example,
stand behind the barrier. X
Get out of the vehicle. Pay attention to traffic
conditions when doing so. X
Close the driver's door.
MOExtended tires (tires with run-flat
properties)
General notes With MOExtended tires (tires with run flat char-
acteristics), you can continue to drive your vehi-
cle even if there is a total loss of pressure in one
or more tires. The affected tire must not show
any clearly visible damage.
You can recognize MOExtended tires by the
MOExtended marking which appears on the
sidewall of the tire. You will find this marking
next to the tire size designation, the load-bear-
ing capacity and the speed index ( Y
page 315).
MOExtended tires may only be used in conjunc-
tion with an active tire pressure loss warning
system or with an active tire pressure monitor.
If a pressure loss warning message appears
in the multifunction display: R
observe the instructions in the display mes-
sages ( Y
page 230). R
check the tire for damage. R
if driving on, observe the following notes.
The driving distance possible in run-flat mode is
approximately 50 miles (80 km) when the vehi-
cle is partially laden. When the vehicle is fully
laden it is approximately 19 miles (30 km).
In addition to the vehicle load, the driving dis-
tance possible depends upon: R
vehicle speed R
road condition R
outside temperature
The driving distance p ossible in run-flat mode
may be reduced by extreme driving conditions
or maneuvers, or it can be increased through a
moderate style of driving.
The driving distance possible in run-flat mode is
counted from the moment the tire pressure loss
warning appears in the multifunction display.
You must not exceed a maximum speed of
50 mph (80 km/h). Flat tire 287
Breakdown assistance
Page 290 of 342
When replacing one or all tires, please observe
the following specifications for your vehicle's
tires: R
size R
the type and R
the "MOExtended" mark
If a tire has gone flat and cannot be replaced
with a MOExtended tire, a standard tire may be
used as a temporary measure. Make sure that
you use the proper size and type (summer or
winter tire).
Vehicles equipped with MOExtended tires are
not equipped with a TIREFIT kit at the factory. It
is therefore recommended that you additionally
equip your vehicle with a TIREFIT kit if you mount
tires that do not feature run-flat properties, e.g.
winter tires. A TIREFIT kit may be obtained from
a qualified specialist workshop.
Important safety notes
G WARNING
When driving in emergency mode, the driving
characteristics deteriorate, e.g. when corner-
ing, accelerating quickly and when braking.
There is a risk of an accident.
Do not exceed the stated maximum speed.
Avoid abrupt steering and driving maneuvers,
and driving over obstacles (curbs, potholes,
off-road). This applies in particular to a laden
vehicle.
Stop driving in emergency mode if: R
you hear banging noises. R
the vehicle starts to shake. R
you see smoke and smell rubber. R
ESP ®
is intervening constantly.R
there are tears in the sidewalls of the tire.
After driving in emergency mode, have the
wheel rims checked at a qualified specialist
workshop with regard to their further use. The
defective tire must be replaced in every case. TIREFIT kit
Important safety notes TIREFIT is a tire sealant.
You can use TIREFIT to seal punctures of up to
0.16 in (4 mm), particularly those in the tire
tread. You can use TIREFIT at outside tempera-
tures down to �
Page 305 of 342
MOExtended tires (tires with run-flat
properties) With MOExtended tires (tires with run flat char-
acteristics), you can continue to drive your vehi-
cle even if there is a total loss of pressure in one
or more tires.
MOExtended tires may only be used in conjunc-
tion with an active tire pressure loss warning
system or with an active tire pressure monitor
and on wheels specifically tested by Mercedes-
Benz.
Notes on driving with MOExtended tires with a
flat tire ( Y
page 287).
Vehicles equipped with MOExtended tires are
not equipped with a TIREFIT kit at the factory. It
is therefore recommended that you additionally
equip your vehicle with a TIREFIT kit if you mount
tires that do not feature run-flat properties, e.g.
winter tires. A TIREFIT kit can be obtained from
a qualified specialist workshop.
Winter operation
General notes Have your vehicle winter-proofed at a qualified
specialist workshop at the onset of winter.
Observe the notes in the "Changing a wheel"
section ( Y
page 320).
Driving with summer tires At temperatures below 45 ‡ (+7 †), summer
tires lose elasticity and therefore traction and
braking power. Change the tires on your vehicle
to M+S tires. Using summer tires at very cold
temperatures could cause cracks to form,
thereby damaging the tires permanently.
Mercedes-Benz cannot accept responsibility for
this type of damage.
G WARNING
Damaged tires can cause tire inflation pres-
sure loss. As a result, you could lose control of
your vehicle. There is a risk of accident.
Check the tires regularly for signs of damage
and replace any damaged tires immediately. M+S tires
G WARNING
M+S tires with a tire tread depth of less than
�
Page 319 of 342
rating in the service specification. Example:
245/40 ZR18 97 Y. In this example, "97 Y" is
the service specification. The letter "Y" rep-
resents the speed rating. The maximum
speed of the tire is limited to 186 mph
(300 km/h).
If the size description of your tire includes
"ZR" and there are no service specifications,
ask the tire manufacturer in order to find out
the maximum speed. R
The size description for all tires with maxi-
mum speeds of over 186 mph (300 km/h)
must include "ZR", and the service specifica-
tion must be given in parentheses. Example:
275/40 ZR 18 (99 Y). Speed rating "(Y)" indi-
cates that the maximum speed of the tire is
over 186 mph (300 km/h). Ask the tire man-
ufacturer about the maximum speed.
All-weather tires and winter tires
Index Speed rating
Q M+S 1
up to 100 mph (160 km/h)
T M+S 1
up to 118 mph (190 km/h)
H M+S 1
up to 130 mph (210 km/h)
V M+S 1
up to 149 mph (240 km/h)
i Not all tires with the M+S marking provide
the driving characteristics of winter tires. In
addition to the M+S marking, winter tires also
have the �M snowflake symbol on the tire
wall. Tires with this marking fulfill the require-
ments of the Rubber Manufacturers Associa-
tion (RMA) and the Rubber Association of
Canada (RAC) regarding the tire traction on
snow. They have been especially developed
for driving on snow.
An electronic speed limiter prevents your vehi-
cle from exceeding the following speeds: R
all vehicles (except AMG vehicles): 130 mph
(210 km/h) R
AMG vehicles: 155 mph (250 km/h) R
AMG vehicles with Performance Package:
186 mph (300 km/h)
The speed rating of tires mounted at the factory
may be higher than the maximum speed that the
electronic speed limiter permits.
Make sure that your tires have the required
speed rating, e.g. when buying new tires. The required speed rating for your vehicle can be
found in the "Tires" section ( Y
page 325).
Further information about reading tire data can
be obtained from any qualified specialist work-
shop.
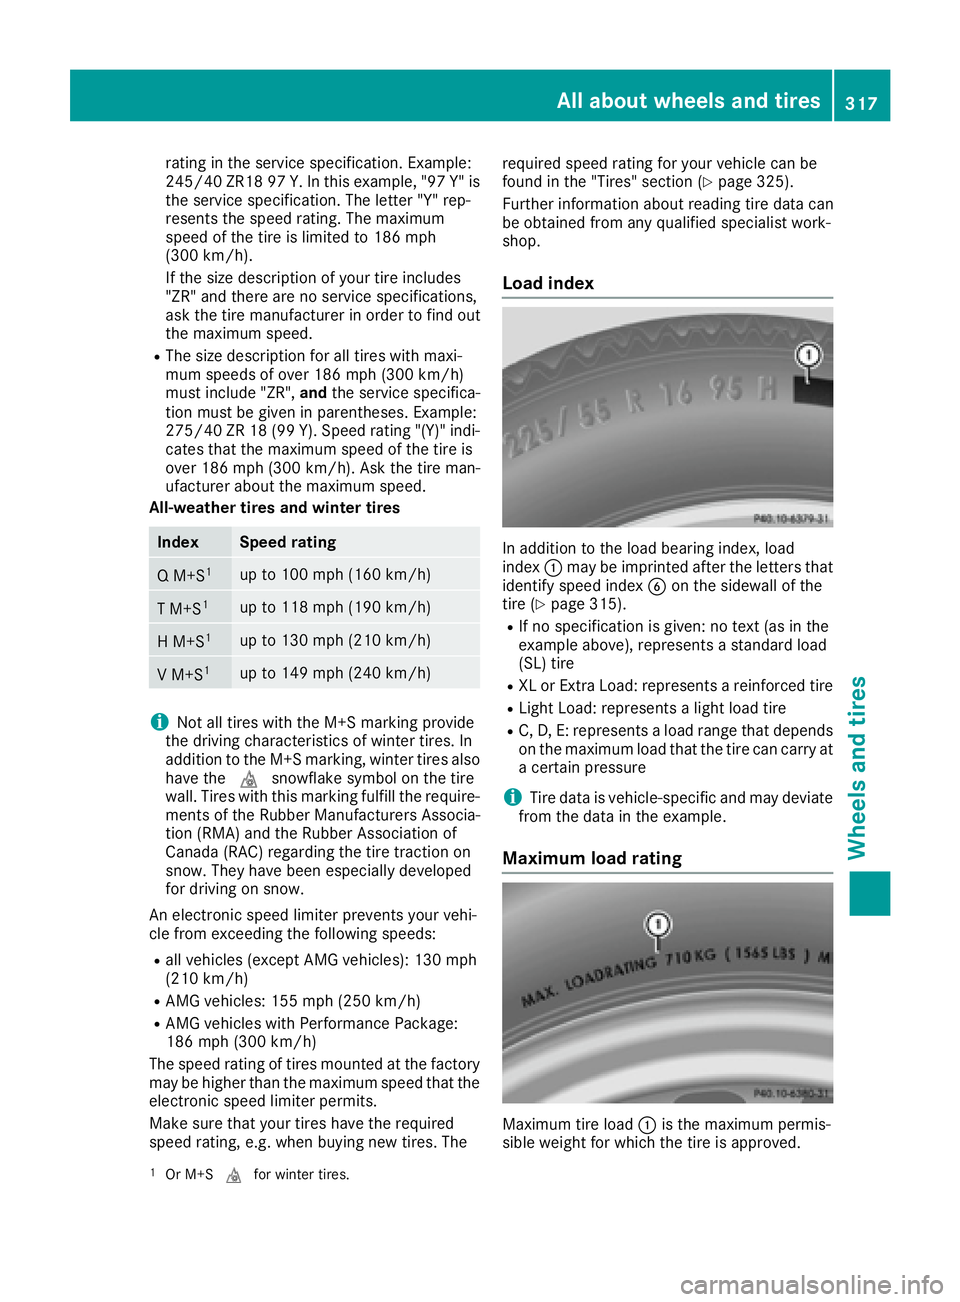
Load index
In addition to the load bearing index, load
index �C may be imprinted after the letters that
identify speed index �
Page 328 of 342
Notes on the vehicle equipment – always equip
the vehicle with: R
with tires of the same size on a given axle (left
and right) R
the same type of tires at a given time (summer
tires, winter tires, MOExtended tires)
Exception: it is permissible to install a differ-
ent type or make in the event of a flat tire.
Observe the "MOExtended tires (tires with
run-flat characteristics" section ( Y
page 287).
Vehicles equipped with MOExtended tires are
not equipped with a TIREFIT kit at the factory. It
is therefore recommended that you additionally
equip your vehicle with a TIREFIT kit if you mount
tires that do not feature run-flat properties, e.g.
winter tires. A TIREFIT kit may be obtained from
a qualified specialist workshop.
Emergency spare wheel
Important safety notes
G WARNING
The wheel or tire size as well as the tire type of
the spare wheel or emergency spare wheel
and the wheel to be replaced may differ.
Mounting an emergency spare wheel may
severely impair the driving characteristics.
There is a risk of an accident.
To avoid hazardous situations: R
adapt your driving style accordingly and
drive carefully. R
never mount more than one spare wheel or
emergency spare wheel that differs in size. R
only use a spare wheel or emergency spare
wheel of a different size briefly. R
do not switch ESP ®
off.R
have a spare wheel or emergency spare
wheel of a different size replaced at the
nearest qualified specialist workshop.
Observe that the wheel and tire dimensions
as well as the tire type must be correct.
When using an emergency spare wheel or spare
wheel of a different size, you must not exceed
the maximum speed of 50 mph (80 km/h).
Snow chains must not be mounted on emer-
gency spare wheels. General notes You can ask for information regarding permitted
emergency spare wheels at an authorized
Mercedes-Benz Center.
You should regularly check the pressure of the
emergency spare wheel, particularly prior to
long trips, and correct the pressure as neces-
sary ( Y
page 304). The value on the wheel is
valid.
An emergency spare wheel may also be moun-
ted against the direction of rotation. Observe
the time restriction on use as well as the speed
limitation specified on the emergency spare
wheel.
Replace the tires after six years at the latest,
regardless of wear. This also applies to the
emergency spare wheel.
i When you are driving with the collapsible
spare wheel mounted, the tire pressure loss
warning system or the tire pressure monitor
cannot function reliably. Only restart the tire
pressure loss warning system or tire pressure
monitor when the defective wheel has been
replaced with a new wheel.
Vehicles with tire pressure monitor: after
mounting an emergency spare wheel, the sys-
tem may still display the tire pressure of the
removed wheel for a few minutes. The value
displayed for the mounted emergency spare
wheel is not the same as the current tire pres-
sure of the emergency spare wheel.
"Minispare" emergency spare wheel/
collapsible spare wheel
Opening the stowage well
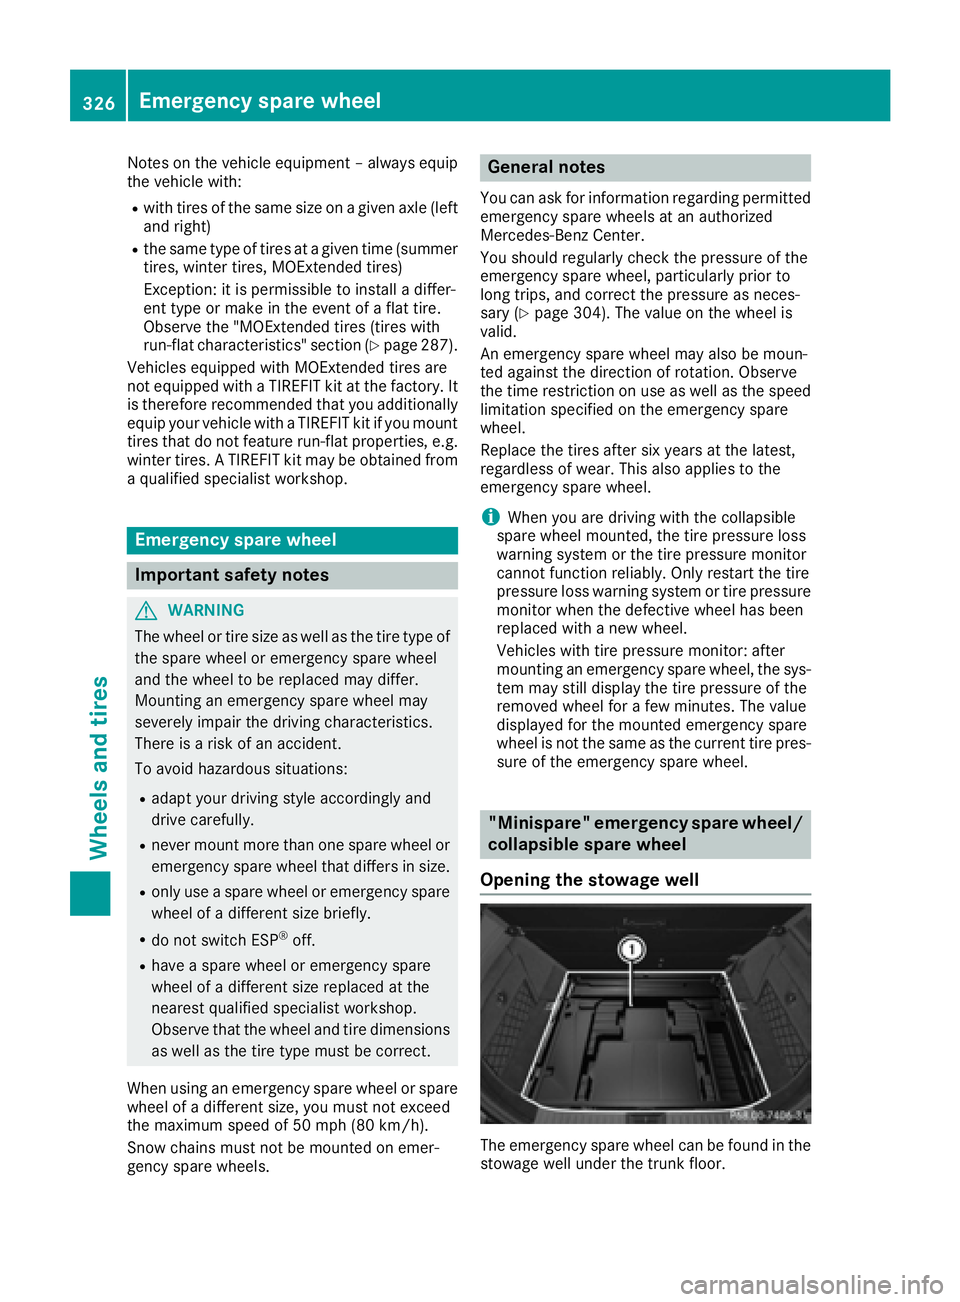
The emergency spare wheel can be found in the
stowage well under the trunk floor.326
Emergency spare wheel
Wheels and tires