start stop button MERCEDES-BENZ CLS-Class 2012 W218 Owner's Guide
[x] Cancel search | Manufacturer: MERCEDES-BENZ, Model Year: 2012, Model line: CLS-Class, Model: MERCEDES-BENZ CLS-Class 2012 W218Pages: 356, PDF Size: 14.25 MB
Page 152 of 356
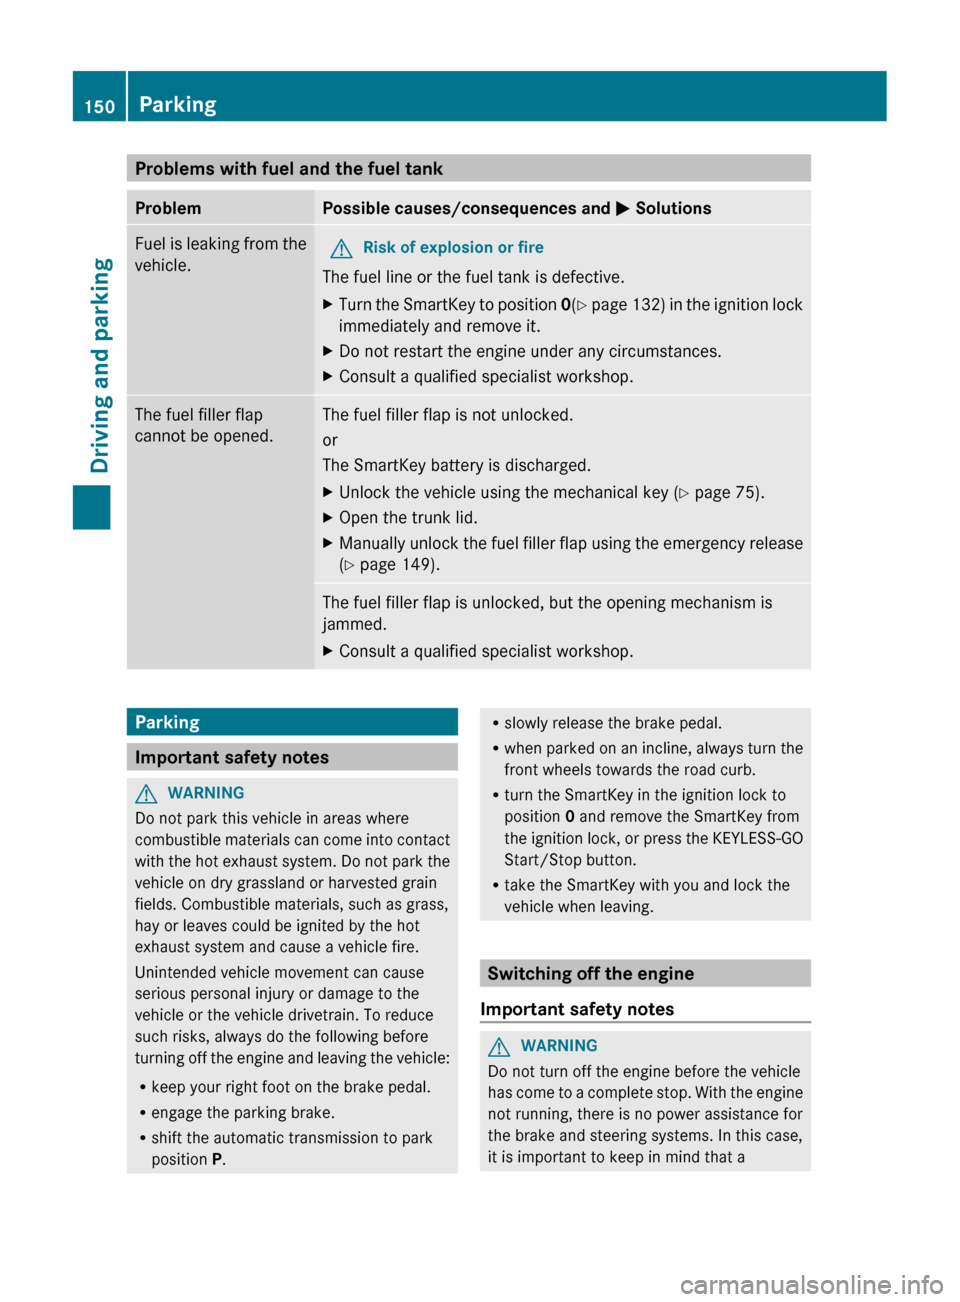
Problems with fuel and the fuel tankProblemPossible causes/consequences and M SolutionsFuel is leaking from the
vehicle.GRisk of explosion or fire
The fuel line or the fuel tank is defective.
XTurn the SmartKey to position 0(Y page 132) in the ignition lock
immediately and remove it.XDo not restart the engine under any circumstances.XConsult a qualified specialist workshop.The fuel filler flap
cannot be opened.The fuel filler flap is not unlocked.
or
The SmartKey battery is discharged.XUnlock the vehicle using the mechanical key ( Y page 75).XOpen the trunk lid.XManually unlock the fuel filler flap using the emergency release
( Y page 149).The fuel filler flap is unlocked, but the opening mechanism is
jammed.XConsult a qualified specialist workshop.Parking
Important safety notes
GWARNING
Do not park this vehicle in areas where
combustible materials can come into contact
with the hot exhaust system. Do not park the
vehicle on dry grassland or harvested grain
fields. Combustible materials, such as grass,
hay or leaves could be ignited by the hot
exhaust system and cause a vehicle fire.
Unintended vehicle movement can cause
serious personal injury or damage to the
vehicle or the vehicle drivetrain. To reduce
such risks, always do the following before
turning off the engine and leaving the vehicle:
R keep your right foot on the brake pedal.
R engage the parking brake.
R shift the automatic transmission to park
position P.
R
slowly release the brake pedal.
R when parked on an incline, always turn the
front wheels towards the road curb.
R turn the SmartKey in the ignition lock to
position 0 and remove the SmartKey from
the ignition lock, or press the KEYLESS-GO
Start/Stop button.
R take the SmartKey with you and lock the
vehicle when leaving.
Switching off the engine
Important safety notes
GWARNING
Do not turn off the engine before the vehicle
has come to a complete stop. With the engine
not running, there is no power assistance for
the brake and steering systems. In this case,
it is important to keep in mind that a
150ParkingDriving and parking
Page 153 of 356
considerably higher degree of effort is
necessary to brake and steer the vehicle.GWARNING
Keep in mind that turning off the engine alone
only will shift the automatic transmission into
neutral position N automatically.
Always shift the automatic transmission into
park position P before turning off the engine.
Otherwise the vehicle could roll away which
could result in an accident and/or serious
personal injury.
Vehicles with automatic transmission
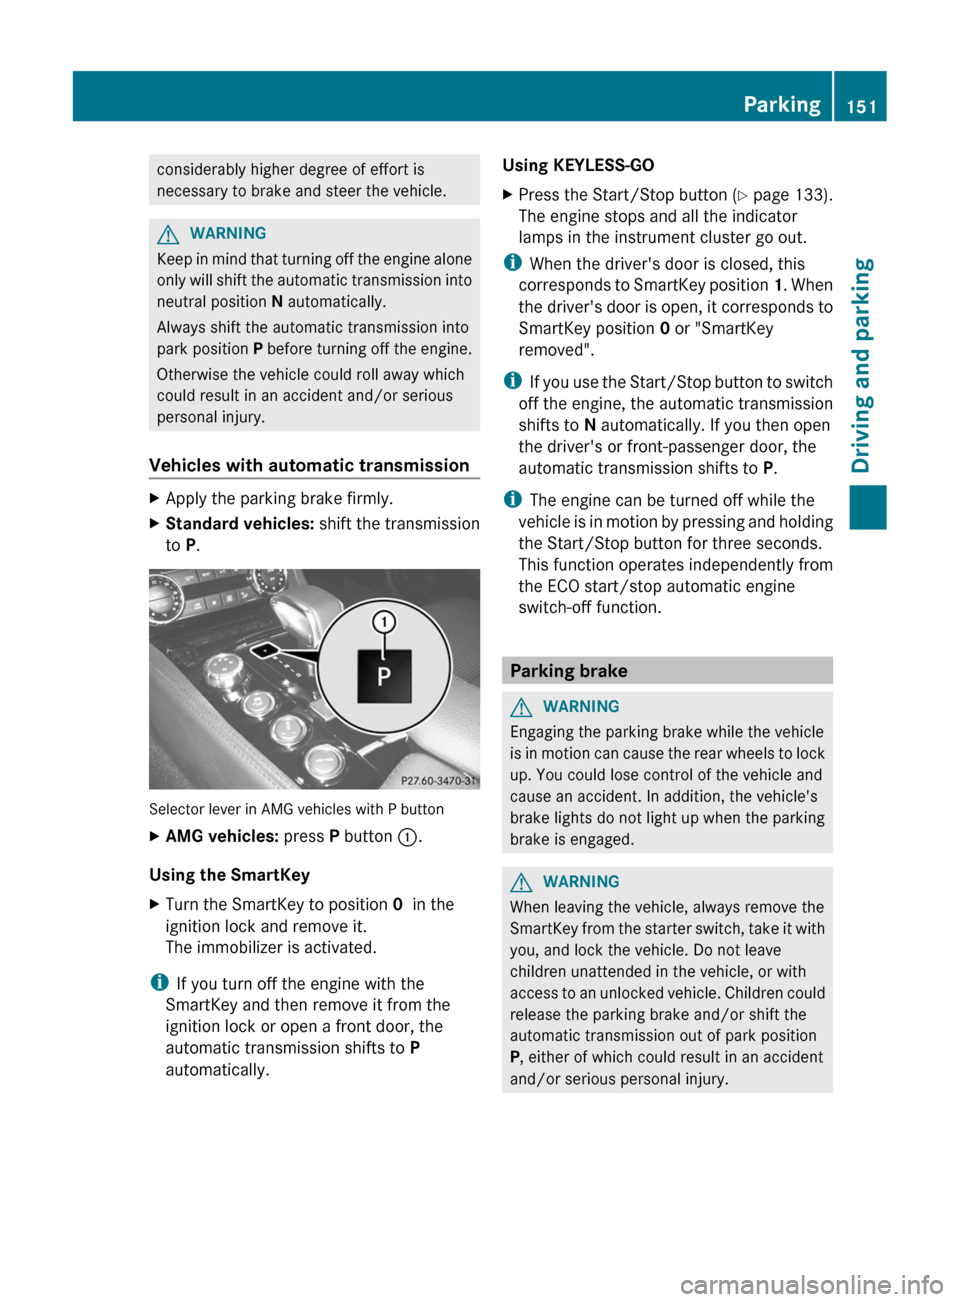
XApply the parking brake firmly.XStandard vehicles: shift the transmission
to P.
Selector lever in AMG vehicles with P button
XAMG vehicles: press P button :.
Using the SmartKey
XTurn the SmartKey to position 0 in the
ignition lock and remove it.
The immobilizer is activated.
i If you turn off the engine with the
SmartKey and then remove it from the
ignition lock or open a front door, the
automatic transmission shifts to P
automatically.
Using KEYLESS-GOXPress the Start/Stop button (Y page 133).
The engine stops and all the indicator
lamps in the instrument cluster go out.
i When the driver's door is closed, this
corresponds to SmartKey position 1. When
the driver's door is open, it corresponds to
SmartKey position 0 or "SmartKey
removed".
i If you use the Start/Stop button to switch
off the engine, the automatic transmission
shifts to N automatically. If you then open
the driver's or front-passenger door, the
automatic transmission shifts to P.
i The engine can be turned off while the
vehicle is in motion by pressing and holding
the Start/Stop button for three seconds.
This function operates independently from
the ECO start/stop automatic engine
switch-off function.
Parking brake
GWARNING
Engaging the parking brake while the vehicle
is in motion can cause the rear wheels to lock
up. You could lose control of the vehicle and
cause an accident. In addition, the vehicle's
brake lights do not light up when the parking
brake is engaged.
GWARNING
When leaving the vehicle, always remove the
SmartKey from the starter switch, take it with
you, and lock the vehicle. Do not leave
children unattended in the vehicle, or with
access to an unlocked vehicle. Children could
release the parking brake and/or shift the
automatic transmission out of park position
P , either of which could result in an accident
and/or serious personal injury.
Parking151Driving and parkingZ
Page 155 of 356
Wet roadsGWARNING
After driving in heavy rain for some time
without applying the brakes or through water
deep enough to wet brake components, the
first braking action may be somewhat
reduced. You have to depress the brake pedal
more firmly. Maintain a safe distance from
vehicles in front.
After driving on a wet road or having the
vehicle washed, brake firmly while paying
attention to the traffic conditions. This will
warm up the brake discs, thereby drying them
more quickly and protecting them against
corrosion.
Limited braking performance on salt
treated roads
GWARNING
The layer of salt on the brake discs and the
brake pads/linings may cause a delay in the
braking effect, resulting in a significantly
longer braking distance, which could lead to
an accident.
To avoid this danger, you should:
R occasionally brake carefully, without
putting other road users at risk, when you
are driving on salted roads. This helps to
remove any salt that may have started to
build up on the brake discs and the brake
pads/linings.
R maintain a greater distance to the vehicle
ahead and drive with particular care.
R carefully apply the brakes at the end of a
trip and immediately after commencing a
new trip, so that salt residues are removed
from the brake discs.
Servicing the brakes
! If the red brake warning lamp lights up in
the instrument cluster and you hear a
warning tone while the engine is running,
the brake fluid level may be too low.
Observe additional warning messages in
the multifunction display.
The brake fluid level may be too low due to
brake pad wear or leaking brake lines.
Have the brake system checked
immediately. This work should be carried
out at an authorized Mercedes-Benz
Center.
All checks and maintenance work on the
brake system must be carried out at a
qualified specialist workshop. This work
should be carried out at an authorized
Mercedes-Benz Center.
Have the brake pads replaced and the brake
fluid renewed at a qualified specialist
workshop, e.g. an authorized Mercedes-Benz
Center.GWARNING
If brake pads or brake fluid other than those
recommended are used, the braking
properties of the vehicle can be degraded to
an extent that safe braking is substantially
impaired. This could result in an accident.
! Vehicles with 4MATIC: function or
performance tests may only be carried out
on a 2-axle dynamometer. If you are
planning to have the vehicle tested on such
a dynamometer, contact an authorized
Mercedes-Benz Center to obtain further
information first. Otherwise, you could
damage the drive train or the brake system.
! Vehicles with 4MATIC: as the ESP®
system operates automatically, the engine
and the ignition must be switched off
(SmartKey in position 0 or 1 in the ignition
lock or Start/Stop button in position 0 or
1 ) while the parking brake is being tested
on a brake dynamometer.
Braking maneuvers triggered automatically
by ESP ®
may seriously damage the brake
system.
Driving tips153Driving and parkingZ
Page 156 of 356
! Vehicles with 4MATIC: as the ESP®
system operates automatically, the engine
and the ignition system must be switched
off (SmartKey in position 0 or 1 in the
ignition lock or Start/Stop button in
position 0 or 1) when:
R testing the parking brake on a brake
dynamometer.
R you intend to have the vehicle towed with
one of the axles raised.
Braking maneuvers triggered automatically
by ESP ®
may seriously damage the brake
system.
If your brake system is subject only to
moderate loads, you should test the
functionality of your brakes at regular
intervals by pressing firmly on the brake pedal
at high speeds. This improves the grip of the
brake pads.GWARNING
Make sure that you do not endanger other
road users when you apply the brakes.
You can find a description of Brake Assist
(BAS) on ( Y page 62) or of BAS PLUS on
( Y page 62).
Winter driving
General information
GWARNING
If the vehicle becomes trapped in snow,
ensure that snow is kept away from the
exhaust pipe and from around the vehicle as
long as the engine is running. Otherwise,
poisonous carbon monoxide (CO) may enter
the vehicle, resulting in loss of consciousness
and even death.
To assure sufficient fresh air ventilation, open
a window slightly on the side of the vehicle
not facing the wind.
At the onset of winter, have your vehicle
winterproofed at a qualified specialist
workshop, e.g. at an authorized Mercedes-
Benz Center.
Observe the notes in the "Winter operation"
section ( Y page 316).
Driving with summer tires
Observe the notes in the "Winter operation"
section ( Y page 316).
Slippery road surfaces
GWARNING
The outside temperature indicator is not
designed to serve as an ice-warning device
and is therefore unsuitable for that purpose.
Indicated temperatures just above the
freezing point do not guarantee that the road
surface is free of ice. The road may still be icy,
especially in wooded areas or on bridges.
GWARNING
On slippery road surfaces, never downshift in
order to obtain braking action. This could
result in drive wheel slip and reduced vehicle
control. Your vehicle's ABS will not prevent
this type of loss of control.
Drive particularly carefully on slippery road
surfaces. Avoid sudden acceleration, steering
and braking maneuvers. Do not use cruise
control or DISTRONIC PLUS.
If the vehicle threatens to skid or cannot be
stopped when moving at low speed:
XShift the transmission to position N.
i
For more information on driving with
snow chains, see ( Y page 317).
GWARNING
Make sure that you do not endanger other
road users when you apply the brakes.
154Driving tipsDriving and parking
Page 179 of 356
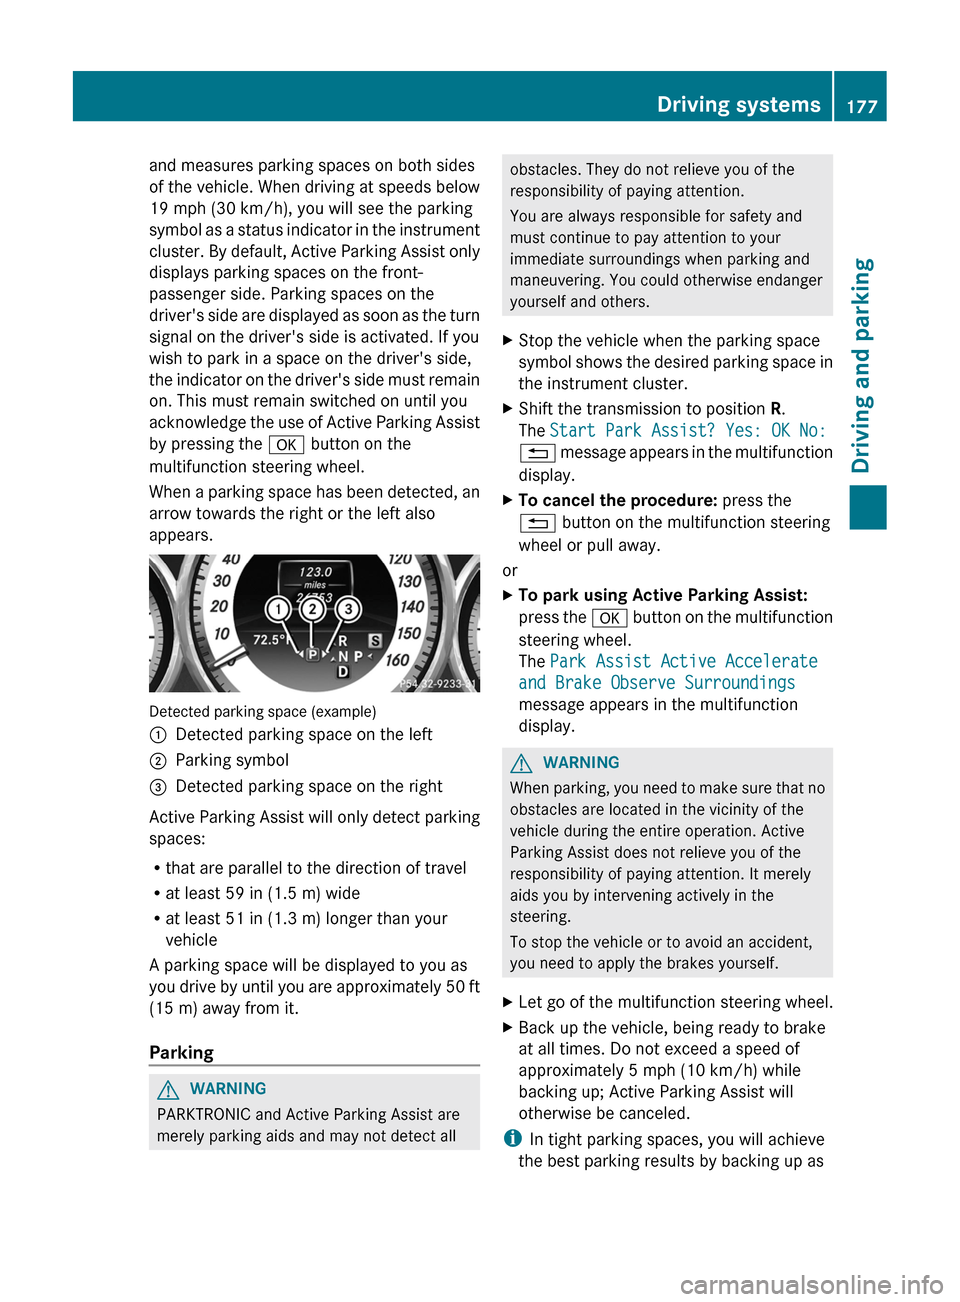
and measures parking spaces on both sides
of the vehicle. When driving at speeds below
19 mph (30 km/h), you will see the parking
symbol as a status indicator in the instrument
cluster. By default, Active Parking Assist only
displays parking spaces on the front-
passenger side. Parking spaces on the
driver's side are displayed as soon as the turn
signal on the driver's side is activated. If you
wish to park in a space on the driver's side,
the indicator on the driver's side must remain
on. This must remain switched on until you
acknowledge the use of Active Parking Assist
by pressing the a button on the
multifunction steering wheel.
When a parking space has been detected, an
arrow towards the right or the left also
appears.
Detected parking space (example)
:Detected parking space on the left;Parking symbol=Detected parking space on the right
Active Parking Assist will only detect parking
spaces:
R that are parallel to the direction of travel
R at least 59 in (1.5 m) wide
R at least 51 in (1.3 m) longer than your
vehicle
A parking space will be displayed to you as
you drive by until you are approximately 50 ft
(15 m) away from it.
Parking
GWARNING
PARKTRONIC and Active Parking Assist are
merely parking aids and may not detect all
obstacles. They do not relieve you of the
responsibility of paying attention.
You are always responsible for safety and
must continue to pay attention to your
immediate surroundings when parking and
maneuvering. You could otherwise endanger
yourself and others.XStop the vehicle when the parking space
symbol shows the desired parking space in
the instrument cluster.XShift the transmission to position R.
The Start Park Assist? Yes: OK No:
% message appears in the multifunction
display.XTo cancel the procedure: press the
% button on the multifunction steering
wheel or pull away.
or
XTo park using Active Parking Assist:
press the a button on the multifunction
steering wheel.
The Park Assist Active Accelerate
and Brake Observe Surroundings
message appears in the multifunction
display.GWARNING
When parking, you need to make sure that no
obstacles are located in the vicinity of the
vehicle during the entire operation. Active
Parking Assist does not relieve you of the
responsibility of paying attention. It merely
aids you by intervening actively in the
steering.
To stop the vehicle or to avoid an accident,
you need to apply the brakes yourself.
XLet go of the multifunction steering wheel.XBack up the vehicle, being ready to brake
at all times. Do not exceed a speed of
approximately 5 mph (10 km/h) while
backing up; Active Parking Assist will
otherwise be canceled.
i In tight parking spaces, you will achieve
the best parking results by backing up as
Driving systems177Driving and parkingZ
Page 200 of 356
Left control panel=
;R Calls up the menu and menu bar9
:Press briefly:
R Scrolls through lists
R Selects a submenu or function
R In the Audio menu: selects a
stored station, an audio track or
a video scene
R In the Tel (telephone) menu:
switches to the phone book and
selects a name or telephone
number9
:Press and hold:
R In the Audio menu: selects the
previous/next station or selects
an audio track or a video scene
using rapid scrolling
R In the Tel (telephone) menu:
starts rapid scrolling through the
phone bookaR Confirms a selection/display
message
R In the Tel (telephone) menu:
switches to the telephone book
and starts dialing the selected
number
R In the Audio menu: stops the
station search function at the
desired station
Right control panel
~R Rejects or ends a call
R Exits phone book/redial
memory6R Makes or accepts a call
R Switches to the redial memoryW
XR Adjusts the volume8RMute
Back button
%Press briefly:
R Back
R Switches off the Voice Control
System
R Hides display messages or calls
up the last Trip menu function
used
R Exits the telephone book/redial
memory%Press and hold:
R Calls up the standard display in
the Trip menu
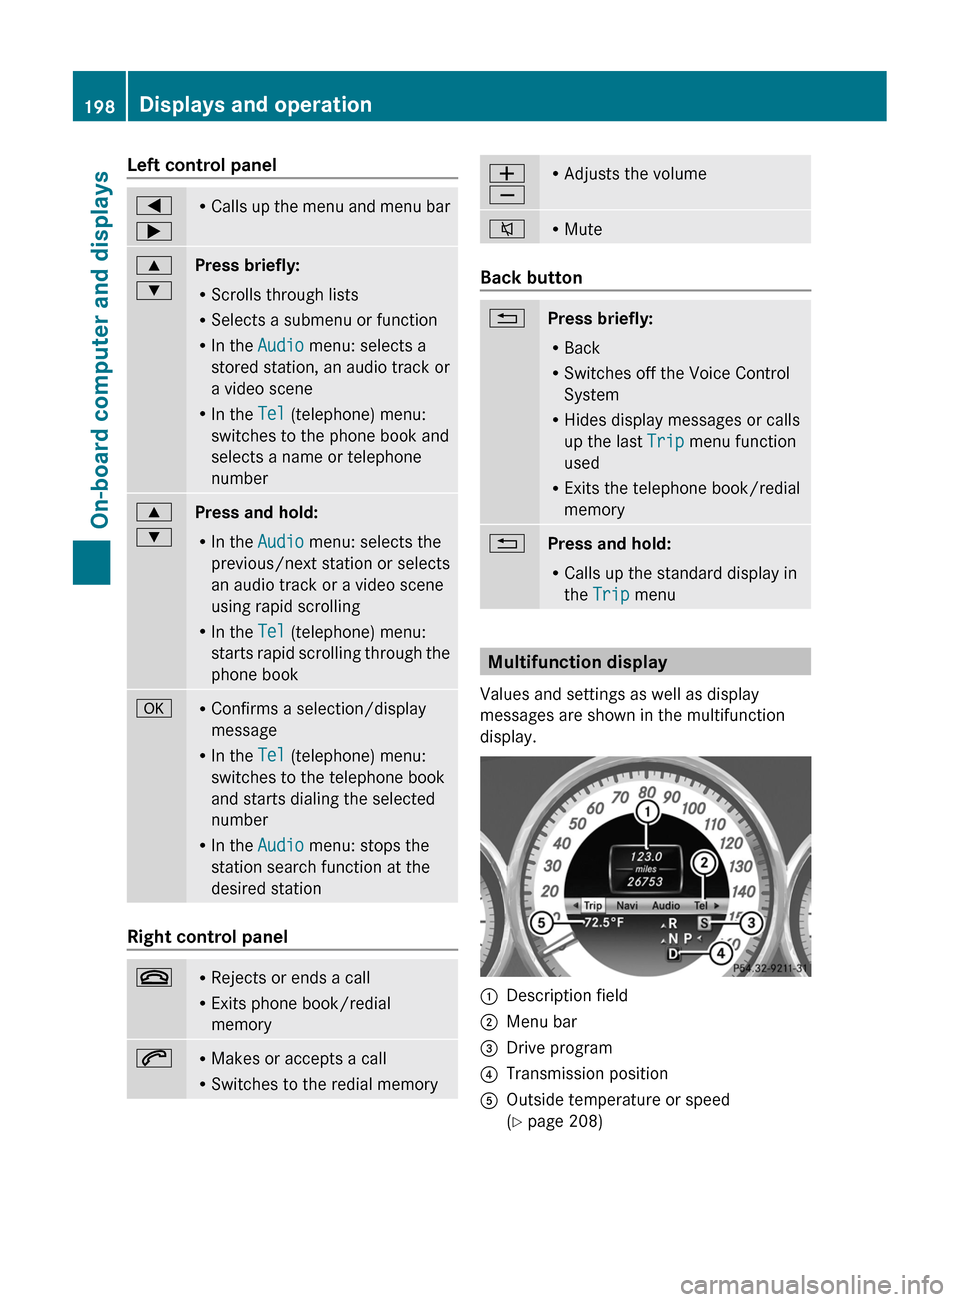
Multifunction display
Values and settings as well as display
messages are shown in the multifunction
display.
:Description field;Menu bar=Drive program?Transmission positionAOutside temperature or speed
( Y page 208)198Displays and operationOn-board computer and displays
Page 207 of 356
You will see one of the following display
messages in the multifunction display:
R Telephone Ready or the name of the
network provider: the mobile phone has
found a network and is ready to receive.
R Phone No Service : no network is
available, or the mobile phone is searching
for a network.
Accepting a call
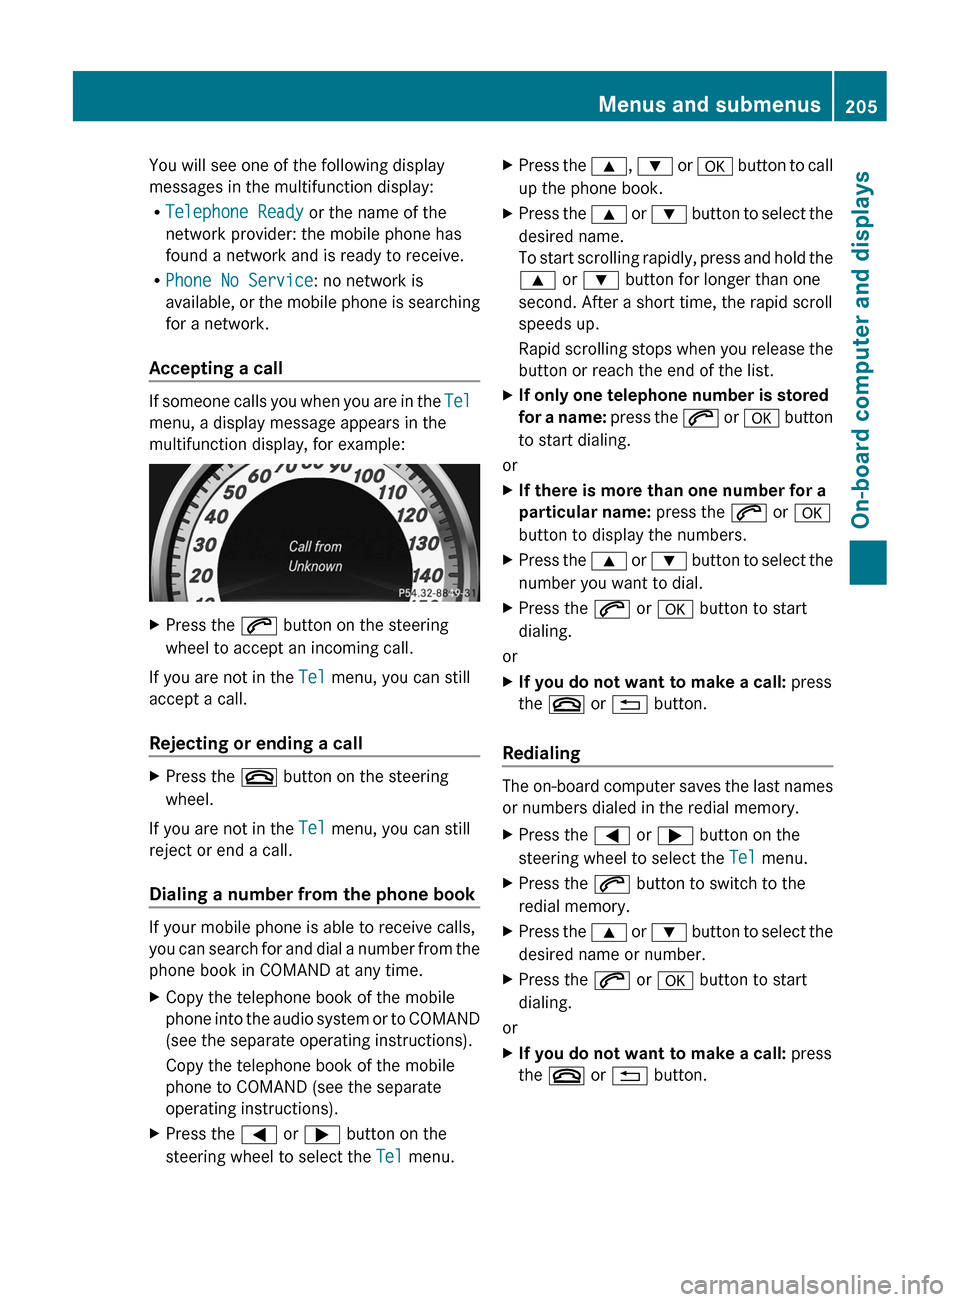
If someone calls you when you are in the Tel
menu, a display message appears in the
multifunction display, for example:
XPress the 6 button on the steering
wheel to accept an incoming call.
If you are not in the Tel menu, you can still
accept a call.
Rejecting or ending a call
XPress the ~ button on the steering
wheel.
If you are not in the Tel menu, you can still
reject or end a call.
Dialing a number from the phone book
If your mobile phone is able to receive calls,
you can search for and dial a number from the
phone book in COMAND at any time.
XCopy the telephone book of the mobile
phone into the audio system or to COMAND
(see the separate operating instructions).
Copy the telephone book of the mobile
phone to COMAND (see the separate
operating instructions).XPress the = or ; button on the
steering wheel to select the Tel menu.XPress the 9, : or a button to call
up the phone book.XPress the 9 or : button to select the
desired name.
To start scrolling rapidly, press and hold the
9 or : button for longer than one
second. After a short time, the rapid scroll
speeds up.
Rapid scrolling stops when you release the
button or reach the end of the list.XIf only one telephone number is stored
for a name: press the 6 or a button
to start dialing.
or
XIf there is more than one number for a
particular name: press the 6 or a
button to display the numbers.XPress the 9 or : button to select the
number you want to dial.XPress the 6 or a button to start
dialing.
or
XIf you do not want to make a call: press
the ~ or % button.
Redialing
The on-board computer saves the last names
or numbers dialed in the redial memory.
XPress the = or ; button on the
steering wheel to select the Tel menu.XPress the 6 button to switch to the
redial memory.XPress the 9 or : button to select the
desired name or number.XPress the 6 or a button to start
dialing.
or
XIf you do not want to make a call: press
the ~ or % button.Menus and submenus205On-board computer and displaysZ
Page 216 of 356
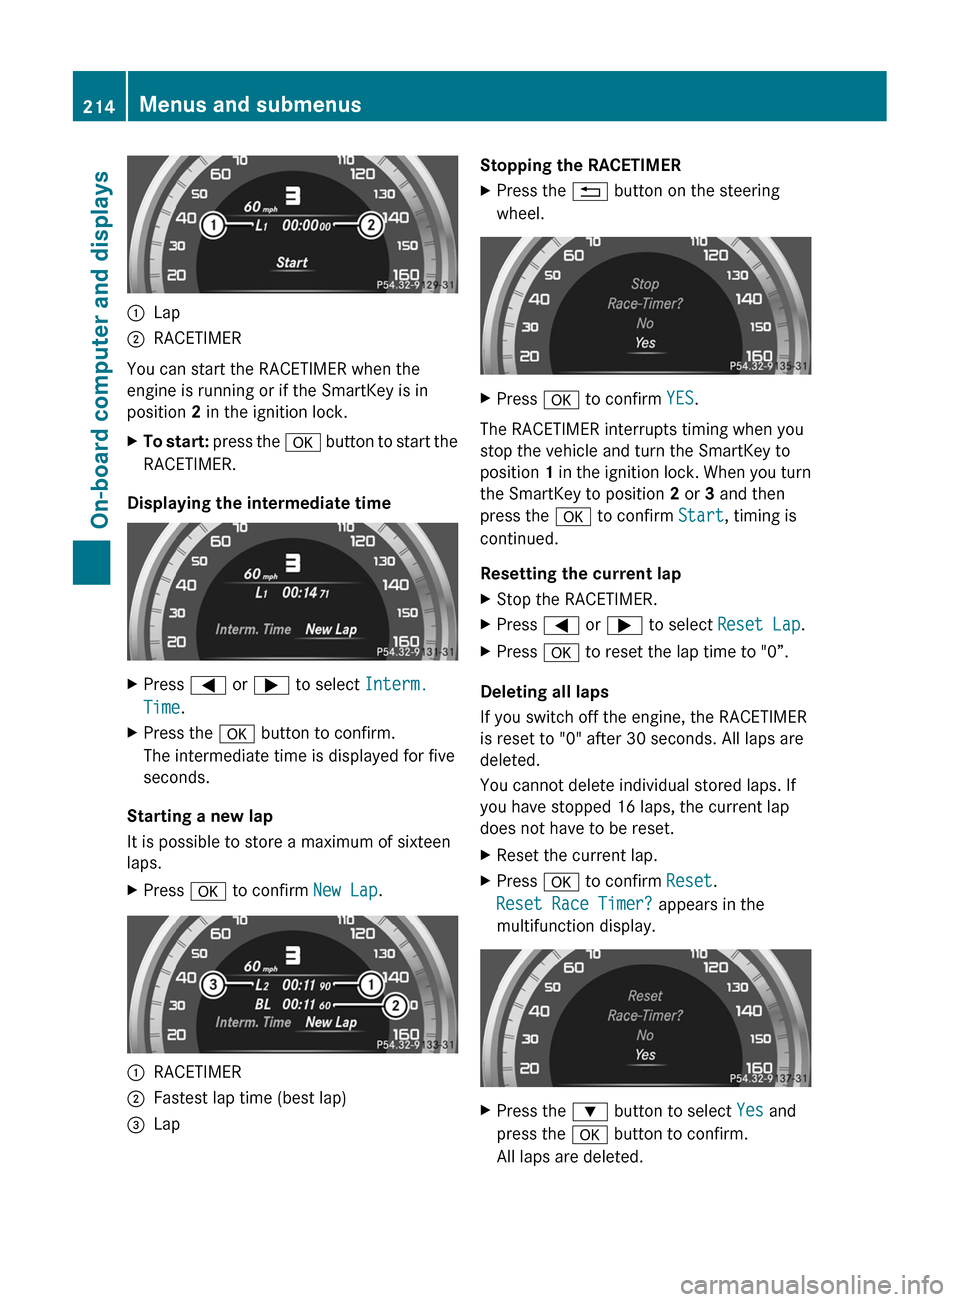
:Lap;RACETIMER
You can start the RACETIMER when the
engine is running or if the SmartKey is in
position 2 in the ignition lock.
XTo start: press the a button to start the
RACETIMER.
Displaying the intermediate time
XPress = or ; to select Interm.
Time .XPress the a button to confirm.
The intermediate time is displayed for five
seconds.
Starting a new lap
It is possible to store a maximum of sixteen
laps.
XPress a to confirm New Lap.:RACETIMER;Fastest lap time (best lap)=LapStopping the RACETIMERXPress the % button on the steering
wheel.XPress a to confirm YES.
The RACETIMER interrupts timing when you
stop the vehicle and turn the SmartKey to
position 1 in the ignition lock. When you turn
the SmartKey to position 2 or 3 and then
press the a to confirm Start, timing is
continued.
Resetting the current lap
XStop the RACETIMER.XPress = or ; to select Reset Lap .XPress a to reset the lap time to "0”.
Deleting all laps
If you switch off the engine, the RACETIMER
is reset to "0" after 30 seconds. All laps are
deleted.
You cannot delete individual stored laps. If
you have stopped 16 laps, the current lap
does not have to be reset.
XReset the current lap.XPress a to confirm Reset.
Reset Race Timer? appears in the
multifunction display.XPress the : button to select Yes and
press the a button to confirm.
All laps are deleted.214Menus and submenusOn-board computer and displays
Page 242 of 356
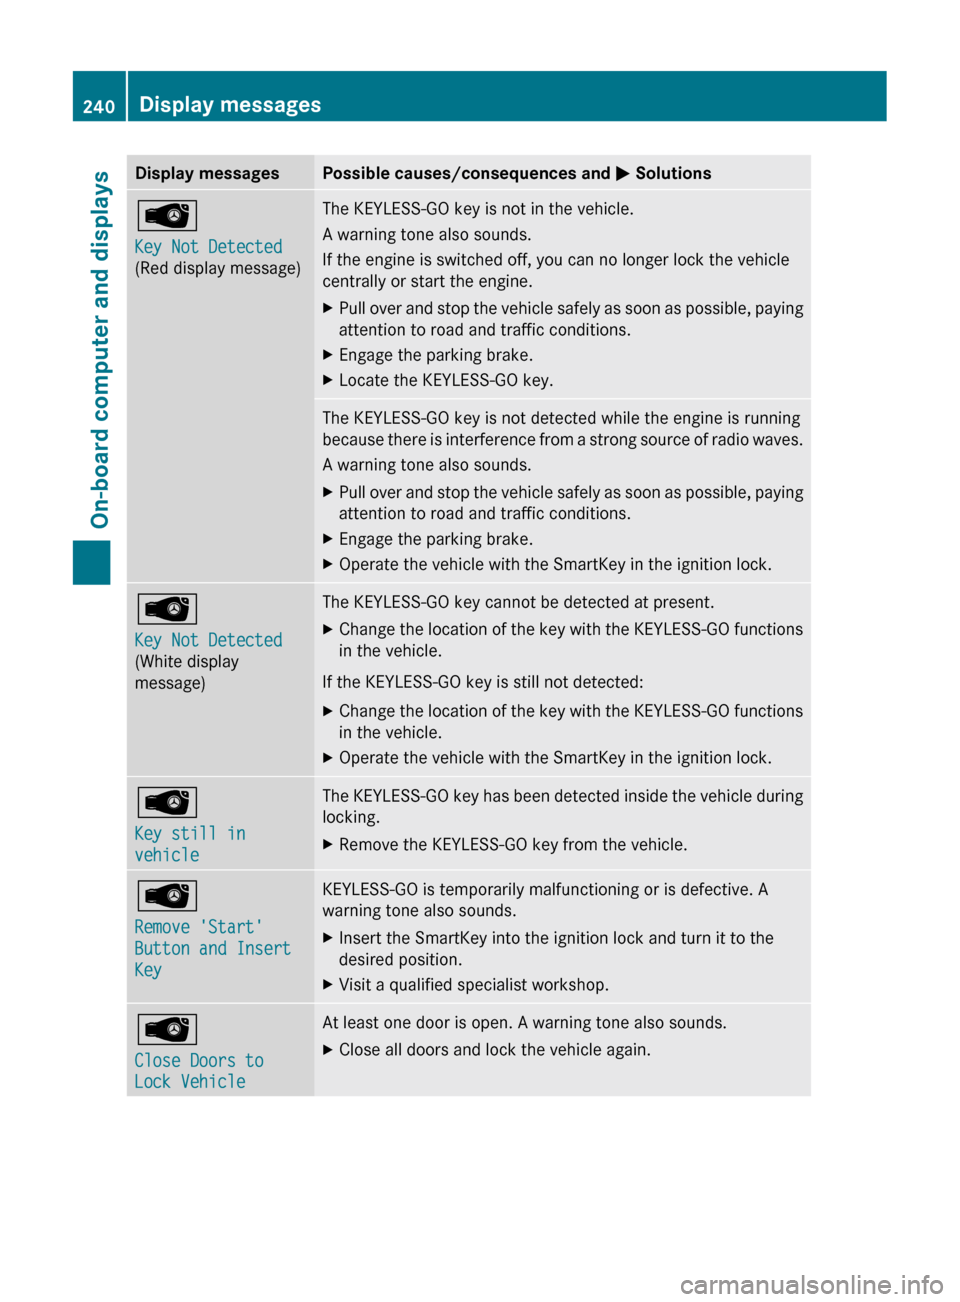
Display messagesPossible causes/consequences and M SolutionsÂ
Key Not Detected
(Red display message)The KEYLESS-GO key is not in the vehicle.
A warning tone also sounds.
If the engine is switched off, you can no longer lock the vehicle
centrally or start the engine.XPull over and stop the vehicle safely as soon as possible, paying
attention to road and traffic conditions.XEngage the parking brake.XLocate the KEYLESS-GO key.The KEYLESS-GO key is not detected while the engine is running
because there is interference from a strong source of radio waves.
A warning tone also sounds.XPull over and stop the vehicle safely as soon as possible, paying
attention to road and traffic conditions.XEngage the parking brake.XOperate the vehicle with the SmartKey in the ignition lock.Â
Key Not Detected
(White display
message)The KEYLESS-GO key cannot be detected at present.XChange the location of the key with the KEYLESS-GO functions
in the vehicle.
If the KEYLESS-GO key is still not detected:
XChange the location of the key with the KEYLESS-GO functions
in the vehicle.XOperate the vehicle with the SmartKey in the ignition lock.Â
Key still in
vehicleThe KEYLESS-GO key has been detected inside the vehicle during
locking.XRemove the KEYLESS-GO key from the vehicle.Â
Remove 'Start'
Button and Insert
KeyKEYLESS-GO is temporarily malfunctioning or is defective. A
warning tone also sounds.XInsert the SmartKey into the ignition lock and turn it to the
desired position.XVisit a qualified specialist workshop.Â
Close Doors to
Lock VehicleAt least one door is open. A warning tone also sounds.XClose all doors and lock the vehicle again.240Display messagesOn-board computer and displays
Page 276 of 356
operator, make sure people and objects are
out of the way of the device to prevent
potential harm or damage. When
programming a garage door opener, the door
moves up or down. When programming a gate
operator, the gate opens or closes.
Do not use the integrated remote control with
any garage door opener that lacks safety stop
and reverse features as required by U.S.
federal safety standards (this includes any
garage door opener model manufactured
before April 1, 1982). A garage door that
cannot detect an object - signaling the door
to stop and reverse - does not meet current
U.S. federal safety standards.
When programming a garage door opener,
park vehicle outside the garage.
Do not run the engine while programming the
integrated remote control. Inhalation of
exhaust gas is hazardous to your health. All
exhaust gas contains carbon monoxide (CO),
and inhaling it can cause unconsciousness
and possible death. All exhaust gas contains
carbon monoxide (CO), and inhaling it can
cause unconsciousness and possible death.
i USA only:
FCC Rules. Operation is subject to the
following two conditions:
1. This device may not cause harmful
interference, and
2. this device must accept any interference
received, including interference that may
cause undesired operation.
Any unauthorized modification to this
device could void the user’s authority to
operate the equipment.
i Canada only:
This device complies with RSS-210 of
Industry Canada. Operation is subject to
the following two conditions:
1. This device may not cause harmful
interference, and2. this device must accept any interference
received, including interference that may
cause undesired operation.
Any unauthorized modification to this
device could void the user’s authority to
operate the equipment.
Programming the integrated garage
door opener on the rear-view mirror
Programming
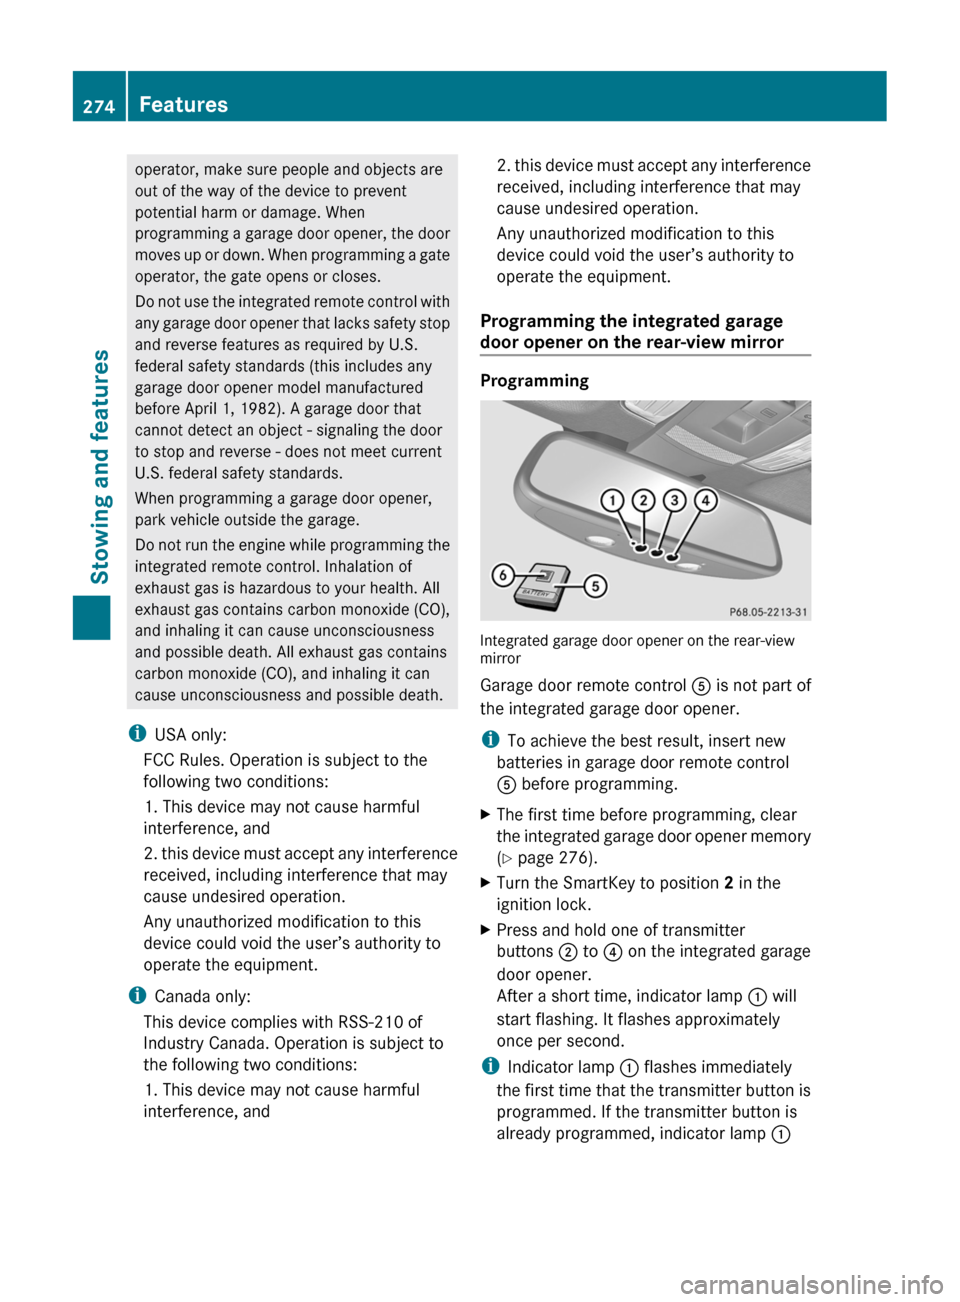
Integrated garage door opener on the rear-view
mirror
Garage door remote control A is not part of
the integrated garage door opener.
i To achieve the best result, insert new
batteries in garage door remote control
A before programming.
XThe first time before programming, clear
the integrated garage door opener memory
( Y page 276).XTurn the SmartKey to position 2 in the
ignition lock.XPress and hold one of transmitter
buttons ; to ? on the integrated garage
door opener.
After a short time, indicator lamp : will
start flashing. It flashes approximately
once per second.
i Indicator lamp : flashes immediately
the first time that the transmitter button is
programmed. If the transmitter button is
already programmed, indicator lamp :
274FeaturesStowing and features