service menu MERCEDES-BENZ CLS-Class 2015 W218 User Guide
[x] Cancel search | Manufacturer: MERCEDES-BENZ, Model Year: 2015, Model line: CLS-Class, Model: MERCEDES-BENZ CLS-Class 2015 W218Pages: 398, PDF Size: 7.43 MB
Page 308 of 398
at a later time by another means, e.g. by e-
mail or phone.
Another function of the Vehicle Health Check is the transfer of service data to the Customer
Assistance Center. If a service is due, the dis- play shows a message to this effect together
with information about any special offers at
your workshop.
This information can also be called up under
"Owners Online" at http://www.mbusa.com.
Information on the data stored in the vehicle
(Y page 28).
Information on Roadside Assistance
(Y page 24).
Downloading routes Downloading routes allows you to transfer
and save predefined routes in the navigation
system.
A route can be prepared and sent by either a customer service representative or under
"Owners Online" at http://www.mbusa.com.
Each route can include up to four way points.Once a route has been received by the navi-
gation system, you will see the The
The
name> external
external route
routehas
hasbeen
been saved
saved
to "Previous Destinations". Would
to "Previous Destinations". Would
you you like
like to
tostart
start navigation?
navigation? message
on the COMAND /Audio 20 display.
The route is saved.
X To start route guidance: selectYes
Yes.
An overview of the route is shown in the
display.
If you select No Nothe saved route can be
called up later in the navigation menu.
X Select Start
Start.
Starting route guidance.
Downloaded and saved routes can be called
up again.
You can find further information in the sepa-
rate COMAND/Audio 20 operating instruc-
tions. Speed alert You can define the upper speed limit, which
must not be exceeded by the vehicle.
If this selected speed is exceeded by the vehi-
cle, a message will be sent to the Customer
Assistance Center. The Customer Assistance
Center then forwards this information to you.
You can select the way in which you receive
this information beforehand. Possible options
include text message, e-mail or an automated call.
The data you receive contains the following
information:
R the location where the speed limit was
exceeded
R the time at which the speed limit was
exceeded
R the selected speed limit which was excee-
ded
Geo fencing Geo fencing allows you to select areas which
the vehicle should not enter or leave. You will be informed if the vehicle crosses the boun-
daries of the selected areas. You can select
the way in which you receive this information
beforehand. Possible options include text
message, e-mail or an automated call.
The area can be determined as either a circle
or a polygon with a maximum of ten corners.
You can specify up to ten areas simultane-
ously. Different settings are possible for each area.
These settings can be called up under "Own-
ers Online" at http://www.mbusa.com.
Alternatively, you can trigger an MB Info call
and inform the customer service representa-
tive that you wish to activate geo fencing.
Currently inactive areas can be activated by
text message. 306
FeaturesStowage and featu
res
Page 318 of 398
X
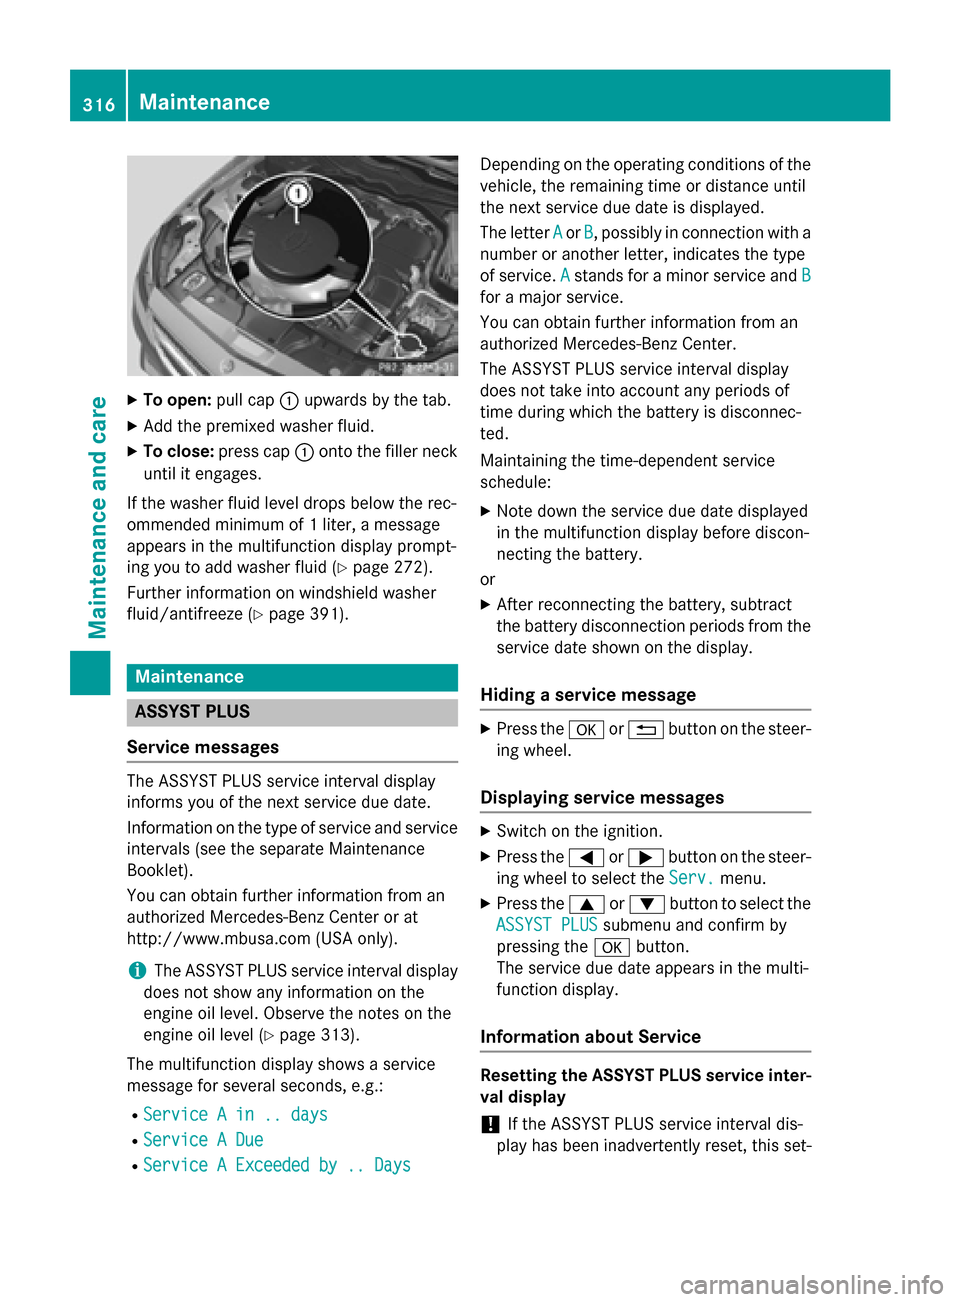
To open: pull cap:upwards by the tab.
X Add the premixed washer fluid.
X To close: press cap :onto the filler neck
until it engages.
If the washer fluid level drops below the rec-
ommended minimum of 1 liter, a message
appears in the multifunction display prompt-
ing you to add washer fluid (Y page 272).
Further information on windshield washer
fluid/antifreeze (Y page 391).Maintenance
ASSYST PLUS
Service messages The ASSYST PLUS service interval display
informs you of the next service due date.
Information on the type of service and service
intervals (see the separate Maintenance
Booklet).
You can obtain further information from an
authorized Mercedes-Benz Center or at
http://www.mbusa.com (USA only).
i The ASSYST PLUS service interval display
does not show any information on the
engine oil level. Observe the notes on the
engine oil level (Y page 313).
The multifunction display shows a service
message for several seconds, e.g.:
R Service A in .. days
Service A in .. days
R Service A Due Service A Due
R Service A Exceeded by .. Days
Service A Exceeded by .. Days Depending on the operating conditions of the
vehicle, the remaining time or distance until
the next service due date is displayed.
The letter A Aor B
B, possibly in connection with a
number or another letter, indicates the type
of service. A
Astands for a minor service and B
B
for a major service.
You can obtain further information from an
authorized Mercedes-Benz Center.
The ASSYST PLUS service interval display
does not take into account any periods of
time during which the battery is disconnec-
ted.
Maintaining the time-dependent service
schedule:
X Note down the service due date displayed
in the multifunction display before discon-
necting the battery.
or
X After reconnecting the battery, subtract
the battery disconnection periods from the
service date shown on the display.
Hiding a service message X
Press the aor% button on the steer-
ing wheel.
Displaying service messages X
Switch on the ignition.
X Press the =or; button on the steer-
ing wheel to select the Serv. Serv.menu.
X Press the 9or: button to select the
ASSYST PLUS
ASSYST PLUS submenu and confirm by
pressing the abutton.
The service due date appears in the multi-
function display.
Information about Service Resetting the ASSYST PLUS service inter-
val display
! If the ASSYST PLUS service interval dis-
play has been inadvertently reset, this set- 316
MaintenanceMaintenance and care
Page 354 of 398
Restarting the tire pressure loss warn-
ing system Restart the tire pressure loss warning system
if you have:
R changed the tire pressure
R changed the wheels or tires
R mounted new wheels or tires
X Before restarting, make sure that the tire
pressures are set properly on all four tires
for the respective operating conditions.
The recommended tire pressure can be
found on the Tire and Loading Information
placard on the B-pillar on the driver's side.
Additionally, a tire pressure table is
attached to the fuel filler flap. The tire pres-
sure loss warning system can only give reli-
able warnings if you have set the correct
tire pressure. If an incorrect tire pressure is set, these incorrect values will be moni-
tored.
X Also observe the notes in the section on tire
pressures (Y page 348).
X Make sure that the SmartKey is in position
2 in the ignition lock (Y page 149).
X Press the =or; button on the steer-
ing wheel to select the Serv.
Serv. menu.
X Press the 9or: button on the steer-
ing wheel to select the Tire Pressure Tire Pressure
menu.
X Press the abutton.
The Run Flat Indicator active
Run Flat Indicator active
Restart
Restart with
withOK
OKmessage appears in the
multifunction display.
If you wish to confirm the restart: X Press the abutton.
The Tire Pressure Now OK?
Tire Pressure Now OK? message
appears in the multifunction display.
X Press the 9or: button to select
Yes
Yes.
X Press the abutton.
The Run Flat Indicator restarted
Run Flat Indicator restarted
message appears in the multifunction dis-
play. After a teach-in period, the tire pressure
loss warning system will monitor the set
tire pressures of all four tires.
If you wish to cancel the restart:
X Press the %button.
or
X When the Tire Pressure Now OK? Tire Pressure Now OK? mes-
sage appears, press the 9or: but-
ton to select Cancel
Cancel.
X Press the abutton.
The tire pressure values stored at the last
restart will continue to be monitored. Tire pressure monitor
General notes If a tire pressure monitor is installed, the vehi-
cle's wheels have sensors that monitor the
tire pressures in all four tires. The tire pres-
sure monitor warns you if the pressure drops
in one or more of the tires. The tire pressure
monitor only functions if the corresponding
sensors are installed in all wheels.
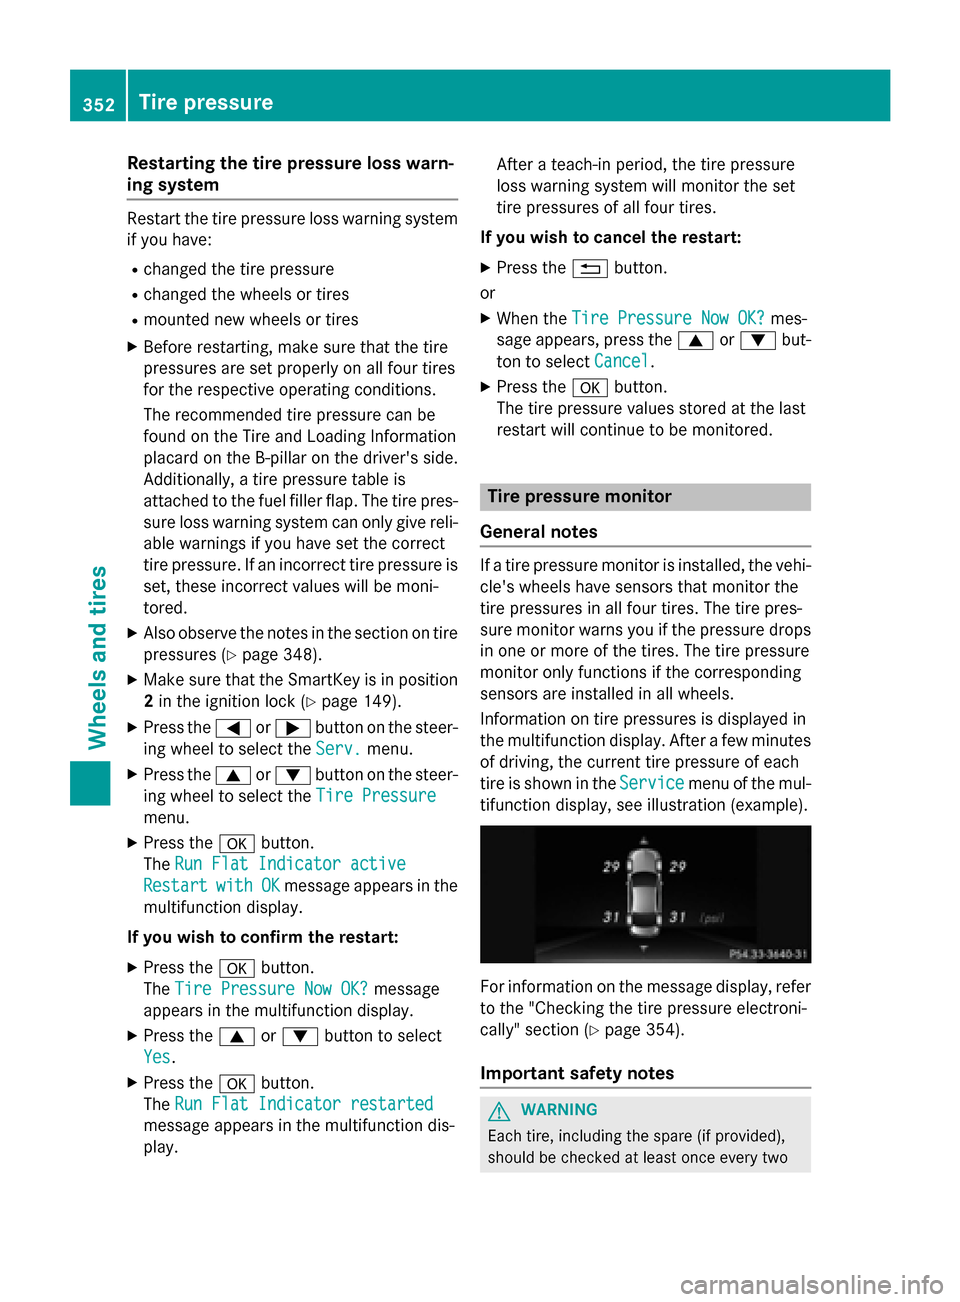
Information on tire pressures is displayed in
the multifunction display. After a few minutes of driving, the current tire pressure of each
tire is shown in the Service Servicemenu of the mul-
tifunction display, see illustration (example). For information on the message display, refer
to the "Checking the tire pressure electroni-
cally" section (Y page 354).
Important safety notes G
WARNING
Each tire, including the spare (if provided),
should be checked at least once every two 352
Tire pressureWheels and tires
Page 356 of 398
In addition to the warning lamp, a message
appears in the multifunction display. Observe
the information on display messages
(Y page 267).
It may take up to ten minutes for a malfunc-
tion of the tire pressure monitor to be indica-
ted. A malfunction will be indicated by the tire pressure warning lamp flashing for approx-
imately one minute and then remaining lit.
When the malfunction has been rectified, the
tire pressure warning lamp goes out after a
few minutes of driving.
The tire pressure values indicated by the on-
board computer may differ from those meas-
ured at a gas station with a pressure gauge.
The tire pressures shown by the on-board
computer refer to those measured at sea
level. At high altitudes, the tire pressure val-
ues indicated by a pressure gauge are higher
than those shown by the on-board computer. In this case, do not reduce the tire pressures.
The operation of the tire pressure monitor can
be affected by interference from radio trans-
mitting equipment (e.g. radio headphones,
two-way radios) that may be being operated
in or near the vehicle.
Checking the tire pressure electroni-
cally X
Make sure that the SmartKey is in position
2 in the ignition lock (Y page 149).
X Press the =or; button on the steer-
ing wheel to select the Service
Service menu.
X Press the 9or: button to select
Tire Pressure
Tire Pressure.
X Press the abutton.
The current tire pressure of each tire is
shown in the multifunction display.
If the vehicle has been parked for over
20 minutes, the Tire pressure will be Tire pressure will be
displayed after driving a few
displayed after driving a few
minutes minutes message appears.
After a teach-in process, the tire pressure
monitor automatically detects new wheels or new sensors. As long as a clear allocation of the tire pressure value to the individual
wheels is not possible, the
Tire Pressure
Tire Pressure
Monitor Active Monitor Active display message is shown
instead of the tire pressure display. The tire
pressures are already being monitored.
If an emergency spare wheel is mounted, the
system may continue to show the tire pres-
sure of the wheel that has been removed for a few minutes. If this occurs, note that the valuedisplayed for the position where the spare
wheel is mounted is not the same as the cur-
rent tire pressure of the emergency spare
wheel.
Tire pressure monitor warning mes-
sages If the tire pressure monitor detects a pressure
loss in one or more tires, a warning message
is shown in the multifunction display and the yellow tire pressure monitor warning lamp
comes on.
R If the Correct Tire Pressure Correct Tire Pressure message
appears in the multifunction display, the
tire pressure in at least one tire is too low
and must be corrected at the next oppor-
tunity.
R If the Check Check Tires
Tiresmessage appears in the
multifunction display, the tire pressure in
one or more tires has dropped significantly and the tires must be checked.
R If the Warning Tire Malfunction Warning Tire Malfunction mes-
sage appears in the multifunction display,
the tire pressure in one or more tires has
dropped suddenly and the tires must be
checked.
Observe the instructions and safety notes in
the display messages in the "Tires" section
(Y page 267).
If the wheel positions on the vehicle are rota- ted, the tire pressures may be displayed for
the wrong positions for a short time. This is
rectified after a few minutes of driving, and
the tire pressures are displayed for the cor-
rect positions. 354
Tire pressureWheels and tires
Page 357 of 398
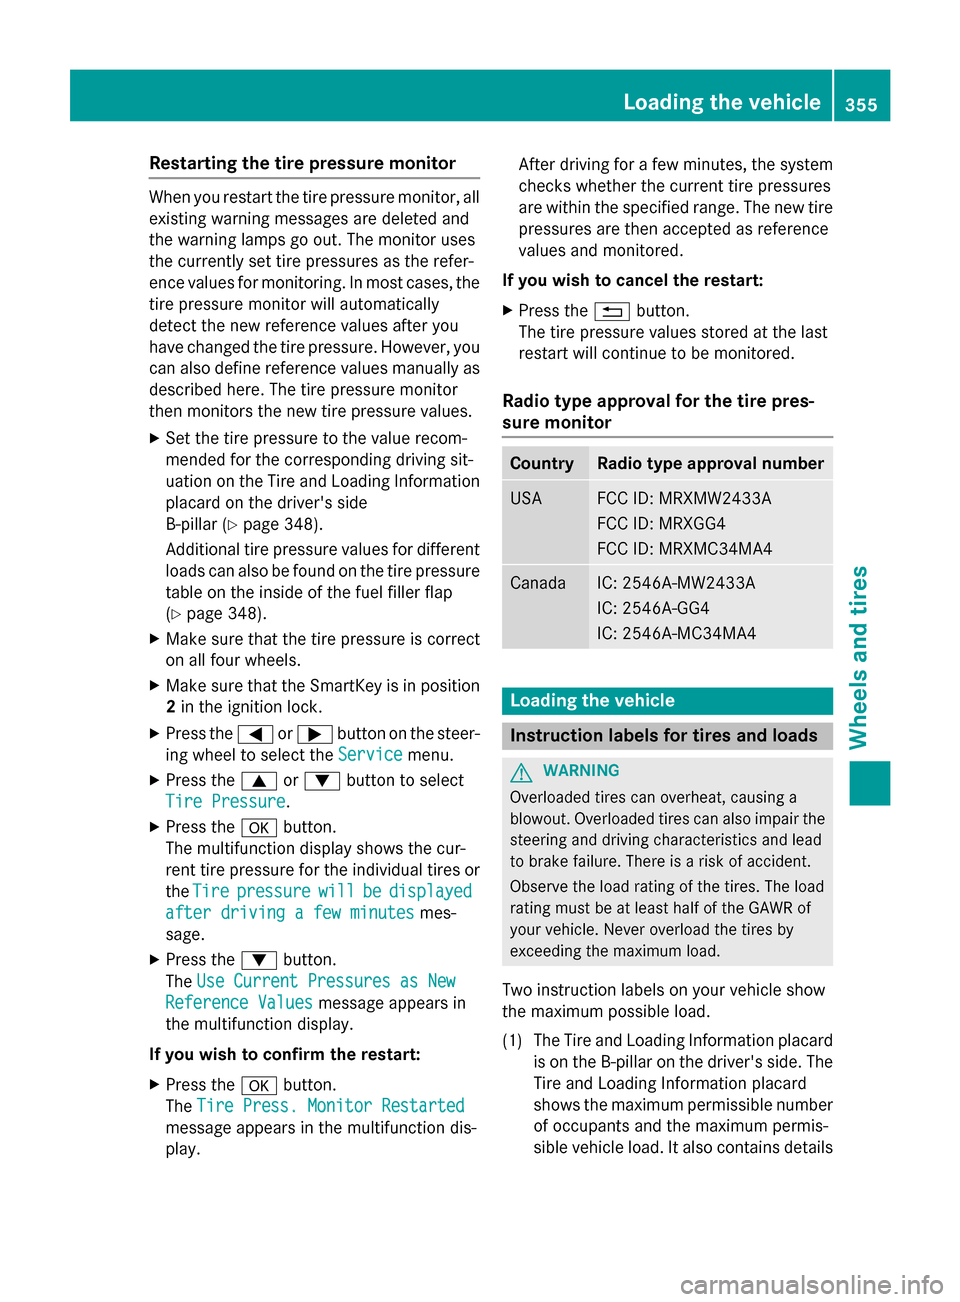
Restarting the tire pressure monitor
When you restart the tire pressure monitor, all
existing warning messages are deleted and
the warning lamps go out. The monitor uses
the currently set tire pressures as the refer-
ence values for monitoring. In most cases, the
tire pressure monitor will automatically
detect the new reference values after you
have changed the tire pressure. However, you
can also define reference values manually as described here. The tire pressure monitor
then monitors the new tire pressure values.
X Set the tire pressure to the value recom-
mended for the corresponding driving sit-
uation on the Tire and Loading Information
placard on the driver's side
B-pillar (Y page 348).
Additional tire pressure values for different loads can also be found on the tire pressure
table on the inside of the fuel filler flap
(Y page 348).
X Make sure that the tire pressure is correct
on all four wheels.
X Make sure that the SmartKey is in position
2 in the ignition lock.
X Press the =or; button on the steer-
ing wheel to select the Service
Service menu.
X Press the 9or: button to select
Tire Pressure Tire Pressure .
X Press the abutton.
The multifunction display shows the cur-
rent tire pressure for the individual tires or
the Tire
Tire pressure pressure will
willbe
bedisplayed
displayed
after driving a few minutes
after driving a few minutes mes-
sage.
X Press the :button.
The Use Current Pressures as New
Use Current Pressures as New
Reference Values
Reference Values message appears in
the multifunction display.
If you wish to confirm the restart: X Press the abutton.
The Tire Press. Monitor Restarted
Tire Press. Monitor Restarted
message appears in the multifunction dis-
play. After driving for a few minutes, the system
checks whether the current tire pressures
are within the specified range. The new tire
pressures are then accepted as reference
values and monitored.
If you wish to cancel the restart:
X Press the %button.
The tire pressure values stored at the last
restart will continue to be monitored.
Radio type approval for the tire pres-
sure monitor Country Radio type approval number
USA FCC ID: MRXMW2433A
FCC ID: MRXGG4
FCC ID: MRXMC34MA4
Canada IC: 2546A-MW2433A
IC: 2546A-GG4
IC: 2546A-MC34MA4
Loading the vehicle
Instruction labels for tires and loads
G
WARNING
Overloaded tires can overheat, causing a
blowout. Overloaded tires can also impair the steering and driving characteristics and lead
to brake failure. There is a risk of accident.
Observe the load rating of the tires. The load
rating must be at least half of the GAWR of
your vehicle. Never overload the tires by
exceeding the maximum load.
Two instruction labels on your vehicle show
the maximum possible load.
(1) The Tire and Loading Information placard is on the B-pillar on the driver's side. The
Tire and Loading Information placard
shows the maximum permissible number
of occupants and the maximum permis-
sible vehicle load. It also contains details Loading the vehicle
355Wheels and tires Z