navigation MERCEDES-BENZ CLS-Class 2016 W218 Comand Manual
[x] Cancel search | Manufacturer: MERCEDES-BENZ, Model Year: 2016, Model line: CLS-Class, Model: MERCEDES-BENZ CLS-Class 2016 W218Pages: 246, PDF Size: 6.72 MB
Page 26 of 246
FunctionPage
GAccepts a call119
Makes a call119
Redial119
Accepts a new call when a
call is being made (call wait-
ing)
122
HRejects a call119
Ends an active call123
ISwitches the mute function
on/off
31
Switches off navigation
announcements
31
FunctionPage
JSwitches to navigation
mode
65
Calls up the navigation sys-
tem menu
107
KCalls up the telephone
menu
113
LCalls up vehicle settings54
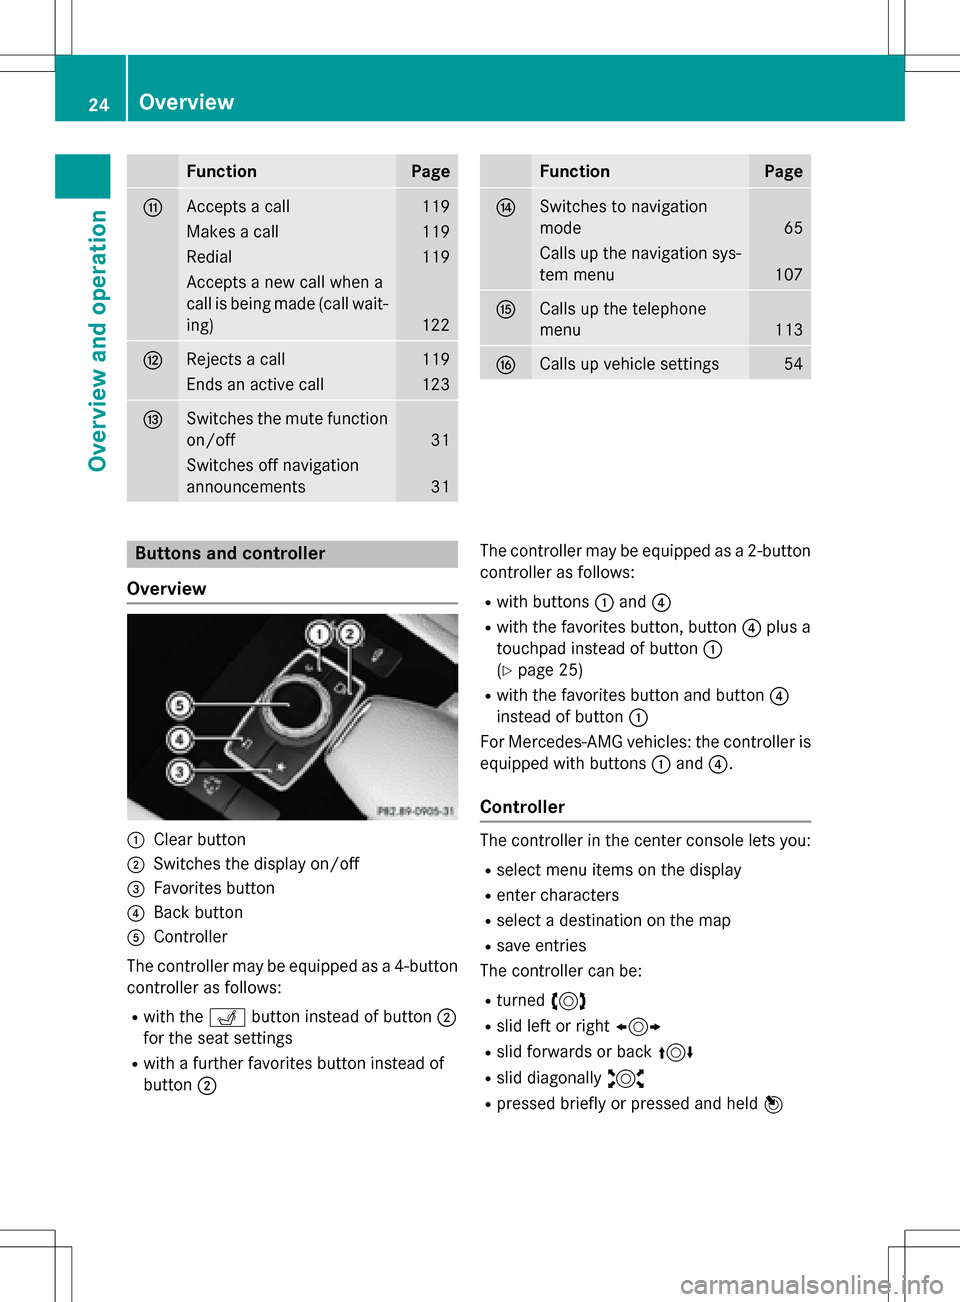
Buttons and controller
Overview
:Clear button
;Switches the display on/off
=Favorites button
?Back button
AController
The controller may be equipped as a 4-button
controller as follows:
Rwith the Tbutton instead of button ;
for the seat settings
Rwith a further favorites button instead of
button ; The controller may be equipped as a 2-button
controller as follows:
Rwith buttons
:and ?
Rwith the favorites button, button ?plus a
touchpad instead of button :
(
Ypage 25)
Rwith the favorites button and button ?
instead of button :
For Mercedes-AMG vehicles: the controller is
equipped with buttons :and ?.
Controller
The controller in the center console lets you:
Rselect menu items on the display
Renter characters
Rselect a destination on the map
Rsave entries
The controller can be:
Rturned 3
Rslid left or right 1
Rslid forwards or back 4
Rslid diagonally2
Rpressed briefly or pressed and held 7
24Overview
Overview and operation
Page 27 of 246
Back button
You can use the%button to exit a menu or
to call up the basic display of the current
operating mode.
XTo exit the menu: briefly press the%
button.
COMAND changes to the next higher menu
level in the current operating mode.
XTo call up the basic display: press the
% button for longer than two seconds.
COMAND changes to the basic display of
the current operating mode.
Clear button
The delete button is on the COMAND control
panel and on the controller.
XTo delete individual characters: briefly
press the $button on the control panel.
or
XBriefly press the jclear button on the
controller.
XTo delete an entire entry: press and hold
the $ button on the control panel.
or
XPress and hold the jclear button on the
controller.
Favorites button
You can assign predefined functions using
the g favorites button and call them up by
pressing the button (
Ypage 49).
Display off button
You can switch the display off/on using the
_ button (
Ypage 41).
Seat button
If the controller is equipped with the T
button, you can call up the menu for the seat
settings (
Ypage 56).
Touchpad
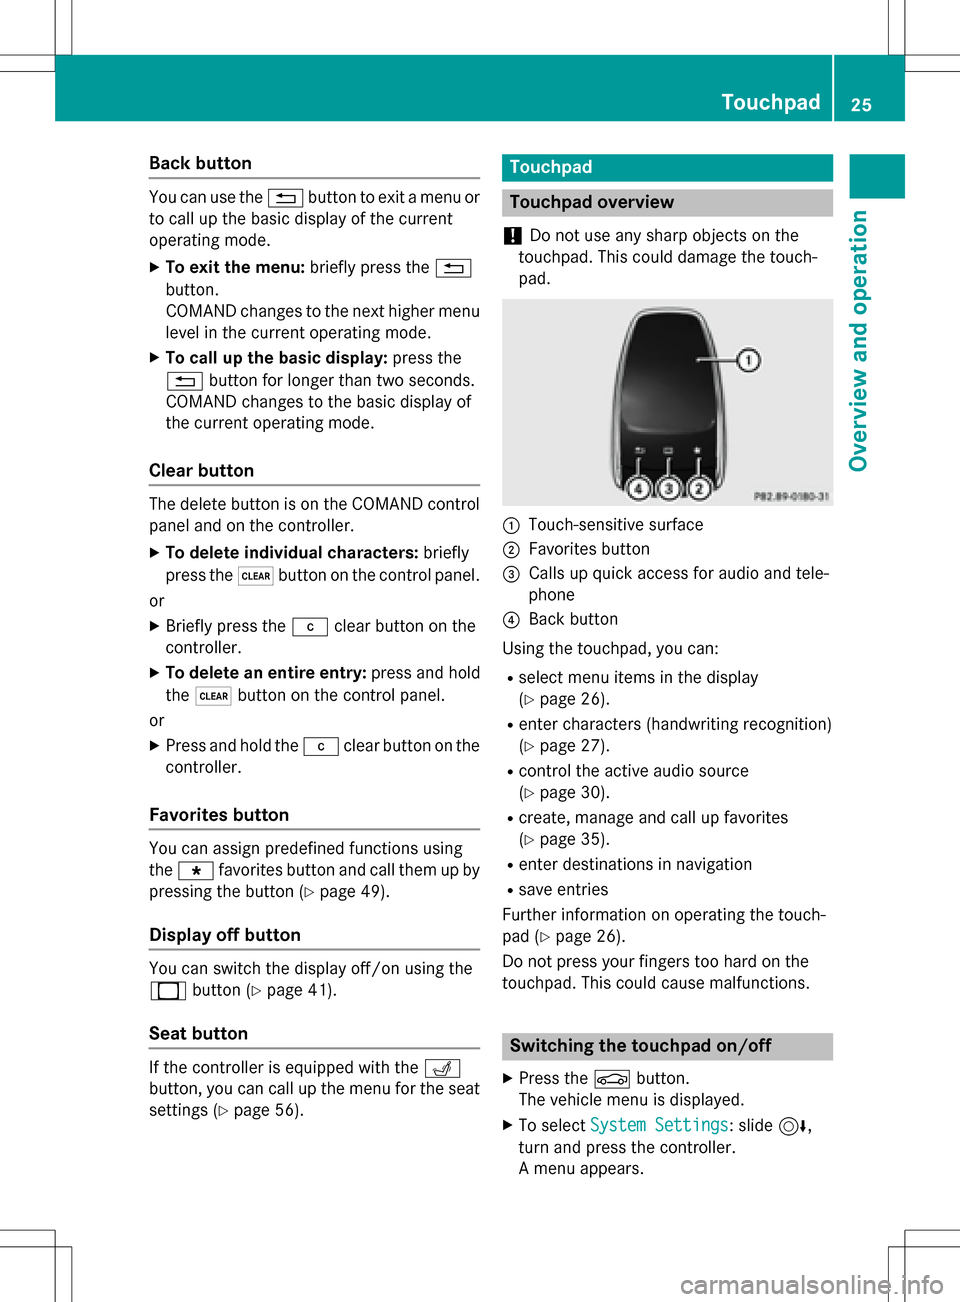
Touchpad overview
!
Do not use any sharp objects on the
touchpad. This could damage the touch-
pad.
:Touch-sensitive surface
;Favorites button
=Calls up quick access for audio and tele-
phone
?Back button
Using the touchpad, you can:
Rselect menu items in the display
(
Ypage 26).
Renter characters (handwriting recognition)
(
Ypage 27).
Rcontrol the active audio source
(
Ypage 30).
Rcreate, manage and call up favorites
(
Ypage 35).
Renter destinations in navigation
Rsave entries
Further information on operating the touch-
pad (
Ypage 26).
Do not press your fingers too hard on the
touchpad. This could cause malfunctions.
Switching the touchpad on/off
XPress the Øbutton.
The vehicle menu is displayed.
XTo select System Settings: slide6,
turn and press the controller.
A menu appears.
Touchpad25
Overview and operation
Page 33 of 246

XCallupquic k access during a call
(
Ypage 26).
XTo select cha racters: glide your finger to
the left or right and press.
Every character selected will betransmit-
ted immediately.
Basic functions
Switching COMAND on/off
XPress the qcontrol knob.
When you switch on COMAND, a warning
message willappear. COMAND calls up the
previously selected menu.
If you switch off COMAND, playback of the
current media source will also be switched
off.
Adjusting the volume
Adjusting the volume for media sources
XTurn the qcontrol knob.
or
XPress the WorX button on the mul-
tifunction steering wheel.
The volume of the med iasource currently
selected changes.
Adjusting the volume for traffic
announcements and navigation
announcements
During traff icor navigation announcements:
XTurn the qcontrol knob.
or
XPress the WorX button on the mul-
tifunction steering wheel.
iYou can set the volume for navigation
announcements to bedifferent from the
volume of the respective med iasource.
Adjusting the volume for phone calls
You can adjust the volume for hands-free
mode during a telephone call.
XTurn the qcontrol knob.
or
XPress the WorX button on the mul-
tifunction steering wheel.
iSe tting the volume for the Voice Control
System voice output, see the separate
operating instructions.
Switching the sound on or off
Media source sound
XPress the 8button on the COMAND
controller or the multifunction steering
wheel.
The sound isswitched off. Ifthe audio out-
put isswitched off, the status line willshow
the 8 symbol. Ifyou switch the med ia
source or change the volume, the sound is
automatical lyswitched on.
iEven ifthe sound isswitched off, you will
still hear navigation system announce-
ments.
Switching navigation announcements
off and on again
XTo switch navigation announcemen ts
off: press the 8button during an
announcement.
The Spoken
drivingrecommendations
have been deactivated.message
appears.
XTo switch navigation announcemen ts
back on: switch COMAND off and then on
again (
Ypage 31 ).
or
XSt art a new route calculation (Ypage 71 ).
Basic functions31
Overview and operation
Page 34 of 246
or
XSelect+: while route guidance is active,
show the menu and press the controller
(
Ypage 90).
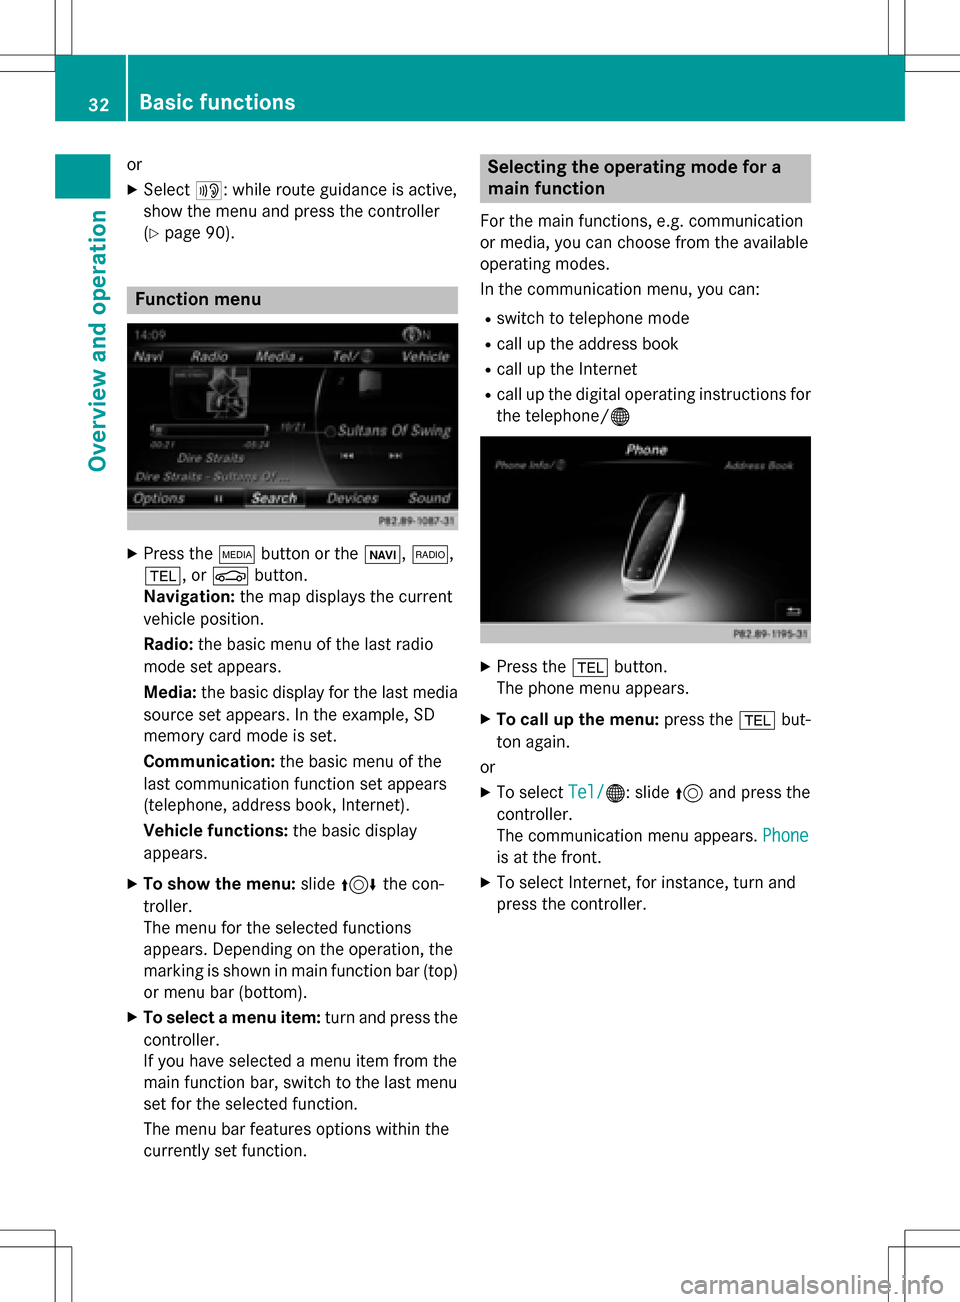
Function menu
XPress the Õbutton or the ß,$,
%, or Øbutton.
Navigation: the map displays the current
vehicle position.
Radio: the basic menu of the last radio
mode set appears.
Media: the basic display for the last media
source set appears. In the example, SD
memory card mode is set.
Communication: the basic menu of the
last communication function set appears
(telephone, address book, Internet).
Vehicle functions: the basic display
appears.
XTo show the menu: slide4 the con-
troller.
The menu for the selected functions
appears. Depending on the operation, the
marking is shown in main function bar (top) or menu bar (bottom).
XTo select a menu item: turn and press the
controller.
If you have selected a menu item from the
main function bar, switch to the last menu
set for the selected function.
The menu bar features options within the
currently set function.
Selecting the operating mode for a
main function
For the main functions, e.g. communication
or media, you can choose from the available
operating modes.
In the communication menu, you can:
Rswitch to telephone mode
Rcall up the address book
Rcall up the Internet
Rcall up the digital operating instructions for
the telephone/®
XPress the %button.
The phone menu appears.
XTo call up the menu: press the%but-
ton again.
or
XTo select Tel/®: slide5and press the
controller.
The communication menu appears. Phone
is at the front.
XTo select Internet, for instance, turn and
press the controller.
32Basic functions
Overview and operation
Page 36 of 246
SymbolFunction
%Cancels input
SInserts a paragraph
Entering characters using the number
keypad
If an input line for text or numbers is selected,
the number keypad is used for the character
entry.
XFor example, to enter the letterc: press the
l number key briefly three times in suc-
cession.
An additional display area is shown with all
the available characters. Press the key
repeatedly to go through the characters
until c
is highlighted.
XWait until the character display goes out.
The letter c
is entered in the input line.
Character entry (navigation)
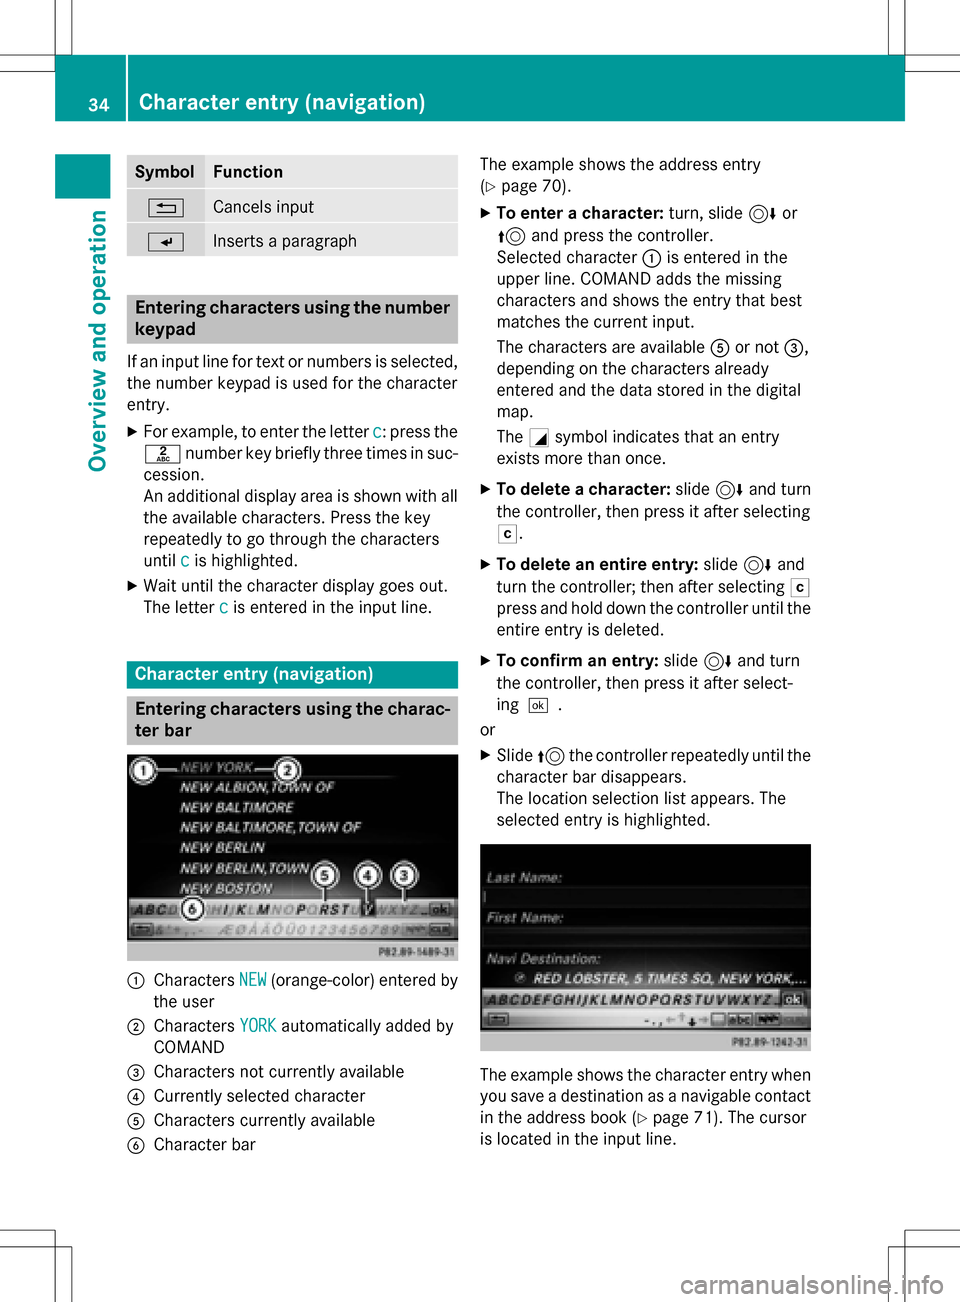
Entering characters using the charac-
ter bar
:Characters NEW(orange-color) entered by
the user
;Characters YORKautomatically added by
COMAND
=Characters not currently available
?Currently selected character
ACharacters currently available
BCharacter bar The example shows the address entry
(
Ypage 70).
XTo enter a character:
turn, slide6or
5 and press the controller.
Selected character :is entered in the
upper line. COMAND adds the missing
characters and shows the entry that best
matches the current input.
The characters are available Aor not =,
depending on the characters already
entered and the data stored in the digital
map.
The Gsymbol indicates that an entry
exists more than once.
XTo delete a character: slide6and turn
the controller, then press it after selecting
F.
XTo delete an entire entry: slide6and
turn the controller; then after selecting F
press and hold down the controller until the
entire entry is deleted.
XTo confirm an entry: slide6and turn
the controller, then press it after select-
ing¬.
or
XSlide 5the controller repeatedly until the
character bar disappears.
The location selection list appears. The
selected entry is highlighted.
The example shows the character entry when
you save a destination as a navigable contact
in the address book (
Ypage 71). The cursor
is located in the input line.
34Character entry (navigation)
Overview and operation
Page 38 of 246
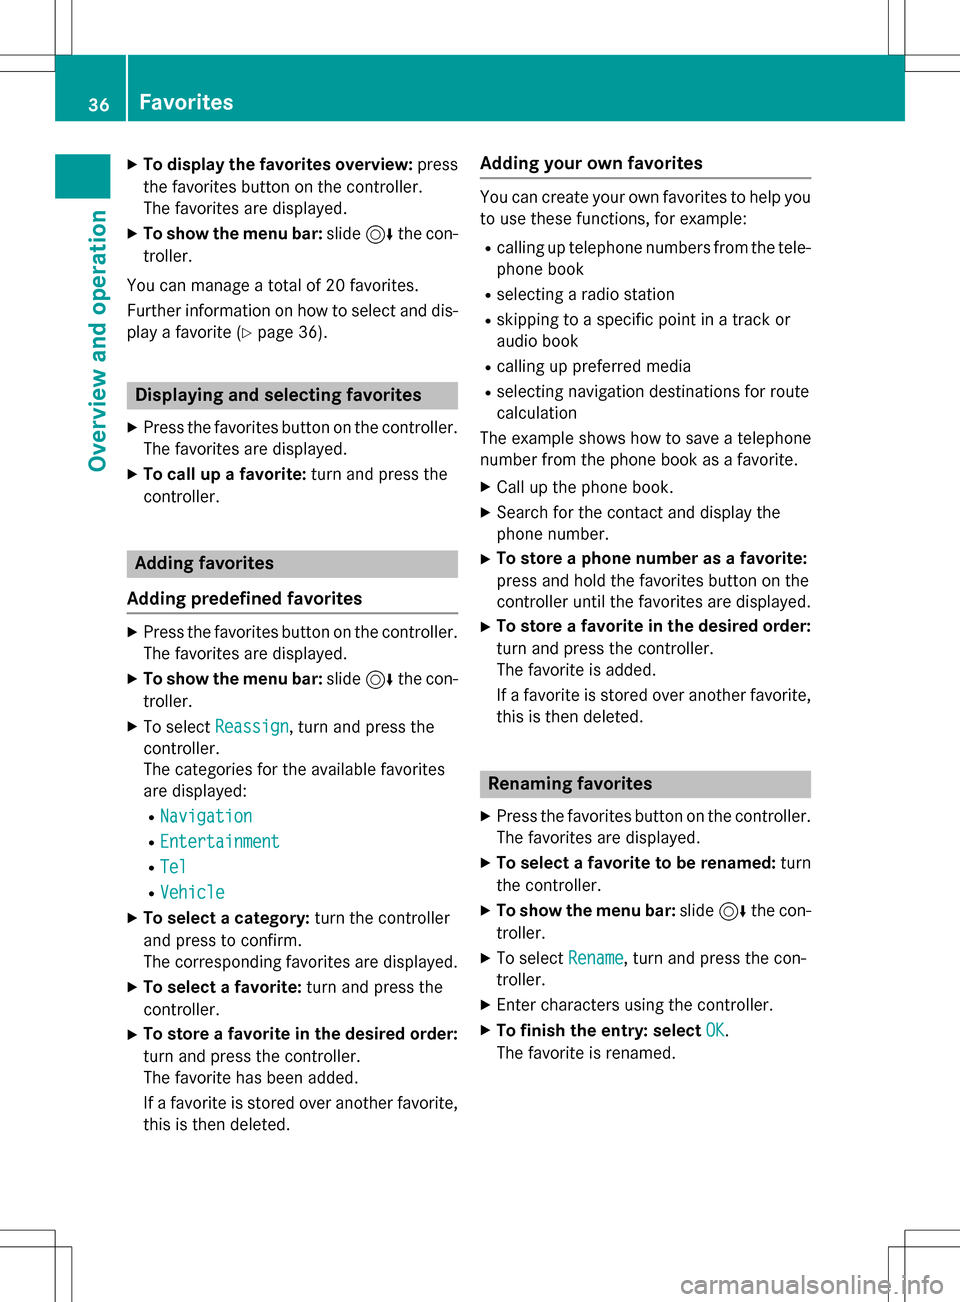
XTo display the favorites overview:press
the favorites button on the controller.
The favorites are displayed.
XTo show the menu bar: slide6the con-
troller.
You can manage a total of 20 favorites.
Further information on how to select and dis-
play a favorite (
Ypage 36).
Displaying and selecting favorites
XPress the favorites button on the controller. The favorites are displayed.
XTo call up a favorite: turn and press the
controller.
Adding favorites
Adding predefined favorites
XPress the favorites button on the controller. The favorites are displayed.
XTo show the menu bar: slide6the con-
troller.
XTo select Reassign, turn and press the
controller.
The categories for the available favorites
are displayed:
RNavigation
REntertainment
RTel
RVehicle
XTo select a category: turn the controller
and press to confirm.
The corresponding favorites are displayed.
XTo select a favorite: turn and press the
controller.
XTo store a favorite in the desired order:
turn and press the controller.
The favorite has been added.
If a favorite is stored over another favorite,
this is then deleted.
Adding your own favorites
You can create your own favorites to help you
to use these functions, for example:
Rcalling up telephone numbers from the tele- phone book
Rselecting a radio station
Rskipping to a specific point in a track or
audio book
Rcalling up preferred media
Rselecting navigation destinations for route
calculation
The example shows how to save a telephone
number from the phone book as a favorite.
XCall up the phone book.
XSearch for the contact and display the
phone number.
XTo store a phone number as a favorite:
press and hold the favorites button on the
controller until the favorites are displayed.
XTo store a favorite in the desired order:
turn and press the controller.
The favorite is added.
If a favorite is stored over another favorite,
this is then deleted.
Renaming favorites
XPress the favorites button on the controller.
The favorites are displayed.
XTo select a favorite to be renamed: turn
the controller.
XTo show the menu bar: slide6the con-
troller.
XTo select Rename, turn and press the con-
troller.
XEnter characters using the controller.
XTo finish the entry: select OK.
The favorite is renamed.
36Favorites
Overview and operation
Page 43 of 246

XTo selectSystem Settings: slide6,
turn and press the controller.
A menu appears.
XTo select Display: turn and press the con-
troller.
A menu appears.
XTo select Day Mode,Night Modeor Auto:
turn and press the controller.
The #dot indicates the current setting.
DesignExplanation
Day ModeThe display is set perma-
nently to day design.
Night ModeThe display is set perma-
nently to night design.
AutoIf the Autosetting is
selected, COMAND eval-
uates the readings from
the automatic vehicle
light sensor and auto-
matically switches
between the display
designs.
Switching the display on/off
XPress the Øbutton on the COMAND
control panel.
XTo select DisplayOff: slide6, turn and
press the controller to confirm.
The display goes out.
or
XPress the _button on the controller.
The display goes out.
XTo switch the display on again: press the
controller.
Time settings
General information
COMAND can automatically set the time and
date. The following navigation system functions
require the time, time zone and summer/
standard time to be set correctly in order to
work properly:
Rroute guidance on routes with time-
dependent traffic guidance
Rcalculation of expected time of arrival
Switching automatic time on and off
The
Automatic Time Settingsfunction is
used to activate or deactivate the automatic
setting of the time and date. This function is
activated when the vehicle leaves the factory.
XPress the Øbutton on the COMAND
control panel.
or
XPress Vehiclein the main function bar.
The vehicle menu is displayed.
XTo select Time: slide6, turn and press
the controller to confirm.
A menu appears.
XTo select Automatic Time Settings:
press the controller.
XTo switch the function on Oor off ª:
press the controller.
Setting the time zone
To set the time zone, the Automatic Time
Settingsfunction must be activated.
XPress theØbutton on the COMAND
control panel.
or
XPress Vehiclein the main function bar.
The vehicle menu is displayed.
XTo select Time: slide6, turn and press
the controller to confirm.
A menu appears.
XTo select Time Zone:: turn and press the
controller.
A list of countries appears. The #dot indi-
cates the current setting.
Time settings41
System settings
Z
Page 50 of 246
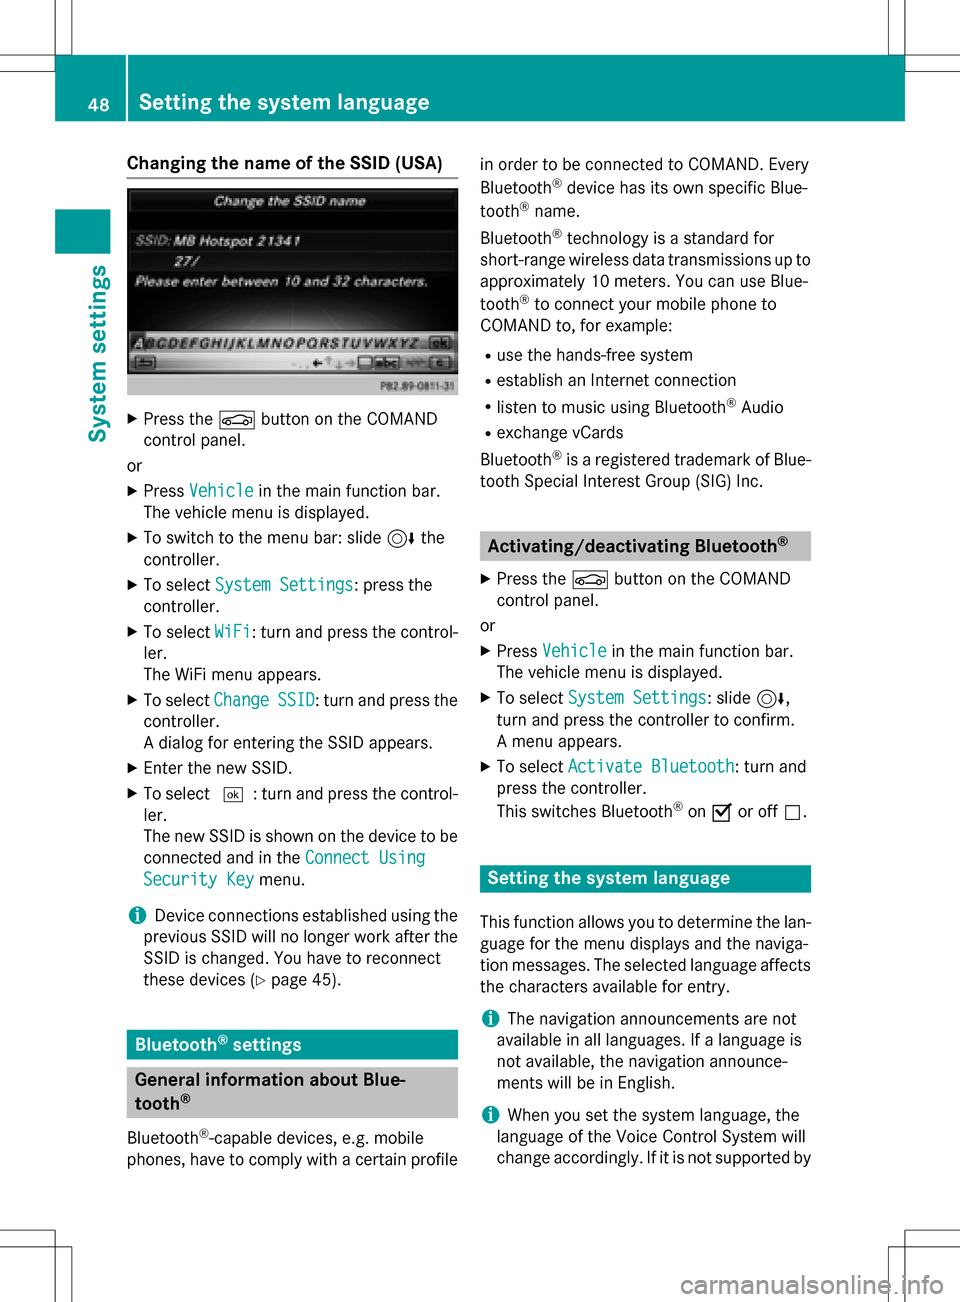
Changing the name of the SSID (USA)
XPress theØbutton on the COMAND
control panel.
or
XPress Vehiclein the main function bar.
The vehicle menu is displayed.
XTo switch to the menu bar: slide 6the
controller.
XTo select System Settings: press the
controller.
XTo select WiFi: turn and press the control-
ler.
The WiFi menu appears.
XTo select ChangeSSID: turn and press the
controller.
A dialog for entering the SSID appears.
XEnter the new SSID.
XTo select ¬: turn and press the control-
ler.
The new SSID is shown on the device to be
connected and in the Connect Using
Security Keymenu.
iDevice connections established using the
previous SSID will no longer work after the
SSID is changed. You have to reconnect
these devices (
Ypage 45).
Bluetooth®settings
General information about Blue-
tooth®
Bluetooth®-capable devices, e.g. mobile
phones, have to comply with a certain profile in order to be connected to COMAND. Every
Bluetooth
®device has its own specific Blue-
tooth®name.
Bluetooth
®technology is a standard for
short-range wireless data transmissions up to
approximately 10 meters. You can use Blue-
tooth
®to connect your mobile phone to
COMAND to, for example:
Ruse the hands-free system
Restablish an Internet connection
Rlisten to music using Bluetooth®Audio
Rexchange vCards
Bluetooth
®is a registered trademark of Blue-
tooth Special Interest Group (SIG) Inc.
Activating/deactivating Bluetooth®
X
Press the Øbutton on the COMAND
control panel.
or
XPress Vehiclein the main function bar.
The vehicle menu is displayed.
XTo select System Settings: slide6,
turn and press the controller to confirm.
A menu appears.
XTo select Activate Bluetooth: turn and
press the controller.
This switches Bluetooth
®on O or off ª.
Setting the system language
This function allows you to determine the lan-
guage for the menu displays and the naviga-
tion messages. The selected language affects
the characters available for entry.
iThe navigation announcements are not
available in all languages. If a language is
not available, the navigation announce-
ments will be in English.
iWhen you set the system language, the
language of the Voice Control System will
change accordingly. If it is not supported by
48Setting the system language
System settings
Page 53 of 246
iIf you import data, such as address data,
the existing data on COMAND is overwrit-
ten. You will see a message to this effect.
COMAND is restarted after the data import.
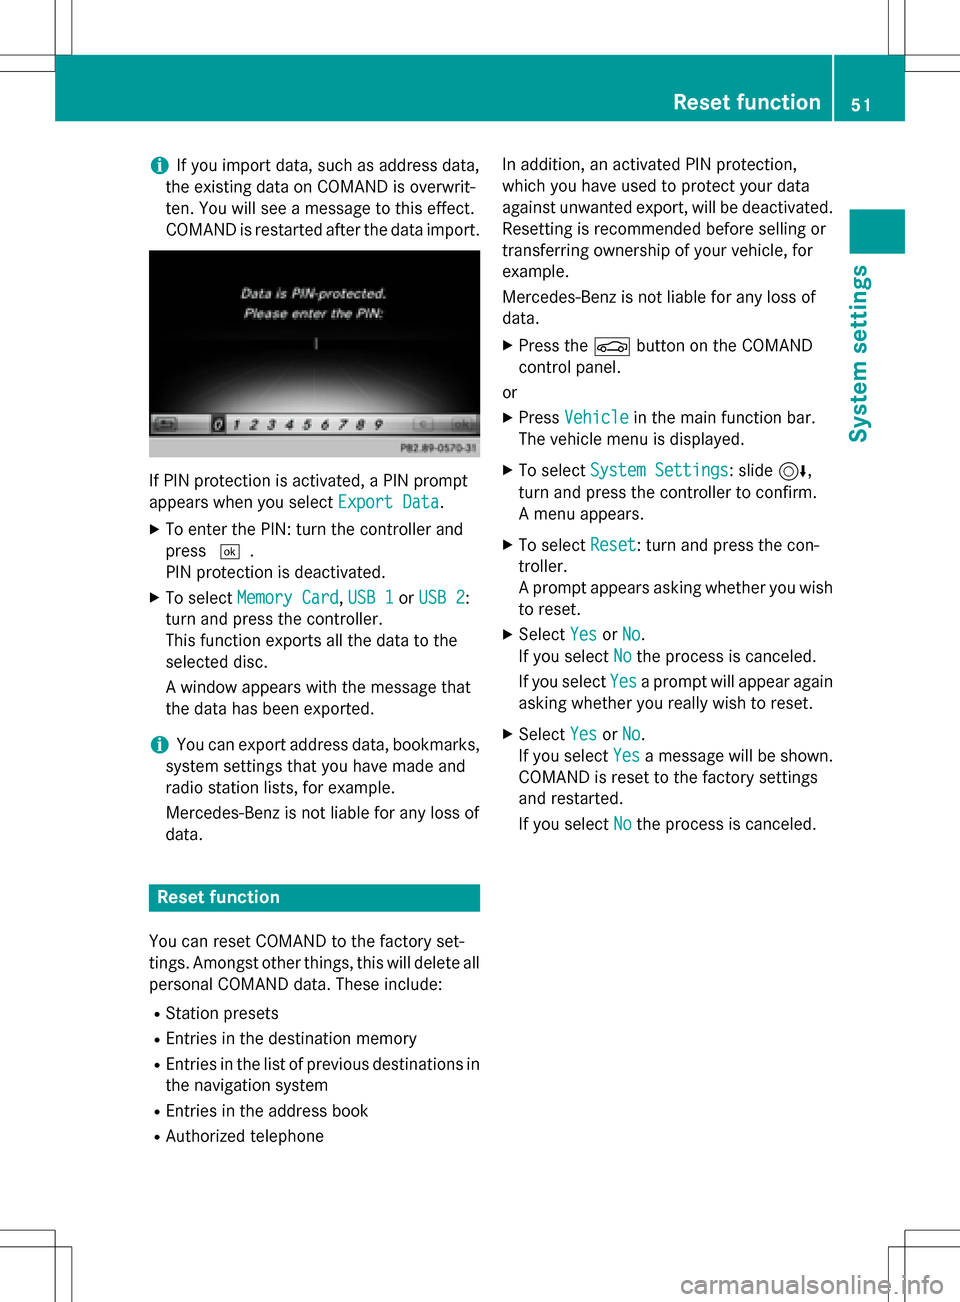
If PIN protection is activated, a PIN prompt
appears when you select Export Data
.
XTo enter the PIN: turn the controller and
press¬.
PIN protection is deactivated.
XTo select Memory Card,USB 1or USB 2:
turn and press the controller.
This function exports all the data to the
selected disc.
A window appears with the message that
the data has been exported.
iYou can export address data, bookmarks,
system settings that you have made and
radio station lists, for example.
Mercedes-Benz is not liable for any loss of
data.
Reset function
You can reset COMAND to the factory set-
tings. Amongst other things, this will delete all
personal COMAND data. These include:
RStation presets
REntries in the destination memory
REntries in the list of previous destinations in
the navigation system
REntries in the address book
RAuthorized telephone In addition, an activated PIN protection,
which you have used to protect your data
against unwanted export, will be deactivated.
Resetting is recommended before selling or
transferring ownership of your vehicle, for
example.
Mercedes-Benz is not liable for any loss of
data.
XPress the
Øbutton on the COMAND
control panel.
or
XPress Vehiclein the main function bar.
The vehicle menu is displayed.
XTo select System Settings: slide6,
turn and press the controller to confirm.
A menu appears.
XTo select Reset: turn and press the con-
troller.
A prompt appears asking whether you wish
to reset.
XSelect YesorNo.
If you select No
the process is canceled.
If you select Yes
a prompt will appear again
asking whether you really wish to reset.
XSelect YesorNo.
If you select Yes
a message will be shown.
COMAND is reset to the factory settings
and restarted.
If you select No
the process is canceled.
Reset function51
System settings
Z
Page 65 of 246
Your COMAND equipment..................64
Introduction ........................................ .64
Basic settings ...................................... 66
Destination entry ................................ 69
Persona lPOIs an droutes .................. .82
Route guidance .................................. .87
Real-tim etraffic reports .....................94
Storing destinations ...........................98
Ma pfunctions .................................. .100
Navigation functions ........................107
Problem swit hth enavigation sys -
te m .................................................... .109
63
Navigation