MERCEDES-BENZ CLS-Class 2017 W218 Comand Manual
Manufacturer: MERCEDES-BENZ, Model Year: 2017, Model line: CLS-Class, Model: MERCEDES-BENZ CLS-Class 2017 W218Pages: 202, PDF Size: 6.35 MB
Page 71 of 202
Personal POI from destination address
XInsert the SD memory card (Ypage 149).
XTo switch to navigation mode:press the
ß button.
XCall up the address entry menu and enter the
destination address (Ypage 57).
XTo select Save: slide6the controller.
XTurn and press the controller.
XTo select To Memory Card: turn and press
the controller.
XEnter the name.
The current address is saved in the Not
Classifiedcategory on the SD card.
iYou can select a destination from the FromPreviousDestinationsorFromContactsmemories and save it on the SD card.
RFrom Previous Destinations(Ypage 61)
RFrom Contacts(Ypage 62)
Personal route from a tour including
intermediate destinations
XInsert the SD memory card (Ypage 149).
XTo switch to navigation mode: press the
ß button.
XEnter a destination, e.g. by address
(Ypage 57).
XStart route calculation (Ypage 59).
XCreate intermediate destinations (Ypage 65).
XTo select Save As Personal Routein the
intermediate destinations menu: turn and
press the controller.
The route is saved in the Personal Routes
folder on the SD card.
Importing personal POIs and routes
via Mercedes-Benz Apps
You can use Mercedes-Benz Apps (e.g. Down-
load POI) to import destinations to the naviga-
tion system. These have their own symbol and
are filed in theMercedes-Benz Apps
category.
You can save the imported destinations and
routes as personal POIs and routes (
Ypage 68).
When importing routes, please note:
RThe Mercedes-Benz Apps may generate a
route based on a different map from the one used by the multimedia system. Points on the
route may therefore be situated off the digital
roads.
RThe Mercedes-Benz Apps minimize the num-
ber of route points offered.
For this reason an imported route com-
menced in the multimedia system may devi-
ate from the original route from the
Mercedes-Benz Apps.
Selecting and editing personal POIs
and routes
Selecting
XInsert the SD memory card (Ypage 149).
XTo switch to navigation mode: press the
ß button.
XTo show the menu: slide6the controller.
XTo select Destination: turn and press the
controller.
XSelect From Memory Card.
XTo select a category or Personal Routes:
turn and press the controller.
The available personal POIs or route entries
are displayed.
XSelect personal POI or personal route.
The address of the personal POI appears or
the personal route is displayed in the map.
If a large number of entries are stored, a register
for quick selection appears. Personal POIs and
routes can be stored with different character
sets (e.g. Latin, Cyrillic, Arabic).
XTo select a register: slide9 the control-
ler.
XSelect a character by turning the controller.
Editing
Personal POIs and routes69
Navigation
Z
Page 72 of 202
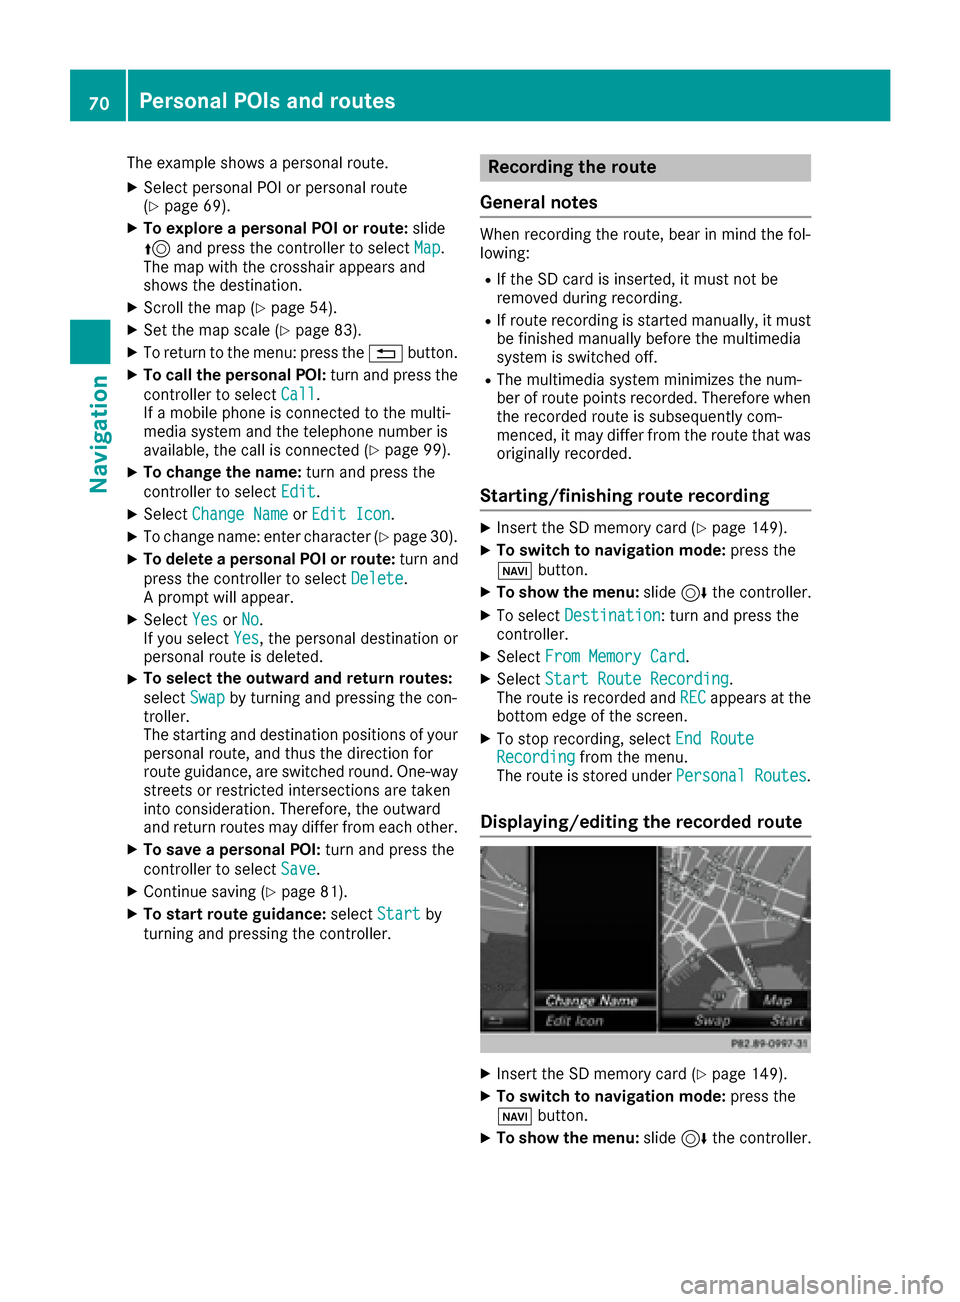
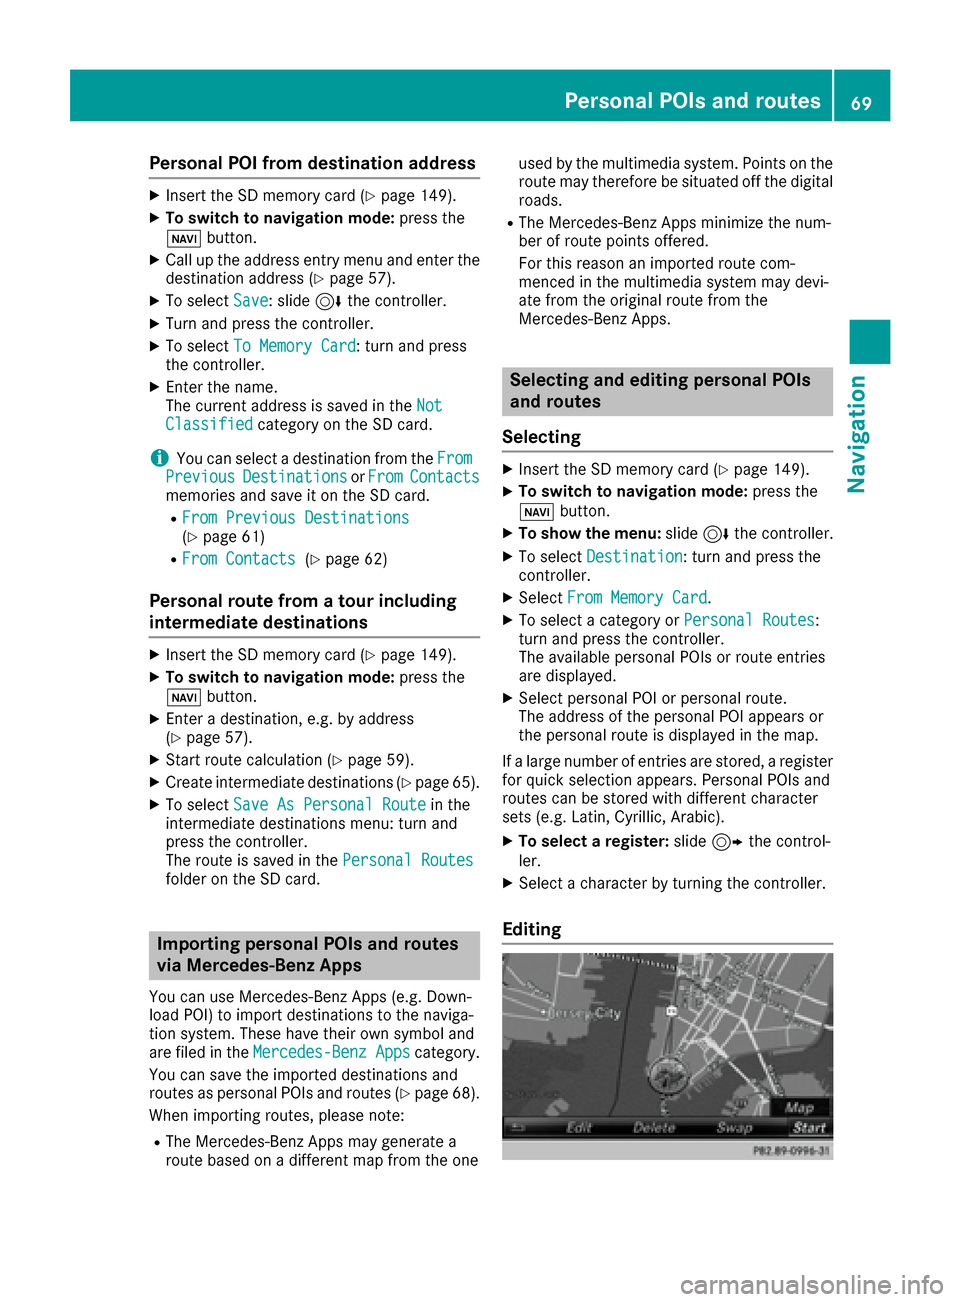
The example shows a personal route.
XSelect personal POI or personal route
(Ypage 69).
XTo explore a personal POI or route:slide
5 and press the controller to select Map
.
The map with the crosshair appears and
shows the destination.
XScroll the map (Ypage 54).
XSet the map scale (Ypage 83).
XTo return to the menu: press the %button.
XTo call the personal POI: turn and press the
controller to select Call
.
If a mobile phone is connected to the multi-
media system and the telephone number is
available, the call is connected (
Ypage 99).
XTo change the name: turn and press the
controller to select Edit
.
XSelectChange NameorEdit Icon.
XTo change name: enter character (Ypage 30).
XTo delete a personal POI or route: turn and
press the controller to select Delete
.
A prompt will appear.
XSelect YesorNo.
If you select Yes, the personal destination or
personal route is deleted.
XTo select the outward and return routes:
select Swap
by turning and pressing the con-
troller.
The starting and destination positions of your
personal route, and thus the direction for
route guidance, are switched round. One-way
streets or restricted intersections are taken
into consideration. Therefore, the outward
and return routes may differ from each other.
XTo save a personal POI: turn and press the
controller to select Save
.
XContinue saving (Ypage 81).
XTo start route guidance: selectStartby
turning and pressing the controller.
Recording the route
General notes
When recording the route, bear in mind the fol-
lowing:
RIf the SD card is inserted, it must not be
removed during recording.
RIf route recording is started manually, it must
be finished manually before the multimedia
system is switched off.
RThe multimedia system minimizes the num-
ber of route points recorded. Therefore when
the recorded route is subsequently com-
menced, it may differ from the route that was
originally recorded.
Starting/finishing route recording
XInsert the SD memory card (Ypage 149).
XTo switch to navigation mode: press the
ß button.
XTo show the menu: slide6the controller.
XTo select Destination: turn and press the
controller.
XSelect From Memory Card.
XSelectStart Route Recording.
The route is recorded and RECappears at the
bottom edge of the screen.
XTo stop recording, select End RouteRecordingfrom the menu.
The route is stored under Personal Routes.
Displaying/editing the recorded route
XInsert the SD memory card (Ypage 149).
XTo switch to navigation mode: press the
ß button.
XTo show the menu: slide6the controller.
70Personal POIs and routes
Navigation
Page 73 of 202
XTo selectDestination: turn and press the
controller.
XSelect From Memory Card.
XSelectPersonal Routes.
Previously recorded routes are displayed.
XTo select a route: turn and press the control-
ler.
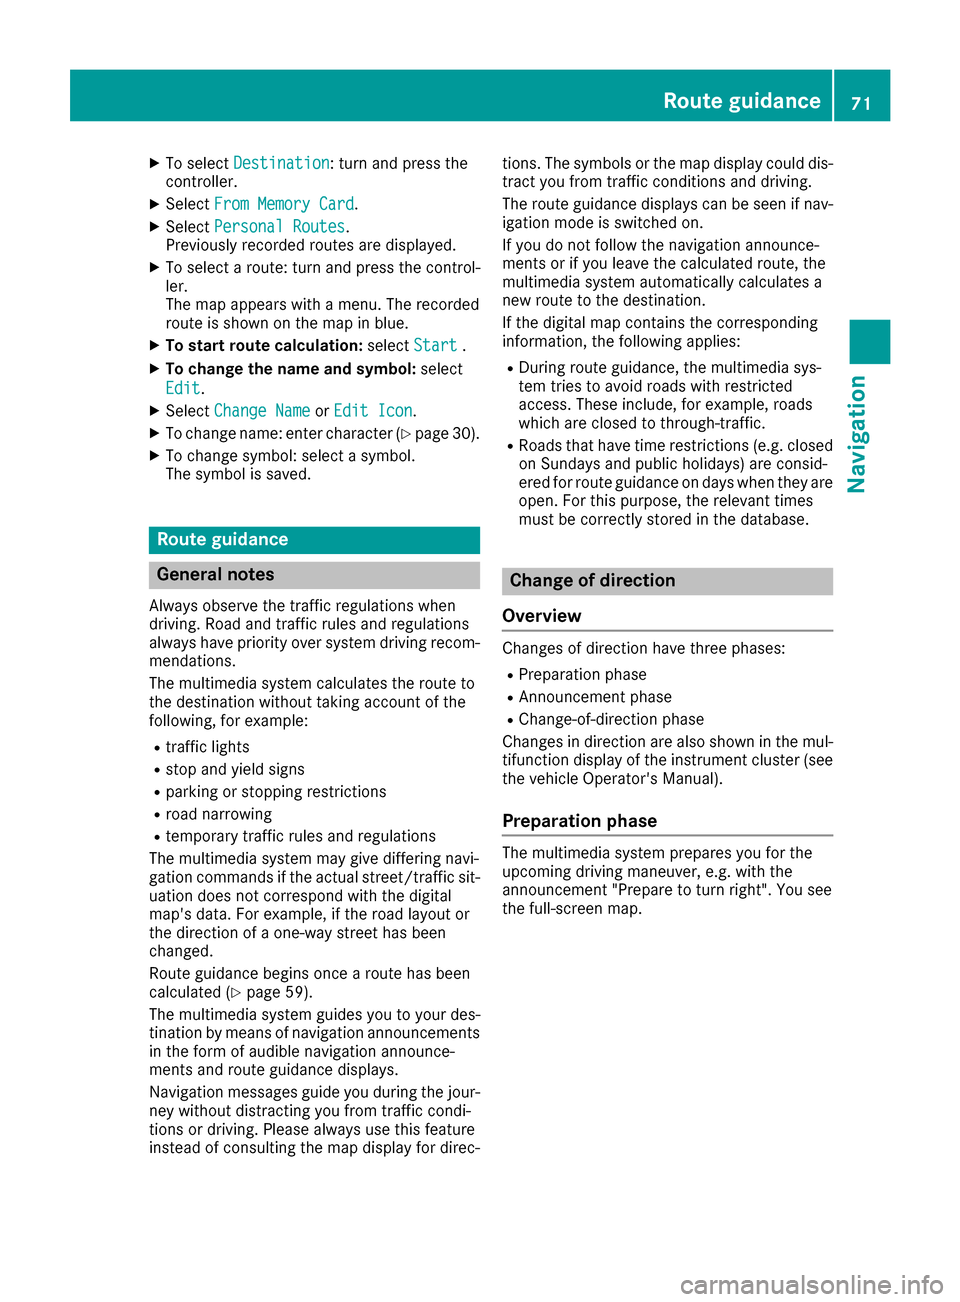
The map appears with a menu. The recorded
route is shown on the map in blue.
XTo start route calculation: selectStart.
XTo change the name and symbol: select
Edit
.
XSelect Change NameorEdit Icon.
XTo change name: enter character (Ypage 30).
XTo change symbol: select a symbol.
The symbol is saved.
Route guidance
General notes
Always observe the traffic regulations when
driving. Road and traffic rules and regulations
always have priority over system driving recom-
mendations.
The multimedia system calculates the route to
the destination without taking account of the
following, for example:
Rtraffic lights
Rstop and yield signs
Rparking or stopping restrictions
Rroad narrowing
Rtemporary traffic rules and regulations
The multimedia system may give differing navi-
gation commands if the actual street/traffic sit-
uation does not correspond with the digital
map's data. For example, if the road layout or
the direction of a one-way street has been
changed.
Route guidance begins once a route has been
calculated (
Ypage 59).
The multimedia system guides you to your des-
tination by means of navigation announcements
in the form of audible navigation announce-
ments and route guidance displays.
Navigation messages guide you during the jour-
ney without distracting you from traffic condi-
tions or driving. Please always use this feature
instead of consulting the map display for direc- tions. The symbols or the map display could dis-
tract you from traffic conditions and driving.
The route guidance displays can be seen if nav-
igation mode is switched on.
If you do not follow the navigation announce-
ments or if you leave the calculated route, the
multimedia system automatically calculates a
new route to the destination.
If the digital map contains the corresponding
information, the following applies:
RDuring route guidance, the multimedia sys-
tem tries to avoid roads with restricted
access. These include, for example, roads
which are closed to through-traffic.
RRoads that have time restrictions (e.g. closed
on Sundays and public holidays) are consid-
ered for route guidance on days when they are
open. For this purpose, the relevant times
must be correctly stored in the database.
Change of direction
Overview
Changes of direction have three phases:
RPreparation phase
RAnnouncement phase
RChange-of-direction phase
Changes in direction are also shown in the mul-
tifunction display of the instrument cluster (see
the vehicle Operator's Manual).
Preparation phase
The multimedia system prepares you for the
upcoming driving maneuver, e.g. with the
announcement "Prepare to turn right". You see
the full-screen map.
Route guidance71
Navigation
Z
Page 74 of 202
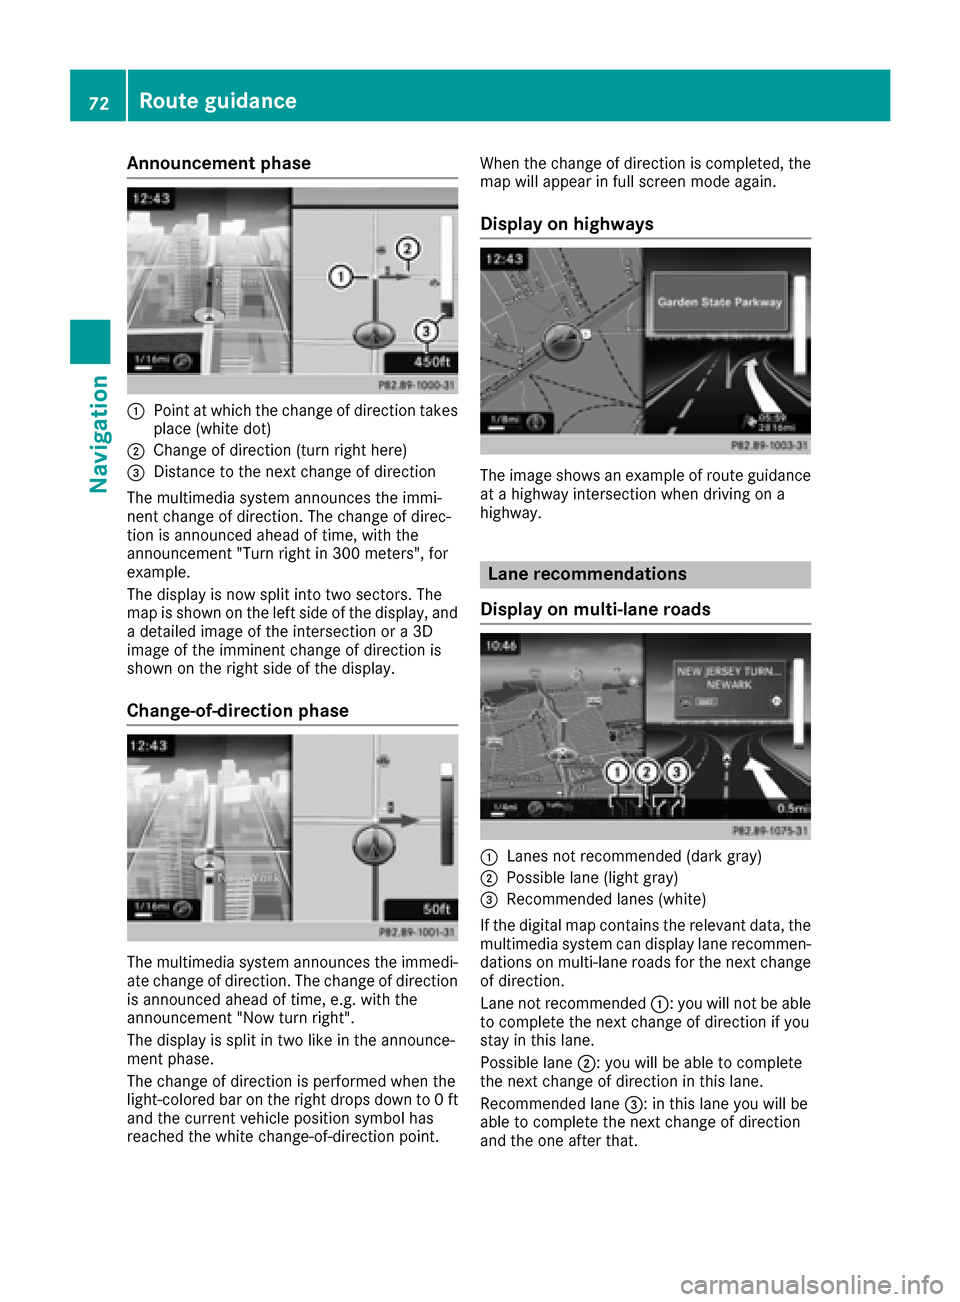
Announcement phase
:Pointat whic hth echang eof direction takes
plac e(whit edot )
;Change of direction (turn right here)
=Distanc eto th enext chang eof direction
The multimedia system announce sth eimmi-
nent chang eof direction .The chang eof direc -
tion is announce dahead of time, wit hth e
announcemen t"Turn right in 30 0meters", for
example.
The display is no wspli tint otwo sectors. The
map is shown on th elef tside of th edisplay, and
a detailed imag eof th eintersection or a3D
imag eof th eimminent chang eof direction is
shown on th eright side of th edisplay.
Change-of-directi onphase
The multimedia system announce sth eimmedi-
ate chang eof direction .The chang eof direction
is announce dahead of time, e.g. wit hth e
announcemen t"Now tur nright".
The display is spli tin two lik ein th eannounce -
men tphase.
The chang eof direction is performed when th e
light-colored bar on th eright drops down to 0ft
and th ecurren tvehicl eposition symbol has
reached th ewhit echange-of-direction point. When th
echang eof direction is completed, th e
map will appear in full scree nmod eagain .
Display onhighways
The imag eshows an exampl eof rout eguidance
at ahighway intersection when drivin gon a
highway.
Lane rec ommendations
Display on multi-lane roads
:Lanes no trecommended (dar kgray)
;Possibl elan e(ligh tgray)
=Recommended lanes (white)
If th edigital map contain sth erelevan tdata, th e
multimedia system can display lan erecommen -
dation son multi-lane road sfor th enext chang e
of direction .
Lan eno trecommended ::you will no tbe able
to complete th enext chang eof direction if you
stay in this lane.
Possibl elan e;: you will be able to complete
th enext chang eof direction in this lane.
Recommended lan e=: in this lan eyou will be
able to complete th enext chang eof direction
and th eon eafter that.
72Route guidance
Navigation
Page 75 of 202
Lane recommendations are also shown in the
multifunction display of the instrument cluster
(see the vehicle Operator's Manual).
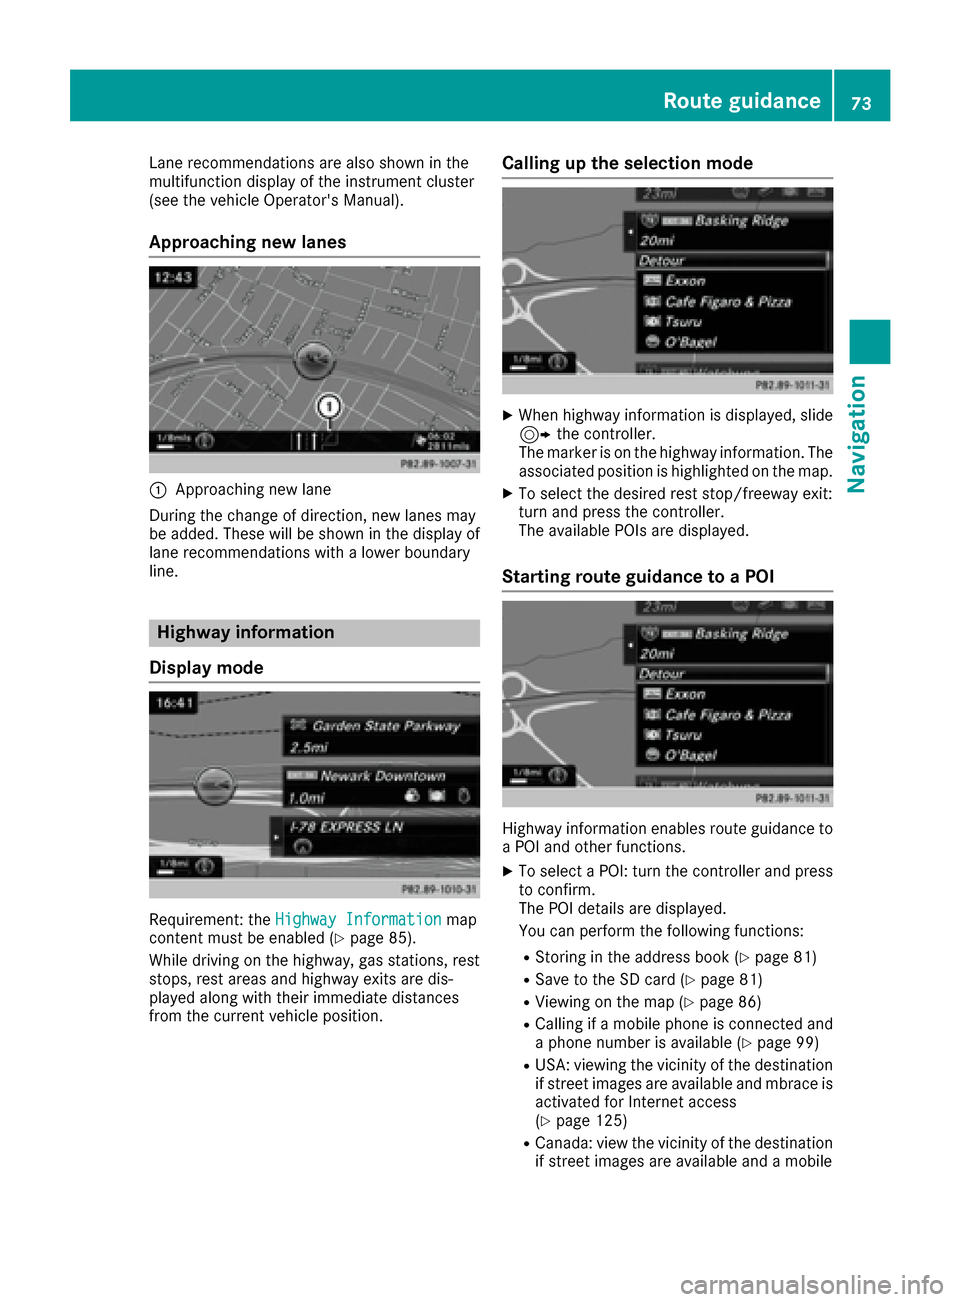
Approaching new lanes
:Approaching new lane
During the change of direction, new lanes may
be added. These will be shown in the display of
lane recommendations with a lower boundary
line.
Highway information
Display mode
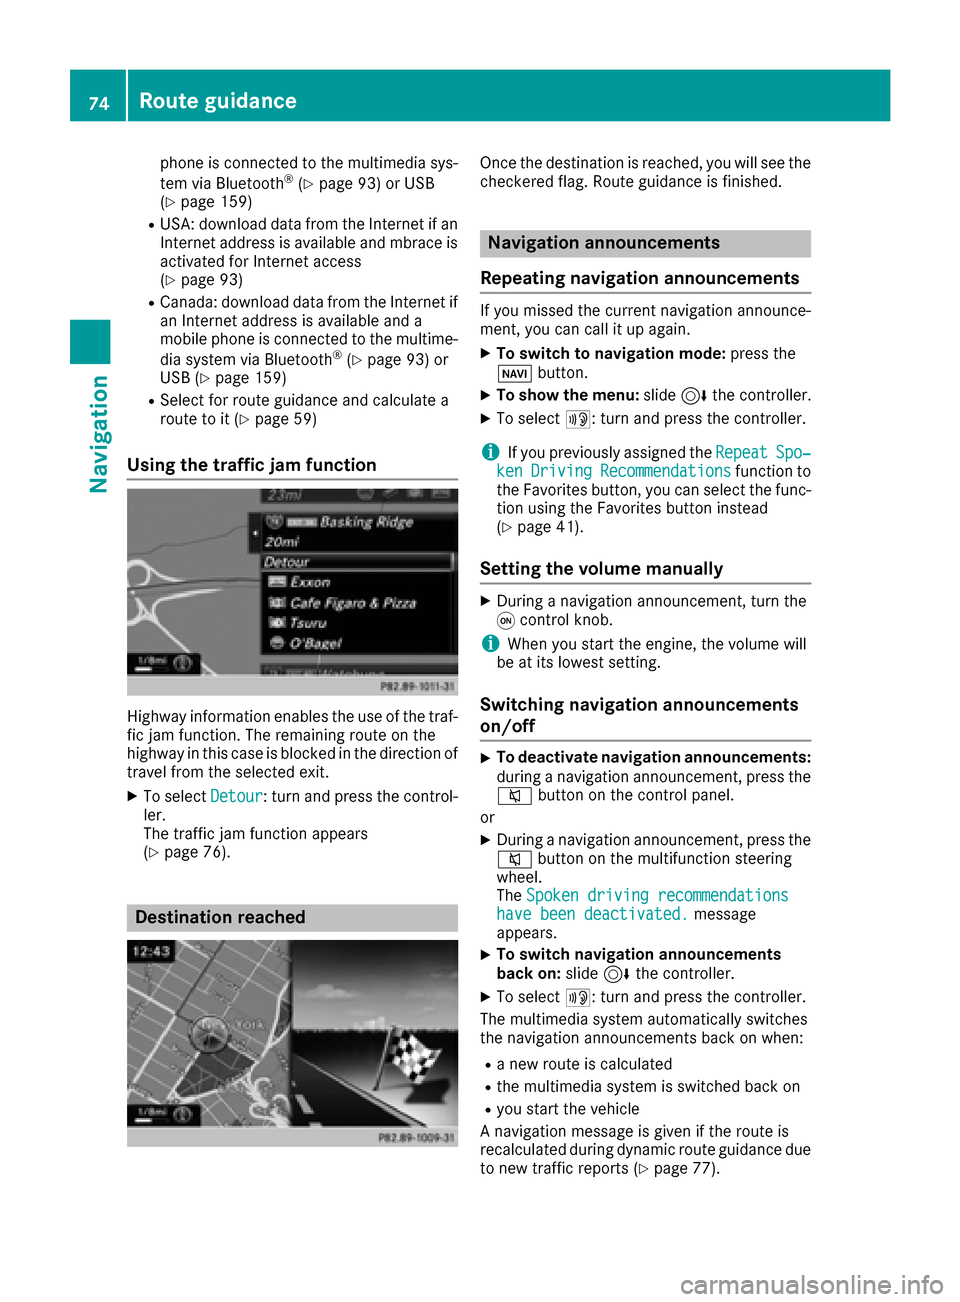
Requirement: the Highway Informationmap
content must be enabled (Ypage 85).
While driving on the highway, gas stations, rest
stops, rest areas and highway exits are dis-
played along with their immediate distances
from the current vehicle position.
Calling up the selection mode
XWhen highway information is displayed, slide 9 the controller.
The marker is on the highway information. The
associated position is highlighted on the map.
XTo select the desired rest stop/freeway exit:
turn and press the controller.
The available POIs are displayed.
Starting route guidance to a POI
Highway information enables route guidance to
a POI and other functions.
XTo select a POI: turn the controller and press to confirm.
The POI details are displayed.
You can perform the following functions:
RStoring in the address book (Ypage 81)
RSave to the SD card (Ypage 81)
RViewing on the map (Ypage 86)
RCalling if a mobile phone is connected and
a phone number is available (Ypage 99)
RUSA: viewing the vicinity of the destination
if street images are available and mbrace is
activated for Internet access
(
Ypage 125)
RCanada: view the vicinity of the destination if street images are available and a mobile
Route guidance73
Navigation
Z
Page 76 of 202
phone is connected to the multimedia sys-
tem via Bluetooth®(Ypage 93) or USB
(Ypage 159)
RUSA: download data from the Internet if an
Internet address is available and mbrace is
activated for Internet access
(
Ypage 93)
RCanada: download data from the Internet if
an Internet address is available and a
mobile phone is connected to the multime-
dia system via Bluetooth
®(Ypage 93) or
USB (Ypage 159)
RSelect for route guidance and calculate a
route to it (Ypage 59)
Using the traffic jam function
Highway information enables the use of the traf-
fic jam function. The remaining route on the
highway in this case is blocked in the direction of
travel from the selected exit.
XTo select Detour: turn and press the control-
ler.
The traffic jam function appears
(
Ypage 76).
Destination reached
Once the destination is reached, you will see the
checkered flag. Route guidance is finished.
Navigation announcements
Repeating navigation announcements
If you missed the current navigation announce-
ment, you can call it up again.
XTo switch to navigation mode: press the
Ø button.
XTo show the menu: slide6the controller.
XTo select +: turn and press the controller.
iIf you previously assigned the RepeatSpo‐kenDrivingRecommendationsfunction to
the Favorites button, you can select the func-
tion using the Favorites button instead
(
Ypage 41).
Setting the volume manually
XDuring a navigation announcement, turn the
q control knob.
iWhen you start the engine, the volume will
be at its lowest setting.
Switching navigation announcements
on/off
XTo deactivate navigation announcements:
during a navigation announcement, press the
8 button on the control panel.
or
XDuring a navigation announcement, press the
8 button on the multifunction steering
wheel.
The Spoken driving recommendations
have been deactivated.message
appears.
XTo switch navigation announcements
back on: slide6the controller.
XTo select +: turn and press the controller.
The multimedia system automatically switches
the navigation announcements back on when:
Ra new route is calculated
Rthe multimedia system is switched back on
Ryou start the vehicle
A navigation message is given if the route is
recalculated during dynamic route guidance due
to new traffic reports (
Ypage 77).
74Route guidance
Navigation
Page 77 of 202
Canceling/continuing route guidance
Canceling route guidance
XSlide 6the controller.
The menu is shown.
XTo select Destination, turn and press the
controller.
XSelect Cancel Route Guidance.
The blue route line is no longer shown on the
map.
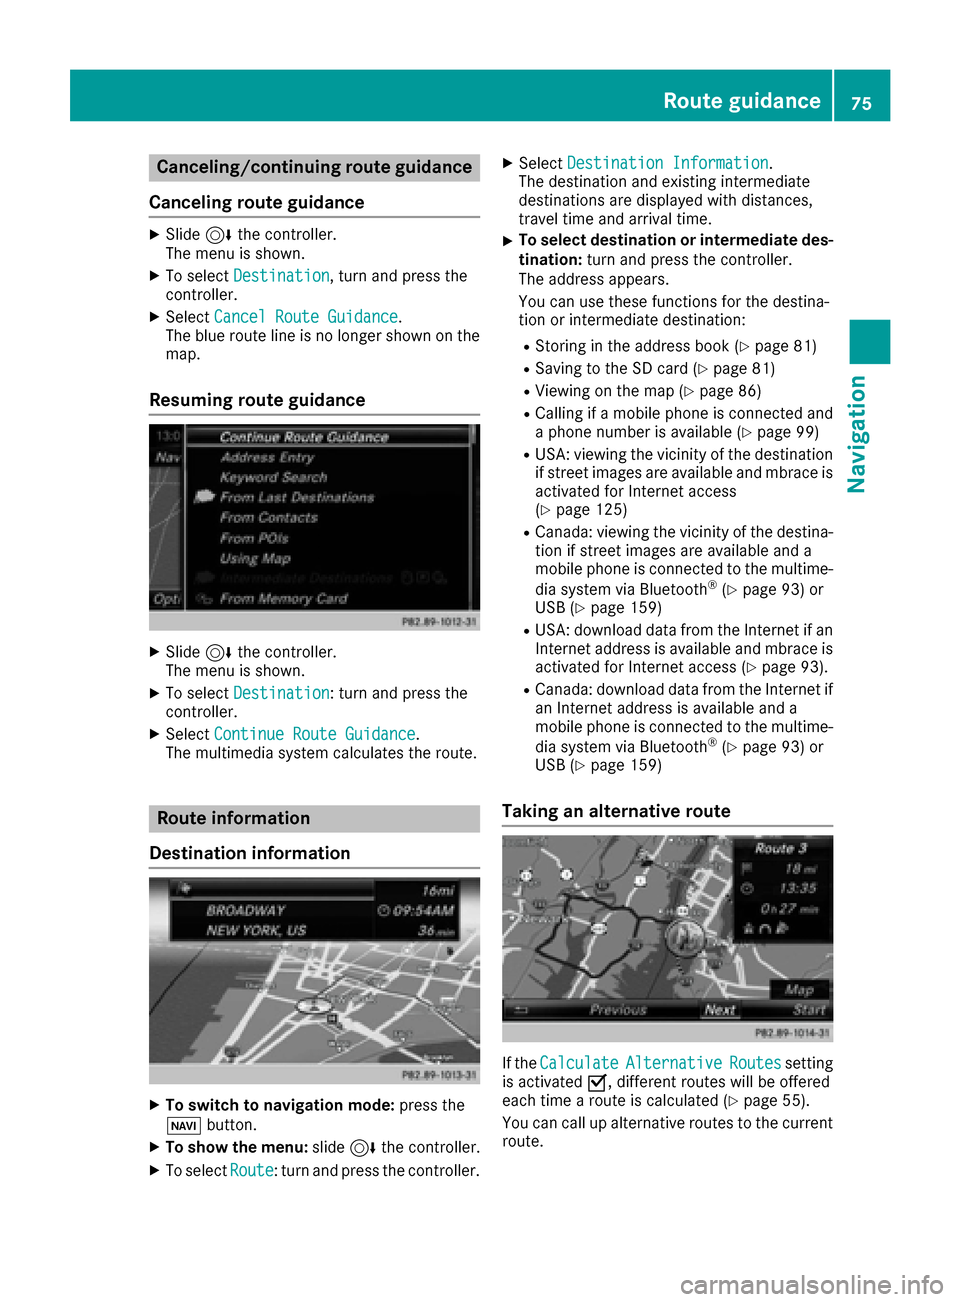
Resuming route guidance
XSlide 6the controller.
The menu is shown.
XTo select Destination: turn and press the
controller.
XSelect Continue Route Guidance.
The multimedia system calculates the route.
Route information
Destination information
XTo switch to navigation mode: press the
Ø button.
XTo show the menu: slide6the controller.
XTo select Route: turn and press the controller.
XSelectDestination Information.
The destination and existing intermediate
destinations are displayed with distances,
travel time and arrival time.
XTo select destination or intermediate des-
tination: turn and press the controller.
The address appears.
You can use these functions for the destina-
tion or intermediate destination:
RStoring in the address book (Ypage 81)
RSaving to the SD card (Ypage 81)
RViewing on the map (Ypage 86)
RCalling if a mobile phone is connected and
a phone number is available (Ypage 99)
RUSA: viewing the vicinity of the destination
if street images are available and mbrace is
activated for Internet access
(
Ypage 125)
RCanada: viewing the vicinity of the destina-
tion if street images are available and a
mobile phone is connected to the multime-
dia system via Bluetooth
®(Ypage 93) or
USB (Ypage 159)
RUSA: download data from the Internet if an
Internet address is available and mbrace is
activated for Internet access (
Ypage 93).
RCanada: download data from the Internet if
an Internet address is available and a
mobile phone is connected to the multime-
dia system via Bluetooth
®(Ypage 93) or
USB (Ypage 159)
Taking an alternative route
If the CalculateAlternativeRoutessetting
is activated O, different routes will be offered
each time a route is calculated (
Ypage 55).
You can call up alternative routes to the current
route.
Route guidance75
Navigation
Z
Page 78 of 202
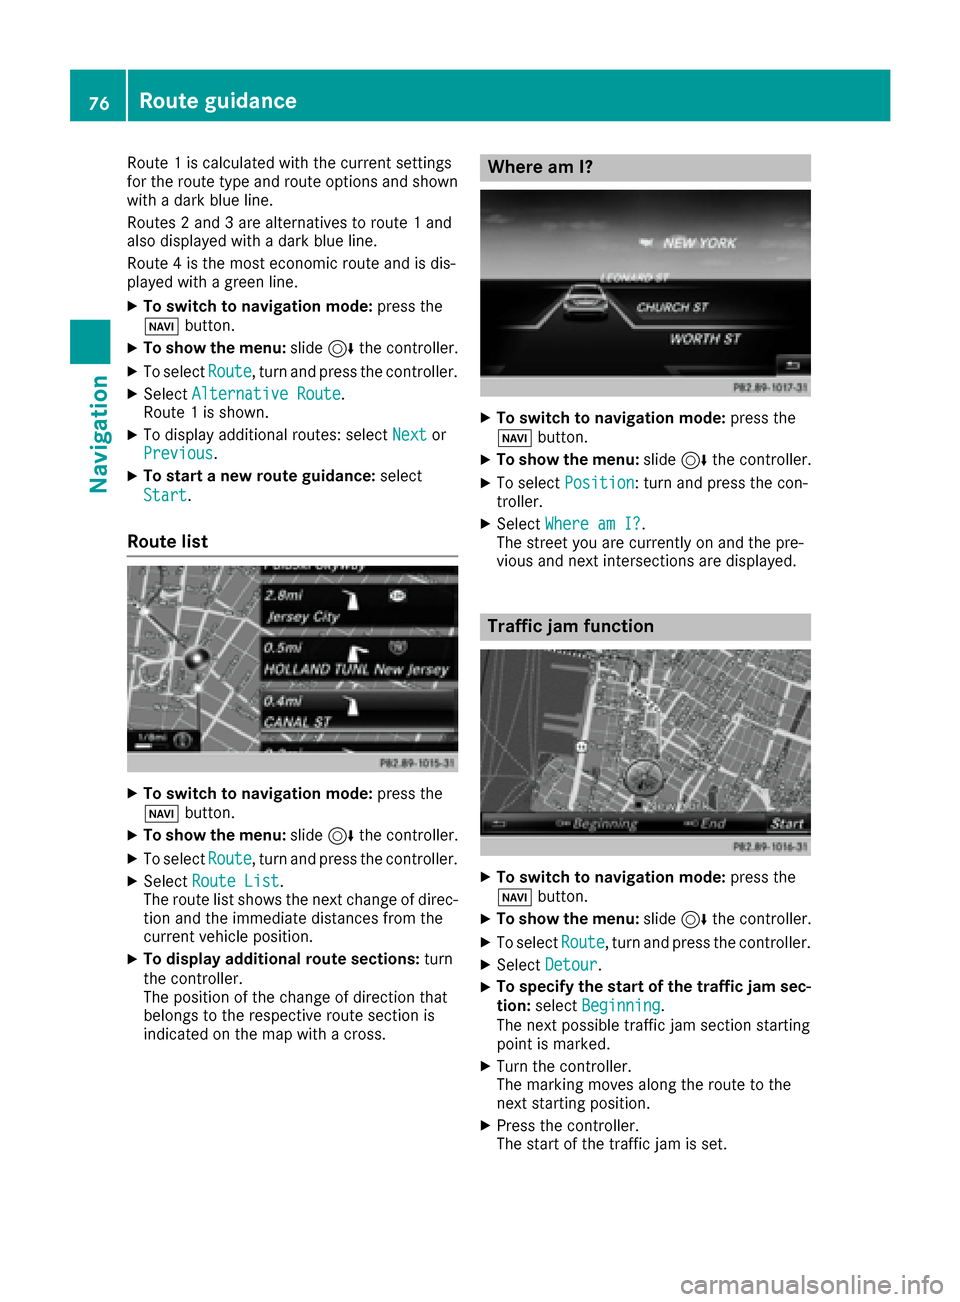
Route 1is calculated wit hth ecurren tsetting s
for th erout etyp eand rout eoption sand shown
wit h a dark blue line.
Routes 2and 3are alternatives to rout e 1and
also displayed wit h adark blue line.
Rout e 4is th emos teconomi crout eand is dis-
played wit h agreen line.
XTo switch to navigation mode: press the
Ø button.
XTo sho wthemenu: slide6 thecontroller .
XTo selectRoute,tur nand press th econtroller .
XSelectAlternative Route.
Rout e 1is shown.
XTo display additional routes: select Nextor
Previous.
XTo star t anew route guidance: select
Start
.
Route list
XTo switch to navigation mode: press the
Ø button.
XTo sho wthemenu: slide6 thecontroller .
XTo selectRoute,tur nand press th econtroller .
XSelectRoute Lis t.
The rout elist shows th enext chang eof direc-
tion and th eimmediat edistances from th e
curren tvehicl eposition .
XTo displa yadditiona lroute sections: turn
th econtroller .
The position of th echang eof direction that
belong sto th erespective rout esection is
indicated on th emap wit h across .
Where am I?
XTo switch to navigation mode: press the
Ø button.
XTo sho wthemenu: slide6 thecontroller .
XTo select Position:tur nand press th econ-
troller .
XSelectWhere am I?.
The stree tyou are currentl yon and th epre -
vious and next intersection sare displayed.
Traffic jam function
XTo switch to navigation mode: press the
Ø button.
XTo sho wthemenu: slide6 thecontroller .
XTo selectRoute,tur nand press th econtroller .
XSelectDetour.
XTo specify th estar tof th etraffic ja msec-
tion: select Beginning
.
The next possibl etraffic jam section starting
poin tis marked.
XTurn th econtroller .
The markin gmoves alon gth erout eto th e
next starting position .
XPress thecontroller .
The start of th etraffic jam is set .
76Route guidance
Navigation
Page 79 of 202
XTo specify the end of a traffic jam section:
selectEnd
.
The next possible traffic jam section end point
is marked.
XTurn the controller.
The marking moves along the route to the
next end position.
XPress the controller.
The end of the traffic jam is determined.
XTo calculate the detour: selectStart.
Off-road
General notes
The multimedia system may guide you to off-
road routes that your vehicle cannot drive on
without causing damage to the tires and wheels,
or the vehicle itself. It is the driver’s sole respon-
sibility to determine the suitability of the route.
The state and navigability of off-road routes may
be influenced, for example, by factors such as
time of day, time of year and current weather
conditions. The multimedia system cannot
judge these factors or take them into account
for route guidance.
Route guidance to an off-road destina-
tion
The multimedia system can guide you to desti-
nations which are within the area of the digital
map, but which are not themselves on the map.
These destinations are known as off-road des-
tinations, which you can enter using the map, for
example. In these cases, the multimedia system
guides you for as long as possible with naviga-
tion announcements and displays on roads
known to the system.
If the vehicle reaches an area which is not part of the digital map, the display appears as a split-
screen view. On the right, an arrow appears that
points to the off-road destination. You hear the
announcement: "Please follow the arrow on the
display". As the vehicle approaches the desti-
nation, you will see a display to this effect.
Route guidance from an off-road loca-
tion to a destination
Off-road location: the vehicle's position is on the
digital map, but the map does not contain any
information about that location. The multimedia system is able to guide you to a destination even
from an off-road location.
At the start of route guidance, you will see the
Road Not Mapped
message, an arrow and the
distance to the destination. The arrow shows
the compass heading to the actual destination.
As soon as the vehicle is back on a road known
to the system, route guidance continues in the
usual way.
Off-road during route guidance
Due to road construction, for example, there
may be differences between the data on the
digital map and the actual course of the road.
In such cases, the system will temporarily be
unable to locate the vehicle position on the dig-
ital map. The vehicle is therefore in an off-road
position.
In the display, you will then see the Road Not
Mappedmessage, an arrow and the distance to
the destination. The direction arrow shows the
compass heading to the destination.
As soon as the system can assign the vehicle
position to the map again, route guidance con-
tinues in the usual way.
Real-time traffic reports
Requirements
In order to receive real-time traffic reports via
satellite radio, you need to subscribe to SIRIUS
XM Satellite Radio Traffic Message Service.
Further information on satellite radio
(
Ypage 138).
The multimedia system can receive traffic
reports via satellite radio and take account of
these for route guidance in the navigation sys-
tem. Received traffic reports are displayed on
the map either as text or as symbols.
Real-time traffic reports77
Navigation
Z
Page 80 of 202
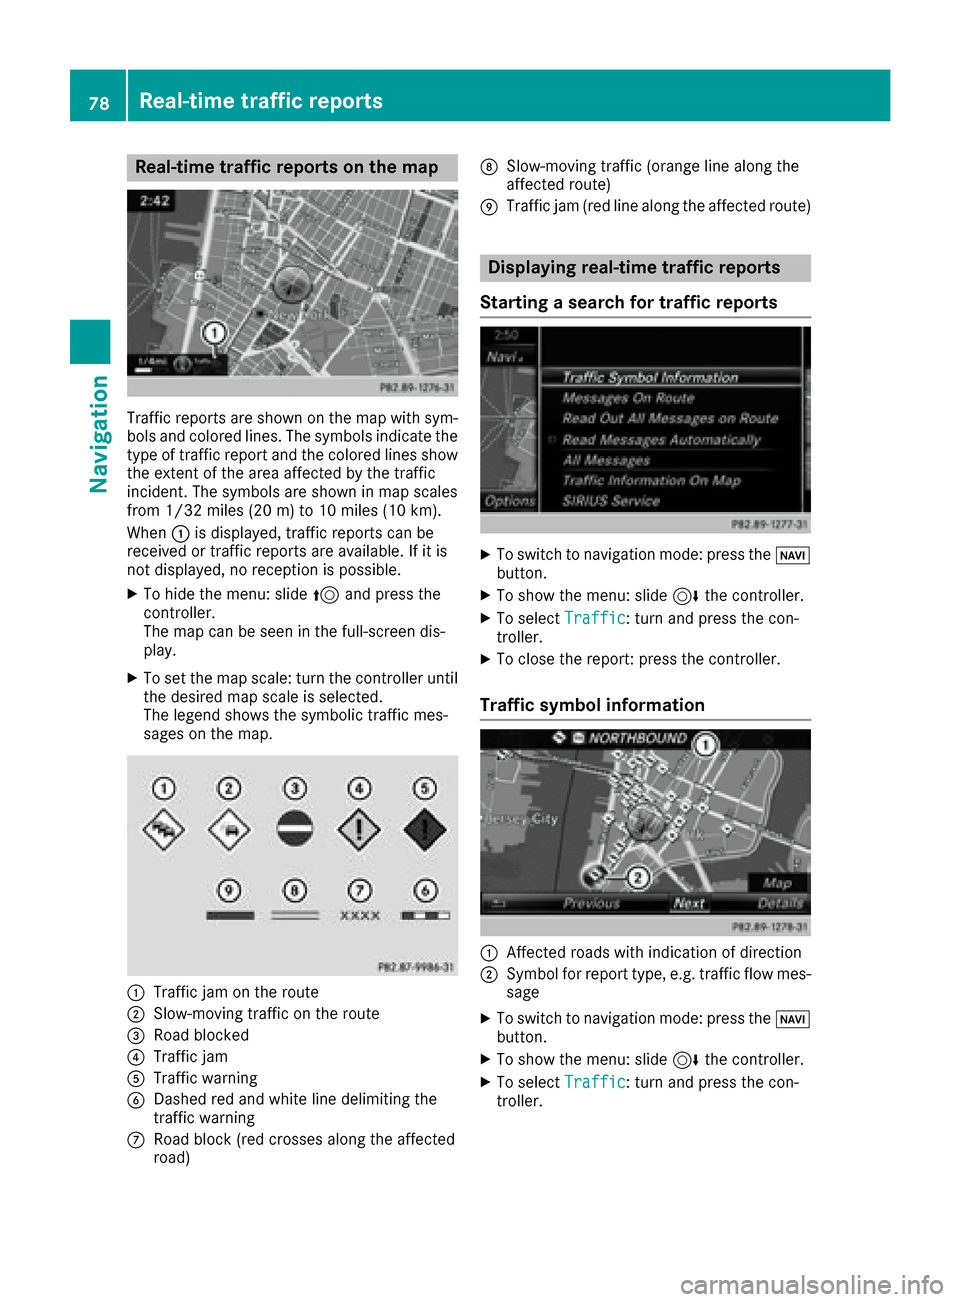
Real-time traffic reports on the map
Traffic reports are shown on the map with sym-
bols and colored lines. The symbols indicate the
type of traffic report and the colored lines show
the extent of the area affected by the traffic
incident. The symbols are shown in map scales
from 1/32 miles (20 m) to 10 miles (10 km).
When:is displayed, traffic reports can be
received or traffic reports are available. If it is
not displayed, no reception is possible.
XTo hide the menu: slide 5and press the
controller.
The map can be seen in the full-screen dis-
play.
XTo set the map scale: turn the controller until the desired map scale is selected.
The legend shows the symbolic traffic mes-
sages on the map.
:Traffic jam on the route
;Slow-moving traffic on the route
=Road blocked
?Traffic jam
ATraffic warning
BDashed red and white line delimiting the
traffic warning
CRoad block (red crosses along the affected
road)
DSlow-moving traffic (orange line along the
affected route)
ETraffic jam (red line along the affected route)
Displaying real-time traffic reports
Starting a search for traffic reports
XTo switch to navigation mode: press the Ø
button.
XTo show the menu: slide 6the controller.
XTo select Traffic: turn and press the con-
troller.
XTo close the report: press the controller.
Traffic symbol information
:Affected roads with indication of direction
;Symbol for report type, e.g. traffic flow mes-
sage
XTo switch to navigation mode: press the Ø
button.
XTo show the menu: slide 6the controller.
XTo select Traffic: turn and press the con-
troller.
78Real-time traffic reports
Navigation