navigation system MERCEDES-BENZ CLS-Class 2017 W218 Comand Manual
[x] Cancel search | Manufacturer: MERCEDES-BENZ, Model Year: 2017, Model line: CLS-Class, Model: MERCEDES-BENZ CLS-Class 2017 W218Pages: 206, PDF Size: 6.66 MB
Page 28 of 206
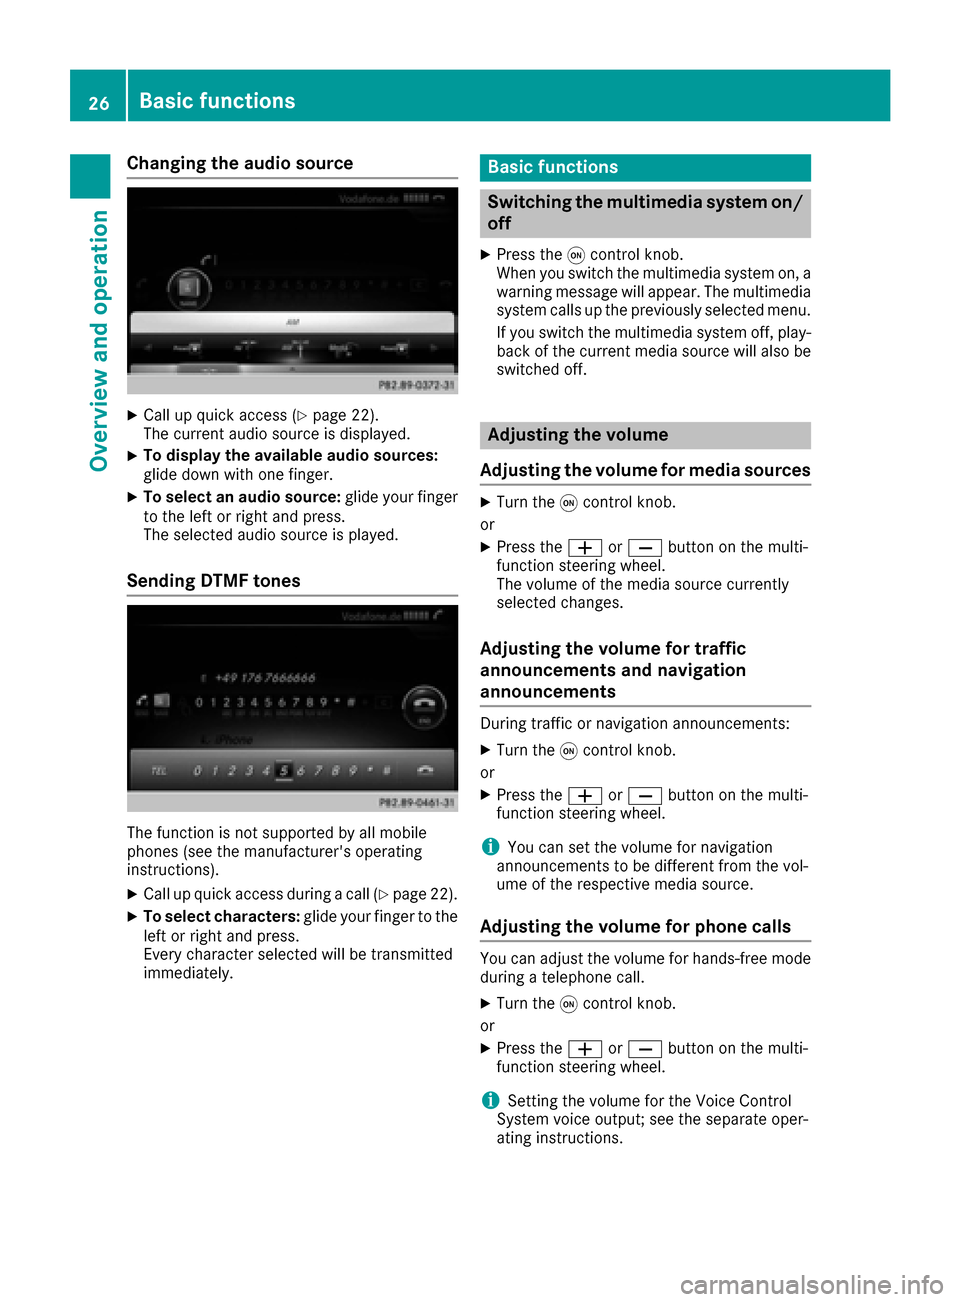
Changing the audio source
XCall up quick access (Ypage 22).
The current audio source is displayed.
XTo display the available audio sources:
glide down with one finger.
XTo select an audio source: glide your finger
to the left or right and press.
The selected audio source is played.
Sending DTMF tones
The function is not supported by all mobile
phones (see the manufacturer's operating
instructions).
XCall up quick access during a call (Ypage 22).
XTo select characters: glide your finger to the
left or right and press.
Every character selected will be transmitted
immediately.
Basic functions
Switching the multimedia system on/
off
XPress the qcontrol knob.
When you switch the multimedia system on, a
warning message will appear. The multimedia
system calls up the previously selected menu.
If you switch the multimedia system off, play- back of the current media source will also be
switched off.
Adjusting the volume
Adjusting the volume for media sources
XTurn the qcontrol knob.
or
XPress the WorX button on the multi-
function steering wheel.
The volume of the media source currently
selected changes.
Adjusting the volume for traffic
announcements and navigation
announcements
During traffic or navigation announcements:
XTurn the qcontrol knob.
or
XPress the WorX button on the multi-
function steering wheel.
iYou can set the volume for navigation
announcements to be different from the vol-
ume of the respective media source.
Adjusting the volume for phone calls
You can adjust the volume for hands-free mode
during a telephone call.
XTurn the qcontrol knob.
or
XPress the WorX button on the multi-
function steering wheel.
iSetting the volume for the Voice Control
System voice output; see the separate oper-
ating instructions.
26Basic functions
Overview and operation
Page 29 of 206
Switching the sound on/off
Media source sound
XPress the 8button on the control panel or
on the multifunction steering wheel.
The sound is switched off. If the audio output
is switched off, the status line will show the
8 symbol. If you switch the media source
or change the volume, the sound is automat-
ically switched on.
iEven if the sound is switched off, you will still
hear navigation system announcements.
Switching navigation announcements
off and on again
XTo switch navigation announcements off:
press the 8button during an announce-
ment.
The Spoken driving recommendations
have been deactivated.message
appears.
XTo switch navigation announcements on
again: switch the multimedia system off and
then on again (
Ypage 26).
or
XStart a new route calculation (Ypage 58).
or
XSelect +: while route guidance is active,
show the menu and press the controller
(
Ypage 74).
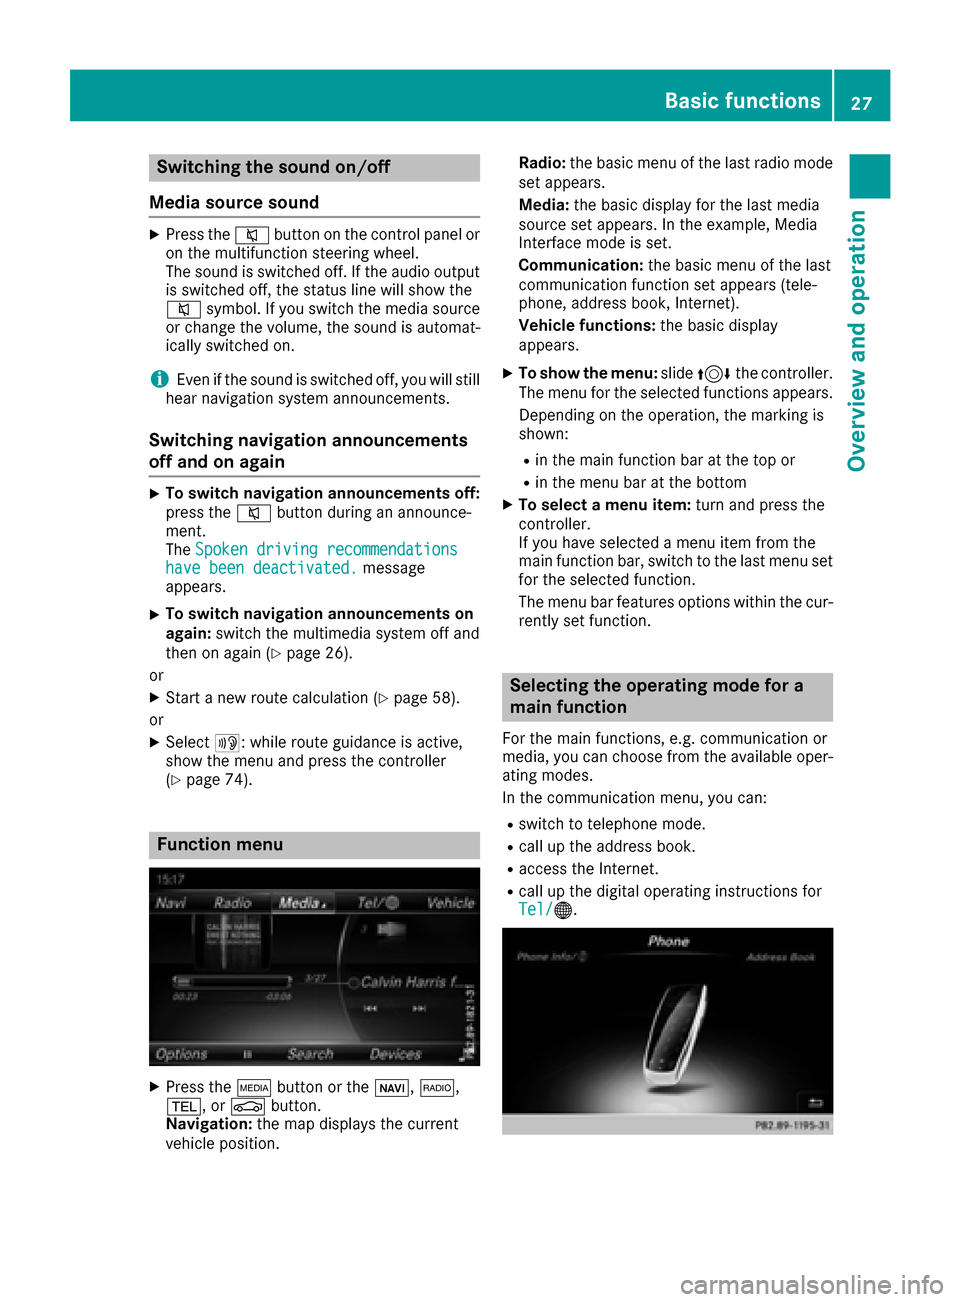
Function menu
XPress the Õbutton or the ß,$,
%, or Øbutton.
Navigation: the map displays the current
vehicle position. Radio:
the basic menu of the last radio mode
set appears.
Media: the basic display for the last media
source set appears. In the example, Media
Interface mode is set.
Communication: the basic menu of the last
communication function set appears (tele-
phone, address book, Internet).
Vehicle functions: the basic display
appears.
XTo show the menu: slide4 the controller.
The menu for the selected functions appears.
Depending on the operation, the marking is
shown:
Rin the main function bar at the top or
Rin the menu bar at the bottom
XTo select a menu item: turn and press the
controller.
If you have selected a menu item from the
main function bar, switch to the last menu set
for the selected function.
The menu bar features options within the cur-
rently set function.
Selecting the operating mode for a
main function
For the main functions, e.g. communication or
media, you can choose from the available oper-
ating modes.
In the communication menu, you can:
Rswitch to telephone mode.
Rcall up the address book.
Raccess the Internet.
Rcall up the digital operating instructions for
Tel/®.
Basic functions27
Overview and operation
Page 31 of 206

SymbolFunction
%Cancels input
SInserts a paragraph
Entering characters using the number
keypad
If an input line for text or numbers is selected,
the number keypad is used for the character
entry.
XFor example, to enter the letterc: press the
l number key briefly three times in suc-
cession.
An additional display area is shown with all
the available characters. Press the key
repeatedly to go through the characters until
c
is highlighted.
XWait until the character display goes out.
The letter cis entered in the input line.
Character entry (navigation)
Entering characters using the charac-
ter bar
:Characters NEW(orange color) entered by
the user
;Characters automatically added by the mul-
timedia system YORK
=Characters not currently available
?Currently selected character
ACharacters currently available
BCharacter bar
The example shows the address entry
(
Ypage 57).
XTo enter a character: turn, slide6or5
and press the controller.
Selected character :is entered in the upper
line. The multimedia system adds the missing
characters and shows the entry that best
matches the current input.
The characters are available Aor not =,
depending on the characters already entered
and the data stored in the digital map.
The Gsymbol indicates that an entry exists
more than once.
XTo delete a character: slide6and turn the
controller, then press it after selecting F.
XTo delete an entire entry:slide6and turn
the controller; then after selecting Fpress
and hold down the controller until the entire
entry is deleted.
XTo confirm an entry: slide6and turn the
controller, then press it after selecting ¬.
or
XSlide 5the controller repeatedly until the
character bar disappears.
The location selection list appears. The selec-
ted entry is highlighted.
The example shows the character entry when
you save a destination as a navigable contact in
the address book (
Ypage 58). The cursor is
located in the input line.
XTo select an input line: slide6and turn
the controller, then press it after selecting 4
or 5.
or
XSlide 5the controller repeatedly until the
character bar disappears.
XTurn and press the controller.
XTo move the cursor: select the input line.
XSlide6and turn the controller, then press it
after selecting 2or3.
Character entry (navigation)29
Overview and operation
Page 36 of 206

DesignExplanation
Day ModeThe display is set perma-
nently to day design .
Night ModeThe display is set perma-
nently to night design .
AutoIn th eAut osetting ,th e
multimedia system evalu-
ate sth ereading sfrom th e
automatic vehicl eligh t
sensor and automatically
switches th edisplay
design .
Switching the display on/off
XPress th eØ button.
XTo select DisplayOff:slid e6, turnand
press th econtroller .
The display goe sout .
or
XPress th e_ buttonon th econtroller .
The display goe sout .
XTo switch th edispla yon again: press the
controller .
Time settings
Gene ral inform ation
The multimedia system can automatically set
thetime and date.
The followin gnavigation system function s
require th etime, time zone and summer/stand-
ard time to be set correctl yin order to wor k
properly:
Rrout eguidance on routes wit htime-depend -
en ttraffic guidance
Rcalculation of expecte dtime of arrival
Switching automatic ti me onand off
TheAutomatic Tim eSettingsfunction is
used to activat eor deactivat eth eautomatic
setting of th etime and date. This function is
activated when th evehicl eleaves th efactory.
XPress th eØ button.
or
XPress Vehicl ein themain function bar.
The vehicl emen uis displayed.
XTo select Time:slid e6, turnand press th e
controller .
A men uappears.
XTo select AutomaticTimeSettings:press
th econtroller .
XTo switch th efunction on Oor off ª:press
th econtroller .
Setting the ti mezone
To set th etime zone ,th eAutomatic Tim eSettingsfunction mustbe activated.
XPress th eØ button.
or
XPress Vehicl ein themain function bar.
The vehicl emen uis displayed.
XTo select Time:slid e6, turnand press th e
controller .
A men uappears.
XTo select TimeZone::tur nand press th e
controller .
A list of countrie sappears. The #dot indi-
cates th ecurren tsetting .
XSelectth ecountry you are currentl yin by
turnin gand pressing th econtroller .
The country is accepted.
A time zone list may also be displayed,
depending on th ecountry selected.
XTo select th edesired time zone: turnand
press th econtroller .
The time zone is accepted.
A list of available option sfor setting summer
time appear s (
Ypage 34).
Setting sum mer and standard ti me
TheDaylightSavingTimemen uis no tavail -
able in all countries.
You can use th eDaylight
SavingTim emen u
to set automatic summer time changeover or
switch th esummer time setting on or off .The
changeover to summer time advance sth etime
by on ehour .
34Time settings
System settings
Page 42 of 206
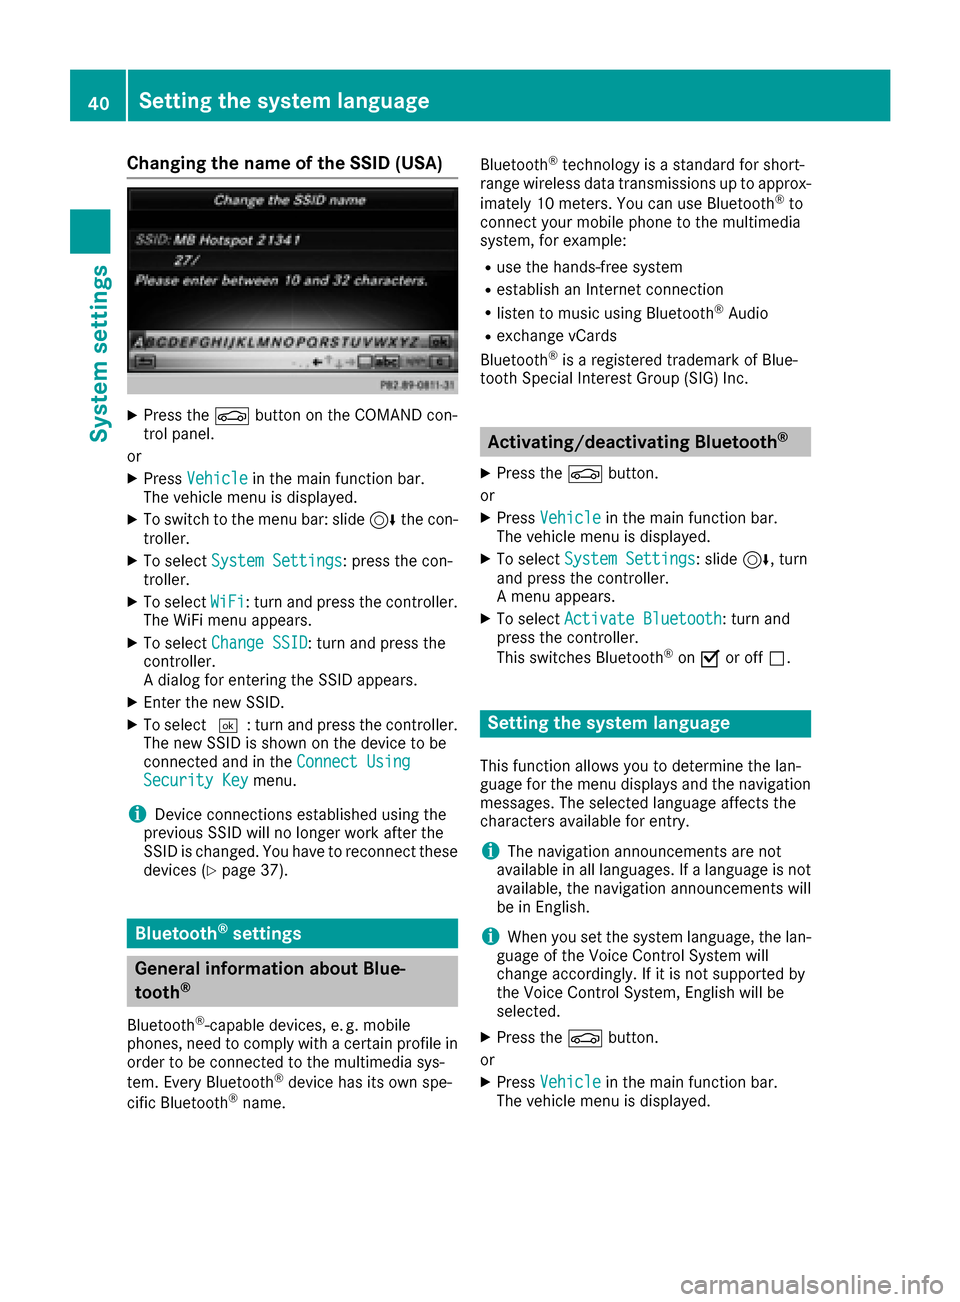
Changing the name of the SSID (USA)
XPress theØbutton on the COMAND con-
trol panel.
or
XPress Vehiclein the main function bar.
The vehicle menu is displayed.
XTo switch to the menu bar: slide 6the con-
troller.
XTo select System Settings: press the con-
troller.
XTo select WiFi: turn and press the controller.
The WiFi menu appears.
XTo select Change SSID: turn and press the
controller.
A dialog for entering the SSID appears.
XEnter the new SSID.
XTo select ¬: turn and press the controller.
The new SSID is shown on the device to be
connected and in the Connect Using
Security Keymenu.
iDevice connections established using the
previous SSID will no longer work after the
SSID is changed. You have to reconnect these
devices (
Ypage 37).
Bluetooth®settings
General information about Blue-
tooth®
Bluetooth®-capable devices, e. g. mobile
phones, need to comply with a certain profile in
order to be connected to the multimedia sys-
tem. Every Bluetooth
®device has its own spe-
cific Bluetooth®name. Bluetooth
®technology is a standard for short-
range wireless data transmissions up to approx-
imately 10 meters. You can use Bluetooth
®to
connect your mobile phone to the multimedia
system, for example:
Ruse the hands-free system
Restablish an Internet connection
Rlisten to music using Bluetooth®Audio
Rexchange vCards
Bluetooth®is a registered trademark of Blue-
tooth Special Interest Group (SIG) Inc.
Activating/deactivating Bluetooth®
X
Press the Øbutton.
or
XPress Vehiclein the main function bar.
The vehicle menu is displayed.
XTo select System Settings: slide6, turn
and press the controller.
A menu appears.
XTo select Activate Bluetooth: turn and
press the controller.
This switches Bluetooth
®on O or off ª.
Setting the system language
This function allows you to determine the lan-
guage for the menu displays and the navigation
messages. The selected language affects the
characters available for entry.
iThe navigation announcements are not
available in all languages. If a language is not
available, the navigation announcements will
be in English.
iWhen you set the system language, the lan-
guage of the Voice Control System will
change accordingly. If it is not supported by
the Voice Control System, English will be
selected.
XPress the Øbutton.
or
XPress Vehiclein the main function bar.
The vehicle menu is displayed.
40Setting the system language
System settings
Page 45 of 206
XTo enter the PIN: turn the controller and press¬.
PIN protection is deactivated.
XTo select MemoryCard,USB 1or USB 2: turn
and press the controller.
This function exports all the data to the selec-
ted disc.
A window appears with the message that the
data has been exported.
iYou can export address data, bookmarks,
system settings that you have made and radio
station lists, for example.
Mercedes-Benz is not liable for any loss of
data.
Reset function
You can reset the multimedia system to the fac- tory settings. This includes the deletion of all of
your personal multimedia system data. These
include:
RStation presets
REntries in the destination memory
REntries in the list of previous destinations in
the navigation system
REntries in the address book
RAuthorized telephone
In addition, an activated PIN protection, which
you have used to protect your data against
unwanted export, will be deactivated. Resetting
is recommended before selling or transferring
ownership of your vehicle, for example.
Mercedes-Benz is not liable for any loss of data.
XPress the Øbutton.
or
XPress Vehiclein the main function bar.
The vehicle menu is displayed.
XTo select System Settings: slide6, turn
and press the controller.
A menu appears.
XTo select Reset: turn and press the controller.
A prompt appears asking whether you wish to
reset.
XSelect YesorNo.
If you select Nothe process is canceled.
If you select Yes
a prompt will appear again
asking whether you really wish to reset.
XSelect YesorNo.
If you select Yesa message will be shown. The
multimedia system is reset to the factory set-
tings and restarted.
If you select No
the process is canceled.
Reset function43
System settings
Z
Page 54 of 206
Your multimediasyste mequipment
These operatin ginstruction sdescribe all th e
standar dan doptional equipment of your multi-
media system, as available at th etime of going
to press. Country-specifi cdifference sare pos -
sible. Bear in min dthat your vehicle may no t
feature all function sdescribed here. Thi salso
applies to safety-relevan tsystems an dfunc-
tions.
Read th einformation on qualifie dspecialis t
workshop sin th evehicle Operator's Manual.
Introduction
Important safet ynotes
GWARNING
If you operat einformation systems an dcom-
munication equipment integrated in th evehi-
cl e whil edriving, you will be distracted from
traffic conditions. You could also los econtro l
of th evehicle. There is aris kof an accident.
Only operat eth eequipment when th etraffic
situation permits. If you are no tsur ethat this
is possible, par kth evehicle payin gattention
to traffic condition san doperat eth eequip-
men twhen th evehicle is stationary.
You mus tobserv eth elegal requirements fo rth e
country in whic hyou are currentl ydrivin gwhen
operatin gth emultimedia system.
The multimedia syste mcalculates th erout eto
th edestination without taking accoun tof th e
following, fo rexample:
Rtraffic lights
Rstop an dyield signs
Rmergin glanes
Rparking or stoppin gin ano parking/n ostop-
pin gzone
Rother road an dtraffic rule san dregulation s
Rnarrow bridge s
The multimedia syste mmay provid eincorrec t
navigation recommendation sif th eactual
street/traffic situation doe sno tcorrespon d
wit hth edigita lmap's data.
Examples of suc hdeviation sincl ude:
Ra
diverted rout e
Rachange in th edirection of aone-way stree tDigital map
sdo no tcover all areas no rall routes
in an area.
Fo rthis reason ,you mus talways observ eroad
an dtraffic rule san dregulation sdurin gyour
journey. Road an dtraffic rule san dregulation s
always hav epriorit yover th esystem' sdrivin g
recommendations.
Navigation announcement sare intended to
direc tyou whil edrivin gwithout divertin gyour
attention from th eroad an ddriving.
Please always use this feature instead of con-
sultin gth emap display fo rdirections. Lookin g
at th eicon sor map display can distract you from
traffic condition san ddriving, an dincrease th e
ris kof an accident.
General notes
Operationa lreadines sof th enavigation
syste m
The navigation syste mmus tdetermin eth eposi-
tion of th evehicle befor efirst use or wheneve r
operational status is restored .Therefore, you
may hav eto drive fo r awhil ebefor eprecise
rout eguidance is possible.
GP Sreception
Amon gother things, correc tfunctionin gof th e
navigation syste mdepends on GPS reception .In
certain situations, GPS reception may be
impaired, there may be interferenc eor there
may be no reception at all, e.g. in tunnels or
parking garages .
iUsing roof carriers may impair th ecorrec t
functionin gof aroof antenn a(phone, satellite
radio, GPS).
Entry restriction
Fo rvehicles in certain countries, there is adat a
entr yrestriction .
Entries can be mad ewhen th eselecto rlever is in
position Por th evehicle is stationary.
Whe nth erestriction is active ,certain entries
canno tbe made. Thi swill be indicated by th e
fac tthat certain men uitems are grayed out an d
canno tbe selected.
52Introduction
Navigation
Page 56 of 206

Basic settings
Selecting the route type
XTo switch to navigation mode:press the
Ø button.
XTo show the menu: slide6the controller.
XTo select Options: turn and press the con-
troller.
XTo select Route Settings: press the con-
troller.
XTo select the route type: turn and press the
controller.
A filled circle indicates the current selection.
RWith active route guidance, the navigation
system calculates a new route.
Route guidance active: a destination has
been entered and the route has been cal-
culated.
RIf there has been no route calculated, the
navigation system uses the selection as the
new basic setting.
FastRouteThe navigation system calcu-
lates a route with a short jour-
ney time.
DynamicTrafficRoute
Based on the Fast Routeroute type and includes traf-
fic reports on the route for the
route guidance.
DynamicTRF.RouteAfterRequest
If there are traffic reports, a
prompt appears asking
whether these reports should
be considered in the route
calculation.
Eco RouteThe navigation system calcu-
lates an economic route. The
journey may take slightly lon-
ger compared to taking the
fast route.
ShortRouteThe navigation system calcu-
lates a route with a short dis-
tance.
The route types Dynamic Traffic Routeand
Dynamic TRF. Route After Requestuse
real-time traffic reports from SIRIUS satellite
radio.
Further Information on real-time traffic reports
(
Ypage 78).
XTo calculate alternative routes: select
Calculate Alternative Routes
.
Switch the function on Oor off ª.
Function activated: after each route calcula-
tion, route alternatives are offered that cor-
respond to the local conditions (
Ypage 76).
If desired, you can have the navigation system
calculate alternative routes even during route
guidance (
Ypage 76).
Setting route options
XTo switch to navigation mode: press the
Ø button.
XTo show the menu: slide6the controller.
XTo select Options: turn and press the con-
troller.
XTo select Route Settings: press the con-
troller.
54Basic settings
Navigation
Page 57 of 206

XTo avoid/use route options:selectAvoid
Options.
A menu appears.
XSelect one of the options.
O: using or avoiding route options is enabled
ª: using or avoiding route options is disabled
RAvoid Area(Ypage 86)
You can define areas that you would like to
avoid.
RAvoid Highways
RAvoid Ferries
RAvoid Auto Trains
RAvoid Tunnels
RAvoid Unpaved Roads
The function is not available in all countries.
RUse Toll Roads
The route calculation includes roads which
require you to pay a usage fee (toll).
RNumberofOccupantsintheVehicle:
If your vehicle meets the access conditions
for carpool lanes, you can use this function.
Navigation includes carpool lanes if the car-
pool lanes option is activated.
Depending on local conditions, the navigation
system may not always be able to include all
route options. A route may include a ferry, for
instance, even though Avoid Ferries
is ena-
bled. The navigation system will notify you of
this visually and through a navigation message.
XTo use toll roads: turn and press the con-
troller.
A menu appears.
XSelect an option.
The options include using roads that require
cash payment or electronic billing, or switch-
ing off the function.
XTo exit a menu: slide1 the controller.
Selecting announcements
XTo switch to navigation mode: press the
Ø button.
XTo show the menu: slide6the controller.
XTo select Options: turn and press the con-
troller.
XSelect Settings.
XSelect an option.
Switch the option on Oor off ª.
AnnounceStreetNames
The navigation system announ-
ces the names of the roads
onto which the upcoming
change of direction leads.
AudioFadeoutThe volume of an active media
source is automatically
reduced during a navigation
announcement.
AudibleInfo Dur‐ingPhoneCall
The navigation message is also
given during telephone calls.
Gas onReserveFunction activated: once the
reserve fuel tank level is
reached, a message appears to
help you start a gas station
search.
Atten‐tionAssist
Function activated: if ATTEN-
TION ASSIST displays a warn-
ing in the multifunction display,
a message appears in the mul-
timedia system display when
you drive onto a highway. This
can help you start a rest stop
search.
For further information on
ATTENTION ASSIST, see the
vehicle Operator's Manual.
Basic settings55
Navigation
Z
Page 58 of 206

Using car pool lanes
You can include carpool lanes (HOV or car shar-
ing lanes) in the route calculation.
If you use HOV or carpool lanes, please observe
the applicable laws as well as the local and time
limitation conditions.
Carpool lanes may only be used under certain
conditions. They can normally be used when
there are two people in the vehicle. However,
there are also carpool lanes which can only be
used when there are three or more people in the
vehicle. In California, single drivers may also use
the carpool lanes if the vehicle's emission or
consumption values are below the prescribed
levels.
Carpool lanes may be reserved for specific
times (e.g. during the peak period).
Carpool lanes are indicated by a diamond sym-
bol on specific road signs and on the road sur-
face. The road signs may also include the des-
ignation CARPOOL. The lanes are arranged as a
separate lane next to the others or are built as a
physically separate lane.
Depending on the setting underNumber of
Occupants in the Vehicle:, the navigation
system uses carpool lanes when calculating the
route. During route guidance, visual and audible
driving directions provide guidance into and out
of carpool lanes.
XTo switch to navigation mode: press the
ß button.
XTo show the menu: press the controller.
XTo selectOptions: turn and press the con-
troller.
XSelect Route Settings.
XSelectAvoid Options.
XSelectNumber of Occupants in theVehicle:.
A menu appears. The #dot indicates the cur-
rent setting.
XTo select the number: turn and press the con- troller.
Destination entry
Important safety notes
GWARNING
If you operate information systems and com-
munication equipment integrated in the vehi-
cle while driving, you will be distracted from
traffic conditions. You could also lose control
of the vehicle. There is a risk of an accident.
Only operate the equipment when the traffic
situation permits. If you are not sure that this
is possible, park the vehicle paying attention
to traffic conditions and operate the equip-
ment when the vehicle is stationary.
You must observe the legal requirements for the
country in which you are currently driving when
operating the multimedia system.
Destination entry may be blocked while driving,
depending on the country specifications.
Using an address
Calling up the address entry menu
XTo switch to navigation mode: press the
Ø button.
XTo show the menu: slide6the controller.
XTo select Destination: turn and press the
controller.
XSelect Address Entry.
Address entry options
Examples of how you can enter an address:
Rcity or zip code, street, house number
Rcity or zip code, street
56Destination entry
Navigation