sunroof MERCEDES-BENZ CLS COUPE 2008 Owners Manual
[x] Cancel search | Manufacturer: MERCEDES-BENZ, Model Year: 2008, Model line: CLS COUPE, Model: MERCEDES-BENZ CLS COUPE 2008Pages: 329, PDF Size: 29.26 MB
Page 13 of 329
10 N
Navigation . . . . . . . . . . . . . . . . . . . . . 120
Navigation menu (on-board com-
puter) . . . . . . . . . . . . . . . . . . . . . . . 120
NECK-PRO head restraint . . . . . . . . . . 49
Resetting triggered NECK-PRO
head restraints . . . . . . . . . . . . . . . . 269 O
Oil topping up
. . . . . . . . . . . . . . . . . . . 195
On-board computer . . . . . . . . . . . . . . 111
AMG menu . . . . . . . . . . . . . . . . . . . 116
Audio menu . . . . . . . . . . . . . . . . . . 118
Convenience submenu . . . . . . . . . . 123
Display message . . . . . . . . . . . . . . 219
DVD menu . . . . . . . . . . . . . . . . . . . 120
Dynamic driving seat submenu . . . 129
Factory settings . . . . . . . . . . . . . . . 121
Heater submenu . . . . . . . . . . . . . . 123
Instrument cluster submenu . . . . . 122
Lighting submenu . . . . . . . . . . . . . 122
Message memory menu . . . . . . . . . 121
Navigation menu . . . . . . . . . . . . . . 120
Settings menu . . . . . . . . . . . . . . . . 121
Standard display menu . . . . . . . . . 115
Telephone menu . . . . . . . . . . . . . . 130
Time/Date submenu . . . . . . . . . . . 122
Trip computer menu . . . . . . . . . . . . 129 TV menu
. . . . . . . . . . . . . . . . . . . . . 119
Vehicle submenu . . . . . . . . . . . . . . 123
One-touch gearshifting . . . . . . . . . . . 105
Operating system see On-board computer
Outside temperature
Display (on-board computer) . 111, 116
Overhead control panel
Overview . . . . . . . . . . . . . . . . . . . . . 36
Own number sending (mobile
phone) . . . . . . . . . . . . . . . . . . . . . . . . . 184 P
Paint code number
. . . . . . . . . . . . . . 300
Parking . . . . . . . . . . . . . . . . . . . . . . . . 103
Parking aid . . . . . . . . . . . . . . . . . . . . . . 85 Parktronic . . . . . . . . . . . . . . . . . . . 148
Parking brake . . . . . . . . . . . . . . . . . . . 104
Display message . . . . . . . . . . . . . . 231
Parking lamps
Display message . . . . . . . . . . . . . . 236
Parking lock
Releasing manually (automatic
transmission) . . . . . . . . . . . . . . . . . 268
Parking position
Exterior mirror . . . . . . . . . . . . . . . . . 85
Parktronic . . . . . . . . . . . . . . . . . . . . . . 148
Activating/deactivating . . . . . . . . . 150
Malfunction . . . . . . . . . . . . . . . . . . 258 Range of the sensors
. . . . . . . . . . . 148
Warning display . . . . . . . . . . . . . . . 149
PASSENGER AIRBAG OFF warning
lamp . . . . . . . . . . . . . . . . . . . . . . . 51, 242
Performance . . . . . . . . . . . . . . . . . . . 303
Permanent Speedtronic . . . . . . . . . . 144
Petrol Minimum grade . . . . . . . . . . . . . . . 191
Plastic trim
Cleaning . . . . . . . . . . . . . . . . . . . . . 212
Power windows
see Side window
PRE-SAFE ®
system . . . . . . . . . . . . . . . . 48
PRE-SAFE ®
System
Display message . . . . . . . . . . . . . . 223
Preventive occupant safety system
see PRE-SAFE ®
Program selector button
Automatic transmission . . . . . . . . . 106
Pulling away . . . . . . . . . . . . . . . . . . . . 103 R
RACETIMER (on-board computer)
. . 117
Radio Changing a station (on-board
computer) . . . . . . . . . . . . . . . . . . . 119
see separate operating instructions
Rain closing feature (sliding/tilt-
ing sunroof) . . . . . . . . . . . . . . . . . . . . 171 Index
219_AKB; 2; 4, en-GB
mkalafa,
2007-11-13T09:28:36+01:00 - Seite 10
Page 15 of 329
12
Side windows
Cleaning . . . . . . . . . . . . . . . . . . . . . 212
Skibag . . . . . . . . . . . . . . . . . . . . . . . . . 174
Sliding/tilting sunroof . . . . . . . . . . . 169
Rain closing feature . . . . . . . . . . . . 171
Resetting . . . . . . . . . . . . . . . . . . . . 171
Sliding sunroof
see Sliding/tilting sunroof
Snow chains . . . . . . . . . . . . . . . . . . . . 205
Socket Cockpit . . . . . . . . . . . . . . . . . . . . . . 182
Rear compartment . . . . . . . . . . . . . 182
Spare wheel
Fitting . . . . . . . . . . . . . . . . . . . . . . . 282
Storage location . . . . . . . . . . . . . . . 217
Technical data . . . . . . . . . . . . . . . . 308
Speed
Technical data . . . . . . . . . . . . . . . . 303
Speed limiter
Speedtronic . . . . . . . . . . . . . . . . . . 142
Speedometer
Digital speedometer (on-board
computer) . . . . . . . . . . . . . . . . . . . 116
Segments . . . . . . . . . . . . . . . . . . . . 110
Setting the unit (on-board com-
puter) . . . . . . . . . . . . . . . . . . . . . . . 123
Speedtronic . . . . . . . . . . . . . . . . . . . . 142
Display message . . . . . . . . . . . . . . 227
Permanent . . . . . . . . . . . . . . . . . . . 144
Variable . . . . . . . . . . . . . . . . . . . . . 142 SRS (Supplemental Restraint Sys-
tem)
. . . . . . . . . . . . . . . . . . . . . . . . . . . . 43
warning lamp . . . . . . . . . . . . . . . . . . 43
Standard display (on-board com-
puter) . . . . . . . . . . . . . . . . . . . . . . . . . 115
Selecting the display . . . . . . . . . . . 124
Station
see Radio
Status line (on-board computer) . . . 112
Selecting the display . . . . . . . . . . . 124
Steering wheel
Adjusting . . . . . . . . . . . . . . . . . . 81, 82
Buttons (on-board computer) . . . . . 111
Storing settings . . . . . . . . . . . . . . . . 86
Steering wheel gearshift paddles . . 107
Steering wheel heating . . . . . . . . . . . . 82
Malfunction indicator lamp . . . . . . 242
Stowage compartment . . . . . . . . . . . 177
Armrest (in front) . . . . . . . . . . . . . . 178
Armrest (under) . . . . . . . . . . . . . . . 178
Centre console . . . . . . . . . . . . . . . . 177
Centre console (rear) . . . . . . . . . . . 178
Driver's seat . . . . . . . . . . . . . . . . . . 179
Glove compartment . . . . . . . . . . . . 177
Rear seat armrest . . . . . . . . . . . . . 179
Ventilating . . . . . . . . . . . . . . . . . . . 178
Stowage compartments
Overview . . . . . . . . . . . . . . . . . . . . . 38
Stowage space
Cup holder . . . . . . . . . . . . . . . . . . . 172 Submenu (on-board computer)
. . . . 122
Convenience . . . . . . . . . . . . . . . . . 123
Dynamic driving seat . . . . . . . . . . . 129
Heating . . . . . . . . . . . . . . . . . . . . . 123
Instrument cluster . . . . . . . . . . . . . 122
Lighting . . . . . . . . . . . . . . . . . . . . . 122
Time/Date . . . . . . . . . . . . . . . . . . . 122
Vehicle . . . . . . . . . . . . . . . . . . . . . . 123
Summer opening . . . . . . . . . . . . . . . . 100
Sun visor . . . . . . . . . . . . . . . . . . . . . . . 180
Supplemental Restraint System
see SRS
Supplemental Restraint System (SRS)
Display message . . . . . . . . . . . . . . 227
Warning lamp . . . . . . . . . . . . . . . . . 248
Surround lighting
Switching on/off (on-board com-
puter) . . . . . . . . . . . . . . . . . . . . . . . 125
Switching off the alarm
ATA . . . . . . . . . . . . . . . . . . . . . . . . . . 61 T
Tail lamps Display message
. . . . . . . . . . . . . . 236
Tank capacity . . . . . . . . . . . . . . . . . . . 311
Technical data Acceleration . . . . . . . . . . . . . . . . . . 303
Engine . . . . . . . . . . . . . . . . . . . . . . 302
Tyres . . . . . . . . . . . . . . . . . . . . . . . 305 Index
219_AKB; 2; 4, en-GB
mkalafa,
2007-11-13T09:28:36+01:00 - Seite 12
Page 24 of 329
Exterior view
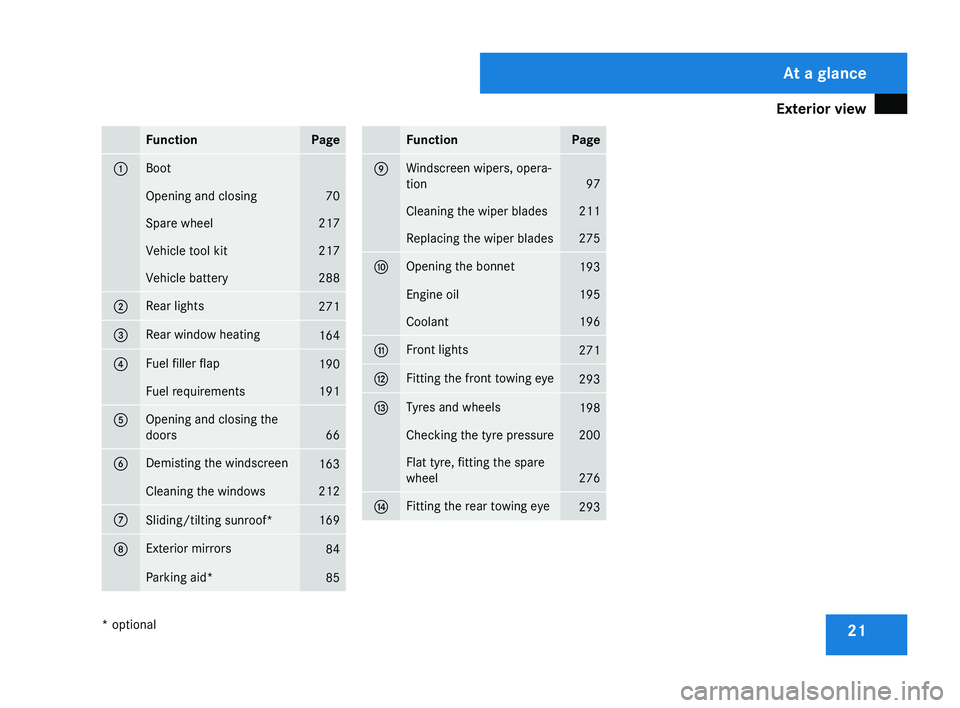
21Function Page
1 Boot
Opening and closing 70
Spare wheel 217
Vehicle tool kit 217
Vehicle battery 288
2 Rear lights
271
3 Rear window heating
164
4 Fuel filler flap
190
Fuel requirements 191
5 Opening and closing the
doors
66
6 Demisting the windscreen
163
Cleaning the windows 212
7
Sliding/tilting sunroof* 169
8 Exterior mirrors
84
Parking aid*
85 Function Page
9 Windscreen wipers, opera-
tion
97
Cleaning the wiper blades 211
Replacing the wiper blades 275
a Opening the bonnet
193
Engine oil 195
Coolant 196
b Front lights
271
c Fitting the front towing eye
293
d Tyres and wheels
198
Checking the tyre pressure 200
Flat tyre, fitting the spare
wheel
276
e Fitting the rear towing eye
293 At a glance
* optional
219_AKB; 2; 4, en-GB
mkalafa,
2007-11-13T09:28:36+01:00 - Seite 21
Page 39 of 329

Overhead control panel
36 Overhead control panelFunctionPage
1ò Switches the rear
interior lighting on/off
96
2¡ Switches the auto-
matic interior lighting on/
off
96
3ð Switches the front
interior lighting on/off
96
4Opens/closes the sliding/
tilting sunroof*
169
5Primes/deactivates the
interior motion sensor*
62
6X Switches the right-
hand reading lamp on/off
96
7Rear-view mirror83
8Reading lamp96
9Transmitter buttons for
garage door opener*
186
aPrimes/deactivates tow-
away protection*
62
FunctionPage
bInterior light96
cX Switches the left-
hand reading lamp on/off
96
dAmbient light96
At a glance
* optional
219_AKB; 2; 4, en-GB
mkalafa,
2007-11-13T09:28:36+01:00 - Seite 36
Page 51 of 329
Occupant safety
48
R
independently of the belt tensioners
R if the vehicle overturns, but only if the sys-
tem detects high vehicle deceleration in a
lateral direction and determines that side-
bag deployment can offer additional pro-
tection to that provided by the seat belt
Windowbags
The purpose of the windowbags is to enhance
the level of protection for the head (but not
chest or arms) of the vehicle occupants on
the side of the vehicle on which the impact
occurs.
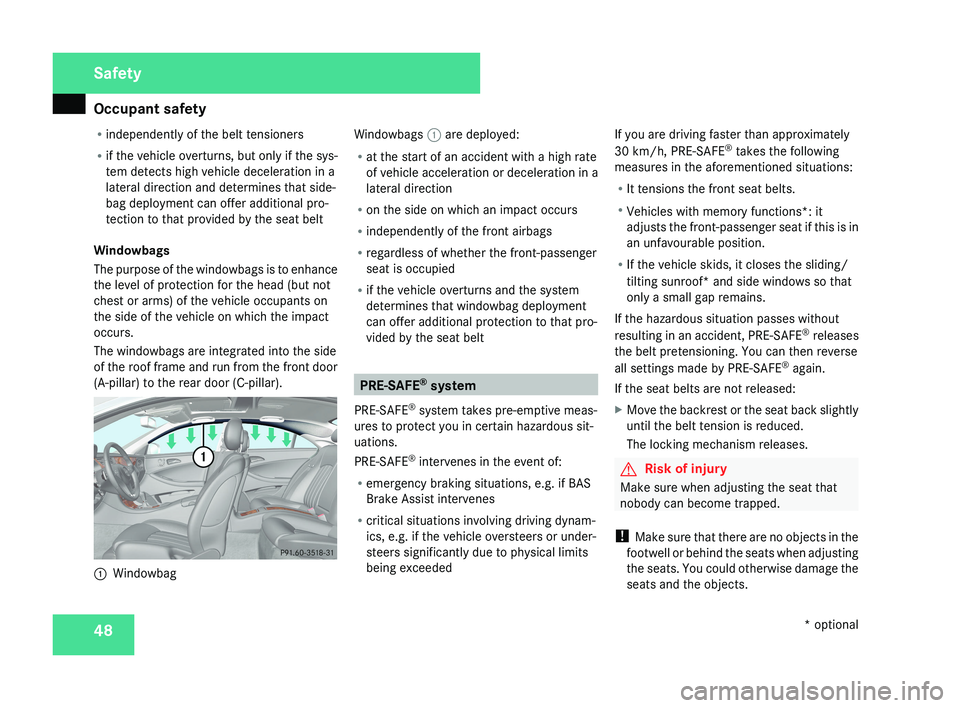
The windowbags are integrated into the side
of the roof frame and run from the front door
(A-pillar) to the rear door (C-pillar).1 Windowbag Windowbags
1 are deployed:
R at the start of an accident with a high rate
of vehicle acceleration or deceleration in a
lateral direction
R on the side on which an impact occurs
R independently of the front airbags
R regardless of whether the front-passenger
seat is occupied
R if the vehicle overturns and the system
determines that windowbag deployment
can offer additional protection to that pro-
vided by the seat belt
PRE-SAFE ®
system
PRE-SAFE ®
system takes pre-emptive meas-
ures to protect you in certain hazardous sit-
uations.
PRE-SAFE ®
intervenes in the event of:
R emergency braking situations, e.g. if BAS
Brake Assist intervenes
R critical situations involving driving dynam-
ics, e.g. if the vehicle oversteers or under-
steers significantly due to physical limits
being exceeded If you are driving faster than approximately
30 km/h, PRE-SAFE
®
takes the following
measures in the aforementioned situations:
R It tensions the front seat belts.
R Vehicles with memory functions*: it
adjusts the front-passenger seat if this is in
an unfavourable position.
R If the vehicle skids, it closes the sliding/
tilting sunroof* and side windows so that
only a small gap remains.
If the hazardous situation passes without
resulting in an accident, PRE-SAFE ®
releases
the belt pretensioning. You can then reverse
all settings made by PRE-SAFE ®
again.
If the seat belts are not released:
X Move the backrest or the seat back slightly
until the belt tension is reduced.
The locking mechanism releases.
G Risk of injury
Make sure when adjusting the seat that
nobody can become trapped.
! Make sure that there are no objects in the
footwell or behind the seats when adjusting
the seats. You could otherwise damage the
seats and the objects.
Safety
* optional
219_AKB; 2; 4, en-GB
mkalafa,
2007-11-13T09:28:36+01:00 - Seite 48
Page 65 of 329

Anti-theft systems
62 Tow-away protection*
An audible and visual alarm is triggered if your
vehicle's angle of inclination is altered while
tow-away protection is primed. This happens
if the vehicle is jacked up on one side, for
example.
Priming tow-away protection X
Lock the vehicle using the key. On vehicles
with KEYLESS GO*, the locking button on
the door handle/boot lid can also be used.
Tow-away protection is primed after
approximately 30 seconds.
To deactivate tow-away protection When you unlock your vehicle using the key
or KEYLESS GO*, tow-away protection is
automatically deactivated.
Deactivate tow-away protection manually to
prevent a false alarm if your vehicle:
R
is being transported
R is being loaded, e.g. onto a ferry or car
transporter
R is being parked on a movable surface, e.g.
split-level garages 1
To deactivate tow-away protection
2 Indicator lamp
X Remove the key from the ignition lock.
X Press button 1.
Indicator lamp 2 lights up briefly.
X Lock the vehicle using the key. On vehicles
with KEYLESS GO*, the locking button on
the door handle/boot lid can also be used.
Tow-away protection remains deactivated
until the vehicle is unlocked and locked
again. Interior motion sensor*
If the interior motion sensor is primed, a vis-
ual and audible alarm is triggered if move-
ment is detected in the vehicle interior while
the vehicle is locked. This occurs, for exam-
ple, if someone breaks the side windows of
your vehicle or reaches into the vehicle's inte-
rior.
Priming the interior motion sensor X
Make sure that:
R
the side windows are closed
R the sliding/tilting sunroof* is closed
R there are no objects, e.g. mascots, hang-
ing on the rear-view mirror or on the
grasp handles on the roof trim.
This will prevent false alarms.
X Lock the vehicle using the key or, on vehi-
cles with KEYLESS GO*, using the locking
buttons on the door handle/boot lid.
The interior motion sensor is primed after
approximately 30 seconds. Safety
* optional
219_AKB; 2; 4, en-GB
mkalafa,
2007-11-13T09:28:36+01:00 - Seite 62
Page 66 of 329
Anti-theft systems
63
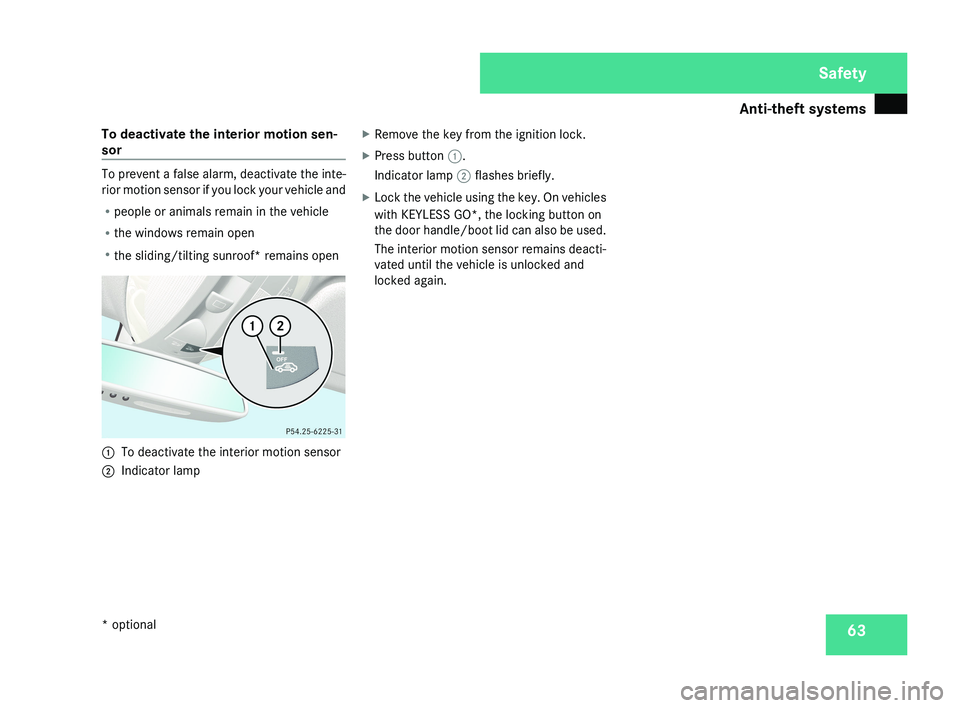
To deactivate the interior motion sen-
sor To prevent a false alarm, deactivate the inte-
rior motion sensor if you lock your vehicle and
R
people or animals remain in the vehicle
R the windows remain open
R the sliding/tilting sunroof* remains open 1
To deactivate the interior motion sensor
2 Indicator lamp X
Remove the key from the ignition lock.
X Press button 1.
Indicator lamp 2 flashes briefly.
X Lock the vehicle using the key. On vehicles
with KEYLESS GO*, the locking button on
the door handle/boot lid can also be used.
The interior motion sensor remains deacti-
vated until the vehicle is unlocked and
locked again. Safety
* optional
219_AKB; 2; 4, en-GB
mkalafa,
2007-11-13T09:28:36+01:00 - Seite 63
Page 68 of 329
65
Opening and closing
...........................66
Key positions ....................................... 74
Seats .................................................... 75
Steering wheel .................................... 81
Mirrors ................................................. 83
Memory functions* ............................. 86
Seat belts ............................................. 88
Lights ................................................... 91
Windscreen wipers .............................97
Side windows ...................................... 98Driving and parking ..........................
101
Transmission ..................................... 104
Instrument cluster ............................109
On-board computer ..........................111
Driving systems ................................ 132
Air conditioning ................................. 151
Sliding sunroof .................................. 169
Loading and stowing ........................172
Features ............................................. 180 Controls
219_AKB; 2; 4, en-GB
mkalafa,
2007-11-13T09:28:36+01:00 - Seite 65
Page 69 of 329

Opening and closing
66 Opening and closing
Key
The vehicle's equipment includes two keys
with remote control. Each key contains an
emergency key element.
The key is configured at the factory to cen-
trally lock and unlock the following:
R the doors
R the boot lid
R the fuel filler flap G
Risk of accident
Never leave children unsupervised in the
vehicle. They could open a door from the
inside, even if it has been locked, or start
the vehicle if the key is left in it. They could
endanger themselves and others. You
should therefore take the key with you
when leaving the vehicle, even if you are
only leaving it for a short time.1 j Locking button
2 i Unlocking button for the boot lid
3 k Unlocking button
4 Battery check lamp
i The key can also be used to open and
close the sliding/tilting sunroof* and the
side windows. You can open them using the
summer opening feature (Y page 100). You
can close them using the convenience clos-
ing feature ( Y page 100). Factory settings
X
To unlock centrally: press the k but-
ton.
The turn signals flash once. The locking
knobs in the doors pop up. The anti-theft
alarm system* is deactivated.
When it is dark, the surround lighting also
comes on if it is activated in the on-board
computer.
i If you do not open either a door or the
boot lid after you have unlocked the vehi-
cle, it will automatically relock after approx-
imately 40 seconds.
X To lock centrally: press the j button.
The turn signals flash three times if the
doors and boot lid are closed. The locking
knobs in the doors drop down. The anti-
theft alarm system* and the immobiliser
are primed.
Individual settings
You can change the setting of the locking
system in such a way that pressing the
k button only unlocks the driver's door
and the fuel filler flap. This is useful if you fre-
quently travel on your own.
Controls
* optional
219_AKB; 2; 4, en-GB
mkalafa,
2007-11-13T09:28:36+01:00 - Seite 66
Page 70 of 329
Opening and closing
67
X
To change the setting: press the k
and j buttons simultaneously for
approximately six seconds until the battery
check lamp flashes twice.
The key now functions as follows:
X To unlock the driver's door: press the
k button once.
X To unlock centrally: press the k but-
ton twice.
X To lock centrally: press the j button.
Restoring the factory settings X
Press the k and j buttons simulta-
neously for approximately six seconds until
the battery check lamp flashes twice. KEYLESS GO*
If you are carrying the KEYLESS GO key on
your person, you can use the KEYLESS GO
functions of your vehicle. The KEYLESS GO
key should not be more than one metre away
from the vehicle. However, you can also use
the KEYLESS GO key like a normal key with
remote control.
When you pull the door handle, the following
unlock centrally if the factory settings have
not been changed:
R the doors
R the boot lid
R the fuel filler flap G
Risk of accident
Never leave children unsupervised in the
vehicle. They could open a door from the
inside at any time, even if it has been
locked. Or they could start the vehicle if a
valid KEYLESS GO key is in the vehicle and
they press the KEYLESS GO button on the
gear selector lever. They could endanger
themselves and others. Switch off the
engine and take the KEYLESS GO key with
you, even if you are only leaving the vehicle
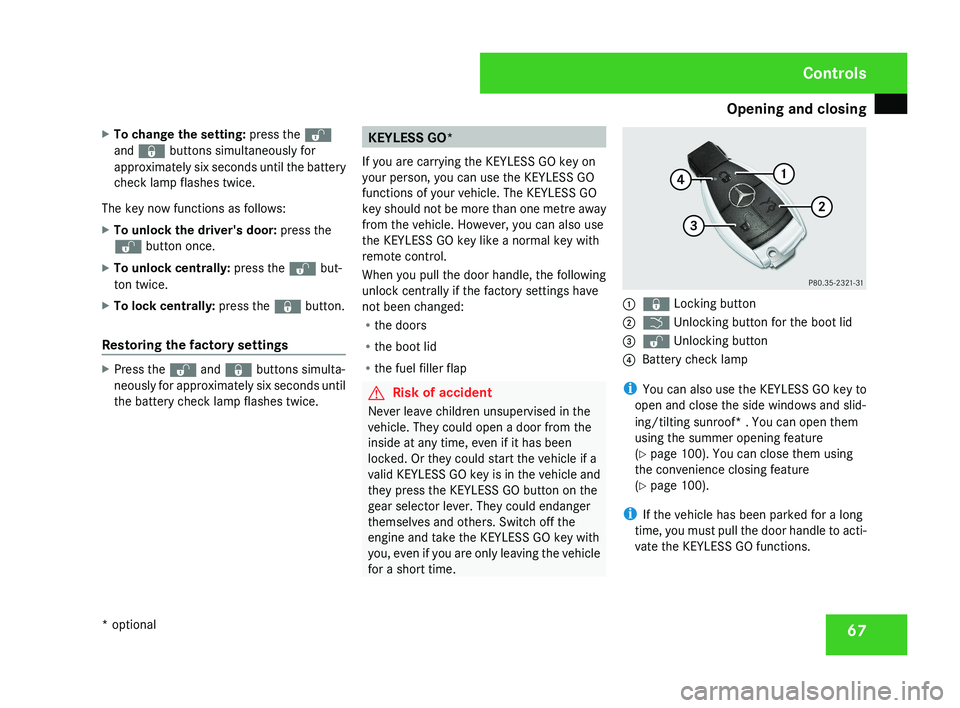
for a short time. 1
j Locking button
2 i Unlocking button for the boot lid
3 k Unlocking button
4 Battery check lamp
i You can also use the KEYLESS GO key to
open and close the side windows and slid-
ing/tilting sunroof* . You can open them
using the summer opening feature
(Y page 100). You can close them using
the convenience closing feature
(Y page 100).
i If the vehicle has been parked for a long
time, you must pull the door handle to acti-
vate the KEYLESS GO functions. Controls
* optional
219_AKB; 2; 4, en-GB
mkalafa,
2007-11-13T09:28:36+01:00 - Seite 67